Transcripts
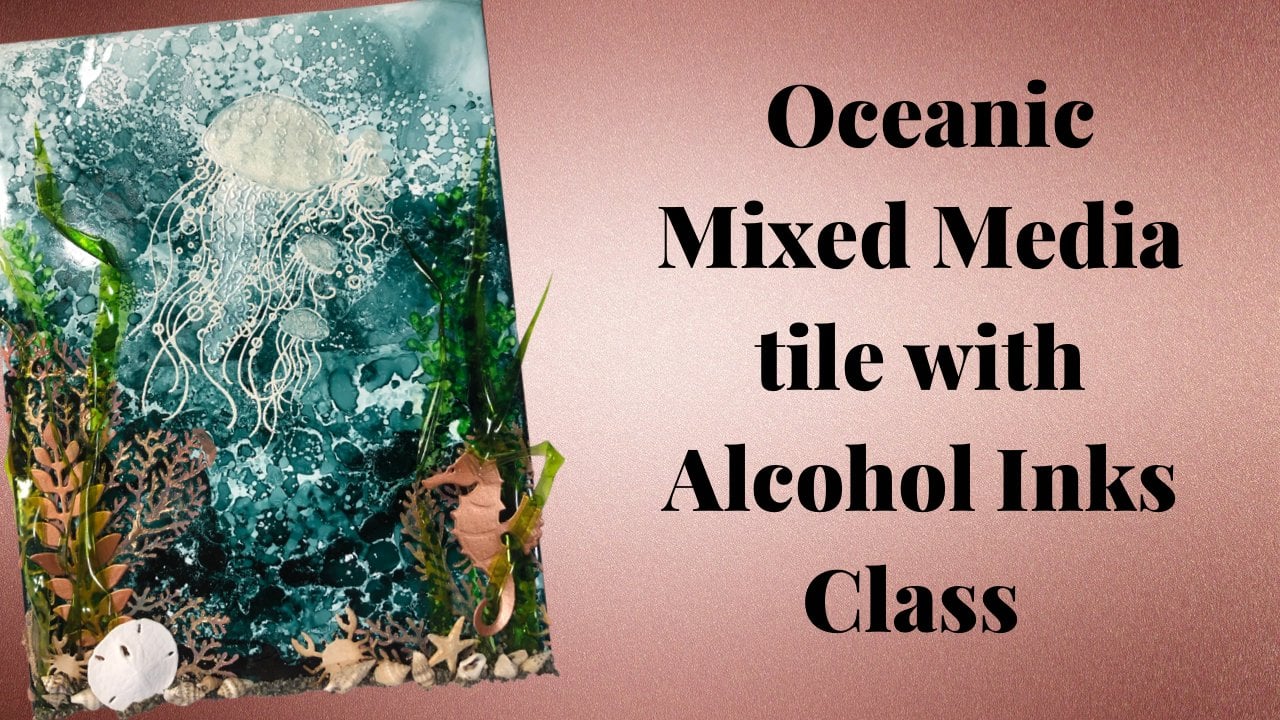
1. Seahorse Alcohol Ink & Resin Class: Welcome to the sea horse
alcohol ink and resin class. I absolutely love
mixing or working with alcohol inks between
layers of resin because it adds so much depth and dimension to your piece. Let me show you
what we're gonna be working on in this class. Here is the project
we are going to be working on with this class. Now we're gonna be doing
three different layers of alcohol inks and in-between
each and every layer, we're going to be putting
a thin layer of resin. And what that's gonna do is it's going to give
you some dimension. As you're working on your piece. I'll let you know. I'll walk you through prepping your piece before we even
start with the alcohol ink, how to mask off your
patterns so that you don't get alcohol ink where
you don't want it to go, as well as tips and
tricks for using resin, how to seal your alcohol
inks in-between each and every coat so that your
resin doesn't react with it. I'll also show you how to remove the resin drips from the back
that accumulate as you're working on it and how to add a hanger to the
back of your piece. This class comes
with a supply list. It's going to list every
single thing that I have used for this particular peace. I also have the PDF for the seahorse that I
used on this one, but I'll share with
you the website that I got the image from. And if you decide you want to do a different animal or different image,
you absolutely can. The technique is
exactly the same. I want you to have fun with it. Also, I'll share with you the colors that
I've used for this, but you can change
the colors to suit your decor or your preference. Will see you in class.
2. Prepping & Basecoating Wood Panel: The very first step in starting our project
is we're gonna take some wax and we're going to rub it all over the
back of the wood panel. Now the reason we
do this is because when it comes to the
end of our project and we want to remove the resin drifts that have
fallen well curing. This is going to help
them release from the wood a lot easier. So it's just going to make
that job quite a bit simpler. Now we're ready to base coat
the front of the panel. I've got some painters
pyramids here. I'm going to put
my panel on there. I'm just going to
use some primer. I have a little paint tray
here and a foam roller. I like to put it on
with a foam roller. If you prefer, you could
always use a brush. I just prefer the
texture from the roller rather, rather
than brushstrokes. Going to put some
in my paint tray. And I'm actually going
to do two quotes a bit. I'm just going to fill one
coat and then the other quote, once the first code is dry, I'm going to add a
second coat for that. I want to make sure that my
panel is completely covered. First thing I'm gonna
do is do all the edges. If you prefer to do the front or the top first and
then do the edges, you can absolutely do that. It's very helpful to have it
on those painters pyramids. Especially while doing this. You definitely need
it on something while you're doing the resin. But I just find by having them on here while I'm painting, I can easily do the sides
without having to lift it up. Let's do the front. I tried to take as much of
the excess of the paint off, not sloughing it around and
having big blogs in areas. You can see I like to
hold down my panel so that it doesn't really move
on those futures pyramids. Then center here. I'm going to let that
completely dry and then I will add my second layer. Alright, our first code
is completely dry, so let's add a second coat here. If by chance, after
adding a second coat, you find that something hasn't been covered
quite as well. You can always add a
third coat for a width. I'm looking for. I think two coats is
gonna be enough here. Because this is the last coat. I'm just going to go over the entire have a smooth surface
without any ruler lines. Now I'm going to
let that completely dry before we go
onto our next step.
3. Transfer Image & Masking: All right, Our would
panelists completely dried. This way on here. I've got my seahorse printed out the size that I want
to fit on this panel. The PDF for this is the PDF link for this
particular sea horse is in the supply list. If you didn't have the same
size panel as I'm using, you would need to
change the size of it. Or I'll have the website
where I get the images from. And you can choose
whatever image you're wanting to create this
same technique with. In order to transfer
our image to our panel. You could download the SVG from the site that I
get these images from. If you have a die cutting machine or an electronic
cutting machine, then just put that in there
and use removable vinyl. But not everyone
has one of those. So I just figured I'd
show you how to do it without having an
electronic cutting machine. So I just took some charcoal
and rubbed it on the back. Then you'll notice that I get a whole bunch
of powder there. I want to clean that
completely off. Now I am going to have some of this charcoal rub onto
here where I don't necessarily want it
and I'm just going to use a cloth to wipe that off. Any excess off this on here. I'm trying to center my
seahorse in the middle of the middle of my wood panel. I'm just eyeballing it. What I'm gonna do is
use a ballpoint pen. You could use a stylist, you could use a pencil. Basically, you want
something that's got a pointed edge that you can trace around the
di dip, the detail. I'm only doing this half of the seahorse because the
other half we're gonna have our alcohol ink blowing. Clearly I can't talk and
trace at the same time. You add in whatever
details you want. This part here, I'm
just going to leave it because I think without it, you'd still know that
it was a seahorse. It's really easy to see exactly where it is that you're tracing. But you could, if you chose, use a different colored pen, then you'd be able to see
it a little bit easier. But I even with a black pen
on the black ink there, I'm not having any trouble seeing exactly where I'm going. You see how I have my
seahorse design there. Here's the places that my hand, where my hand was pressing down. So I have some
charcoal transfer. They're all I'm gonna
do to remove that. It's take a baby wipe. Just wipe it off before
we go to the next step. We just definitely want to
make sure that it's all wiped off before we put any resin coats on because if you put a resin code
on top of that, it is enclosed and you
cannot remove it after that. All right, so that is good. So now I've got
some masking fluid in a bottle that's
got a fine tip to it. And I am going to trace
around the edge of that. Now I am going to lose some of the detail on, let me
show you that part. This part here. I am going to lose a little bit of
the detail on that. But what I can do, if I really liked
that detail on there, I can take I can take a paint brush and brush part of that in before we put
our code or resin on top. But it's one of those
things that you might not even know if it's
a detail that you really want or find
as necessary until we pull this masking fluid
and the liquid latex off. I'm using the masking
fluid right around the image just because I have
a little bit more control, I'm going to let
this completely dry. Then I have some liquid latex that I'm going to
brush on the rest of this front of the panel. And the reason I'm
doing that is because sometimes when you're
working with alcohol inks, it can splatter a little bit. And I want to give it
the best chance of not splattering on this
white section. I want to keep that as
pristine as possible. So I want to protect that. You could take some painters
tape or something like that and use that to protect
it that would work as well. And I will be doing
the painter's tape on the sides of the panels. Or I might change my mind
and use the liquid latex. I'm just not sure. Alright, so that is
completely outlined. Now I'm going to let that dry. And once that's dry, I'm going to add
some liquid latex. This is just going to be
easier to brush around the whole rest of
the surface here. I wanted to get this
a little bit thicker. Here we go. You can see it's a creamy
opaque right now when it's dry, it tends to turn transparent, but you should be able to see the difference when I'm
back and it is dry. Alright, so our masking
fluid is mostly dry. There's a few sections here
that aren't fully dry, but you can see the difference. It gets a little bit, little bit on the creamy side. Sorry, it gets a little
bit on the clear side when it's dry and it's creamy, are looking when it is wet. Let's get this here. I'm going to put these
on majors pyramids, just raise them up a little bit. Then I'm gonna take
some painters tape. I should have done
this ahead of time. It takes some painters
tape here just to protect some of the edges and then do the liquid
latex on top of it. I also don't want any splatters going
down the sides here, which is why I'm protecting it. Let's do this one this way here. Because for some reason this particular tape
seems to like to. All right, this way I'm
gonna be using up less, less liquid latex as well. See how there's
no finds out here and you're just basically
pouring a puddle. That's why I didn't
want to do that for the edges of the seahorse because
he would have very little control over it. I have a little silicone brush here that I'm using to push it towards the mascot
masking fluid. Sorry. I'm not trying to go over it. I'm just trying to go a little bit or
go up to it and then overlap it just slightly. But I don't want it to go
into my seahorse design. This very similar to
the masking fluid, is creamy when it is wet and
goes clear when it dries. I want a decent amount on there because
it's going to make it easier to lift it up. Once. Once I'm done the first layer, and this step is going to need
to be need to be repeated between each of
the layers because I'm doing resin between
each of the layers. If you wanted to do it and do alcohol ink over topic alcohol ink, you
wouldn't need that. You can just leave this
one layer and then do it and then just do a
layer resident at the end. I liked doing layers
or resin in-between my alcohol ink layers simply because it adds
dimension to the piece, as well as the fact that then when I put the next
layers of alcohol ink, it doesn't rehydrate
my previous layers. So I'm gonna leave this
to completely dry. Then I will start my next step. Once it is totally dry, we'll start doing
the alcohol links.
4. First Alcohol Ink Layer: Alright, or liquid latex
is completely dry. One thing I'm going to do
for a second beat note, I was just going to see if
any of that charcoal was exposed and if it
was rub it off. But it's all covered
within the masking fluid, but that's that's okay. What we're gonna do. We're gonna do our first
alcohol ink layer. And then when that
is completely dry, we are going to
remove all of this. And then I will rub it off. Before going into our next step. I'm just adding a little
bit of alcohol ink. I also have some 99%
isopropyl alcohol here. Then I'm going to use
to help it to flow. This is all about
building the layers. I haven't alcohol ink
blower here that we're using to blow it out. If you have an air compressor,
you could use that. You could use an empty bottle. I've tried using just
an empty model from the dollar store
before, and it works. The only thing is, is it doesn't reinforce quite as well as this alcoholic
blower does. I'm starting with
my lightest blue. This is Aqua. I'm just blowing it
all the way out. Like I said before, we're going to have
three layers here. So as the layers progress, I'm gonna go just a
little bit darker. But even in this one, I am going to add some
of the darks of the darker or the medium
color is mermaid. I want a combination of the two. I will tend to just put
dots at the color and then drops of my isopropyl right on top of it
to help it to flow. You kind of get into a routine and what works best for you. You may find that it
works best for you to put some isopropyl down first
and then blew it out. Where to put the ink
and then blow it up. Now the one thing to
keep in mind is we use masking fluid
on the edge here, so it's not going to run
into our white over here. If by chance you had a cricket or have a
cricket and shows to create an SVG and
cut it on your cricket. When you put removable
vinyl on here, you're going to want to, Let's paint the edges by that removable vinyl
width, our primer. On my YouTube channel, there is a video, I think it's called
Vancouver Island is better, where I die cut the shape of Vancouver Island and then created a feather
art piece with it. But what I did was used
removable vinyl, same primer. I did it on Canvas. And then then before
adding the alcohol ink, I used the primer and painted all around the edges so that it went seep underneath. Just a little hint,
if you happen to be choosing to use
vinyl is your stencil. I think I've pretty much, I'm good with my
first layer here. I want to have a
little bit more light. By light, the light color
coming through here. That isopropyl is just going
to help it to blend out. You could use blending
solution for this as well. Isopropyl alcohol
works just as well. And it's a lot cheaper, so I
tend to use the isopropyl. The other thing with
the isopropyl it was it'll lighten your
alcohol ink colors. If you have an area that's
a little bit too dark, you can add the isopropyl, like for instance, say this, I don't find it too
dark, but if I did add the isopropyl and then
blow it out just to lighten it a little bit. I left my edges bear so that the ink could
flow down there. I don't mind that if
that bothers you, you could mask it with either some liquid
latex or some painters tape. You'd have a better chance of completely covering it with
the liquid latex though. If you want your color
to stay darken and area don't at the isopropyl. I do want it to be darker
right on this edge. And it is going to get darker because we're gonna
add more layers to it. There's want to make sure
we have a clear edge here. If we're going to
the next layer. Any areas that you find are
little bit on the dark side. Just add some isopropyl
and blow them out. The fun part about isopropyl, alcohol ink is sometimes you get different
colors in there. So this is a more
of a blue-green. But when I did that
last one there, all of a sudden we get
some blue in there. So it's kind of fun to
see what colors come out. And then right here I'm
getting some green. One of the things that I
find fascinating about it. As you can see, the
last couple of times, I haven't been using
any alcohol ink. I'm only using the isopropyl. I'm just blowing
some of the colors out to make them a
little bit later. There we go. I like that the way it is. I'm going to let that completely dry them with alcohol inks. It really doesn't
take very long. And alcohol dissipates
quite quickly. Once it's completely dry, we are going to remove the
tape and we're going to remove the liquid latex. The alcohol ink is pretty much dry and I am clearly impatient. So I am going to pull my
taping my liquid latex off. Now you can see I've got some
seepage there with my tape. What I'm going to do
there is I am going to use a little bit of isopropyl and lightening
as much as possible. And then I'm going
to use my primer and put another coat on there. Just touch it up a little bit. It's going to be encased
in the layers of resin. So we're not going
to necessarily see a touched up area there. But when taking the isopropyl and bleaching it
out a little bit, it's going to help
cover it a little bit. It will stain it slightly, but it should be fixed. I can see I just messed
that area right there. You have to be careful with
the isopropyl alcohol. I shouldn't have done
two areas at one time. I should just work
on and focus on it. I'm just dabbing up in there. I'm going to put some
isopropyl alcohol on my paper towel. Alright, so I'm gonna stop messing with this
because I'm clearly making it worse by adding
more isopropyl alcohol, but it's good to know
how to fix things. So I am going to just touch
up there with my primer. I'm going to use my,
whereas the wet. Just get rid of some
of my charcoal there. Before I go to the next
step and ADJ or resin, I need to put a
couple of light coats of the camera varnish, then a couple of light codes of the UV resistant spray to
protect it from the light. Now, this Kumar has to go first and only light
coats will work. If you dose it with heavy coats, it will affect the alcohol ink and it will start
to move it and it will be a cool effect, but probably not
so light coats let them dry in-between your coats. And then, like I said, a little bit of UV resist. You have to wait 24 hours
after spraying it with those sprays because
you need to let all of the chemicals
dissipate from it. Otherwise, it will affect your resin cure and you
will likely get fish eyes.
5. How much Resin will I need: While we're waiting
for our primer to dry, let's talk about how to figure out how much revenue
we're going to need. If you Google most
epoxy resin calculator, most epoxies is the
reason that I am using. And then plug in. The length of your piece. Mine here is ten inches
by eight inches. I only want 1 16th inch code. Like I don't want to
really thick coat because we're putting several
of them on here. The intent is for three
coats or resident, but I don't necessarily
need them to be very thick. So I'm using the measurement that they have here
for 16th of an inch. So 0.0625. Then it tells me exactly
how many ounces that I will need to 0.75 or whatever ounces. So now I know for each layer, That's how much resin
I am going to mix up. That way I'm not
wasting excess resin or having too much of it flow
off of it, drip off of it.
6. First Resin Layer: Alright, the next
day I've sprayed with Kumar and UV spray, a couple coats of Kumar and then a couple of
quotes or UV spray. And I've allowed a
day for the gases to dissipate while it's sitting. The other thing that I
did before I did that is I took a small brush, just a little small brush
with some isopropyl alcohol. I had drips down the side
and that's totally fine. I wanted them, but I wanted them a little
bit more subtle. So it took some isopropyl
alcohol and just blended my stripes
in a little bit before spring with the sprays. Now I'm ready to mix my resin. I have a cup here that's got
measurements on this side. We're just going to make
it very easy to measure. I'm using most epoxies resin
and there's two parts to it. There's the Part a and Part B, and you use equal parts of each. So I am going to do that. I mix it for three minutes, making sure to scrape the
sides as well as the bottom. The other thing is make
sure that you follow the safety protocol from the resin that you
are choosing to use. That information
will typically be with the product or
on their website. I'll be back once I have
my resin all mixed. My resin is mixed
and we're ready to go before you do anything, make sure you take a
level and make sure that your piece is
completely level. Because if it's not, the resin will flow
to the lowest point. So best to do that
ahead of time. If by chance is not level, I typically will put a toothpick
or something underneath my painter's pyramid in order to raise it
up a little bit. My resin has been mixed
for three minutes. And typically it's quite easy to see that it's
mixed thoroughly. While you're mixing it,
you'll see the two parts. You'll see the striations in the resin and then
all of a sudden it becomes pretty clear. There is bubbles in
it and it tends to happen even more when
the resonant is thick. But we're going to
use a heat gun to pop those bubbles covering
the surface completely. Using my gloved hand to spread it all the
way to the edges. And I like mine flowing
over the edges, so I'll spread it all
the way to the edges. And then I will also take that
hand with the resin on it. And I will rub it
all over the edges. And what that does is it ensures that it's going to
run over the edges a little bit more evenly. Typically what I
do when I'm using resin is I'll have a
mold or two to the side. So if by chance I have
a little bit extra, I'll just pour it into the mold. Do some experimenting on it. And typically that's the
way to not waste it. Sometimes you'll learn
something about their resume. You're using great
way to play with it. Using up extras for
little experiments. Make sure we've got resin
around all four sides. Clearly moved it around on the painters pyramids
while doing that. Then make sure that you're completely covered on the front. Taking one glove off
to touch my heat gun. And I'm using a low setting when all over it and you can
just watch the bubbles pop. You're gonna do this until you stop seeing bubbles popping. And then usually for the next
half an hour to an hour, go back to it every
ten minutes or so. Because typically some more
bubbles will have risen to the surface and
I will crop them. If you need to protect it from dust and stuff like
that in the air because rather than tends to attract it, you can put a clear
container over top of it so that you can still watch
it, but it's protected. I typically will do that if it's the last coat that I'm
putting on my piece. Typically if I have
other levels or other resin layers that
I'm at plan on adding. I don't really protect it too much because I have
easier access this way. Alright, So all the
bubbles are popped, their little thing in
there and I'm gonna take a toothpick in a minute
and pick that out. And I'll see you tomorrow and we will mask
for our second layer. While I remember,
while it's on my mind, one thing that I mentioned
with spraying the Kumar and the UV spray on the resin is that you need to wait 24 hours
for it to dissipate. Otherwise, the gases coming from the sprays tend to
result in fish eyes. The way to fix it if
you happen to get them, because sometimes you'll still
get them after 24 hours, is to add another quota of resin that should
fix the problem.
7. Masking for Second Alcohol Ink Layer: All right, our first layer of
resin is completely cured. I do wait until it's
completely cure to start with the next step
because I don't want my masking fluid to affect the finish of the
resin in any way. At this point what it might do. And I don't actually I haven't tested it to see if what I think might happen
might happen. But I think it might. If the resin isn't
completely cured, I think you might have
a hard time getting the masking fluid
off, peeling it off. So I always just wait
until it is completely cured and I know that I'm not gonna have any
issues with it. Once again, I'm starting with the masking fluid with the fine tip so that I
can get right to the edges. I'm going to let
this completely dry. And once this is completely dry, I'm gonna go in with
my liquid latex. Now, this whole project, you don't need to do
it with three layers or resin if you wanted. You could do all
your Acrylic, Sorry, all your alcohol ink
layers together, but one layer, dry or dry and then go and
do the next layer. The only thing that
that would effect is by putting layers of resin in-between each
alcohol ink layer. What we're actually
doing a ceiling, the alcohol ink in there. So you're not going
to rehydrate any of that. In your next layer. If you choose to do
them all in one layer, you will rehydrate the
alcohol underneath, which may be what you want,
maybe what you don't want. I would suggest trying it and seeing what
she liked better. It's one of those
things that not one fit is for everyone. I always like I said
in the last video or when we were doing
the alcoholics before, I like the dimension that you get by adding the
resume in-between. And I also like that when I
go to work on my next layer, none of the detail from this
layer is going to go away. It'll still be in there, and it will just add some more interests to
the whole piece. I'm going to let
this completely dry. I will be back and we will add our liquid latex just back for a quick second
to mention something. You might see some bubbles
here in the masking fluid. I take a little thumbtack, I just pop those. Super easy to do, but
I just want to make sure that everything
is completely blocked, masked off especially
the bigger ones and tiny bubbles I
don't worry about, but there are some in here that happened to be bigger bubbles, so definitely make sure to pop them if they are bigger bubbles. Alright, so it has been an hour, most of the mascot
is completely dry. There's a little bit here in a little bit here There's no, but it's dry enough that we're ready to go to the next step. I'm gonna do the same as before. Take off some sections, since it did work last time other than a
little bit of seepage, but that's easy enough to fix. This way. I'm just
using a little bit less of the liquid latex. Really likes to tear. Alright, so now some
of that liquid latex, I put it down, just make sure
I've got some good contact with the resin there. Coursing down and use
the same brushes before I did clean off the dry it
up liquid latex from here. So it just picks off, same as picks off your art piece when you are ready
for your next step. Once again, makes sure that
all the areas are covered as super easy to spread out
with this silicone brush. If you didn't have
a silicone brush, you could say use
a popsicle sticker or something like that. I wouldn't use a
brush that you like because I'm not sure
how easy it would be to pull the liquid latex. I would've an actual brush. I personally wouldn't
do it online. So if you have a cheap one from the
dollar store or something, something that it doesn't
matter if it gets ruined. That's fine. But I definitely wouldn't be using a brush that you like
to move this stuff around. Easiest solution for me
was the silicone brush. I think you can even buy
these at the dollar store. Mine came with some silicone
resin tools that I bought. This part of the kit and I don't really use it with resin, but I do use it for this which comes in quite handy. All right. We've got everything
completely covered. Need to wait for that
to completely cure, and then we're ready to do our next layer of
alcohol, same as last. Same as the masking fluid. I'm gonna take a toothpick
and a toothpick. My thumbtack, see if I can
figure out where I put it. And I'm gonna pop some
of those bigger bubbles. The smaller ones I
don't worry about, but the bigger ones
I want to pop them. We'll see you in the next step.
8. Second Alcohol Ink Layer: All right. So it's been three
hours, just a heads up. It does take awhile for the
liquid latex to fully dry. This part here is
not completely dry, but I think it's gonna
be okay enough to start. I'm going to use stream and
Mermaid for this layer. I'm not going to use
their really light color. And then I'm going to
add just a little bit of Sterling Alloy. Make sure that it's completely
mixed up before you start. You could also use a
metallic with this, I'm using the alloy
because the alloys are a little bit more of
a leafing metallic. And I would like to have some chunks of
metallics in here. So i'd I'd like the
look of chunks within the layers were blowing it out exactly the same
as the first layer, using those two colors just to darken rate
around the edges here. Now I can't remember
if I said it in the first layer or not. I am using a blower here. You could use an air
compressor if you have one. Or you could use like an
empty squeeze bottle. The thing with the empty
squeeze bottles though, is it does get a little
bit hard if you're inflating it quickly for
it to reinforce that. So there are some
limitations to it, but it's a great alternative. If you just want to
try a technique, I wouldn't see if
it's your cup of tea. There's nothing worse than spending a whole lot
on supplies and then realizing that
wasn't your forte. But these blower tools
are not super expensive. I'm in Canada and they're both, I think about 20
bucks or something, so they're not super expensive, but they're a great way to test. And see if you like it. I happen to have
an air compressor that could be used as well, but I didn't want to use
it for this video simply because it's not something
that a lot of people have access to or can afford. I wanted to keep the tools used easily
accessible to people. I'm just going back
and forth between the lighter or the medium
and the darker color. Adding a little bit of that
alloy and then some of the isopropyl alcohol
and then blowing it out. Now it doesn't
seem to be leafing as much as I would like. But what I'm going to
do once I get enough of the metallic on there or how much I would
like to be on there. I'm just gonna do the
last little bit with just alcohol ink to help
separate it a little bit. I'm blowing it out
but I'm not blowing it out all the way to the edges. I do want to be able to see
that first layer in there. Little bit of the
medium color here, little bit of metallic in here. And I do find putting a drop of the alcohol ink and
then the metallic and the alcohol ink
tends to help it. The alloy flow a
little bit better. Go. You're just going
to continue this as much as you want until you're satisfied
with your results. If there's a whole bunch
of metallic in here. And I don't necessarily
want a big metallic. I'm just going to go use my alcohol ink and separate
it a little bit more. And I'm noticing as I'm using that alcohol ink to separate it, I'm getting a little bit
more of the chunking of the another thing that would help the leafing would
be using blending solution. And I might just go grab
that for this layer. Because it is recommended to use the blending solution simply because
there's resin within the blending solution and it
works well with the alloys. It helps that leaf
leafing action occur. So I'm just going to
grab that a second, I'll be back. All right. So here is my alcohol
blending solution. I can see right away as soon
as I start putting it down, I started getting a
little bit more leafing. Funny some of the
details that you totally remember and then others that after a little bit
rings a bell again. The blending solution works very similar to the
isopropyl alcohol, but there is a resin in it. Something to keep in mind. That is why it works
well with the leafing. Isopropyl is great
to use because it's an inexpensive way
to move them around. And it's great for
when you're starting. But sometimes you do need the
blending solution because the alcohol inks do what
they're supposed to do a little bit better
when you're using them. Just going to add a
little bit of some of the darker alcohol AIG. Just like I said,
you get to decide when you are completely done. You can stop at anytime. I'm very close to being done. All right. Tony Stark in that
right in there. A little bit more because I just lightened it after
I blew it out. Pulling it out tightly or
just a tiny little bit. I just don't want
hard edges there. Alright, I am going to leave that layer to completely dry. Then I will remove
the liquid latex and the masking fluid and then spray it with the Kamara varnish
as well as my UV spray. A couple of quotes
to the Kumar and then a couple of white
coats of the UV spray. I have drips down the side
there that before I spray it, I am just going to take my brush with some isopropyl alcohol, just soften those lines. I like them there, so I don't want to
remove them totally. I just want to soften them a little bit so
they're not quite so harsh with the other layer. And I will see you tomorrow
in the next video. We're going to add
our next layer resin back against super quick. I just wanted to mention that if by chance you get a touch of tape residue on clean, clean one on your resin. Just take a little bit
of isopropyl alcohol and Q-tip and you
can clean that off. Sometimes you'll find that you
get a little bit of a mark from the isopropyl
alcohol on the resin. Again, we're adding a
couple more layers still, so we don't need to
worry about that. Just want to remove what you
can between the layers that it doesn't affect
your final result. Will see you tomorrow.
9. Second Resin Layer: All right. It is the
next day our piece has been sitting for 24 hours. I have my resident
already mixed up second-level side of the cup. So I'm going to pour it. I've already mixed it
for three minutes. And the resin I use has equal
parts of Part a and Part B. So I've already done that. Support all over. And these silicone cups
and tools are great for, if you like to do resonant, want to be able to
reuse your tool. So I'll show you at the end of this course how to
clean them easily. Make them ready
for being re-used. Once again, I'm just spreading the resin all the
way to the edges. First. I'm gonna go over the slides. Even though we leveled
at the first time. And likely you haven't moved
your painters pyramids since that you still want
to make sure that your pieces level every single
time you go to do this. Just that the off chance
that something has shifted. We want to make sure that
we've got a nice even coat. We don't want our retinol
floating to the lower end. And it's really easy
to be able to feel around the size to make sure
that everything is covered. Completely. Checkout at a different angle to make sure that you've
got the front or the top. I'll cover it completely. Now let's remove
one of the gloves. Get rid of the air bubbles. Once again, the
heat gun is just on a low setting. Move
in and around. You don't want to get too close to it because you can score to route than if you
get too close to it. But you'll find that the
bubbles pop super easy. If by chance you
have a stubborn One, you can stay over the
area for a little bit, a couple of inches away. And you'll also
find the heat from the heat gun helps you are a resident of fear. Even out. Most of the bubbles are popped. I'm gonna watch it once
again for the first half, an hour to an hour or so popping bubbles as I see them come. As well as picking out
little dusk bits that might happen to fall into
there in order to protect it. Clear container over top, pivot top of it while it's curing and
that's going to help prevent some dust for
getting into there. But you do still want to check
it periodically to see if something happened to
manage to get in there, even though if it's covered, dust seems to be attracted
rate to residence. So you definitely want to
keep your eye on it for the first several hours
to check on that. So we'll see you tomorrow and we won't get ready for
our third layer.
10. Masking for our Third Layer: All right. Our second layer of resin is all
completely cured. I'm not sure if you'll be
able to see on the video, but you can really start
to see the dimension from the layers of resin
between the alcohol ink. We're going to do our
next layer of masking. The nozzle with squeaking on
top of the resonance sound. Funny. I tried to get my line as close
to my previous line. You happen to get it a
little bit and you will see the layer of the previous
layer of alcohol inks, but it also gives it a
little bit more dimension because obviously a
seahorse isn't flat. If you find, you get it
in a little bit too much, what you can do is just
use the brush here. And I've done that
a couple of times. Just push it back a little bit. You don't want to rely on that. It better to be more precise
when you're putting your masking fluid around and
avoiding those areas. Alright, I think we've got
a good enough layer here. And you can see in these
sections here I do put a thicker layer mainly because I
don't want to be getting into that area with my liquid latex and risk
going over the edges. I want to make sure that I get those areas in
with the masking fluid. Once again, where did my
toothpick go or my Q-Tip there? My my thumbtack hard right now. Any of those big bubbles pop it. I typically use a
thumbtack or a toothpick. This is a dye piercing
tool. It will work as well. You just need something
with a sharp point, a needle will work. And after popping a couple, I'll clean the edge off. You want a really nice
sharp tip on the end. And that's what's going
to pop those bubbles, any of these little tiny
bubbles I don't worry about, I only worry about
the really big ones. Just because I don't want
them popping while it's drying and then creating a hole there that
alcohol we can get into. I'm gonna leave
that to completely dry and then I
will see you next. And what we putting on the
mask or the liquid lake. Alright. My masking fluid is
pretty much dry. There's a few spots that
are a little bit wet, but it is good enough for
me to add the liquid latex. Once again, putting
some tapered at some of the bigger areas that
we don't need to use quite as much of the latex corner covered here tends to like to dribble
down this corner here. So I'm trying to protect that. Once again, same as before. Going to use my
little silicone brush here to move it around. All those areas. Also making sure to do the edges of the tape so that it doesn't
seep under there, especially with this layer
because it's the last one. I want as few things as possible go wrong or
to possibly go wrong. So much easier to just do a little bit of
extra protection. I mean, IT folks, it
is easy to fix it with some isopropyl
alcohol and a Q tip. Always nice to not have to. Just like before I'm
making sure to go over my masking fluid edge, not just up to it. More. Oops. I'm working on little
silicone mat is actually a baking sheet that I
caught a long time ago, but anything just
picks right off of it. So it's a great surface to work on for something
like this because any of this masking fluid
that has dripped off here, once it's completely dried, it's just going to
peel right off. Once again, any of those bigger bubbles,
I'm gonna pop them. They definitely don't
like popping as much with the liquid latex is
the masking fluid. There we go. That's on top of paper tape. I don't need to worry
about that one. Alright, so I'm gonna let that dry toilets
completely clear. And the next time
I will see you, we're going to start working on our third layer of alcohol inks. See you in a bit.
11. Third Alcohol Ink Layer: All right, Our liquid
latex and masking are cured or dried so we're ready
to do their next layer. So this last layer,
I'm just going to use the darkest color plus some
of the Sterling alloy. And then I'm going to be
using the blending solution instead of the
isopropyl alcohol. Because I definitely want
to get more leafing. Then metallic. Blow it out with lower. Once again, if you've
got too much metallic, just add some of the alcohol. Blow it up. And I got too much for my liking of the metallic
on that section. So I'm going to definitely be a little bit more
light handed with it. The rest here. I'm
trying to concentrate more on this area because I definitely
want to be able to see those other two layers. Really, it's early on in
this layer if I wanted to, I could just clean up
section completely off, but I don't want to right now. Once a bit better. If it goes a little bit
too close to the end. He just like I was doing there just below it
back a little bit. Alcohol inks are one of
those things that you have some control and you
don't have some control. So you do have control of it, but it is also going to
do what it's gonna do. So part of playing
with alcohol inks, it's just learning how to control it and
learning how much to use. Learning how to fix it
when you don't like it because that's too
much metallic beer. I don't like it, so I'm
going to load that back. And what really, if
it was really too much, I could do this. I will take your paper
towel. Just pick it up. Same thing here. There are ways to fix it. Part of it is learning the
medium and playing with it and realizing how it reacts,
what it's gonna do. And then working within those parameters to have it flow as much as
you're wanting. I definitely want
it to be darker. Towards this edge here. A little bit to the little tube. Want to add a little
bit more here, but I also want to let
that dry before doing that because it's flowing out a little bit more
than I would like it to. All right. I like it the way it is, so
I'm gonna leave it as it is. Once the alcohol ink
is completely dry, I will remove the masking. And really it should take
maybe 510 minutes or so. It usually is quite quick for the alcohol ink to
start dissipating. It was close to being
dry but not quite. I did add a couple
of drops closer to the edge because I
want it a bit darker. But as the ink gets a
little bit thicker, when you blow it out, you
get little spines in there, which I kinda like just
wanted to show you that in a minute before waiting for it to finish drawing this dry, Let's take off the
painter's tape and the masking fluid here. It's so satisfying to take
the liquid latex off. Just be careful if you have a little bit of alcohol
ink on your fingers. I had a bit there, so I will
be cleaning that off with some rubbing alcohol
and thank you. Tip. There we go. Once I've got that
little bit there cleaned off and then there's a
couple there cleaned off. I'm going to spray it with
a couple of coats up Kumar, and then a couple of
quotes or the UV spray. And then tomorrow we'll be
ready to pour the resin.
12. Third & Final Resin Layer: Our piece has sat
for 24 hours after a spring with the Kamara
and the UV spray. I'm ready to do the last coat of resin to make sure that
everything is completely level. I've got my resin
all mixed up here. It's the same amount is
every layer. Let's pour it. Spread it all over the top, over the front of your piece. Try to keep it from
moving while you're spreading it because we've
already made sure it's level. We don't want to
accidentally knock it. I say that as I knock it, go. Now, remember the sides. Make sure that we
have it flowing evenly over all of the sides. It's definitely moving a lot as I'm bringing the slides,
but that's okay. Check one last time to make
sure all sides are covered. Alright, so now let's
go to up the heat gun and remove the bubbles
on the surface. Being our last layer. I mean, I'm careful
with every layer to second for bubbles, but this time you
definitely want to check it for a little bit
longer than the first. Keep your eye on it. If by chance you have something
that floats into it. After that first, that way
you can still remove it. There does become a time
when little bit too late. This layer, especially
since it's the last one. It's a great idea to cover
it records your container, something that you can see
through it to keep checking. It helps to protect it. Got the bubbles out for now. I will keep checking it and making sure that
nothing has landed in it. If by chance you do have
something that falls in it, just a little toothpick,
just pick it out. And that will definitely help. We will see you tomorrow. I will show you the
finished piece and removed the drip top to bottom.
13. Removing the Resin Drips: All right, Our pieces
completely done and now it's time to remove
our resin drips. Got a lot of resin that has gone on my
shower curtain here. Let's get this out of the way. Peels off super easy. You may get to a point where it actually a whole and not just what happened right
there, but that's okay. One thing you want to make
sure to do is put down an old towel or something
soft to put your piece on. Because if you put this down on a hard surface or
a rough surface, it's going to scratch your surface so you
don't want to do that. Next thing you're gonna do
is put your narrower tip on your heat gun and it's just going to direct
the heat a little bit more. And then here we go. We're going to
heat up our resin. And then we're going
to use a retractable razor scraper to scrape it off. And because we've waxed in here, it's going to resist, it's going to help lift it up. The first little bit.
We'll take a little bit longer to release it simply because that heat
gun isn't warm yet, so you won't need to warm that
he'd gone up a little bit. They just pull off. Super easy once you get started, I just go around the edge of it, working in a couple
of intersections. See how easy that comes off. I do want to get these pieces out of the
way because I don't want them to stick to my
resident and wouldn't ruin it. But I just want to
out of the way. This is one of my
favorite parts of doing a resin pieces,
removing the dress. Just so satisfying. You do want to be
careful of the angle of your scraper because
we are working with wood. If you angle it too
much into the wood, you will start to go ****
into the wind. There. Would just be a little
bit careful about that. Obviously, you can move your piece around to make
it easier for yourself. There we go, Oliver bits, some pieces or off. Now we did get some alcohol ink staining on the back there. That just happens. If you are wanting to, you could take your
primer that we use at the very beginning and you could paint that or you can take some craft paper or
wherever and cover your back just to make it
look a little bit pretty. I'm not doing that. This is just gonna
be for my bathroom and personally don't care
what the back looks like. But if you're doing
this just to LA it or to give it as a
gift or something. You may want to make the back
look a little bit prettier. But there we go. Pieces completed. I'll see
you in the next video. We're going to put a hanger
on the back of our piece.
14. Adding a Hanger to the Back of our Art Work: All right, We're
now ready to put a hanger on the back of our piece so that we can
hang it on our wall. I like to use these
little saw-tooth hangers. The very first step is to measure the center
of our wood panel here. This one is eight by ten. So I'm just gonna put a mark
at the four-inch mark there. I'm going to place my
hangar in the center. I use some tweezers to
hold my nail in place. You could use some
needle nose pliers. Make sure that it is centered before you
start to anneal it. And also make sure that
the nails that you're using are short enough. Like for instance, you
don't want this going through the front
is what I'm saying. Alright, I redid my marks so
it's where I could see it. So I didn't have to
constantly trying to move it in order to be able
to see where it was. I made my nail mark or my center mark a little bit lower so that I could see
it a little bit better. The end of my tweezers don't really want to hold
that and they also, I'm a little bit up. I hammer it just a little ways
and it doesn't need to be all the way in for the
next one to go in. Once they're both in place and
then I can just hammer it. But there we go.
We have our hanger in place and we're
ready to hang. It was the end of the next video and I will show you how to
clean up all your tools.
15. Cleaning our Resin Tools: Alright, so our
very last step in our project is cleaning
up all of our tools. We've got resin on
all of these things. We want to make
sure to have them clean for our next time. And it's actually fairly easy. These tools are covered in cone, so it does resist the resin. Now, mine are fairly old, so some of the silicone
is starting to pop off, so they do need to be replaced. So just keep in mind
they are reusable, but they do have a lifespan, but you just want to pick
all the resin off of them. Now when it comes to these cups, there will be a little disk
at the bottom, pull it out. And I like to do this to release the
pieces on the inside. And I find the
easiest way to get those little bits out
is wisdom duct tape. I'm gonna take a
piece of duct tape here, cut a piece off. I'm going to wrap it around
my fingers sticky side out. Then I'm simply going
to go into the cup. Use that sticky side to pick up all those little resin
drops that are in there. Little bit great there that
it doesn't want to come off. And there you go. Perfectly clean cup ready
to use for the next time. I'm gonna do that
with all of my tools. Every single time I'm
finished a project, I clean up my tools to make sure that there are clean and ready
to go for the next time. The worst thing in the
world is wanting to be created and then having
to clean up first. So I tried to make sure
that it is all done. That time there.
I didn't do this. And I do have a
couple of pieces that were stuck in there
just going around. I do find that it helps to
release them a little bit. And then when it
comes to these things here with your
painters pyramids, you're gonna get the
resin fooling around it. But all you do, bend
it and they come out, just be careful
because sometimes the edges get a
little bit sharp, depending on how many layers you've done and how
long it's cured. I find the longer it's cured, the more brittle it is. Which means that the edges
are a little bit more sharp, a little bit more
needs dangerous, but still pretty easy
to get those bits and pieces off and reuse them. These little tabs here
sometimes you'll find they get caught in the
resin and bend. But I don't really worry
too much about that because they're not
necessary for them to work. I'm just going to
leave that one because I'm quitting with it
a little bit more. Take the last one here, rub it and get some tape. There we go. Are tools are ready to use
for the next time.
16. Seahorse Alcohol Ink & Resin Class Thank You: Thank you so much
for joining me for the seahorse alcohol
ink and resin class. I hope you enjoyed it. I hope you found it informative
and I hope I didn't inspire some creative juices for starting your next project. We'll see you soon
in another class.
 Artsy. Island Girl, Teacher