Transcripts
1. Welcome to the Class: When we talk about Floral, the most peaceful Art Form to paint on an order to
add some creativity. I thought, let us spend some beautiful Roses
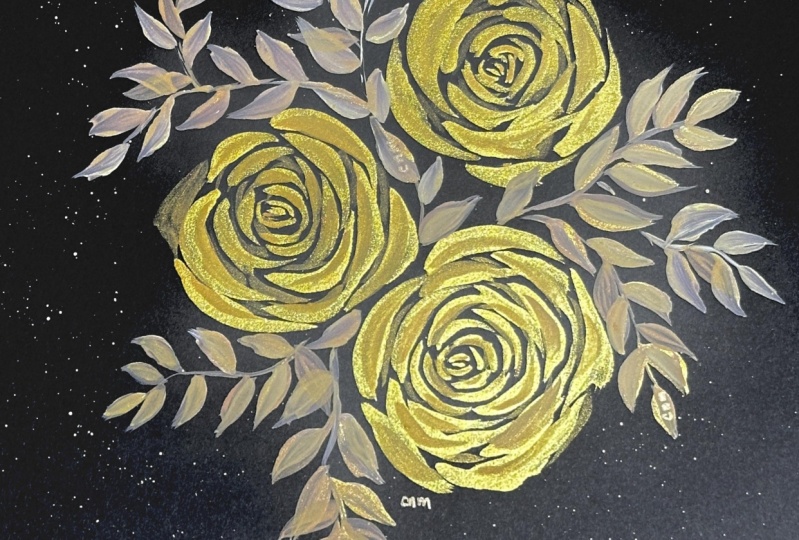
using golden powder. And this class, we are going to create three beautiful
Elegant Paintings, which are going to
be based on Roses having a different style
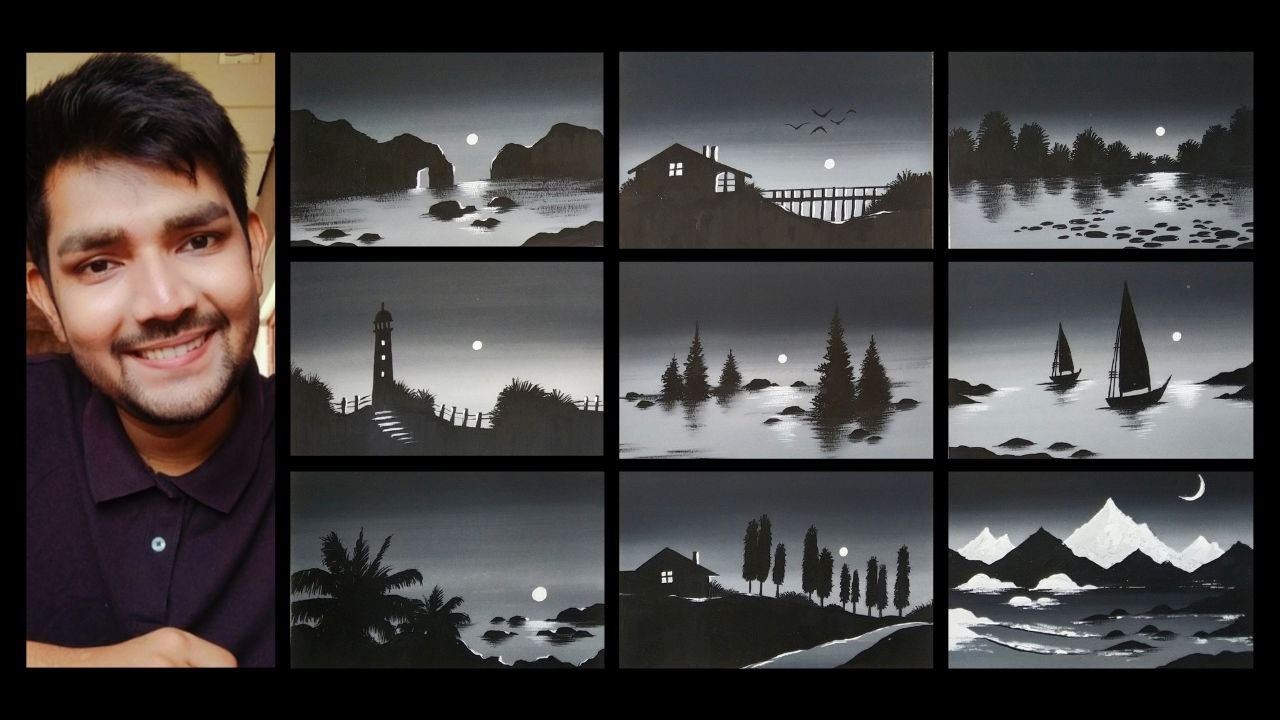
and combination together. Hey everybody, I'm rutvik Patel. I'm a self-taught
independent artists and an interior
designer by profession. Beating Art as something
that I love to do the most. We will be starting
by knowing about all the Art Supplies in detail. We are going to talk
about the brushes and the black paper that
we are going to use. I'll be teaching you
how you can create a beautiful gold paint
using gold metallic powder. Before we start with all
the three class projects, we are going to have a
beautiful practice session in which we are
going to talk about the brushstrokes and all
the elements that we are going to combine and form three beautiful,
Elegant Paintings. They are going to talk
about how you can create a beautiful composition by deciding the position of the
rows and the entire foliage. We are going to have a
beautiful combination of white and golden
color together, which creates an amazing
contrast with the black paper. By the end of the painting, we are going to learn
how you can create some beautiful splattering
effect to the entire painting. There are also going to add some nice message in the
entire painting using a byte. And beating is something
that I love to do the most and make Art as simple as possible for
all my dear students. And as someone who's very
passionate about Art, my major focus is to create some amazing classes
for beginners and intermediate artists who wants to develop their
artistic skills. I'm very happy and excited to share this class
with all of you. So without any delay, grab your Art Supplies and lets get started with the
creative journey.
2. Art Supplies: Hey everybody. So before we start, it is very important for all of you to know the correct Art Supplies
that you will need for this particular class.
No need to worry at all. You will find all the
Art Supplies very easily in any nearby
local arts store. So let us start with
the first Art Supplies, which is a simple waste cloth, which we are going to
use to dab the brushes to remove excess amount
of water and clean it up. Then the next Art Supply
is a simple color palette. As you can observe, it's a simple ceramic
palette in which we have three sections so that you can take out color
and different parts. Also, no need to worry at all. You can use a simple
color palette as well. Using this particular
color palette, we are going to create some
beautiful golden color. Next up we have the most
important Art Supplies, which is the brushes that
we are going to use. So we are going to basically
use only two brushes, which are going to be
size zero and size two. And these are basically
quill brushes. Incase you do not
have quill brushes, you can go for round
brush as well. That also works absolutely fine. Now let us talk about
the next Art Supply, which is a simple white pen. So by using this
particular white pen, we are going to
have a nice message in all the three class projects. No need to worry at all.
You can find a white pen very easily in any
nearby local arts store. Then next up we have some
basic Art Supplies like a simple pencil that
we are going to use before starting
the entire painting. A simple eraser that you can use incase you make any
mistake using the pencil. Now comes another add supply, which is a simple Spray
bottle that we can use to take out some water
in the Color Palette. Next up, we have the major Art
Supply that you will need, which is basically a
gold metallic powder. This is not a liquid
form of color. This is basically
present in a powder. Respond, let me show you so that you can
get an exact idea. And just me, it's result, or I can say it's
output is really amazing when we create
the entire color, will be learning
about how you have to create a beautiful
golden color as well. The next time we have a
simple white poster color, or you can use a
gouache color as well. So we're not going to use
a watercolor basically, we are going to
use a poster color or a gouache color so that we can get a nice matte
finish on the black paper. Next up we have a simple cup in which we are going to have some clear water so that we
can clean up our brushes. Whenever required. Then comes the base, which is basically
the black paper. I have a simple sketch
book which is of a5 size. Let me show you so that
you can get an exact idea. This is basically
a practice journal from which we are going to
use a simple black page, which is of size a5. And no need to worry at all incase you do not
get the exact size. You can use Black paper
of another size as well. This is how we are going to
have a simple black paper on which we are going to
create the entire painting. Let me show you all the
three paintings as well, so that you can get an idea of how we are going to
use the black paper. And we are going to basically paint it in a vertical format. Then we have the
last Art Supply, which is a simple glue, which we are going to use to create a beautiful golden paint. So these are all the Art
Supplies that you will mean. Now let us move
towards the next part.
3. Preparing the Color Palette: Hey everybody. So
before we start, it is very important
that you prepare your color palette
for the entire class. The major color that
you will need for the entire class would
be a goal color. And that we are going
to create by using a gold metallic powder
in the class project. As you can observe, we have these beautiful Roses which
are painted with gold paint. So here I have my
gold metallic powder. As you can observe,
you can find it very easily in any nearby
local arts store. So this is not basically a color which you will
find in liquid form. It will be in a powder. Respond, you can observe
in my color palette, I have taken some
amount of gold. Now. We are going to convert
it into a liquid form so that we can use it to
apply on the black paper. So here I have my
simple Spray bottle, add some amount of water. As you can observe, I have just sprinkle some water
in the Color Palette. So we want to create a
nice consistency of color. Now we are going
to add some glue. So you can observe
that also I have taken some amount of glue
in the Color Palette. So now you must be
wondering why we have added some glue to
the entire mixture. It is because so
that the Color can permanently stay on the paper. Now you can absorb using my
Quill brush of size zero. I'm just mixing the
components together. So it is basically gold powder, Gold Metallic
Powder, some water, and some glue together. And you have to
mix it really well so that it gets a
nice consistency and it becomes in a
very good form of liquid so that we can apply
it on the black paper. Also, one thing that you
have to keep in mind is while mixing your
brush should be clean. It shouldn't have any
other color in it. So make sure that
you clean it well, and then makes the
entire color components. Now the other color that
we are going to need is a simple white poster
color or incase, you do not have a poster color. You can go for a
gouache color as well, just because we want a matte
finish on the black paper. Now on the second portion
of the Color Palette, I'm taking some white color, tried to add some amount of
water so that you can get a nice consistency to apply
it onto the black paper. We are ready with the
entire color palette. So these are the two major
colors that you will need to complete all the
three class projects. No need to worry about
the gold metallic powder. You will find it very easily in any nearby local arts
store or incase, you do not have a
gold metallic powder. You can go for liquid
gold color as well. Now let me demonstrate
a little bit about the color that we have prepared in the Color Palette. I'll be using my Quill
brush of size zero. And we are going to
make some beautiful strokes so that you can observe. So we'll be starting using
the tip of the brush and we'll apply a little bit of pressure on the center portion. And as you come towards the end, you have to apply the
least pressure so that you can create these
streamline strokes. And you can observe the
beautiful contrast between the golden color and the black
people that we have used. Similarly, we are going to
use the white color as well. That'll be taking my
Quill brush of size two. And I've taken some
solid white color and the second portion
of the Color Palette, they have created
another three strokes, just below the golden strokes. You can observe the
movement and the way we have just made these
talks on the black paper. Here, you can also observe the consistency of the color
that we have prepared. So it shouldn't have access
amount of water in it. So make sure that you create the gold metallic color in a
very slow and steady manner. Try to have a good composition. Now let us move
towards the next part.
4. Lets Practice the Elements: Hey everybody. So before we
start with the class project, let us practice all the elements that we are going to use in it. So I'm ready with my
practice, our journal, which is in a horizontal format right now placed
in front of you. And I have created a nice
heading on the top as well, using a white pen, which is lets Practice all the elements. So I'm ready with my
gold metallic color and some white color
in the Color Palette. So let me give you
some details about what we are going to do in this particular practice sheet. We are going to create
all the elements that you are going to observe
carefully so that you know how to paint
all the elements in detail before starting
with the class project. So here I have a simple
pencil and we are going to start by learning how we
have to paint the rose. I have drawn a simple
circle first using my pencil and one more
circle just inside it, which is a little
bit smaller in size. So similarly, we are going to draw two more circles like this, having one because so-called
and one small circle inside. Now let me draw the
last circle as well. Now you must be wondering why we have drawn three circles. So this is basically for
your understanding to know these steps of how you have
to paint the major roles. In all the three class projects. Rose is going to be
the main element and all the three paintings. So you have to be very careful while painting the main element. So we are going to
start by learning how to create the Roses post. And then we'll be talking
about the foliage, which includes the leaves and the random strokes
that we are going to make using the brush. For your understanding,
what you can do is you can use a simple white pen and you can add some headings to all the three circles by
adding the label as step one, step two, step three. This particular step will
be really helpful for you to keep a record of
your practice sheet. And it can also be
very helpful once you start painting
the class projects. I have taken my Quill
brush of size zero and we are going to take some
nice amount of color in it. You can observe the
first small circle and then we have
a bigger circle. So there's a reason why we
have separated two circles. So in the inner portion
you can observe we have little strokes
and color form. And as we come towards
the outer area, we are going to increase the size of the strokes
that we are making. You can observe very carefully
that I'm using the tip of my Quill brush to create
these columns, the strokes. And no need to hurry at all. Try to paint it in a very
slow and steady manner. Apply these strokes
in a random way. So you can observe that we have covered these smaller
circle completely. Now you do not have to cover
the remaining portion, the outer circle right now. We are going to do it in
step three that you can observe all the
steps 123 carefully. Now I'll be repeating
the same step by adding these little strokes
in the smaller circle. Make sure that you painted in a very slow and steady manner. Now once we have covered
these smaller circle, we are going to cover the
outer portion as well. The bigger. So good. Now this time we are
going to increase the size of the strokes
that we are making. They're making these strokes
and archived format. And we have to apply a little bit of pressure
on these anti-abortion. You can observe, once you
start making the stroke, we are using the
tip of the brush. We just apply a little bit of pressure on the center portion. Once you pull up your brush, apply the less pressure. So this is how you have to
make the outer strokes, which are a little bit bigger, competitive to the
inner strokes that we have painted in
the smallest circle. I hope that you got an
exact idea how you have to move step-by-step to
create a beautiful rose, which is going to
be the main element for all the three
class projects. So this is how you
have to practice this particular element. Now let me give you some basic muscle exercise that
you can double up. Or I can see the stroke making exercise using your Quill brush. So just take some amount of gold color and you Quill
brush of size zero. Use the tip of the
brush and try to create these beautiful
little circle. Try to paint from the inner
portion and come towards the outer area by creating
these little circles. And it should be really thin so that you know how
much pressure you have to apply while making little strokes inside
these smaller circle. This is basically
a simple exercise to develop your hand movement. And by doing this, you
will get an exact idea of how much pressure
you have to apply onto the smallest strokes
that you are making. For this particular
practice sheet, I have created these
four elements only, but you can practice it as
many as times you want to. Now, we have the outer
strokes which are going to cover the entire Rose, which are basically a
little bit bigger in size. So you can observe the
movement of my Quill brush and you can see how
much pressure I'm applying on to the
center portion. So we start by applying
the leaves pressure, which is going to
be really thin on the starting potion and on
the end of the entire petal. But we have to apply a
little bit of pressure on the center portion so that the petal can look
a little bit solid. Right now we are creating all the strokes
that we are going to cover around these
smaller strokes. So it can be on the top portion, on the bottom portion, on the left-hand side, and on the right-hand portion. And by using these
particular strokes, you have to cover
the entire rose. Now I hope that you want an exact idea of how you have
to paint the main element, which is the Rose basically. Now let us start with
the next element, which is going to be the leaves, that is basically the part
of the entire foliage. So we have these leaves in
different sizes and shapes. Also, we are going to create some little strokes which
are the part of the foliage, which can be considered into
the stem portion as well. So no need to worry at
all to paint the leaves. There is a very easy
and simple technique. You have to take
some golden color in your Quill brush
of size zero. We are going to use the
tip of the brush to just initiate by
creating a small stem, basically a small
lines, small pen line, which is going to be the
main element of the leave. And then we are going to
apply some little pressure. And as we come towards
the outer portion, we are going to
apply less pressure. So by creating these
little tools strokes you can create one leaf. And by simply applying one little stroke also
you can create a leaf. You can use either of any techniques or you can
use both the techniques as well to create some beautiful leaves around
the entire Rose element. And you can observe the
movement of my brush as well. And you can change
the direction, size, and composition
of the leave as well. Now the other type
of leaves that we are going to have
is around the rose, which is going to be
very near to the rules. You just have to create
an outline which is very much and
listen to the rose. So once you create
the entire outline, you how to fill in solid
gold color inside. So you can observe this
particular leaf as well. It is having a different shape. You can also use the tip
of your brush to create some natural outline for
the entire leaf as well. So this is how you can
paint another type of leaf to create the
beautiful foliage around the entire Rose. Now let us talk about the thin strokes
that we are going to use to create some
beautiful foliage around the rose as well. So you just have to use the
tip of your Quill brush. And you just have to apply the least pressure creating these little vertical strokes, which are innovative,
random and natural format that isn't any
specific way of painting. These. Also, you can create some nice variation by
creating these little strokes. You can play with the size. You can play with the thickness
of the strokes as well. So you can observe
that I have created another type of stroke
on the bottom portion. So by using the
tip of your brush, you can experiment with
the foliage as well. Now, apart from the golden
color that we have used, we also have some
solid white color also to create some beautiful
contrast with the black paper. So trust me, it looks really
amazing when you create a combination of two colors and a background
color in the black, it creates a nice
composition as well. So by using the
white color also, I'm going to tell
you how you have to paint these beautiful leaves. The method and process
is absolutely seen. Just simply use the tip of your Quill brush to
create the main stem. Basically. Once they have painted the main
line for the leaf, we're just going to
apply a one stroke, which is going to
be really amazing. You just have to
apply less pressure, initially, some pressure
on the middle portion. And again, the least pressure and the end once you
pull out your brush, this is how you have to create the leaf using white color. The method and
technique is absolutely same that we did for the
golden color as well. So to create a perfectly, you can just practice it as
many as times you want to. For this particular
practice sheet, I have just made three beautiful leaves
using white color as well. Now the another type of leaf
that we are going to have in the foliage is having a
nice outline initially, which is going to be very
near to the main rose. And then we have to fill in
solid white color inside. Now using the white color also, we can have these little
thin strokes which are going to look rarely aesthetic in the
entire painting. And it can make our painting
look even more beautiful. To just have to use the tip and create these
little ten strokes. You can also experiment
with the sizes and the shape of the
strokes as well. Now to make the entire
practice sheet look a little bit more attractive and a
little bit more aesthetic. You can add these
little statements, or we can call it as labels, so that you can keep a nice record of your
practice sheet as well. This is something that I love
to do personally as well. This is how also you
can keep a record of your work in a very
systematic manner. I hope that you got an exact
idea of how we are going to use all the elements to combine and form of
beautiful Painting. Let me take you a
little bit closer to the entire practice
sheet so that you can absorb all the
details carefully. You can practice
all the elements in a very slow and
steady manner. Try to practice it as many
as times you want to. Now, let us move
towards the next part.
5. Project 1 - Single Rose: Hey everybody, you are most welcome to the first Painting, which is a Single Rose. So you can already
observe on my desk, I'm ready with my
black sketchbook. I'm having a simple pencil. I'm ready with the
Color Palette, having gold and white color
in it as simple cup of water, which is having some
clear water to clean up the brushes in case required. Then we have our two
brushes ready as well of size zero and size to you can observe the quality of the golden
color that we have prepared. So make sure that it has the right consistency before
starting the final painting. Then I have a simple piece
of cloth on which we can just simply dab the brushes to clear some extra
amount of water. Now I'm going to start by creating a simple
circular shape, which is going to decide the
position of the entire Rose, which is the main part of the
entire painting, of course. And we are going to have its
stem using the same pencil. To draw a perfect circle. You can have irregular
circular shape as well, to just have the exact location of the rows where you
want to paint it. And we are going to
have a simple stem on the bottom portion. So you can see I've
just drawn a line. So now we are ready
with the basic sketch. We are going to have a small
circle inside as well. So incase you have observed the, lets Practice all the
elements section you might have absorbed clearly that we are going to
have two circles. Basically. One is going
to be the smaller one where we are going to
create smallest strokes. And the bigger one is going
to be the part where we are going to make bigger
strokes using the Quill brush. I've taken some good amount of golden color and my Quill
brush, as you can observe. And we are going to start from the center portion
of the small circle. And as you can observe, you have to create
these little strokes in a circular format. Make sure that you
use the tip of your Quill brush creating
these little strokes. So we have covered
the smaller circle using smaller strokes. Now we are going to
cover the bigger part, which is in-between the smallest circle and
the bigger circle. Now this time what
I'm doing is I'm trying to create these
circular strokes, but these are a
little bit bigger than the strokes that
we made. Initially. Slowly, slowly,
you have to create the petals the way I'm
creating right now. So initially you have
to use the tip of the brush and then you have
to apply some pressure. And then when you
pull out your brush, you have to apply
the least pressure. This is how the entire
Patel will be pointed from the edges and it will be a little bit thicker in
the middle portion. You can already observe how beautifully and using
simple brush strokes, we have painted the entire Rose. No need to worry at all, and also no need to hurry
incase you are not that much confident enough to paint the entire Rose directly
to the final painting. You can practice it on a rough scrape off
paper initially, and then you can come
towards your final painting. Now, let us move
towards the next part, which is painting the leaves. So we are going to
paint the leaves and create the entire
foliage around the Rose, which are going to be of
two colors, white and gold. So initially I have taken
the same golden color in the Color Palette
and the same brush, which is a Quill brush
basically of size zero. And you can observe the
movement of my brush. I'm just trying to
create the leaves which are very near
to the main roles. You can observe that
we have started from the outline of
the entire Rose. We have painted the leaves, which are a little bit
thicker near to the Rose. And as we moved towards
the outer portion, you have to make
a nice thin edge. This you can do by using the
tip of your Quill brush. Now similarly using the
tip of my Quill brush, I'm just painting the entire
stem of the main rose. No need to hurry at all. Try to paint it in a very
slow and steady manner. Make sure that you do
not apply a lot of pressure while you're
painting the entire stem. We want a thin line. Incase you apply a
lot of pressure, then there will be a thick
line for the entire stem. Now we are going to
create some leaves around the main Rose body. So you just have to make it look as if the leaf is coming
out of the main rose. You can observe that I'm trying to fill some golden color, which is a little bit thicker, near to the entire Rose. And as I move towards
the outer portion, I'm making a nice thin stroke. I would suggest that no need
to worry at all incase you find it a little
bit difficult to paint to the main
painting directly. Want you can do is you can just take a rough
scrape off paper, which is going to
be black of course. And then you can practice
on it initially. And then you can come
towards your final painting. This will definitely minimize the chances of making mistakes. And also incase
you make mistakes. And the final Painting also, it is absolutely fine. Now similarly, I'll be adding some more leaves around
the entire Rose body. And there isn't any
specific way of doing this. You can decide the position of the leaves by using
a simple pencil. You can naturally create some beautiful leaves
around the entire dose. Also, it is not at
all compulsory or necessary to paint it in the exact same way
I have painted You can create your own style
and composition as well. So no need to worry
about the output encase. It is not exactly same
as I have painted. In fact, I would personally
suggest you to experiment and create your own style and composition for the
entire rose as well. You can have a Single Rose. You can definitely play with the shapes and sizes
of the leaves. You can create your
own composition for the entire foliage as well. Now you can observe,
I have created some beautiful leaves
around the main Rose body. The methods and techniques
are absolutely same. Now to make the painting look a little bit more
attractive anesthetic, we can use the tip of the same Quill brush and
create some thin stems. And we are going to add some beautiful leaves
on that as well. So you can observe that by
making a single stroke, you can create these
beautiful leaves. Just try to apply some pressure
on the middle portion. And just use the tip of your Quill brush initially and while pulling
out your brush. Also incase you are missing
out on a Quill brush. It is absolutely fine. You can use a round
brush as well. Now to create a beautiful
classic effect, just take some gold color in your brush and a good amount. And simply tap your
finger onto the brush, splatter some color on certain
areas of the entire paper. Make sure that it is
not an, an axis amount. Now, I'm going to use my
Quill brush of size two. And we are going to take some
solid white color in it. And as you can observe, I'm just making these
little ten strokes using the tip of
the Quill brush. And similarly, we
are going to paint the leaves using the
white color as well. So the method and the
steps to paint the leaves around the entire Rose body is going to be absolutely same. The one which we used in
the golden leaves as well. You just have to paint a thicker portion,
neon to the Rose. As you come towards
the outer area, you just have to decrease the size of the strokes
that you are making. I'm trying to add these
white leaves in-between. The golden leaves
also can separately paint them in certain
other areas as well. No need to worry
about decomposition. You can paint it in a very natural and
random way as well. Also incase, you
are not that much confident enough to
paint the white leads directly to the black
paper I want you can do is you can practice it on a rough scrape of
people initially. Then you can come towards
your final painting. Now using the tip of
your white brush, you can create some
amazing foliage around the entire Rose body. So as I told you earlier also, there isn't any specific
way of painting florals. These are very natural
and organic shapes. You can create different shapes
and sizes for the leaves. You can also play
with the composition, and it is not at all compulsory, unnecessary to paint it in the exact same way
I have painted. I'll be adding some more leaves onto the stem area as well. The matter is absolutely same. You can absorb the way we have a nice composition of molten
and white leaves together. Also, I would like
to tell you that painting florals is
actually very peaceful. I have taken some good amount of white color and my
Quill brush and just simply tap your finger to the brush and you can splatter
the white dots as well. Now comes the last step, which is adding a
beautiful message to the entire painting. I'll be using my white pen. So the reason behind using
a white pen is so that it can create a nice contrast
with the black paper. The message that
I'm writing here is Elegance is in florals. Now it is not at all necessary to write the same message
that I have written. You can experiment or you can write your own message as well. You can take some good quotes or any motivational line
according to your convenience. We are done with the
entire painting. Let me take you a
little bit closer to the entire painting
so that you can observe all the
details carefully. I hope that you enjoyed
this particular painting. Now let us move towards
the next Painting.
6. Project 2 - Pair of Roses: Hey everybody, you are most welcome to the second Painting, which is Pair of Roses. As you can observe,
I'm ready with my black sketchbook,
my color palette, having some gold and
white color together, we are ready with a cup of
water and our two brushes. I'll be using my simple pencil. And the step is absolutely same. We are going to
decide the position of to Roses. Basically. I have drawn one circle
on the upper portion. Another one is a
little bit bigger and slightly to the left portion
of the force circle. By using a simple pencil, you can simply decide the
position of body Roses. Now we are going to
start painting the rose, which is going to be
on the top portion. I'm using my Quill
brush of size zero. The steps are absolutely same. You have to start by applying the little strokes on the
center portion initially. No need to hurry at all. Make sure that your
strokes are smaller in size and just apply it
in this code format. And as we move towards
the outer portion, we are simply going to increase the size of the strokes
that we are making. So by simply applying these strokes in this
circular manner, we are going to paint
the entire petals. No need to hurry at all. Make sure that you get a nice composition for
the petals as well. Try to leave some blank
space in between the petals so that we can create some
nice depth to the entire Rose. Also incase you are not that
much confident enough to paint the entire rules directly
to the final painting. You can do is you
can practice it on a rough scrap of
paper initially, and then you can come
towards your final painting. I'm going to paint
the second rose, which is on the bottom portion to the steps are
absolutely same. Initially we have applied ten and smallest strokes
on this center portion, which is basically
the force circle that we did in the
practice session. And then we are just applying
the biggest strokes. You can observe that I'm leaving some blank space
in-between to create some nice depth in the entire Rose. No
need to hurry at all. Try to make these strokes in a very slow and
steady manner. Use the tip of your Quill brush to paint in difficult areas. Once we're done with
both the Roses, we are going to use the tip of the Quill brush to paint
these little stems, which is basically the part of the foliage for the entire rose. Or I would say for
the entire painting. This is how you have
to use the tip of the brush to paint
the entire foliage. Now we are going to add some
beautiful leaves around this particular foliage that
we have painted right now. You just have to apply to ten strokes to create
the entire leaf. And no need to hurry at all. You can just simply use the entire surface of your Quill brush to paint
these beautiful leaves. You just have to
make sure that you apply the right
amount of pressure. So you can observe
that I'm creating some leaves me on to the main
body of the rose as well. So here you have to
make sure that you apply more color near to the entire Rose body where we have take
part of the leave. And as we move towards
the outer portion, we're just going to decrease
the size of the leaf. Leaves are generally pointed
on the outer portion, so you have to use
the tip of the brush. Now in-between the Roses, you can just simply add ten strokes to add
some nice foliage. And you can use the same brush to create these
beautiful leaves. This is just our one
stroke technique and it's very easy and simple. Trust me, on this incase, you find it a little bit difficult or you
are not that much confident enough to paint it directly to the
final painting. You can simply practice it
on a rough scrape of people, which is definitely going
to be black initially. And then you can come
towards your final painting. This will definitely decrease the chances of making mistakes. And also incase you
make mistakes in the final painting that
is also absolutely fine. Florals are generally having a very natural and
organic shapes, so it is not at all
compulsory are necessary for you to paint it in the exact
same way I'm painting. You can definitely play with the composition of
body Roses together. You can play with the sizes and the shape of the leaves that
we are painting right now. Also, you can decide the
position of the leaves as well. So you can create some
beautiful foliage around wherever you
want to create. Like I'm adding these
lines in between. So you can play with that
composition as well. You can add the lines
in-between the leaves and the Roses and
between two leaves. My basic point is that you
can definitely play with the entire composition by
creating some natural shapes. You can definitely
experiment and explore. Now simply all we
just splattering some color around
the entire painting. So just take some good amount of golden color and simply tap
your finger to the brush. You can add some amount of
water in case you find that the color is very
dense and nature. Now we are going to
add some white leaves, creating some beautiful contrast with the gold and
black color together. So I'll be taking my
Quill brush of size two. Now this time we are going
to add some white leaves. The method and step to paint the leaves are absolutely same. You just have to apply it
around the main Rose body. And you can also create some leaves on the
outer portion as well. Now, using the tip of the brush, you can create these beautiful little stems around the rose. One thing that you can keep
in mind while painting is that try to have
a balanced amount of white and gold and leaves. So the leaves shouldn't be in a very big amount that
it overpowers the Roses. So try to have it in
a balanced amount. Also, it shouldn't be that the golden leaves are more and
the white leaves are less, you can create a good balance
between both the colors. So as you can observe
that I'm adding some white leaves in-between
the golden leaves as well. So this basically creates
a nice contrast and it makes the entire painting look a little bit more
attractive as well. Now similarly, there isn't any particular way of
adding the white leaves. Also, it is not at all
necessarily that you paint it in the exact same way
I'm painting right now. You can add them in your own natural and
random way as well. Now similarly, I'll be adding these splattering effect
of white dots as well. So just simply tap
your finger onto the brush and you can splatter it in a very natural
and random way. So we are going to
add a nice message to this particular
painting as well. And no need to hurry at all. Try to write a nice message
and your own handwriting. And in a very slow
and steady manner. I'm simply using a
white pen so that it can create a nice contrast
with the black paper. The message that I'm
writing right now is you are stronger
than you think. You can take any
message, any quote, or any motivational
line that you want to write according
to your convenience, it is absolutely fine. So now you can
observe that we are done with the entire painting. Let me take you a little bit closer so that you can observe all the details
carefully and you can see how beautiful the
entire painting looks. You can also observe the beautiful shine that we
get with the golden color. I hope that you enjoyed
this particular painting. Now let us move towards
the next Painting.
7. Project 3 - Elegant Rose Wreath: Hey everybody, you are most welcome to the third Painting, which is an Elegant Rose Wreath. So as you can observe, I'm reading with my
black sketchbook, my color palette with white
and golden color in it, and a simple cup of water. So initially we are going to use a simple pencil to create
a beautiful oval-shaped, which is going to give a nice reference line for our Wreath. No need to worry about the
perfection of the oval-shaped. You can just simply draw
a random and drop shape. Now onto the oval-shaped
that we have drawn, we are going to
draw these circles, which are going to
give us the position of the Roses that we
are going to paint. No need to worry about the
position of the Roses. You can create them according to your
convenience as well. And you can create your
own composition as well. Our incase, you want
to follow the one that I have drawn
that also you can do. Once we're done with
the basic sketch, what I'm going to
do is I'm going to use my Quill brush of size zero. And we are going to
take some good amount of golden paint in it. They're going to
start with the Roses initially to the steps and
methods are absolutely same. We are going to start
from the center portion. So you can observe that I'm using the tip of my Quill brush, adding these little strokes
in the center portion. And as we move towards
the outer area, we are going to simply increase the size of the strokes
that we are making. Capital simply
make these strokes in this circular format. This is basically a very
easy and simple technique to paint an entire Rose. Now similarly, we'll be
painting some more Roses. These circles that
I have drawn using my pencil are basically
the position of the Roses. You can play with the composition
and sizes of the rows. We have few more Roses to paint. The steps are absolutely same. Let me repeat it
once more for you. So initially you just have
to paint the little strokes, which are circular in nature. And you have to use the tip of your Quill brush so that you
can get nice ten strokes. And as you move towards
the outer portion, you just have to simply increase the size of the strokes
that you are making. Incase, you're non-black
much confident enough to paint the Roses directly
to the final painting. No need to worry at
all. You can just simply practice it on a
raft, scrape off paper. This will give you
more confidence and your chances of making mistakes
will be really minimum. Also incase you make
certain mistakes and your final painting that
is also absolutely fine. It is just a part
of learning only. We are almost done
painting the Roses. We have two more Roses to paint. Now let me tell you
one thing that Floral generally have a very
natural and organic shapes. So there isn't any specific
way or method to follow. You can have a very natural
and random shape as well. You can play with
the composition, shapes and sizes of all the elements that
are coming together. As you can absorb that, we are done painting
the main element, which is the rose for
the entire Wreath. Now we are going to
add some nice foliage to the entire Wreath. So you can observe that depends, a line is still visible, the oval-shaped that we
haven't drawn initially. Now we are going to
add some nice leaves, uncertain strokes, which are going to be
a part of the stem. You can observe that
I'm using the tip of my Quill brush to
paint the leaves, which is having a variation in size that are thought and leaves which are
going to be bigger. And there can be done leaves which will be smaller in size. So again, I'll be repeating the same step that
no need to worry about painting it in the exact same way I'm
painting right now. There might be
certain difference and it is absolutely fine. You can just simply use
the tip of the brush, applying less pressure on it to create these little ten lines which adds certain amount of detail to the
entire painting. And your painting will look
a little bit more aesthetic. And by using the
same Quill brush, you can paint these
beautiful leaves as well. So you're going to observe
that initially I'm making these little ten
strokes which are diverging from the
entire Rose area. And then I'm adding these little leaves
to the entire Wreath. No need to hurry at all. Try to paint it in a very
slow and steady manner. You can observe the movement of my detailing brush as well. Now I'll be taking
some more color and my Quill brush and
simply tap my finger on it so that we can create this beautiful splattering
effect on the entire painting. Now we'll be using another
Quill brush of size two. I have taken some
solid white color. And we are going to add these little white leaves
in-between the golden leaves. So you can observe
that together, both gold and white
color are going to create a nice contrast with the black people
in the background. So the method and steps to paint the white leaves are
absolutely same. You can simply observe the
movement of my Quill brush. And it's just a one
stroke technique. Tried to apply minimum pressure
where you want to have a smaller leaf and apply some amount of pressure where you want to have a bigger leaf. Using the tip of
the Quill brush, you can create these
little strokes which are diverging
from the Rose area. So similarly, we'll be adding these little leaves
around the entire Wreath. No need to hire Don try to paint it in a very slow
and steady manner. Also incase you are not
that much confident enough to paint it directly
to the final painting. What you can do is
you can practice it on a rough scrape
off paper initially, and then you can come
towards your final painting. Now, I'll be adding
some more leaves around the main Rose body, which are on the outer
area of the entire rose. To just have to paint some good surface
of the entire leaf. And as you move towards
the outer portion, you can just simply make
it a little bit pointed. So we're almost done with
the entire painting. Now just simply take
some good amount of white color and you
Quill brush and dab it with your finger and
you can splatter some white color on
the entire painting. We are done with the
entire painting. Now let us add a
beautiful message. On the bottom area. I'll be using a white pen, which will create a nice
contrast with the black paper. And the message that I'm
writing using my white pen is Art is the best
silence experience. So you can use any message, any motivational line, or any
code that you want to add. It is absolutely fine. You can write it according to your convenience in your
own handwriting as well. No need to hurry at all. Try to write it in a very
slow and steady manner. You can also draw a
simple reference line if you want to write it in
a good horizontal way. Let me take you a
little bit closer to the last painting
that we have created so that you can observe all the
details carefully. And I hope that you
enjoyed creating this particular painting and
got to learn something new.
8. Class Conclusion: In order to create
some beautiful, amazing florals, I thought, let me experiment with
the colors this time. Converting our golden
metallic powder into a beautiful paint and creating some
amazing funerals through It was a simple experiment
for me as well. It was a really
great experience for me to create this particular
glass for all of you, as it was an experiment, which together combine to
form a beautiful class. You'll have no idea the amount of mistakes that I have made. That is something I always tell my students to never get
afraid of making mistakes. One thing that I always tell my students is to maintain
an odd journal in which you can practice on a regular basis and keep
a record of your artwork. I'm very happy to share
this class with all of you. Incase you have any questions or doubts related to the class. Feel free to ask them into
the discussion section. I'll be really happy
to answer them all. I would be really excited to see all of your projects to
the project gallery. It would be really great if you leave a review for the class, as it encourages me a lot, keep practicing
and happy painting
 Rutvik Patel, Artist and Instructor