Transcripts
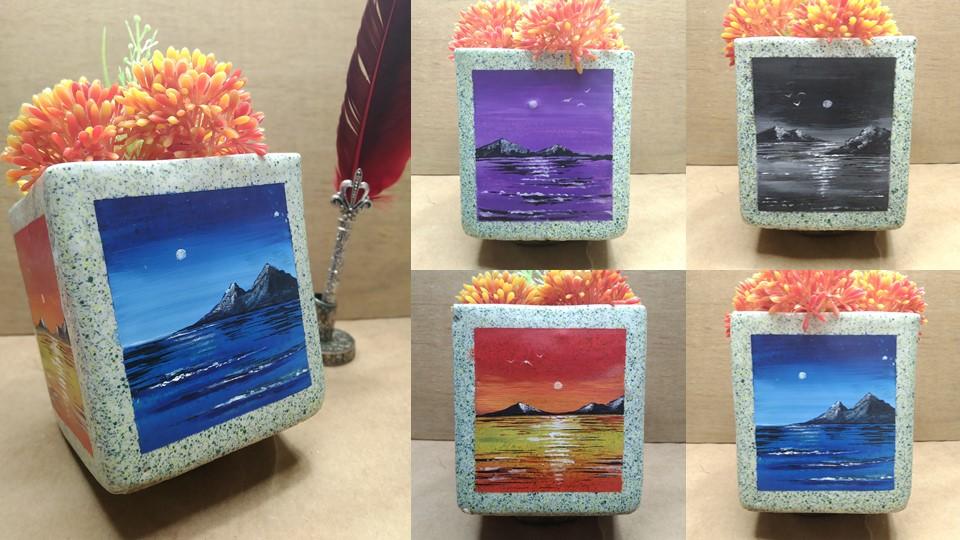
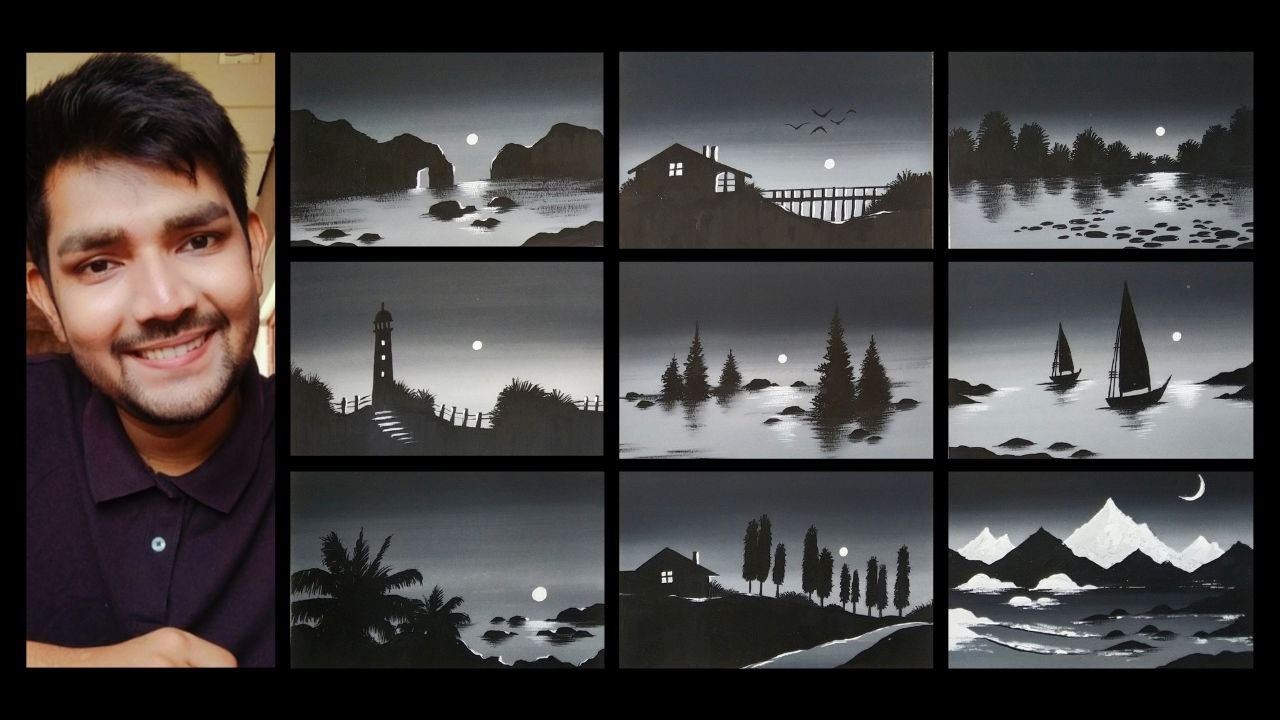
1. Hello & Welcome: It's been a while I have been exploring wash colors and an amazing solid texture it is having after riser. So I was wondering, let me create a sharp claws for all of you based on wash sunset. But instead of papal, let us paint on objects Thus time. So I was just having a look at my art studio and got to have these little artificial plant does and which I keep my favorite flowers. So I'll talk came into my mind that let us keep it a little bit more attractive and artistic. Rather than having a symbol texture. Hello everybody myself, protect Bataille. I'm an independent artist based in good job India. I'm also a professional interior designer. So people who might not be knowing me and AD Join me recently, can find most of my odd bugs being displayed on Instagram. I go by the name should translations. So I'll be helping you to select a right object to being done. We'll be starting with all the material details and on supplies you will need. Before painting the entire sunset on the object, we are going to tape down the entire object. I'll be giving you all the details about being gosh, color that you will need will be starting with the base color, which is the sky and the z. We're going to paint some beautiful mountains and the sea. Together. We are going to learn how to give, Well, thank blend to do colors. We are going to paint a beautiful sun and some enhancement to the mountains. I'll be teaching you how to give an amazing reflection to the water body. The class is best suited for beginners and also intermediate and advanced level artists can try it. So we are going to be in for beautiful sunset, the bubbles sunset and achromatic lens at a beautiful sunset and an amazing blues and said, I assure you that the class is very easy and it has a very short class. But you're going to learn a lot and enjoy under same time. So without any delay, grab your supplies and join me in this creative journey.
2. Art Supplies: So before we start, let me give you basic belief about all the art supplies that you will need. And it is absolutely not compulsory to use the same. You can go for any other good alternative also. So let us talk about the wash colors. So that wash colors that I'm using are from Bristol, but it does absolutely fine if you use any other brand. So yeah, these are being washed colors that I'm using. Now, it is very important to have our rough sketch book for practicing. So this is little e phi size sketchbook in which I practice on regular basis. So you can use scrapbook paper also if you do not have a particular sketch book for practicing. But it is absolutely great habit to keep fun. And you'll find this on a very cheaper rate. All it's hot. It is always reading would do carry additional napkin handy so that you can wipe off the extra color are extra water from your brush. Now this is a simple color palette which I'm using for my gouache colors. So this is a kind of floral color palette in which you can have your different sections to put the Awash colors. Now, you will need our masking tape to tape down the object that we're building. So this is our half-inch masking tape, I guess. And you'll find this very easily in any nearby local stationary. This is a simple spray bottle to loosen up your washcloth. Now let me talk about the handy materials. So this is a simple sketch been, a black sketch been basically, they're not going to use it much, but you'll need it to draw the horizon line. This is a white band from Sakura Gelly Roll. You will need it to add some details to your painting. It is absolutely fine if you go for any other good identity of also. Now let us talk about the brushes that we are going to use. So the first one is our flat brush, and the second one is irradiating brush. So these eyes for the flat brush is five MM. You don't need big old flat brush. You can definitely use a smaller one. Then we have RDD healing brush, which is of size 0. And you will need it to add some minute details to your painting. And that's it. These are the two brushes that you will need. Now, talking about the bland DO that I'm using is a simple cubic planter, which is all one. And you can see how beautiful the four painting looks on it. And this is the open space in which I add my artificial flowers. So these are all the art supplies that you really need for the project. Now without any delay, let's get started with the 4s band of selecting the object.
3. How To Select An Object: So before we start painting on a particular object, it is very important that you select our light object for painting. So now I'm going to talk about the particular object that I have selected. And according to that, you can get an idea how you have to select all objects are any particular object that you want to being done. So I was having this old planter in my art studio, which was a perfect cube. I wouldn't say above a cube but type of cue in which I have these upper part in which the artificial flowers are being placed. So the good part about this particular planter is that to have a lot of planes offices on it. Let me just remove the flowers and show you. So now you can see that this is the hollow band where the flowers are being kept. So as you can see, the entire blunder have these planes offices, which are absolutely very much suited for painting. So choose very wisely, go far plane surfaces on your objects that you are willing to bend and no need to worry, you are going to definitely come with great output. So now we are going to start with our first sunset. But before that, let's dim down the entire surface first. And make sure that you have a plane surface for painting.
4. Tapping The Sides: Hey everybody, Welcome back. So before we start the wash sunset, let us dim down the object first. So here I have my first surface of the object, and here is the half-inch masking tape. You just have to take the bands and place it in Aldi falls Haynes. As you can see, we have a perfect square over here. So now let us just put that did make sure that you do not cover the entire phase. Tried to keep half of the abortion of the masking tape on the object and half on the outer band. So once you place on the forest deep, tried to make sure that it is completely stuck with the object so that we do not have the Gullah going out on the masking tape. And we'll get our gleaners selfies when we take it out. Now simply put the masking tape on all the four sides carefully and make sure that you use to get ready. Play dual, keep exact margin on all the sides. And we are done with the last one. So as you can see, we have got a perfect square and we are good to start with before sunset. So let's start with the first painting.
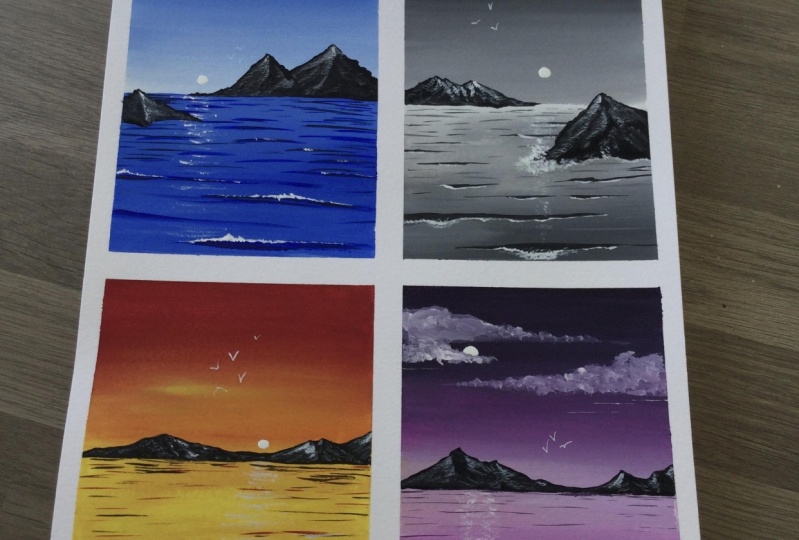
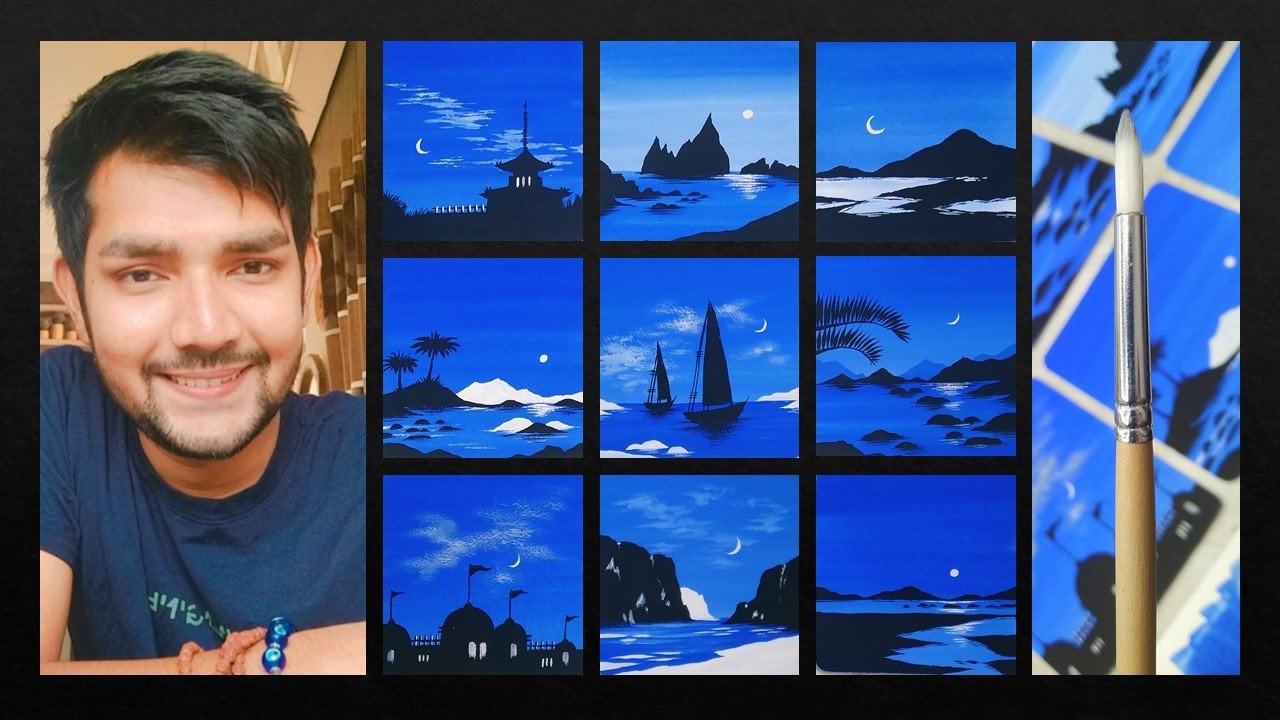
5. Blue Sunset - Painting 1: Hey everybody, I'm very excited to share the first wash tons at painting, which is the blue sunset. And trust me, you're going to enjoy the entire painting. So as you can see, the entire object is ready with the masking tape. And we have got a perfect score on the Santa Barbara. So let us talk about the washcloth. The first one that is Persian blue that you will need. The second one is titanium white and ivory black as the color. So these are the three colors that you will need. Now let us start with the horizon line falls on these anti-abortion tried to use your black sketch pen are any marker that you have and make assemble horizontal line on these anti-abortion. Now once you are done with the horizon line, we are going to paint the sky forced. So use the solid texture of Prussian blue from the top bar, do the bottom one. So we are not adding any water. We are directly applying the wash colors because we need a solid texture. So as you can see, I'm just moving my flat brush and horizontal movement. So we are going to have a darker shade on the top portion and a lighter shade on the horizon line. So you just have to simply apply darker texture to the top bought. And simply move your brush in the horizontal direction I'm moving. Observe the movement of the plaid brush very carefully. Now we are going to add the lighter dawns and the horizon line. So take your titanium white and try to blend it with the brush and blue. So just simply take your flat brush. Again, we are not having any water and the flat brush, and we are going to blend it with the brush and blue on the upper back. So as you can see, the blue ocean blue that we applied initially is wet until now. So it is getting a nice blend with the titanium white. So once you get a nice blend with the sky for pollution glue and titanium white, we are willing to pay in DC. So I had just simply taken some titanium white and blue together and we are bending the C. You just have to apply these solid band below the horizon line. Now we are going to have a darker tone of Prussian blue on the bottom. But take some Prussian blue on the tip of your plaid brush and try to enhance the waves on the sea. You just have domain these random horizontal strokes. No need to hurry at all. You just have to do it very slowly. Die domain these darker dawns of corrosion loop. So as you can see, I'm just simply making these horizontal strokes. So you just have to some glue repeat the process. Tried to add darker values of Prussian blue and the horizontal line format so that you can replicate the veils. Now let us start bending the mountains as the add-on when the sea and the sky part. So the first element is the mountain. So you just have to take ERD dating rush of size 0 and it is around rash. You just have to take the occlusion blue and tried to apply a solid batch enzyme demanding. So as you can see, this is not at all difficult. You just have to draw the outline. And drying mountains is absolutely very easy as you can see. And I'm just filling up the solid color back inside it. So since the titanium white and the background is still read, the version blue is not getting that much darker values. So only do worry at all. Take some ivory black NER detailing brush and add it on the mountain again so that you'll get a nice darker values on your mounting. And it gets enhanced on the white background. So as you can see, the mountane is getting a look contrast. Now. Try to fill the color in detail and do not leave any whitespaces. So as you can see, we are almost done with the mountains. Now we'll be letting it dry for a while. So now using the same be dealing brush and I'm having some ivory black and my detailing brush. We are going to make these little leaves. So as you can see, I'm just making these little horizontal small strokes to show the shadow of the mountains on DC. So once you start adding these little strokes, the painting gets even more attractive. So neon DACA batch of Prussian blue bed, we added the horizontal strokes. We are also going to add these little black ivories torques also. So now as you can see, the leave looks even more attractive. Now simply take your detailing brush and titanium white. And I do being the sun. So this is basically a night view in which the sun is setting and using the same brush via enhancing the mountains. So on the left portion you just have to tap Yaro detailing brush with some amount of titanium black, make sure that you do not have any water. So the texture on the mountain makes it look really realistic. Now using the same detailing brush again and having some nice titanium white in it, we are going to show the reflection of the sun on the water body. So again, try domain these little horizontal strokes and enhance the waves in the front part. No need to hurry at all. You just have to simply making the process flow. If you feel WE DO is Firestone. And if you are building with me, there's an option below. You can slow down the video. Now simply does making these little horizontal rough strokes with your titanium white. And I'm just dabbing my detailing brush and certain portions. Now simply remove the masking tape carefully and very slowly. As you can see, we've got a nice and crisp edge. And the sunset is ready. So as you can see, it has lot of doll difficult to paint. And let me give you a closer look. So you can see the color blending looks really amazing and we are done with the first painting. So I hope that you are definitely going to try it and definitely tied to add your project into the project gallery. Now without any delay, Let's move towards the next sunset.
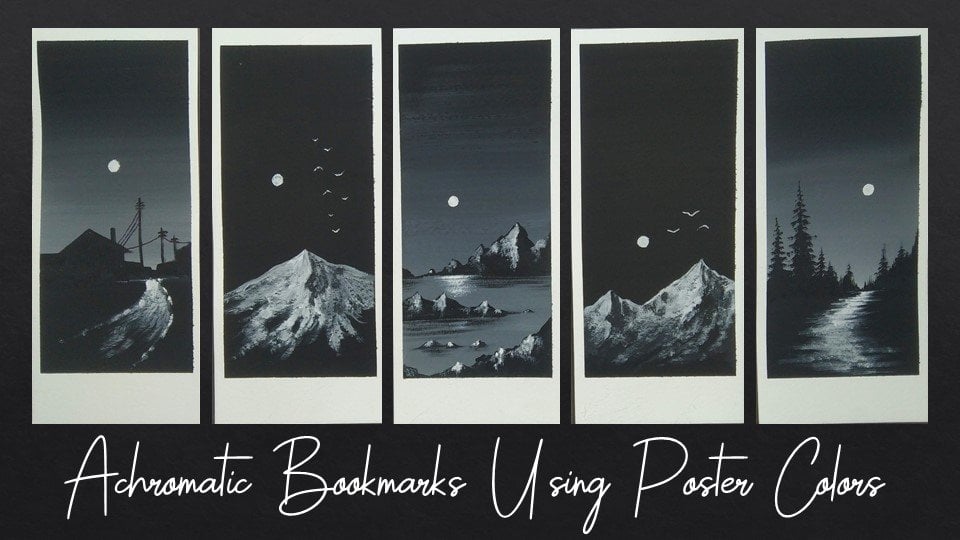
6. Achromatic Sunset - Painting 2: Hey everybody, so I hope that you enjoy the forest painting. Now let us move towards the second sunset, which is the achromatic sunset. Now, as you can see, that the object is ready when the masking tape, and we have our perfect square inside. So for this particular painting, since it is achromatic, you are going to need only two washcloths, which is ivory black and titanium white. So here I have my flat brush ready and Edward be loading rate if you keep tissue paper side-by-side so that you can buy balls extra color. So now you just have to use your simple sketch pen or a marker to draw the horizon line on the sand abortion are a little bit below from the center. Now I'm having my flat brush and we are going to start with the dark portion. Just simply start painting with the dogs bark and tried to apply a solid batch often lack. At the same time you can observe the momentum of my flat brush. You just have to make these horizontal movement back and forth. And no need to worry at all. It will take a while to blend both the colors. Sends black and white are separately pigmented colors. And it always takes little bit of time in blending mode developers. So as you can see that we have applied a nice solid batch on the upper bond. Now simply clean your brush and date some titanium white and your flat brush. And start painting from the above portion of the horizon line and move towards the upper portion size. You can see the so as you can see in the black coat, that we applied initially as red, so it gets started blending with the white automatically. Now you can just take a little bit of water in your flat brush and you can add some blending strokes in between the white and black. Make sure that you do not have access amount of water enough. Land bridge bad one definitely is boiler painting. Now you can see that we have got a nice blend on the sky part. Now let us paint the BC bar. So this time we are going to have a nice gray bad time taking the black and white together. And we're going to paint a solid batch below the horizon line. So as you can see, this is a simple gray badge and you have to just make these horizontal mole. So keep your brush steady and Maine these horizontal strokes slowly. If you find that video fast, you can definitely slow it down. There's an option below. So since we are willing to show some depth, we have taken some solid black and try to paint it on the bottom bar so that you can make a nice visualization of the front and the back part in the water body. And again, you can see that we have got a nice shade. And I wouldn't lend all white and black together on the water body as well. So now we're going to paint the mountains. Just start with the outline first. And once you are done when they outlining and your mountains are being finalized, you just have to fill the solid black color inside it. So as you can see, I'm just filling it with some ivory black. So there isn't any shading. We are going to apply the depth afterwards. So you just have to apply our solid color of black. So as you can see, we've got the mountains with a very good contrast with the background. So now we have another mountain just in front portion. So we I went to paint it a little bit bigger and a little bit in the front of the sea. So as you can see, this mountain has been drawn a little bit below the horizon line so that visually it appears a little bit on the front back. So now again, after drawing the outline, I had just simply put these all in black color inside it. And we are done with these again Mountain also. So now what we are going to do is that we are taking some solid black in healing brush. And we are going to put these little horizontal lines below the mountains. So that gives a nice shadow effect. No need to hurry at all. You just have to meet these little horizontal strokes really carefully and slowly. As you can see, I have given the false mounting a nice shadow effect. Now let us draw the little horizontal strokes and below the bigger mountain, which is English random motion. So these are basically the water body wave lines and at the same time giving depth. So as you can see, the horizontal lines enhances the water body a lot. Saying the front portion also, you can add these little horizontal strokes. Now simply I'm just repeating the same process. So as you come towards the bottom, but you can just simply add these little horizontal lines in a thicker line. And we are done with love. So now let us clean up the detailing brush and some nice titanium white without having any water in your brush. Does family make a small circle between the mountains and I'll admit above it in the sky. So as you can see, we've got a nice solid sign. So this could be also considered as a moon, but since we are taking it as a sunset painting. So this would be a chromatic son. You can just add some solid patch of titanium white to get a great contrast with the background. And you can see it looks really beautiful. So now let us just enhance the mounting. Take some nice titanium white and yarn detailing brush and add these little rough strokes. You just have to tap your detailing brush so that we enhance the side of the mountain. So I'm enhancing the left mountains caused. So we are going to enhance the bad way the sun's rays are coming. Similarly, you have to enhance the bigger mountain. The process is same. You just have to date you're dealing rash and take some titanium white and dab it on the bigger mountain. So we are enhancing the side where the sun rays are coming. And you can see that now the mountains looks even more beautiful and attractive to you. Just have to simply dab your brush. So now once we are done with the mountains, now it is time to get a nice reflection on the water body. So again, this is very easy. You just have to take some solid titanium white and video detailing brush. You have domain these horizontal strokes which are vanishing. So it is coming in the center portion. So you just have to give the horizontal strokes below the sun so that it gives a nice effect to your water body. And these are not complete horizontal strokes, these are vanishing horizontal stroke. So from the center band you just have to make it in a way so that it disappears on the side portion. Now you can simply observe the movement of my detailing brush. I'm just making these little white straw and you can come down a little bit. So that's it. This is the reflection on the water body. As you can see, it looks really beautiful. Now let us enhance the waves also a little bit. So we are adding some amount of titanium white on the other horizontal lines also. But not that much as you can see on these anti-pattern. Now, on the front portion we have these little horizontal waves. So you can enhance those also. And you can see how beautiful the light strokes looks on the dark black background. So now we are almost done with the painting. It is time to add some beautiful modes on these guy. So I'm taking my light bend from Sakura Gelly Roll and has a really solid right collide in it. So you just have domain these little buds. So this is basically a V-shape which represents birds flying in the sky. So you just have domain these little buds. Make sure that you do not make it a little bit bigger in size, tied to maintain the scale. So now we are removing the site tapes. Be very much careful, tried to remove the side tapes and an angle. As you can see, we've got a very nice edge, but a little bit of color has been spread it on the bottom bar. So no need to worry, there is a solution to it. Take your tissue paper, make it a little bit red with dipping it into the water and try to Finishing the edge carefully. So since these are washed colors, the color out of the line will be vanished and you will get a nice crisp edge. I'm just giving it some final touches. And you can see the entire chromatic sunset is ready. Let me give you a closer look. Particularly loved this painting, and I'm pretty sure that you are willing to try it. Feel free to add your projects into the project gallery. I would love to see them. Now let us move towards the next sunset.
7. Orange Sunset - Painting 3: Hey everybody. So you're most welcome to the third being dean ridges and orange sunset. So again, I have my object ready with all the masking tape on the borders. And you can see that we have what, a perfect square inside. So now let us talk about the wash clothes. So the first one is well million, then you will need cadmium yellow, ivory black, and titanium white. So these are all the foreclose that you will need. Now simply take your sketch pen or a marker that you have and draw the horizon line. So you just have to make our simple horizontal line on these inter-band. Now once you are done with the horizon line, I'm digging some darker values of a million. As you can see, Sam just taking 1 million without having any water in my flat brush. And you can observe the movement of my brush. This is a simple horizontal movement. You just have to make our brush back and forth. No need to hurry a doll, have your own time and paint slowly. We are going to blend Valmy Leon with cadmium yellow. So as you can see, I have been did a nice darker values of million on the upper portion. Now, I'm going to take some cadmium yellow and we are going to put it on the lower portion of the horizon line. So are just trying to blend it with Lever million. So again, as you can observe, I do not have any water in my flat brush. We just are willing to take the darker values of cadmium yellow. So you just have to move your brush in the upper direction from the horizon line. And you'll get a nice blend of mammalian with cadmium yellow. So I'm just giving another court so that we get a nice darker patch on the upper portion. Now we are almost done painting the sky. I'm taking a little bit of Titanium bite and cadmium yellow together. And we are going to add it on the horizon line so that we get a nice yellow badge also. So I hope that you can see the blend together. So we are done with the sky part. Now let us pay in DC. I have simply taken my flat brush and we are going to paint it with cadmium yellow and vermilion together. So initially I'm taking some cadmium yellow in my flat brush. And we are going to start with from the upper portion of the horizon line and we are coming towards the bottom pad. So I'm just simply moving my brush in this horizontal direction as we did it in the sky. Now simply move towards z down portion. Now as being moved towards the bottom. But we are going to have the darker values of a million. So by doing this, we are going to give a nice depth to the water body. So I'm adding a little bit of more darker values on the bottom. But now using my detailing brush, we are going to paint the mountains. Just simply date Jodi dealing rash stays 0 and draw the outline for the mountains. Once you are done with doubt lines, just to give our solid batch of black inside the mountains. Now similarly, we are going to paint another mounting on the left side. Simply add again drawn the outline and I'm filling the black color inside. And as you can see, bending the amount gains is not at all difficult. So now once you're done painting the mountains, we are going to add a little bit of shadow and the water body having a little bit of waves inside it so that it looks even more realistic and attractive. So just simply DOD leading does have some darker values of a million inside it. Now try to add these little horizontal strokes just below the amount gains so that you can give a nice shadow effect to it. So basically the mountain shadow is falling on the water body and you are trying to represent it. Now once you are done having the horizontal strokes below the amount Danes, and it does add a little bit of horizontal strokes on the bottom part also. So as you can see, I'm just making these random strokes. No need to hurry at all. Take your own time and beamed slowly. If you find that video a little bit faster, you can definitely slow it down. There's an option below. So as you can see, we have painted the waves very nicely. I'm digging a little bit of darker values are blank and we are going to enhance the horizontal strokes that we made. So just add these little black strokes in between the vomer Leon strokes. No need to apply a lot of pressure on your detailing brush. Tried to have it a little bit of loose hand and make little tenants strokes. We don't want solid dark patches, so we are just trying to make ten strokes. Now as the waves come towards the bottom band, we are going to make it a little bit more darker. So now we are done. Now I'm just cleaning up my brush. And I had taken some titanium white and my detailing brush and simply make us all killed between the two mountains. So as you can see, we are bending the sun and it looks really beautiful. So the contrast between the white and the background of 1 million and cadmium yellow looks really beautiful. Now using the same detailing brush, have some titanium white in it. And try to add these little texture on the mountains so that the mountains can get a little bit more enhancement. So the brushes absolutely drive you do not want any water inside it. Now we are just trying to paint a little bit of reflection on the water body. So just below the sun, draw these little horizontal strokes on the water body with titanium white. And this time the strokes are not mad, vague. We are just making these little stroke coming towards the bottom back. And as you come towards the bottom band tried to make the horizontal strokes even more smaller. You can add a little bit of Titanium White on the remaining wave lines also. Now, let us add some buds and sky. Sam having my white band from Sakura Gelly Roll. And you just have to make these little buds with the pen only. So it is absolutely fine if you have another bite pen of any other band that is not at all compulsory to have the same. You can draw the bonds in the bunch of 3 and now simply remove those I very carefully. So you can observe how nicely edges looks. Now let me remove the bottom and the top part also. And the binding is ready. Sam, very happy with the output and the color is really vibrant. Let me take you a little bit closer. So just simply follow the steps and I'm very sure that you'll come with great output as well. So now let us move towards the last painting, and I hope that you enjoyed painting this beautiful sunset.
8. Purple Sunset - Painting 4: Hey everybody, So welcome towards the last painting, which is above the sunset. So as you can see, I have my object side for ready with the masking tape. And we have a little bump in the entire South is but no need to worry, we'll cover that up. Pile painting. Make sure that your masking tape is nicely stuck on the Celsius. Now the colors that you wouldn't need is our violet. Then we are going to need titanium white and ivory black. So these are the three gouache colors that you will need. Now using my sketch man, I'm just drawing a horizon line a little bit below the center line to separate the skyline and the C. Now we are taking some darker values or violet, and we are going to paint it on the upper portion. Now you might be thinking that this is a proper subset then why we had taken the boil it. So the reason behind it is that when we are going to blend it with titanium white, you'll get a nice purple shade, which you will find when we did. So, just follow the steps, take the darker values of violet on the top portion and observe the movement of my flat brush. Now I'm taking some values of titanium white and my flat brush. And we are going to blend it with violet. So you just have to love your flat brush from the horizon line towards the top portion. And now as you can observe that we've got our nice shade of purple. So this is what happens when you blend titanium white with violet. So you can observe the blend. It is looking really beautiful. No need to hurry. I tried to make these horizontal strokes slowly. Now let us say I am having a nice combination of titanium white with violet, and we've got a nice shade which is lighter in tone. So add these darker values of violet on it. So what I'm doing is that I'm just digging DACA values of violet and I'm adding it on the bottom part. So now what you have to do is just take your flat brush and try to add these little darker values representing. So we are just adding these darker values of violet to show some nice wavy lines in the water body. Now, I have taken my day dealing brush, which is a round brush basically. And we're going to take some ivory black. So you just need to draw the vadose paused. So we're going to add the borders of the mountain. And then you have to fill it with solid black to just add some water if your color dries up, but make sure that you do not have access amount of water. And your detailing brush Maddow definitely spoil your painting. So now we are painting these again mounting, just add the solid black color inside it also. Now using the same detailing brush, take some darker values of ivory black and we're going to add the wave lines. So you have to just make little horizontal strokes. Now initially you can enhance the mountains by adding the shadow effect, applying the horizontal strokes below the mountains. Similarly on the bigger mountain also. So there isn't a particular pattern to do this. You can just add these random strokes. So now to enhance the front waves, let us add these black strokes on the bottom portion also. Only to hold your brush died. Just have it in a loose manner and try to make random strokes. Now what I have done is that and my detailing brush and just clean it up and taken some titanium white and simply make a small circle. So you can see that the sun looks really beautiful. You can also consider it as a moon also matters absolutely fine. Now, just take the same detailing brush and add these little texture on the mounting so that it looks even more attractive. Similarly on the smaller mountain as well. So the painting is almost ready, but now let us enhance the waves as well. So now again, take some titanium white and draw these little horizontal strokes just below designer. But this time you do not have to draw the horizontal strokes. Bambi, just try to make it a little bit smaller. And as you move towards the bottom, but it should vanish. Also can enhance different waves by adding these little white strokes. So it gives a nice texture. Similarly, you can add these details on the sides. No need to take your time. Now using my white pen, I'm going to draw some little buds on the right portion of the sun. So you just have to make a V-shape by your white pen. So the white pen that I'm using is from Sakura Gelly Roll. But it is absolutely fine if you use any other brand also. So as you can see, we have drawn three boards and it looks really beautiful and depopulate sky. Now really carefully removed as I did. And you can see how beautiful the entire painting looks. Now let me take you a little bit closer so that you can observe the details even more carefully. So at times what happens is that edges get a little bit distorted if you're deep is not that much tight and stuck well do the self is so what you can do is just simply DO tissue and add some water in it and rub it on the surface so that you'll get a nice, crisp and smooth edge. Hey, much carefully. Do it on the edge only don't go inside the painting. I hope that you enjoyed all the four paintings and got to learn something new. Do not forget to go towards the final thoughts section and happy painting. Feel free to add your projects into the project gallery. I would love to see them.
9. Final Thoughts: So as you all know, that painting on a paper is a very regular thing and people do that alot. But apart from that, I wanted to create and do something new and wanted to share it with all of you. I hope that you enjoyed painting all the four beautiful sunset on an object. If you feel that you have an old object and you can paint that as well, feel free to add your project into the project gallery. I would love to see them. Also. This is something really new and fresh that you can explore with a wash colors. Feel free to ask any questions or doubts you have related to the class. I would love to answer them. In case you're on Instagram, do tag me, I go by the name should transplantation. I would love to repost your work and my stories as well. And we'll be rolling grade if you leave off he Mac or my class, as it encourages me to come up with even more creative classes like this. And my glass can reach many more students like you. I hope that you enjoyed the class and want to learn something new. I got to explore something new. Stay connected for the next class and thank you so much for joining.
 Rutvik Patel, Artist and Instructor