Transcripts
1. Introduction: Are you interested in vintage fashion or fashion
design in general, and enjoy designing your characters outfits
as much as I do, then creating a paper doll is a wonderful method to experiment
with different styles, showcase your beautiful designs, and create a unique and fun
artwork in the process. Hi everyone, I'm Julia, also known as Unovin, and I'm an illustrator
from Germany. I have a huge passion
for everything vintage, whether it be clothing, accessories or furniture pieces, and love to incorporate
that into my art. Fashion is definitely a very
important part of my art. I love coming up with outfits, or creating posters
around vintage pieces. I also really enjoy illustrating with bold colors and
lots of texture. Even though I work digitally, it's very important to me that my illustrations still have
an analog fields with them, which is why I love emulating traditional techniques like screen printing or
litho printing. Since you can make
paper dolls for so many different
themes, styles, or even make custom ones
for persons or brands, they are highly
versatile and some of my most well
liked illustrations. Paper dolls, also can bring
back so many memories for you and perhaps you grew up
playing with them like I did. Illustrating a
paper doll is also a great way to get
more comfortable when it comes to
drawing clothing or experimenting with
different styles. They have been cherished
for generations, inspiring creativity, imagination, and allow
for fashion and design. I thought it would be
really fun and useful to teach you how to make your
own paper doll illustration. In this class, we will dive into the world of
paper dolls from the origins a simple
cutout figures to the digital
versions of today. I will give you a
step by step guide on creating your own digital
paper doll in procreate. We will explore ways
to find inspiration, choose a strong theme, and create our own mood-board
based on fashion decade. We will learn how to sketch our doll and design
outfits with the help of procreate symmetry tool
and learn how to choose a great color palette
that will make our illustration stand out. I will show you
techniques to bring a retro and analog fields with illustrations by using
textures and printing effects. Throughout the
class., I will also share my best tips and
tricks for drawing, coloring, and texturizing
and procreate. It will be simpler
to follow this class if you have some
experience with procreate, however, it is not required. I'll walk you through
every step of the process. Whether you are a beginner
or working professional, this class is for you. Let's begin and let me show you what exactly the
class project will be
2. Class Project: For the class project, you will create your own retro inspired paper doll
illustration in Procreate based on the
vintage style era you choose following my
step-by-step guide. All you need for the
class is an iPad with the Procreate installed
and an Apple pencil. I'm personally using
the 11 inch iPad Pro. This one is the third generation
with 128 GB of storage. With that I use
the Apple pencil, this one is the
second-generation. Regarding Procreate, I'm
currently using Version 5.3.2. Please make sure you are using this or any more recent version that may be available now. As you're taking
this class so you aren't missing any of the
features that I will be using. For the main project,
this is all you need. I also put together
some resources and downloads that we will be
using throughout the class. If you have any problems
downloading the files, you can also find a link at the bottom of the
class project section. Just make sure that if
you are on the iPad, you go on the Skillshare website
and not through the app. You can download them all now, but I will also explain how to do it in more detail
once we need them. Now it's time for you
to get your surprise. Maybe grab a tea or a coffee, and I'll see you in
the first lesson.
3. Finding Inspiration : Before we look at
different fashion errors and gather inspiration
for our paper doll, let's first take a brief look at some vintage paper dolls and notice some of
the key features. Here we can see a
paper doll from the 1930s and from the 1940s, which features
some nice outfits. We can notice, and of course,
the name gives it away, that paper dolls
were made of paper, which made them a
very inexpensive toy for children
back in the day. Here you can also really see the paper texture from the skin. Another interesting part
that we can see is that the clothes have these small
rectangles attached to them. These are called folding tabs and I used to put the outfit on the doll after you cut it out by following them
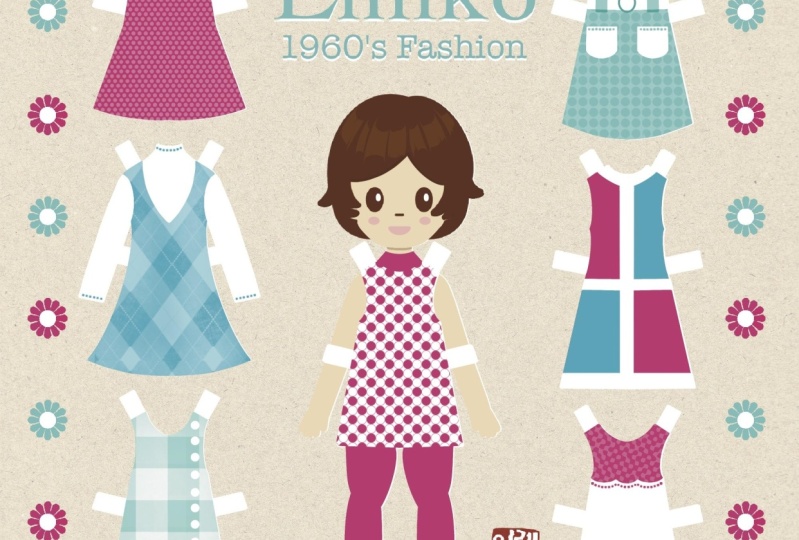
around the doll's body. Now, let's make a jump and
look at paper dolls from '60s. This one is featuring
Twinkie and it got an fashion
icon of the '60s. He has one of Brigitte
Bardot's featuring outfits that she could wear
or also want to share. I think one of the reasons why paper dolls
are still popular today is because you can explore different styles and
personalities with them. Just be super creative
entry with what you create. Now, for the last paper dolls, I chose these from the
'70s featuring Barbie, which was super popular
doors back in the day. While looking at these, I think it's important to
note that unfortunately, paper dolls in the
past often only showed a very specific and realistic
type of Curlin body. When it comes to creating
your own paper doll, I encourage you to create
whatever you want and have fun and not feel obligated to stick to any of
these depictions. Now that we have an idea of
how paper dolls looked like, it's time to get inspired and
think about our own theme. Since we want to create
a retro-inspired doll, let's first decide on
a decade to focus on. If you don't know
what decade to pick, that's no problem at all. I may Pinterest boards for
a fashion of the '50s, '60s, '70s, and '80s. To get you inspired, you can find them when you
search for my username, which is Junoregenart or you can also use the link I provided in the class
project description. Though here you can see
the boards for the '50s, '60s, '70s, and '80s. I tried to include a
variety of things so from clothing options to
hairstyles to accessories, like the handbags or the shoes to let clothing
for different occasions, outerwear, and here we have
beach wear for example, thing goes for the other boards. You can see how
much they change. Here we have a lot
more bold colors, lots of like oranges and pinks and get just
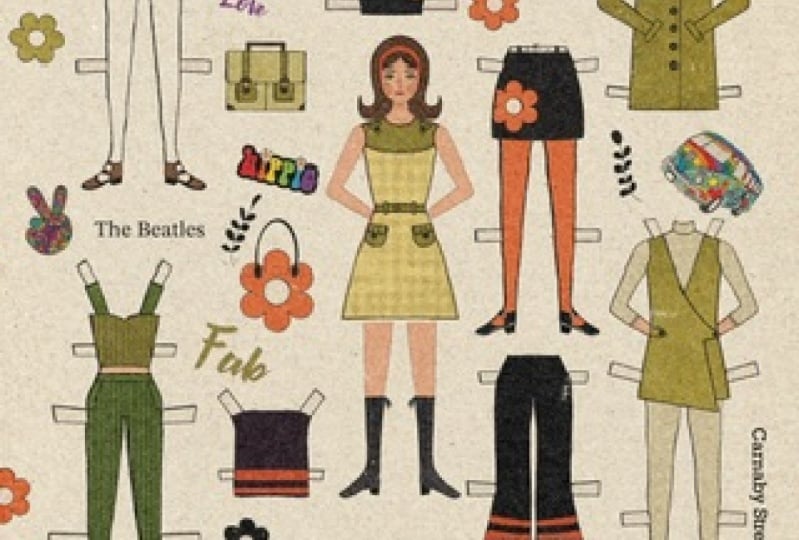
very fun outfits. Can get you inspired same
for '70s here we have a lot more earthy tones and they're very fun silhouettes
and accessories as well. Same goes of course,
from the '80s, which are like
totally different. A lot of neon and very, bold colors and very
interesting silhouettes. There's a lot of emphasis
on the shoulders, which I really quite like. You can just have a look at that and maybe figure out if there's like a pattern you
like or a color combination that you are
drawn to for a decade, I hope that gets you inspired. I also love to look through
old-fashioned magazines. If you don't own any,
that's completely fine. A great source, archive.org, which has an online
magazine rack there. You can browse all magazines and even download them for free. I like to use the search
bar and simply type in keywords that are related
to what I'm looking for. For example, let's
search for Vogue and it will show us all the Vogue magazines
from the archives. They have a lot of
new ones as well, but what I am mostly interested
in is the vintage ones. You can browse through
there and get inspired. For example, let's look at this Vogue magazine from 1965, I really liked the
rainbow dress and you can just look through it like you would with a
physical magazine. It's really interesting to see what magazines looked
like back then. You can also scroll through it faster with the bar
at the bottom and get inspired by
the advertisements and editorials of the past. Another way to get inspired is looking through
books about fashion, and they also look beautiful as coffee books in my opinion. This is the first one, and it's called
20th-century fashion, which features the
last 100 years of fashion by showing over
400 advertisements. What's really nice
about this book is that it is in German, English, and French and it goes
all the way 1900-1999. I love looking at
these advertisements because they really
show what was popular during different periods of time and they also
include a timeline in the book which tells
you interesting facts about each year and how
it influenced fashion. The second book I
can highly recommend is Vintage Details of
Fashion Sourcebook. This is a collection of more than 600 fashion details from outfits of
the 20th century. I think it was mostly
meant for people who are sewing or are designing, but I think it is great for illustrators as well because it really shows great details that can make your
design stand out. It is divided into
different parts like sleeves, colors, or pockets, and it's just really beautifully photographed and
you can learn so much about the wake
of slip back then and create really authentic
designs for your art. I personally really love '60s style-wise so I had to
look through that part and what I really liked
was the oranges and also the greens and how
they look together like here, for example, I really like the contrast of the
green and the orange. I decided that I
will be creating a '60s paper doll but
now it's your turn. Have a look at the
boards or any other form of inspirations and notice what things you are drawn to and decide on a decade you want
your paper doll to focus on. There's no need to spend a huge amount of
time on the doll. Just have a brief look through
stuff and see what you and then the next step we
will define our theme more and start looking
for actual references
4. Defining Your Theme: Hopefully you've found a decade that you're interested in, and are excited to start
gathering reference images. Before we do that, I recommend defining your doll's
theme a bit more. Doing that will make your
paper doll feel more cohesive, and it will help you
to not get overwhelmed when it comes to searching
for reference images, and then designing the outfits. Things you can ask
yourself to find a more precise theme
can be, who is my dog? Should it be a person that
is well-known for a style? Or maybe I want to create
myself as a paper doll, or I just do an invented person. What season do I
want to design for? For example, a summer paper doll is way different than
a winter paper doll. But it can also be fun to do
one outfit for each season. What occasion or occasions do I want the outfits to be for? Do you want to create
more casual looks, or something more
special like for a party or maybe for the job that the paper
doll would be doing? Is there a motive or pattern
that I want to focus on? For example, shapes like flowers or stars
can be really fun. For patterns like
polka dots or stripes. As a last question, is there a color combination
that I want to focus on? It could be really
fun to maybe create a neon doll or just
go monochromatic. I really like the idea of a spring paper doll that
focuses on flowers as a motive. I think that would really
go well with the orange, and green combinations that I saw on Pinterest
in the 60 sport. I also think that I will
create more everyday outfits. Maybe something that I
would personally wear, maybe to a picnic or just to meet a friend
to go into town with. But now it's your turn. Take a few more minutes to think about your
paper doll's theme, and answer these questions. Then we will start
creating our mood board.
5. Making a Mood Board: Now that we have a decade
and a more defined theme, we can make our paper
doll mood board. It will be a visual
representation of the overall aesthetic and
style you want to create for your illustration and
it's a great tool when exploring the look and
feel of a specific decade. We have a broad image of what the decade we chose
looked like fashion wise, but now it's time to
narrow it down and choose actual references and styles we would like to use
for our paper doll. As a first step, lets collect the variety of images
to put on our board. You can use photographs,
illustrations, magazine ads, or even pieces of clothing
and accessories from the era. Feel free to use my Pinterest
boards as a starting point. I also created a couple of
mood boards using them. If you want to
choose one of them and a theme that I created, you can download them in
the resource section. For that, you simply go
to the resource section again and click on
the PDF on the right. I created eight boards and total with different themes
featuring some of the images I found on Pinterest as well as color palettes
to get you inspired. Creating a mood board is
a little time-consuming, but you can learn a lot
and it is really fun. But I made these as options if you want to go
straight into sketching. If you want them as JPEGs, you can also scroll
to the bottom and click the link to
the OneDrive folder, which contains all the resources and you can just download
them there as well. But now let's have a look on how to make a mood
board yourself. For my paper doll, I will go to my 60s board and I am just looking what
I think would fit with my theme or what I
would love to use as inspiration or as a
reference for my designs. For example, I really
like this one. I will just wait until
these buttons go away then take a screenshot and save it for my mood board. I saw this earlier and really liked the
flower on the shoe. Definitely going to
screenshot this one. No worries if the
quality isn't that great since it's just
for a mood board. I also really like this one. I'm not sure if I want to
create this exact dress, but I really like this
detail with the scallops. I'm also going to screenshot this one and just
continue searching for stuff that stands
out to me and that I think would go
nice together with things I have already
screenshotted. I think this one would
make a great bag. It's very cute and I would totally wear this
too if I had it. It can also be great to take screenshots of
something like this. To get a feel for the
look of the paper doll, so you don't only have to
do clothing, of course. I will also screenshot
this one to get a nice idea of the makeup that
I want to put on my doll. Textures and patterns
are also important in creating the overall look
and feel of a mood board. Look for images that show the
types of fabrics, prints, or patterns that remind
you of the decade or that you really want to create when making
the paper doll. For example, I really like
this knit texture here and especially paired with
this more thicker fabric of the pinafore dress. Go ahead and pause the lesson and finish
collecting your screenshots. I would recommend finding around 15-20 images and as
soon as you're done with that, we'll start creating our
mood board and procreate. Now that we have a collection of our screenshots on our iPad, it's time to jump into procreate
and make our mood board. I really like to
use this A4 canvas. Then I just rotate it like this, so it's facing this way. I start by adding all
the images to my Canvas. What I do is go to
the actions settings up here and press
"Insert a photo" and I put all the
reference images into an album and now I will start
inserting them one by one. Now that the first
image is imported, I will go to the select tool, which is here in
the upper corner and I make sure that the
rectangle is selected. I zoom in a little bit and
already crop my image, so we are only left with what's
important for our board. I just select the
area like this and then let go and then I
press "Copy and Paste". As you can see
now, under layers, we have our crop image
and we can delete the previous version by swiping left and
pressing "Delete." Now we do this for each
image and while we do this, because it can take a
little bit of time, we can already start
thinking about which images might
go well together or start thinking about outfits
that could work or maybe a specific image that we
want as a focal point. We just continue like before. We select "Crop" and copy paste, and then we delete
the previous version. I also don't really worry
about the placement yet. I'd like to add all
the images first and get an overview
of what I chose. Now we are done with this
step and we can start to sort the images and
make a nice composition. Actually, what I like
to do first is turn off all the layers so I'm not too overwhelmed by all the
images that are here. Then I will first start with
the title of our mood board. For that, I go to actions, add and press "Add Text." Since my paper
doll will be 1960s inspired and is inspired by
what I would like to wear, I am just going to call it
1960s Juno paper doll for now. Let's make the text bold. Then I will just place it
in the corner like this. Then what I like to do is lock this layer by swiping
left and pressing "Lock." That basically means you can't edit this layer
until you unlock it. It will not distract you. Then I like to go through all my images and choose
one that stood out to me. Which for me is this
dress because I love the shape and details and would like to
design a similar one. Now I will select the image and just start by placing it in the middle and then I
will continue like this. For example, I think boots would look really
good with the dress, so I'm adding them next to it. In terms of composition, you can really just do
it however you want it. You can be more messy or
really organize them neatly. The only thing I would pay
attention to is to not overlap your images in a way that hides the design like
this, for example. Go ahead and continue
adding your references to the canvas and come up with a composition
that works for you. If you want to move
multiple images at once, you can select them by swiping
right on each of them, and then press "Select" and
just move them like this. As you can see, our mood board is really starting
to take shape. The floral spring
theme I chose to focus on is getting reflected
in the images I chose. I'm starting to get
really excited to design my doll and
outfits based on them. Now that we're happy with our
composition and references, I'd like to add a
color palette to my mood board that
represents the decade. Let's do that on the
upper right corner. For that, I first create a new layer and
draw a circle with the technical pen and by pressing on the
screen like this, it will automatically create
a perfect circle for me. Then I just drag
and drop black for now and place it
inside the circle. Now what I do is duplicate this layer and drag the
new layer to the side. Now it's time to
select some colors that I like from our
mood board and for that, I use the color picker. All you have to do is press down on the Canvas
with one finger. As you can see, it gives you a swatch of the color you
are pressing down on. Let's start with this
nice green of this dress. I will just drag and drop
the color on a circle and then I adjust the color
and edit it a little bit, so it's more bright and
more what I am looking for. Now, I want an orange as well. I will pick a color from
the dress here that I like and maybe just make
it a little bit lighter. Then I want a nice deep yellow similar to this
one on the flower bag. I'm just going to make this
a lot brighter as well. I think a neutral
color would go well. Let's just pick from
the hair for now and then adjust the color
until I'm satisfied. As a last color, I would
really like a soft pink. I first watch a pink from this bag here and then just
edit it until I'm happy. This is my final color
palette for the mood board. With that, you now have a
mood board that represents the fashion and the aesthetic of the decade you're exploring. Now let's save the
mood board as a JPEG. We are ready for
the next lesson, where we will set
up our Canvas for the paper doll and add our
mood board as a reference.
6. Setting up Your Canvas: Now that we have done
a lot of research, it's time to set up our Canvas
so we can start sketching. Press the plus button
and New Canvas. We are going with a Canvas
that is 2,000 by 2,000 pixels. We should set the DPI to 300, and that will give us
258 layers on my iPad, but it might vary depending
on what iPad you have. Then for the color profile, you can pick any of the RGB options or the
display option like me. This is great for posting to the Internet or social media, but if you want to
print your artwork, I do recommend to go higher, so at least 3,000 pixels. Now our Canvas is ready and
we need brushes to use. Procreate gives us a lot of
cool options for brushes, but I also made a
brush pack for you, which has a couple of Procreate
brushes that I like as well as some that I made by
myself or that I edited. I will show you how
to download that one. All you need to do
is scroll down at the Resources and you can either download it
on the bottom here, or you can go to
the Resources on the right and just click
the Paper Doll brushset, and then you just download it. You press here. It
will open a zip file. Here you can see the
Paper Doll brushset. You just press it and
it will automatically import the brush set
into the Procreate app. Now the only thing
we need to start sketching is our mood board. Go ahead and go to Settings. Under, Canvas, you can find a Reference option and we want to turn
that switch on. Now we can add our mood
board by pressing image, "Import image", and
choose our board. Just like that, you now have this handy reference tab
that you can zoom in on. You can also adjust the size by dragging the
bottom-left corner, and you can freely drag around
the reference tab as well. Now that we are all set up, we are ready to start
sketching in the next lesson.
7. (Optional) Sketching The Doll: Now we'll start
sketching our doll. You can skip this step
if you want to start designing the outfit
straight away, and for that, you can again either
download it directly from the resources section
or down below using the link and then
save the image. Then we open our Canvas in Procreate and add
the doll template. If you did that, you can
jump to the next lesson now. For those who want to
sketch their own doll, I will explain how I do that in more detail now
in this lesson. First of all, let's remove
the reference for now. If you need it, you can always
turn it back on like this. For sketching, I like to use the Procreate pencil
from the brush set, which is just a
slightly edited version of the default brush. Now when it comes to
sketching the doll, there really is no right or
wrong way to approach this. I will just explain the way
that I personally approach it and try to give you some tips and things
to pay attention to. First of all, the paper doll we are creating will
be symmetrical. What that means is
that both sides of the doll will be
exactly the same. You can see this very well when we look at my finished
paper doll here. This symmetry will make our sketching and designing
process a lot easier, and I will explain how to
use the symmetry tool in Procreate in the next step to make this a really
convenient process. But for our initial sketch, just keep in mind to keep the doll as symmetrical
as you can. I like to start by thinking
of the body as shapes. An oval for the head and
rectangular for the neck. Then moving onto the
shoulder and torso, and I also add this line in the center to help me pay
attention to the symmetry. Then I move on to the hips, which I want to be a little
wider than the waist. Now for the legs, I also start
with a straight line and Procreate will
automatically straighten the line when you hold your
pen down for a little bit, which is very handy for me as
I have pretty shaky hands. Then I continue with the arms. I decided to position them at an angle so the hands are behind the back of the doll since I do not really have any
long-sleeved designs in mind, I prefer to just having the arms straight down like
the legs and then I add some shape to the leg and add where I think
the feet will go, and then also add some
more shape to the arms. Then I will select the image and just drag it a little bit
more to the middle then I go to layers and I make this first sketch of my guide
for the second sketch by turning down the
opacity like this to around 25% and
adding a new layer. Now, I try to refine the sketch, so trying to get the shapes
and proportions more right. You can also use
references for help. There are great classes
here on Skillshare, for example, anatomy
or for proportion. But generally, I
just say practice, practice, and don't be
afraid to make mistakes. It's all part of the learning process and my dolls are definitely
not perfect, but they also don't have to be just try to have fun with it. Now, for the second sketch, I like to refine one side first and then when
I'm done with that, I go to layers and
actually duplicate this layer and then
go to select, press, "Flip Horizontal" and make
sure I have magnetics on, and then drag the layer
until we have a full body. I think that really
helps to spot more things I want
to change or refine, and now I just merge
these layers together. I really like this technique of creating sketch
over sketch because you can start pretty
rough and then make each sketch cleaner
and more refined, and it can also help
you to spot mistakes. For example, the head I
drew in the first sketch, now it looks very off and I can fix it in
the next sketch. Yeah, it's basically
just a lot of drawing and erasing
until I'm happy with it. For the head, let's turn off the guide layer and
create a new layer. Again, I just start with a
basic oval shape for now, and then I also add
the hairline and like a rough cross to see where the
eyes and the nose will go. Then I merge the
layers and delete the initial sketch because I now want to use my second
sketch as a guide, so I'm setting the
opacity down to 25% again and create a layer for the third
and final refinement. For this sketch, I really try to keep my lines
clean and create a final outline before
using the symmetry tool in the next step to make the
sketch completely symmetrical. I also add a top and
bottom for the doll, making sure it
will not interfere with any of the designs
I will be using, so I won't draw any straps
for the top, for example. I also just roughly
sketch in where the eyes, nose, and mouth will go. Before the next lesson, sketch your doll and refine
it until you are happy. In next chapter, I
will explain how the symmetry tool works and how it makes the
process really easy.
8. Symmetry Tool: If you have skipped
the doll part, please don't skip now
as the symmetry tool will be very important
for the clothing as well and I want to show
you how to use it in detail with the final
refinement of our doll sketch. First, let's turn on the symmetry tool by
going to Actions, Canvas and turning
our drawing guide on and then we want to go to Edit Drawing Guide and it will give you the
options for 2D grid, isometric, perspective,
and symmetry. Let's press on symmetry
and it gives us this guideline down the center
and now for the settings, I like the opacity of the line around 40% and the thickness around 50 and they are also more options for
different kinds of guides, but we want to stick with
the vertical option. On the top here you can also choose the color
for the guideline, but I will just stick to black because it's the most visible. So now we're done with
that and we can create a new layer and when you
press on this layer, it will open the Options tab and we want to turn on the
Drawing Assist here. As you can see,
what we draw is now being mirrored on the other
side of the guideline, so for example, we can create
a perfect heart like this. Now before making our
final doll sketch, go to the sketch
layer and select it and make sure the
center of the doll is aligned with the
symmetry guideline and then we can turn
down the opacity of this layer to around 25%
and create a new layer with the drawing
assist turned on for the final sketch and as a brush, I now like to use the
stable procreate pen, which makes your
lines a lot smoother. Now I make the final outline of my doll and thanks to
the symmetry tool, I only have to
draw 50 percent of the doll while getting a
perfectly symmetrical sketch. Now, I am also sketching a
face for my doll and again, here you can just do
whatever you like, since my doll is '60s inspired, I do want to give her a nice cat eyeliner and pronounced bottom
lashes as well as some eye shadow and I also always like to
do this round cheeks. If you want to add
a feature that is not supposed to
be symmetrical, you can just go
to your layer and turn off the drawing
assist like this, so for example, I want to
give my doll and freckles, which I don't want it
to be symmetrical, so now I can just draw
them in like this. Now that I'm done
with the outline, I turn off the other
sketch and make sure all my lines are
nice and clean and have a final look and I actually think her neck
could be a little bit longer, so I am merging my layers, selecting my doll and with
the free hand selected, I draw an outline around
the head and then press the arrow on the top and now I can freely move the
head up just a little bit. Now as a final step, I just do some final adjustments
until I'm happy. So now it's your turn to finalize your sketch
with the symmetry tool, in the next lesson, we will then design our outfits, which is my favorite part, so I'm looking forward to
showing you how I do that.
9. Designing Clothing: In this lesson, we are
designing all the clothing for our paper doll and getting everything ready for
the coloring process. I will guide you through
my process of coming up with outfits and creating
a pleasing composition. First of all, I want my
doll a little bit smaller, so there is more
space for the cloths. With uniform selected, I'm going to re-size
her and then I turn on snapping to position her
perfectly in the middle. Then we turn down the
opacity to around 50%. Turn off drawing assist and
name our layout sketch. Then let's create a new layer. Turn on Drawing Assist so we can continue to get a
symmetrical sketch. For the brush, I will use
the procreate pencil again. Now, all we have to
do is go to actions, canvas and turn our
reference back on. What I like to do is
sketch my outfits on the doll directly so
they fit perfectly. Generally, I'd recommend
starting with the outfit that I want my doll to wear
in the finished illustration, I just really loved this
dress from the mood board. I want to start with that. Now, I want to
recreate the shape and the belt detail of the dress
because I really like it. I first start with everything
that's symmetrical. I do want to change
the neck line though, because I do prefer the
one on the other dress, but maybe a bit more rounded and with a little
scalloped edge. Now, I also want to add some pockets to create a
more interesting dress. Since my theme is '60s
and flower inspired, I think I will put
some on the pockets. Then as a last step, I add all the
details that aren't symmetrical with the drawing
assistant turned off. Then when I'm happy, I rename my layers so I
don't get confused later. Now I continue with her hair and I think I also want
to add a barrette. I sketch that in without
a Drawing Assist, so it sits on her
head more naturally. Now for shoes, I think
high boots would be great since the dress is quite short to create a
nice silhouette. Now let's have a
look. Let us turn off the doll sketch for a second
and look at everything. I think it's all looking good. Of course, don't forget
to rename your layers. Now I am ready with
the output of my doll. You can pause the
video here and do the same thing and sketch
your doll's outfit. Next, we will continue to design the other
pieces of clothing. I like to continue with the outfits that will
take up most room. Long pants, voluminous
skirts, coats or dresses, because that way it
will be easier to get a nice composition and figure out where
each piece will go. For my doll, I think the biggest pieces will be the coat
and the dresses. I want to start there. First, let's create a
group for the outfit on the doll by swiping right on each layer and
then renaming it. Then we can turn that layer off and create a new
one for the coat. Now, I do love the shape, but I think the pattern
is a little too busy. I will change that when
it comes to coloring. But again, I'm first
figuring out the shape. For example, this
coat is rather boxy. I try to recreate that, especially on the
shoulders. For the sleeves. I think it would be
nice to have them in pockets actually to
create more interests. I'm sketching that in
and then just adjusting the silhouette until I'm happy and adding
the color as well. Then sketching in these
cute floral buttons that go perfectly with my theme. A tip I have is to draw
one flower duplicate it, press Select, and turn on magnetics and drag
the layer down. Then I am merging these two layers and
repeat the process. Then I do that until I have enough flowers and merge
everything together. As the last step, we need to add our falling tabs so we get that authentic
paper doll look. I create a new layer
and rename it. Of course, turn on
drawing assist. I draw in the tabs. I put them in places that would help the clothes
to stay attached. Mostly where the outline of
the doll and the outline of the clothing are
touching like here on the shoulders or
also on sleeves. I also wanted to one down here. I make the tabs a little bit longer so they would
fall around the doll. Then when I'm done with that, I group up the layers
together and rename it again. Then what I like
to do is duplicate this layer and flatten
one of them like this. Now I have the group that I will keep on the
doll for later. When we want to add color and
the flat coat in one layer, which I will use to map out
where to put it on my canvas. I select it, turn off snapping and put it in the corner for now where I think it looks good. Next, I want to do a skirt with tights and shoes attached. I'm using my mood
board as a guide while paying attention to
creating authentic shapes. My skirt is going to be a line because that's what I mostly saw when looking at references. When I'm done, I'm doing
the same thing as before. I add the folding
tabs, rename my layer, create a group, and then duplicate that group and
flattened one of them. Then what I like to do is
create a group that contains all the outfits I am leaving on the doll so it's
nice and organized. I'm going to call that clothes
on doll and turn it off. Then I move my flat
layer to a freespace on my canvas and I'm ready
to start the next piece. I am moving on like that and create more outfits
for my paper doll. I pay attention to the
shapes and silhouettes and tried to always
include some details like colors, buttons,
or stitching. I also think about
texture already. For example, the spinner for, I want to roughly
sketch in that I want to replicate this material
when coloring it. You can also invent completely
new clothes, of course. For example, I really want to create a more
fitted dresses well. I am combining things I
like from the references, like a little color
and scallop sleeves, as well as a small
belt around the waist. Now that I have the
biggest pieces done, I like to think of their
final position a bit more. I am trying to find a
good place for them on the Canvas instead of just
placing them all to the side. You can also turn
on the outfit on the doll to make sure
that nothing overlaps. Then I continue with
smaller pieces of clothing like tops,
shorts, or shoes. It can also be fun
to add graphics or patterns to your pieces when
it works with the decade, for example, for my
'60s inspired doll, I really want to add a lot
of florals to my pieces. For this top and skirt, I roughly sketch in
some dots that I relate to turn into
polka dots on coloring. Patterns and
different fabrics are a great way to add
interests to your designs. Experiments and look at your references to
how about stripes, polka dots, or pled of a fabric. How about a fluffy sweater or a [inaudible] row
instead of jeans. You can also duplicate pieces and later give
them different colors. For example, I really liked
the boots I put on the doll. I will find them, duplicate the layer and drag
it to the top. Then I add the folding tabs and I have a second
pair just like that. Now the Canvas is
getting filled more and more and the pieces
are getting smaller. Accessories are a great
way to fill the gaps. Let's start with a
bag for the gap on top and add another
pair of shoes. It's also really fun to add
different hairstyles as well. To give you a character,
even more variety, you can add hair accessories
to like headscarves, a headband, or acute hep maybe. From now on, I start moving on to sketching directly
in the empty spaces. I really want to add
this cute flower bag. You can get a symmetrical
flower easily by creating a circle
and duplicating it. Then select it, make sure magnetics are turned
on and drag the circle up. Then repeat the process and drag the circle to
the side like this, then merge the last two circles together and duplicate
them as well. Now select them and press flip horizontal and drag
them to the side. Now you can merge them
to duplicate them again and press Flip
Vertical and drag them down. Just like that, you'll
get a perfect flower. Then I just erase
what I don't need. Place the flower in the center and at the handles of the
bag with the drawing assist. Now for the rest of
the accessories, I will also draw them in the center and then move
them to do I want filled. I also still have a good
amount of space on the left, so I'm going to
draw another top. If you are left with
very small gaps, you can also add shapes that work with your design
or with your theme, like stars or flowers, sparkles, or maybe
even confetti. Just be creative and experiment. Great other things to
add are bags, jewelry, hats, or sunglasses, since they don't take
up a lot of space. It can also be fun to add some more personality
to your doll. For example, I think my dog
would enjoy drawing as well. Why not add a note book
to fill some space? Other fun things to add could
be instruments, a camera, umbrella, hair brush, makeup, or even items that could
be inside the bag. If there's a part that you really don't know how to fill, it's also a great trick to just add some text
to your paper doll. I often don't really know what to put right under my doll. I really like to
add my texts there. For that, you just
go to Actions, Add and press, Add Text. I'm just going to write
1960s paper doll. I also want the text to be bold, so I'm going to edit the text. I can also adjust the size
and a few other things. I will just see what works
with the space I have, adjusting the pieces of clothing as well until it looks nice. Then I filled the last gap that stand out to me
with more flowers. With that, I'm pretty
much done with my sketch. Now as last thing, I like to Zoom out and
look at my composition again and readjust until I'm really happy
with where I am. Then when you're happy, you can merge all the layers together that are
not on the doll. With that, we are done
and ready for coloring. Take your time with
sketching and figuring out a composition until
you're happy with everything. Then in the next lesson, we will start coloring
our illustration
10. Adding Colours and Details: Now we come to the part
where we add color to our illustration and really
make the clothing pieces pop. I will explain the
steps I take in detail and give you
some tips on how to make coloring with
Procreate really easy and actually
relaxing experience. First, let's rename
our layer and turn the opacity
down to 40 percent. Now, let's start with
coloring the doll sketch. Again, I am also turning
down the opacity to around 25 percent and I also turn off the outfits layer as
I don t need it right now. Then I create a new layer
and drag it to the bottom. Then I also add my
mood board again. Based on the colors I
put on the mood board, I did create a larger palette in Procreate with
more variations. You can find it in
the resources section as well if you want to use it. Let's first start with the skin. Don't forget to turn on the drawing assist and
my favorite brush to use for coloring is
the technical pen as it gives you
nice clean lines. You can use the normal one or the more stable technical pen if you want a more
weighted line like me. Now, just like we
did with the sketch, I outline the body
carefully and I always close my lines
so there are no gaps, so can easily fill them using Procreate's
color drop feature. Now for everything
that goes on the body, I want to set my new
layer to clipping mask, which makes sure that what
I draw is only visible on the body and the color
in her top and shorts. Again, making sure that my
outlines don't have any gaps, so I can just drop in the color. Now, any other color I add, I want to put on a new layer so we can adjust it
easily if we decide to change it later and it will automatically set it to
a clipping mask as well. I continue to add
skin and clothing details and then I
move on to the face. For the face and hair, I do like to take my time. Again, I work on a new
layer for every new color. Since the 60s had
quite bold colors and make up especially when
it came to the Mod style. I like to add a colorful lip and also add freckles
and for these, I like to set the
mode to multiply so they can be seen well on
the skin and on the nose. I also want to add
about eye shadow and then Let's keep on adjusting
the face until I'm happy. After that, I will put all my layers into a group
and name it accordingly. Now we can move on to
the outfit on the doll. We have the boots,
hair, and the dress. I'd like to start with the hair. Again, I am turning down
the opacity and create a new layer for the outline and coloring process underneath
the sketch layer. Now, it's basically the
same as with the dog. I draw my outline, fill it with color drop and add a new layer for each new
color I want to draw with. Like here I am moving
on with the beret and some details for the hair
so it appears less flat. Then I want to add
the hair and had to group as well and name it so everything stays organized and I also delete the sketch layer because we don't
need it anymore. Now, let's move on to the dress. I really wanted to have
this nice green color, so I am starting with
that and because I want the blouse and the color underneath the
dress to be white, I adjust the
background color from white to something with
a little more contrast. Let's go with this light pink. Now, when it comes
to the sleeves and pieces of your
design in general, it can be fun to play with
the opacity to add interest. Here I'm turning it
down slightly to around 75 percent and I
really like the look of that. Then I continue to add
more details to the dress. I'm drawing the pockets
and I am adding these little orange
and yellow flowers to them for a nice contrast. Now, for the belt loop, I like to use the
multiply setting again, just as we did with
the freckles before. I first draw them, set it to multiply and then change the color to exactly
the same as the dress. As you can see, you get
this nice effect where the green parts that
overlap become darker. Now we finish up the belt, create a group for
the dress layers and then the only thing
missing on doll are the boots so I draw them in the same way as
the other pieces. Then I create a group that
contains the three pieces and call it my outfit
on doll and with that, we are ready to move on
to the extra outfits. We can turn off the
outfit on Doll layer now and turn on the
cloths on Doll layer. Now, I like to just
go piece by piece. Let's start with the coat. First, I merged the
folding tab and coat layer and adjust the opacity and
create my layer for coloring. Of course, with drawing
assist is always the steps are now exactly
the same as before. We create the outlines and add details using our reference
as a starting point. I also pay attention
to whether piece of clothing will be on my canvas and choose the
colors accordingly. For example, I make
the coat green as well as it won't be close to
the green dress we just did, because they won't be next to each other in my illustration. Now, one of the brushes I put in the brush pack is really fun. If you want to add a fairy
texture to your clothing. It's called salt grass
and looks like this. It is great for
giving that effect. I adjust the size and draw in my third
detail on the sleeve. Then I turn on Alpha Lock and fill the
layer with white selected. Then I erase parts
that I don't like. Just like that, you have this cute and
interesting detail. For the floral patterns I do the same technique as we did
for the flower bag sketch. I created using
circles and mirroring them and then I
multiply my flower. I just noticed I forgot to use
Drawing Assist for detail. I'm just doing that first. Add some stitching detail to the bottom as well and then we can add the following tabs to our code and then it's
all of our code layers. After that, we put our
layers into regroup again, name it, and move the
group to the right place. With that, we can move
on to our next piece. From now on, it's just
repeating the same steps. One thing that I leave for the
letter is adding patterns. I like to focus on
solid colors and details like stitching
or buttons first. Then when I have all
my pieces colored, I go back in and add more details like
stripes or polka dots, where I think the piece
needs more variety. I really liked the
coloring part because you can see your illustration
starting to take shape and since the step for each piece are
pretty much the same, it can be very relaxing
for me and I like to put on some music and just
a fun with picking colors. Now, while I continue
to work on my pieces, you can start coloring
yours as well. I will speed my process
up by a lot now. Let's have a small recap while we're in the
middle of coloring. Use a limited color palette. Always remember
that less is more. You can always add more
color if you need it, but it's pretty hard to
take some away afterwards. Remember to close your outlines and use the color drop feature. This just makes your
whole process a lot easier and a lot
more convenient. Start with solid colors and
then move on to details, leaving things like
patterns until the end, experiment and have fun, play with the opacity, multiply two color combinations,
contrasts, et cetera. Just don't be afraid
to try out things. Sometimes when you think
you make mistakes, it actually turns out to be like a really cool detail or something very
interesting to look at. Remember to organize
your layers. I know it's annoying
and to be honest, I don't always do it, but when I do it, I'm always glad that I
did because it just makes managing a lot of layers
so much less stressful. Now that we are almost done
with the coloring process, I like to take a step back and decide where I want
to add more detail. As we decided while sketching, I really want to add polka dots to my
skirt and top combo, and I actually made
a brush for that. Choose the decimals brush, find your layer and
add a clipping mask. Now you can choose
whatever color you like. I usually go with a
lighter or darker version. Let's try out a
darker orange first. I like to paint a
larger area than just the skirt so I can adjust the size and position of
it afterwards like this. I'm not entirely
happy with the color. I'm turning on Alpha Lock on my layers and fill it
with different hues. Then for the top, since it's supposed to be a set, I simply duplicate the pattern
layer and drag it onto my top and position it until I am happy and
merge the layers. Now, I think my
yellow bodycon dress looks a little bland. I actually think a
flower could look nice. I'm just going to duplicate the flower layers
I made for my bag. Drag them down to the
dress like this and position and resize the
flower and adjust the color. Then if you remember the
shirt under the pinafore I really want to give it that
rip texture and for that, I like to use the drawing guide, but in another setting, so let's go to Edit Drawing
Guide and choose 2D grid and I adjusted grid size until I like the amount of space
between each line. This drawing assist makes you only draw horizontal or
vertical lines like this. I just draw vertical lines along the guide to create the stripes. Then I turn off the Drawing
Guide and adjust the opacity. Now, I also added some other pattern brushes from Procreate to the brush pack, like the rosette or honey eater, which can also help to add
a nice look to your piece. Similar to the reference, it creates this nice textured
effect for the dress. I like to use that on a
skirt as well like this. I continue to add
some more patterns to my pieces using some of
the brushes in the pec. Like here with the beats
brush and a green top. I'll draw that brush
for the green dress on my doll until I'm happy with how everything looks and then I am done with
the coloring process. Go ahead and finish up coloring your doll and adding all your
final details and patterns. Then we come to the last
step of our illustration, which is adding more
texture to the pieces, as well as giving our digital illustration a retro
and analog field by adding printing effects and defects and adding a paper
texture that I created
11. Adding Textures: In my opinion, textures I would really bring your illustration
to the next level. It can add so much interest, dimension and character and with retro textures and effects, it can create a feeling
of nostalgia and warmth, that digital illustration
of the legs. In this lesson, I
want to show you three ways to add retro
feel to your paper doll. The first way is using
texture brushes. In the brush pack I
created for this class, I added some of my
favorite Procreate texture brushes that I want
to add to some of my pieces. Let's start with the
first texture brush which is burnt tree, and make a clipping mask. Depending on how much
pressure I apply, it will give me more
or less texture. Just experiment with that. Then I like to adjust the
opacity and position of the texture and erase or add to fill gaps or get rid of spaces that have too
much of it like this. Now, let's try out the
second texture brush, which is heavy metal. This has more subtle texture. It almost gives it
a watercolor effect that looks a little bit
like swayed, in my opinion. The third texture I chose for
the pack is rusted decay. I really like this texture because it has a leathery field. It's great for clothing
or accessories. Now I just continue to add some of the textures
to my pieces. Just give it a try and add some to your
illustration as well. For my doll, I really like
the leathery textures. Perfect. Now, let's
look at another way to add a retro feel to
your illustrations. This is my favorite
way to really achieve that analog
and printed feeling. Let's have a look at these
old matchbook labels so you can see what I mean. When you are looking a
little more closer at this, you can see how the colors
sometimes overlap or how there are some white gaps where the colors weren't
properly aligned. This really gives it an organic
and quite lovely look in my opinion and we can actually recreate it very
easily in Procreate. Let me demonstrate
it on my doll. I go to the body layer
and duplicate it, then I turn on Alpha lock on the bottom layer and
fill it with white. This will now act
as our background. Now, I want to set the
other layer to multiply. Now this layer interacts
with the pink background. Now we select our background
layer and we just move it a little bit into one
direction and as you can see, it creates this printing effect similar to the one we
saw on the matchbox. Let me show you
the process again. For the dress on my doll, we do the same steps. I duplicate the dress layer, turn on Alpha lock and
fill it with white. Then I set the upper layer
to multiply and move the white layer
slightly like this and we get this
really nice effect. You can also do the same for details like the
flowers or the pockets, which creates this
very nice look. Now, I do this for a lot of my pieces and just go in order. From the bottom to the top, one thing to note is that I usually don't do this effect on dark pieces often
because the darker the color you use the
multiply effect on, the less it will actually give you an effect because the color itself is really dark and it won't react much with
the color underneath. The same goes for white layers. The multiply tool
actually gets rid of any white so there is no
point in doing it. Now I just continue
with this technique until I am happy with how
everything is looking. You can also try this out on your doll by following
the same steps and then I will show you my final tricks to achieve even more of that vintage feel. Remember how I spoke about the paper texture on the
paper doll references. Adding a paper texture
will give your paper doll this great analog
look. For this class. I created a paper
overlay that you can download in the
resources section. For that is simply downloaded
like the other resources and it will automatically get imported into
Procreate like this. Now, we select all the layers
like this and drag them onto our paper doll Canvas and put it on
the top of our layers. Then we select the
following layer modes. For texture, we set
it to color burn. For ink fade, we
set it to screen, and for paper, we
set it to multiply. Now this of course, is a little much so I adjust the opacities. For this, I'd go somewhere around 30 percent
and as you can see, just like that, we now have this nice paper overlay
for our paper doll. Then I put my paper layers
into one group as well. I like to add some
more printing defects. For that, I made three more
brushes for you to use. They are right here
at the bottom. A fine speckle, ink splitter, and
scuffing brush. I like to add this on top of all my drawing layers
and with white selected, I start adding it to my
illustration like this. I just go with trial
and error here. Just looking where I
like it and creating these little defects that make everything
feel more analog. Same goes for the splatter
and discovering brush. You can get this nice and
subtle effects with it. Then I rename that
layer as well and now I also like to add some of those defects to my
background layer. I created layer and pick
a color that's a little more dark than my background and I just add some
of the defects. Adjust your opacity and you get this nice
background texture. With that, we are completely done with our paper
doll illustration. Go ahead and add the paper overlay and have some fun with
the printing effects. In the last lesson, I will
show you how to share your illustration on Skillshare
and on social media. I'm so excited to see
what you have created
12. Final Thoughts: I really hope you
had fun creating your own paper doll
illustration and gained a few more skills when
it comes to drawing and procreate and
designing your clothing. I would love for you to share your doll in the class
project section. You can upload your
final illustration, but I would also love
to see the process, like the mood board you
created or the sketch you did. It would also be amazing if you would tag me on
Instagram @junoregen if you decide to
post your paper doll there so that I can share
it with my followers. It would also mean a lot if you could give my
class overview. Let me know what part
is your favorite or a specific thing you
learned during the class. Thank you so much
for taking my class. It has been so much fun
showing you how I create my paper dolls and I
hope to see you soon.
 Julia Leister, Illustrator and Surface Designer