Transcripts
1. Introduction: Are you looking for a relaxing illustration project that doubles as a gift
or portfolio piece? Hi, I'm Mary Rose, everyone's illustrator
and designer based in Portland, Oregon. Today I want to explore
something fun and relaxing food illustration
in Procreate, I'll walk you through my
entire illustration process from start to finish, beginning with
finding inspiration to thumbnail sketching,
adding color. And finally, I'll teach you
how to use the type tool in Procreate and some hand
lettering tips and tricks. For the project,
you have the choice between two different
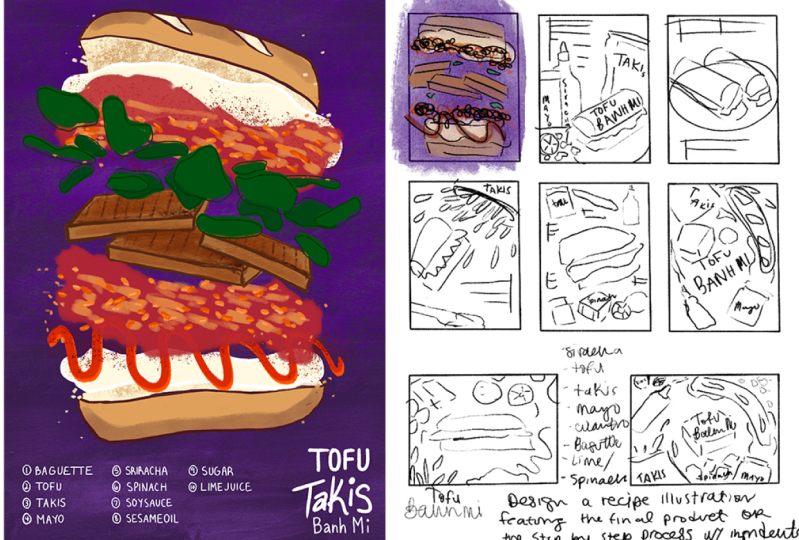
types of compositions. Image dominant
composition that features the finished recipe
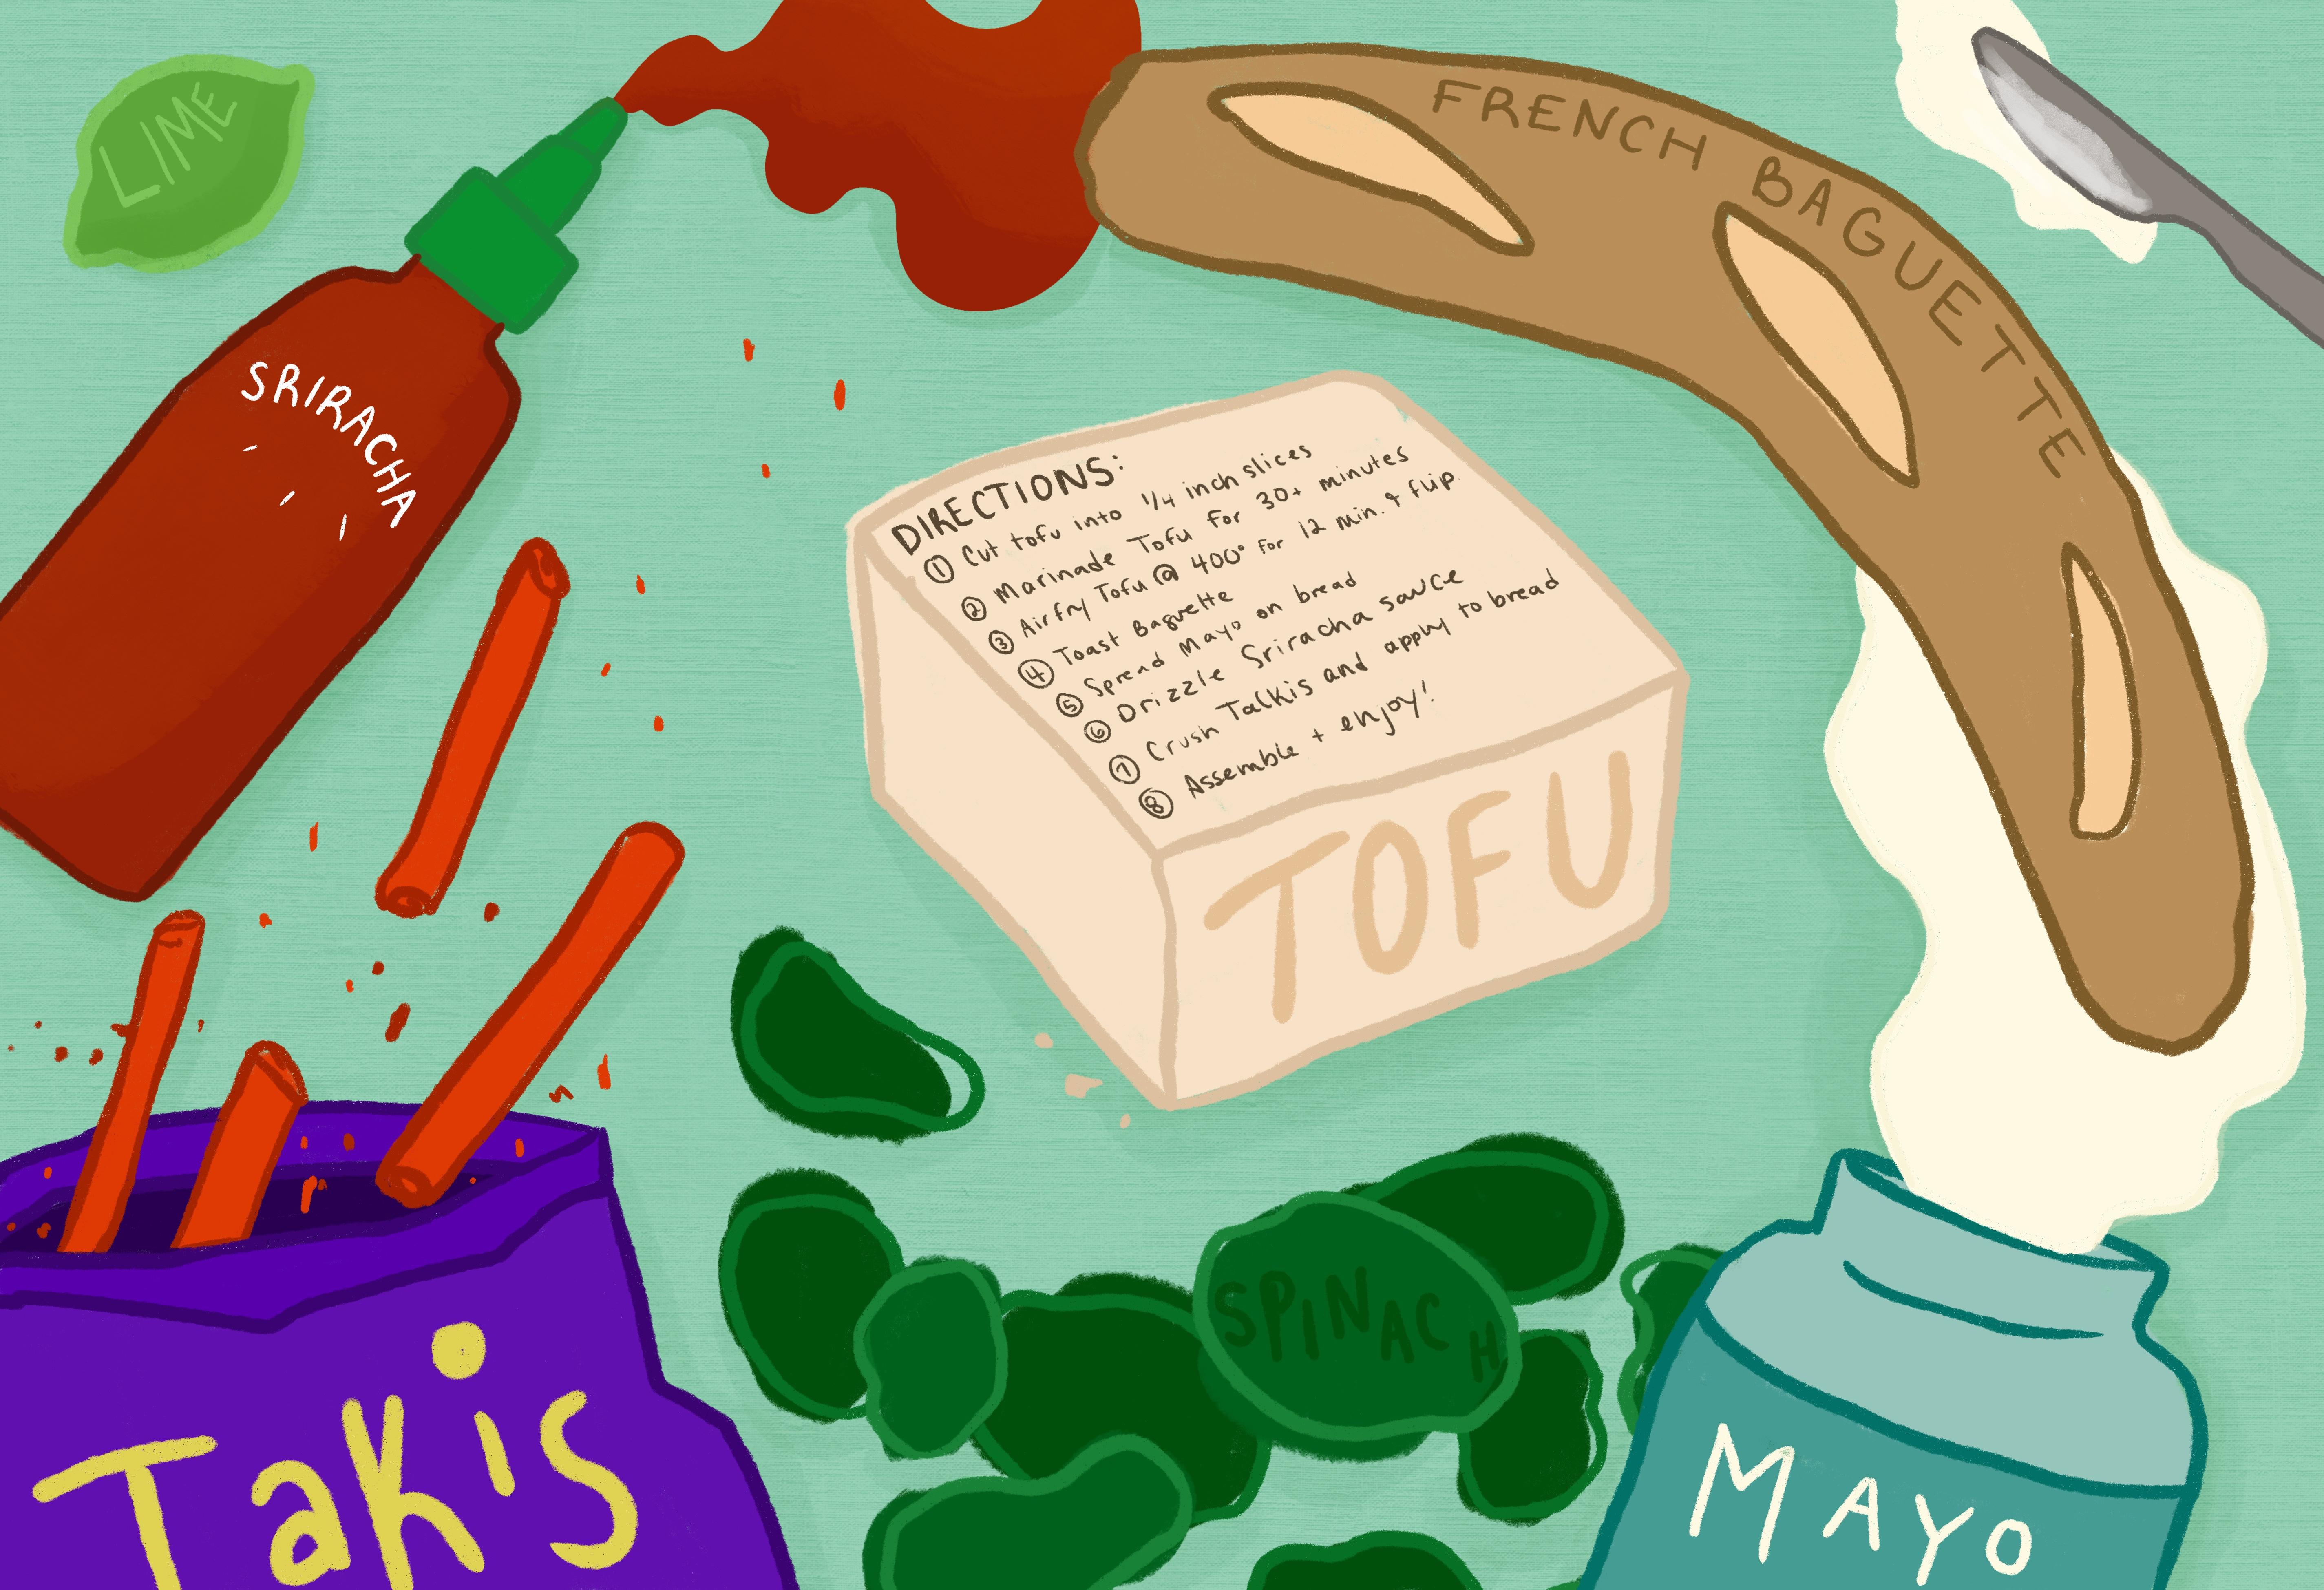
product and the title. Or a step-by-step version that I'm about to
demonstrate for you that combines
both illustration and texts for hand lettering. So you can have a
more interesting complex projects to
get you started. I've provided some
vegetables stamps that you can use as a
base for your sketches. I've also compiled the
brushes I've used in my project and added
some texture brushes that I've created to
add some interests in variation and the elements
in the composition. I'll be teaching this
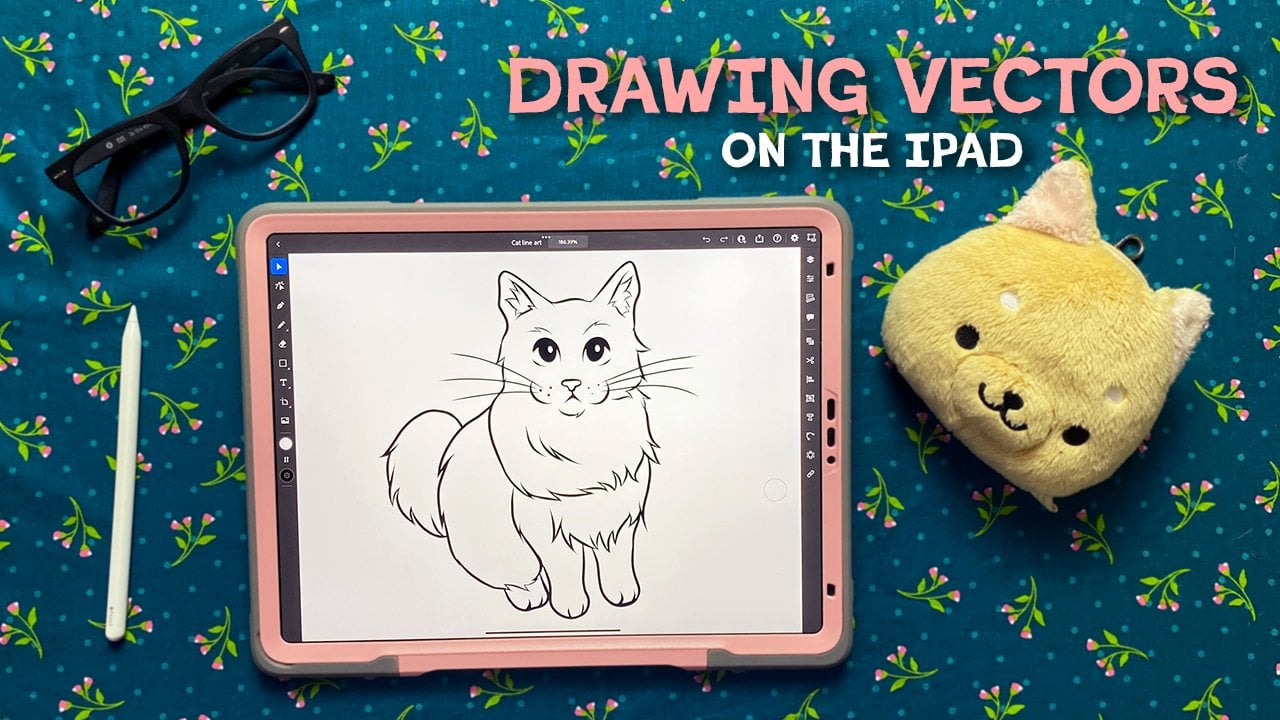
class on my 12.9 inch third generation iPad Pro and procreate using
the Apple pencil. These tools are recommended
for my process. I will be showing you, you can still follow along the same techniques and other drawing software
of your choice. It's up to you. Alright, let's get started.
2. Your Project: Now for the class project, we are going to design and illustrated recipe
of your choice. I'll walk you through
my personal workflow from start to finish, beginning with finding
our inspiration to exporting the final project. Hi there holly. I wanted to give you two
options for the composition. A image dominant design
with the finished product, front-and-center
and minimal text. Or the step-by-step variation that I'm going to demonstrate
in the class that uses illustrated elements
of the recipe combined with the step-by-step
directions using handwriting or the text
feature in Procreate. So you can have a more complex
and varied illustration. Not every delicious recipe
is going to be very visually engaging
in its final form. That's why I wanted to give
you these two options so you can make the most out
of your chosen recipe. I was actually assigned a project just like
this in college. I used a more realistic
illustration style. And it was a little bit more involved than what I
want you to do here. But because of it, I learned a lot
about having fun in my work and using
Passion Projects, so to speak, to advance my
illustration abilities. It taught me how
to find reference, build a layout, use hand lettering techniques that I wasn't comfortable with at all. Basically, it was a project
that got me right out of my comfort zone and into the next phase of my
illustration journey. And that's what I hope this
project can be for you. Fun, relaxing experiment that
just might make you think a new way that you haven't before and expand
as an illustrator, this class will be
taught entirely in Procreate on my iPad Pro, to get the most
out of the class, make sure you download
the brushes and stamps in the project
resources section, I will explain how
to import used in personalized those brushes in the brushes and stamps lesson. So stay tuned when
you're finished, remember to upload
your final project to the project gallery. Alright, next step. In the first lesson, I'm going to show you how I find the inspiration
for my design.
3. Inspiration: Welcome back. Let's brainstorm some ideas for the composition
of the recipe. Elements, layout, style, stuff like that is what I want you to
be thinking about. I'm going with my
fried rice recipe. It has a lot of beautiful
vegetables that are cut in different ways and the
sauteing and the sauces, all of these things
just kinda create a visual explosion in my mind. So I know it'll
be a good choice, but if you're choosing
a recipe that's not as visually stimulating, made me think of the overall
layout and placement. What are you adding to it? Are the plates beautiful
in the silverware and napkins and basically
any added elements that can take a
simple piece of pie and turn it into a five-star
dining experience. In my process, the first
thing I tend to do is a word web he wanted
to write down coming from the initial bubble. Anything that comes to
mind when you think about your recipe, tools,
supplies, layout, action words like
saute scrambled, dice, things that actually come up with an
image in your mind. I want you to write that
down for my recipe. The very first thing I tend
to think about is the walk. I think about the fried
rice being flipped or stirred inside of the walk. So I know I want
to either include or start thinking about the walk and those
kinds of elements. Let's make a quick list of
your favorite ingredients. So fav, ingredient. I'm thinking bell pepper,
course mushrooms. What else? Maybe green onion. So I think of a bunch
of different types of chopped vegetables are
frozen vegetables. Maybe you could do something
with the packaging. So these are the
actions that I think of when I'm thinking about
creating my dish. Adding ****** and seasonings, cutting vegetables, saute my vegetables and
rice inside of the walk. So the next step is looking at your physical recipe
written down circle. These steps are ingredients that you think are
the most crucial, especially if you're doing
this step-by-step version. So you can start building a visual language for
your recipe in your head. Once you've compiled your word
web in your list of ideas, the next step, finding inspiration and
references elsewhere. Obviously the best solution would be taking
pictures of your own, of your own recipe, of your own ingredients. But that's not available
for everybody. So there's great stock
photo websites like Unsplash and Pexels
that work just like any other search
engine to find good-quality images just for
what you're looking for. So we scour the Internet. This is a great
source for looking at ingredients to copy,
like vegetables. So for instance, you can put tomato and you get
a wide variety. So let's say I want
some for my fried rice. There's some really nice
finished product photos are some great inspiration
for collating and styling. If that's the way
you want to go. I especially like the
mound of fried rice, but I never really
do that at home. Mine just gets wolf down. Start to see how
other artists and photographers like
to present food. There is definitely an
art to food presentation. Often, I noticed that there's very saturated
colors paired with low light or dark,
moody ambiance. That seems to really go well for dinner dishes or anything heavy. While on the other hand,
if you're searching, see pastry, I think
it's the opposite. You tend to see light, white, buttery, airy elements. They can go on the
darker Heaviside too. But I think for the most part, you want to think about the spirit of what you're
drawing and the types of words and adjectives
that tend to go along with that type of recipe. For inspiration, for layout
or other artistic styles. I tend to go straight
to Pinterest, not to copy, but
to get inspired. I've actually made a
board for this class of all of the reference
images that I find useful. You can find this
Pinterest board in the class description below. I tried to collect a
variety of art styles and different techniques
in this board and also include different
composition styles, some that feature the
finished product or more of the step-by-step
ingredients style as well to inspire either option
here and you get the idea of art styles typically used in
food illustration. Watercolor journal style is very popular and beautiful
to look at. Saturated, delicate
painting works well for pastries and
other dreamy dishes. Try to match your style
to the final products so the textures and fine details make sense for what
you're creating. Your assignment is
to combine a series, five to ten images that feel right for your project
and create a mood board. Here's my mood board. I've just compiled some
reference images that I found on those free websites
that I talked about earlier. I've also pulled colors from my mood board here
and call it fried rice. This is just a simple
limited color palette that feels right for
my illustration, clearly referenced
from this mood board and are a great
jumping off point. Alright, now that we've collected
all of our inspiration, I'm going to talk
about the brushes and stamps I've made for this class. See you there.
4. Brushes and Stamps: All right, Before
we get started, I wanted to show you
the brushes I created an selected specifically
for this class. They should help you
get started quickly and follow along
with my process. The brushes can be found in the project resource
section of this class. Download them
directly to your iPad to open them or import
them in procreate, there are two files
you'll find there, the stamp brushes and
the regular brushes. Download them both. Both work as regular
brush files in Procreate stamp
brushes just have their very specific settings that create the
stamp like effect. They download
exactly the same way to download the brushes. Find them in the
files on your iPad. I have mine in my iCloud Drive. Click on the brush
type and it'll import directly into procreate. Or you can go into brushes, choose the addition symbol
and import them directly. Just like so. Now I have both my version and the version I
just downloaded. If you accidentally
download too many, just tap on the brush folder and hit delete, rename or share. It's really that easy. So after you've
gotten your brushes, you'll need to know
how to use them. The class brushes, which I've
titled food illustration, or a mixture of
all of the brushes that I use to create
my illustrations. My go-to sketching and
fill brush is a six B with the size turned all the way up from the brush settings. I also loved the dry ink for a more refined sketch
or final linework. I use those pretty
interchangeably, but you can test them out
and see what you prefer. I added the syrup for a non textured lining
brush or sketching brush, it does have some
streamline effects on it, but you can turn that off. But what I really like to
use it for is my eraser because it has a really
dramatic thin to thick line, which is really good
for getting into small little nooks and crannies when you're
trying to erase. The brushes I created
specifically for this class are an
overall texture brush. I really have background
elements in mind, but you can use these for any
part of the illustration. So those two brushes are the
chalk board in Canvas brush. I use photographs to create
these texture brushes. These are my first one. So let me know what you think. Let me know if
they work for you, they're really great for
doing an overall texture. If you want to show us
more of a subtle texture, you can add the lighter
or darker version of that color behind it. And then you get a
really subtle look. Here's what the canvas
brush looks like. I think it would
look great for like a tablecloth or a napkin, or I added it on a
grilled piece of tofu and a previous
illustration. Basically, it's a
great way to separate the elements or just add a nice overall
background texture, whatever you need it for, it's there, the gouache
and artists crayon or for coloring objects or filling in the entire background
for a textural element. Unlike the ones I created, they will add more color
over time as you keep going. E.g. they are nice
for slowly building up color or texture in
small or large areas. I think they're the most
in-between brushes of this set and you can
choose to use them or not. They're just there
because there's some of my favorites and I've used them in other elements
in my illustration. I especially like using
the artists CRAN, as like burnt or
cooked looking marks. And the gouache brush is
really great for like a subtle browning or
delicate toast on something basically just
think of ways you can apply these textures to food elements and how they work for that, we are going to try to
add some hand lettering or textual elements
to make that easier. I wanted to include this
little stencil that I mean, it works with the brush
size, scalar, and opacity. So you can do really tiny ones, are really big ones to
fill up the entire page. I especially like taking
the smaller ones using the free form and
stretching them out across the page
to make a sentence. The goal is to keep the middle of the characters
on the midline, but you can decide
to play with that and create different
looks just like that. You can use this blurring
guy to do anything you like. Make big titles with your own handwriting
or use the text tool. And once you remove the
guide and becomes easier to see the text and how
readable it becomes. Without the lettering guide, my y's tend to go
all over the place. Of course, you can always use the brushes you feel
comfortable with. These are all just
recommendations and to help you get
started on the project so you don't feel too intimidated by all of the
decisions you have to make. The stamp brushes can take
the place of a sketch by adding texture and
color, enlightened shadow, they can become an entirely
complete illustration or simply use them as
background patterns. Let's look at it. So I'm going to go into that
G stamps in the settings. I've created some
jitter in rotation. As you can see, the scatter
and the rotation and the jitter create a randomized
pattern look to the SAM. You can play with
these settings to get a completely
different look or feel. The shape of the stamp is
what makes the stamp stamp. I made the original files for
these stamps pretty large, so you can use them at quite a large scale without
them getting blurry. But always be mindful of
the scale that you're using for the stamps to create an overall background pattern, simply choose smaller size
and don't let your brush up. It will randomize the brushes
across the background, creating a really unique look. But be careful of overlapping
like I've done on this side that can
look a little messier. I like to use a zigzag pattern
from corner to corner, making sure some
go off the page. So it looks more
natural like paper. You can always use the
selection tool to move individual stamped
elements or rotate them to make your
pattern more exact. But that's how to create a
really nice background overlay with those stamp brushes if
your piece calls for it. So since I want to use bell
pepper for my illustration, let me put one on my canvas. Now. I know I'm going to draw in
a highly textured style. I'm going to use probably
the dry ink brush. And so these clean
lines that I use, I think the syrup brush
for don't quite work. So I can do then is you can
either choose Alpha Lock, which locks everything on
that layer to stay in place. And when you go back to draw, it will only appear where
you've already drawn. So only where the
stamp is already been created will be
affected by my brush. So then you can go in to
the food illustration, choose one of the texture
brushes like artists CRAN, choose a darker or
lighter version of the color of the stamps. So I'm going to
choose brighter and then just paint over it there. Now you have a highly
textured liner. If you want to create an even
more dramatic texture that actually affects the outline and doesn't let it looks
so clean anymore. You'll want to
select the eraser. I'm choosing the eraser and a highly textured brush like the artist crayon
turn off alpha lock, choosing a lower opacity, 5-20%. Let's go with like 15. Then you're just going
to suddenly erase over the lines there. Now it's a lot more broken up and it can go
even more dramatic. So if I increase the opacity, you can almost completely get
rid of that stamp and then maybe go back in and
redraw and add color and texture and it
really becomes yours. Alright, you have the idea lists and the brushes
prepared for the class. Meet me in the next lesson where we finally start sketching. See you there.
5. Sketching: Now for the fun part, Let's see what we can create. The canvas size and dimension
is entirely up to you. I'm using 13 by 19 " because that's the largest size
I can print at home. And I might want to do that. You choose the best
size for your project. Always be aware that the
larger canvas you choose, the easier and crisper and the lines are going
to look in Procreate. Basically you're not going
to see the pixelization. But if you choose to use
a larger canvas size, know that this will reduce the amount of layers
that Procreate can allow you to use for
that intended document. So you might want to
play with that to get the amount of layers that will work well for this project, I think at least 20
layers is the minimum. It's nice to have somewhere 20-50 if you want to
have like a lot of elements in your
composition and do a lot of coloring
and affects layers. So at least 300 DPI if you
are going to print this out. Otherwise, you can choose
any dimensions at you, like make sure you
keep your references and inspiration
very close at hand. A feature in Procreate
that I want to show you is you go to actions canvas and choose
the reference toggle. You have a few options. It will show you the
actual Canvas or you can import an image or use it as a mirror and
look at your face. So I'm going to import
that mood board. I created the
inspiration lesson. You can scale this however you like and move it
around the canvas. I really liked that
it's a free element. And you can zoom in to see the full quality of the
photos you've selected. This will help me brainstorm
one thumbnail sketching. Before I start sketching, I'm going to create
some boxes on my canvas that
represent the scale of the canvas so I can be accurate and more proportions when I'm drawing
the composition, I'm going to use
only the brushes in the food illustration folder
for my illustration project. So you can follow
along and understand the methods that I'm
using for sketching. I like to use the six B
pencil at a smaller scale. Now, I'm going to
lightly draw in a box, keeping a little bit of
distance from the outside. And now I can reduce this,
keeping uniform selected. And I have a perfect dimension
replica of my canvas. I can duplicate it and make
my thumbnail sketches. So let me just add a few. Duplicate. Treat these as a warm up. They don't need to look good or intelligible for
anyone other than you. You just want to
move around all of the elements you want to
include in the composition. Play with it. Try different variations. Maybe one is imaged dominant, one has the
step-by-step process. To change your mind,
scribble things, basically have a good
time and try to decide what exactly you want to
include into the illustration. I also like to make a list at the bottom of the page and keep track of the things
that I may or may not want to put in
the illustration. Keep in mind the
principles of design. As you make your
thumbnail sketches. Think of hierarchy, how big in where those elements
are in the page. What is the first thing you see? What is the focal point? What is really drawing the
eye into the composition? Is it the finished product, or is it a really beautiful rendered
element of the recipe, like a bell pepper or a knife about to slice into
a piece of cake. What is that focal point? Is it fiery and energetic? Is there a knife and cutting
things up or a flame roasting something that has a certain feel and look to it? Or is it a soft, delicate,
buttery croissant? So do think about your chosen recipe and the best way to
visually represent it. Where are the
elements on the page? Are they strewn about messily, or are they in a line order, prim and proper, that
will say something about the overall
composition as well. If you want it to look
really nice and clean, looking at magazines
and cookbooks, something that's made for print. And of course, don't
forget about the text, where you place
it, how big it is, how it's aligned, left or right, will really change the way the composition flows and looks. I'm not handwriting
everything right now. I like to create boxes with
lines to represent my texts. Or if it is supposed to be illustrated or look a
certain special way, like with my knife where
it says fried rice. Then I leave it in a more quick lead done
illustrated style. But please don't spend time minute writing down the
text that you want. Understand where you
want to place it, but don't worry about
the details right now. Don't forget to think about the text as a graphic
element as well. A really large tidal can anchor to the bottom
or top of the piece, really drawing the eye and changing the momentum
of the composition. So always try to keep
these elements in mind. When you're finished
with the thumbnails, choose a final and blow it up
to the scale of the canvas. I'll be using the dry ink
brush for my second pass. It has streamline
properties turned on, so it has a little bit
of a cleaner look and feel that you can use whatever
you feel comfortable with. I'm gonna go more slowly, be a little bit more
deliberate with my line and my shapes. I'm not looking to
render anything, but I want you to understand what type of elements
I'm drawing. Of course, you can trace the
found reference photos from the copyright-free sites or use the stamps as part
of your sketching. I chose this sketch for all
of the movement and the fire. I like the idea of a warm and cool composition
with a lot of energy. My fried rice recipe
is made really quickly and has an
explosion of flavor. And I feel like this best
represents the dish. I also want to keep
the text separate from the illustration
this time and do a step-by-step directions with the title in case I want
to hang it in my kitchen. I like to start with
objects that are in the background that have
things in front of them. So I'm going to start with
the walk in the flame. For flames, I just make a leaf-like shape coming from the same stores
like a flower. I like to stylize it and keep it simple so it's
easier to read. Now, I just create the outline of the rice
and the vegetables. I want the rice to have a
lot of movement and energy, so I'm fragmenting
it as it moves up. Think of a wave, small elements together to
kind of look like a liquid. And that's the principle
I'm using for the sketch. Use the reference pictures
for ideas on how to simplify the veggies or use the stamps
as a base if you get stuck. I'm going to modify the mushroom stamps so it
doesn't stand out against my other line art
and also cut it in half so I can have a different
variation on the mushroom. Just redraw over it
with a thicker line or erase out the details so it
matches the other line art. Since my sketches so vague, I'm going to move things a lot until I'm happy
with the placement. Normally, I would
spend more time on the sketch before using
a final line brush. But this style is all about keeping a natural
hand-drawn look. So this method
works best for me. Don't be afraid of tracing your references
for your linework, especially if you're a beginner, if it makes the design
process easier for you, all the small elements
also helps sell the idea of movement and give
some variation in scale. I'm keeping this
messy on purpose. The randomness
adds to the style. Now I go back and refine
certain elements. Use the eraser to crisp
up edges and points. I have captured all of the
elements I want to draw. I've added the walk, the flames, the foundation
for the rice layer. All of the little elements
that are going to have color in more detail in
the coloring section. Okay, That's the
sketching process. Up next, let's add some color.
6. Adding Color: Alright, welcome back. Let's add some color to
these illustrations. So here's my color palette. I want to make sure
I feature a lots of vibrant colorful vegetables, as well as the cool and warm overall color compositions so that we'll start
with the flame. And then I'll make
sure I use contrasting blue tones to compliment that. I'm going to use the
six b to fill in each individual element
on its own layer. And then I'm going to
use some of the texture brushes like the artist
crayon and gouache to add some more dimension and texture and
depth to the shapes. This will work as
light and shadow. I try not to use pure white
or pure black too early on or at all in my illustrations because it
can have a flattening effect. So instead, I tend to
stay in the dark blues, dark reds, dark greens. And then if I truly want
to emphasize something, I'll use black or white. So now I'm going to
create a clipping mask. You can know it's a clipping
mask by that little arrow. So now everything that
I draw on this layer 11 will only appear where
there's color on layer ten. This is a really easy way to
do highlight and shadow or any other effects because
you can also have the independence of the opacity of the clipping mask layer. For a live variety. I'm going to choose
the gouache because fire has a low opacity. I can use that fire
example as inspiration, but I don't want to
copy it exactly. Realism is not what
I'm going for. I'm suddenly adding some of the yellow hue on
that clipping mask tap to just build up color. You can create
multiple clipping mask for sections to have
various effects. E.g. if I want the light of
the fire to really glow, I might want to
use color dodge or add and then bring back
the opacity quite a bit. And then do something
completely different for another shade with
the flame based done, Let's move on to the walk. I've turned off the other
layers because of the overlap. I don't want to get
confused and want to see directly when
I'm working on, I'm adding a layer
under the walk for the coloring using
my six B pencil. I'm not 100% certain what
colors I wanted to go with, but I stay within my palette and then I
can change it later on. So since I have a good
variety of greens, I'm going to start there. I want to use the lines of the drawing since
third solid and I can just drag and drop to do that on the layer that's
not the line layer. You can make the line
layer a reference layer. This means that on
any other layer, those lines will be recognized
in procreate and you can drag and drop within
those lines. Like so. I'm adding lighter
colors on the top and darker colors on this side just for a little bit of lighting. Now that the shape is filled, I want to remember to turn
off the reference layer. Now I'm going to
add the base colors for the rest of the
elements one at a time. You can turn off all
the walk layers to really focus in on the rise. Again, I'm making this a
reference layer so I can use it. When I want to drag the color in with the larger
sections filled in, I'm going to now
use the brush to fill in these
little rice shapes. I'm not trying to
stay in the lines. I like it when it
looks a little messy, especially in a design
with movement like this. When you draw the color a little bit off sync with the lines. It reminds me of animation, and it just helps give
that element of movement. The green onions remind me
that I really like to change the line art color as I
go with the coloration. Basically to add a little
bit of light and dark value. So before I add color, I want to change the green
onion lines to a dark green. It's easy to achieve
this by simply choosing Alpha Lock and coloring
over the selection. I'm going to choose
a dark green and the FBI and just
color over them. Now I'm going to add a
layer underneath the fill. The lines might be
a little too dark, so I'm going to go into
hue saturation and brightness and just
lighten them up. Mess with the saturation and color sliders to get really
interesting effects. I want there to be a
little bit of contrast in each element between the
lines and the core value. But I don't want it to be really eye-catching and a light
and dark contrasts. So that's why I
definitely want to change the line color on
the rice as well, either making it slightly
lighter or slightly darker. Firstly, I'm going to try hue saturation and brightness because I feel like
that's an easy fix. But I don't really like
the way that looks. So I'm going to undo the
alpha lock thing again. It will make more sense when
I add a background color. And you can still see some of the dark texture from
the color beforehand. At back other elements
so you can see how they play together with the
walk added back in. I know I want to adjust
the line of the rice. You always want to
make it clear what elements are coming
forward and back. You can use lots of methods, overlap, intensity
of color and scale. Of course. Next up, we have the mushrooms. I'm going to fill the mushroom
with the medium yellow. In the 6 ft. After that we have
the peas and carrots. Now, I want to change the line
color again so it matches. If you ever get stuck on
how to color your objects, make remember you have
your reference photos. I know I'm going to
add a lot more value to the mushrooms when I
do the light and shadow. But for now, the dark lines can say because that makes sense
for the reference image. But for the peas and carrots, I definitely want to make them a lot less contrast because they don't look
like that in real life. For the carrot, I'm
just slightly darkening the lines from the core color. I don't want them to have such
a high level of contrast. And finally the peppers. Alright, now that I've
added the base colors, I'm starting to feel like the illustration is
a bit too sparse. So I'm going to duplicate some
of these colored layers to start moving things around and making it seem more
fool in lively. Don't forget, you can always use the selection tool
to just change where things are placed and
the layer in which they overlap each other
in the layers panel. I really don't like the
amount of mushrooms. So I'm gonna go, I'm going to group these layers so now I
can easily duplicate it. And then now I have a
second group of mushrooms. When you duplicate
elements like this, make sure you
significantly changed them either by the scale or use the transform properties to walk them in some way like this, I'm going to make them
smaller and a little elongated and then just find a place for them
within the illustration. I kind of like how it's overlapping elements
and the top half here. But I don't like this mushrooms, so let me select it
and move it around. Maybe it looks good here. So now we have more mushrooms. And I'm going to just
grab these layers and move them into
the other group to save the amount
of layers I'm using. Alright, now let's look
at other elements. I think we could use some
more peas and carrots. So let me do the
same thing for that. Alright, let me make it smaller. Stretch it out a little. I like to keep the scale of the illustration
small when I'm moving elements
around so I can get a good idea of how
it looks overall. I kinda like that, but let me move
some parts around, like the overlap right here. I think there's too
many peas there. That seems natural. So now we have doubled
the mushrooms, double the amount of
peas and carrots. It's starting to look
more lively for sure. Alright, now that we have all of the elements accounted for, I think that there's a
good volume of elements. I'm going to start adding some light and shadow
values with clipping masks. Now I want to add some
of the browning effects. You can see her from
the reference photo. It's not very striking, like burnt or chart, which I would use for the artist crayon, It's more subtle. So I want to use the
gouache brush to add a little bit of just browning on the edges
of the mushroom. I'm going to use low
opacity and a small brush. And just multiple
passes will create a nice textural effect
like the reference photo. All right? It's
subtle and you just have to keep swiping the
pencil across the section. I also like to make
the brush large and do a light pass
over all of them. Really subtle. I wanted
to change the color of the walk because I think it's a little bit
too much green. I can do that easily in hue
saturation and brightness. I really liked the way
it looks when it's blue. It's a favorite color
of my but I wasn't aware that I might make the
background that colors. So maybe I change my mind
and go more orangey red. Light the flame and darken it. So it's like an
old cast iron pan. I will do the same
treatment, two lines. This time choosing the lighten them so they are all visible. I forgot to change the
lines on the fire, so let me do that
now. Alpha lock. Let's see, We'll
make it red hot. I wanted to lighten the lines on the green onions because I feel like they match the
piece a little bit too much. I want to add an overall texture
to the pan because I use the drag and drop color fill and it's pretty
texture list. And as you can see
with it's coloring, I think it needs some bit of
RST, more rustic texture. So I'm going to add
a clipping mask to the artist's crayon
and the dark value. And just pink dot over top. And then play with
the blending modes a little to see how I can make that pattern shine
and reducing the opacity. And I turned it on to multiply. So you can still see it into the dark areas with most of
the elements accounted for. Let me try adding some background color that can always change the
flow of the piece.
7. Background Elements: Alright, now create a
background color layer. Choose a color that
does not compete with all of the
elements you have, but ever so slightly
contrast it. So if blue is my
main contrast color, I'll use a subtle light
blue in the background. Add a layer, but the sketch, I'm going to choose
the blue from my palette and lighten it significantly and drop it. Now I want to add
another layer on top and choose one of my
texture brushes I created. With my brushes, you can create a light and dark effect by contrasting the overall texture with a darker, lighter
layer underneath. And then combine, I like
the chalkboard one for this because it's a bit more smoky
and moody like the piece. Then I'm going to choose
a darker version of this color and paint
it in the background. Automatically, the texture from the illustrations
feel a lot more harmonious with the background and things feel
that more unified. But I do think that blue
is way too eye-catching, so I'm going to find
a way to reduce that. Let me start with hue
saturation and brightness. I'm going to darken the color and see what
this does the piece. This is an interesting look. I actually kinda like this. It makes the dark
elements really pop, gives everything
are really moody. Feel. Compare. This is
very bright and energetic. And this feels like a
chalkboard illustration, which is what I was going for. So let me see. I like that. We'll keep that for now. The dark background also
helps me keep track of a little rice elements and helped me decide if
I should add more. I think one element I'm missing is the steam from the rice. I wanted to make sure
I get that in there. Above everything. I'm going to create a layer with gouache and that lighter
blue I used earlier. And let's test it. You can't quite see it. Let's mess with the
blending modes. Screen works really well. So I'm going to make
another layer with screen, increase the opacity and
start adding some smoke. I'm trying to mimic the wispy
nature of the reference by just drawing lines
that meet together. Starting from the rice. I'm making the brush
smaller as I go to add more detail and wispy sections, I'm leaving this theme layer
on top of everything so you can see the contrast
of before and after. But I do want to clean up
some of the edges there. Now we have a really
steamy recipe. I think I want to make the
background more of a gradient. I think because there's a
light source at the bottom, it would make sense for
more light to be down here. Then at the top, that would
also make the steam pop more. So let's go back down here. I'm just going to take a brush, six B and a darker blue
and paint the top half. To get a gradient. I'm going to go into
Gaussian Blur and add it. So there's a smoother
transition from dark and light. I still think this
could be more dramatic. So I'm going to go
into hue saturation and start playing with
the values again. There. I think that's moody enough, but now I want to add
a glow from the flame. So I'm going to combine
these flame layers, create an Add Layer, because that is my
favorite blending mode for any type of glowing effect. Choose the orange, choose the gouache to the low opacity and a big brush
and start playing. I'm just swiping the
brush in a U motion, keeping the intensity of the colors centered
on the flame. Tapping to really add the
saturation to the flame area. Now, I'm going to reduce this significantly before and after. But let's reduce. So I kinda like God
amount of glow. Let's play with other
blending modes. I think I like lightened
best actually, but I'm going to reduce
it a little bit more. Narrow. We haven't really glowy. And moody illustration. I didn't think we're going to create this moody
of an illustration, to be honest with the clipping
mask, are you on the walk? I want to add some
of that glow effect onto the walk as well. I add a bit of a rim light on
the underside of the walk. So it doesn't seem bizarre that it's dark
against the flame. I use add and reduce it. I think I've included all of the elements I wanted to
make sure to include. I have the warm
and cold contrasts with the flame in
the background. I have mushrooms that have
a nice texture on them. And the elements are moving
fairly nicely up the screen. The smoke really helps
emphasize that and create multiple layers of
transparency and overlap. Alright, meet me in
the next lesson. Finally, add some texts of these designs in our recipe illustrations
will be complete. See you there.
8. Adding Text: Finally, we're at the last step. Let's add some text to our
illustrations for you. This might just mean a title, or it could be a series
of step-by-step blurbs. Throughout your illustration, I'm going to show
you both how to use the text tool here in Procreate and how to do some
handwritten methods. Very basic stuff, but it should really finish off these
illustrations nicely. Before we begin, I wanted
to let you know I've duplicated my document and combined all of the color and line layers and separated
from the background layer. So now I just have three layers, the sketch, the color,
and the background. I did this because I needed more layers for
this text example. And it just helps
clean up my workspace. I did this after duplicating the documents so I can always go back and refer to the
previous version, alright, to add text
to this document, you want to go into
actions and add text. It's pretty much that simple. You can write it out
with the Apple pencil or use the keyboard to
type out what you need. You can highlight the text by
simply double-clicking it, or be more selective
with these blue handles. So you can highlight
just one character or the entire word. Here you have a mini menu
on how to edit the text. This will tell you the typeface, and if you click on it, you will get the larger menu. This can also be done by just simply hitting this
double a icon. It'll bring up the full
Settings menu for the text. You don't need your
texts elected to do the edits just to make sure
you are on the text layer. Alright, let's run down
the settings panel here. The size is self-explanatory. Kerning refers to the space between individual letter forms. So if I change the kerning here, it will affect them all equally. But if I use the selection, I can select just the kerning in-between those
specific letter forms. That's great for typefaces that might look a
little wonky and you might want to adjust how far spaced certain letters
are next to each other. Tracking is also about spacing, and this one will always equally affect the spacing between
the letter forms of a word. Letting has to do with
multiple lines of text, but letting will add more or less space
in-between rows of texts. The opacity is pretty obvious, but I recommend using the opacity slider in the
layer and not this panel. It's a little bit easier to keep track of baseline changes. How high or low the letter
forms go on the baseline. So you can change specific
letters to go above or below the baseline or entire words to rise above or
below the baseline. This can be useful
when you're making sentences and can move words up or down
independently of each other. Over here we have the alignment, left alignment, centered right
alignment and justified. These work like any other
word processing software. We have underline, you
have outline texts, and you have vertical text. This T T icon will
capitalize the layer. Procreate comes
with a wide variety of fonts you can utilize. Some of the ones
that might interest you are something
like Chalk Duster. This automatically has
a more hand-drawn look to it and will
look good against, let's say the chalkboard
background, e.g. you can change the color
by going up here and just like you would for any other part of
the illustration, let me make it a really
bright color so you can see if you still want to
create that hand-drawn look, look for a typeface that
is a handwriting or overly texture typeface that married
with the illustration, will probably look better than
something like Helvetica, which has a very
digital geometric look, which can contrast hand-drawn or overly
textured illustrations. Personally, I don't like to use the text tool for
multiple rows of texts. It can get a little bit hard to fine-tune all of the elements. So for this project, I want to use my
handwriting and show you my tips and tricks for a
little bit of hand lettering. I am by no means a
hand lettering expert. I just use it where I
feel like it works best.
9. Hand lettering: You can use that
lettering guide I've crafted to help place texts
wherever you need to. Remember, you can use the
transform feature to make one brush selection into an entire line for
writing sentences. If you're using hand-drawn texts in this project is
probably more for the look and feel of it than the actual usability
of the recipe. So feel free to just make messy, really textured
looking handwriting styles if that looks good. Readability is not our
number one concern because this is not an
instruction manual. The actual legibility of
the text is not crucial. You want it to look nice, match the style to
the illustration. And if messy works, messy works. I will use the dry
ink brush for this, change the streamline to have a more mechanical
movement with your line. It will not let you have as much nuance in the
lines are making e.g. very smooth curves. When I reduce the streamline, there's a little bit more bumpiness and uniqueness to
the way the line moves it. A little bit subtle. And the stabilization removes
the curve from the line. So I literally
can't draw a curve when you turn up the
stabilization very high. This means that you have less variability in the
way you move your pen. So if you want something
more geometric or cleaner, add more stabilization,
I'm going to move back very far down. But also try any
of the inking or calligraphy brushes
native to procreate. All those were really nicely when you're trying
to hand letter. And I want to make sure to utilize the guide
that I have here. Choose a color that stands out in the side
where you want to place your text
before you have to make the actual letter forms, it's good to think
about how large, how much you want to say and
where you want to put it. So I know for sure I wanted
to say fried rice pretty big. Maybe mushroom fried rice
with mushroom smaller. But let's think about placement. Do we want the title to overlap the food or is it on the top? Is it overlapping? Let's think about it. I'm going to make a
large guide right there. I like the way that looks. It's both at the top
and overlapping. And it's in this nice large
amount of blank space. And then I'm going to reduce
the scale of this and just add a few down here. And you can copy and paste
it to make it easier. And I'll see how that works. Reduce the opacity
of the guides, and add a new layer on
top in the Dry Ink. I'm going to choose the
eye-catching blue for now. I might change it. I don't really have a
hand lettering style. I'm not great at it. I pretty much just managed
to use my own handwriting and keep it straight in bold, or use a lowercase. Let's just write
fried rice first. I want the brush to
be a bit bigger. Use the middle thin line for the placement of the mid stroke of the letter forms
like the E and the F. Think about the spacing. You're keeping the
same distance between each letter and the width of each letter is
staying similar. So as you can see, I've made the F a little bit wider than the R and so I'm going to bring
the r. So it makes sense. And you can use the eraser
to round off sections. Try for irregularity. You don't want it
to look geometric and perfect because if you did, you would just use
the text tool fried. Now you can decide
if you want to move the letter forms at all. Like I think I need
more space right here. So just use the selection
tool and move things around. This is basically the kerning, but doing it manually. I think this R could be
a little bit bigger, a little bit, maybe wider. Use the Freeform tool to make things ever so
slightly different. So you can make sure that
they look good together. I don't mind the
word fried rice. I do think the word Fried
is a little bit too big. Let me scale it down. I think I wanted to
include the word mushroom, but I want it to
be a lot smaller. So I'm going to move this down and add another guide
for the word mushroom. Maybe create a new
layer so you can move around each word. Remember, more layers is better when you
are moving around the elements don't settle on a placement just because
that's where you drew. It. Makes sure that
they're aligned. Now I don't want to mess
with some of the colors. I'm going to change mushroom to a brown color with
alpha lock, use the 60. You can turn off the sketch
to get a better look, I'm going to duplicate
the word fried rice because I want to try
a dual tone effect, change this to white
and move it slightly. I want to do the same
thing for the mushroom. Now that I look at it, I think I even want
to add a drop shadow. So I'm going to duplicate
this back layer, make it black, and then do
a slight Gaussian blur. So before, after, before, after, it really does separate things and make it
pop off the page. But at this point, I'm
not sure if I want the word overlap my
illustration so much. So let's play with it. Move it around. I'm going to group everything
so I can move it easily. Does it look better down here? I kinda like it
down here because it's almost like it's
being caught on fire to, and that makes me want to change the word fried to
a different color. So alpha lock 60. And let's try the orange. I'm going to change the
blue to red as well. And the white behind the
mushroom isn't working so much, so I'm gonna change
it to a black. I'm going to duplicate this. So I can save it, turn it off, and start changing some of these
elements around. I think I like the
color treatment. So I'm going to start
combining comments by one, separate the word
fried and rice. Let's separate it by copying it and then removing it
from the previous one. Now I want to try
a stacked version. So let's move things around. Now I have two options. I'm going to save the
decision to the end. I'm not sure if I love either, but I'm leaning towards
this one right now. Now I'm going to turn
the texts layers back on, create another layer. Use the dry ink. I'm going to use white. Now, I'm going to start just
writing down the directions. You could also just simply list the ingredients or just
leave it as the title. I'm leaving this a
bit more hand-drawn. So it has personality. I don't really need it to
be legible or perfect. I've reduced the
instructions to be as few words as
possible and to be direct so they're clear to
read and understand if wanted. But basically I just
don't want to have Wong never ending
sentences really. I'm not looking for sentences. Just one more word
blurbs, I suppose. Move the guide as needed, be careful not to draw
on the wrong layer. Now I have the handwritten
step simplified. I'm going to move
them around slightly. Play with the scale. Sometimes I need to add
more texts because I feel like it's a bit too sparse. So add more if need be. I think the handwriting
sticks out a little too much, so I'm going to reduce
the opacity slightly. I like this fellow
handwriting here. Here's an example. If I were to duplicate the text. If you want to just keep adding handwritten elements
throughout the piece, it can look nice too. I know it doesn't make
any sense because I didn't actually
write the steps out. But sprinkle the handwriting throughout the page
also looks really good. Even if it's not legible. I really liked the look of that. And maybe I'll go back through and add some that
makes more sense. But for now, I'm
just going to keep the small amount of texts
that we have here and here. I like the movement that starts at the bottom
and goes to the top. And these two blank spaces
are now filled with texts that kind of compete
with each other for attention. So I think the, I placed
pretty well through the piece. I'm really happy
with the way that the steam looks and
the glow of the fire. It really feels
intense and vibrant, like fried rice fields
to me and it has a nice energy to it
that I was looking for. The mushrooms are
pretty front-and-center and it has a very moody
vibe, which is fun. And exactly what
I was going for. All right, when you've
added that texts, you've finished
the illustration. Congratulations, you can expert and share
your work in the Share tab. I like to export my
work as a JPEG or PNG. A PNG will retain a transparent background if that's something you
want to utilize. But otherwise a jpeg works
from boast application. You can share it directly to social media or save
it on the iPad. Alright, now you have finished your recipe illustration design. Thank you for taking this class.
10. Final Thoughts: Here's my baby Holly. She hopes you really
enjoyed this class and have a lovely recipe
illustration that you can share with your friends and
family and social media. And that you feel
more comfortable with the entire design process
from start to finish. That was my goal of this class. Make sure you share it in
the project gallery section of this class so we all
can enjoy your hard work. Include things like thumbnail
sketches, reference photos. Hey, even the entire time-lapse
from Procreate would be really nice so we can understand and appreciate your
thought process. That's my favorite
part of the design. I can't wait to see how you utilize the resources
I've provided, like the textures
and stamp brushes. I'm sure you've done things
I couldn't dream of. If you have any
questions at all, please leave them in the discussion section
of this class. I'll keep my eye out and
look forward to seeing your projects and answering
any questions you might have. If you want to let me know
how you like the class, please leave a review
and follow me here on Skillshare for
future classes. Any feedback from you as
appreciated and helps you make better classes
here in the future. Thank you again.
 Mary Rose, Illustrator & Designer