Transcripts
1. Intro: Resin is a medium like no other. It starts out liquid and then hardens into a beautiful
solid material, and it can be used to create a variety of unique
art projects. In this class, I
will be discussing resin on a smaller
crafting scale. This course was made with the
absolute beginner in mind, and I share all of my current
knowledge that I wish was available to me years ago when I started
working with resin. I will explain two
part resin and UV resin as well as
casting versus coating, and how each one works. I will also talk about
the necessary tools, molds, ways to add color, safety precautions to take, and a bunch of tips to help your finished pieces
come out flawless. This information
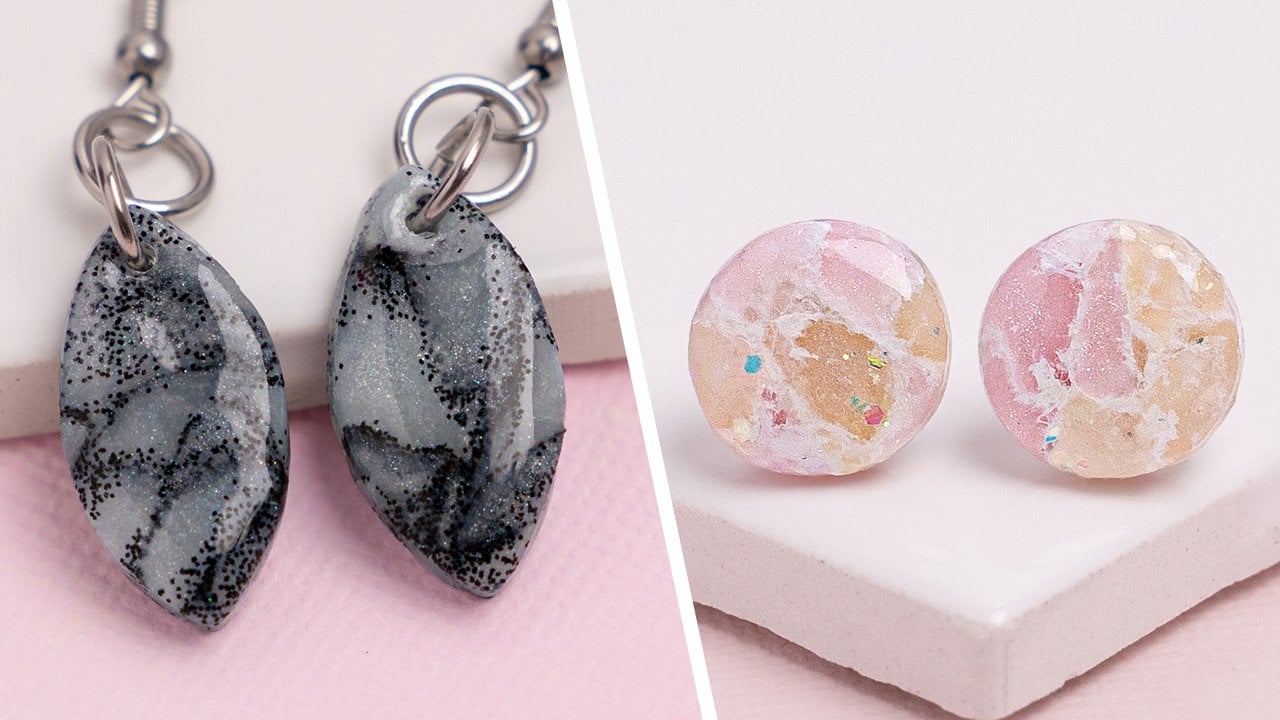
can be applied when making things like
jewelry, coasters, and various other art pieces. It can also be used for
learning how to coat and protect surfaces and
artwork such as paintings. At the end of the class, I'll walk you through
two different projects that you can try
out for practice. If you're interested in
buying resin materials. All of the products
that you'll hear me mention can be accessed through the "about" section of this course. Let's get into it!
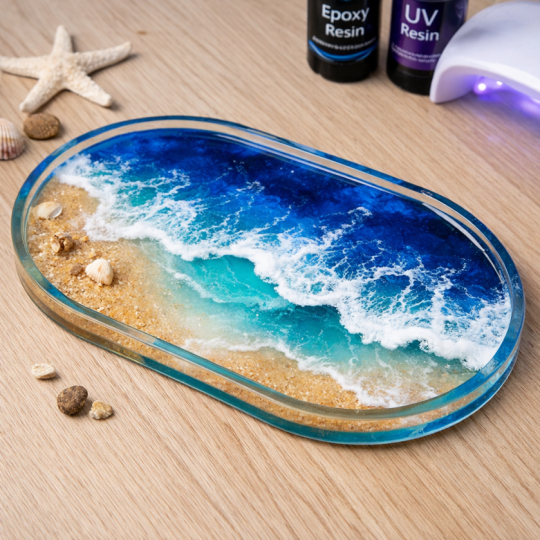
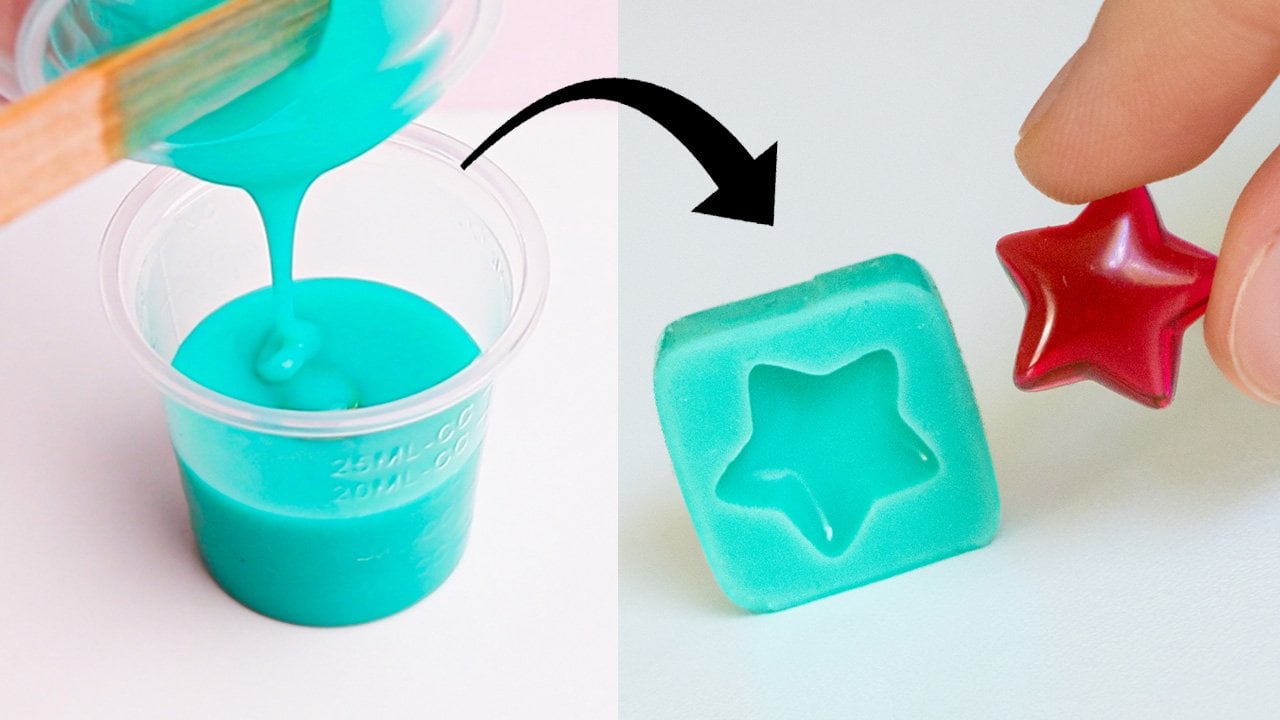
2. Epoxy/Two-Part Resin: The first type of
resin that I'll be talking about is two part resin, which is also known as two
part epoxy or epoxy resin. In this class, you'll hear
me interchangeably use the terms epoxy and
two part resin. Please know that I am referring
to the exact same thing, which is any kind
of resin that has two parts which need
to be mixed together. These two different
parts that make up epoxy are called
resin and hardener. When separately exposed to air, both of these parts
remain liquid. But when mixed together, the two begin a chemical reaction that changes their combined
liquid form into a solid. This process of
transforming from liquid to a solid is referred
to as curing. Working with epoxy
is fairly simple, but you must be meticulous and precise when handling
the wet resin. The first thing to look for is how your epoxy
should be measured. Some two part resins must
be measured by volume, while others must be
measured by weight. The reason for this distinction
is that some brands have a resin and hardener that
have the same density, whereas with other brands one could be heavier in
weight than the other. Weight can seem like the best way to get accurate measurements, but if your epoxy is meant
to be measured by volume, then measuring it by weight
will throw off the ratio. If two part resin is
measured incorrectly, it won't cure properly and it will usually remain
tacky and bendy. Every resin is different. It's important to follow the measuring instructions
on your bottles. It's also very important
to measure out the resin and hardener
based on the ratio. The brand has instructed
brands use a one to one ratio, but that isn't always the case. Be sure to read the instructions that come with your resin. For example, the resin
I use needs to be measured out by volume
at a one to one ratio. If I measure out 20
milliliters of resin, then I also need to measure out 20 milliliters of hardener. If your resin is
measured by volume, do not measure both
parts using one cup. Instead, use two cups, one for each part. This way you can make sure that the resin and hardener
are measured correctly. If your resin is
measured by weight, you can measure both in
one cup if you want to, but it will be much easier to avoid mistakes if you use two. Once your parts
are measured out, you can pour one
part into the other. Some brands will specify
which part to pour. Mix slowly and carefully for
at least 3 to 4 minutes while scraping the sides and bottom of your cup or container. As you're mixing, the epoxy
will look cloudy and swirly, but once it's fully mixed, it should look like
one clear liquid. A useful rule of thumb for
making sure that the two parts are fully mixed is to stir
until it looks ready to you. Then mix for another 2 to
3 minutes, just to be sure. Now that your resin and
hardener are mixed together, you can start working
with your resin. But the amount of time
you have is limited because epoxy has
a set work time. Work time is the amount
of time you can work with the resin while it is
still in liquid form. Once you've mixed the resin
and hardener together, the countdown basically starts. After that the resin
will thicken and gel up, then eventually cure
and become a solid. You should be able to
find work times on the bottle labels or on
the brand's website. Every brand is different, but you can generally expect a work time of 40 to 60 minutes. During this time, you
can color your resin, pour it into molds, coat surfaces, or do anything
else that you have in mind. After you've finished pouring
or casting the resin, you need to leave it to cure. Put it somewhere where it won't be touched or tipped over. Pick a room that no
one spends a lot of time in, especially
no bedrooms. Epoxy isn't something
you want to be breathing in for long
periods of time, and the curing
process usually takes 48-72 hours for the resin
to completely harden. But again, each
epoxy is different, so yours may take
more or less time. After that, you can
demold the resin. Or if you've poured your resin, like on a painting or a table, it should now be solid
and ready for use.
3. UV Resin: Unlike two part resin, UV resin comes in one bottle and it does not need to
be mixed with anything. It is ready to use
straight out of the bottle because it does not need to
be combined with hardener. Instead, it stays liquid until exposed to ultraviolet
rays like sunlight, which causes the resin
to cure and harden. Uv flashlights and lamps also
work for curing UV resin. And they are much
faster than sunlight, placing the resin
under a UV light. It can cure completely
in just a few minutes. But even with just sunlight, your resin pieces can be fully cured and ready to use
in less than an hour. Uv resin is much
easier to use than two part resin because it doesn't require as
much precision. It's less messy.
Ready to use and bubbles aren't as much of an issue as they are with epoxy. Uv resin is pretty
straightforward, but it does have its downsides. It can't be used in large
quantities like epoxy can. Hence why most artists only use it for jewelry
and keychains. Cured UV resin is usually more
brittle than cured epoxy. You don't want to use
it for thin pieces. That being said, it's
extremely convenient and a great option if you want to
use resin in small amounts.
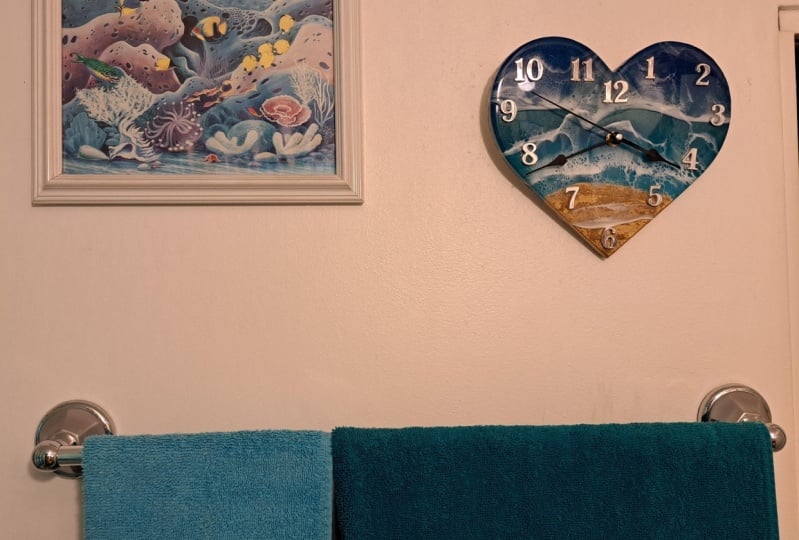
4. Casting vs. Coating: Coating and casting are the
most common uses of resin. What's the difference
between the two? Coating is when you pour a thin layer of resin
over a surface, doing so can make that
material stronger. Glossy and water resistant. Wood paintings and
other art pieces are a few things that are
commonly coated with resin. Casting is when you
pour resin into something like a mold,
then let it cure. What types of resin can be used for casting and what should be used for coating,
starting with epoxy. These kinds of resin
can technically be used for coating or casting, but you'll have to
make sure to buy a brand that is suitable
for your needs. Some epoxy brands work
for casting and coating, while others specify that
they are only meant for casting or only meant
for coding coating. Resins are usually thicker
compared to casting resins. A thicker epoxy makes it easy
to control the direction of the resin when coding so that it doesn't flow
over the edges. On the other hand, when casting, a thin consistency easily
gets in all the grooves of a mold so that the
finished piece has all the intended detail. If you are casting with a large, deep mold, you will typically
need to work in layers. Resin heats up as it cures, and if you cast large
amounts in one layer, the resin will heat
up too much and there can be issues during
the curing process. Brands will often specify how
thick these layers can be. My R and glow epoxy suggests
working in layers that don't exceed 6 ounces in volume with whatever resin
you're working with, you would pour out a layer, let it cure for a few hours, then pour the next
layer, and so on. Once the last layer has had
at least 24 hours to cure, you can de mold it and it
will be solid to the touch, but it will need the total 48, 72 hours to fully cure. Now, for the UV resin coating and casting is a bit different. Uv resin isn't intended to
be used in large amounts. You can cast and coat with it, but in much smaller
amounts than you would with epoxy when coating the object you
plan to cover should be small enough that it
is about jewelry sized. I would personally say it
shouldn't be any bigger than 3 " in ***gth just
to be on the safe side. But you may still be successful
in coating an object bigger than that when casting, molts should be small as well. Molts intended for
UV resin are usually less than 2 " in
***gth, like epoxy. When casting with UV resin, you will need to work in layers. These layers need
to be pretty thin, around three to 4
millimeters in height. Uv resin also heats
up when curing, and a thick layer will
cause overheating. This can make your resin shrink, warp, or become discolored. Uv resin isn't an alternative to epoxy as much as it
is its own thing. Epoxy and UV resin may provide
a similar finished result, but they serve different needs. When cured, epoxy is the
stronger out of the two. If durability in the long
run matters most to you, then you should use
two part resin. If you're looking to
create or large pieces, then again, epoxy is
probably the way to go. If you want to make smaller
pieces and you don't want to spend a lot of time mixing resin and waiting
for it to cure, then UV resin will
likely be for you. Likewise, if you need your
resin to cure super quick, UV is perfect for this, but if you don't mind the extra
effort and waiting times, you could use epoxy for
small pieces as well. Ultimately, the type of resin you choose will depend
on your project. But if you really can't
decide which one to pick, then I'd suggest epoxy
because it works for a wider variety of
crafts than UV resin.
5. Essential Tools: Resin Work is pretty
straightforward and only a few basic tools
are needed with UV resin. The only thing that's
required is some kind of UV light source
to cure the resin. But if you plan on working
with two part resin, the first thing you'll need are some measuring cups and
or mixing containers. If the resin you're using
must be measured by volume, then measuring cups
are vital for ensuring that you pour out the
correct amount, each part. If you're working with
large amounts of resin, you might also want to get
larger containers for mixing. Otherwise, you can use the same measuring
cups for mixing resin. There are two kinds of
measuring cups that you can get, silicone
and disposable. Each one has its advantages. Silicone cups are re,
usable, flexible, durable, heat safe clean up
can be as simple as letting extra resin cure then
popping it out of the cup. On the other hand, disposable
cups are obviously easier for clean up because
you can just toss them out. I personally prefer disposable because they're clear
and easy to see through. They accumulate less dust and they come in more sizes
than the silicone ones. Plus, even though they are
made to be thrown away, they can still be re, used. After I finish working, I leave any excess resin in
the plastic cup to cure, and 24 hours later I'm able to pull it
away from the plastic. Then the cup can be
washed with soap and water so that it's
clean for the next use. Granted, it isn't
as easy to peel cured resin out of these
cups than the silicone ones, but it's still worth
it for me, personally. If your resin needs to
be measured by weight, you do not need to use
measuring cups, though. They may still be
helpful for mixing. What you will need is some
scale to weigh the resin. I recommend getting a digital pocket scale
or kitchen scale for this because they
are sensitive and it's easy to measure
out correct amounts. The last necessary
tool for working with two part resin is
a mixing utensil. Just like with the cups, you have the option between
silicone and disposable. Silicone stirring tools are re, usable and easy to clean. However, most of these
tools are usually flexible, which can make them slightly
annoying to work with. The most common disposable
mixing tools used are popsicle sticks
and plastic spatulas. These disposable
options are stiff, which makes them easier to
stir with than the silicone. Popsicle sticks
work really well, but they may also introduce bubbles into your resin mixture. They also can't be re, used. I typically use plastic spatulas because I find them to
be the easiest to use. They don't create as many
bubbles as popsicle sticks, and they don't have to be
thrown away after one use. If you wipe the spatulas
off after you finish working and before the resin
has time to start setting, then you'll be able
to re, use them, which is better for the
environment and it saves money. That's about all you really need to start
working with resin. But here are a few extra tools
that really come in handy. The first is a heat
gun or a blow torch, if you're working
with epoxy heat, will help remove
bubbles and make the resin thinner for
a period of time. Both of these things
make it easier for your cured resin to come
out smooth and flawless. I'm going to explain everything about heat guns, blow torches, and heat in general, during the removing bubbles
lesson in this class. But for right now, all you
really have to know is that some heating tool will
be extremely helpful, especially if you're working
with two part resin. Next up we have
silicone paint brushes. You can use these to
apply and spread resin. They work similar to
regular paint brushes, but you don't have to worry
about the resin ruining them like it would with
a normal bristle brush. You can also use these to
spread a little bit of resin into the crevices of a
mold before filling it up. Sometimes pockets of air fill ****** in a mold
before the resin can. Especially if the mold has small details like the arms and legs on these gummy bears. You usually won't notice
that the mold wasn't fully filled until
you mold the resin. But if you paint a layer
of resin all along the inside of the mold before pouring in the
rest of your resin, your pieces are more likely
to cure with no holes. The last thing I would
recommend are bezels. Bezels are shaped frames that
can be filled with resin. These don't only make fun
key chains and jewelry, but they're also a great way to practice if you're new to resin. Bezels will work with
epoxy and UV resin, but they are more
commonly used with UV resin because the fast
curing helps avoid spillage. I purchased these ones
from Miniature Sweet, but you can also get them
from Sophie and Toffee, Etsy, and Amazon, just
to name a few places. All of these tools and
materials that I mentioned are things that I actually use
every time I work with resin. That being said, most of
them are not necessary. So feel free to try out different things to find
what's most useful for you. And please keep in mind that all tools, molds, containers, and any other object you use for resin should never be
used for food again. Once it is used with resin, that should be the only
thing you use it for M.
6. Coloring Resin: If you want to spruce up your
resin and add some color. There are a few ways to do that. The first method is to use
some kind of powder dye. In my opinion, these
kinds of dyes are the most reliable option
for coloring resin. Because they are
strong and pigmented. The colors won't fade
or change over time. And they can be used with both two part resin
and UV resin. Some powder yes you can
use are mica powders, pigment powders, shaved down, chalk pastels, and
even eyeshadow. A powders and pigment powders are pretty much
exactly the same. The only difference is that
mica powders are shimmery, while pigment powders
can be matt in color. Eye shadow should work similar. Just be sure to crush it into a fine powder before mixing
it in with your resin. Also, I wouldn't waste expensive
make up on this either use an old palette you have or purchase drugstore
eye shadow. Chalk pastels can be
shaved down into a powder, though they won't mix into the resin as seamlessly
as the other powder. Yes, there might be a little flecks of chalk
that just won't b***d in. The second best
method for coloring resin is to use liquid pigments. These are quicker and less
messy to use than powder. Yes. However, not
all liquid dyes can be used with UV resin. Colors could fade once the
resin is exposed to sunlight. When buying dyes,
make sure that it is compatible with the type of
resin you plan on using. Another popular color,
it is alcohol ink. You can mix some
into your resin, but the color will
be very transparent. The more common way of using these is to add a few drops of ink to your wet resin after
it has been placed in a mold. You can blow or swirl the
ink around if you'd like, but if you leave it,
it will naturally produce really
beautiful designs. The main downside
to alcohol inks is that the colors
may fade over time. Acrylic paint can also be mixed in with resin
to add color. However, I would only use
this as a last resort option. And limit the amount of paint you add to just a few drops. A little bit of paint
will work well, but adding too much can cause
the resin to thicken up, while wet thin pieces will be slightly bending even
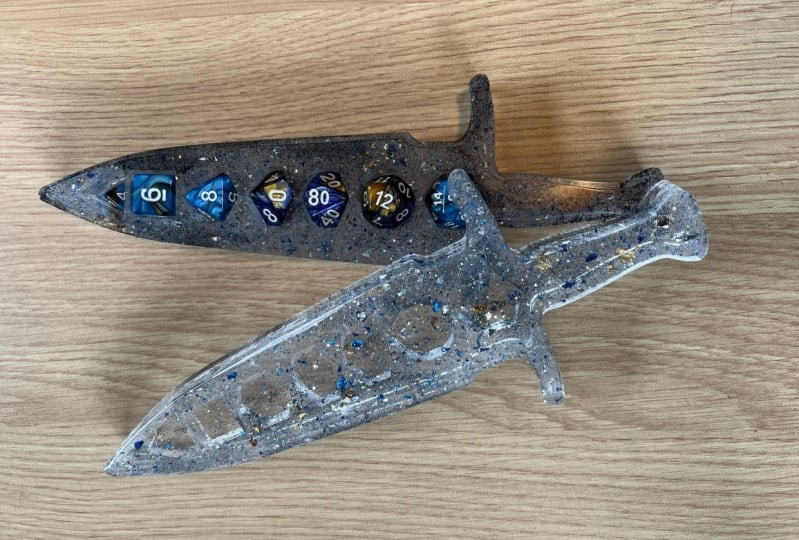
after they have fully cured. Lastly, you can add glitter
and other additives. Loads of things can be
added and encased in resin. You just want to avoid
things like fresh food and plants because they will eventually rot inside
your cured artwork.
7. Molds: Resin sticks to just
about anything. So many mold materials
can't be used. If you're looking to cast resin, the most compatible
option is silicone. Silicone molds are
extremely flexible, so it's easy to pop
the cured resin out because resin doesn't
stick to silicone. These molds are
very easy to clean. Silicone molds are
widely available. I usually purchase
my molds on line from Amazon and
but they are also available in craft
stores and even in the baking sections of stores
like Target and Walmart. I also make many of the molds I use because I have more
control over the design. Silicon mold maker is available both online
and in craft stores, and it's pretty simple to
create your own molds for resin crafting if you'd like to learn more about how to make
your own silicone molds, I have a class here on scale, share all about
easy homemade molds for resin and polymer clay. One more important
thing to know is that any color of
silicone will work. Molding two part resin, but when it comes to UV resin, only clear molds can be used. The transparency allows for ultra violet rays to pass
through and cure the resin. If you use an opaque mold, only the resin on the
surface will cure and everything touching
the inside of the mold will remain tacky. Here's a quick tip to figure out exactly how much resin
you need to fill a mold. First, get the mold you plan on using and fill it with water. Next, transfer the water from the mold to
a measuring cup. I'm using some plastic
pipes for this. Any of the water or alternatively, you can measure out the
water first and just subtract the amount of water you don't use to fill the mold. Lastly, it helps to write
down the amounts needed for all your molds so that you don't have to repeat this
process later.
8. Removing Bubbles + Avoiding Holes: Bubbles are a much
bigger problem with two part resin than
they are with UV resin. And that's because
the mixing process introduces a lot of air. The first thing you can do
to keep air pockets out of your resin is to
avoid creating them. Heat helps bring bubbles to
the surface where they can then pop before even
pouring out your resin. And hardener, place
the bottles in a warm water bath for
around 10 minutes. This helps eliminate
micro bubbles. It thins out the consistency
of the wet resin mixture. The thicker and more
viscous your mixture is, the more bubbles you can expect. After taking the bottles
out of the bath, dry them off so no water
enters your resin mix. Instead of making
a warm water bath, you could pour out each part, then use a heat gun
to warm them up for a few seconds before mixing
the two parts together. Heat guns blow out, we heat. I always go with this
method instead of the water bath because
it takes less time. Once each part has been
warmed up and measured out, you can carefully pour
your hardener into the resin slowly and in one direction to
prevent adding extra air. After mixing the
resin and hardener, it helps to let the
mixture sit for five to 10 minutes as many bubbles will
rise on their own. After that, I use
a heat gun to pop any bubbles that may
still be on the surface. At this point, you can
start using your resin. You may still have
a few air bubbles, but there are a
few ways to remove them once the resin
has been poured. The most common is to use heat. The three most popular
sources are heat guns, blow torches, and lighters. I've briefly talked
about heat guns, but they blow out hot air and they're basically
really hot hair dryers. They are powered by electricity. All you have to do is plug
them in and they work. They're a really great
choice for beginners and those who want an
easy to use option. However, the biggest problem
with heat guns is that the air blown out can move the wet resin around
a little bit. This isn't an issue
for most people, but those who do
intricate resin pores may not love that aspect. Next we have butane and
propane blow torches. Torches provide more
heat than heat guns, and it's often easier to achieve a bubble less
appearance using them. Plus they don't
blow out any air, so you don't have to worry about your resin moving around. With that said,
unlike heat guns, it's better to not use torches. With silicone molds, the high heat can
melt and damage them. It can also cause the resin
to stick to the mold. Instead, torches are
usually used when coating something like a painted
surface or a tabletop. Also, obviously, this
method uses gas, so you have to be cautious when filling and using these torches. Other than that, this is a really popular option
among resin artists. Lastly, we have lighters. These are most
commonly used when making very small
pieces like jewelry. If you do choose
to use a lighter, make sure to get one with a
long neck so that your hand doesn't have to
come too close to the wet resin or to the flame. They may be advertised
as candlelighters, utility lighters,
or grill lighters. When using any of
these three options, keep your heat source
moving around in circular motions and
never hold it in one place for more
than a few seconds so that you don't over
torch or burn the resin. You want to get close enough to the resin so that you
can pop the bubbles, but you never want to
actually touch the resin. If you're using a
lighter or a blow torch, be extra careful that the flame doesn't make contact
with the resin. It's also important to mention that heat speeds up
the curing process. Using heat at any point
to remove bubbles will cause the resin to
cure faster than normal. This means that you will
have less time to work with the wet resin than you would
without the use of heat. There's no way to
know the exact amount of time that heat shaves off, but I personally
subtract 20 minutes from the normal work time listed
for the brand I use. Some brands will have this
time written on the bottles, while others will have it
written on their website. Normally with no heat, I would get 45
minutes to work with the wet resin before
it starts to set. When using heat, I try to
work a little bit faster, and within 25 minutes, Two more methods for
removing bubbles are pressure pots
and vacuum chambers. I've never used
either one of these. I can't personally
speak on them, but many professional
resin crafters swear by these two tools. In the about
section, I've linked a great video that
describes how they work. Lastly, you can
gently blow through a drinking straw to
pop surface bubbles. This doesn't work as well as
the other methods mentioned, but it is better
than doing nothing. If a straw is all that's
available to you, this isn't a bad option.
9. Eliminating Dust: Dust is a serious problem
when creating resin art, it easily sticks to
the wet resin and it gets noticeably caught
in cured pieces. The first thing you
can do to avoid dust is to wipe down your
work surface and all your utensils
and tools before you start working After that, it's also helpful to use a
water filled spray bottle or Miss bottle to lightly mist the air and
your work surface. The water droplets, grab any dust particles floating in the air and pull them
down to the floor. If you have already mixed
your resin at this point, make sure it's covered before
you start so that you don't accidentally get any dust
or water in your mixture. After you've sprayed the air, some small water
droplets will be sprinkled across
your work surface. This helps dust
stick to the surface instead of being released
back into the air. So you do not want
to wipe the water away until you finish working. Dust and lint stick to
silicone molds like crazy. And the best solution I've
tried for this is tape. I use a few pieces of transparent or packaging tape to pick dust off
the entire mold, even the outside,
because that dust could end up getting
in the resin as well. The tape doesn't stick
to the silicone, so you don't have to worry
about damaging your molds. This trick works
on all silicone. You can use this method
to clean dust off your silicone measuring and mixing cups as well as your utensils. Another great tip is to cover your pieces while they cure. You could use a cup,
a cardboard box, or anything else that will be lifted enough so that it
doesn't touch the resin. It also helps to use
something clear for this so that you can keep
an eye on your piece, but it isn't necessary
just for comparison. These are two pieces of
baked polymer clay that I coated with epoxy
resin while curing. I covered one of them and I
left the other one uncovered. As you can see, the
one that was covered has a clear and smooth finish, yet the one that I
left exposed has little pieces of dust
embedded in the resin. An additional thing I like to do is turn on an air purifier. Air purifiers filter the air in the room and suck
in floating dust. I like to turn mine on half an hour before
I start working, so that it has some time
to clear the room of dust. And then I also keep it on
just in case while I work. But I put it on
the other side of the room so that the dust being drawn in by the purifier doesn't get too
close to my resin.
10. Cleaning Up Resin: It's very important to clean up spilled liquid resin and
remnants of cured resin. If you've spilled wet resin
on a silicone surface, your best bet is to leave
it there until it cures. Or if it's UV resin, use a light to cure it, then you can peel it
off and discard it. If you've spilled resin on
any other hard surface, it must be cleaned
up immediately. Do not use water to try
and clean up the resin, it only makes it stickier. Instead, use rubbing
alcohol or acetone with some kind of disposable rag
or cloth like a paper towel. Ideally, you want
to get either 91, 99% rubbing alcohol, the
stronger the better. But 91% is more easily found in stores and
it works just fine.
11. Cons of Working With Resin: Resin, whether it be two
part or UV is one of a kind, no other craft material can perfectly achieve
the same results. That being said, there
are many caveats to keep in mind before ever even
working with resin. The first is yellowing. A lot of brands say that
their resin is crystal clear, but they are only
referring to how it looks right after it finishes curing over time due to exposure
to sunlight and UV rays. Both two part resin and UV resin can start to
develop a yellow color. The more time your cured
resin is exposed to sunlight, especially direct sunlight,
the more it will yellow. Some brands react to UV
light more than others, and it doesn't take long before a resin piece starts to lose
its crystal clear finish. Likewise, not all brands
yellow to the same degree. Some may only yellow a bit. But regardless of time and how
dark the yellowing may be, it is still something
to expect with most, if not all, brands
to avoid this. Some people like to mix UV light stabilizer pigments
in with their resin. This isn't a solution as it
doesn't prevent yellowing. Instead, it just
extends the amount of time it would take for
your resin to yellow. But it may be something to
explore as it can help. Uv light has the greatest
impact on yellowing, but high temperatures
and excessive amounts of water can cause your resin
to develop a yellow tint. I recommend avoiding
these things as much as possible if you're curious about how certain brands look
after they've yellowed. In the About section,
you can find links to a few websites and videos that compare yellowing among
different brands. The second con mainly applies to two part resins and it won't necessarily be a
problem for everyone, but resin has a
limited work time. This means that you will
have to work fairly quickly if you mix up a
bigger batch than you need. You might as well make use of that resin for
something because it will start to set and you can't just save it
for another project. As previously mentioned, heat speeds up the
curing process. The more heat you use, the less time you'll have
to work with the resin. On the other hand, UV resin doesn't have a set
limited work time. Instead, it will gel
faster depending on how much UV light is around
while you are working. If you're working in a room
with a lot of sunlight, you can expect your resin to begin curing within
a few minutes. But if you work at night or in a room with little
exposure to sunlight, you will have a much longer
amount of time to work. Another issue with
resin is the price. Both UV and two part resins are costly and UV resin is
the pricier of the two. Considering that resin is a learning curve when you
first start working with it, you may mess up quite a bit. A lot of your first
pieces may not be great and you can end
up wasting resin. It isn't a cheap hobby, especially not at the beginning.
12. Necessary Safety Precautions: The last and in my opinion, most important con
to working with resin is the health aspect. Resin fumes can cause
respiratory illnesses, irritation to eyes and skin, as well as other health issues. Some resin brands, like the
one I mentioned earlier, don't contain any VOCs or
volatile organic compounds. They are therefore
safer than others. According to these brands, you don't need much more than gloves and ventilation
when using their product. I can't speak on whether or
not that is perfectly true, but I do not recommend
taking that chance. Resin is not a material that just anyone can or should use. For example, if
you are pregnant, you should completely
stay away from resin. If you have asthma,
you may be more susceptible to resin induced
respiratory problems. For anyone working with resin, it is very important to wear the correct protective gear no matter what kind of
resin you're using. What protection do you need? First and foremost, get a respirator with the
appropriate cartridges. A respirator is worn over your face and it covers
your nose and mouth. It is you from inhaling
any gases or vapors. Respirators come in
different sizes, whatever size you
end up getting. Just make sure that it
actually fits your face. Medium sized respirators are typically recommended for women, but I'm I'm five foot and it didn't feel
right on me at all. It pressed hard on my nose and was ever so slightly
loose around my jaw, I ended up getting a size small, and that fits me perfectly. If your respirator
doesn't feel right, you may want to
try another size. As an ill fitting respirator
will not protect you well. It should feel comfortable
on your face a bit snug, it shouldn't hurt or
be uncomfortable. I use a three M 6,202 face
piece re usable respirator, but most respirators
work just fine. What's more important is that you buy the correct cartridges. I use the three M
P 100 cartridges, but whatever brand you
decide to go with, make sure that the
cartridges are rated for organic vapors. Your cartridges should always be attached to the
respirator during use. You should not be able to smell anything once you
are wearing it. A good way to test
this is to put on your respirator and then spray
some perfume into the air. You should smell nothing. Never start resin. Work with a respirator that you
can smell out of. If you don't have perfume, you can try smelling anything that you know has
a strong scent, such as food or coffee. Respirators come
with instructions on how to test the fit
and do seal checks, but you can also find specific
videos about this on line. In the about section, you
can find the video that I used to test the
fit of my respirator. If you've never used
a respirator before, it might take some
getting used to. You may have to breathe a bit slower and more deliberately
than you normally would, so that you don't get dizzy. It becomes second
nature pretty quick. Also, your cartridges will expire a few months
after opening, so keep an eye out
for that date. Expired cartridges won't
work or protect you anymore. If you can smell while wearing a respirator fitted
with old cartridges, they have definitely expired
and you should not use them. The P 100 cartridges
by three M that I use expire six
months after opening, even if they haven't been used. I know that was a lot of information to take
in all at once, but that is as complicated as protection
instructions get. Other than that, here's a few more things
that you will need. Disposable gloves
so that you don't get any wet resin on your skin. You'll also need some eye
protection or safety goggles. You could also just purchase a full face respirator which covers and protects your
whole face at once. You will need to work in
a well ventilated area, open as many windows as you can. Please keep in mind that the
air purifier I mentioned earlier is not a sufficient
source of ventilation. But you could turn it
on or just use a fan to help circulate air along
with your open windows. The biggest mistake you can
make with resin is to treat it like any other art material
sold in craft stores. When I first started
working with resin, I was a teenager
and I didn't take any safety precautions other than occasionally
opening one window. I didn't realize it was
required because most of the resin artists I watched online wore no protection,
not even gloves. I would literally
see people get it on their skin and pay no mind. After a couple weeks of using
both UV resin and epoxy, I began to get intense migraines that would last for days, even on the days that I
didn't work with resin. Also get dizzy, especially
while curing UV resin. Some people get allergic
reactions from inhaling the vapors and
others can develop a sensitivity even
to cured resin. That didn't happen to me, but what I experienced
was enough that I stopped working with
resin for a long time. Eventually, when I decided
to get back into it, I did a lot of research on
what I should be using. I switched from pro
marine epoxy resin to art and glow because
the smell isn't as strong. I also bought the necessary
protection and I work in a very well ventilated
room with the door closed to restrict
possible fumes from getting to other
parts of the house. I don't want this to discourage
anyone from working with resin because it
can be used safely. If you do want to try it out, just make sure to be cautious
so that you don't put yourself or anyone around
you in harm's way. I know that to some, all of these precautions
may seem excessive, especially if the brand you use claims to be
completely safe. At the end of the day, it's your decision what
precautions you take. I'd highly recommend
doing your own research on resin and whatever
brand you pick, just so you fully know
what you're getting into.
13. Can Any Age Work With Resin?: After hearing all the
safety precautions, you may be wondering if
you could be too young or too old to work with
resin for the most part. When it comes to what
ages can use resin, I don't think that years
matter as much as maturity, caution, and your
own personal health. That being said, I personally don't think it's a good idea for anyone under high school age
to be handling resin alone. And honestly, kids probably shouldn't be working
with resin at all. If I had to put an age on it, I'd recommend being at
least 16 years old. But again, caution and maturity are what matter most as long as you read and follow
the instructions and safety warnings,
everything should y.
14. Epoxy Project: We're going to work on
two class projects, one that uses epoxy and
one that uses UV resin. I'm going to start with
the epoxy project and I'll be showing you how
to make a simple coaster. In the project and
resources tab, you'll be able to
find a PDF that has the exact links of all
the products I'm using. For both projects,
including the mold and bezel still follow along
using any supplies you have. For this project, you
will need two part resin, a coaster mold, measuring
and mixing cups, and a mixing tool. Some optional materials are
pigments or des glitter, a heat gun packaging tape, and a box or some other
container for covering. The first thing you'll
want to do is measure out how much resin you need
to fill your mold. To do this, I use the
water technique that I mentioned earlier during the
molds lesson of this chorus. I measured that each one of these hexagon molds needs about
3 ounces of resin to make one coaster that I
dried the mold off and prepped it for casting by removing all dust using
some packaging tape. Once your mold is completely
clear of all dust and lint, you can set it to the side while we mix our two part resin. Before we start, make
sure you are wearing protective gear and working
in a well ventilated room. Since my resin needs
to be measured out at a one to one ratio, I mark the one a two ounce point on two measuring cups
using a Sharpie. Then I carefully
poured resin into one cup and hardener
into the other. You can use a heat gun to
warm up each part a bit. Just be careful not
to get so that you don't burn the resin or
melt your measuring cups. If you're using plastic, then pour one part into the
other and stir slowly in one direction until your
mixed resin looks clear. This will take a
few minutes to do. If the mixture looks
cloudy or swirly, keep stirring for
a few more minutes until the two parts are
fully combined into one. This process took me
around 7 minutes total. Afterwards, I used my heat
gun to warm up the mixture. Then I let it sit
without touching it for two to 3 minutes so that any bubbles can rise
to the surface. Again. I use gun to pop the bubbles that have
risen to the surface. Now you can keep your resin
clear or you can add color. I poured some of my resin into another cup because I want
to use two different colors. If you want to use one
color for your coaster, there is no need
for a second cup. I decided to keep most of the resin clear,
but for the other, I added some white
dye and a bit of pink pigment powder to give the resin a pastel pink color. If you'd like, you can also mix some glitter
into your resin. I some iridescent flakes to
both my clear and pink resin. Now take a quick look at your mold to make sure
it is still dust free. If it isn't, just use some
more tape to fix that. If you're using a silicone
mold and a heat gun, you can warm it up
for a few seconds. Warming up the mold
is an extra step, but it helps the resin spread
easily through the mold. It helps eliminate bubbles. At this point, you can start pouring your resin
into the mold. If you're using more
than one color, like me, you can alternate between
them when filling the mold. Regardless of if you're
using one color or multiple, it helps to fill up the mold in increments and use a
heat gun in between. Once your mold has been filled, you can cover it and
leave it to cure. As an extra step, you can check back on it after
half an hour or so and pop any more bubbles or
remove any pieces of dust that may have gotten
caught in your resin. Then cover it up again and leave it for
the remaining time. Once it has cured, you can carefully take it out of the mold and it is
now ready to use.
15. UV Resin Project: This next project uses UV resin, and we're going to be creating a beach scene pendant
using a bezel. You'll need UV resin, a UV light source, something to mix in, and something to
mix with resin tape or some other kind
of no sticky tape. An open bezel, and blue and
white dyes or pigments. Some optional materials are
craft sand and a heat source, like a heat gun or lighter. Start by cutting a piece
of resin tape that's a bit bigger than the
bezel you plan on using. If you don't have
any resin tape, you can use painter's tape, magic tape, or washi
tape like I am using. Lay the tape sticky side up and press the bottom
of your bezel onto it. You want to make sure that the entire piece is
completely stuck to the tape because any gaps can cause
your resin to leak. Place this to the side
and we're going to start preparing the
sandy part of our scene. You can ignore the step If
you don't have any sand, combine some craft
sand with UV resin. Take parts of this mixture and add it to the lower
area of the bezel. This part will represent
sand on a shore, so feel free to shape
it however you'd like. Just try not to add
so much that it goes beyond the thickness
of the bezel frame. Then use a UV light to set the sandy resin enough
that it won't move. If you're using a UV
flash light or lamp, one to 2 minutes should
be more than enough time. If you're using sunlight, it will depend on how much
of it is hitting your resin, but I would give it
at least 7 minutes or just keep checking on
it by lightly touching it with a silicone
tool or a toothpick until it becomes solid
enough that it won't budge. Now for the water, I'm mixing UV resin and some
blue powder dye. Fill the remaining area of the bezel with a
thin layer of this. If you didn't add any sand, you'll want to fill the whole
bezel with your blue resin. Again, use some of UV light
source to set the resin. The last color you'll
need is a milky white. Add a small amount of white dye to your resin so that
it isn't too opaque. Layer this on top of the blue. And before setting it, we're going to drip some
clear resin onto the white. This will help
create a foamy water look that you see at a shore. You can add small amounts of the resin at a time
using a toothpick, or you could add larger blobs
straight from your bottle. You can leave these larger
pools of resin or you can spread them around with a
toothpick or a heat gun. If you notice any
bubbles at the surface, you can pop them using a
lighter or a heat gun. Once you're happy with
the way it looks, you can cure the entire thing because I'm using a flash light. I used some containers
to prop it up so that I don't have to hold
onto it the whole time. A few minutes later, my
whole piece was fully cured. You can now gently peel
it away from the tape. Your piece may have
some sticky residue on the back from being
stuck to the tape. And if it does, you can use some rubbing alcohol
to remove it. It may take a few days for the UV resin smell to wear off, but your piece is ready
for use right now, and it can be attached
to keychains, necklaces, or whatever
else you have in mind.
16. Final Thoughts: I really hope you learned some valuable
information that you can apply when working
on future projects. If you are completely
new to resin, take your time learning and
be patient with yourself. Resin takes time to master, so don't be disappointed. If your art isn't perfect at the beginning, practice
makes progress. If you give one of the
class projects a shot, you can share it with everyone
by submitting a project, I'd love to see your creations. Again, all the materials, tools, and sources that I mentioned are linked in the About
section of this course. And if you have any questions
that were left unanswered, feel free to ask away in the discussions tab and I'll
do my best to answer them. If you'd like, you can check
out my Youtube channel and my other social media
accounts where I post videos all about my art. Thanks for making
it all the way to the end and I hope you enjoyed.
 I The Crafter, Sculptor & Content Creator