Transcripts
1. Intro: If you craft with resin
and polymer clay, you can easily make your
own molds right at home. Doing so can be cheaper
than buying molds. And you have creative
control over the design, which is perfect for when you have a unique idea for a mold In this course,
I'll be discussing two types of silicone
molds that you can make. And I'm going to describe how to make these moles shiny or matte. I'm also going to go over two easy non silicone
options that you can make with materials you
may already have at home. By the end of this course, you'll be able to
confidently create your own molds per
resin and clay. And you'll have the
skills to bring your custom mold ideas to life. If you want to buy any of
the supplies I'm using, just head over to
the 'about' section of this course where you'll find a link to all of the
products I use for mold making. And without further ado, Let's begin!
2. Liquid Silicone: The first and most popular
mold making option for resin is liquid silicone. These molds also work
great with polymer clay, and as long as you
use clear silicone, you can also use these
molds with UV resin. You'll need to purchase a liquid silicone mold maker for this, and you can find them
online or in craft stores. I got mine from Amazon. Here's how you can make
these molds at home. The first step is to pick out the thing that you want
to make a mold out of. The only types of materials
that stick to silicone are silicone, latex,
and some rubbers. so you'll want to avoid objects
made out of those materials, but pretty much everything
else works fine. And you can always do a small test before
making a full mode just to make sure that
the materials you're using are compatible
with silicone. Next, you need to decide what
to pour your silicone in. You can use a cookie cutter,
cardboard, disposable cups. Or if you're making large molds, you can even buy
mold housing kits, which are essentially
big plastic frames. Now position your piece
for molding. If you're using a leak-proof object
to make the mold in, such as a cup, all you have to do is
secure your piece to it using some hot glue or tape. If you're using an open
object like a cookie cutter, you'll want to
position your piece on a solid flat surface, like a ceramic tile or a
sheet of tempered glass. But you could also cover
whatever surface you're working on with a bit of wax
paper or parchment paper, then hot glue or tape your
piece to this surface. Double stick can work, but I just use regular
tape and place it sticky side up so that I
can press my piece onto it. Then you can place your
cutter around the object and you'll need to use some hot glue to secure it to the surface. Do your best to make sure
it is completely glued as any little gaps will cause the silicone to
spell out later on. Next, it's time to use
your silicone mold maker. And I like to wear disposable gloves for this
because it can get messy. To mix up your silicone, follow the instructions
on the label. Most brands use a
one-to-one ratio, but yours could be different. You'll also want to note
if it's meant to be measured by weight or volume. The brand I'm currently using is meant to be measured by volume. So I pour out equal amounts
using a measuring cup. You can use two separate
cups for this, but I usually use one and it has never thrown
off my ratio. After that, use a popsicle stick or some other kind of
mixing tool to stir the two parts together for a few minutes until they
are completely combined. Then simply fill the cup or cookie cutter with
your mixed silicone. You don't need to fill
it up super high. I had just mixed up
too much silicone and I decided to use it anyway. But you only need to
add enough that you can't see your piece
at all anymore. If you're using clear silicone, you'll still see it though. So aim for about an
eighth of an inch to a quarter of an inch higher
than where your piece stops. But if you do want to make
the mold really strong, you can add more silicone
to make it thicker. The silicone mold maker I use self de-gases. So at this point I just
leave my molds to cure and all the bubbles rise to
the top and pop on their own. But if you want to
get rid of bubbles in your silicone, after pouring, you can heat up the
mixture with a heat gun, just like you would with resin, then leave it to cure. Most silicone molds will be solid and ready to
use within 24 hours. But again, just follow the instructions on the
brand you're using. Once your molds are ready, you can take them out of
the object, encasing them. If you've used cardboard,
you can rip it off. And if you used plastic like these disposable
measuring cups, all you have to do
is carefully pull it the sides until they
peel away from the cup. Then push the bottom of the cup upwards and lightly
tug at the silicone. You should be able to pop out the mold without
damaging the cup. My favorite mold making
method is to use a cup because I don't need to worry
about possible spilling. It's faster to use and
easier to clean up. Plus I can reuse the plastic cup over and over when
making other molds. If you used an open shape
like these cookie cutters, you can pull it away from the surface and push
the silicone mold out. Then the hot glue can be pulled off the cutters and
your work surface. And if there's any excess
silicone around your piece, you can use a craft
knife to remove it. If you decide to mold a complete 3D object like I did with this
miniature glass, then you'll need to cut
slits in your mold. Doing this will
make it possible to easily get the casted resin out. To make these slits gently
push the mould apart. And then with a craft knife, carefully slice down the sides, but don't go all the way down. Only make the slits
as deep as you need to be able to
wiggle the piece out. Then make a similar
cut on the other side. To use the mold for casting, all you have to do is place a rubber band on
the outside to hold the two sides together before you fill the
mold with resin. These molds are
fairly easy to make. The capture detail
and shapes well, and they are super flexible. However, on the other hand, liquid silicone can
get really messy and it takes hours and
sometimes overnight to cure
3. Silicone Putty: This next molding option
uses silicone putty. As the name suggests, this mold maker has the
consistency of soft putty, but once it dries, the molds are bouncy and flexible
like normal silicone. I personally prefer
this silicone over the liquid because
it's easier to use. It's less messy and
it cures much faster. The brand I use is EasyMold and I like
this kind in particular, because these molds can
withstand the heat of an oven and polymer clay can be baked
directly inside of them. You can also use these molds
to cast two-part resin, but they won't work for UV resin because of their opaque color. So to make these molds start by picking an appropriate
work surface, this putty won't really
stick to any surfaces, but it is a bit
greasy and it can leave spots on
materials like wood. So you'll want to work
on a surface that you can easily wipe off and clean. Again, I like to work
on a ceramic tile, but you can always learn
your table or desk with a piece of wax paper
or parchment paper. Next, you'll want to
pick out an object to mold because this mold maker
is also made of silicone, the same rules as
liquid apply and your original object
can be made out of any material other
than silicone, latex and in some cases rubber, as those materials can
stick to the molds. I almost always mold pieces
that I've sculpted out of polymer clay. Now measure out equal amounts
of part a and B. It's okay if they aren't
exactly the same size, just get them as
close as you can. These two parts
combined should be enough putty to
encase your piece. And a safe estimate can
be to make each part roughly one-and-a-half times the size of the object you want
to make a mold out of. Now, mix the two parts together
and meet them until they are combined and you don't
see any swirls of color left. No pressure. But at this point
you'll want to work a little fast
because once mixed, the putty will start
the curing process. Work time will depend on temperature and how much
putty you're using, but the molds set quick. So in general, you'll
have about 3 minutes to shape your mold
before it starts to set. If you're working with
a small amount of putty, or if the temperature
in the room is warm, you'll have to work even faster as the putty could start
setting in less time. Once the parts are combined, you can press your object
face down into the putty. You don't need to apply
a lot of pressure when doing this as the mold
material is very soft, just make sure that your piece
is completely surrounded and you can use your fingers to adjust the putty as needed. Once it looks good, you
can leave it to dry. Your mold should cure
and about 25 minutes. Although if you make an
extremely large mold, it may take longer. A cured mold will feel
kind of hard and rubbery, sort of like a bouncy ball. And at this point
you can pop out the original piece and start using your mold
with polymer clay. But if you want to
use it for resin, you'll either need
to let it cure for at least 24 hours or you can heat cure it by baking in an oven at 350 degrees Fahrenheit
for 30 min. The best thing about mold putty is that it cures super-fast, and molds can be used within the same hour
of making them. Another great thing is that
this specific brand can withstand temperatures up
to 400 degrees Fahrenheit. So polymer clay can be
baked inside of them and then removed once
cured and cooled. However, since the
putty cures rapidly, it's important to work
quickly and efficiently. Also because of the consistency, it may be harder to capture shapes as perfectly
as liquid silicone
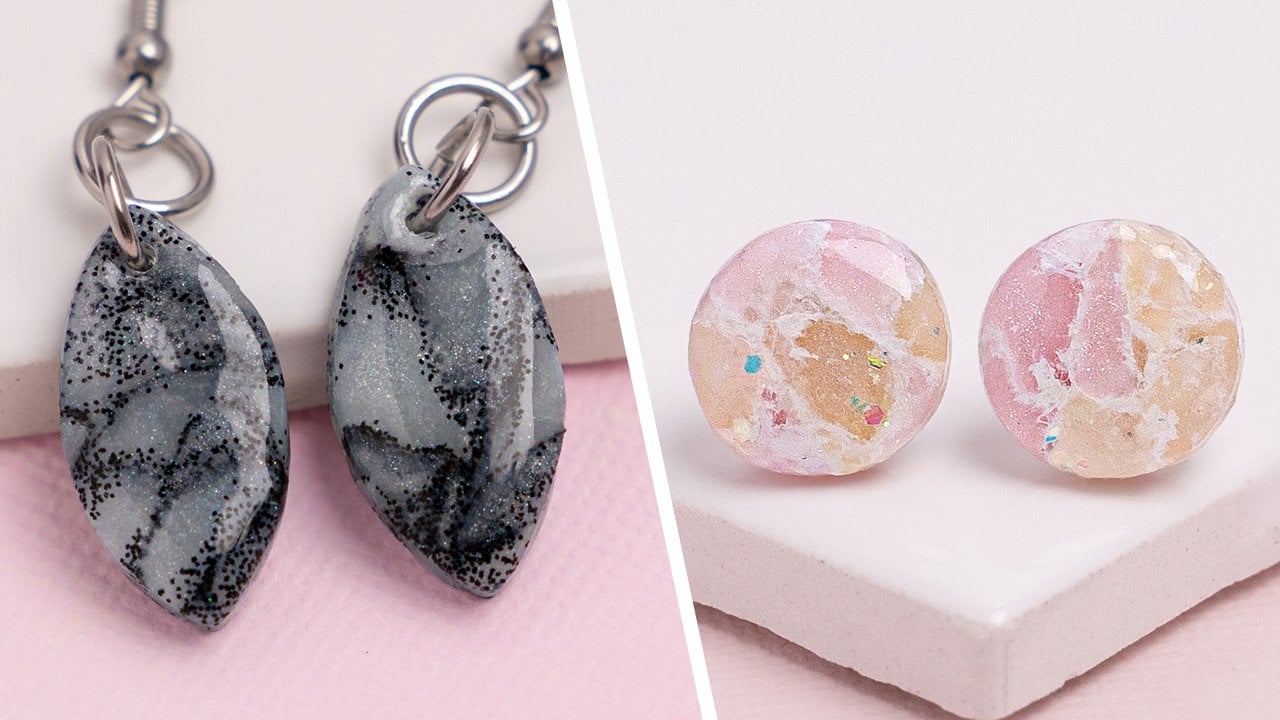
4. How to make molds shiny or matte: If you're making silicone
molds to use with resin, you can control whether or not your casted pieces
come out shiny. Silicone typically produces
a surface that mimics the finish of the original
object being molded. So if you use a matte object
when making a mold, all resin that gets cast in that mold will come
out looking matte. Likewise, if you
use a shiny object, all casted resin
will look shiny. It's fairly easy to alter an object to make
it matte or shiny. If you want to make
a shiny object matte just sand down the
surface layer. I like to use 400 grit
sandpaper for this. If you want to make
a dull object shiny, all you have to do is
coat it with a thin layer of something really glossy resin
works perfectly for this. I have two stars I made
out of polymer clay here. Polymer clay is naturally
matte once baked. So to demonstrate the
difference in molds, I'm going to leave
one the way it is and I'm covering the
other with some resin. I'm using UV resin just
because it's quicker and I'm using a gloved hand
to coat the piece. I gave the resin a minute
to settle and become level, and then I cured it
with a UV light. Then I used a silicone mold
maker to make the 2 molds. You can use any kind
of silicone for this. I'm using liquid silicone. But putty will produce the same results. After the molds
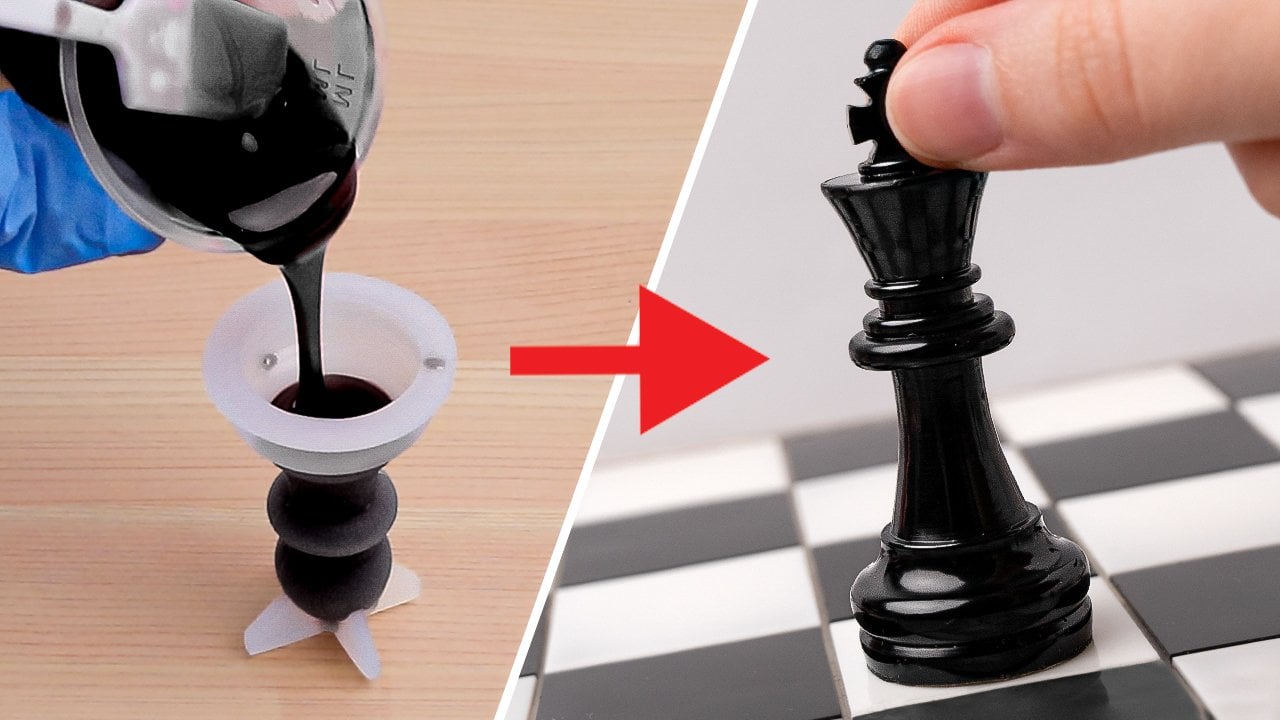
were ready to use, I mixed up some black epoxy
resin and filled each one up. I let them cured completely
before demolding. And as you can see, even though I use the exact
same resin for both molds, they come out looking
completely different. The shiny one is also
really smooth and the glossiness helps the
colors look more intense
5. Hot Glue Molds: If you're looking for
a non silicone option, molds for resin and clay can be made using a hot glue gun. And as long as you use
clear glue sticks, these molds are compatible
with UV resin as well. To make the molds,
start on a surface that the glue won't
stick too much. I'm using a ceramic tile, but you can also use parchment, paper, a silicone mat, or any other kind of flat heat safe surface that hot glue
can be peeled off of. Now for the objects
you want to copy, you can use baked polymer clay, fully dried air dry clay, and things made out of
metal, plastic, or glass. You generally want to avoid
porous materials like fabric or paper because the
glue will stick to them. Two of the pieces I'm using
are made from polymer clay, and the third is plastic. If you're using clay and your piece isn't
thin or fragile, you can usually get away with molding your object immediately. Otherwise, to stay
on the safe side, I recommend prepping
your object for molding by covering it with a thin
layer of petroleum jelly. You especially want to do
this with plastic items because it can be harder to
pry them away from the glue. After that, place the object on your heat safe work surface. And you can use some
hot glue to hold them in place if they're
moving around too much. With your hot glue gun, apply a small amount of
glue around your piece and try to get into all the
little grooves and crevices. Then you can add some more glue to give the mold structure. If you use petroleum jelly, it may be a bit more difficult
to get the glue to stick, but it helps to go
slowly and be patient. It can also help to work on
small sections at a time and let the glue dry before
moving onto the next part. After you've poured enough
glue for your mold, leave it to dry. This should only take a few
minutes and the glue will become slightly opaque in
color and cool to the touch. At this point, you can remove
the glue from your surface. If it's stuck, you can use something to
carefully pry it off. I used one of my
metal sculpting, then gently remove the
piece from the mold. If you lubricated the
piece beforehand, you'll want to clean up the
mold with soap and water. And now you can use your molt. If you're working
with clay and you find it sticking to
parts of the mold, you can lightly dust some baby powder or
cornstarch into your mold. Otherwise, you should
be able to pop the clay out without
any prep work. If you're using resin, whether it'd be epoxy or UV, you can go ahead and
fill up the mold, then leave it to cure just like you would with a silicone mold. I used some UV resin on
this bunny hot glue mold, and then I cured it
with my UV flashlight. The hot glue is
slightly opaque but clear enough that the UV
light can pass through. So you can easily use these molds with UV
resin as long as you use regular clear
hot glue sticks and not the colored ones. However, I don't recommend
making hot glue molds using tall 3D objects
like this chest piece, because it's pretty difficult
to get them out and it will be hard to remove
casted resin as well. I had a lot of trouble getting this out of
the mold because the hot glue lacks flexibility,
and because of the shape, I decided to cut this mold just like I would with silicone, but it was really
hard to cut through. After I managed to
get the piece out, I realized that a
rubber band wouldn't be enough to hold them all
together while casting. So to avoid resin spillage, I decided to glue
them back together. I put it in a plastic
cup and I used some tape to hold it up so
that it doesn't tip over. Then I used some of that
black epoxy resin from earlier to fill up the mold
before I left it to cure. For the small to be reusable, I would have to cut it
down the sides again, just like I did earlier, but it's pretty difficult to do. So I decided to just
dispose of the mold. Once I get my resin out. I use a heat gun and my craft knife to
loosen up the hot glue. Some parts came out easily while others stuck to the glue, but I was able to get the
entire piece out eventually. And then I used some
sandpaper and polishing paper to quickly give the
pawn a more polished look. I only did this
for a few minutes, and it already looks
so much better. So if you do make
one of these molds, just make sure to finish
up the piece afterwards. Hot glue molds are
easy and quick to make and they're
compatible with clay, epoxy, and UV resin. That being said, it
can be difficult to perfectly mold an object. So your molds may have
small holes in them and the shapes may not come out
looking perfectly identical. Another big issue for me is that the molds aren't heat safe. I normally use a heat gun to
remove bubbles for my resin, but I can't do that with these or else the molds will melt. So when I made
that pawn earlier, I refrained from
heating up the mold like I would with silicone and the cured resin and came
out with some holes in it where air bubbles must
have been. Over all, Hot glue can be a good option, but it definitely
isn't the best option. If you have access to silicone, I recommend that over this. But if you don't, this should work for your project just fine.
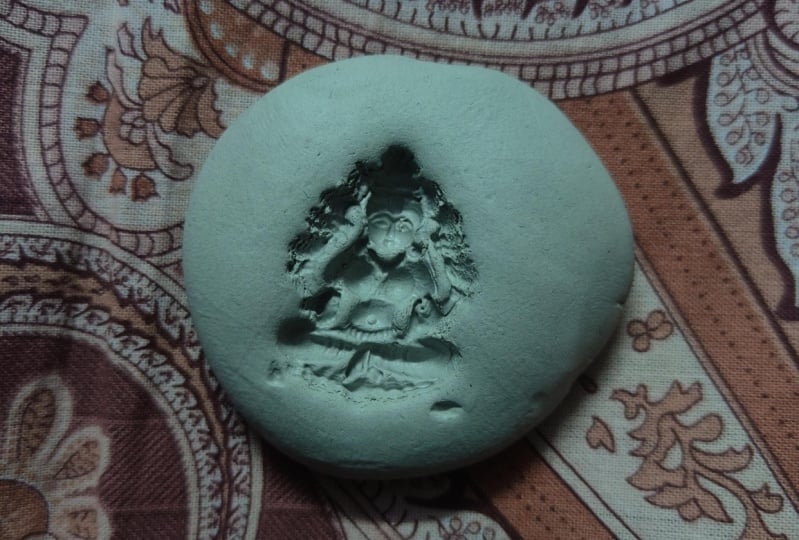
6. Scrap Clay Molds: If you're looking for
another non silicone option to use with polymer clay, you can make hard molds from polymer clay or
from air dry clay. However, this method
doesn't work for casting resin because the clay
would adhere to it. The first thing I
do is mix all of my scrap clay into
one smooth mixture. I like to use scraps so that
I don't waste new clay. But even if you
aren't using scraps, you'll still want to condition your clay beforehand
to warm it up and make sure it has the same consistency all the way through. Also be sure that
you aren't using really soft clay because it
can stick to your object. Next, take the piece
that you want to mold. Any material should
work fine for this, I'm making three
different molds and I have one object that's
made from resin, another from polymer clay, and the last is made of metal. Take a piece of clay that's a
bit bigger than your object and roll it out into
a ball or an oval. Then press it down a little bit so that the surface is flat. Take your object and
place it face down into the clay and push it
in to make an imprint. And then with your
fingers, a needle tool or some jewelry pliers, take the piece
out of the clay. You can also carefully pop
the piece out of the clay, then readjust the mold. If your objects are
sticking to the clay, you can dust them
with some cornstarch or baby powder before
pressing them in. Once you like the way
your mold looks, you can bake it in the oven by following the instructions on your polymer clay or if you made these molds
out of air dry clay, let them dry completely. Once the molds are hard
and you've let them cool, they are ready to use. I like to use a paintbrush
to brush some baby powder or cornstarch into the molds so
that the clay doesn't stick. And if you use enough, you can usually pull
the clay out easily. if the clay doesn't
come out easily. You can press some more raw clay on the back to pull it out. These molds are easy to make and it's a good way to
use up scrap clay. Also, because they're
made out of clay. You don't need to worry
about damaging or ripping your molds like you would
with silicone or hot glue. You can also take your time when making these molds if you use polymer clay as it only
cures once baked in an oven. However, the biggest issue with these molds is that they
are completely solid. It can be difficult to get
the clay out of them and details could get smushed
or stretched in the process
7. Final Thoughts + Class Project: I hope that the knowledge you have gained from this course will be useful for your
resin and clay art. Keep in mind that mold making can be challenging at the start. So don't worry if your
initial moles aren't perfect. I promise it will get
easier with practice. For your class project, I encourage you
to attempt one of the mold making techniques that I demonstrated in this course. If you're completely
new to mold making, I'd recommend trying out one of the non silicone options first. However, if you feel
ready for silicone, then absolutely go for it. After you have
completed your mold, be sure to share
it with everyone by submitting a project. If you have any
unanswered questions, feel free to ask in
the discussions tab, and I'll do my best
to answer them. Also, if you'd like, you can check out
my YouTube channel and my other social
media accounts where I post sculpting videos all about my miniature artwork. Thank you so much for watching and for completing the course. And I hope you enjoyed
 I The Crafter, Sculptor & Content Creator