Transcripts
1. Intro: Hello, everyone, and
welcome to this class. I'm glad that you're here. And in this class,
we will create some Christmas themed
artworks using watercolors. Before we proceed
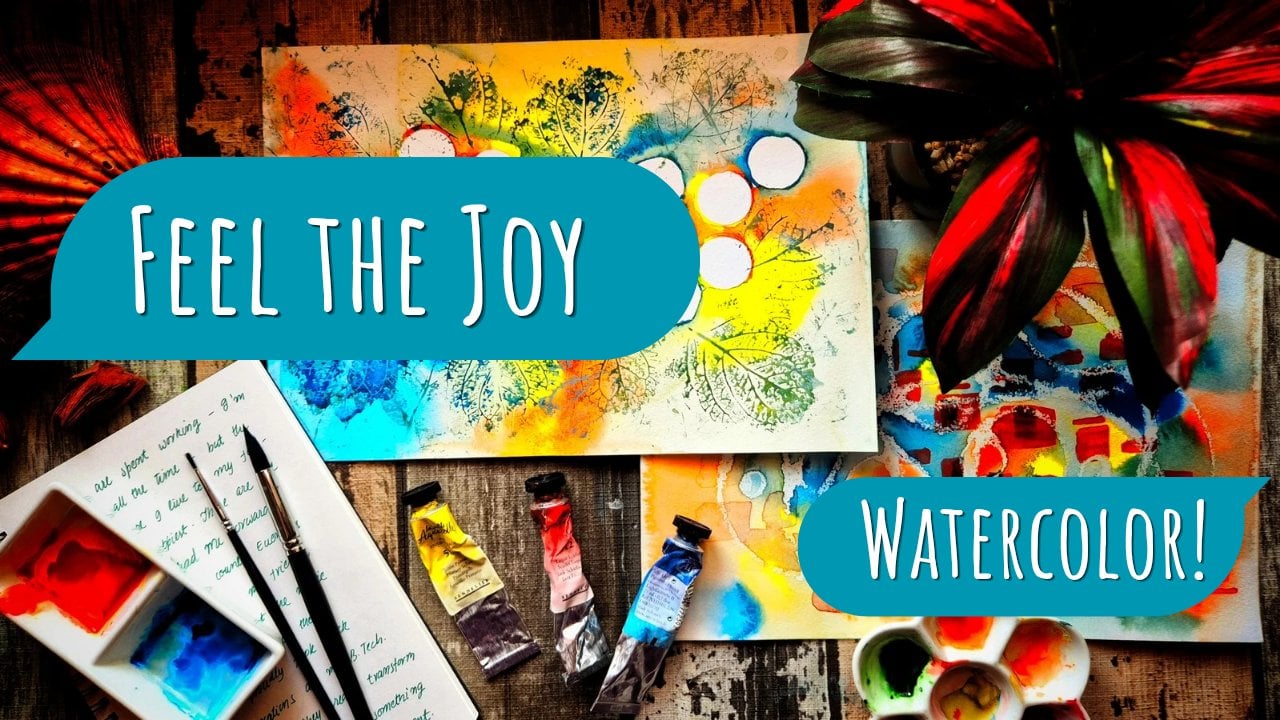
to the lessons, let us talk a little bit about the philosophy
of this class. So the idea here is that we sit down with our paints
and our paint brushes, and we just have a good time. Is a doodle style class, so you will use your paintbrush almost like it was
a pen or a marker, and you would create
these Christmas themed designs that
you can use on, you know, cards or gift
tags or gift trappers. And really, the idea is to just have a calm and
relaxing and cozy. You're a beginner.
It's completely fine. This class is exactly
the right class for you. There is no stress and there is no right way to do things. Whatever you do is right. And even if you're
somebody who does not really want to learn
watercolors in depth, but really just wants to have
a good art filled evening, this is the perfect
class for you. This is probably not the
right class for you if you are an advanced learner
who's looking to upgrade your skills because the goal of this class
is very different. So I hope this class is
a right fit for you. And if you are here
and that's the case, please stick around
for all the projects. You'll really enjoy
it, I promise and see you in the
lessons. Bye bye.
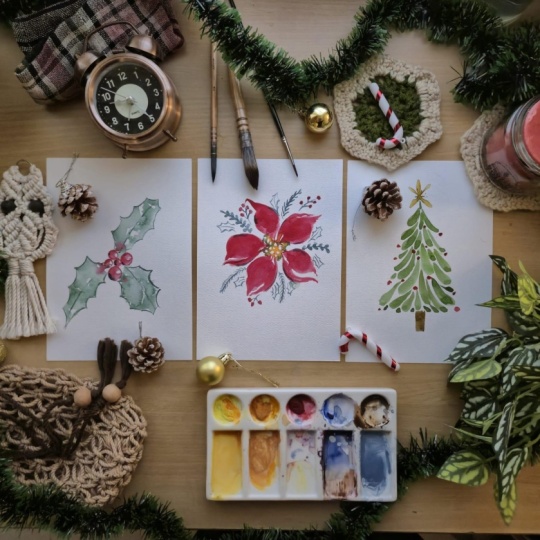
2. Supplies: In this lesson,
let us talk about the supplies that we need
for our class today. The very first material is
watercolor sheets of paper. These sheets are very thick and they can hold a lot of
water without buckling. You can get them at
any nearby art store, and I'm using a local brand, but really any brand and any
kind of paper, for instance, either ellos or cotton is
fine for the class today. The next supply we need
are watercolor paints. So these paints came
in tube formats, and I squeezed out
a little bit of the paint from the
tube onto my palette. But even if you have
pan sets or cakes, watercolor cakes,
that is also fine. You could use those as well. Just any watercolor paint
is okay for this class. Next, I optionally have some
sketch pens or glitter pens, and I use these glitter pens to write Merry
Christmas on my card. So this is another
supply that you'll need. I also have a clear
jar of water to clean off my paint
brushes as I paint. And, of course, I
have paint brushes to use along with
the watercolors. And for the class today,
I'll use three paintbrushes. One is medium size, one is a bit large and one
is really tiny. Now, you don't need three sizes. Even one size of a
paintbrush is fine. You would need finer control,
but really it's okay. You can work with just
one paintbrush that would work just as well
for the class today. Finally, I have this
piece of cloth that I use to dab off excess water from my paintbrushes
while painting, but you do not necessarily
need to have this. So these are all
the supplies that we'll use in our class today. And once you have all
of them ready with you, I will meet you in the lessons.
3. Holly Leaves and Berries: For our very first
Christmas themed artwork, we will draw some holly leaves
and berries on the left. I have a reference
image that I would like to use for this artwork
and on the right, I have an AFI size
watercolor sheet on which I have written
Merry Christmas. I get a little bit
of green watercolor, and I mark the center
of my Holyberry bunch. So that is roughly where I
would like the center to be. And I pull out three
central veins for the holly leaves out of
that center, like so. These are roughly equally
spaced from each other. And now I make the leaf shapes by making these quick see shaped strokes like
you can see here. So we are just drawing it
almost like a doodle now, and we'll later fill
it in with colors. I'm just using my paintbrush
almost like it was a marker pen or a pencil,
and I'm drawing this. So my second leaf
is ready, as well. I've used a thick concentration
of pigment for this, and this is a very
stylized image. It looks almost like a
watercolor illustration and is cute and appealing
for just that reason. Once I have the outline of
all three leaves ready, I block in the
darker green colors. There are many things you
can do here if you're less confident with
making these strokes out of watercolors directly. You can draw the leaves
with pencil first, but it's not necessary. And besides, we
are here to relax. So adapt the method to what
helps you relax the most. I'm using different
intensities of watercolurs at different
places by adjusting the amount of water I use and also by
leaving some white space in the middle of my patches of
green, as you can see here. So I put an intense
mix of green. Then I cleaned my watercolor
brush with some clear water and placed the clear water on my sheet next to give
a lighter shade. And this way, I can get many different shades of
green just like that. Finally, let's make some
berries at the center. In the empty space that
I had left earlier, I make these small circles, and it's not necessary
to be very precise here. And it's okay if some of
that red goes into the leaf. In fact, the color
red bleeding into the green gives us a
very interesting feel. And now that I have the
outline of the berries ready, I will clean my
brush and I'll get some red paint to block some solid colors into those
circles, just like that. I leave a little bit of white
around the corner just to give it a look like the
berries are shining. Optionally, once you have
placed all your colors, you can intensify some of them. I can get some of the green and add some shadows down here. It's completely optional
this last part. But it helps add dimension
to the painting. With that, my artwork is nearly complete and I feel
like I can fill in some of the empty spaces around it with a few more
berries and holly leaves. So I draw these very
tiny red circles around the leaves, like so. And next, I get a bit of green to add very imprecise and loose leaves
that are pointy, but abstract nevertheless to the corners of those
red, just like that. Yeah. With these berries at the corner,
especially, I'm very, very free and playful just
because it's really worth enjoying the pleasures of creating art while doing
these kinds of paintings. I hope you enjoyed
this first lesson, and I'll see you
in the next one, where we will create a Christmas
tree using watercolors.
4. Christmas Tree: For this next artwork, we are going to use
a repetitive leaf like pattern to make
our Christmas tree. This is, again, a very loose
style watercolor painting, and I have a reference image on the left hand side that I'm going to use to make
the tree on the right. I'll make the drop
shape using green, and that's a repeated
pattern that I'll have for all of my tree. I have, again, an A five size watercolor sheet on which I've written
Merry Christmas, and with some green, I get
started on these drop shapes. So the brushstroke is
somewhat like this, so I make this drop shape. I don't have any
underlying drawing, but if you prefer
you could draw it or even practice the
brushtroke on a spare piece of paper before you do it on your actual
Christmas card or gift tag. But the idea here is very
simple that we make many of these drop shapes and we start them one over
the other like so, and we create an
entire tree this way. You want to go wider as you go towards the
bottom of the tree, and do not forget to fill in the space in the
middle of the tree either. You can vary the
intensity of the green, though I'm not
varying very much, but if you use different concentrations of
water while drawing this, it would naturally vary a bit. To get the drop shape, notice that I apply a very
light pressure when I start. So the tip of the
brush is all I use, and with a very light pressure, I get a very small mark, and I increase the pressure
on the brush and press it down to get the wider
drop at the bottom. I make an estimate of what
the shape of a tree should be like and I fill in all of the space that I want the tree to be
at just like that. And different
shapes and sizes of the leaves is what gives
interest to this painting. I thoroughly wash off
my paintbrush next, and let's add the
star on the top. I first pull out a few
lines from the center, and then I use a dilute mix of water to create
the star like so. So I wash my paintbrush again, and at the concentrated
pigment at the center, I just lightly touch
my brush like so. This is a really fun part, and I have to maneuver my hand in funny
positions for this. But you can see how this turns
out, and it's beautiful. Almost like a glowing floor
at the top. Just like that. Okay. Next, let's
get some brown, and you can create brown
by mixing green and red. And with that brown, I draw the trunk of this
tree just like that. My tree is nearly complete, but I would like to also add
some Christmas bubbles or these red dots or balls to the tree to make it look
like it's decorated. Wherever I can find
some white space within my leaves or even at the edges, I add these red dots. And with that, my tree
is nearly complete. There are many ways that you can further add interest
to this painting, and one way could be to
splatter some paints. For splattering,
get some water onto your paint brush and makes
a very dilute green. You should have a
generous amount of paint on the brush and just flick the brush like
so over your painting. This will add these tiny
spots to the paper, and it's a bit messy to create, but it gives a very
satisfying feeling.
5. Poinsettia Flower: For our very last class project, we are going to paint a pin set tea flower using watercolors. I'm going to use my larger
size brush for this project. I take a generous
amount of red onto my paint brush to paint
the flower first, and later we'll paint the center and the leaves
around the flower. Before I block in
the first petal, I roughly decide where the center of my
flower is going to be, and that's where I
want the center. And from there, I use a
very light pressure on my paintbrush to
draw this petal. I increase the pressure to draw a thicker
part of the petal. I use the tip of my paintbrush
to refine the shape of the petal and
for the next petal, I'll repeat the exact
same technique. From the center, I
apply a light pressure, then a heavy pressure
for the thick center, again, a light pressure
for the tip of the petal. And just like that,
I have two petals. I'll try to block in five petals that are
roughly equally spaced, but it's okay, even if I'm not able to get
the equal spacing. I have a way to cover
up any white spaces. And I'll show you that
method in the end. But for now, this is my fourth petal using the same technique
of light pressure, followed by heavy pressure, followed by light pressure, and refining the shape of the petal using the tip
of my paintbrush. I'm more red for
the final petal, and there it is. I went the opposite
way for this one. So I went from the tip of
the petal to the center, and that's also an
okay way to do this. Now, I can get some
more petals in this white space and in this
other white space as well. And towards the bottom, there's some more white space. So I put more petals there. And just like that,
all the petals of the flower are complete. Now, time to draw the
center of the flower. For this, I use my
smaller paint brush, and I get some of
that yellow color. I draw small circles,
and once again, just like we did for
the berries class, even if some of
that yellow bleeds into the red, it's
perfectly fine. In fact, it's art's interest to the painting, so it's all good. And the center of the
petal is almost complete. Finally, let's make some
leaves around this. So I take some green now, and this is the most colorful
of all three projects I feel because I use a generous
amount of all three colors. The first kind of
leaf that I'll make are these branches with kind
of circular or oval leaves. So I drew out the branch first, then I made these oval or
circular shapes around it. And some of the
circles are filled, but some are empty,
and this is okay. A lot of these empty leaves
and some more filled leaves. I scatter these kinds
of leaves all around my petals and I also intensify the color
at certain places. A second kind of leaf
that I can add are these pine leaves that have
pointed ends just like that. You can also make
some holly leaves, small tiny ones around it. And this variety gives
interest to the painting, and it also helps us have a few different
things to do within the same artwork. Let's see. Let's Let's add, um, a few branches
there, and I think I'll add some berries
to these branches. So I wrap some more red, and I add red dots around these branches that
come in sets of three. So That's it for my
very last project. I hope you enjoyed all three of the artworks that
I demonstrated to you today and that you had a fun time. See you
in the next one.
6. Outro: A Tale of Two Holidays: Now it's time for a short story. Around this time last year, I had planned to put
out a Skillshare class with five or six of these cards. And these are some of the cards that I had planned
for last year. They looked pretty, I felt.
They looked polished. They were just the
perfect set of Christmas cards that
anyone could want to make. However, in my attempt
to make these cards, I was so stressed out, and I had to take a step
back and decided not to put those card tutorials out primarily because
of perfectionism. And with that in mind, I made a new set of
paintings this year, and I brought these to you. The very simple and
doodly paintings where perfectionism is
not the goal in any case, because I, as a teacher, feels the stress that
perfectionism can make. And I'm sure you as a
student feels it, too. I hope therefore that you have enjoyed these classes
that they have brought you the relaxation and calm that I so much wish for you during these holidays and
that you'll keep coming back to relaxing
and enjoyable classes. So if that is the case, please follow me on Skillshare, as well as check out
my other classes. Put in any recommendations for what classes you
would like to watch next. Do post discussions
about any questions you have and your projects in
the project gallery below. I'm really excited to
look at all of them. Once again, I wish you a
splendid holiday. Bye bye.
 Sheryl Mathew, A Physicist with a Watercolor Streak