Transcripts
1. Introduction: Hello everybody. My name is Emily and I am a
furniture artist. Okay, So today we're
gonna talk about painting a piece of furniture. And I'm going to walk you through my process
from start to finish, painting a dresser, sharing
tips along the way. And I'm gonna go over all of the materials that you'll need. So let's get started.
2. The Furniture: So today I'm working on a French provincial
dresser that I got for free or
Facebook marketplace. And this is what it looks like. So as you can see, it's
not in the best condition. You can see there's
some paint chipping that I obviously can't
just paint over. So I am going to
have to strip back the top where the
most damage is. That way, the
texture of the paint that I do apply
is really smooth. And there's some issues with the veneer here that I'm
going to have to would fill so that I get an
even and smooth look. I just like to put my piece of furniture on these little
wheels to make it easier to move around in my
garage and push into better lighting
conditions when needed.
3. Materials: When it comes to flipping
a piece of furniture, the materials that you're
going to need are really specific to the project
that you're working on. But something that you're
definitely going to need is a degreaser. So this is a cleaning
product that removes any grease and residue from
your piece of furniture. And the reason you want
a good degree, sir, is because you want the paint
to adhere to the project. So if you have any oily spots or finger marks or dirty,
dusty, cruddy areas. The paint is not going
to stick properly and it's going to
chip off eventually. So this is a really
important step. Buying a good degree, sir, and cleaning your
piece thoroughly. And in this slide here you
can see I have a selection of different cleaning decrease
or products that I use. But there are plenty
more out there. So whatever is available to you that has degreasing
properties will probably work as long as you're cleaning with it and
then doing a rinse afterwards with just plain
water to make sure that you get any residue from the
cleaning product off as well. With the exception of the Lily Moon furniture prep that I have in this slide here, that one actually does not require rinsing off afterwards. So you just mix
that with water in a spray bottle and wipe it down. And that's it. Pretty simple. Okay. So this was a hard
one to come up with because depending on the
needs of your piece, you could have a variety of different repairs
that need to happen. But these are the main tools
that I seem to need when I'm making basic
repairs would glue, gluing anything back together if the drawers are coming apart, if there's something
that's chipping off and you need to
glue it, clamps. So clamping down the
things that you just glued and then a wood filler. I like to go for either plastic would I
liked this one because it's pink and then it
dries to a neutral color. So I know when it's completely dry because it's no longer pink. And quick wood, which you'll
see me using this video. I love this because it's two
parts. It's really strong. You just cut a little piece off, mix it together in your hands and it dries really
quickly as well. So these are the main
things I use, but again, you might need a variety of
different tools and products. Another must-have supply
when flipping a piece of furniture is a sanding tool, whether that'd be a hand
sander, a power sander, or sanding sponges like you
see here in this slide. Whether or not you're
going to sand something completely down to
the wood grain. You do want to definitely
send your peace, give it a scuff sand
with I usually go for a 1 fifth to 20 grit
sandpaper just to make sure that the primer and the
paint at here really well. So all of these steps go into the prep process of
just making sure that your painted piece of
furniture is going to be super durable and last
for a really long time. So giving us scuff
sand to your piece of furniture is a necessary step. I tend to go for my
orbital sander when I'm scuff sanding or just completely sanding down
a piece of furniture. But I do really enjoy the sanding sponges
for areas that are maybe harder to reach with the orbital sander because
they do have crisp edges, but also the sponge genus
of them allows for sanding curved edges without compromising
the shape of the wood. Another product you're going to want to have when
you're flipping a piece of furniture
is a primer. A lot of different paints advertise having a
built-in primer. But if you really, really want to just
make sure that your piece is super durable, you're gonna wanna do
a primer either way, just for extra added insurance. So I like these primers that
you see on this slide here. The 123 primer is a great primer for
just doing the basics, prepping your surface, making
sure the paint adheres. But if you have a piece that Has a lot of bleeding. So if it was
previously stained and that stain color you could see was coming off as you
were wiping the piece. Or if it has a
particular smell to it, you're going to want to buy a shellac based primer like the one you see
here in the middle, and the last one as well. Because this is just
going to block in all odors and stains. So I do really like the
middle primer you see here. But with that one, it does require you to
use a throwaway brush. So like a chip
brush, for example, because it is really hard
to clean out of your brush. Then the last one
you see here is another Lily Moon paint product. I really enjoyed this
primer because it's tinted. So if you're painting
something in a dark color, using a dark tinted primer is a great thing to
use because it's going to allow for better coverage and less coats down the line when you're
applying your paints. Obviously, you'd use
a white primer if you're using a lighter
color and you can tend to your own primer with just a small amount of the paint color that
you're gonna be using. So these are the primers
that I would recommend, but again, there are
plenty more out there. Just remember if you're
blocking and stains and odors, you really want a
shellac based primer. When painting a
piece of furniture, you really want to
make sure that you're getting a high-quality paint. That's going to work well for painting a
piece of furniture. So I wouldn't recommend
any exterior paints or latex based paints. So in this slide you'll see these are the ones
that I recommend. I would say a chalk paints is a really good start
or paint if you're just starting off
painting furniture, it's very forgiving,
usually pretty pigmented, usually pretty
inexpensive as well. But with chalk paints, if you are going for
a smooth finish, it is going to require a
little bit more effort. So sanding in between coats with 220 grit sandpaper for example, because it is a bit thicker. If you're just trying to
go to the hardware store and buy a paint, I would recommend just getting an advanced interior paint. So something that is
fairly durable and has self-leveling properties so that you don't have to sand
in-between coats. And then of course, just make
sure that you're priming correctly prepping your peace top coding,
everything like that. So it's super durable. If you're looking
to spend a little extra money for something higher-quality and something
that is gonna save you time. I would recommend going for
an actual furniture paint. So something like
Lily Moon paint or Milan she paints and other great brand because these
are mineral paints. So they're going to self level. And a lot of them, like I said, have
built-in primers. So that can be a little
extra insurance for you. Some of them even have
built-in top coats. It does save you time for a
little bit of extra money. One of the final steps
for flipping a piece of furniture is top coating
your piece of furniture. So top coding it is adding that final protective
layer that locks everything in and makes
your piece super durable. It's going to prevent it from just coloring or yellowing
in the sunlight's. And with time, it's
going to prevent it from getting any scratches or chips. So it is a very important step. As I mentioned before, some paints do have built-in top coats and depending on the piece that
you're working on, that might be enough for you. In the demo that I walk
you through in this video, the paint I use actually
has a built-in top coat. And I just went with that top coat because
I'm flipping a dresser, which doesn't get
a lot of traffic. But if I were flipping
something like an entryway, for example, I would definitely
want to go in with polyacrylic or a polyurethane just to make sure
it's extra durable. You can also go in
with a furniture bomb, which is oil-based
or a finishing wax, or a polyvinyl, depending on the finished
that you're trying to get. So polyacrylic, some
polyurethanes I've found are not as forgiving as a furniture bomb or finishing wax or polyline. Those seem to be very
forgiving in terms of not having streakiness
in the end product, but they're not as durable
and they often do require you reapplying after
however many years. Depending again, on the
traffic that the piece gets. If you are doing a dark
colored paints and you're working with a
polyacrylic to top coat, I would recommend adding a small amount of your
paint just to tend to your top code because
polyacrylic can sometimes be a bit
cloudy as they dry, but nothing is too difficult. All of these are fairly simple to use, pretty
straightforward. So don't let that
scare you away.
4. Cleaning: The first step when flipping
a piece of furniture is giving it a really
thorough clean. So you'll see here, I am
removing all of the drawers, taking apart the entire
piece so that I can really inspect what
needs to be done. And just kinda get ready to deep clean the inside and
outside of the piece. Here I am putting on some
gloves just because this was a free piece that was
outside for a long time, so I don't know what's
going on with it. So I just want to make sure
that I have a little layer of protection on my
hands from all of the grime and ickiness that
comes with this piece. And I'm just gonna go
in and start picking up any leftover trash from
the previous owners. Now I'm going in with
my shop vacuum and I'm just trying to
get as much dust and debris out of
here as possible before going in with my degree, sir, and my rag. And you really want
to make sure that you're covering all
surfaces and trying to get as much as possible out with your shop vacuum or
regular vacuum cleaner, especially in the corners and the creases of your
piece where dust collect. I'm going in and
I'm vacuuming out the inside of the
dresser as well. I cannot tell you the
amount of times I've gotten a piece off Facebook
marketplace and just found cobwebs and spider eggs in a bunch of
nastiness inside of the piece. So you want to make
sure that you're cleaning the outside and the inside really,
really thoroughly. I like to think that if I am going to be selling
a piece of furniture, I want it to be in the
condition that I would want it to be if I were
keeping it for myself. And I am a neat freak
and a German fobs, so it needs to be really
clean, really, really clean. If you're keeping
it for yourself, you probably want
it to be really, really clean as well. I would recommend doing this if it's your piece
that you're flipping. Two, even if it's just something that you're flipping
for yourself, just to give it a fresh
and complete new life. Okay, here I am prepping my cleaning products,
my degreaser. So for this video, I'm just using regular
dish soap and hot water. Dish soap, as I mentioned earlier, has
degreasing properties. You're just going to
make sure that you have nice hot soapy water
to go in and get all of the little
smudges and dirt and everything off of your piece of furniture so that
it's ready to paint. Before you start wiping
everything down. I would really
recommend that you take the hardware off at this point because a lot of dust and grime gets trapped
under the hardware. So taking it off, It's just going to make
sure that you have the best and most clean
surfaces to work on. And I just like to screw
the screws back into the hardware and I
put them either in a Ziploc bag or in
an old paint tin. So I can keep track of everything because
you do not want to lose these parts if you plan
on reusing your hardware. I don't show it in this video, but you are going to want to
clean the hardware as well, especially if you plan
on spray painting it. If you plan on using
brass ISO and buffing it, restoring it and that way
to clean the hardware, I just go in with warm
soapy water and then I pat them dry and then let them
air dry the rest of the way. Now I'm going in
with my bucket of warm soapy water and
my microfiber rag. And I'm just wiping everything down inside
outside the sides, the bottom of the drawers, everything you want to make
sure all surfaces are clean. This particular
piece had a lot of makeup and baby powder in it. So I really, really, really wanted to make
sure that all of that dusty stuff was out and cleaned off of
all of the surfaces including the
bottom because they do hold a little bit of a cent. And I don't want the next
buyer to have something that smells like the
previous owners makeup. And make sure that you're
getting into all of these little grooves
that hold dust. Because again, if you don't get all that dust and debris up, the paint is not
going to stick to it. It's just going to flake
right off when it dries. So really work to get
that stuff out of there. Now I'm just wiping everything down with some plain old water to get any residue from that soap off of the
piece of furniture. The cleaning process
does take awhile, but this is such
an important step. So please do not skip or rush through thoroughly cleaning
your piece of furniture. It's very important that you
do the prep work correctly. Now for the best part.
5. Repairs: Once your piece is clean, you're going to want to go
in and make any repairs that you need to make to the piece
I showed you guys earlier, this chip to veneer. And I'm going for somewhat
of a smooth finished. This is an upcycled piece, so it's not gonna be perfect, but I am just mixing my quick wood together so
that the two colors blend. And this product is amazing. It dries really quickly
and it's really strong, but you do want to work
pretty quickly with it. And a little goes a long way. Here. I am just
smoothing it over that imperfection and
I want it to be a little bit higher than the
rest of the surface because it is going to contract
a little as it dries. And then I wanna go in
and sanded down once it's completely dry to make sure that everything is nice and level.
6. Stripping: Alright, as you guys saw at
the beginning of this video, the top of this dresser
is peeling and chipping. And the texture of
it is just not good. It would take awhile
to sand it down. So I am just going to go in with citrus strip and strip the
paint off of the top of this. The body is fine, the drawer fronts are fine, that pain is not going anywhere. So it is okay to just scuff
sand prime paint off code, all of that rest of the piece. But because I want this to
be a really smooth finish, I am definitely not
just going to paint over the chipping and flaky, nasty paint that was
on the top of this. So here I am just spreading
out the citrus strip. I want it to be a fairly thick
coat because I need it to stay wet in order for
it to do its job. If it dries out, it's
not going to work. So I am applying a
fairly thick coat all over the top of this. If you guys are interested in a more in-depth video of the process of stripping
a piece of furniture. I have that posted here. It's my other video on
Skillshare right now. So feel free to check that
out and learn a little bit more about the
process of stripping furniture because there's a good amount that goes into it. I'm going in now with my
plastic wrap just to make sure that everything remains
activated and wet. It's been about five hours, so I'm coming back
and I'm peeling off that plastic wrap so I can start to scrape everything off. Here. I am going in with my
plastic paint scraper and I'm just scraping up all that gunk and discarding
it into a bucket. This dresser has given
me a lot of issues because there are several
coats that you can see. I'm trying to get through here. But for the most part
it's going pretty well. And this is like the
most satisfying part of the process is just scraping
away all of that residue. Now I'm going in with
my mineral spirits and a medium steel wool just to get any extra paint
and residue off. And of course I am wearing
my chemical resistant gloves because I don't want my
hands to get damaged. If your paint doesn't
need to be stripped, you do not need to
follow this step. But like I said,
mine had a bunch of textural issues from
the existing paint job. So this was a
necessary step for me. Some finishes you
could just sand down. If you're working with a
just plain wood piece, you don't need to
do this at all.
7. Sanding: Now I'm going in with
my orbital sander. And for this, I am working
with a 150 grit sandpaper. And I'm just sand and everything down nice and smooth
on the top here. I'm going in with
my sanding sponge and I'm standing over
those areas that I put the quick word earlier just to make sure that everything is level and smooth. And now I'm just going in for all of the drawer fronts and the body and basically
the entire rest of the piece of furniture. I'm going in with my sanding
block here again with a 150 grit and I'm scuff
sanding the entire piece. This is just going to make
sure that the surface is not glossy and has a
little bit of Grab to it so that my primer and paint
can stick to it better.
8. Priming: Once your piece has been
cleaned and scuff sanded, you are ready to prime. I'm going in here
with a paint roller. You can also just
use a paintbrush. I'm using my primer that I
showed you guys earlier. And I'm just going to roll
this onto all of the surfaces. And then I'm gonna go
in with a brush to do more detailed work to the areas that the roller can't reach. Here I am using a
paintbrush again just to go into those more detailed
areas that my roller couldn't reach so
that my whole surface is primed and ready
for a second coat. After my first coat
of primer has dried, I'm gonna go in with
a 220 sanding block, just sand in-between
coats again, just to make sure that it
adheres really nicely. And also just to make
sure that I have a really smooth finish with no brushstrokes or roller marks. And now I'm adding my
second coat of primer. And this piece is only
going to need two coats because it's
covering really well and there are no stain
seeping through. Here. It is all primed
and ready for paint.
9. Painting: Alright, and after
all that work, it is finally time
for us to paint. So I'm gonna be using my zebra. I believe this is the two-inch
chiseled wedge brush. I love this brush. It holds a lot of paint and makes really
smooth, clean strokes. So I'm definitely using
this one. It's my go-to. And I am opting for this
nice blue color today, making sure none of those little dried paint
bits get into my paint. And this particular paint has self-leveling properties and
also a built-in top coat, which I am going to be
taking advantage of today because this is a dresser and doesn't get a
lot of traffic, so I don't need any heavy
top coat on top of this. But like I mentioned earlier, any of those products that
you saw in the materials list would be great if you
do require a top coat. So I'm going in with
my first coat of paint and what I like to do is I
like to load up my brush, try to get a little
bit of the excess off. And then to really smooth,
clean, even strokes, I tend to work in the same direction I am going horizontal and
vertical for this one, just to get all the
little grooves from the little wood framing that
these drawer fronts have. But afterwards, I do like to go over and just
make sure that everything is smooth
and even so that the dry time is all the same and there are minimal
brushstrokes. So try to work in the same direction with long brush strokes so
everything looks smooth. Because this paint has
self-leveling properties. I'm not going to go in and
sand with A2 20 in-between. But as I mentioned earlier, if you're working
with something like a chalk paint that's
a bit more thick, then you probably do
want to go in and sand in-between coats depending on the look you're going for. But there's no right
or wrong answers. If you like the look
of brushstrokes, then go crazy with it. I just tend to go for a
really smooth finish. So I like self-leveling paints and standing in-between
coats if necessary. But again, here I am
applying my second coat. This piece is actually only
going to mean two quotes because of the opacity of
the paint, which is awesome.
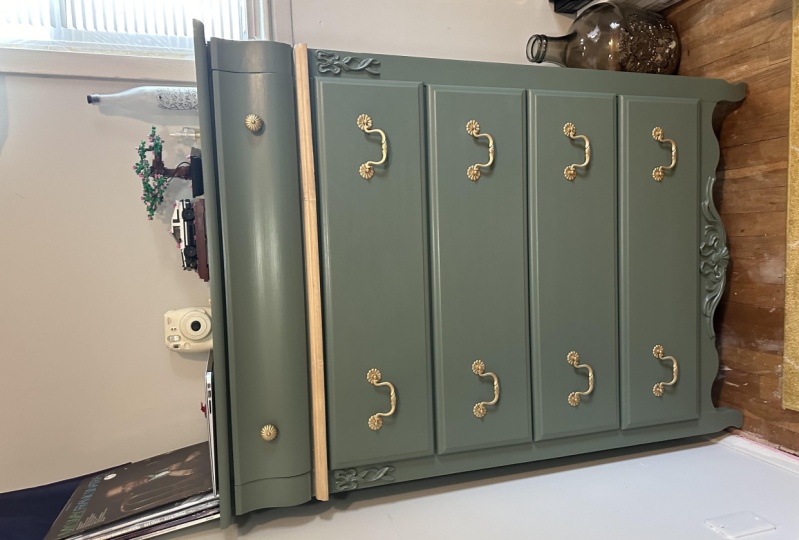
10. Results: And after all that work, he or she is all staged and photographed and ready
to be listed for sale.
 Emily B, Restore Refurbish Revive