Transcripts
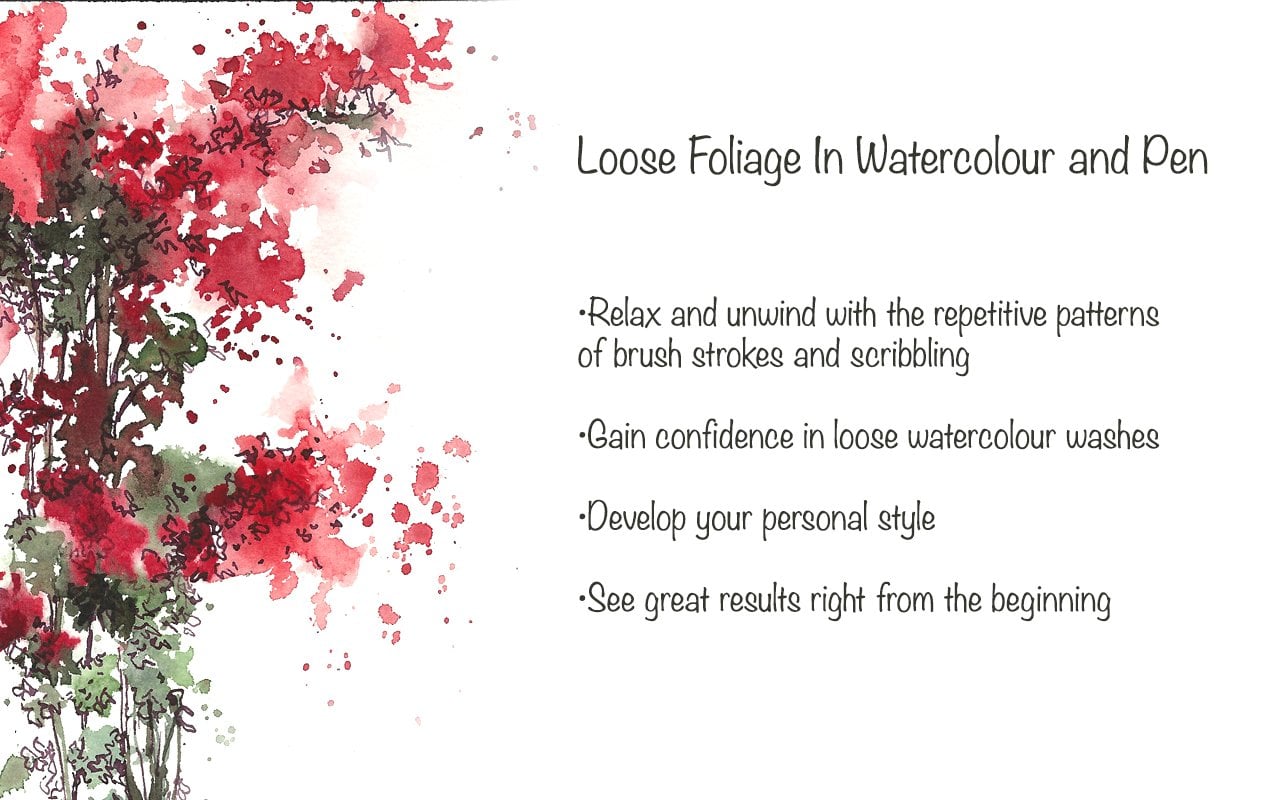
1. Introduction: Hello and welcome to my world of water colors. I am Suzanne and I are artists. Today I will be showing you how to use a line and wash technique using pin for well defined lines on. You are also free to use ink. If you have any trouble, few line joins us your washes, but I won't talk to you about it in my material. Six. For today's class project, we're going to do a very constant you can see I have used my imagination. Done a very colorful raven. You are free to use your imagination on use any colors that you like for your project. The most important thing is that you will enjoy this process, just as I have on happy painting everyone.
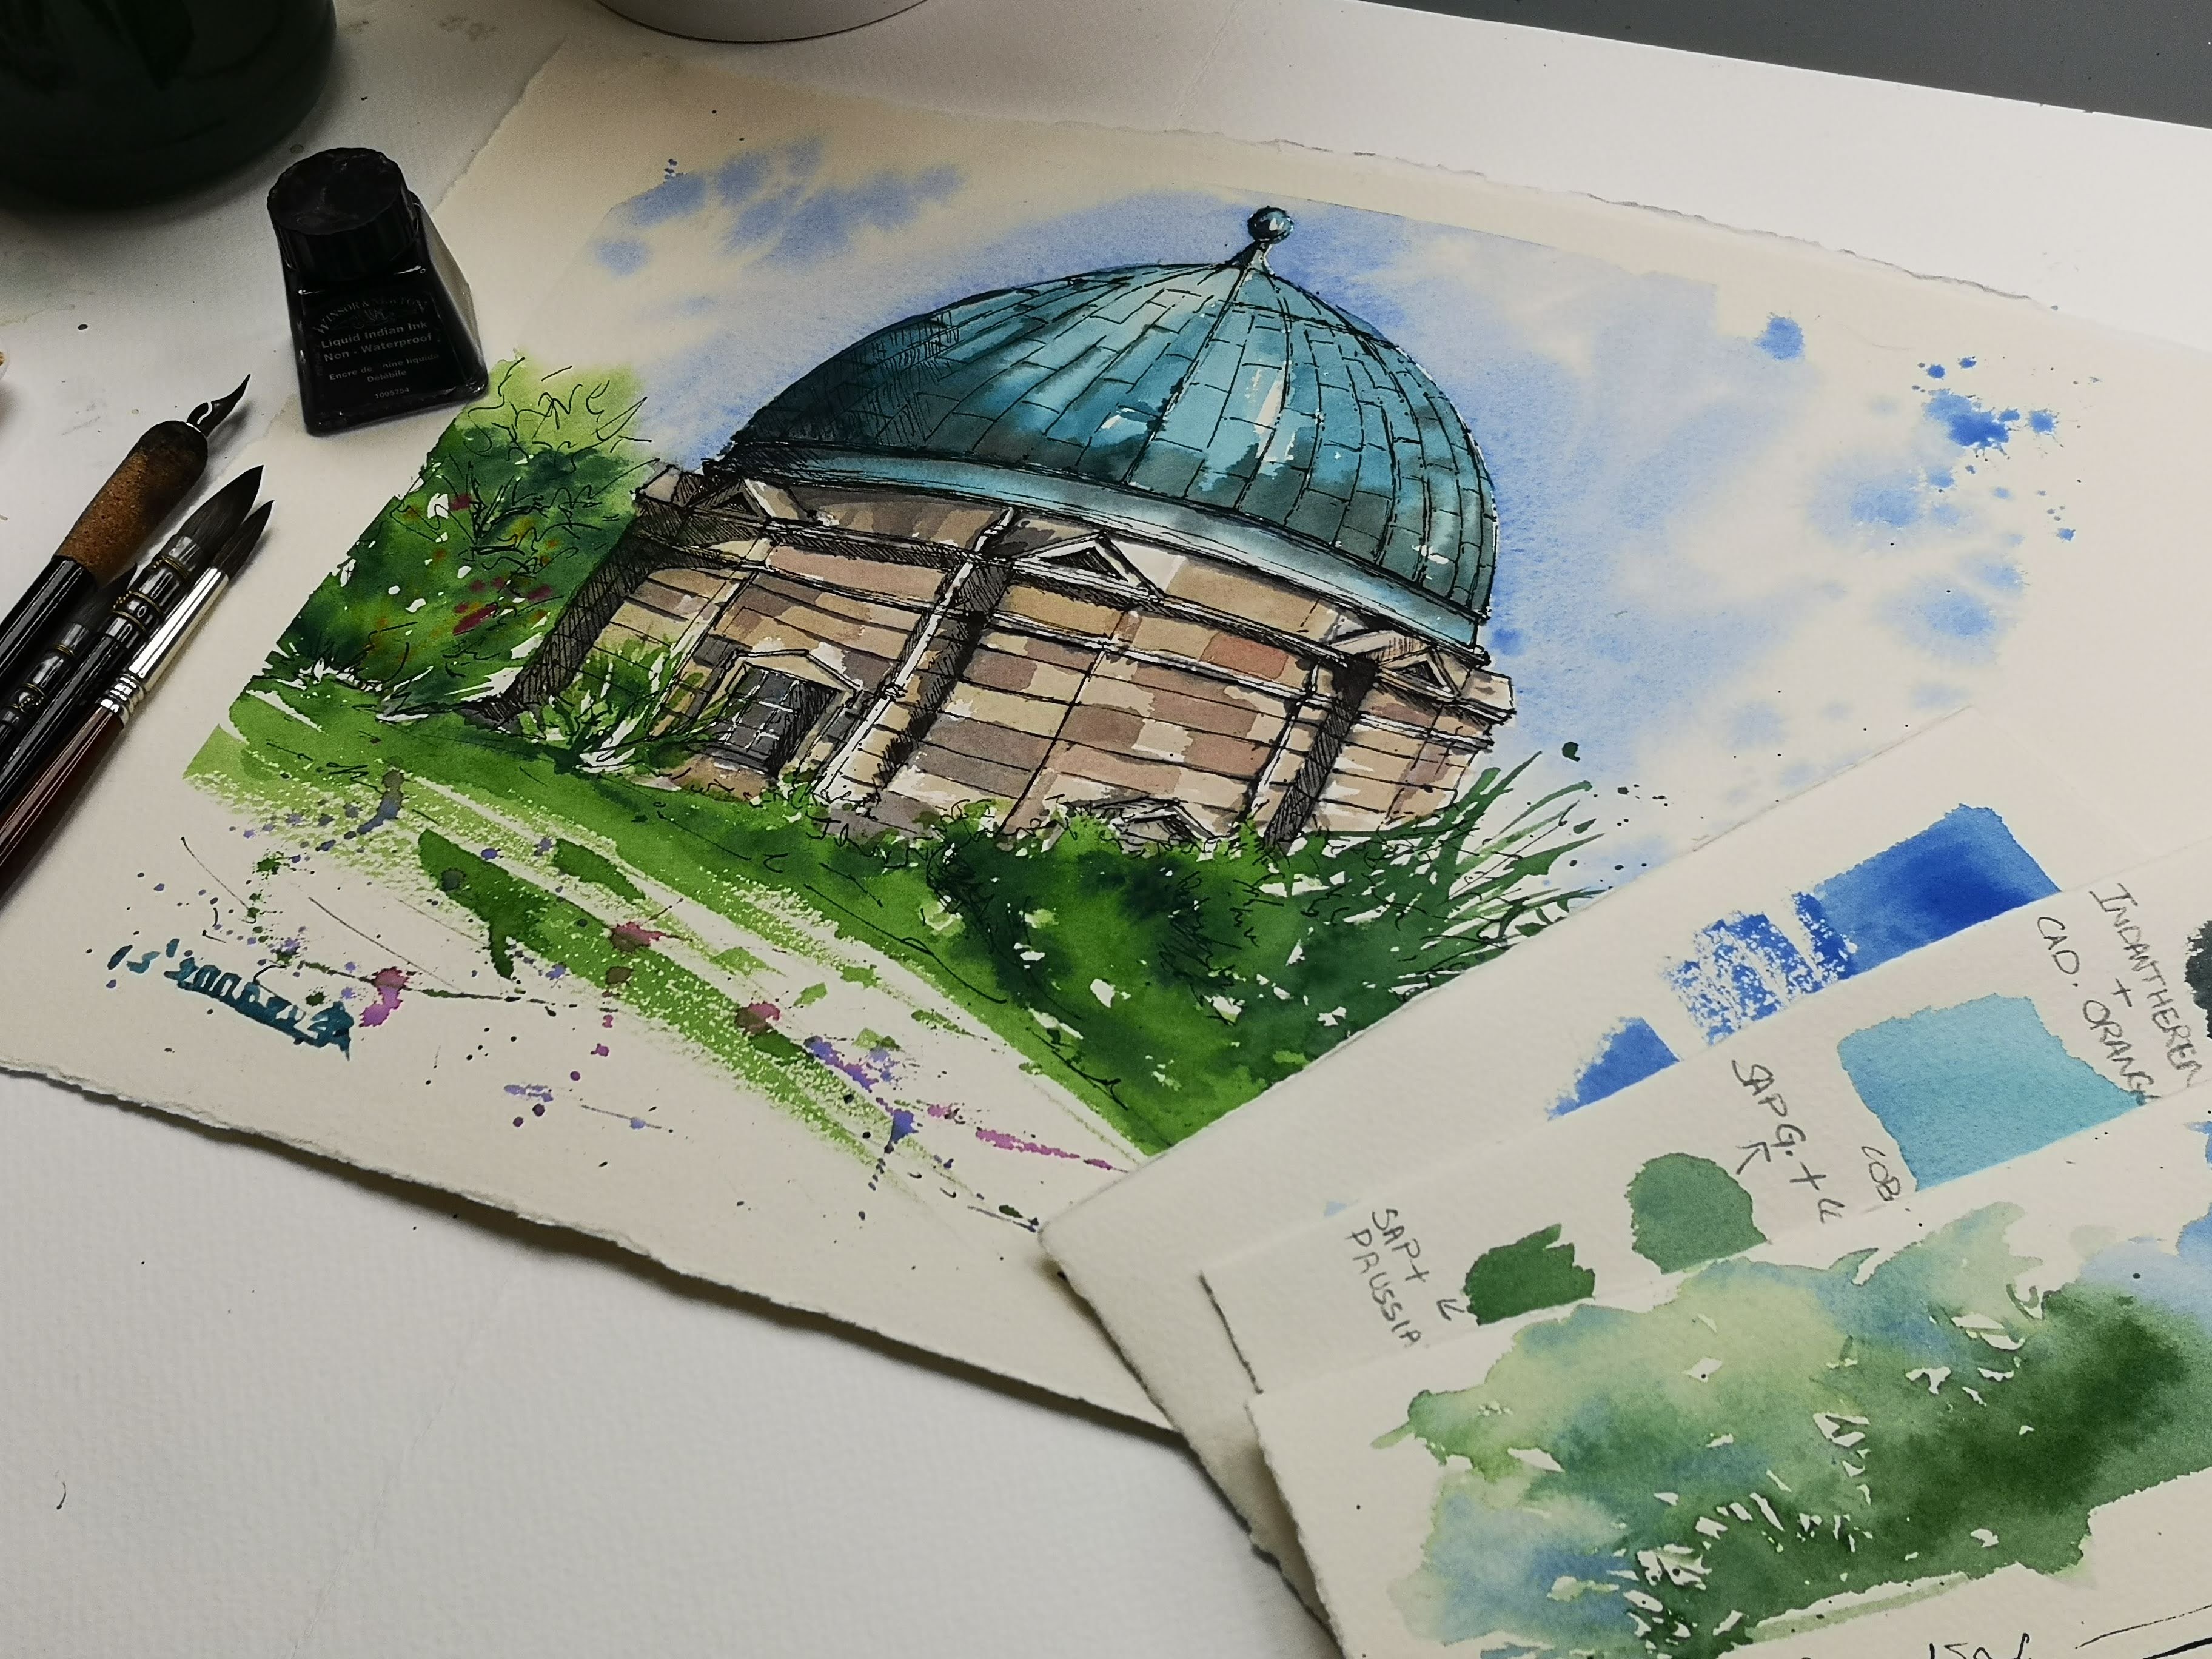
2. Materials required: in this video, I'm going to talk about all the materials that you will require for this class. So let's begin with the pen I'm going to use. Ah, you nibble Fate proof waterproof pen. It is really grateful, sketching and using in line and wash because it is waterproof and this is exactly what we need when we do our wash over it. Another option is a fountain pen. Unfortunately, the ink that I have for found when it's not waterproof, so it is not very good with watercolor washes. But if you like the effect way it blends in with the water color washes. You are free to use that for today's class, but I will just be using the waterproofing today. The next material that we need today is watercolors. It can be any type of water colors that you have. It could be watercolor cakes or watercolor tubes. It can also be ink if you like it. Today, I'm using a win through Newton Cotman Range watercolor cakes. And as you can see, it is a much loved pilot moving on to our next material. That is the brush you can use any medium sized round brush for this project. I'm not going to use all of these brushes. I'm just showing this to you. So you have an idea off what sort of brushes you could use for this project you condone. Use a size eight or a size six brush round brush. And for final details, you could choose to have a smaller brush as well. But if you're comfortable using the larger brush for final details, that should be perfect. You don't have to worry about having too many brushes with you. All you need is just one brush. You will also require a jar of water or two, depending on how much of painting. Newly doing today. I also have a pencil on bond property. Razor. Well, you can choose any razor that you like. Um, this is just for my initials sketches. And finally, the paper that I'll be using today for my project is the Windsor and Newton watercolor paper, and it is a 300 grams heavyweight paper. You can also use other papers like a mixed media paper that is used for different media's or even a mole skin sketchbook. You can use any type of watercolor paper you have as long as it is a heavyweight paper and it can handle a lot of washes without buckling or tearing, So that's a little materials that were required today.
3. Introduction to line and wash technique: So in this we dio I'm going to show you how to use the line and wash technique for our painting. So this is a little warm accession where we will practice lots of line and wash before we move on to the main project. Um, so, as I had explained before, this is my waterproof ben that are going to use today. Um, so you can decide if you want to begin with your pen or your watercolor wash. It doesn't matter what order you do. You construct with the Ben and then fill it in with watercolor wash. Or you can start with a very rough watercolor wash and then draw over it with Ben. I don't have a particular order for using it. Sometimes I tend to use the pen crust and then do a what color wash, and then go on and add little elements onto it with my pen again. Andi in Han certain areas and my painting. So it doesn't matter what order you choose. It's really your choice. So here I will show you how to use the pen and watercolor wash, starting with the pain fast, and then we will try another little illustration where we used watercolor Wash first and then used to pen over it. So let's start with the pain first. So, as you know, this is just a practice session. I'm going to draw, um, a little circle, and you can decide how sketchy you want it. So I decided I wanted quite sketchy and then going to go over it with a little bit off scribbles. This is, I'm guessing this is a solid shape that have drawn here off. Just started drawing water felt. So this is a little illustration addicted with my pen, and now I am going to use watercolor over it. You can also use ink if you like eso. It's not always watercolor for Lyman Wash. You also have the chills of using, and it's I'm going to start off with a very translucent wash. So not a lot of fun. Thick paint, a lot of water, and I'm just going to start off with a very watery wash. And just like any other watercolor sketch, which is going to start painting, you can leave white areas in between if you like, and you can also have little splatter. Now I'm going to use some Prussian blue. Just start going over this. I can also add little sketches with my brush, the tip of the brush so it doesn't necessarily have to be Just pin for your sketches. If you are confident with your brushes and you like adding sketches with your brushes, you can always do little sketches. So and there's no strict rules with ease. Um, as I always say, This is your artwork and this your creation you condone, decide how it should look like and what it should look like. You can decide what elements you want in there and line and wash is a perfect medium for doing just that, because you can play around with pen as well. Last watercolor wash. You can enjoy the unpredictable flow off pigment on paper, as well as control it a little bit with your pen sketches along the way. So I love this medium because it's very versatile, and it gives a very great effect on your paintings. You don't have to do a lot off washes on it, as you can see, because the pen enhances the whole painting. No, I'm just going to dio a random sketch off a leaf. Oh, let's say a little branch off leaves, so it's going to be very loose. Watercolor wash. Yes, you can see here. There's no specifics shape going on here at the moment. You wouldn't tell it's a branch or you wouldn't tell its leaves at the moment because it looks very messy now. And but this is what I'm trying to explain that it doesn't have to be very neat. And within the lines you can play around with your brush strokes. You can have any thought off sketchy brush strokes you like. You don't have to worry about not having good control over your brushes. Um, all you need to do is to enjoy the movement off the brushes and just enjoy the flow off paint on paper. So I've done this little brown with leaves. I'm just going to wait for it to dry completely so I can start using my pen over it. So if you want to speed up the trying process, you can always use a hair dryer. So no, um, this sketch is completely dry. I'm going to go over it with my pen. So at this point, because the wash is completely dry, and if you don't intend to put anymore washes over the pen after you're done with the pen, then you can use your fountain pen. That's if you don't want the ink to spread. Um, all stick to our waterproof pen so it gives you the option off enhancing your sketch ones. You done with the pen, so I'm just going to start off with rocks. Catches. As you can see, I'm holding the pen very lightly and not very rigid, because holding the pen very lightly like this gives me more space for movement off my arm . And it gives characteristic lines. So I am not looking for a straight clean line. I'm looking for very characteristic lines. So, um so it gives a lot of character to your sketches and when you think you need more control over your drawing, for example, here, I need more control over my drawing. When I'm doing this leave and I'm going to hold the pen much closer to the neighbors. Now it doesn't have to stay within the wash. Your pen lines can go outside your watercolor wash, the same with when you're trying to do the pen first on the watercolor wash. The watercolor wash doesn't have to stay inside your pen lines because we're not doing any coloring here. We're actually trying to paint, and we need a lot of character to our painting. We need a lot of individuality in our painting so it doesn't have to stay within the lines . You can go outside the lines. The washes can go outside the lines. The pen marks can go outside the lines, or it can stay inside in any way. You like it again. There is no specific rule. All you need to do is try to scruple and see how therapeutic it is, and this crippling gives a lot off character to your sketch. - So here in this little cluster here, I have decided to put two leads, and I've also decided to do a bit off sketchy lines here, just in harm's the leaves. So it stands out again. I can I can leave out a few what color washed leaves if I want. I don't have to necessarily go over all the leaves. Aiken do away with very minimal sketches over it and then leave it at that stage. Now I've done with my pen, and I feel that I do not have enough water call awash in the sketch. So the good thing about using this waterproof pen iss that I can go over it with paint and it wouldn't smudge. But if it's a smudgy outcome you're looking for, you can go ahead and youth a normal fountain pen or ah, Orrin Orrin dinning as well, if you like. So I'm just going to go over and add a few more leaves in the background. I can also do off a few splinters. There you go. So you can see there is not a lot of difference between these two sketches. It doesn't matter what, um what sequins You go in. You can start off with having the Penn Line first and then go over it with paint. Or you can do the other way around. Either way, line and wash gets a very beautiful effect to your painting, and it's very refreshing to look at as well, so almost going to show you a few cava kristic lines that you could use. I usually use straight lines for shading something like how I have used in this one in the first sketch. Um, you can also do cross hatching. Um, or you could even scribble so loose. Hold a pen loosely. And the new coach do little scruples to enhance your sketches. You can stippled. So you could do anything, Really? Just to enhance your sketch. Um, you can start off with very sin, very every lines on. Then you can go over it with thicker ones. So I'm using up in two and harms your washes is a great way off covering mystics as well. I have bad days where my watercolor paintings go wrong. Um, but the good thing is, with a pin, I can always in harm's my watercolor paintings to and extend. If it's not damaged too much, I can still won't work over it with my penn. And the positive side of fit is, it gives the great effect to your watercolor paintings. Please feel free to go ahead and practice some more. If you think you need a lot more practice before you start the main project, I have bean painting in my mold skin book. You can also pain Jain and wash on watercolor paper. So I hope you have enjoyed this little warm obsession. Please feel free. Teoh do a lot more sketches if you feel you need to be more confident. But I'm sure you don't need a lot of confidence. Or you don't need to overthink these sketches because it's a very refreshing and therapeutic way of painting. With watercolors on, I hope you will enjoy a project which will be the next video.
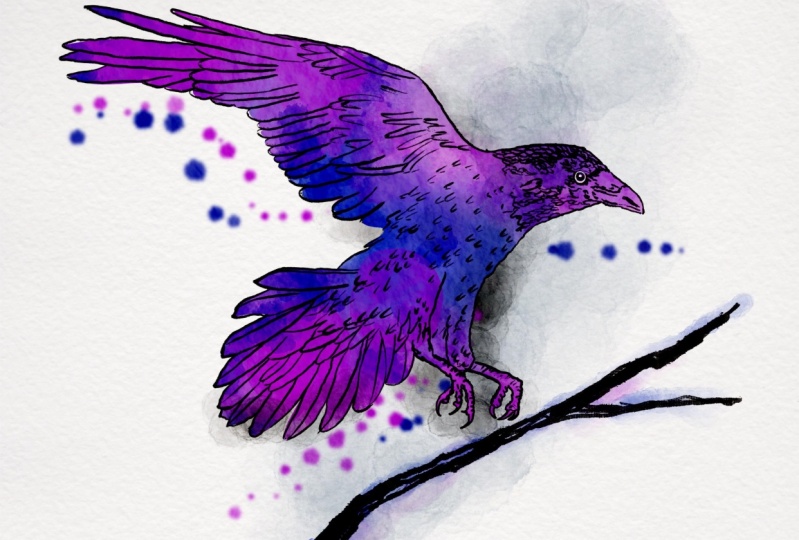
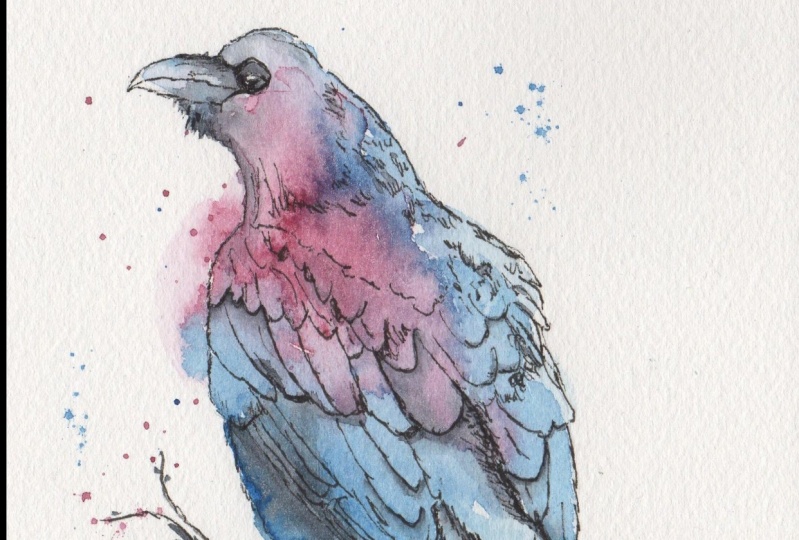
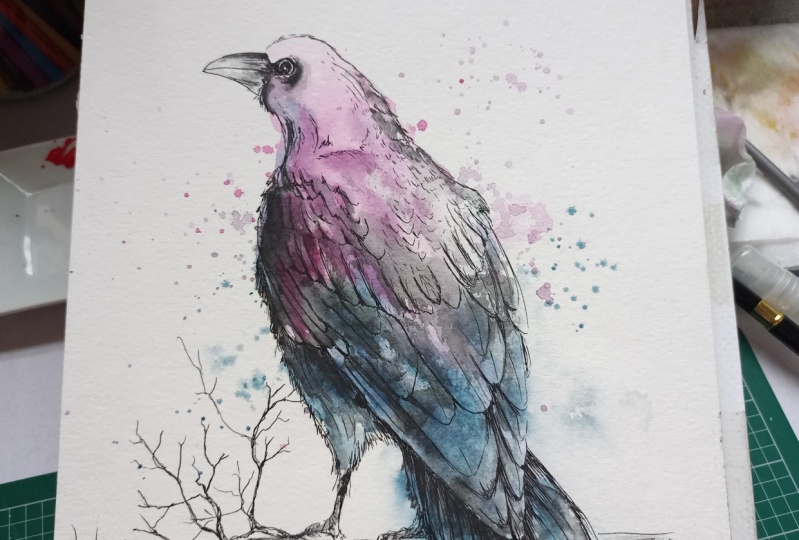
4. Class project: Inking the Raven: So let's begin with a class project of painting this raven in line and wash technique. The first step is to transfer this line, drawing onto your watercolor paper. I have provided this line drawing in the projects and Resources section. You are free to take a printout and transfer it. Want you watercolor paper. The easiest way for you to transfer would be to take a print out on, flip the print out, over and shaved the back wall, the paper in the area where the raben is. So once you've got the graphite on that paper, you conflict. Flip it back over and start tracing over the lines off the line drawing. So once you're done with that, you will get a very feigned line drawing on your watercolor paper, which is enough for you to start painting. If you'd like to learn this in detail, police refer to one of my previous glasses called Boards Tree Landscape, where I have a separate video showing how I transformed my line drawings onto my watercolor paper. You may notice that this Ravens catches quite darker compared to the drawing that you have transferred. That's only because I simply chose to droid directly onto my watercolor paper. You can also try drawing your own raben if you're up for it. But if you're not a fine off drawing and you just want to stick to the painting section, you are free to use my line drawing. No, I've taped my drawing onto our cardboard piece. You can also use a form border, a wooden board, and I'm also using an old masking tape rule to prop the painting up. You are free to use any materials you like. The reason why I would such as to you to prop up your dart board would be that you wouldn't strain your neck and your eyes while you're trying to draw little details on the raven. So let's start sketching this riven with Arpin, as mentioned in the materials. Amusing, waterproof jokin. This is mainly because I don't want that to smudge when I start using watercolor over it, but some people prefer the smudgy effects. So if you're one off those people who like your Inkatha's march along with your water color , you are free to use a normal been where it can purposefully boots marched. As you can see, I'm not trying to make clean lines here. It is quite sketchy on this is exactly what I'm looking for. You can defer the way that you hold the pen. It can be held quite lose where you want your lines to be. Very sketchy, Andi. When you need more control, you can hold a nearer to the neb so that where you get very dark and controlled lines again , differing. The way you hold the pen will give a lot of character to your line drawing Andi. All we need is it needs to look different from everybody's. It needs to look like it is your creation. So try and do different sketchy lines and see how it works for yourself. - No , I'm going to make this, whether a little bit more darker. So I'm going to give a little bit of shading with straight party lines so that I can depict that those feathers are actually being overlapped by the ones on job. So we are actually depicting the shadow that's falling on this better. So by making it a bit more darker, it gives it a more natural look. I'm going to do the same for the feathers on the tail. As you can see, there are layers of feathers on this stale and shading the bottom area off. These would give it a more realistic for you. You can use any thought of shading you can use scribbling or doing little dots, which is stippling or making cross hatches. So it's really your choice, because everybody has different ways of shading something on. But you can use anything that places you. So we're nearly done with thinking this raven, and I'm just finishing off the last bit. That is the eyes, Um, make sure to leave a few white spots while you shading the ice us I'm doing here. And with that, we are done with thinking the raven. Once you done, you can rub off any unwanted pencil lines that you have on your paper. Andi, your raben is ready to be painted
5. Class project: Watercolour wash: our Ravens is inked on, ready to be painted on before we start, we are going to try and test our colors on this little piece of paper. I have personally chosen my Reagan to be very colorful. You are free to use any color that you like, but whatever color it, maybe let's just first try it on this little piece of paper. So my first choice of color is mauve or a pinky purple color. If you don't have this color, you can always mix it with blue 100. My second choice of color is cerulean blue, or you can also use any blue that you have. It could be ultra marine blue or oppression blue anything you like. As you can see, I have also placed the colors quite close to each other, and I'm trying to blend it in because when we start doing the rave in, we are going to leave the colors quite close to each other on let them blend on its own and create the magic of water color. The last color. I'm going to use this Payne's gray, which is a very muted color. It isnot really black or grey. It's called a bluish tinge to it on. It brings in life to the painting, unlike a normal black color. So let me just show you how this car really looks as you can see it straight from the pan. And it looks quite black, but I'm just going to add some water on. Do you can see that it's going to lighten out on. It's got a very muted shade on. It is great for granule ation. This particular pigment is an essential in my parliament, and I use it quite a bit in most of my administration's, mainly because it is such a muted shade, and it can go really well with any color. So these are the only three colors that that will be using today. That is more several in blue on pains. Great. So let's start painting our Reagan Now. I'm going to use a size eight round brush for the wash, but you can also use any other brushes you like. It's really about what you're comfortable with. You can also use a smaller brush if you think that gives you more control. So whatever is in your hand, you don't have to worry if you don't have the same size brush, so I've just prepared the more color now. As you can see, it's not too thick. The consistency is quite watery because we would like the first wash to be quite light so we can build over it in the second layer. The second color is cerulean blue. Andi. I'm going to prepare it to be the same consistency as the mall. Make sure to prepare a pool off pigment for all the colors so you don't run out off them while you're painting the Ravens. And lastly, I'm also preparing pains three as well, and it is going to be a similar consistency to the other two colors. One material that I forgot dimension in my material section is a tissue or kitchen roll, so you can always wipe out extra pained or water on that. So let's load our brush with some more. Andi. Let's start painting the raven. You don't need to worry too much about the paint going outside the lines, as I explained before, in our warm obsession, this is a line in wash technique, and you are free to go outside the lines or make a huge mess, and it will still look beautiful, too. What's the end? That is the beauty off line and washed, and let's explore it to the maximum. Let's also get in some blue at this stage when the paint is still wet. Andi, Let's leave it to blend on its long, especially where the true colors are meeting it is watercolor on watercolor always blends to bring their very beautiful effect, so we don't We don't need to worry too much about it going wrong, because the colors do blend in beautifully most of the time, and the only thing we need to do is just let the water control your painting, for I'm also going to drop in a little bit of blue on top of the more I'm not going to paint over it too much. I'm just going to leave it to blend on its own and also at the bottom. I'm going to make sure that the paint is coming outside the lines. You may also notice that my pigments are all flowing down. This is because we have propped up art board on something and it's in a slanting position, so the gravity is taking control on all our pigments are flowing down, which is fine because it is creating a beautiful effect anyway. But if you don't like this flowing, uncontrollable quality, you're always free to leave your art board flat down on the table. You can also leave some white areas to depict the light falling on the raven. Another way off. Showing light areas in your painting is to lift out extra paint with a damn or a thirsty brush. For this, you need to rinse your brush clean. Andi, take out extra water on a tissue on. Then you have a damp brush. When you move your brush over the painting, it's going to take out the excess pain from your paper. If you think your more is running out and it's going very, very light at the stage, you can add in a bit more pigment at this stage because the paint is still wet. And if you're going to add quite thick Pickman straight from your cake, it is going to blend in nicely and it won't leave Ah, hard mark on your raben. So as you can see here, the paint iss the papers still wet. So as I'm dropping in the pigment. It's sort of feathering out on blending in nicely. So if you want to make your raving a bit more darker, or if you want to build in tonal values in your painting, this is a great way of doing it. So get thicker consistency, paint or take the pain street one the water color and just place it over the wet paper. - If you like splatters, you can add them at this stage while the painting is still wet. Andi We're also going to use the same colors that we used for our rave in. And finally I'm going to add in a tiny bit of Payne's gray only in the darker areas, as the paper is still quite wet. I am not going to use the pains great that we prepared first, because it is quite watery and it may just get all the pigments to run down again. So I'm going to use quite thicker paint straight from my pan, if possible, so you can see here that it's not running down and it's not quite watery. In fact, it's actually blending in along with the blue underneath. You can also notice that it is blending in and it's feathering out quite a bit on. Do you can see that it's gone outside the lines here? But I'm not too worried about it because it's still giving me a very good effect. I quite like the effects them. If you don't like the effect off it feathering out, I would such us that you wait till the layers underneath are dry on. For the fine details, you can always use the tip of the brush to finish it off. If you're not comfortable using a large brush like this, you can change to a smaller brush for finer details. So at this stage, the watercolor wash is complete. You can leave it at this stage if you like, or go over it with Ben. Once it's dry. All you can also use watercolors instead of pen. If you'd like to do more details on your raben, I have demonstrated that in my next video
6. Class Project: finishing touches and final thoughts: So now this painting is completely dry. I'm going to go over it with some details. So here you can see I'm using a thinner brush. It is a size four round brush on. I'm using it for finer details. I'm going to use Payne's gray for the finer details. You are also free to use a pen if you like. If that gives more control to you, you can do similar things with pain as well, so you can see that I am actually doing the beak on the ice. So a few lines Andi spots here and there will do the trick. You don't need to paint in the whole beak or make it look black at all. You can use very light, wash or even leave it white, if you like. Now, for very fine details, like the feathers under the beak and on the neck, all you need to do is just do little lines, shot quick lines with the tip off your brush. You can also add in details off layers of feathers. As you can see, I'm only using pain screen, and I'm painting in some shadows under these feathers here. You can also add in few more feathers with your brush if you like. I'm also adding in more shadows on the tail feathers. As you can see again, I'm only using Payne's gray, and I'm going over the pen lines slightly, so it looks as if it's a shadow area. At this stage. We also need to make sure that we're not covering up the layer underneath entirely because we also like to see that beautiful blue under there on. So we're only using the tip off a brush to make small thing lines, so we're not exactly covering the whole layer underneath. Yeah, so I'm just going to finish off the branch the bird is sitting on. You are also free to leave it the way it is, but if you like it to be painted us or you can go over the lines, you can also add in a few more branches if you like. And there might be some people who likes leaves and flowers. You can even try doing a few things like that with your brush. Or if you're not keen on doing a 300 Brock string, you can always choose to do this with your pain because for most people have seen that the Ben gets more control and doing a lot of scribbles are next can be very therapeutic for some people. So this is a very flexible lesson on you can choose. What do you like more on your painting? Some people before more paint on your painting. In some people, Performer pen marks on your painting. Either way, H is still going to look very beautiful because line and wash has this very special quality that makes it look very magical. I really hope you have enjoyed using the line and wash technique for this project. It is a great way off bringing character to your illustrations. The effect off fine defined lines on loose Big Mons splashed onto it makes it look very vibrant. You can feel a lot of movement, especially if it's painted very loosely. It's a great medium for artists and whole beasts alike. Please feel free to ask me any questions. I really look forward to seeing at least some off your works here.
 Suzanne Abraham, Artist