Transcripts
1. Introduction: About ten years ago, my
illustration background and my new found
gardening hobby collided, forming a complete circle
for me, painting botanicals. I found the joy of process through studying the
plants and sketching and the therapeutic
side of mixing color and completing
the final painting. Looking closely, observing
the beautiful shapes, colors, and patterns provided
a deep appreciation and a stronger
connection to nature. Every time I found a new plant or even a piece of a plant
that was interesting, I just had to paint
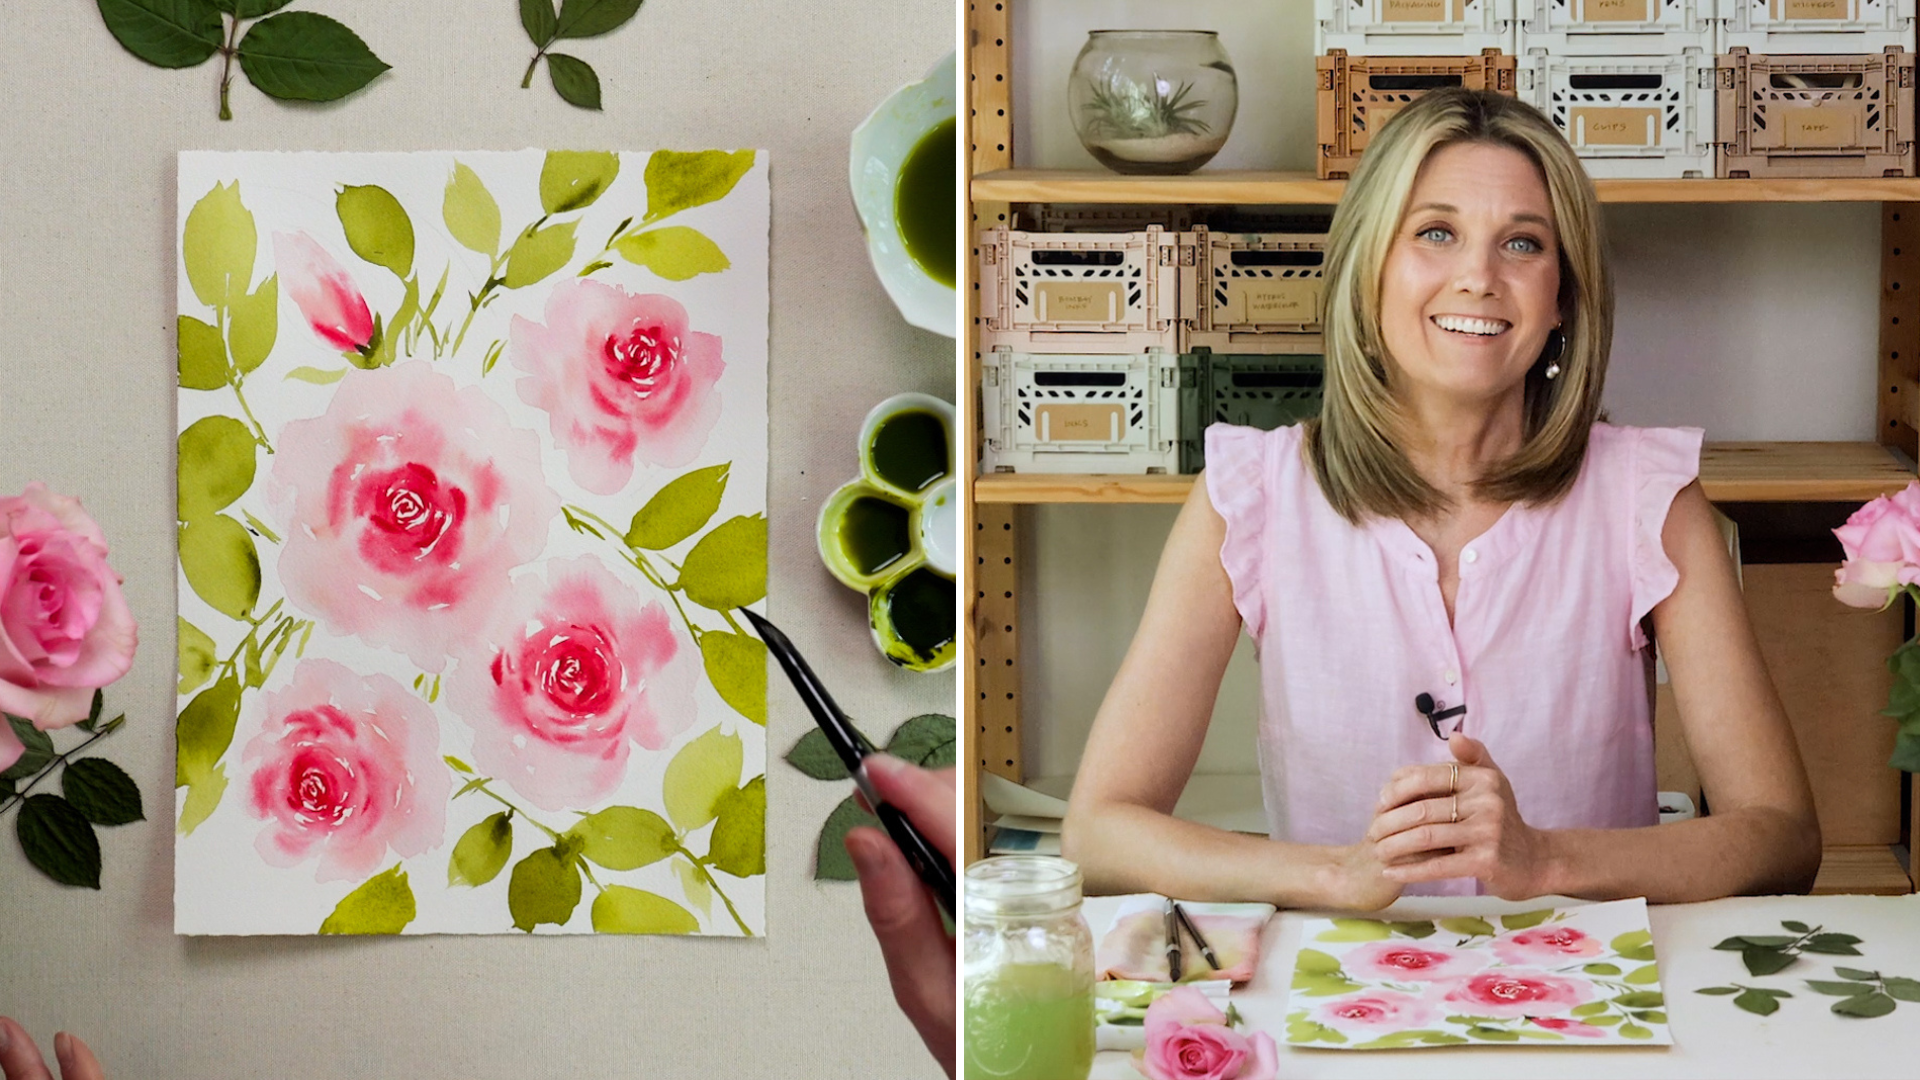
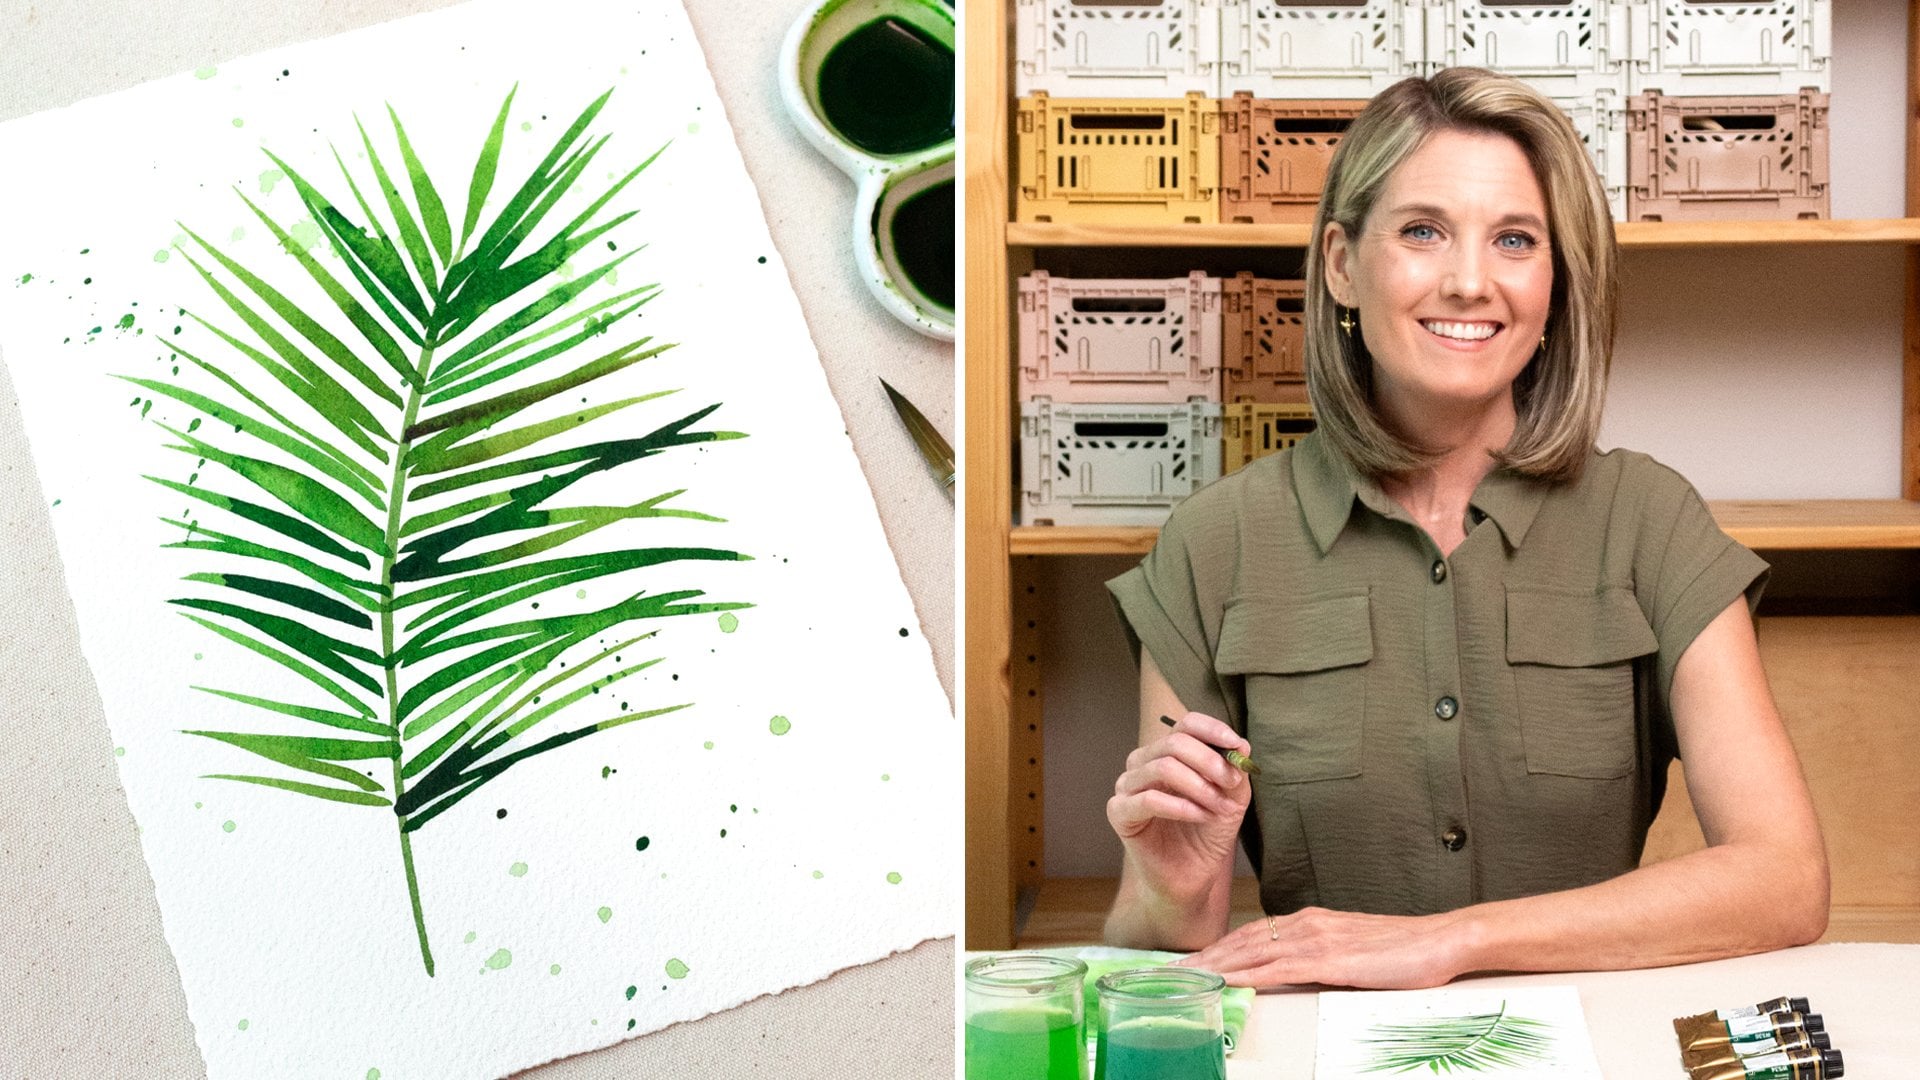
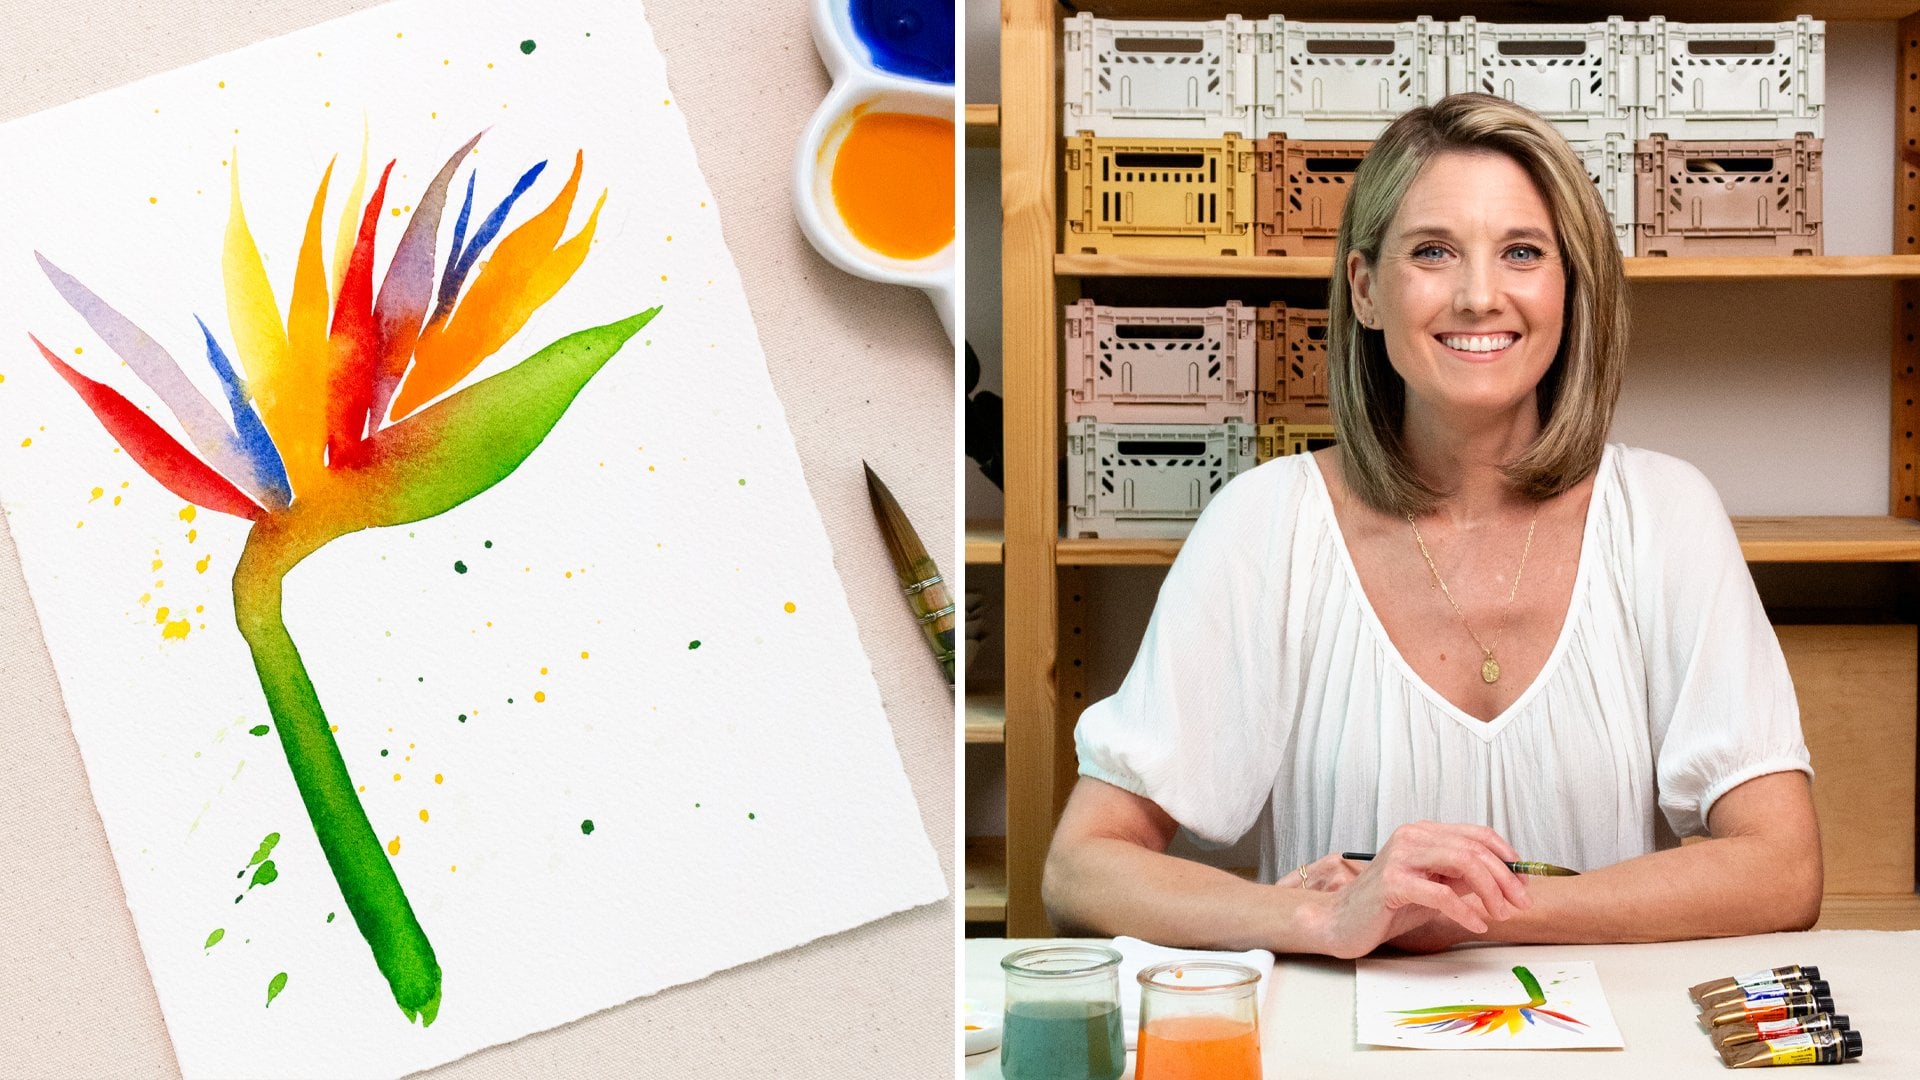
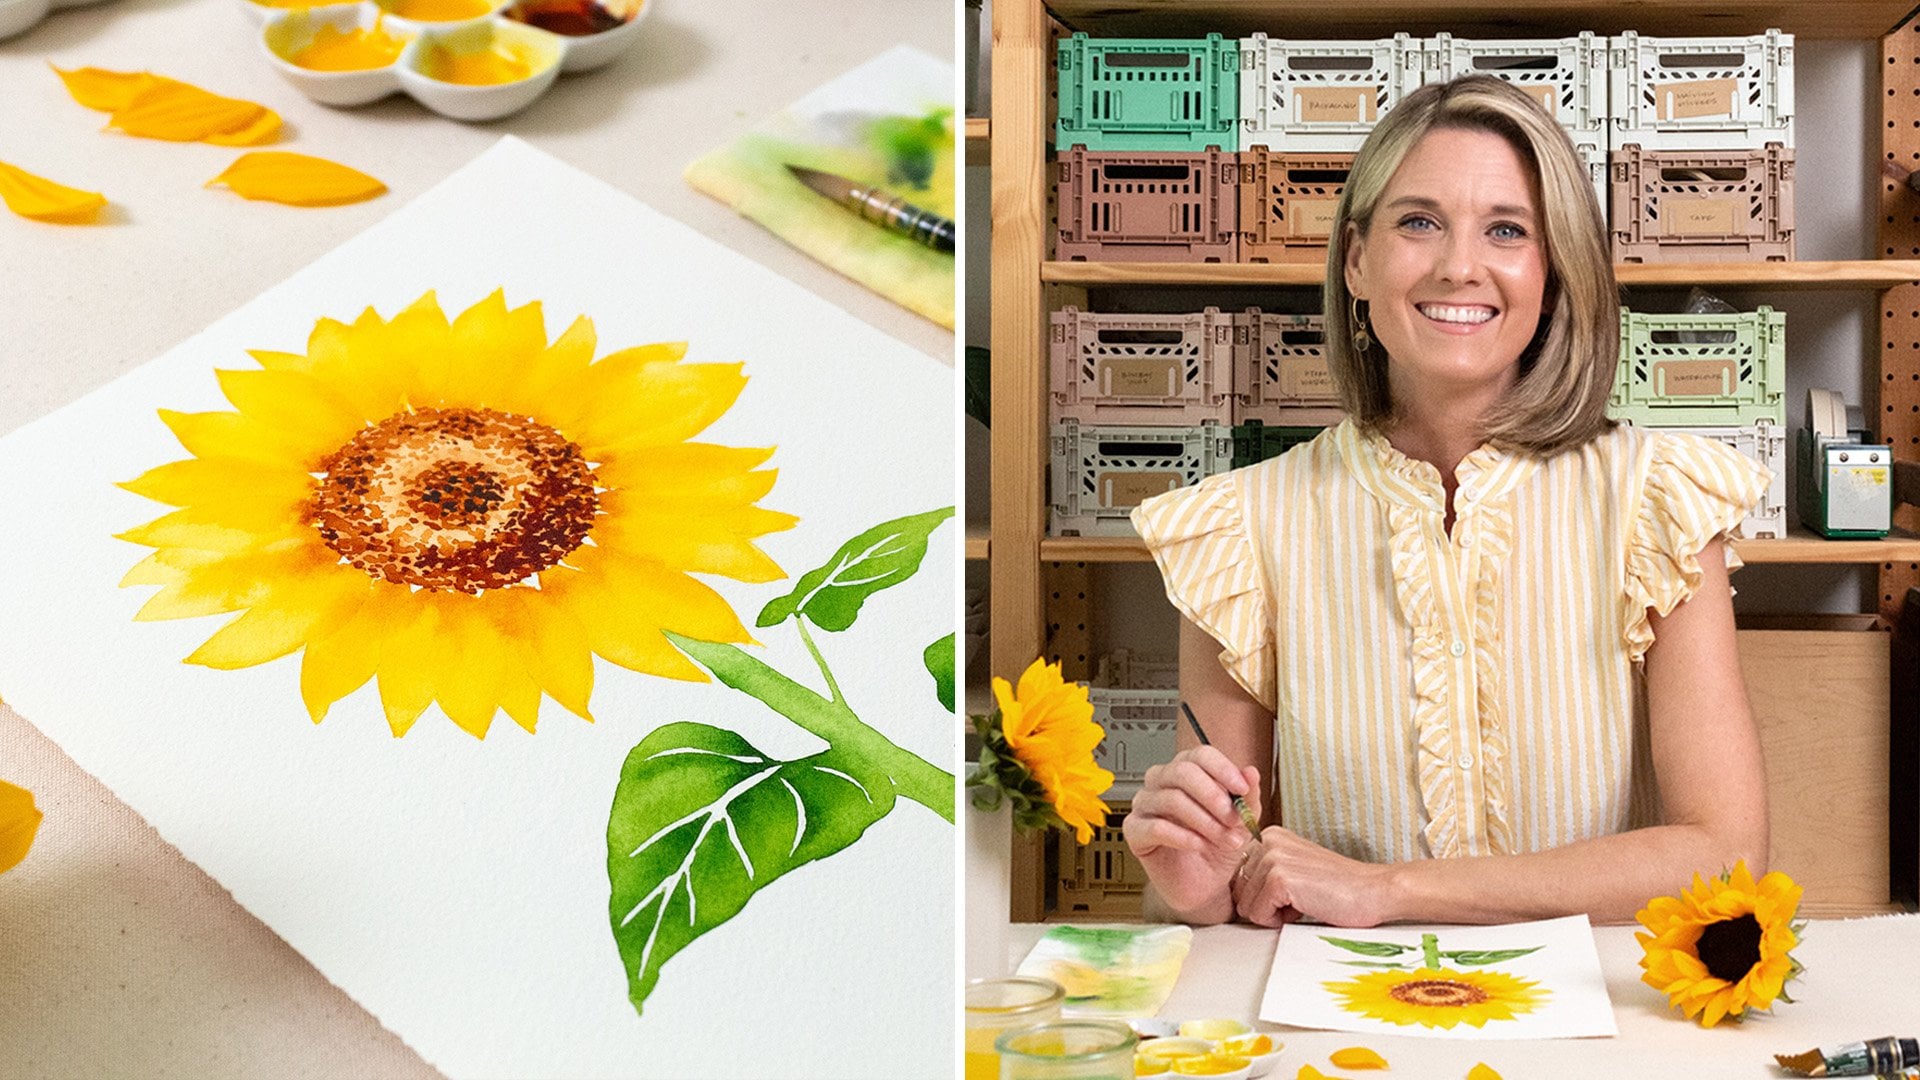
it. Hi, friends. I'm Jenny Ka, also known
as Living Pattern, a watercolor artist with
a focus on botanicals. My artistic journey
has led me to fun collaborations with
brands like WestElm, Chronicle Books, and
Paintbrush Studio. I offer originals, prints, and Licensed start
like repeat patterns. You can also find me teaching
local watercolor workshops. I love spreading the
joy of painting. A recent trip to a
local rose garden left me completely inspired. Today, I'm going to
show you how to paint these modern intuitive and expressive roses in watercolor. I'll guide you through
everything step by step. No worries if you're a beginner that has never
picked up a brush. I've got you covered.
We will start with a quick sketch composition using only see curves and lines. I'll keep it simple
to follow a promise. Then you'll watch
a demonstration of basic watercolor techniques, color mixing, and mark making. After that, we will explore the different perspectives of roses and how to achieve them. Then we will practice
the final tiny details and surrounding foliage. Once you've got
those steps down, we will bring it
all together as we paint a rose floral composition. By the end of this class, you'll leave with more than
just a finished piece of art. You'll carry with you a
deeper understanding of modern watercolor techniques and a new appreciation for the
timeless beauty of roses. I'm so excited you're here, and I hope you enjoy the class. If you're ready, let's paint
some radiant roses together.
2. Class Outline & Materials Needed: There are lots of flowers
that I love to paint, but few are as
iconic as the rose. I'd love to paint them because
there's a certain calm, but deep emotion
when I look at them. Their shape is really
quite unique as well, the way their petals curl and their form changes
as they bloom. We're going to try and
capture that form, and even some of
that emotion using water colors and a series of
simple steps I've developed. Let's start by going over some of the supplies
you're going to need. For this project, I
recommend arches, 140 pound cold pressed
watercolor paper, a mixed media pad. Watercolor tubes. I'll be using permanent rose, Joan Brilliant and olive green, a size four and a
size ten round brush. Three vessels of water, two watercolor palettes,
a squirt bottle, a foam brush, a spray bottle, a rag, a metal
cork backed ruler, an HB pencil, and an eraser. I'll leave a list of
these materials in the class description
as well so you can refer back to the
metro convenience.
3. Preparing Watercolor Paper: In this lesson, we will
go over the basics of watercolor paper and look at some key steps to take before
starting our painting. My favorite brand of
watercolor paper is arches, 100% cotton rag for its
absorbing qualities, paper color and weight. It can be sold by the
block or by the sheet. Today, we're using
a 16 by 20 sheet, and we will be cutting that down to a couple of nine by twelves. In the watercolor world, people either use hot press, which is smooth, or coal
press, which is rough. So why are we using cold press? Cal press has texture, which creates little ridges and valleys for the
watercolor to sit into. This gives it less chance
to move around the page, and you can get those bleeds and funky marks that we love. Let's cut our paper down to
size now from this sheet. You may have seen watercolor
with a decold edge before. And if you've
wondered how to get that decorative look,
I'll show you how. You need your cork backed metal ruler and a
pencil for this. So here is what our final painting size
paper is going to be like. It's just a nine by 12. And then here's our
16 by 20 sheet. One thing I want to say,
before I do the cutting down. You need to make sure you're
using the right side. So the way you can tell
to use the right side of the paper is arches will have a little mark where
see, it says arches. So you can read arches on
the wrong side of the paper. So this is also going
to be smoother. So you're gonna want
to flip that over, and you're going to feel for
that rough texture, okay? So the rough texture is the
right side of the paper, and the smooth side of the paper with arches written on it is
the back side of the paper. So we're going to
make our decled edge, and we're gonna cut
size our nine by 12 paper size out of the
back side of the paper. So backside up. So
just grab your ruler. We want all the decod
edge to be the same. So what we're going to do is
we're going to take an inch. Let's take an inch
off one side, okay? So put your ruler right
there on the edge, mark 1 " and put it on
another edge and mark 1 ". Alright, so put your ruler. Cork side down on the
back of the paper, and hold your ruler really,
really, really solid. Like, just like that, and grab the corner
of the paper now, while holding your ruler
down, start to pull up. Alright? And you'll see You'll start to get that cool decled
edge. This is so simple. And it makes it look so
much more expensive. But yeah, so this is
what you're left with. Save this for scrap paper. This is awesome for
watercolor testing or scrap. Alright, now you got one side. So what we're gonna do is
we're going to go back in. Now we're gonna measure
for our nine inch mark. So put your roller
down. Nine inch. And roller down again and
nine inch. Same thing. Alright, except this time, since we want our deckle
edge to go that way. We're going to put our
roller there on the inside. So this is our paper.
This is our scrap. Now, take the paper up
just like that and pull. And pull it C how
pulling it away, so towards the other side, kind of coming into the roller, that'll give me a tight deckle. Then you left with this. There's one edge.
Last thing I have to do is measure out 12. Be All right. There we go. Now, here we are. Last ugh. So now we're going to line up just the same way,
on the inside. So on the paper
part of the marks. Now on that side, 'cause we
want our decled edge to be. Alright. So push down and
pull back just like that. There you go. And
that's it. That is it. Oh, yeah, look how
pretty that is. Now you'll know why I did it on the wrong side 'cause see
you get that little line. This is the wrong
side of the paper, and this is the right
side of the paper. So you want to cut coming up off the wrong
side of the paper. And this looks really good
in a shadow box frame. Have you heard of watercolor
paper sizing before? It's a thin layer
of gelatin put on the surface of the paper at
the mill during production. Sizing is used to alter the absorbent qualities
of the paper. Watercolor paper
absorbs paint directly into the fibers like a
sponge without the sizing. So it's best to remove for achieving super vibrant colors. Now I'll show you
how to remove it. So for this, you're
going to need your spray bottle and your
three inch foam brush. You're going to want
your foam brush to be just a little bit damp. So what I'm going to do because
this is completely dry, I'm just going to
take my sprayer and spray the front and
the back just lightly, and then I'm going to
push the water around, and get it just lightly damp. The reason I'm doing that is
because if it's totally dry, there's a chance it'll be a
little abrasive on the paper, and it'll start to
pull up the cotton, and you'll see a
little cotton balls. Alright, so we're on the
painting side of the paper. Don't forget. This
is the rough side. And we're going to
take our spray bottle, and we're just going to give
it one light wash spray. Like, seven or eight
spritzes. Alright. So put the bottle aside, and then you're going
to go top to bottom, just taking that
water and smoothing it on the paper and
also removing it. Alright, I'm going
to kind of, like, kneel down and look on the side and see how
much water is on there. I want just a little bit more. So let's give it just
a few more spritzes, especially on the
top and bottom. And I'm going to do one more run around the edges and
one more top to bottom. Alright, now our paper is totally prepped and
ready for painting. Join me in the next lesson where I'll show you
how to mix your paint, one of my favorite parts
and set up your palette.
4. Mixing Your Paint Palette: Before we start painting, I want to review how
I set up my palette. I've got one mason jar, two smaller bowls of water
for rinsing my brushes, and a little squirt bottle for adding water to my palettes. We're going to be working
with three colors. Permanent rose, Joan
Brilliant and olive green. We're going to be
using two palettes, one for warm colors, and another for cool colors. Now, let's start mixing. We're going to start off by adding a little permanent rose, one dab into one of the wells
of my porcelain palette. Just about that much. A
quarter teaspoon will be fine. Then we're going to grab
some of this join brilliant, and we're going to put it on the exact opposite
side of the palette. One quarter teaspoon,
just like that. Now, we're going to
take our squirt bottle, and we're going to put
about half a teaspoon of water in each of
these four empty wells. You can leave this
middle one alone. We're going to mix up the
dark rose color first. And then we're going to
gradually get lighter. So grab half of the
permanent rose on your bust, just like that, and start
mixing it into the next well. So we clockwise. It's okay that it's starting
to spill into that. That's just fine. Water color is simply water plus pigment. So you really want to get
all of the globs, like, all of the blobs and
globs completely stirred because you're just combining
that pigment and the water, and you're leaving
a nice smooth. Like, this should kind
of look like milk, like a milk consistency. Alright, so let's stop there. Now, a bunch has
spilled into this well, which is totally fine, and now we're going to
not rinse our brush. We have some permanent
rose pigment on there, and we're going to mix
it into the next one. So, see, that gives us a
nice gradiation of color. So I want this to be
very, very, very light. So I'm going to put water almost to the top
and mix around. All right. Now, let's test
where these colors went. First, we're going to swish of rinse off our brush
here in this jar. And then one of these
is for warm colors, and one of these is
for cool colors. So let's rinse again. L's just like a double rinse. Dab off, and now we're
going to test our colors. So this is just the
pigment out of the tube. Let's see where
this is. Alright. Oh, yeah. That's pretty. That's one of my favorite
colors out of the tube. Alright. Now, let's keep
that pigment on the brush. Let's give this
one little swirl. I don't like to waste
pigment in the water jar, so I always try to pull it back into the palette
to get it off. All right. So let's see
where this color landed. Oh, that's so
pretty. What a nice. That's perfect. That's like
your mid ground pink, okay? Now, I'm going to swish off. Once and twice. Get
it nice and clean. And I'm gonna grab this light color and
see where it went. Oh, that's so pretty.
Okay, perfect. So this is good.
You have your dark, dark, your middle,
and your light. Alright. Let's rinse that off. Rinse it off twice. See how much pigment is
still in that brush. This is why we do like a two ns. Alright. Do a little dab off. Now we're going to
go to the peaches. We want these two colors
to almost be married. So what I'm going to do is
I'm going to pull a hint. This goes a long way. Just a hint of this
permanent rose. If you can even see on the
brush, how much that is. It's barely on the
tip of the brush. And I'm going to go into
this peach color here. So see what I'm doing. I'm just adding like a bare hint of the rose to my pure pigment,
Jane Brilliant. What that's going to do is it's just going to make it cohesive. You're going to wipe
off that extra pigment. Now, with that still
on your brush, you're going to go
into this next well. Ooh, see how it
gives it that, like, just a little bit of a pink, and you can drop some of
that water back in here too. I'm going to completely
get that pigment off. And now I'm going to go without washing my brush off,
go into the next one. So that's just going to
create that lighter color. All right. So again, I want a lot of
that to work with, so I'm just going to add
a little bit of water. Alright. There we go. Alright, now, let's go
ahead and test these out. Alright. So here's
the one brilliant, permanent rose kind
of mix we made. Let's put it at the top. That's so pretty. Love that. Okay, now, just keep this on
your brush and, like, load it into here. Let's try to see what
this color L. Oh, yeah. Oh, that's perfect. See how it's got just
a hint of that in it, but it's far enough where it's going to give some cool depth. Alright, now, let's do a rents cause we want to see what
that lighter value really is. One, two, and grab some of this. Oh, yeah. Look at that. Gorgeous. Just a hint. So, we're only using
olive green through this. We're going to use
a dark olive green, a middle ground olive green, and maybe two light
greens. Okay. So I'm just going to
load this in my palette. I'm going to use a lot.
Alright, so, same thing. We're going to take
our square bottle, and I'm going to work clockwise. Alright, so grab about half of that and start
mixing in a circle. And if it starts to
pour in, that's okay. One, two. See, I didn't
even rinse my brush. Stir stir, stir. See that. And and now to this one, see, I'm not rinsing my brush. This is such an easy way
to make a quick palette. Now we've got pure, dark, medium, light,
and ultra light. Okay? Now, you're going to
want to rinse this off. Rents in the main jar. And then go back for a second wash. This is going to be
our cool ns off jar. And look how cute it is. All right. Now,
let's test these. So this is our dark. Oh, yeah. That's our dark
dark. And actually, let's throw that
pigment in there. Kind of wipe it off. Okay.
Alright. Let's rinse that off. And we're going to go
here. It's pretty. Rinse off again. Alright.
That's one, two. That's a night. That's good. I'll keep that transition. That's a little strong
of a transition, but this could be really
good in the long run. Alright, and then
super pale. Alright. Perfect. Now we have
our palette ready. Our colors are
completely swatched out. Next, it's time to
put our brush to work with some practice
mark making. H.
5. Practice Mark-Making: Now, let's practice
some mark making before we move on to
our final painting. A practice pad is great to have around because
with watercolor, once a mark is made on
the final painting, you won't be able to remove it. You will often want to test
out marks before adding them. It's also a great place to
get to know your brushes. So let's start with
an exercise to learn our brushes and all the marks
they are capable of making. What I'm using here is a size
four and ten round brush. These are made by silver brush, and they're from their
black velvet collection. They carry huge
amounts of color and then release in a slow
controlled manner. There are lots of brands of watercolor round brushes
that will be fine to use. I just personally
love silver brushes. Now I'm going to show you the different ways to hold the brushes for different marks. You can follow along
with me if you're ready. We will fill up a
whole page here. Don't worry about
what this looks like. This is just preliminary,
and you're having fun. We're going to start up top
with the vertical hold. Now let's start off with some 1 " little dashes holding
the brush up and down, just like this, and let's kiss
the paper just like that. I just want you to
see what we can do using the vertical hold
and this tip of our brush. Now, I'm just pushing my
arm in a circular motion, almost like I'm pedaling a bike. See, it's just one little mark. My elbows not on the table. My hands are not on the table. Just one little d d, d. Alright, that's what the tip of
the brush can do. Okay? Now, let's load
up. You only need to load up one
time for each row. And let's go the
opposite direction, and now let's start pushing
the brush at the top, pulling it, and making a
wider mark at the bottom. So we're gonna, like, push
down and do a little of that. Okay. Do you see what
one db down can go? Like tip down, push, and lift, just like that.
Quick little marks. Oh, cool. See, and you can kind of be a
little aggressive, pushing really hard or being quick and fast, just like that. Alright, now, let's combine those two little
movements I showed you, and let's swirl left
and swirl right. Okay? So my arm's totally
off the table, and I'm going to go
hook left hook, right. So push down with the tip and up with the tip,
down with the tip, up with the tip, and we're
just going to make like, backwards parentheses
marks, almost. Just like that. But
you're just practicing, turning the brush while
pushing down and lifting up. This is such an awesome
little exercise if you're a beginner because it's so
important to know your brush, and filling this whole page up, will just increase
your skills fast. Right? So Twisting, and turning left and turning
right, just like that. Alright. That's our next row. So let's grab a little
bit more pigment. Now I'm going to
show you holding a little more of a flat
hold, what we can do. Now we're going to start push down and pull up,
almost like that. Same, turning a pedal. Right? I'm I'm not touching the table with
my arm or anything. So angle your brush
down a little. Like, we're at like a 45, and then push down and lift up. Push down and lift up.
See how they're kind of, like they're squares, but
they're atle bit rounded. That's what we're going for.
So There we go. Perfect. Boom. And I haven't
loaded my brush yet. So it's kind of see the dry
brush, too. I love that. Alright, now grab a
little bit more pigment. And now I'm going
to show you how to combine that one
with the previous one. A little bit higher
than a 45 degree angle. And we're just going
to put the tip down here and twist and lift up. You see that? Twist and lift up. So that's just like
a nice wide mark. These also look like leaves. We'll go back into these again. And in the other demo. So in connect them
also so you can see how the paint
interacts and bleeds. So that's just point
down and pull up. Those cool little edges. Point down, pull up.
Okay? There's that row. All right. Now, let's
switch our brush out. Let's go to the four round. This is the same brush,
just a different weight. Grab some pigment on him, and we're going to
do the same thing. Vertical hold, one third up. And we're going to do
some quick little dashes. And you can see,
I want you to see how fine of a line you can get, and then how thick of
a line you can get. See? Isn't that amazing? Look how much of a variation
you can get with one brush? And this is a four. So how thin, thin, thin to thick. Okay? Alright. Now,
let's continue. Alright. Let's do a really
long horizontal line. Alright, so I am
holding my brush. One third of the way. Let's just do some thin little
horizontal lines. Now, I like broken little
organic lines like that. I think it makes you know, the stems and everything
look very real. Just practice that. Oh, look. Some of them are bleeding
into each other. Pretty. Alright. Alright, let's start now with almost this
exercise again, with the four. So just side to side, tip down and pull up. Okay. Tip down, pull up. Grab some more pigment. Let's just do that whole
mark all the way across. And by then, your hand movement is going to be really good. You're gonna be loosened
up at this point. Alright. Alright. Alright,
last, but not least. Let's do some ss. We're going to start
with the little one, and then we'll
go to the big one. I'm going to show you
what the weight of the brush can do, going 4-10. So point down, and let's
just do a little hook. Okay? This little little ss. Okay. This will just get you to understand how
to move the brush. So see how I never even lift
the bristles off the paper. It's almost like you're mopping. Think of it like that. I just
pushing the pigment around. We're just making ss. Alright, so that's the
thickness of the four. We're going to rinse him
off, set him to the side. And now we're going to
grab some more green, and we're back to our ten. We're going to make
that same mark so you can see how
big it can get. Okay. A little sea
mark. Sea mark. So don't lift, carry all around, 'cause I want you to
see how much ground you can cover with
that one brush. And that's it. Now that
we know our brushes, and we're comfortable
with mark making, we're ready for the next lesson. We will sketch out a
quick composition.
6. Sketching Your Composition: Before we talk
about composition, I do want to mention
that for anyone that wants to jump right
ahead to painting, I'm making my
sketch available in the class project
resource section. I'd suggest either tracing lightly in pencil or keeping it off to the side so you can refer back to it as you move
through these steps. Now, let's talk
about composition. I'm going to be working with a marker on villain paper here, so it shows up on camera better, but you'll be wanting
to work in pencil. Make sure to use
an HB so you can easily erase your marks
from the watercolor paper. You'll want to have some
inspiration in front of you. You can either have
live reference or you can use Pinterest. We are lucky to have some perfect roses
here to sketch from, so I'll be using these today. First, I found that
compositions of flowers in general are more
interesting in odd numbers. So one, three or five roses on a page will be more
interesting than two or four. I'm going to add a
few circles here. Some of these will get
dots in the center. These circles with centered dots will be for the roses
that face forward. We want some variety with where our roses are facing to
bring a little more depth, just like we'd see them at
different angles in real life. So I'll add some circles
with dots off center. These will become the roses that will be on their side
to bring in depth. Next, I'll add in
one tear drop shape for a closed rose bud. Lastly, I'll start
drawing lines for the directions of stems,
leaves, and fillers. I like those to be a little bit more expressive and intuitive, so I won't add in much. Just focus on the direction
of the marks here. Take a moment before
moving on and visualize this
composition you're creating for just a minute. This sketch you just
laid out is going to be the guide you'll be following throughout this class project. Ask yourself if
you want the roses clustered together or a
little more space depart. If you need to make changes, just erase your marks, then move around circles and lines until you feel
like it balance as well. You'll only want thin, soft graphite lines on
your paper for this. So take your eraser and pull off thick dark
graphite marks. After your sketch is lightly added to the
watercolor paper, it's time to proceed
to my favorite part, adding color and making
beautiful marks.
7. Painting Roses: Now we're ready to
start painting roses. Okay, so we are going to start right here
with the focal rows. We're going to get our brush
a little bit wet. Dab off. And we're picking up some of the pale pale permanent rows, and then I'm also going
to be using the pale wan brilliant that I mixed with just a slight hint
of permanent rows. Se it's got that pink tint. And we're going to start on
the outside of the rows, and we're going to move inward. Okay, so let's pick
up that color. And we're going to lay down a significant amount
of water color. We're going to keep
it nice and wet. Now, I'm looking
at this rose here. This is my reference rose. So nice to have that
live reference. Alright, so I'm
just making marks. See, I'm going to drag my
rush to mimic those petals, and I'm going around
in a circle while I'm picking up the
permanent rose wash and the one brilliant wash.
That's going to give us effortless depth to use
them both at the same time. Alright, so just go
right in a circle. And I'm just checking
out my petals here. Letting that dance around. Now I'm going to
start to fan that just a little bit
around in a circle. Pick up both colors
here and there. Kind of make those
nice petal marks and leave a little
bit of white space. Just a little. So we're
just working in a circle. The All right. We're getting closer
to the center, and I'm going to start adding in a little bit
darker of a color. But right now, we're
just laying down a lot of watered down pigment. So when I get to the center, it has places to bleed. Alright, and I've left some
white space just to see. Alright, so now we're at the point where you
want to pick up this medium wash
of permanent rows, and we're going to start here, and we're going to
start fanning it out. So it'll start to bleed, and you'll see this row
will come together. So just see those little
marks I'm making. Everything's very wet. This whole area is
very wet. All right. Now grab your dark dark rows
and start to make these tiny little sea curves
at the very center, indicate the center of the rose. Okay? And just stop at that. Now, keep on going with that loaded pigment
and do a ns off. So this is all still very wet. I'm going to keep working
to give it a little depth. Now I'm going to go into
the medium one brilliant. Do a couple little flicks
of my brush like that. So I'm looking at where the
depth is on my actual rows. Now I'll grab a little bit
of that medium. All right. See how I'm just
adding in the depth, a little wash out and leave a tiny amount of pigment
on your brush if you want. Just going to grab
a little here. See how I'm giving it depth, pulling on and off and mixing the two colors at the same time. There we go. Alright, so this is just moving the pigment around
as it's drawing. Oh, my gosh, that's
coming up nice. Right. So occasionally, you
kind of want to lean on your side a bit and
look at the overall. But that's looking very pretty. Alright, I see a
couple of spots that need a tiny amount of peach thrown in, right? Here. You'll give it a little hook. Any kind of mark you make like a little mark like
that will show up. Right? I feel really
good about that. I'm going to leave this as is, and I'm gonna let
it keep drying. And I'm gonna move on
to my next flower. Which is going to be
right here. All right. So this is still a little wet. So let me get another rose here. Okay, this one's nice.
Let's use this one. As I start here, I'm
going to get some of this pale wand brilliant. And I'm going to
start shaping this. And I'm going to
since this is so wet, I'm going to bleed them together
for a nice overlap here. Right? And same thing. I
just go to pick this up. I'm also keeping an eye on this. Like, if I wanted
to add any more in, I can while it's still wet, but I kind of like I kind
of like it as it is. It's really personal preference. A, so there's that bloom. Keep in mind where your
circle is from your drawing. But, you know, this is a
little intuitive as well, so you just want to kind
of do what feels right. If you let fear take over, it's going to ruin
your painting. Alright, so at this point, I'm going to I'm
looking over here, and I want to add
just a hint of dark. You see that? It's
still a little wet. So I just added a little hint
just to give some depth. And now, use that same
medium permanent rose, and I'm going to start to
shape the center of this out, too, just to give
myself placement. Okay? Let's wash that out. Let's grab some
of this mid each. See, that'll be fun.
Okay. Wash that out and keep on going in a
circle and start to let those areas bleed together. Very nice. See, it's
nice to leave some of those white spaces. Okay. There. Okay, Let's dry that off. I got some puddling. I'm
kind of going to pull up. I like how these areas
are reacting. Okay. Now, I'm going back in
the center with my deep, deep dark right out of
the tube permanent rows. Okay? This is all wet. So I'm going to craft
my center just like that. There we go. I'm going to see. I'm just
going to take my brush and kind of work a little
bit, like that. See, that's the effect
that I'm going for. There's just a hint of
that going on. It's nice. Alright, so I'm gonna
leave it light in there. I kind of lucking that. I'm gonna add a couple
of little marks there. Alright, I'm good.
This feels great. Alright, I'm gonna
wash off here. That color is actually
gorgeous in my jar. And now I'm gonna
go here to my side. Alright, let's grab
both. Now we're here. Where's my side flower? Okay, so I'm going to use my side flower as
my reference point. Painting them on their side is a lot more difficult
than face up, but just keep practicing, and you'll get better
and better and better. Okay? I like how this one bud is kind of
dripping off the side. I some to keep that going. And then this also
coming out a bit. And I don't know if you
notice how I'm, like, twisting my brush
and pulling it down and see how all
those marks look. That's from that brush.
Alright. So now, I'm going to come in here. Now, this is the This
is kind of the center. So I'm going to shape a
little bit of that in. Ooh, those marks are nice. Oh, yeah. There we go. See, that's my center. Okay. Let's grab a
little bit of that. Peach. The one brilliant. See. Just little
wispy, dot, dot. Alright, now I'm grabbing
some of my pink that pale, pink washed to kind of
blend it all together. So just leave some white space. You don't have to leave a ton. You don't want to
look too sketchy, and don't forget to
bring your brush back back through for
those really fun marks. Okay, so I like
this. I'm not gonna touch it much more other
than adding the darken, so it feels very much
like these. Okay. So here we go on our side, the dark points are up here, and I'm going to make
that a center and this kind of unfolding there. Okay. Wet that just a
little bit. Toss that in. Now, see, I need to get
just a definition there. That's a too wet, so I just dried my brush off, and I'm going to just to
hit that a little there. Alright. Alright, I'm gonna
let this do its thing. See, it's going to
continue to keep bleeding. Alright. T. Okay, I'm leaving
that rose as is. Alright, now, let's move on
to the other side of rose. So keep in mind the
balance of these roses. Okay. So where's my ra? Here, we're going
to use this one. Oh, I love having
the live reference. It's perfect. Alright. So start on the
outside, Pale washes. And I'm just mimicking
those petals with my brush. Pan, perhaps some pink. Right? Now, let's start
to work in a second. Go this form my outer edge. Okay. Now, this is my center. So, same thing. I'm going to grab this
mid permanent rose, and I'm going to form the center just like you saw me do that. Alright. Let's print that. Let's grab a little bit
of this one brilliant, just to get the depth in. A little too wet. I'm dry
rush pull off a little. Put some movement
marks in there. There we go. And now, I'm going to go to my
dark for the center. Okay. Little ss. And I don't know if you notice, but my brush is
completely upright. This. I'm getting the e. I can push down if I want
some more control, but I'm getting,
like, really nice. Marks. Okay. Just a couple little
couple little marks there. And yeah, that
that's looking good. We're just about done
with our roses. Okay. Now, I see just a couple of
places here that I wanted to have some of that peach
happening in, the one brilliant. So let's throw just
a little. That's it. Okay, if you know me
and you know me well, you know that was not it. To add just a little
bit dark in there. As it starts to dry
with watercolor, you'll notice that it gets
a little bit lighter. So you might need to go back in. Alright, there we
go. Now, we're at the final step of
painting the roses. We have to add our beautiful bud right up in the corner
'cause working with five. Odd numbers is best. Okay. So let's grab a little bit
of the pale wash again. And we're going to
go right up here. I mean, you can barely
see it, but it's there. And then when I add
that dark through it, it'll come together. Okay. Okay. Now, grab some of this dark dark and
just lay it right into the bottom and let it run up and let it do its
thing with a few of these little wispy strokes. See? And you don't
want to overdo it. That's good. Good for
the permanent rows. Let's throw just a little of
this medium one brilliant. Pretty. See how that
gives it a little depth? Gives a depth without
going too far. Okay. Perfect. There we are. Join me in the next lesson where we will
continue filling in the composition by adding
in the leaves and foliage.
8. Painting Leaves & Stems: Okay, now that we
have our roses down, it's time to tackle
our stems and leaves. If you have your live
reference, like, I have these gorgeous
roses here to paint from, But the night before you
start your painting, grab a few leaves off of your plant and put it
in a book to flatten overnight because
then you can use them alongside your painting
while you're painting, and you can kind of turn
them and shift them, and I'll kind of
show you as I go. But it's just a cool
little thing to do. It helps with form
and composition, and just understanding the plant makes your painting better. So yeah, Anyways, let's get started painting the
foliage and the stems. I'm going to put this
little guy over here. Alright. So I'm using two
brushes now, a ten and a four. I'm going to kind of
simultaneously use them. The four is going to be
for the tinier lines, the stem, and then the ten is going to be
for all the leaves. So, let's get going
with this four, and let's start
laying in some lines. Alright, I'm going to start
up here at this corner. Now, that is a perfect
little thing to have here. So I can kind of turn it in the same direction that I need. So I'm looking at this,
and I'm painting here. So load your brush with some
of the medium olive green, and you want to keep
your arm nice and loose and your hand nice and loose and throw in a quick
little mark, just like that. It could be two
little broken marks to keep it nice and natural. Putting my four down, and now I'm going to grab
my ten and throw some of these beautiful
leaves in Now, see. Leave the Let the brush do
its thing. I love overlap. I'm gonna ad to overlap,
just a little bit. Perfect. Let the
brush do its job. Okay? Push down
and pull right up. Get that nice little rose kind of jagged tip with pulling
up the brush like that. All right, I'm going back here. And I'm going to
let this fall off the page just like that. Now, if I want a little
bit of a darker color, I can grab some of that dark and throw it in here and there. See what that does. It
just gives a little depth. All right, so rinse that off. And then we're going
to grab R four again. I just love making the
little stems with four. And I'm going to add a couple, so a couple little details. See? And now I'm going to
go for my rose bud here. I'm going to do a
little bit of that. A couple of little lines there. Let's grab some of this
dark. There we go. Kind of swish that through. Grab my medium, give it
like a point to play on. And give it, like, a little bit longer of a line here and there. Oh, that's so pretty. Okay. Now, let's look at that stem. I'm just going to add a
couple of little lines there. Okay. Just like that. And let's throw a
leaf over here. Like a suggestion.
See the movement that I made in pencil. So let's just go right through
there, just like that. And I will have another leaf. Perfect. Just a couple
little marks like that. Alright, now, we are keeping with the
movement of everything. Let's keep moving in
a circle this way. So here's my medium. Green, I'm going to make a couple little broken
lines up that way. I'm gonna start at the top, and I'm gonna think about, like, a cool little
curve this might have. Perfect. I'm gonna
leave it like that. I like that little
white line in there. Now, this is looking
just a little bit dark, so I'm going to pull
some of that off, maybe add it over here. I kind of keep moving. Color around as you're working. If it's still wet,
feel free, grab it. There we go. And I'm going to throw a little
bit more color in there. Ales. Same thing. I'm going to work off the page. Right? Let it overlap
just a little. Oh, yeah, that's
looking great. Love it. Okay. Now, let me throw Let's say this little leaf wants to come off on its side. So take your brush
and kind of S, look, this is a perfect time
to use this reference. Brush. Kind of go swoop
and do another swoop. Okay? So that gives me
some nice painterly marks. You can always go
back like that. Touch like that. Alright. Alright, so just keep in mind all the directions
you're working. Let me add in a little
touch point there. It just helps to have a
couple of lines like that. And here's our other line for
direction. Let's go down. So I'm going to grab some
of this. Medium green. Let me grab my four.
Try to use two brushes. It'll give you a variance in
your mark making. All right. So there's my four, and I'm going to just
pull out like that. So that's my little guideline. I'm going to go back into it with the medium green,
just like that. Now, with my ten, I kind of want to intersect
some leaves here. So I'm going to look At maybe intersecting that one with one that comes down a
little bit. Let's do this. I'm to use my light light green. Yeah. I like that.
Intersecting makes it pretty. It's not that hard. Alright. Perfect.
Come off again. Let's turn this one a little up. And I'm going to actually pull this one like
it's coming off to the side. This is really just
about practicing like knowing where
to put your leaves. Right? Let's grab
some dark cause I see some areas over here that might need just a
hint of some dark pigment. See? L a little depth. You can always drag your
brush through, see? There. That'll dry
really pretty. Alright, so let's give just a couple little,
like, expressive marks. There and there. And then, again, in some of
these pale colors. Okay. See, just kind of
put two down and run. It helps makes it look
like impressionistic. There we go. Alright, now we're gonna keep on
moving around this way. Let me grab some medium green. I like the lights
happening here and the darks over here. It
looks really pretty. Alright, now, so there's
my directional line. So I'm going to just add
a couple little marks. Boom, boom here, just
to show me direction. And then I'm going
to overlap that. Okay, just like that. See? Now, a leaf is gonna
come out here. So I'm going to do a quick. I don't really want it
to overlap my rose. I want to keep my roses
focal and on top. So I'm just going to do
a little bit of that. Without totally going
over it. There we go. So I'm leaving that as is. I like the way that looks. And I'm also kind of
feeling that I need just a little something
over here touching that. That's it. I'm going to
leave that as is, too. I like those. Little Judge. If you see a line like that,
you can just give it as oge. Alright, I'm leaving this as is, and I'm coming back over here. And I'm going to use this as the reference for the
way that's shaped. So toss that there. And you can point
your leaves in like that to give them see that
dry brush edge, I love that. And then let's start
another leaf here. There in, like, give it a flick up for that
natural little rose leaf. Alright, now I'm
going to go here. It's a little boop. Almost like it's completely
overlapping. There. Now, this needs some dark marks, so I'm going to dug just
a couple in like that. As they spread, you can
kind of dry brush it out and pull out to get
a little line like that. And then I'm going
to leave this. I really like the
simplicity of this. And I'm going to add a leaf
right here on the end. Okay. And I will
this be the tip, so it's going to be and
let's make it very pale too. Like light sitting it. And now I'm seeing an opportunity to
overlap a little bit. Let's do that. So here
is this leaf here. I'm going to pull just
a little color in, and I'm going to take
my brush and go, whoop. Set it go back. There's some broken lines. Now, that came off there, and I'm going to
add a leaf here. I like that for the movement
back up and around. There. And then let's do another pale one back
down this way. Okay? And then we'll do my
little intersection trick. Alright, I'm gonna
leave that as is. That's pretty. That's
really pretty. Okay. Now, I need just a
couple little things here. And just a little something to indicate that bloom, right? And now all we have
left is up here. Put a couple little
marks right there. Let me just add as you
see fit what you need. Alright. There.
Alright. Almost done. Alright, so there's
my directional line. I'm going one up
here and that way. And I'm going to come directly off here and just put some
broken lines in, right? And let's Let's do set
like that and that. Now I'm going with
my medium green. I'm going to do some nice
overlap here with the line. Okay. Let's see the pale green. Just play with it until
you feel good about it. Okay. That's good for me. I want a little bit
of dark in here, so I'm going to grab
some, add it in. Alright, so let's go back up here and that leaf will do that. Just a couple little my
little character marks. That's what I call them. Let's drag that through there. Alright, I like this is
blending really nice. If it's still wet, you
can still play in it, so you can add a little bit
more pigment, if you want. Okay. Just like that. Alright,
now we're here. So I think I like some of the white
balance here with there. So we're only going to add, I'd say right over here. Add a couple little
leaves over there. Alright? So let's start
with a pale pale green. And I'll have one leaf. Framing. That. Yeah. And then let's
take some dark up to the top. Keep rounding out. You
just have to, like, know what to listen
to in your head. Alright. This is kind of when
I just step back. Let's take a nice look and see
how we feel. This section. I don't want to overwork
it because stems, you know, Stems come in, and there's nice leaf shapes. I love this area.
I think I'm done. Oh.
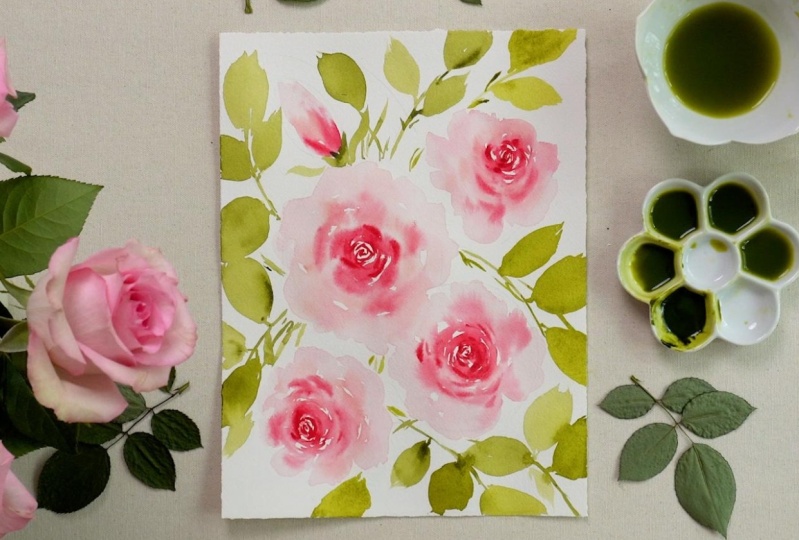
9. Conclusion: Congratulations.
If you've followed along through this class, you should now have
your very own radiant rose floral painting. The techniques you've
learned here can be applied again and again on your
journey with watercolors. So please keep using
them while exploring. Magic is found within
experimentation. Now that you've
completed this class, I want you to remember some
of the lessons we've covered. You should now know at least two different ways to
hold your brush, and you should have
a good sense of the marks that these
holds will produce. You should also understand
how to prep your paper, select colors that will
balance and complement each other and be able to mix those colors to
create a palette. Finally, you should also have an understanding of
how to use bleeds to begin constructing the forms and structure of your subjects
in an expressive way. I'd like to encourage
you to take a moment and just embrace
what you've created. Try hanging it in a
few different places at home and see how
it makes you feel. I love hanging my newest
artwork in my studio on the same wall as my
previous artworks to keep building
my painting style. When you're ready, jump back
to the beginning to refine your techniques a
little bit more and take some time
to experiment. Maybe next time, try
a new arrangement of roses painted in
yellows or reds. You could do a different layout
altogether by simplifying it to just a single rose
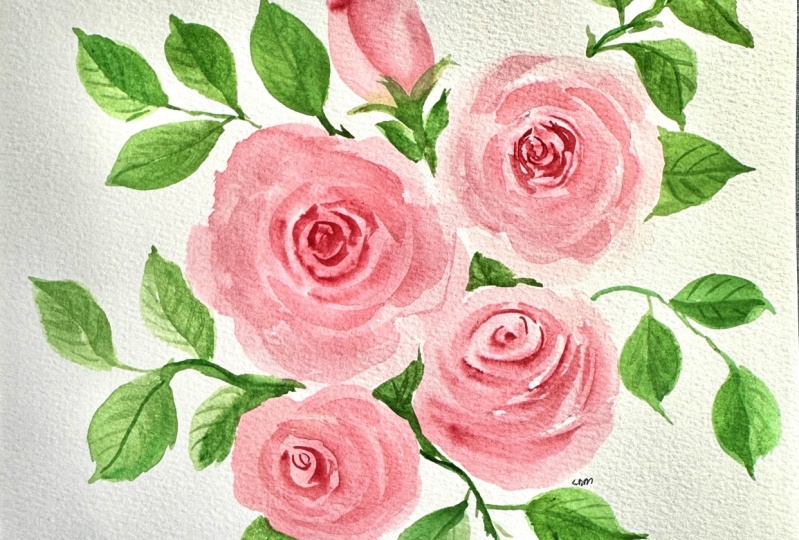
with a few new leaves. Please make sure to upload what you've painted in
class projects. Even if you haven't
finished your project and you'd like to post
a work in progress, I'd love to see it
and cheer you on. I look forward to
connecting with you all, providing feedback
or just to say hi. Engaging with other students in the class project posts is an awesome way to support each
other's journeys as well. And most importantly,
just enjoy the process. If you want to purchase any of the supplies
I've used today, there's a link on my profile
to my Blick curated list. And most importantly, feel free to tag me
at Living Pattern and use the Hashtag
Living Pattern for a chance to be featured
on my Instagram account. If you've enjoyed this class, please leave a review and
share some feedback with me. I hope to create more classes
based on your responses. Until next time, happy creating.
 Jenny K @livingpattern, Watercolor Artist & Teacher