Transcripts
1. Introduction: Hello, and welcome to my studio. My name is Ido Agassi, and today I want to
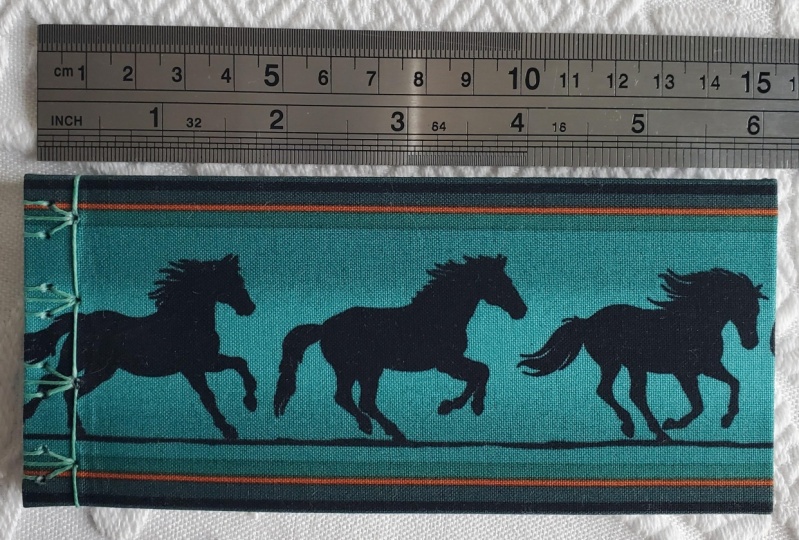
teach you how to make this beautiful
tortoise shell binding, also called the
Kiko Toji binding. The binding is very similar to the four hole
traditional binding, but with two extra holes, one on the left, and
one on the right. So each station
has triple holes, and when you are sewing it, you get to this
beautiful design. This video is part
of three videos. I'm going to make about three different Japanese
sewing patterns.
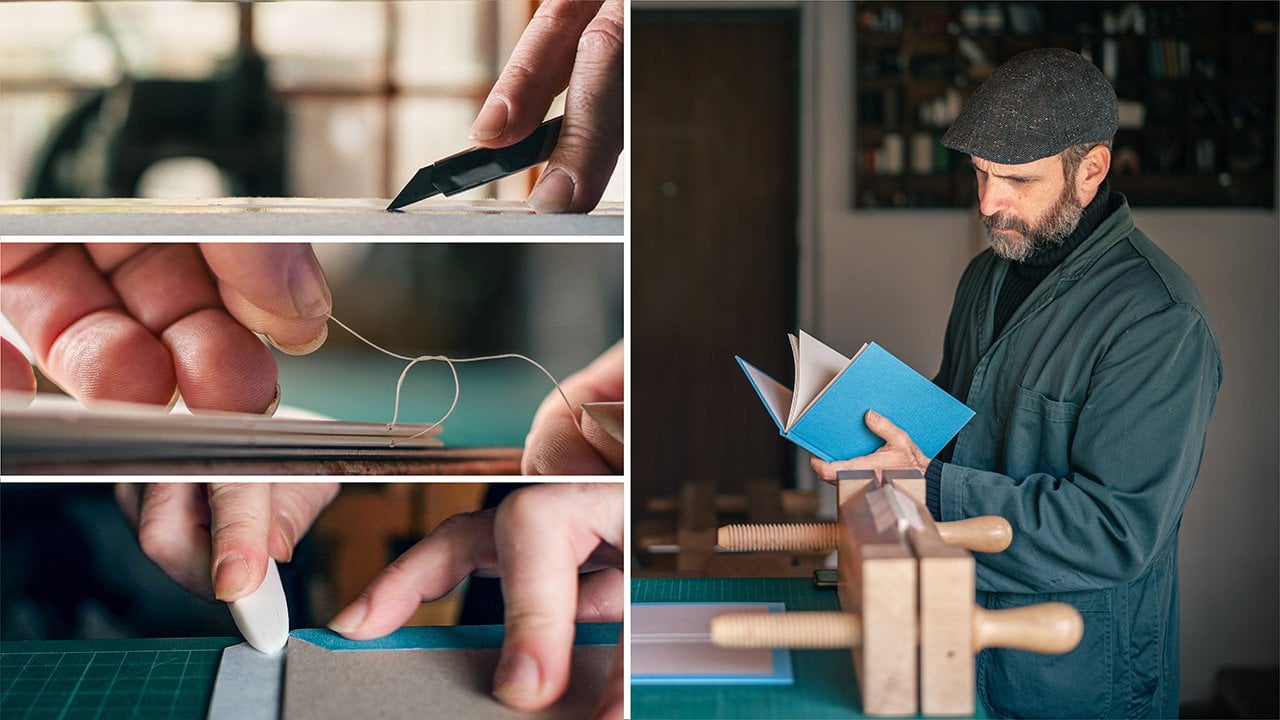
2. What You Need for this Class: I would start this
video with the bookblog already bound and the
cloth covers already made. To get to this stage, what you need to do is pile up single sheets of paper in the
order you want them to be. What I also recommend
you to do is add 1.5 centimeter margins, and to make an inner binding, that would make your life much easier while sewing the outside. Regarding the cloth covers, what you can do is
use paper covers. That's very common to do. And if you want to
make cloth covers, make a crease on it so
you can open it easily. If you want to learn how
to get to this stage, I made a class dedicated to the Japanese
four hole binding. In this class, I show you
how to make the book Block. How to make the inner binding
using paper strings and also how to crease the cover
and cover it with cloth. So what I suggest
you do is watch my Japanese four hole binding
class here on Skillshare. You watch up until
Lesson Number six, I'll show you how to
make the inner cover, how to make the outside cover, and then we can connect them
together in this class. So I invite you to join me in this beautiful
sewing pattern. So are you ready?
Let's start working.
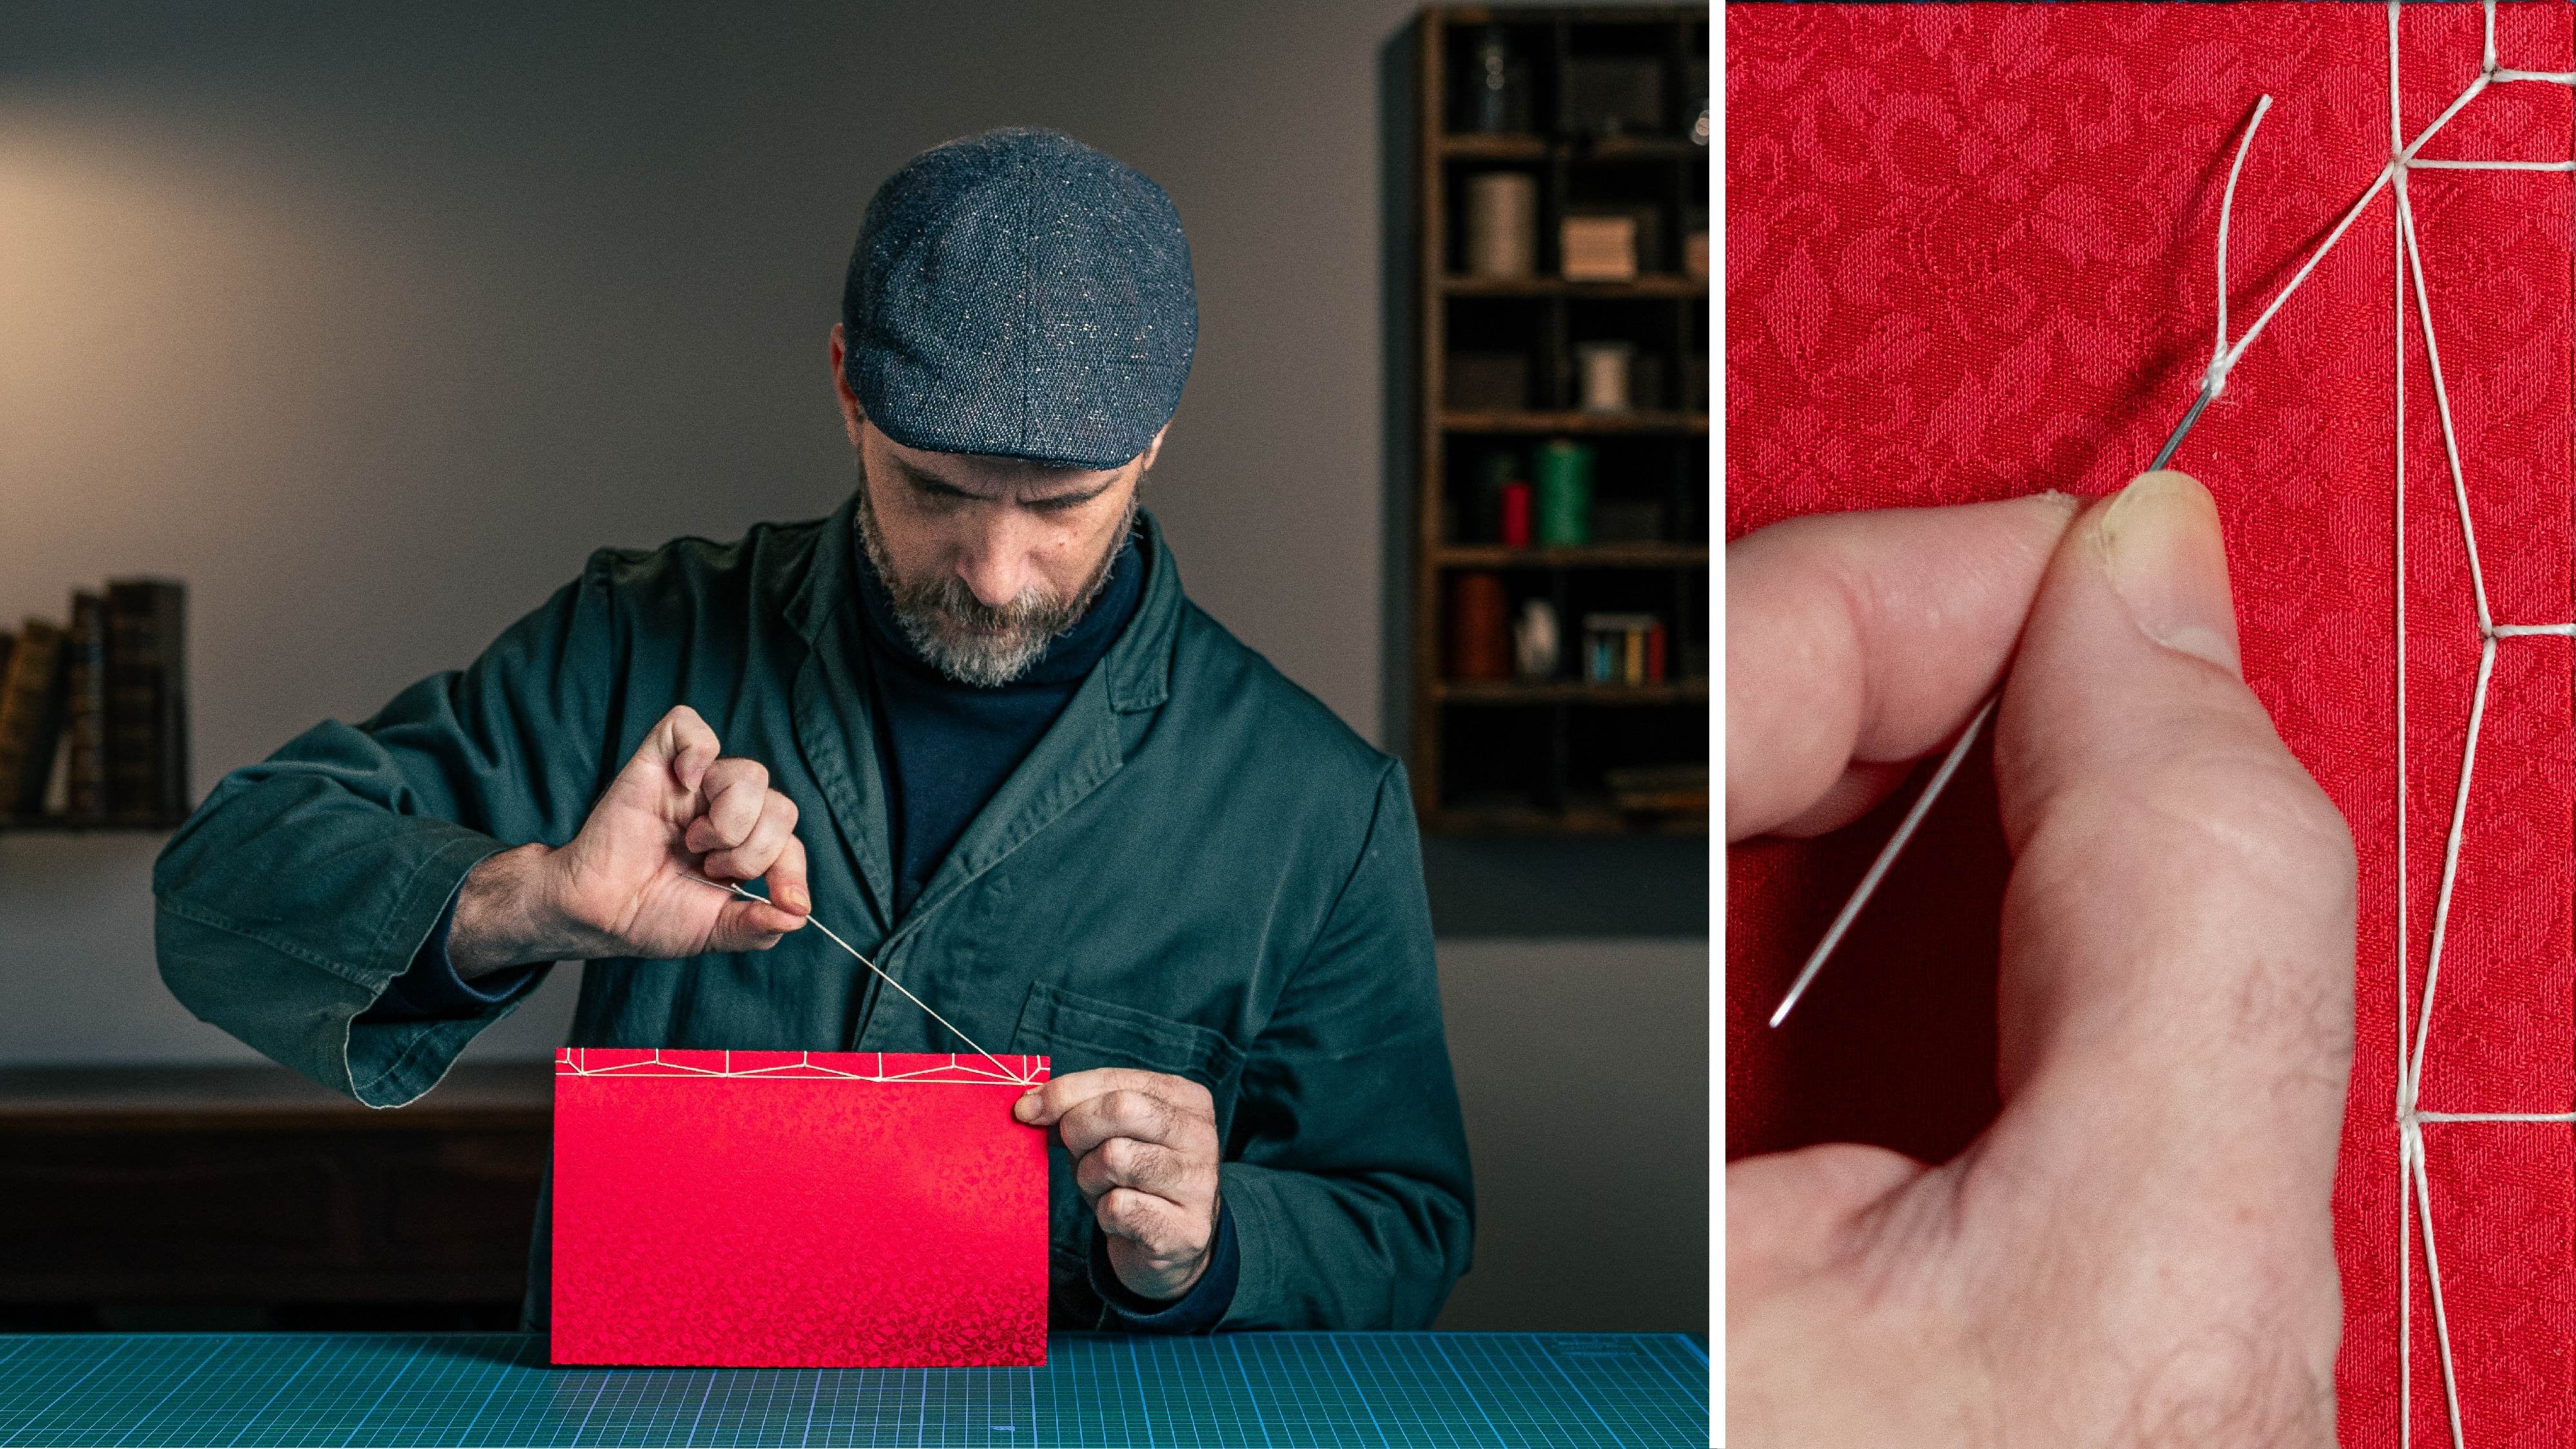
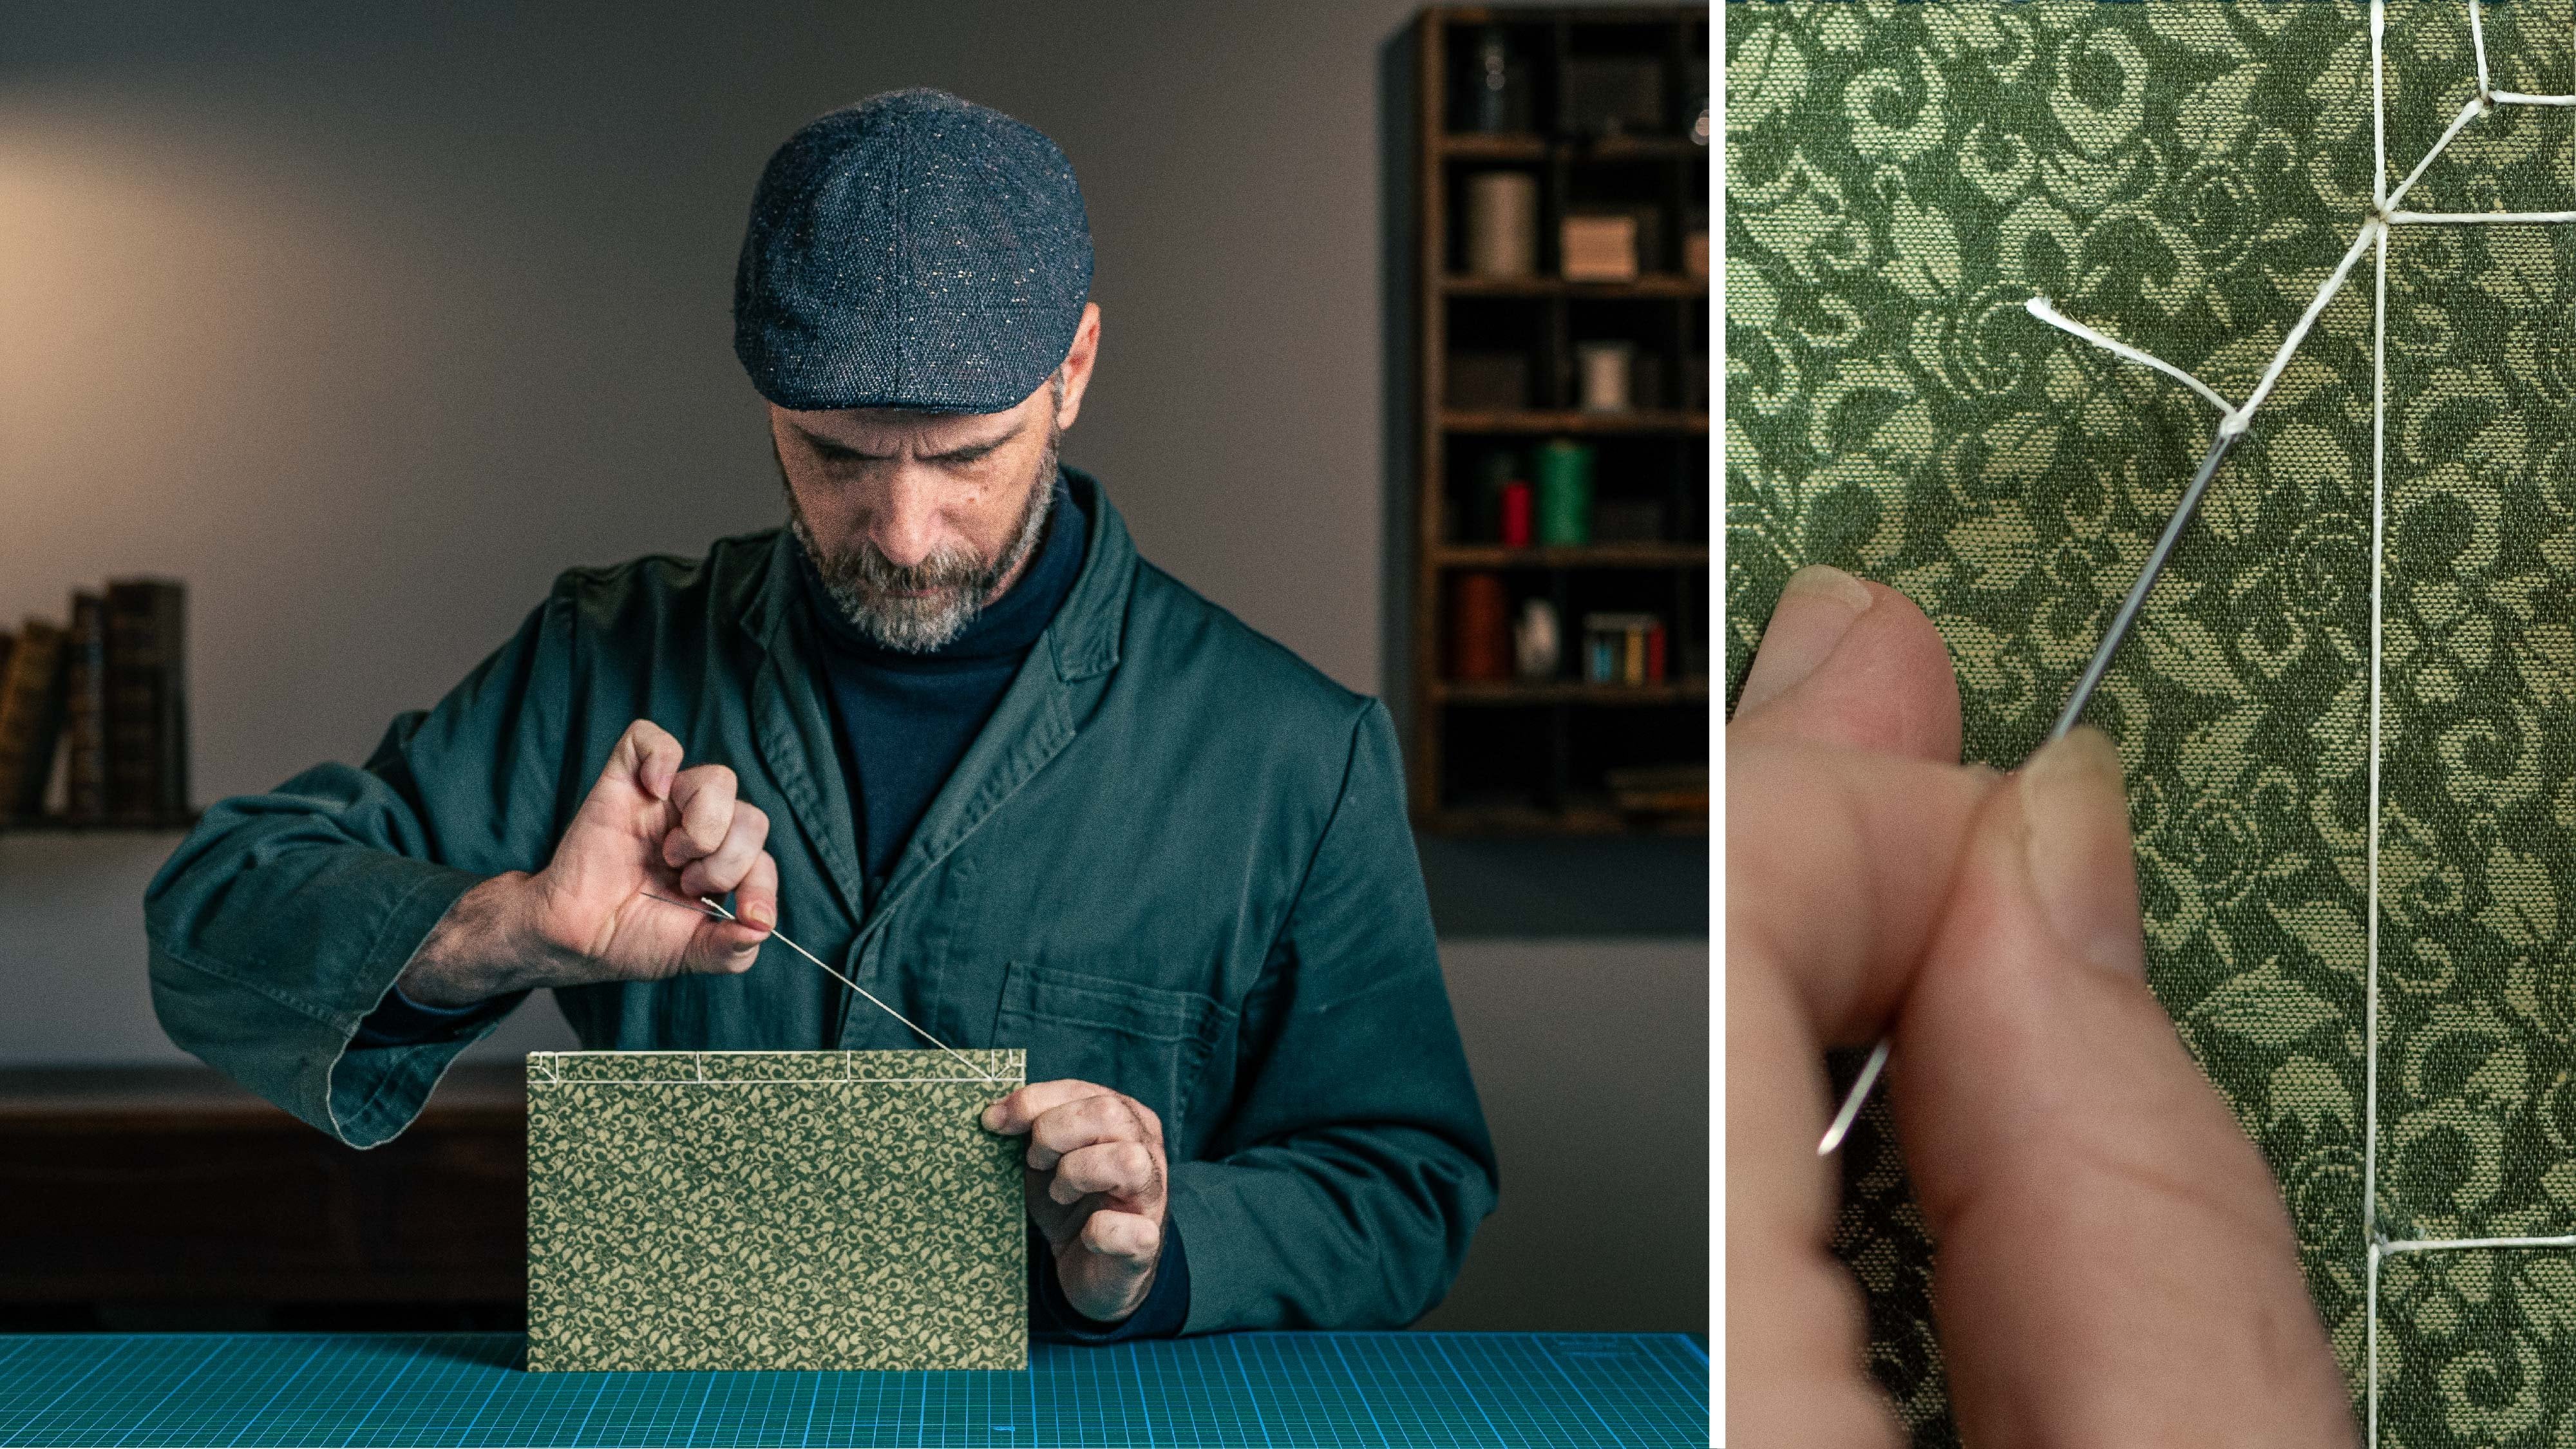
3. Sewing Tutorial: Hello, and thank you for
joining me in this short class. For sewing the book, we
would need very basic tools. We would need an owl. We will need a needle. Scissors and thread. I'm using linen thread, but you can also use cotton
thread or synthetic thread. If you are using
synthetic thread, I recommend that you will fuse
the edges before working. So let me put this aside and bring two wood
blocks on the table. The reason I'm using them is not to damage my
working surface. You can also use a pile of bookbinding boards or something from your house just not
to ruin a working surface. I'm going to start by locating the back cover on the
edge of the wood block. On it, I'll put my book block. And on that, I'm going to
locate the front cover, making sure that the
creasing is towards me. I'll bring a piece of
weight and make sure everything is aligned Okay? Take your time, make sure
everything looks good. I'll put the weight on
it so it won't move. And now I'll bring the template. It has marks for the
holes I'm going to make. I'm going to line them
up with the spine here. I'll put the weight on it. So what I would do is add a
PDFle in our class resources. You can go there and
download the template. I will make one for
this size for a five, and also for half letter. You can print it,
and then you can make the holes and sew with me. So let me take my all I'm going to hold it in
the palm of my hand, going to the first hole, taking my fingers and holding
the entire bookblock. I'm going to lift my arms so
it would be an extension of theol and then I would just
start piercing the holes. Look that I'm taking my
fingernail and putting it with theol and then
when I'm taking it out, I can see how much I got
inside. It looks good. I'm going to the next hole
on the four hole binding. With the twisting movement, make sure that the hole
is parallel to the hole. Let's move on to the third hole. And with the twisting movement, taking it out looks good. And the last hole here
going inside and out. Okay, let's start
the second line. I'll start up here, go inside and out. Second hole. Taking it out, moving on here, hold it on the mark
and go inside. Next one, lift it, parallel 90 degrees, go inside. It's enough. Let's move
on to this station here, holding the book block
so it won't move. Next hole, look that I'm bending my knees and
just with the whole body, not just with the arm,
and going inside. And I'm in the last
station going to the left hole and
the right hole. Yeah. That looks good. I'll move my weight,
take the template out, and slowly slide the book so it would hover and it would make my life much easier
to sew the book. I'll put the weight back
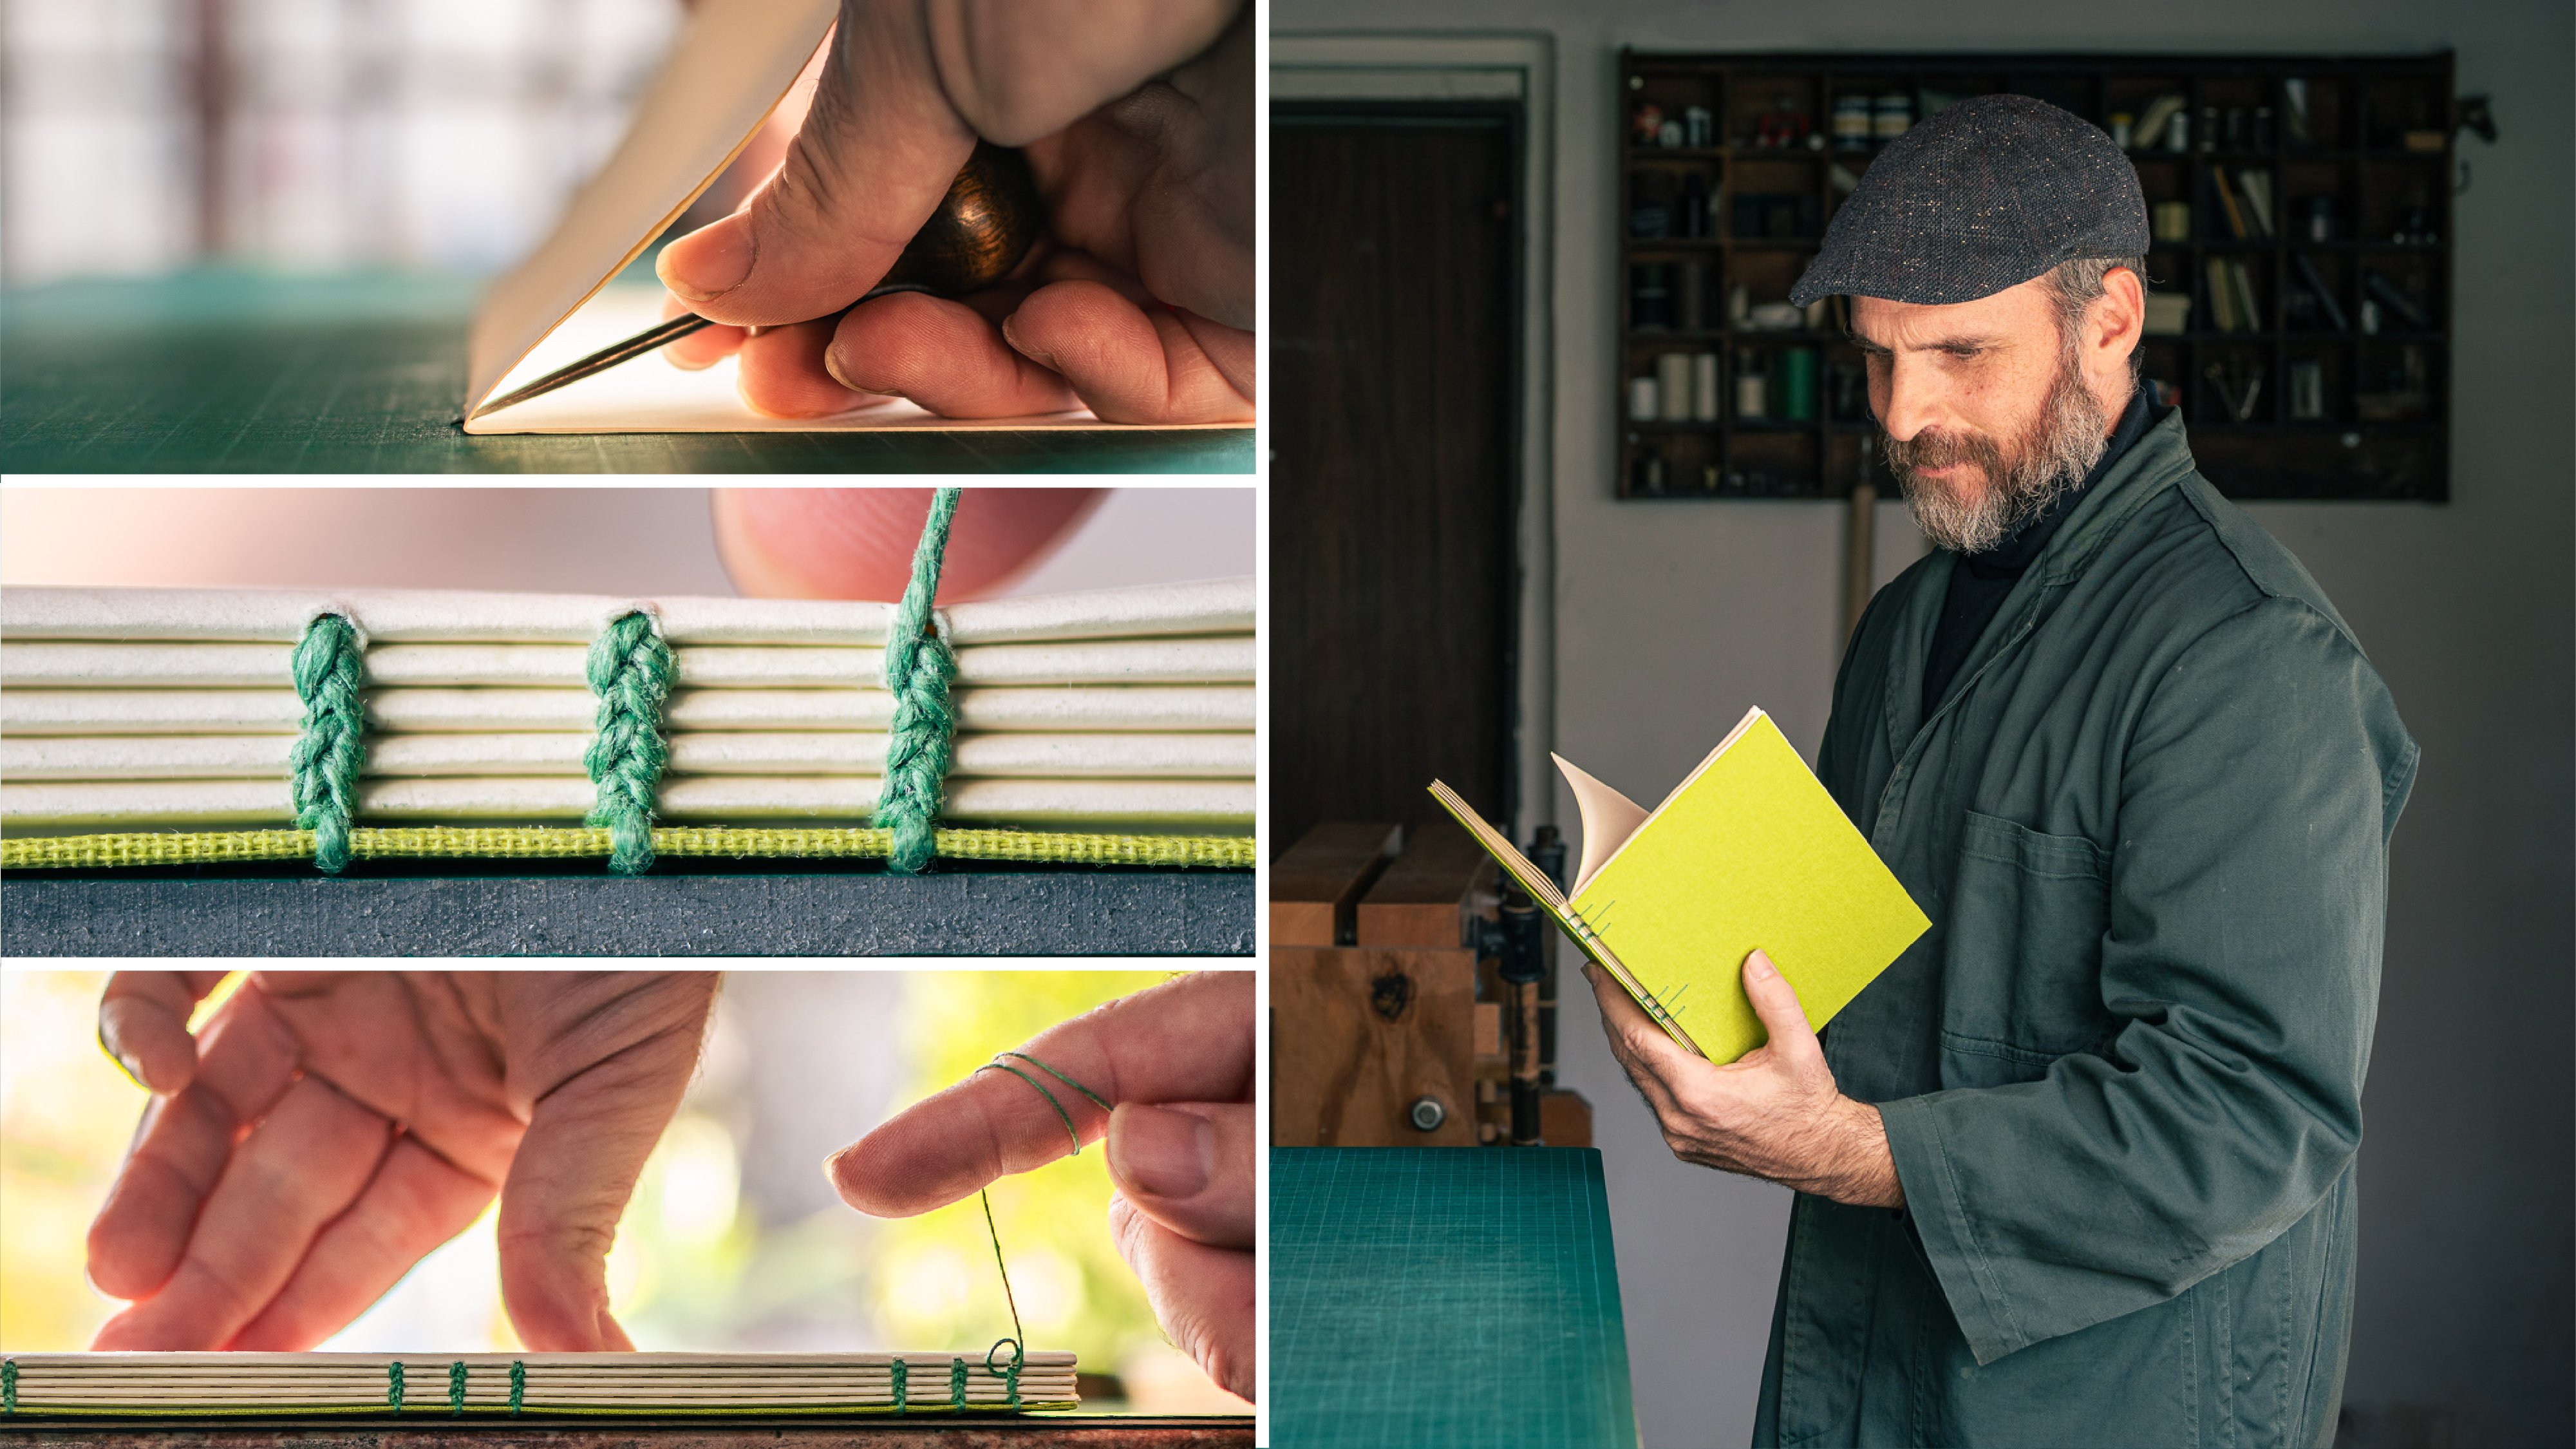
on so nothing would move. And let me bring the thread. I'm going to measure six times
the length of the thread, so one, two, three, four, five and six. Let me bring my scissors. And cut it. Now I'll
take my needle, and I'm going to
thread the needle. 3 centimeters from the edge, I'm going to make my trick. I'm going to insert the needle inside the
middle of the thread. Okay, I'm holding the
needle and pulling back the thread and
it's connected. I'm starting in the second
hole from the bottom up. Take my tail with
around 5 centimeters. And I'm going to repeat
the process from the bottom up
pulling the thread, and now look what happens. When I'm pulling it, it
holds the beginning, and then I can make it
tight and it won't move. I'm going to the hole on the
right from the top down, going around the spine and
back inside the same hole. Going back to the first hole where we started
pulling the thread, and now I'm going left
to the hole beside it. Pulling the thread around the spine and inside
the same hole. Let me straighten it up. Now don't get confused
and go to the next hole. You need to go to the main hole again where we just started. Pull the thread. Ftation is complete. Let's go on left from the
top to the bottom side. Pull it around the spine
and inside the same hole. Pull it. Now I'm
going from the bottom up around the spine and
back inside the same hole. And going to the main hole on
top on the fore hole line. Now I'm going from the bottom
up on the hole on the left. Pull the thread around the spine and back
inside the same hole. And back to the main hole. Now we are on the bottom side, so we are going to the next hole and
going from the bottom up around the spine and
inside the same hole. Go right around the spine,
back to the same hole. Going to the main hole
here, pulling the thread, and then I'm going left around the spine and
inside the same hole. Now I'm going to the
main hole on top here. Now, before going back, don't forget to go over
the head of the book. So I'll pull the
thread and go inside the same hole after holding
the head of the book. Now I'm going back, so from
the top to the bottom. And then from the bottom up And now we reach area
we haven't been yet, so we are going from
the top to the bottom, around the spine and back to the same hole,
pulling the thread. I'll go right from the
bottom up around the spine, back to the same hole. Back to the main
hole on the top. And now from the
bottom up on the left, around the spine, back inside. Back to the main hall, and
let's not forget to go around the foot of the book and back to the same
hole. Make it tight. Stop here. Don't forget
not to go inside. What I'm going to do
is move the weight, flip over the book. I'm going to release
the beginning tail, and now I'm going to
make a double knot, but I don't want
the knot to move, and that is why I'm going
to make an anchor here. And a double knot, so 1 knot, and one more here. Take my scissors and cut around 1 centimeter
from the edge. Now I'm going to take myo, and I'm going to hide the beginning and
end inside the hole. So I'm taking my o and I'm just pushing it inside the hole. Takes a bit of time and
everything is inside. You can see where the
beginning and end is. You can also maneuver
the thread as you want, so everything would be
parallel and to look good. Taam the turtle shell binding. As I said, I'm going to
make two more classes about the hemp lift binding
and about the noble binding. So make sure to go and
see those classes. Also, I would love to see
your end result in your book. So please share it with
us in the class projects. I promise to see each and every submitted work
and give feedback. So, as always, thank you for
being here and for watching, and I will see you
in my next class.
 Ido Agassi, Book Artist