Transcripts
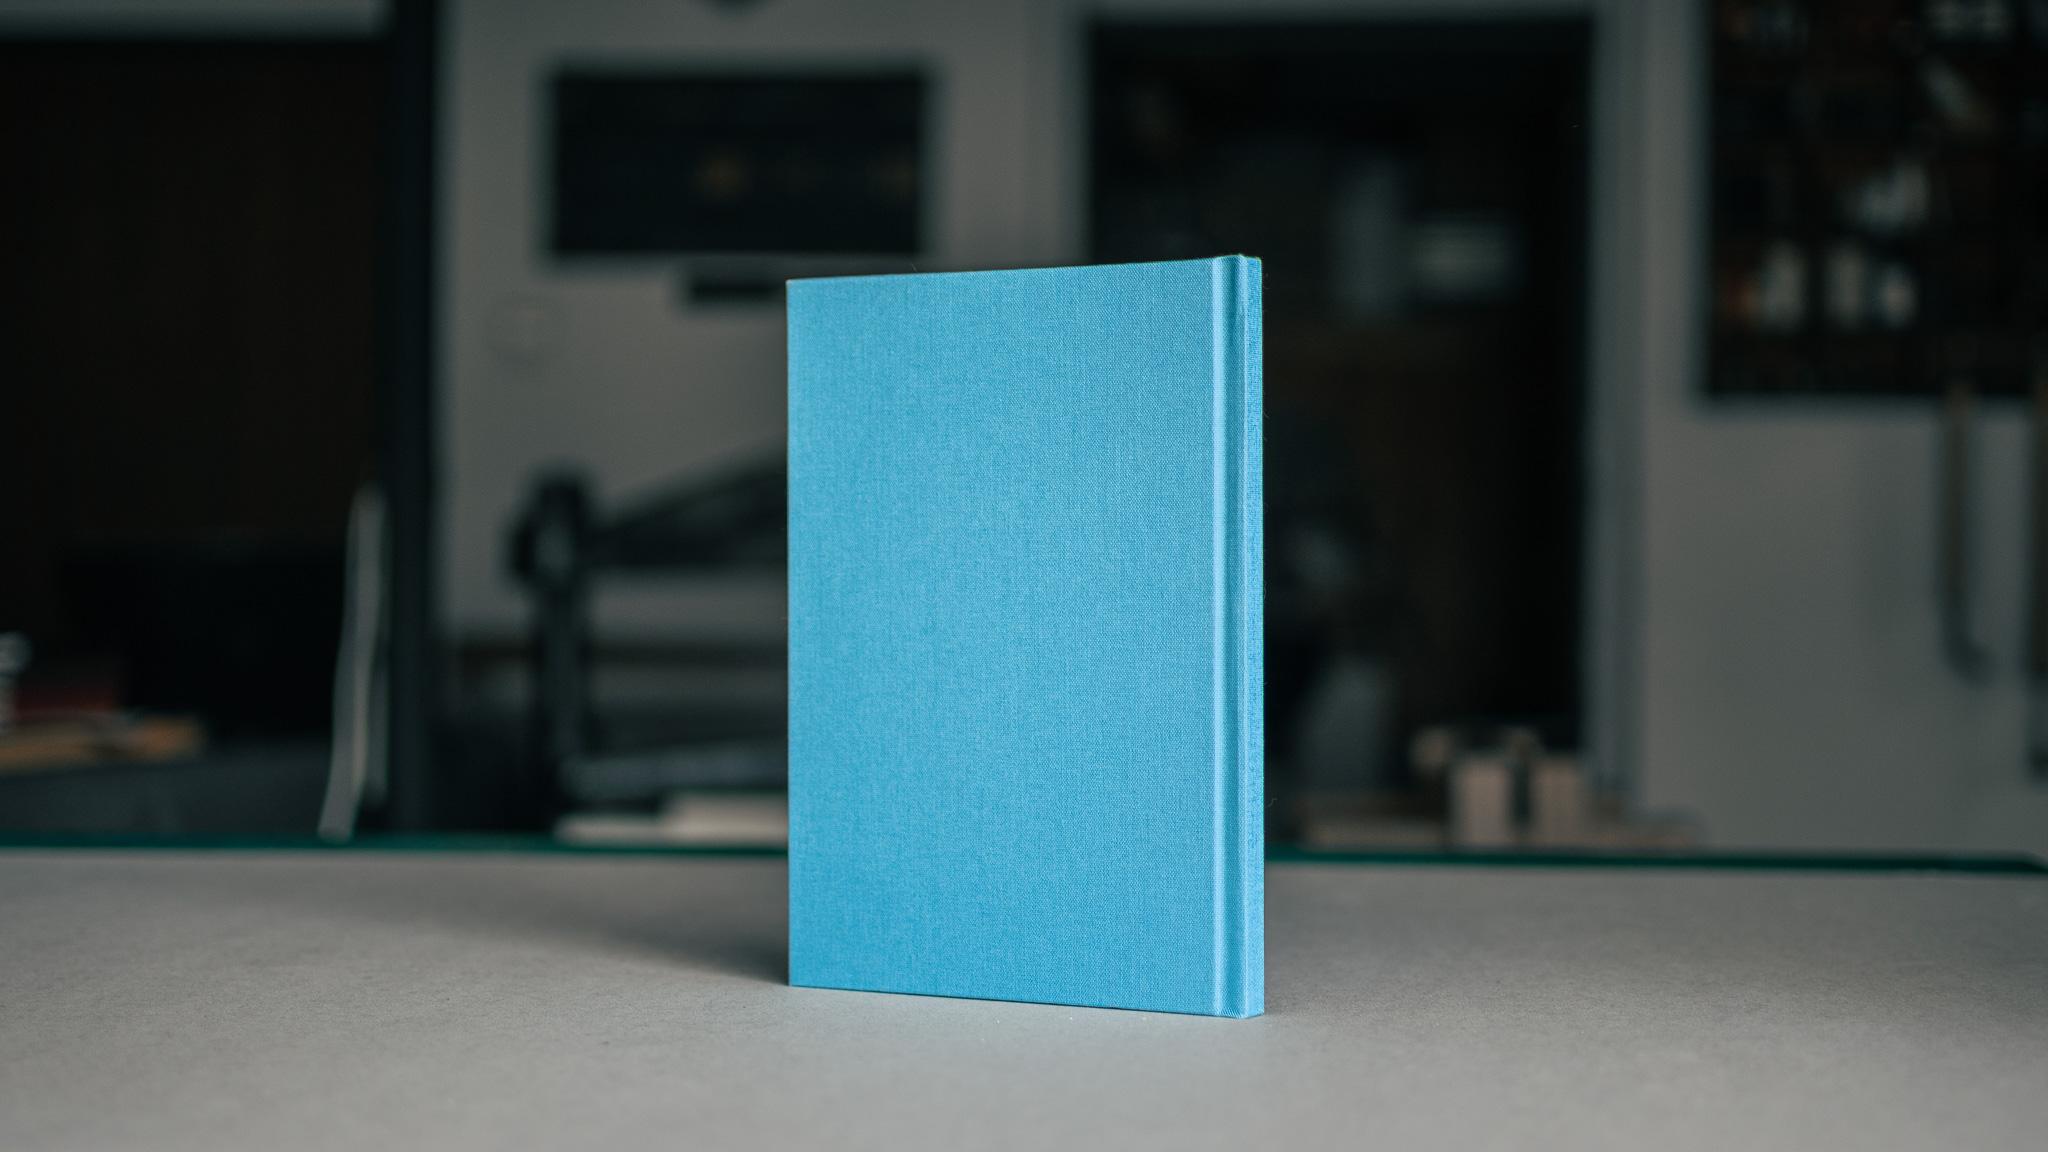
1. Introduction: Hello and welcome to this
bookbinding beginner's class. My name is Edo or gassy
and another book artist, I combine the crafts or Flickr press printing,
bookbinding, and box making to create my
art in the form of a book. I have the pleasure of
making books most of my life, nearly 30 years. I would like to teach
you the process of making a hardcover binding with clear explanations
and detail shots in the course that is
not only informative, but also pleasing to the eye. Through the lessons, I will
show you my special way of binding with tips and tricks
I found along the way. My goal was to make a course I would have
enjoyed learning from. As a beginner. I would cover the
basics of bookbinding. While we are making
this hardcover binding, we will see the process
of folding paper, sewing, making the
outside cover, and connecting them altogether. This would give you
a strong foundation to this special art. So I invite you to join me in this wonderful
journey to the world of books. Let's begin.
2. Tools and Materials: Hello, and thank you for
joining this course. I want to start
with the short run through the tools and
materials that we would need. I will also add the file in our class resources
with the list of everything you would
need for this course. So make sure to go and download it if you prefer
to work in inches. I will also add a file with all the class measurements
converted into inches. So let's start by putting a
gray border bookbinding both on the table and going through
the tools and materials. Let's start with the
cutting mat that I really recommend you to
use a long ruler, 50 or 60 cm, a magic ruler, 30 cm, and a short ruler, 15 cm. You can of course
manage with one, but these sizes are recommended. A triangular ruler for
making the corners, rounded bone folder, a
pointed bone folder, and a Teflon bone folder. If I would need to choose, I would take the pointed
one because it has a rounded side and
the pointed side. A big craft knife for
cutting the boards. A small craft knife, a 30 degree blade. Pencil, about
thread, I recommend using linen thread
size 25 or 40. And all or pre-cleared
number four would be great. Threads, scissors or
regular scissors. Straight needle, number 18. This is what I use. Breast weights or a
piece of marble or woodblock that has
a 90-degree angle and sits flat on the table. A spacer 1 cm thick, made out of bookbinding board. We will talk about
that in the lesson. Ready, steady glue. A big round brush. I recommend number 18, which is 38 mm or one
and a quarter diameter, but it can be bigger or smaller. Straight around glue
brush number 12, which is 2 cm or
three-quarters of an inch, PVA or white clue, there are many brands. So whatever works for you, bookbinding board, 25, 35 cm, we will cut it into size in the lesson about
cutting material, bookbinding cloth,
size 37 on 26 cm. Choose a nice color. You'd like 20
sheets of A4 paper. To end papers. A4 size around 200 g. A gas or more for
lining the spine. A strip of thick paper for
the template and paperclip. So that's all the tools and materials that you would
need for this course. Make sure to go to the
class resources and find the list so you can make
sure everything is there. So that's it for this lesson. And I'll see you
in the next one.
3. Paper Grain Direction: Paper grain direction is a very basic and important thing to understand before
we start our course. Because every material we
are going to use needs to be in the right rein direction
parallel to the spine. So if this is our book
and this is the spine, we need everything to be
parallel to the spine. So the grain direction of the bookbinding board would need to be from top to bottom. Also the end paper
and the inside paper. Imagine that the paper is
going out of the machine. The machine vibrates and tilts. All the fibers of the paper are aligning and making
a grain direction. I glued some matches
together to make you understand the meaning
of the grain direction. So imagine these are the
fibers of the paper. One side would be
easier to fold, the other would
actually break it. Break the paper. So how can you tell, how can you find the
true grain direction? First of all, the
thicker the material, it would be much
easier to find it. He felt, take this bookbinding
board and try to fold it. One side will be much more difficult to fall
than the other. You can clearly see, I can fold this more
easily than this. And that makes the
grain direction of this bookbinding
board this way. So that's the grain direction. Okay? It will take paper. What I would do
is try to fold it and feel the resistance
of the folding. This is one side, and this is the other. I can clearly see that
this side is much more difficult to fold this side. So that means this is
the grain direction. If we'll take the matches, this is the direction of
the matches of the fibers. The paper. Much more easy to
fold like this, then 24 like this. But sometimes it's a bit
more difficult if we'll take this piece of paper and try to fold it, because it's small. It's much more difficult to understand what's the direction. I want to show you a
trick, how to find out. I'll take my knife and
cut with an angle on the long side and 90
degrees on the short side. Now we'll bring some
water and damp the paper. Wow, look at it. Go. You can clearly see
the grain direction. What happens when
the paper is damp? The fibers are moving
apart and then it becomes a curve because the
paper actually expands. Okay, and that shows us this
is the grain direction. If I'll bring the mattress
and put them here, you can see matches
are moving apart, the fibers are moving apart. And it can tell us this
is the grain direction. Move this aside. And I hope this explains
grain direction. And after you know that, we can proceed with our
course, the next lesson, we're going to fold paper and make signatures. And
I'll see you there.
4. Folding Papers and Making Signatures: Folding paper and
making a signature. That's the topic of this lesson. You would need 20 sheets of
A4 paper before we begin. By the way, if you prefer
to work in inches, I will add a PDF file in the class resources with all the materials
converted into inches. Now, after all these details out of the way,
Let's start folding. I want to show you two
ways of folding paper, Y2, because I want you to find your own comfortable
way of folding paper. So let's take a bone
folder and beginning. The first way is to
take a sheet of paper, bring the upper corner
to the lower corner. See that it's aligned. Press the paper gently
with your hand. See that nothing had moved and then work
with the bone frozen. Let's do it again. Coordinate to corner seats aligned
with the hand, then with bone folder. Bring the upper corner
to the lower corner. See that it's aligned. Press the paper lightly
with your hand. First. See the
paper didn't move, and then work with
the current folder. After finishing folding
four sheets of paper, you can make a signature. And I want to show
you how you take the first folded sheet and
put one inside the other. So you have 1234, and that gives us a
signature of 16 pages. In other way of folding
paper is to use a stopper. It could be a piece of wood, it could be marble or
anything you have in the house that is a bit heavy, sits flat on the table and
has a 90 degree angle. I mostly use brass weights.
It's heavy enough. It sits flat on
the table and when you put paper, it won't move. Bring a sheet of paper
until it touches, bring the far end of the paper. So it would touch
the lower side. Fold with your hand first and then with a bone
folder. Let's try again. Bring the paper until it touches the stopper far end,
toward the lower. Check that it's a line, first with the hand and
then with a bone folder. You can try folding
four sheets of paper at the same time. 1234. Papers. Bring them
towards the stopper, for them towards Wait. Hold it first with the hand
and then with a bone folder. Go ahead and fold all the papers until you have five signatures. Don't be afraid to try out. Experiment. Have fun. And I'll see you in
the next lesson.
5. Making a Template: Welcome back. In this lesson, we're going to learn
how to make a template. You would need a
strip of thick paper, 6 cm wide and a paperclip. A template will help us make holes in the
signature for sewing. Usually one will help us repeat the process in the same
location in each signature. So let's take our
paper strip and begin. Let's start by taking
a strip of paper, folding it in half. Think you're born told her
work until it's folded. Put a stopper on the table
with a template touching it, place the signature on it. Make sure it's touching. Make two points with a pencil. One, figure, small ruler. Hold it. Moved the
signature and cut. Make sure the template and the signature
are the same length. Our next step will be to mark on the template
where the holes would be. Let's take our ruler
and a pencil and mark one-and-a-half centimeters
from the edge of the right side and
the left side. Now let's measure
between those marks. You're supposed to have
18 cm divided in five, and you will get 3.6 cm, 3.6 from one side and other side until
we reach the middle. The reason we are measuring
from left and right until we reach the middle is because if you start
measuring from one side, sometimes when you
reach the last mark, it's off by a bit. And this way you have it
centered even if it's smaller. Aftermarket and I fold the
paper from the outside in so the pencil mark would
be visible while working. I write up and
attach a paperclip. Decided writing up
will help us connect the template in each
signature at the same side. One more thing. The reason I'm
showing you how to measure and not just
giving you a file to download is because I
want you to understand the method behind it so you can apply to different formats. So that's it for this lesson, and I'll see you
in the next one.
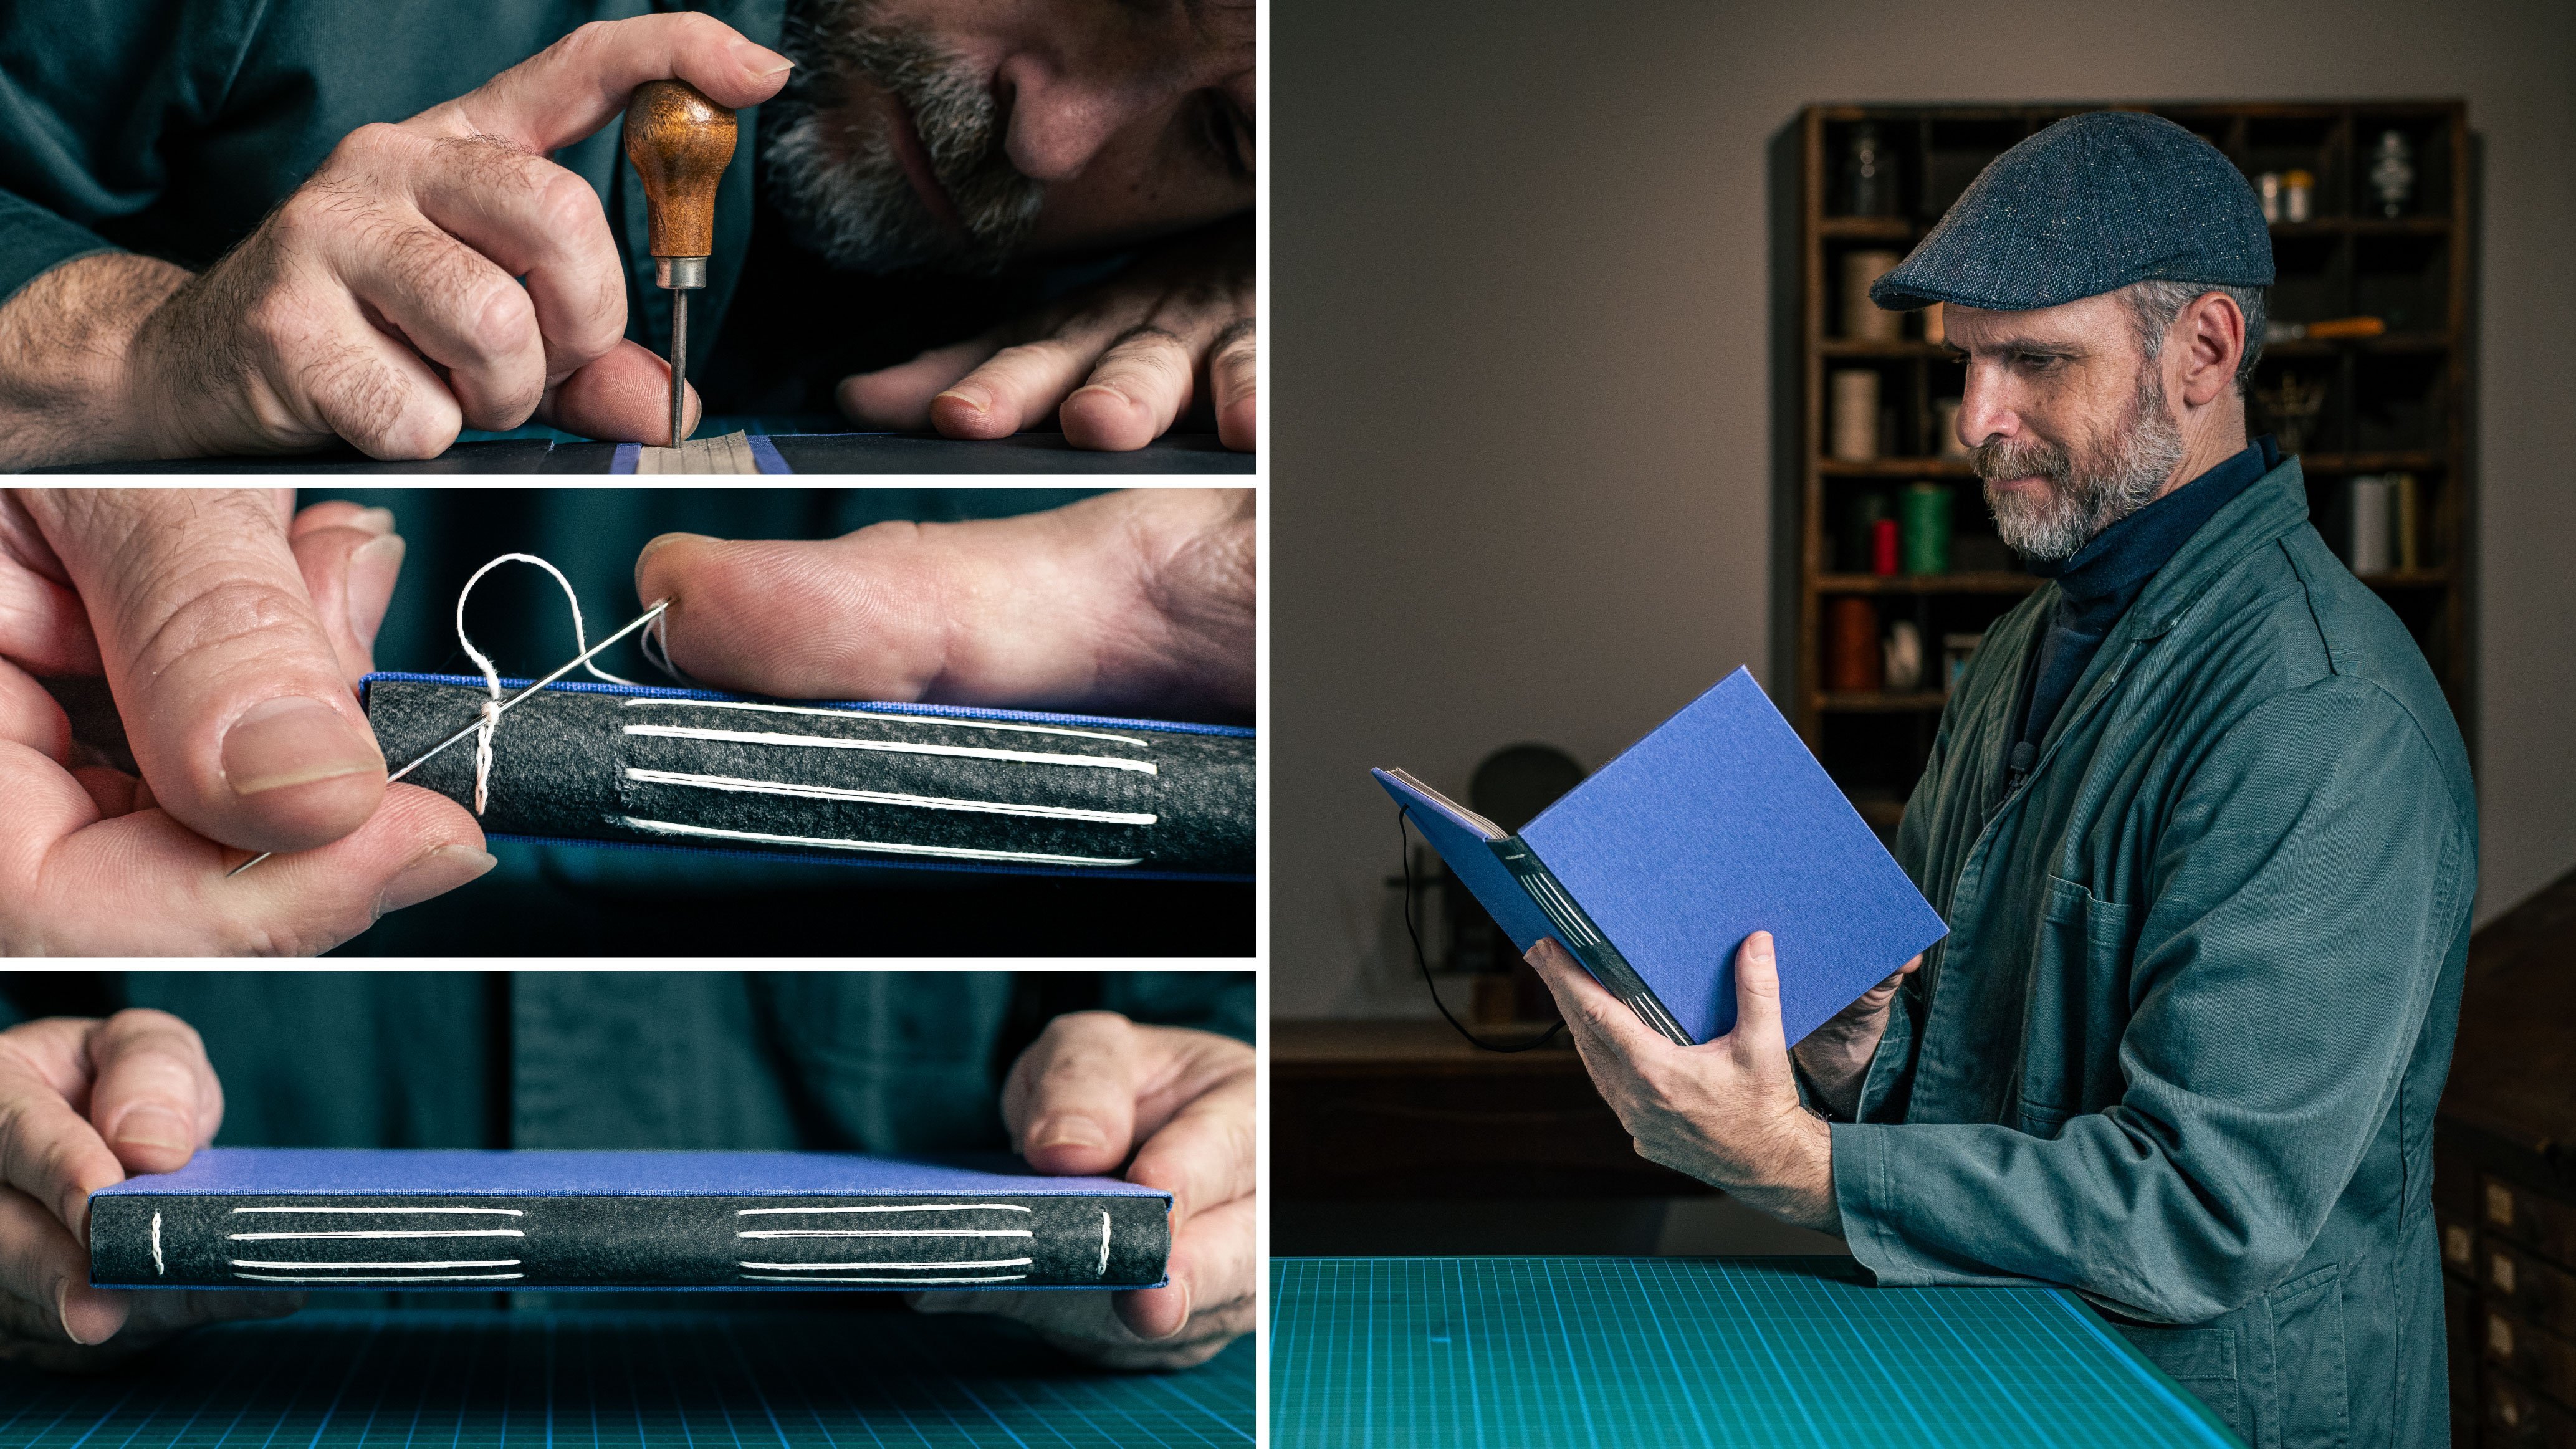
6. A Whole Lot of Holes: Let's make some holes.
For this lesson. You will need your call, five signatures and the
template we just made. Before we begin, I want to emphasize the importance
of precision here. If you make the holes
in their exact place, then the whole
process of sewing and making the book block
would be much easier. Are you ready? Let's begin. Open the signature in the middle fold and
insert the template. Take them all in the palm of your hand so you have
better hold and strength. Not only the fingers, but the entire arm
can make the holes. So the first hole Close. And it's important to put each finished
signature in a way that they will pile up as
a book in the same order. I do it like this.
Take the template out and put the
signature like this, and then they will pile up in. The last one will
be the first one. So let's take another
signature and keep on working. Insert the template
so they are aligned. Start from the top,
locate in the first mark. Now I want you to pay attention to the movement
with my left hand. After locating the mark, I close the signature. And that's for two reasons. One, it gives me
a 45-degree angle allowing me to make the
whole exactly in the fold. And the second reason is I
can see the point going out. And to see it penetrated enough. You don't need to
make it a big hole just for the needle
to go through. See two lines, 1246. And that's it. The signatures
are ready to be sown. Enjoy the process of
making the holes. And I will see you in the
next lesson with needle, thread and a
life-changing trick.
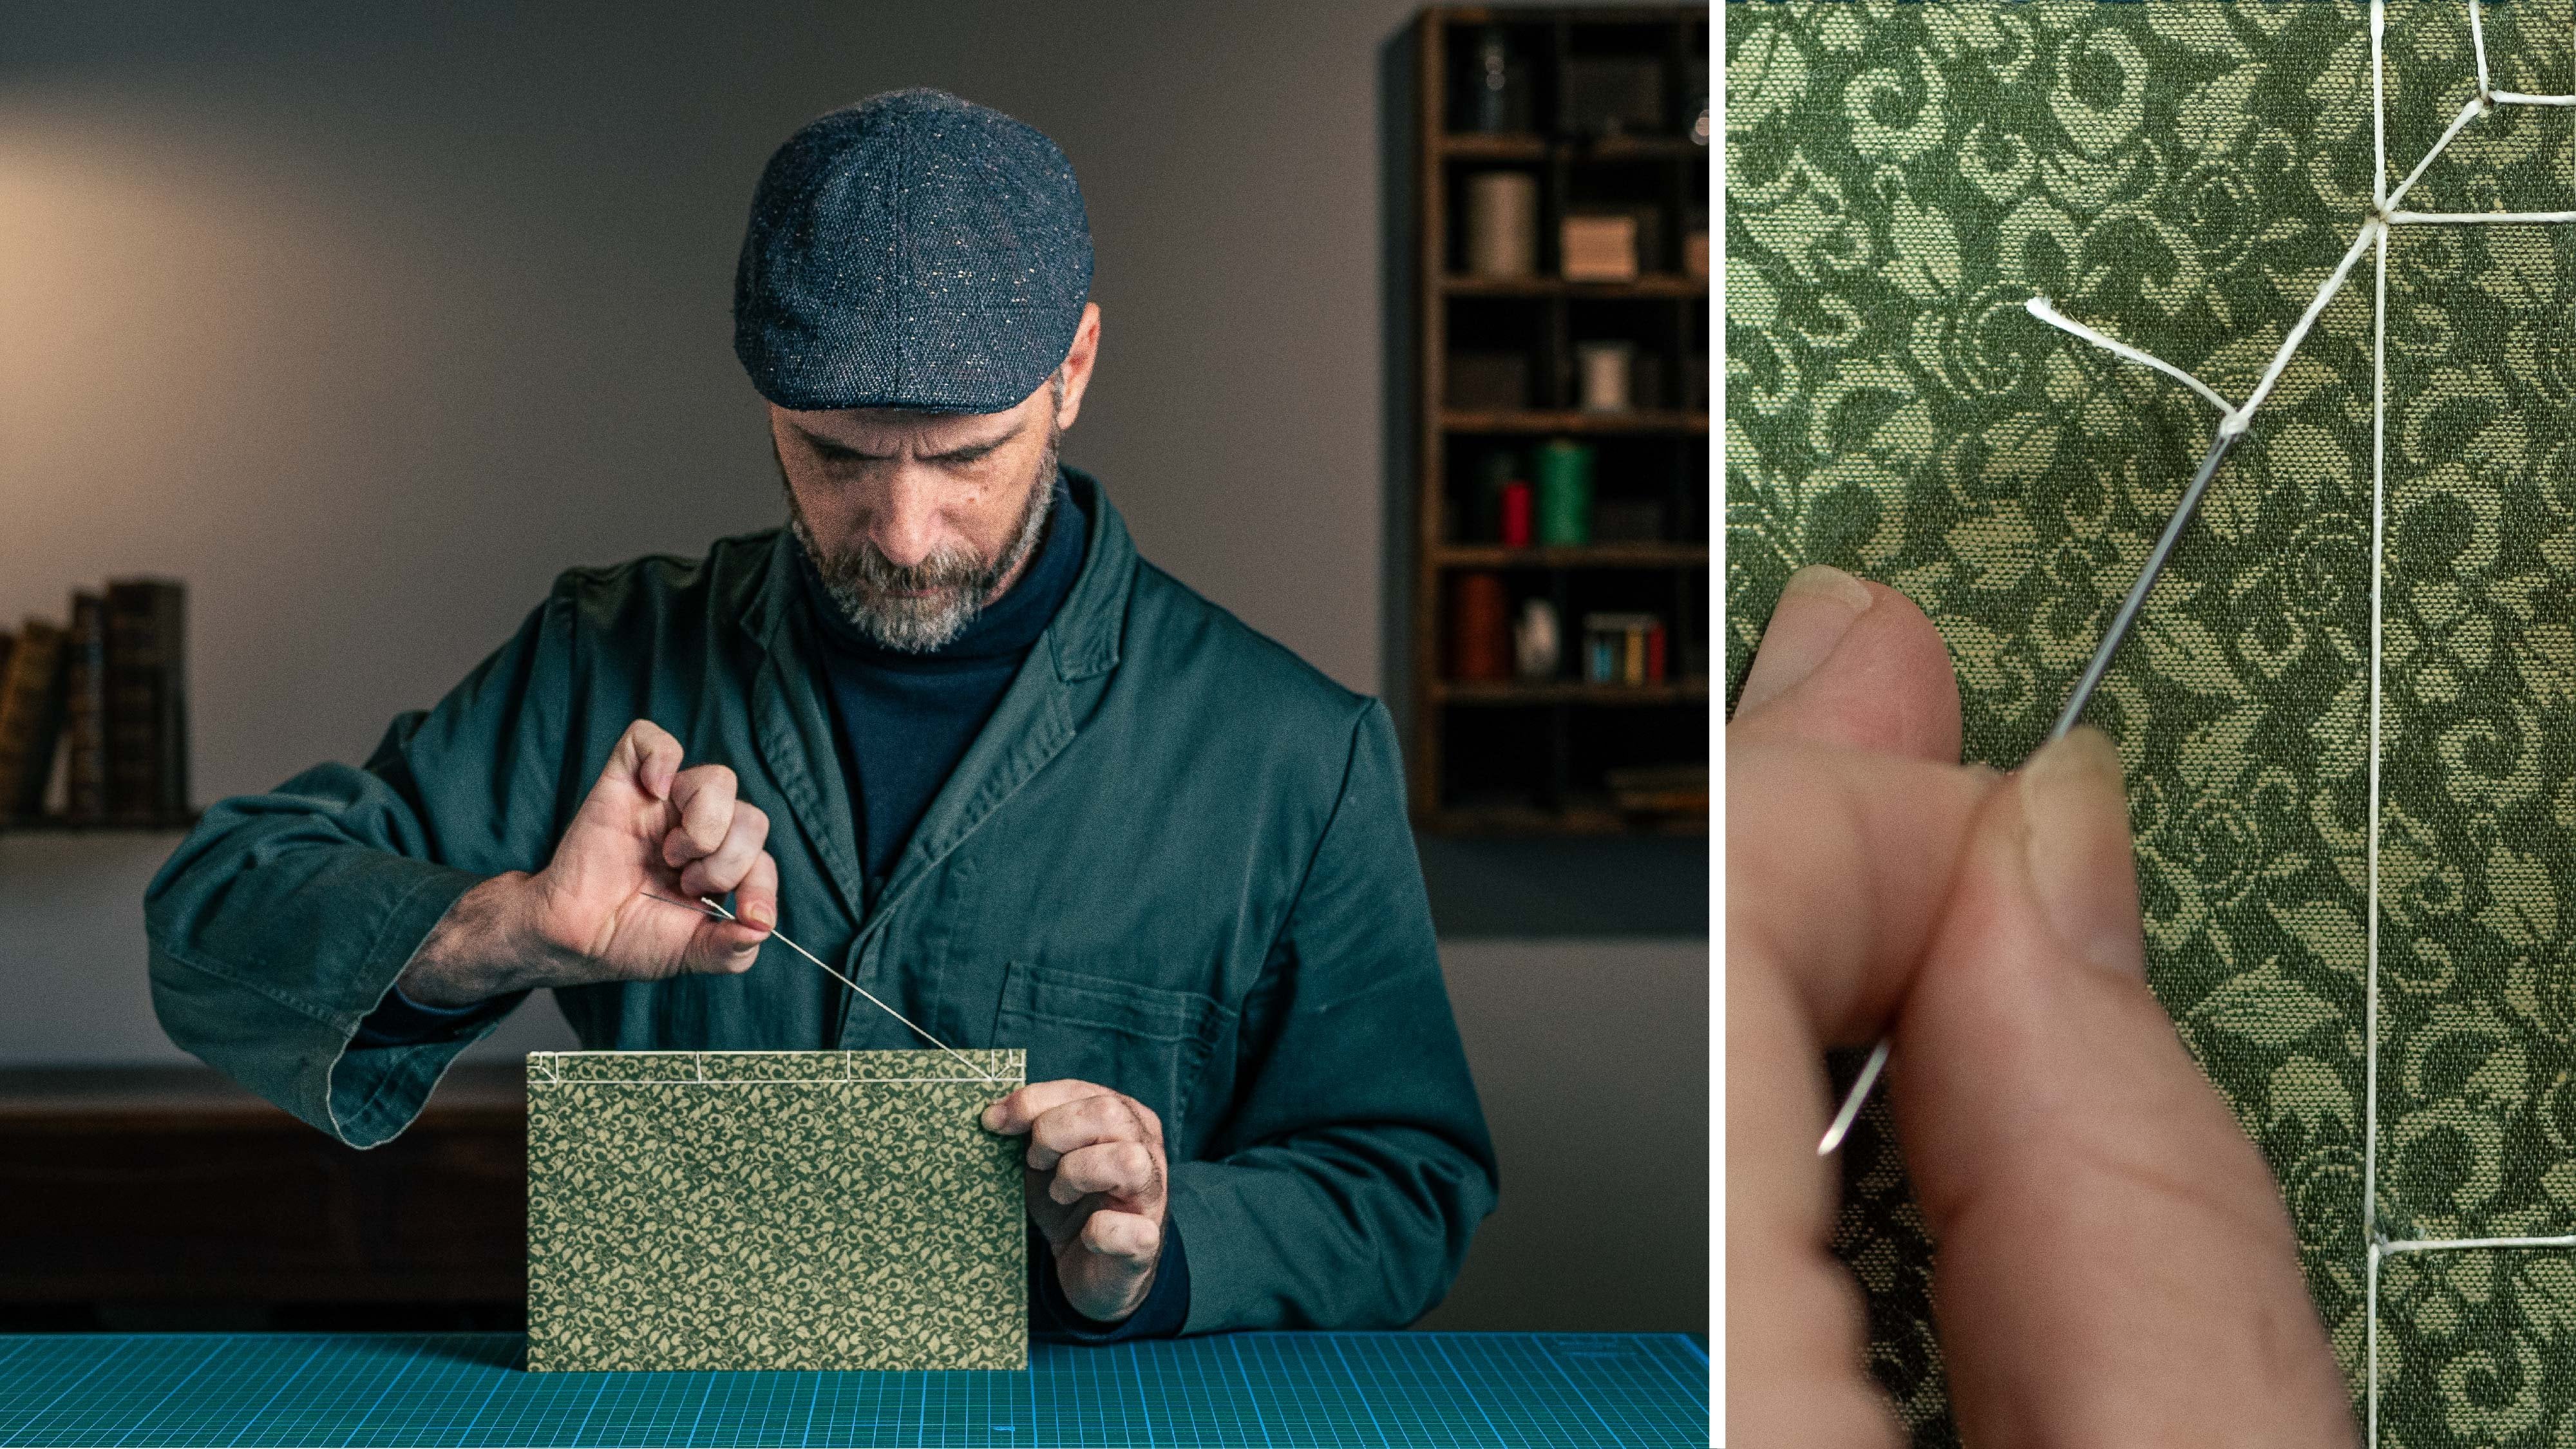
7. Sewing The Book Block: Hi, welcome back. Sewing is one of the best
parts of bookbinding. I'm sure you would love it. There's a kind of
a rhythm to it. For this lesson, we will
need our needle and thread. Let's me just grab it for
a second and we'll start. First of all, we want to measure the length of
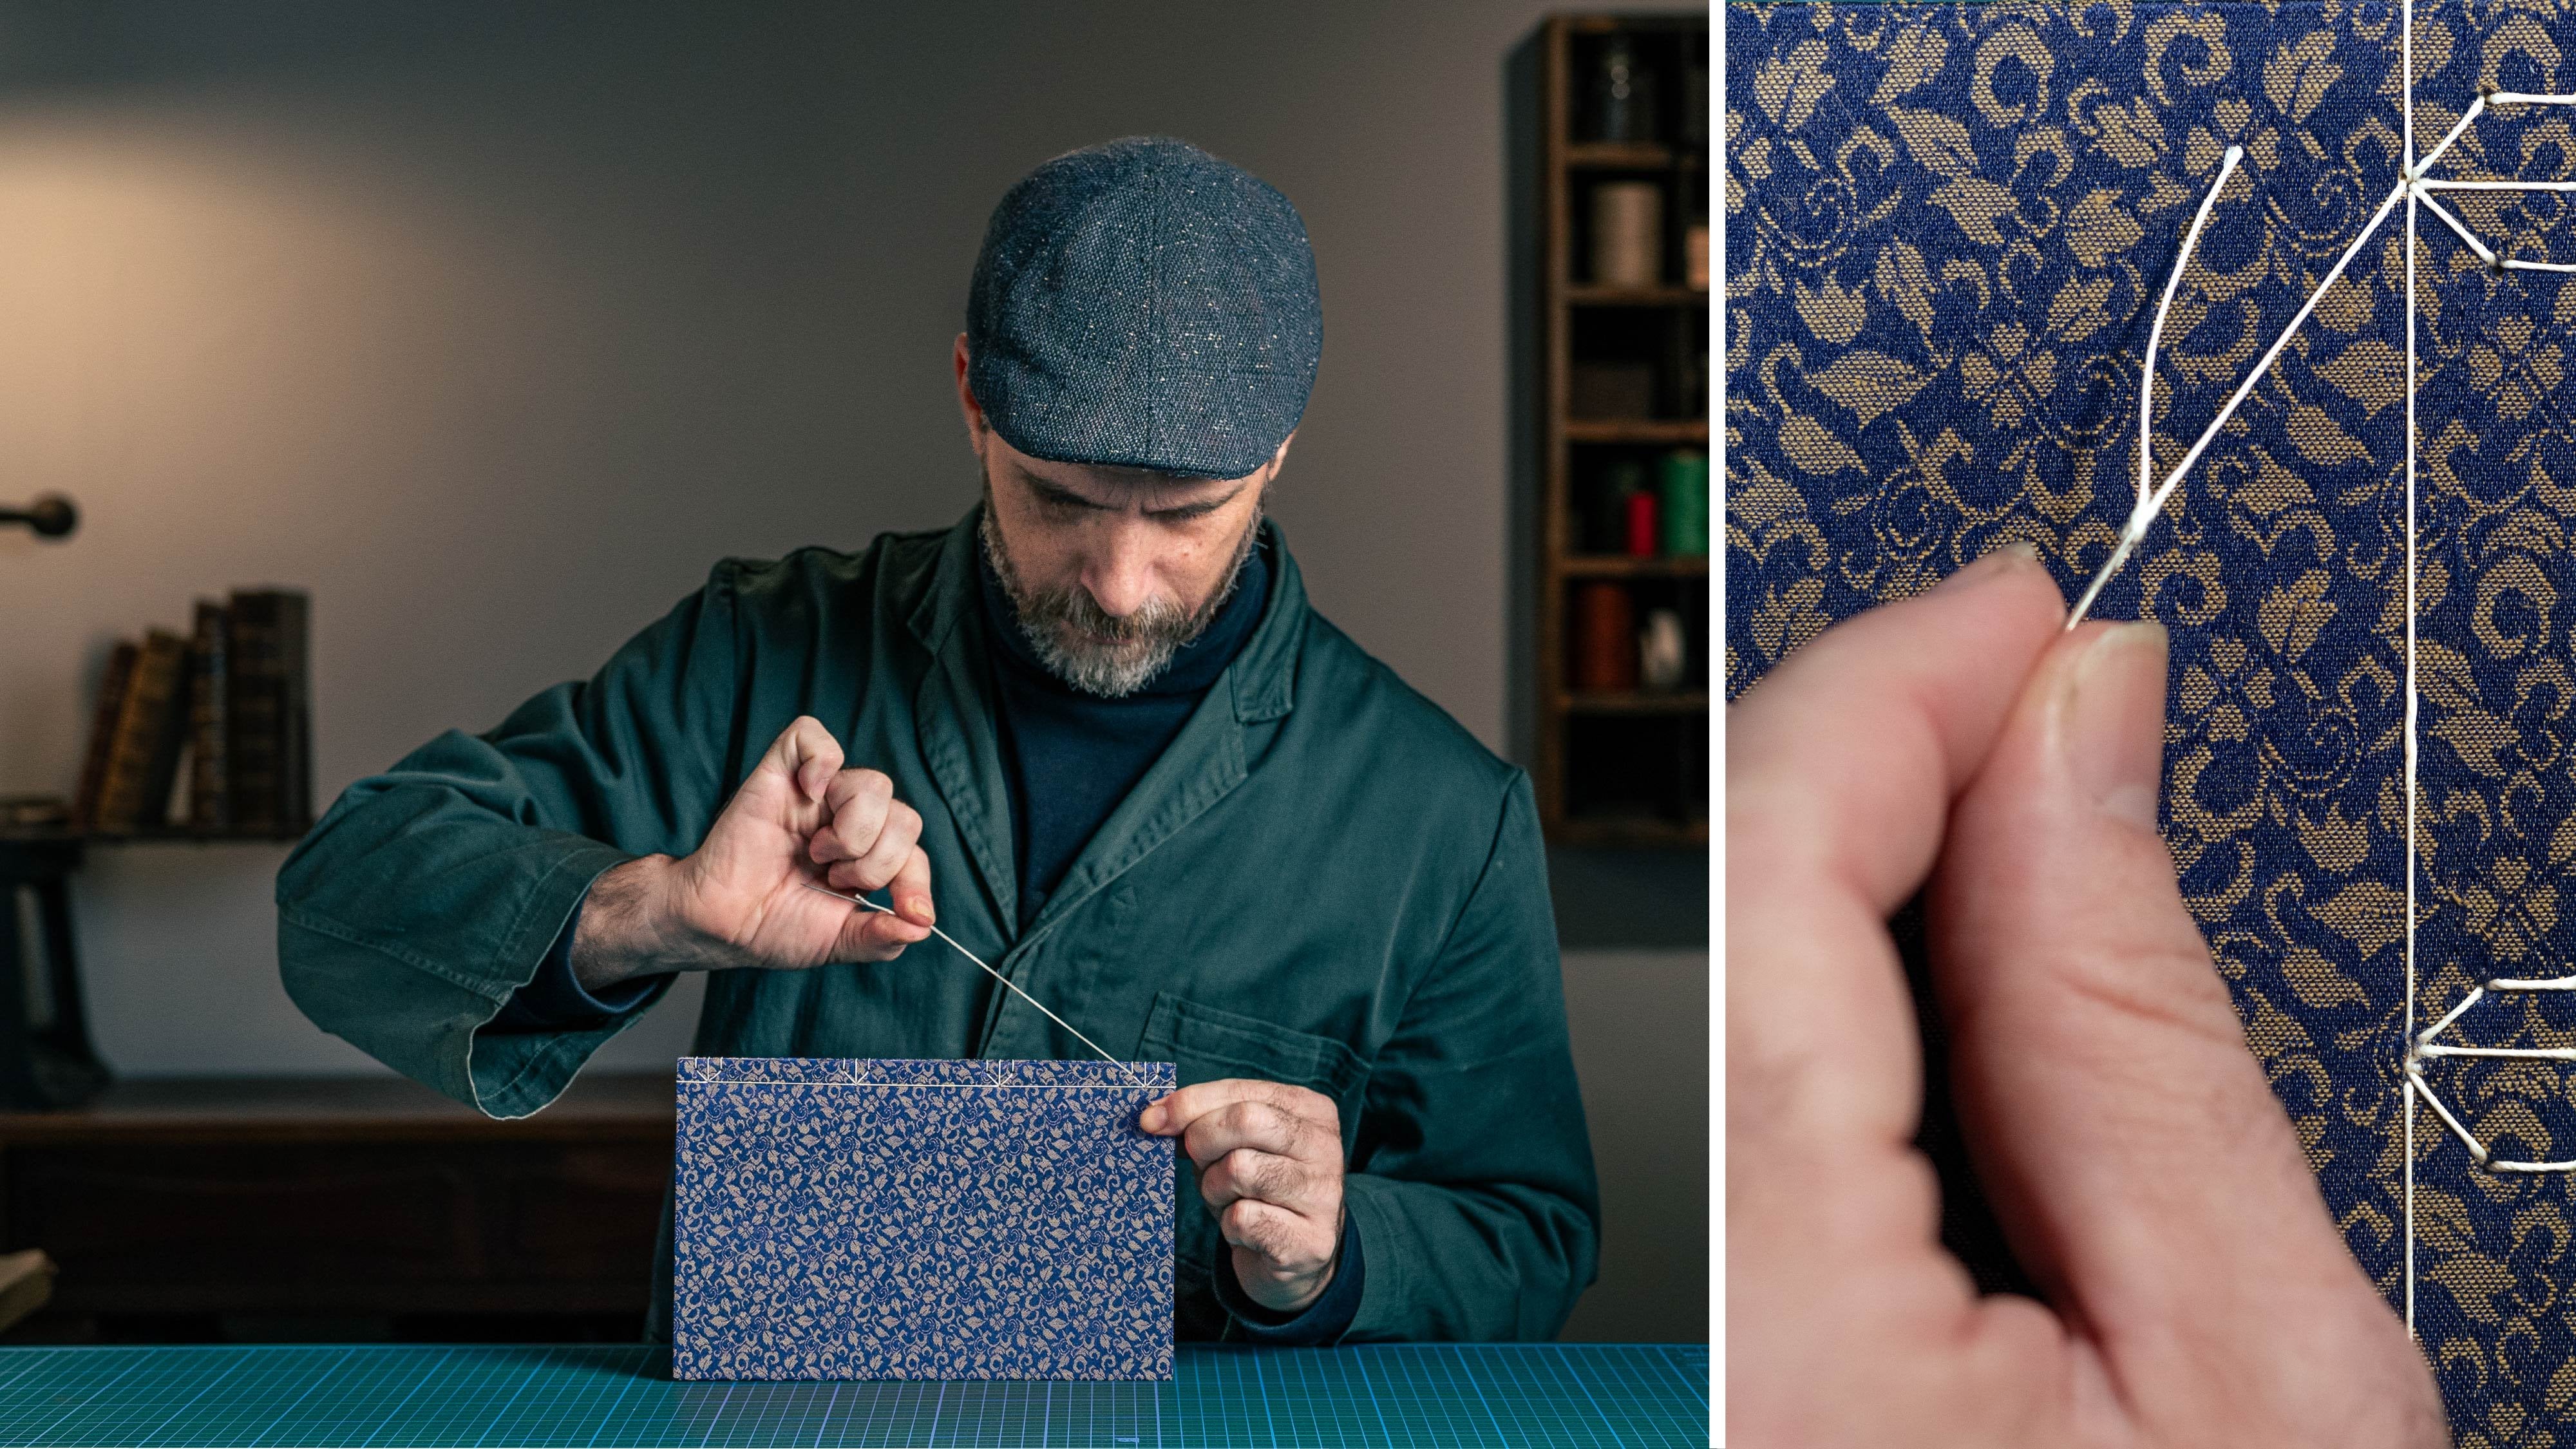
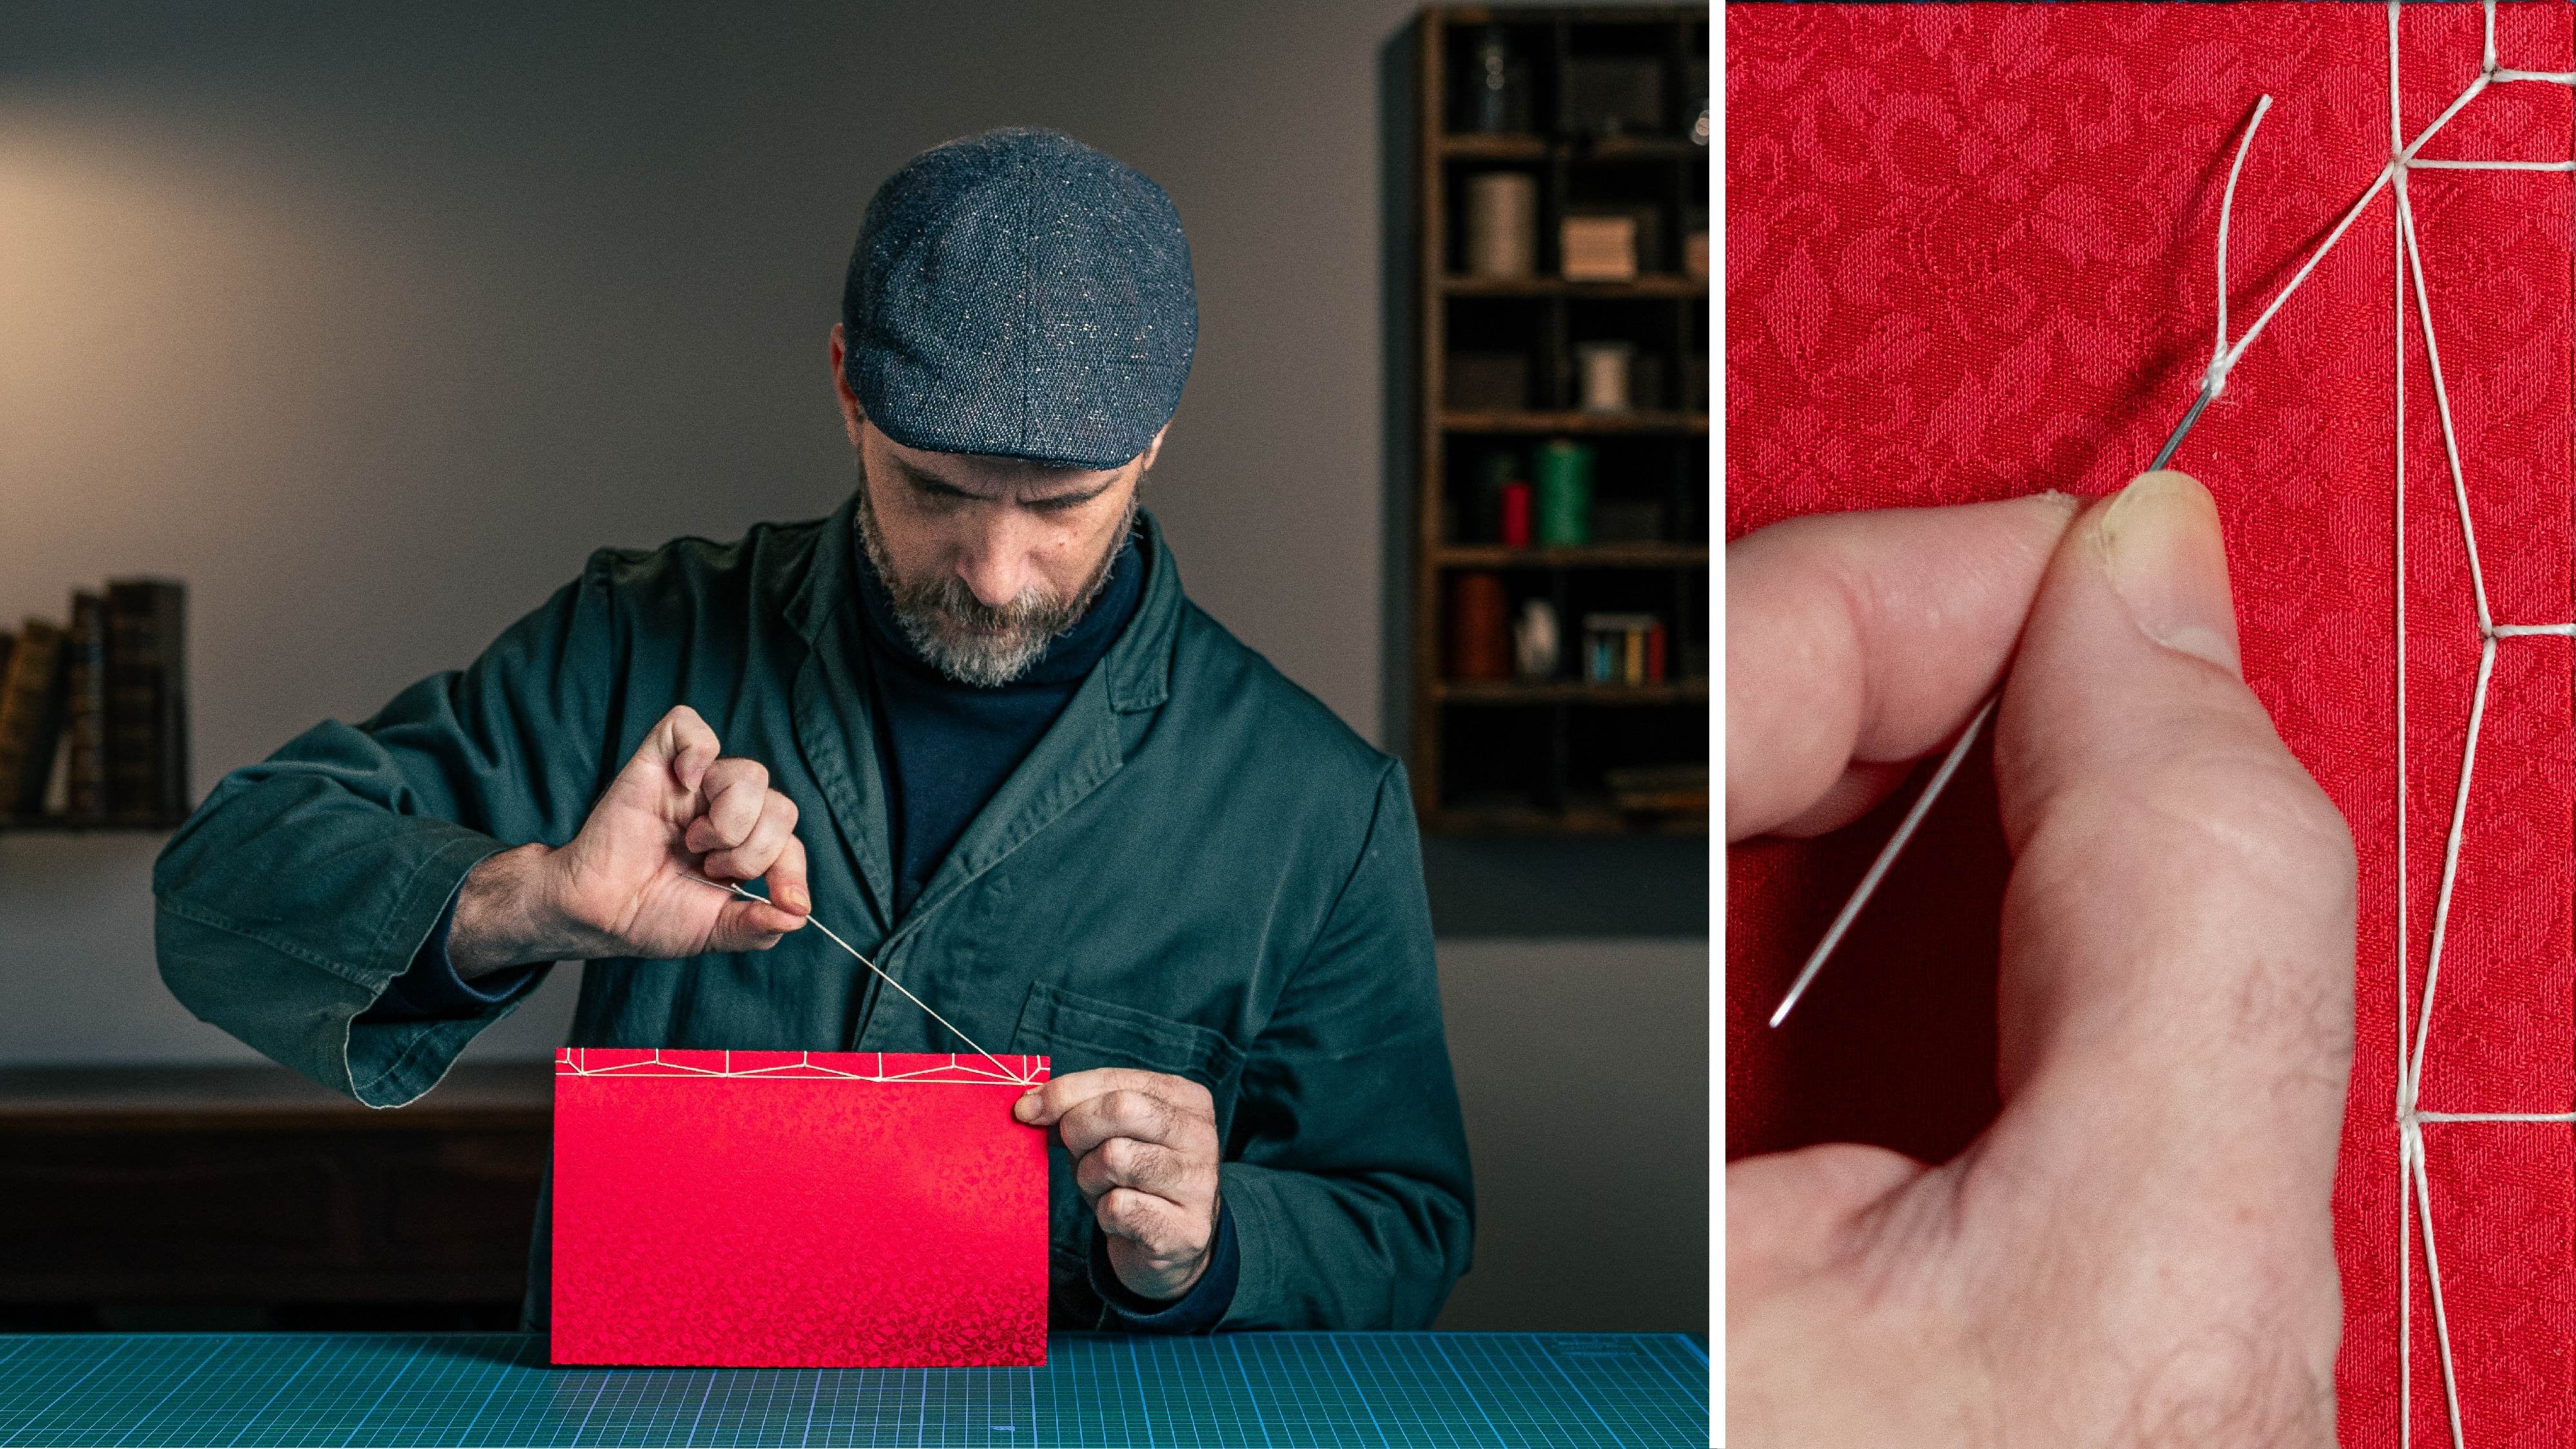
thread, so 123456. Now I want to show you a trick. Embrace yourself because this is a life-changing hack. Okay. You said the thread to
the eye of a needle. Take around 3 cm from the edge. Stick it inside and the
thread is connected. And there's no not to interfere with the
process of sowing. Let's take the first signature and put it on the
edge of the table. I open the signature and put await inside so it won't move. Why we are working on
the edge of the table. It's because I want you
to have the flexibility to move the needle and
inserted more comfortably. If you work in the
center of the table, it would be much,
much more difficult. So let's take it back edge
of the table waiting side. And we are starting
from the right side. From the outside. Leave a tail of around 5 cm. When we finished the
first signature, will take the next one, put it on top, and moved weight. So it would be in
the next signature. Now, insert the needle
in the next signature. Just above where we came out. You pull the thread tight towards the direction of sewing. And then you make a simple
naught once and twice. Let's take our third
signature to wait. Inside installed from
the hole that we went out of from the outside
and inside out. I want you to pay attention
to the way I manipulate the thread by holding it with my hand and moving
it towards the hole. That way, the thread one tangle up and make problems.
You see it? I hold it like this and move
it towards, let's stop here. And I want to show you
the kettle stitch. You take the needle and put it between the first and
the second signature. Hold the needle, make a loop. Insert the needle
from the bottom up. Tighten the thread towards
the direction of sewing. Hold it and close the naught. Let's take the next one. From the outside.
In. Inside out. I'm making a kettle stitch on this side also, making a loop. Needle from the bottom up. See, everything is
straight. And luck. Can you hear the birds? When was the last
time you heard? In the middle, of
course, birds singing. I loved my studio. Kettle stitch. Making a loop. From the bottom up
inside the loop. Make the thread tight towards
the sewing direction. Otherwise, it could
tear the paper. Put your finger and lock the naught because
it's the last one. Let's do it twice. We did it. The book is, so I want to remind you that
in this binding technique, all the spine is glued together. And that is why if you
feel it's moving a bit, don't worry, we
are going to glue it and everything
would be concealed. That's it for this lesson. And I will see you
in the next one.
8. Tipping On The Endpapers: Welcome back. In this lesson, we are going to learn
how to connect and paper to the book
block and papers, the first and last pages
you see in the book, and they help connect the book block with
the outside cover. The end paper could be in
different shades and colors. It depends on your choice. I usually choose a paper that matches nicely
with the outside cover. I recommend for you to use a paper around 200 g
for your first binding, you need two sheets of A4 paper. Make sure that the grain
direction is right. If you're not sure, go to the lesson about paper ventral direction
and come back. Okay, so let's take our end
papers and fold them in half. Is I already taught you
bring corner to corner. First, fold with the hand. Then when the bone folder
open the folded paper, take a small ruler
and a pencil and mark 1 cm from the fold. Take long ruler. And the bone folder
that is pointed and run 12.1 for good luck. Three. Then run the bone folder until the ruler that my friend is called creasing. Creasing allow a better
fold for the paper. And most importantly, it tells the paper exactly where
you wanted to fold. By running the bone folder. You push down the fibers of the paper and it allows
better movement. Okay, I'll show you again. Let's go bring the paper
from corner to corner. Were first with a hand
with the bone folder. Open the folded paper. Take a small ruler in Mark, 1 cm thick, a long ruler, put it between the
marks and work 12.3. And then I take a
bone folder from underneath and bring it
some till the ruler. Then you can let go. Last thing we need
to do is connect the end paper to the book
block. Here's how I do it. I take the book block, put it on the table with
the spine towards me. I take the stopper and
put it on the right side. So it would be easy when I
bring the paper to align it. Okay. Then you take a piece of wastepaper
put underneath so you won't put glue on the
table and another wastepaper on top
until the line. You take your glue brush and put paste from the middle outside. Take it and located. See everything is straight. Take your bone
folder and connect. Let's flip it over
and do the next side. One paper underneath,
one on top on the marks. Let's take our glue and
put it on the paper. Take out the wastepaper 12
and bring it to the stoppers, see that it's aligned
and until the spine. Here everything is trade. Taking the bone folder. And that's it. The book block is ready. In the next lesson, we are going to
glue the spine and connect everything together.
I'll see you there.
9. Improvising a Lying Press: The next step may
involve improvisation. I want to glue the spine of the book and put it
inside the lung press. I have as a professional
bookbinder, many presses around. But when I just started, I didn't have any lying press
and I needed to improvise. I want to show you
different ways because I assume you don't have a
line press laying around. So what I started with
is this work mate, as you can see, I didn't work
with it for a long time. Let me show how
you work with it. It's actually a
woodworkers vice. You open the vice, put the bookings side, hold it, leave it a bit up
from the edge and close it. So that's a great option. If you can manage to find one. Or Baldwin would make
your life much easier. Another option is to take two wood blocks and put
the book between them, but can put it like this
other one back here. And then you can take
the clamp and close it. That's also a great option. Because after you close
it, glue the spine, put the guards or
the mall on it, and then you can just
lift it and put it away. If you don't have to boards. You can use just one and put it on the edge of the table so you
can put the glue on it and just clamp it to the table. There is a disadvantage to that because you need
it to dry for like half an hour and you can move it and it interferes with
the rest of your work. Let's say you don't have
all of these worst case. You can put the book on
the edge of the table, put something on it, and then put weight on it. So it won't move blue the spine, and it would work. Okay. If you have
another solution, I would be glad if you can add it to the comments of the course and help other people
with your ingenuity. So choose the way that is
more comfortable for you. And I'll see you in
the next lesson. And we're going to
glue the spine and put the gods on it and
proceed with our book. I'll see you there.
10. Into The Lying Press: Welcome back. After finishing the book block, we want to glue
everything together. The process would be to make the signatures
straight before the glue, glue the spine, and then connect a piece of mall or
gas on the spine. As you can see, I have a
lifetime supply of gauze. I can wrap myself with it. But we would just need
a strip of 18 on 6 cm. That would be enough. And we will put it on
the spine of the book. And it will allow another layer that will connect between the
book and the cover. So the first thing
we want to do is put the book between two bookbinding
boards to protect it. As you can see, it's much easier if you cut the board into
the size of the book, but just 1 cm less on the
direction of the spine. That way you can make it straight and put
it inside the press. Let's bring the press here. It's called a line, Chris, because it's lying down. Make sure the book is trait. Hold it firmly and put
it inside the press. Sometimes it's movable, it. Let's do it on purpose. So then what I do is I
straighten everything up to my content and lock it. Now let's bring the glue
and glue the spine. You don't need a lot of glue. Just enough that you can see the gaps between the signatures. It doesn't mean you
need to fill it all up, but you just want the
layers to connect together. Just make an even amount. All the way. Look that at the edge. I'm taking it from left to right and then from
right to left. So no glue will go
into the signatures. The loose threads go
inside the book block. Now, let's take our more or cars and put it centered
right and left. And then I put another
layer on top of everything. And that's it. The book block is ready. Congratulations. Let's put this aside. You know, usually when I give a workshop here in the studio, that's the point when we're
doing a coffee break. So I decided I want to add the coffee break to
our course also. It would be something
in formal with tips and tricks and things that can
help you along your way. So make yourself a cup of coffee or tea, and
I'll see you soon.
11. Coffee Break: Coffee break. I hope you're enjoying
the course so far. I wanted to share with you some things that can
help you with your work. First of all, as you can see, my table is in the
standing height, and I worked standing
up most of the day. Also have beautiful
natural light. I really recommend you to find a good light source and make sure you're not
shading your work. I wanted to talk to you about the cutting mat
and about knives. First of all, a cutting mat
is a very important tool. Yes, I consider this tool. It has agreed on it. So you can align
things and cut in 90 degree angle and also measure it comes in
different sizes. I think there's one even
smaller than this one. As you can see, 1 cm squares
that can help me cut. I want to show you how you feel. Take a piece of paper. I can align it on the grid and
take my knife and a ruler, the ruler on the
line, and then cut. It's very easy, simple, and it also won't damage your
blade as other surfaces. So I really recommend
you to invest in one I bought some years ago, and it holds for years. Really. Let's talk about knives.
The small knife. I use the most. I use it to cut paper,
cloth, leather. It's in my hand most of the day. I recommend you to
buy a 30 degree blade rather than the blade that
comes with the knife itself. That is because with
this 30 degree, you can reach places. You cannot read this one. So make sure to find 30 degree blades to
change inside your knife. The big knife I used to cut boards because it
has a big body, you can apply pressure
and hold it more firmly so that I use
for bookbinding board. Through the years
I saw people are not holding the knife correctly. And I want to show you my way of holding the
knife and cutting. Let me bring a piece of
paper and the ruler. And I will show you align the paper on the grid
of the cutting mat. First of all, when
you open the knife, Don't open it too much. Just before the break line. You can lock it. If you
have a lock to the knife. In, what I do is I
hold my index finger, pushing down the knife
and my index finger is on the table making sure the blade is in the
90 degree angle. Okay. So the index finger
is pushing down and the middle finger is making sure of the balance
of the knife. And I'll show you how I cut. I put it beside the two
marks of the cutting mat. Start from the top index finger pushing down middle finger, making it with a
balance and then cut. I make sure I cut
the first time. If not, I'm not
releasing the ruler. I'll go once again until
I'm sure I'm finished. Because if you let go off the
ruler and try to cut again, sometimes you have the cut mark because it's off by a
couple of millimeters. So make sure you will not release the ruler until
you're finished cutting. What do you do when you have
a longer piece of paper? I'll bring my long ruler. And I want to show you how
I maneuver my fingers. What they actually do is when I reach the knife to my thumb, I move my fingers downwards
and keep on cutting. Let me align the paper
and show you what I mean. First of all, make sure
your fingers are not pointing out of the ruler
because you can hurt yourself. I hold the ruler on the
upper side and then cut, move my fingers and cut again. Let's do it again. Cut, move my fingers and cut again. Okay. Let me show you once
more without stopping. That's the way making
sure I cut it. If not, I'm not
releasing the ruler. Another thing I discovered
is people don't know how to break the blade
or they're afraid to do so. I want to show you how to do it. You take out the
blade until the break Mark and inside your lid
there's a small gap. I'll take out the lid. I'm putting the small gap
inside the blade and then you can just break it. That's it. I hope these tips help
you in the future. I think we are ready. We didn't finish my coffee. I think. We are ready for our next step, making the outside cover
and connecting altogether. So make sure to put your drinks aside so you won't
tip them over your work. And I'll see you in
the next lesson.
12. Cutting The Cover Material : Cutting our material into size. That's what we're going
to do this lesson. The key to measuring is adding half centimeters on top
and bottom of the book. That means if the book is 21, we will add 1 cm, and it would be 22 cm. About the width of the book. We are going to cut
the bookbinding board exactly as the
width of the book. Let's take a bookbinding
board, measure and cut. We take the weight, which is our stopper. Take a ruler and our pencil, and let's mark 2,021.2. We take the big knife, hold. The ruler between the marks. And what we will do is first, make a light cut. We are making a light cut
because we are making a path for the rest of the
cuts to go exactly into place. You would never cut
the board in one path. It's impossible. It usually takes
four to five times. So I'm making a light cut. And then I'm going
deeper and deeper. Now, let's measure the width. We need 15 cm, we need 14.8, but
let's round it up. Again. Put the ruler, hold it firmly, make a light paths, and then go inside 234. And that's it. Now,
let's measure the spine. So you take the two boards
that you just cut and take the book, puts
them together. Take the ruler, can see. As I can see, it's 1 cm. So let's take our
board and measure one. Now, don't try and
work like this. It won't work. Take it around. And located between the lines. First light cut and then 12. Let's move to the book cloth. The bookbinding cloth has paper on the other side. Why is that? Because when you put glue, the glue won't go through this
fabric and stain our work. We need a piece of 37 on 26 cm. And I want to show you why
and you have the key to measure if you want to
apply to different sizes. What I do is on the top side, I measure 2 cm. This ruler is 2 cm. Let me mark on the
right side also. Now, when I'm taking my boards, I'll put the first one here. You have one on the right side. Then you have a gap of 1 cm. Then you have the spine
moving on to another gap. And then the next board. I'll take my long ruler, which I can find it. Here it is. It would be 37 cm, which I can also mark. If we'll put this ruler
here and mark 2 cm. Now, cutting the
cloth is very easy. Let's also cut the
26 market here. Ruler. Hold it. Ten cut. That's it. We have our cloth and bookbinding boards
with the spine, and we are ready for
the next lesson. When we are going to glue everything together.
I'll see you there.
13. Ready Set Glue: Prepare your glue brushes
and your wastepaper because we are going to
make the outside cover. Let's start by taking
our book cloth and placing it on the table. So let's put it here and let's
take our board and locate between the marks of 2 cm we made when we
cut the material. If you don't have these
marks, do it now. After I'm locating the board, I put two weights, one on top and one
on the right side. And that would help me after gluing to put it
exactly into place. You can use it the same. If you have the pencil marks, can bring it and put
it between the marks. I usually use these weights. Okay, Let's bring the glue. I want to give you a short
explanation about glue. You dip the brush and then
wipe the axis on the side. It's very important so you won't drip when you are
reaching the board, start from the center
and go outside. Why is this important? Because if you do
it the other way, you can have glue on the edge
and then on your finger, and then you can stain
your cover. This way. You work from the inside out. That won't happen. Now, I take the board and
put it between the weights. Move them, make sure
my hands are clean. Flip the binding over, work with the hand first and
then with the bone folder. Be careful not to
work with the head because it can leave a mark. Let's flip it over
and put the weight. So I will have a
straight line here. Now, what I'm going to
do is take this spacer. I made this from
bookbinding boards. You can make one also, it's 1 cm thick. You can also find something in your house that is 1 cm thick. So when you take the spine, you have a gap between the
front cover and the spine. What you can also do is
make this make a T-shape. This would be 1 cm wide. And you can use it by locating
the straight line on top. And then the spine
would go towards it, lifted and move it
to the other side. So you can make this also just
make sure it's 90 degrees. So let's put the weight
back and put our spacer. And let's put some
glue on the spine. I'm going from the inside
towards the other side. And I'm locating it
to the spacer and make sure this doesn't move because this will
make us the straight line. I'll take out the spacer. Let's flip it over and work with the bone
folder pack again. Let's put the weight again
for the straight line. Put our spacer and work
with the next board. Again, dip. The brush, acts as a glue on the side and start from
the middle outside. Spread it evenly. We don't need a lot of glue. But to either mount
on the entire board. Hold the board and
bring it towards the stopper here and
the spacer here. Make sure it's a straight line. Take the spacer
out, hands clean, and flip it over and work
with the bone folder. If I have any access material, I can cut it now. Take a two centimeter ruler
and just cut the rest. Here it's not straight. We can cut it also. Lets move this aside. And our next step is
to make the corners. And I want to show you how
you take a small ruler and a pencil and put it
between the two corners, the corner of the board and
the corner of the cloth. And Mark half a
centimeter. This side. Corner to corner centimeter. Tweet here. And here. Now, we'll take a
triangle ruler. As you can see in the base, there is a straight line. What you need to do is
put the straight line on the inner side here and align it with the straight
line of the board. Then when you move it
to the right side, when you reach your mark, you will have 45 degree angle. Let's market over here also, straight here, and I move it. And we have 45 degrees. Let's do it here also. And here. Now. I'll take my ruler and the knife and cut it
according to the marks. Next we're going to
do the turnings. First the long ones, and then the short ones. I'll take a piece of paper and put it underneath
the binding. Take my small brush. Hold the binding and
put it from the middle. Towards the outside,
toward the corners. You don't need a lot of glue, just an even amount. Take the paper out. Move the binding to
the edge of the table. Take your thumb and slowly
lift the cloth to the inside. Take your fingers, hold between the gaps that the
binding fly literally. Take your bone folder and push the access in the corner
towards the short side. Let's do it here. Also.
Push it a bit and insert axis cloth
to the short side. Great, Let's flip it over
and glue the long side. With wastepaper underneath. Take your brush,
holds the cover. Put the glue from the
middle to the edge. Because if you do
it the wrong way, you can put glue underneath
and stain the cloth. Take the paper out, move the binding to the edge of the
table and with your thumb. Glue it and slowly
lifted to the inside. Hold your fingers that
the binding flower bit. Take your bone folder and
insert the corner inside. Make it flat here. Okay. Short side. A piece
of paper underneath. Hold the binding. Put some glue. Careful. In the corners,
not a lot of glue. Take the paper out of the table, thumb and slowly lifted. We're doing it slowly
so no gap will be between the cloth and
the bookbinding board. I work with a bone folder and make a nice corner
for our binding. Another layer of paper. Glue it from the inside
out until the edge. Take paper out. Move it to the edge of the
table and turn into cloth. Work with a bone folder. Make yourself a nice corner. That's it. Behold. We have a cover ready. Let me clear out
everything here, and I will see you in the next lesson when
we are going to connect the book and the cover
together. See you there.
14. Connecting it all Together: Welcome back. All the
parts are ready and now it's time to connect
everything together. I want to show you
how to prepare everything and then we'll
do the actual procedure. So first of all, we are going to locate
the book with the cover. What I'm going to do is
take my beloved weights. This is 1 cm. But you can also take a magazine
or a pile of papers or something
that is 1 cm thick. And it will actually
hold the spine not to fall backwards. And I put a piece of wait. So it would lift the
cover like this. I make sure right
and left straight. Which is actually the bottom
side and the upper side. And what we're going to do, I'll show you on dry now. What we are going to
do is take a piece of paper and put it
underneath the end paper, glue underneath the Move on it. Go left and right until we
reach to the entire end paper. Take out the paper. Sometimes it moves. I'll show you what
to do. If it moves. Then I take two fingers, hold the book block, take the cover,
take it down a bit, not strongly, but take it
down a bit and then close it. Work with the bone
folder once on the gap, and open the book on
the edge of the table. This of course
would be over here. Okay. Are you ready? Let me bring the glue. Okay. We'll put the paper underneath. You see this brush, it's a 20 year old brush. Dip the brush, take the
excess glue aside and start by putting the glue
underneath the mall. And then on the mall. As you can see, I'm
going from center to the right side
and the left side. And then keep on moving. Put some more glue,
right side and left side until we reach
all the paper. Make sure your hands are clean. Take out the paper. Let's move it on purpose. Because sometimes it moves, then you can line it up again, left side and right side. Hold the book block, take the cover. Move it down. Not very strong. Move it down and close it. Take a bone folder and slide it to the edge
of the table, open it. And with the bone folder, attach it to the cover. The reason I'm opening
it on the edge of the table to give me
a 90 degree angle. So it opened properly. Great. Let's do the other side. Now it's much more easy
because the book won't move something on the
back to centimeters. Here. Open the book, take a
wastepaper, put underneath. Take my glue brush. And first from the
middle to the right side and the left side underneath
them all on the moon. And then all the way. We don't need a lot of glue. Let's make the spread even. Let's take the paper
out. Two fingers. Hold the book block, take down the cover
and close it. Open on the edge of the table
and work the bone folder. That's it. Behold, we
have our binding ready. I'm so glad you took
the course with me. Let me put it inside the press. You don't have to put the
book inside the press. You can also put it
under a pile of books or weights or something
that would push it down for like a half an hour. And that will do the trick. Don't worry. Let me clear out everything and prepare for our last
and final lesson. I'll see you there.
15. Conclusion: Hi and welcome to
our final lesson. I want to thank you for being here and taking part
in this course. I hope you enjoyed
it like I did. Learning something new can
be a bit of a challenge, but I remind you that
practice makes progress. And they feel that
when I'm teaching you, I'm actually keeping this
beautiful art alive. I also learned a lot from making this course about
cinematography, about how to talk to camera, about how to edit everything together and add close-up shots, which I felt can really clarify all the process
of what we're doing here. I really encourage you to upload your creations to
our class project. And you can also ask
questions and comments. And I will try and answer to the best of my ability
about future classes. You can follow me here on
Skillshare and also on Instagram where I document
my art and my work. So congratulations on
completing this course. I'm really, really proud of you and I will see you
in the next course. Thank you for being here.
 Ido Agassi, Book Artist