Transcripts
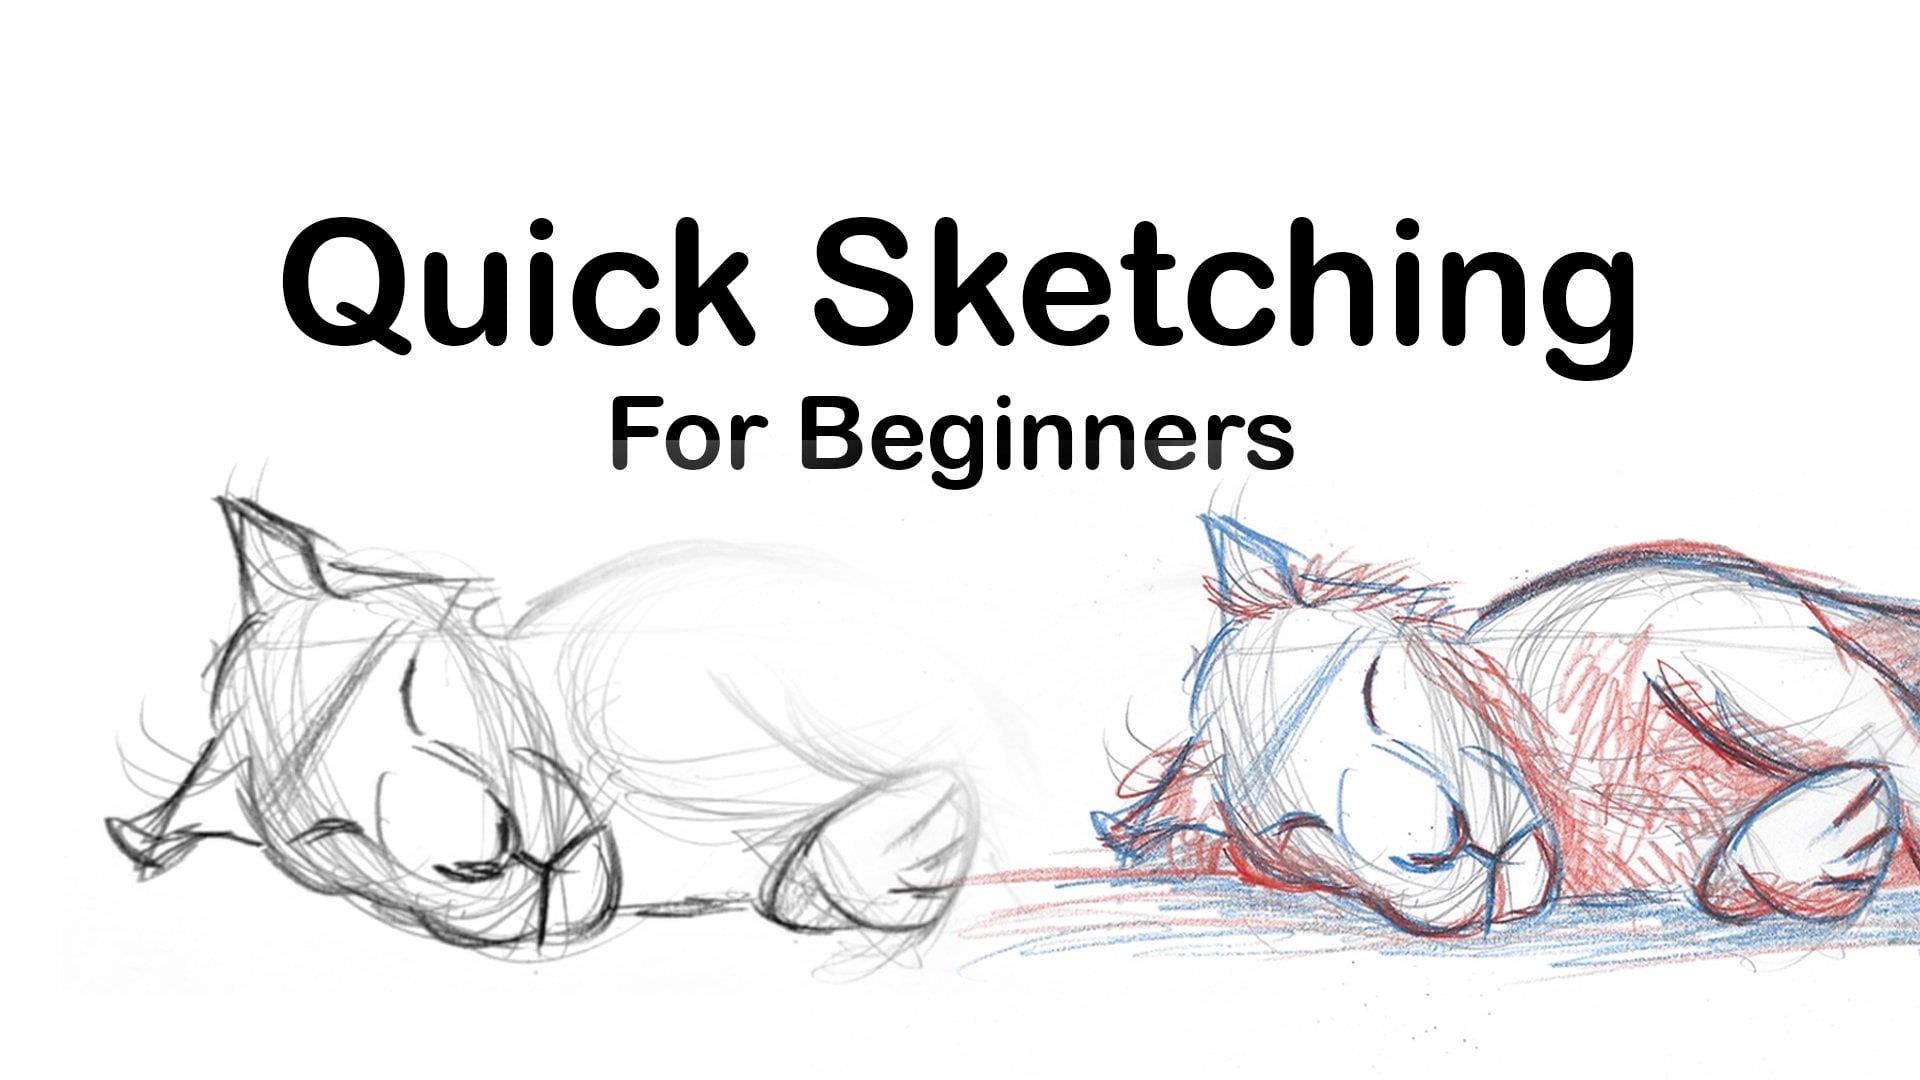
1. Welcome to Class!: Hey, how are you? My
name is Andy Bon. And I'm so happy to meet you
and have you in this class. Today, we'll be
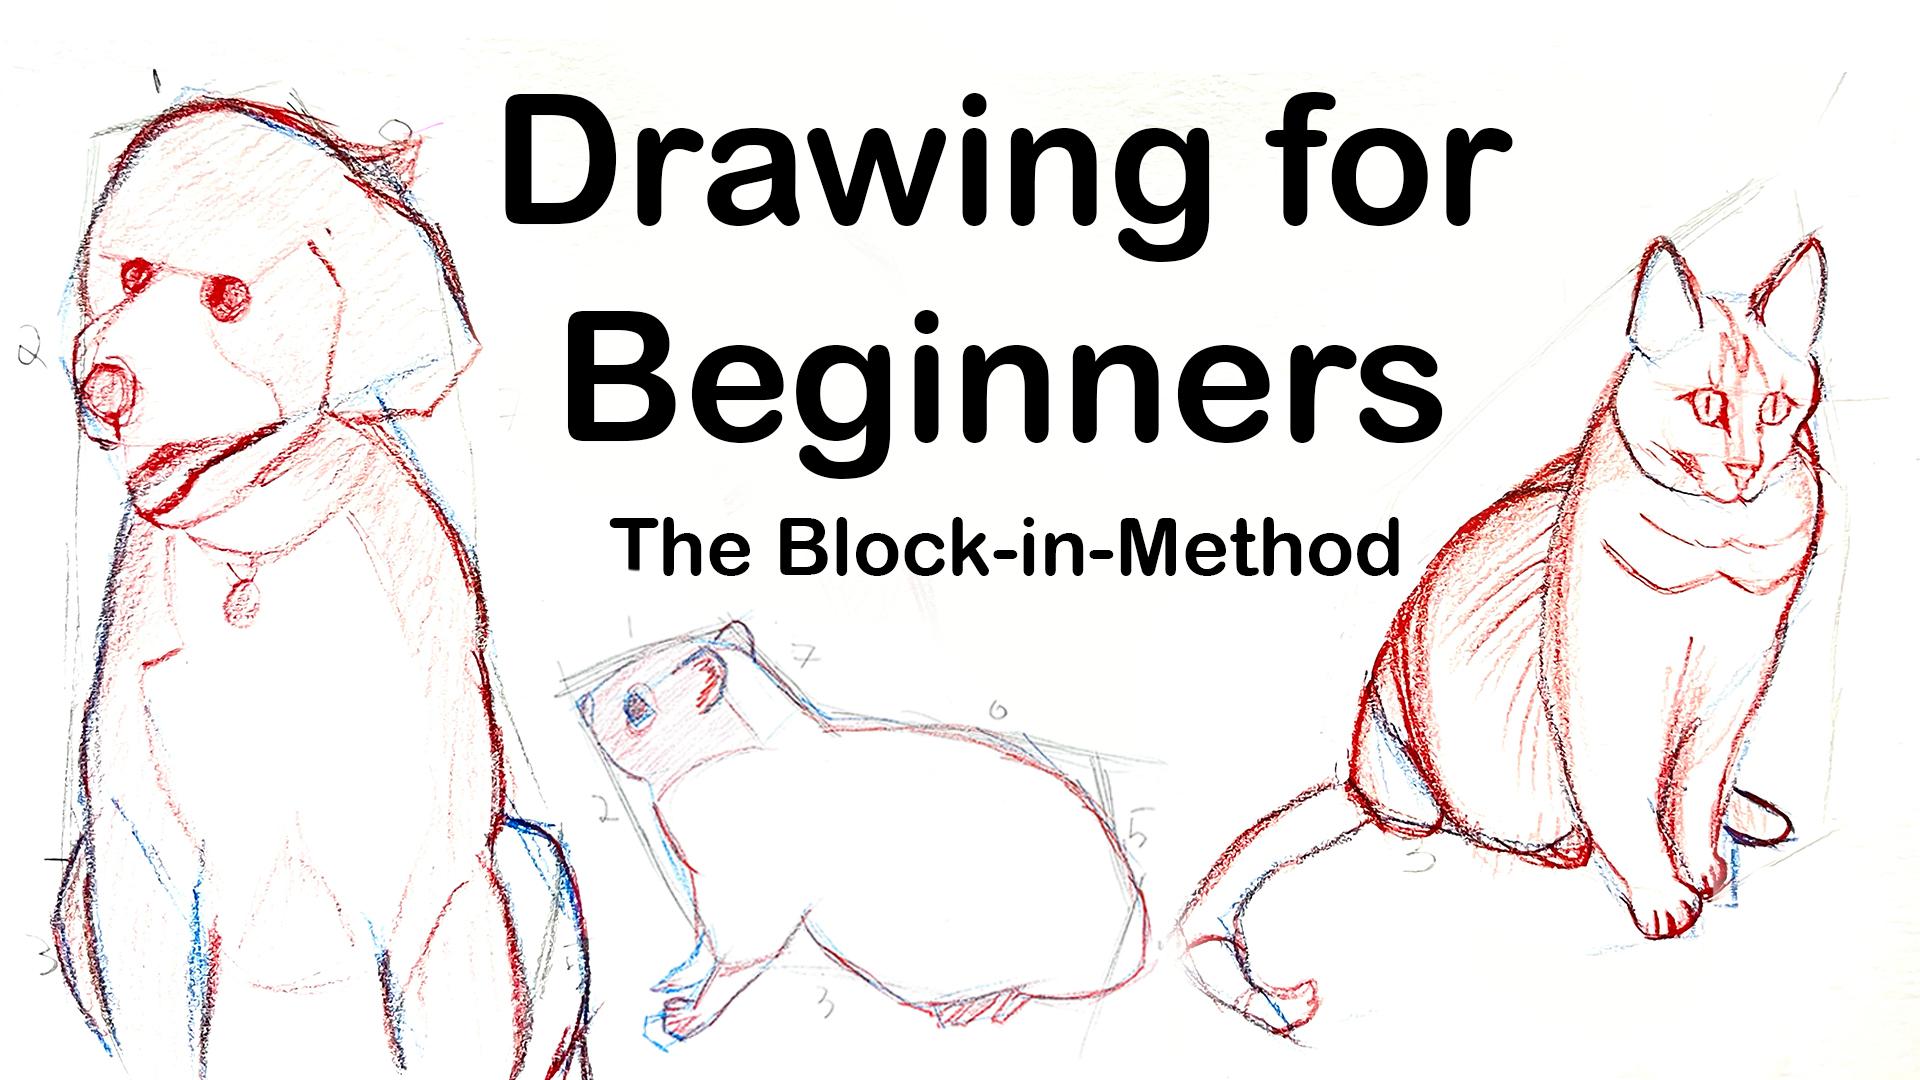
learning to draw using what's called the
block-in method. And it's a great,
useful technique for being able to
draw complex things. In animals and simplify them, and we more easily draw them. My goal for you in
this class is for you not just to be able to
draw the three animals, namely a cat, dog, and squirrel. But then after we
were to take this and apply it to
drawing other animals, other subjects, this method has greatly improved my heart. So we'll jump into
the class or start by going over a few sample
images of animals, and then we'll go to our
sketchbook and start drawing. So I'll see you in
the next video.
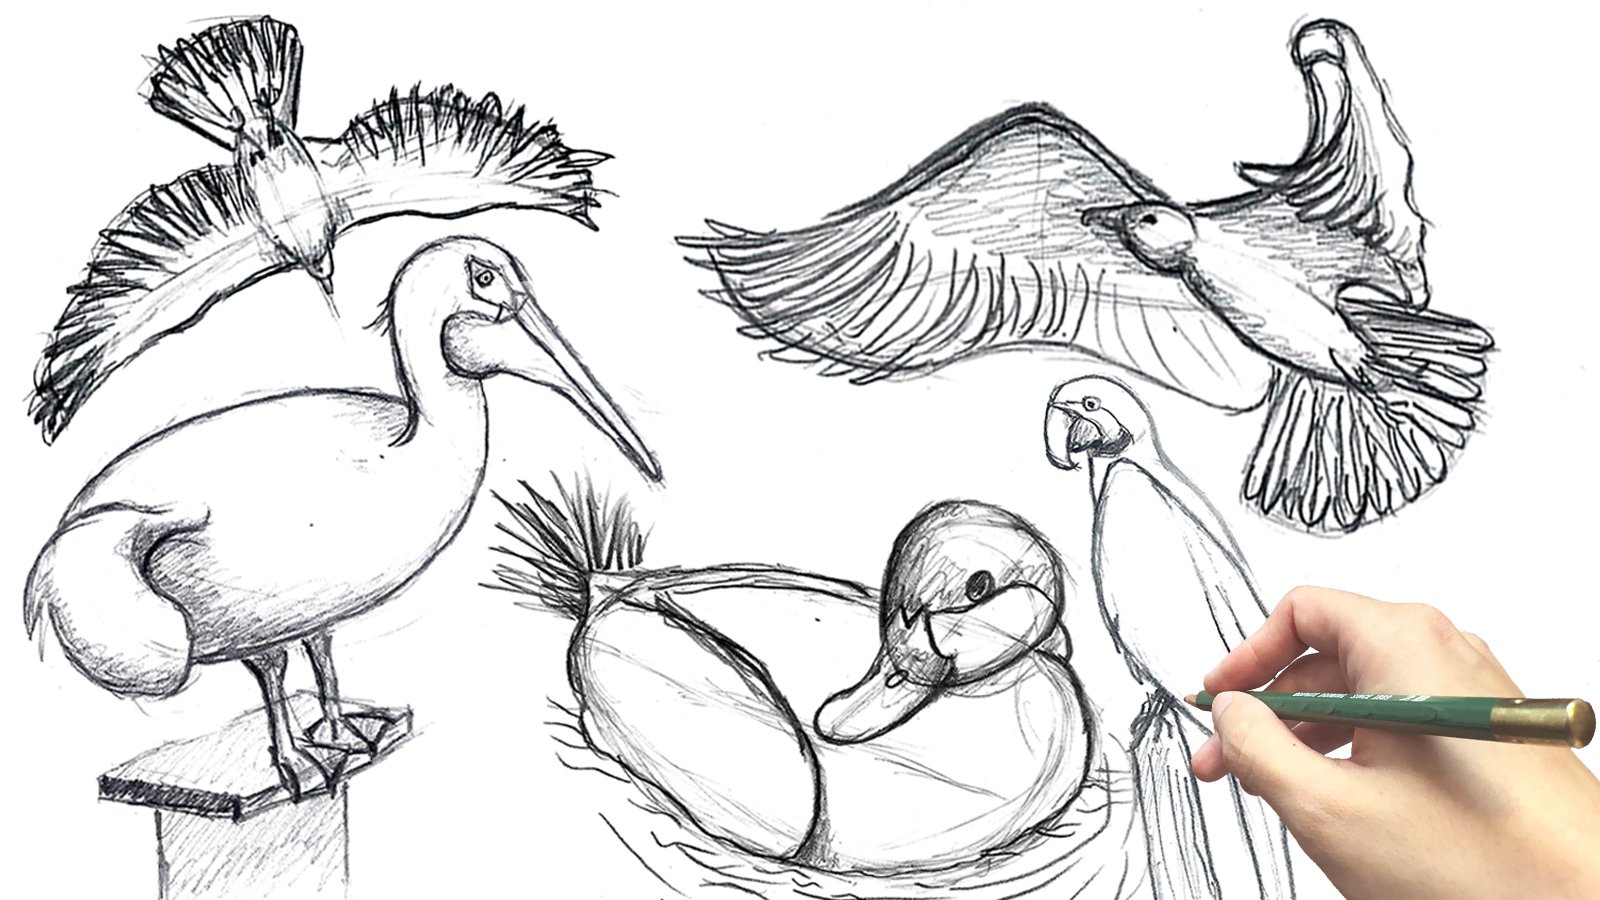
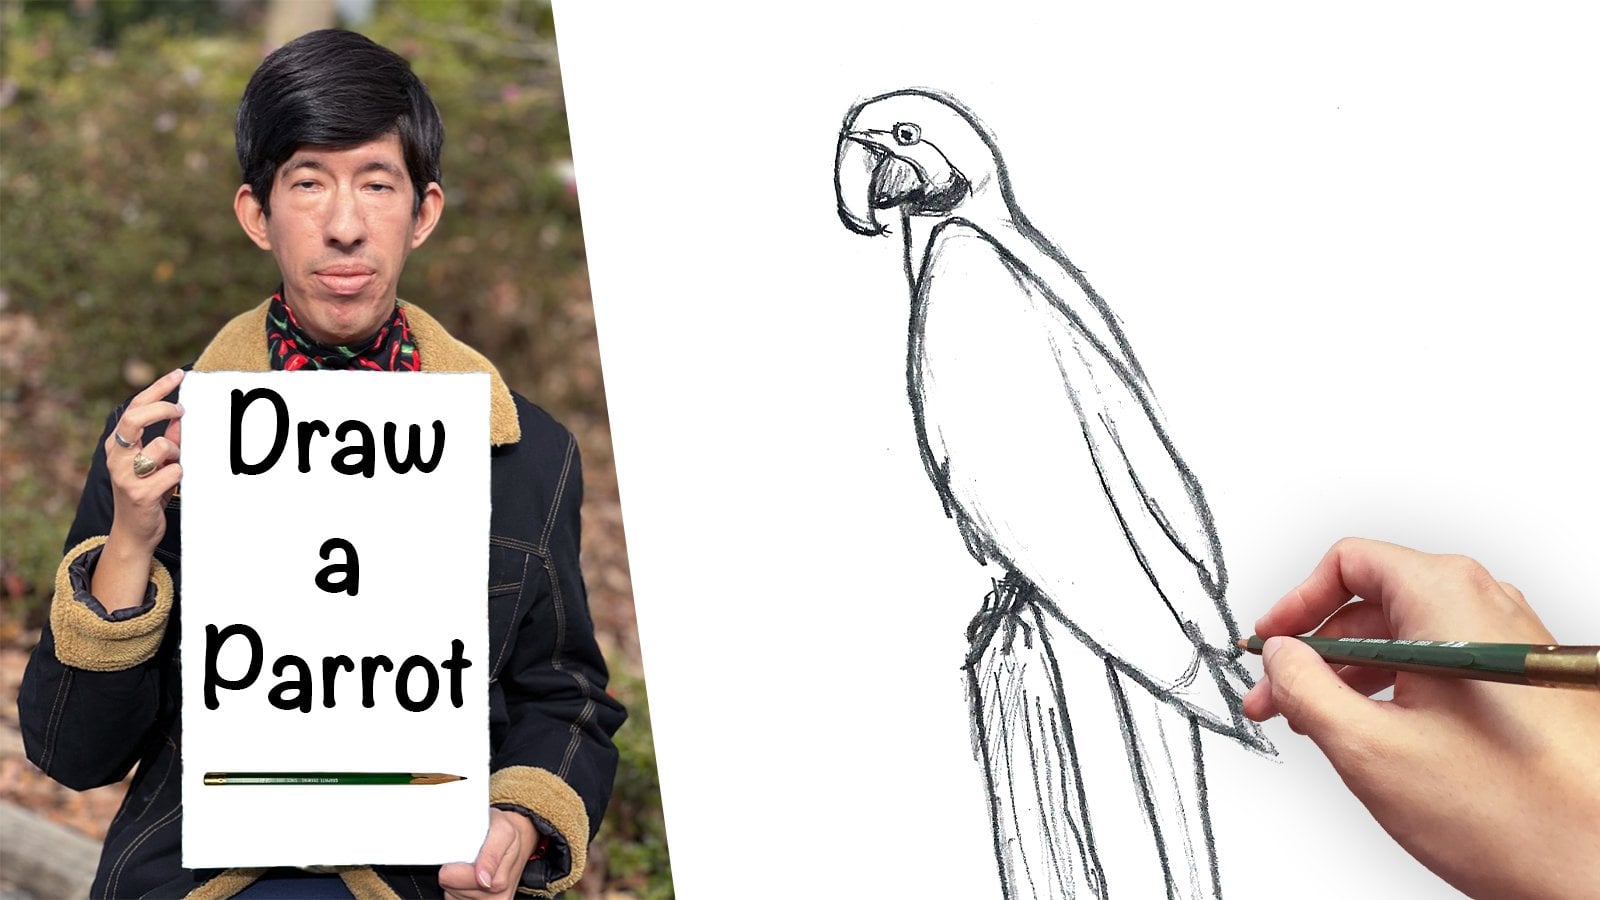
2. Blocking in Method: Example A: So with this method, we want to think about what space There's this animal or thing take up or encompass. So for that, I'm going to start with this green pen and mark out the area that the animal takes up in a square. And our two, this is in the shapes we discussed in the previous videos, the circles, triangles, and so on, Zoom see never drawn out a rectangle for the body. And then I'll follow that for the tail with a wrong triangle and that we discussed. This really gives me a good idea of where the bird goes, where it sits, how much space it takes up. Now, I'm going to go in for my second pass and further sally, use red. And this time I'm adding a few more details. So this time I'm using wrong straight lines, no curves still. And what I'm doing is I'm sculpting it. I'm in a waiting room moving some other grains where that I drew ago and getting closer to what a bird really is, I'm still making it very angular, very much having a square and geometric shape that is easy to draw out. And some areas are that is a long line. Searches down is back or down in front and other areas. It is a bit more complex search as his head, but there we still only have a few side, so you could say for the head. So I see I did 123 sides to make up his head. And instead of drawing a curved line, and now I'll go in for my third pass and add more details. I'm still drawing straight lines. When I'm adding more details, have our re-established Where's bodies so that they are. Now our start to add some of the details of this head is feathers, his wings, his eyes, and so on. So now we can get a better idea what we've done so far. We are starting to see a bird emerging out of what we started with was a simple square box and the triangle using the grain. And then we went shaping it when forming it and adding more and more details. Now we'll go for final has using pink. And this time we will use curved lines. And so we're starting to remove some of those sharp edges and adding curves, shuffling up and making it look even more net Cape Bird. One way to think of this is to think of someone that works with marble or clay. Maybe they start out with a big piece of marble or a big hunk of play. And it's a brown, It's a big square. And then as time goes on, they start chipping away at it. So they start removing some areas, removing in other areas, softening up these areas and slowly and animal or a person emerges from one square, one big hunk. And that's what we're doing. We're struggling with a very basic piece, a square. And we know working with it until we have something beautiful, hammered that we have our bird in this example. And now we can see how others have very much real and ready to add color.
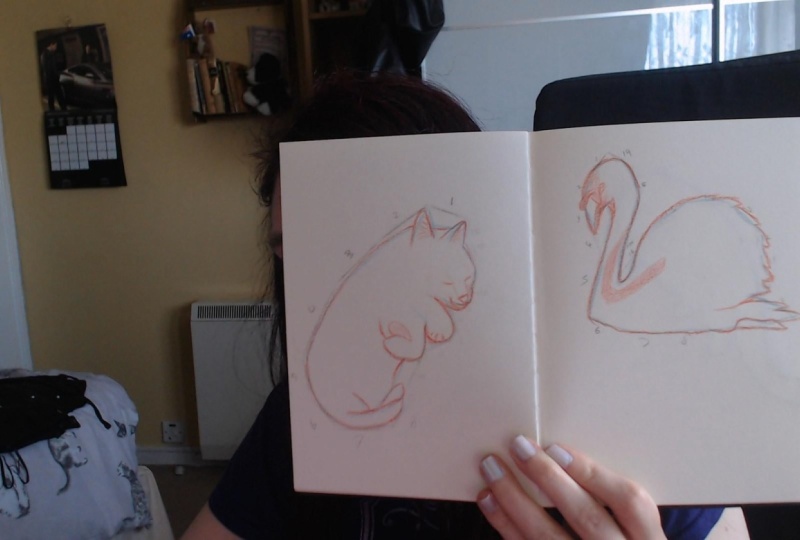
3. Blocking in Method: Example B: Okay, let's look at our second example of a cat. And we're going to start out by establishing the area is n and brought in him in server using basic shapes. And this one isn't quite as exact as the one previously ever be written. More of a complex shape, whether that's okay, we're still making it as simple as possible.
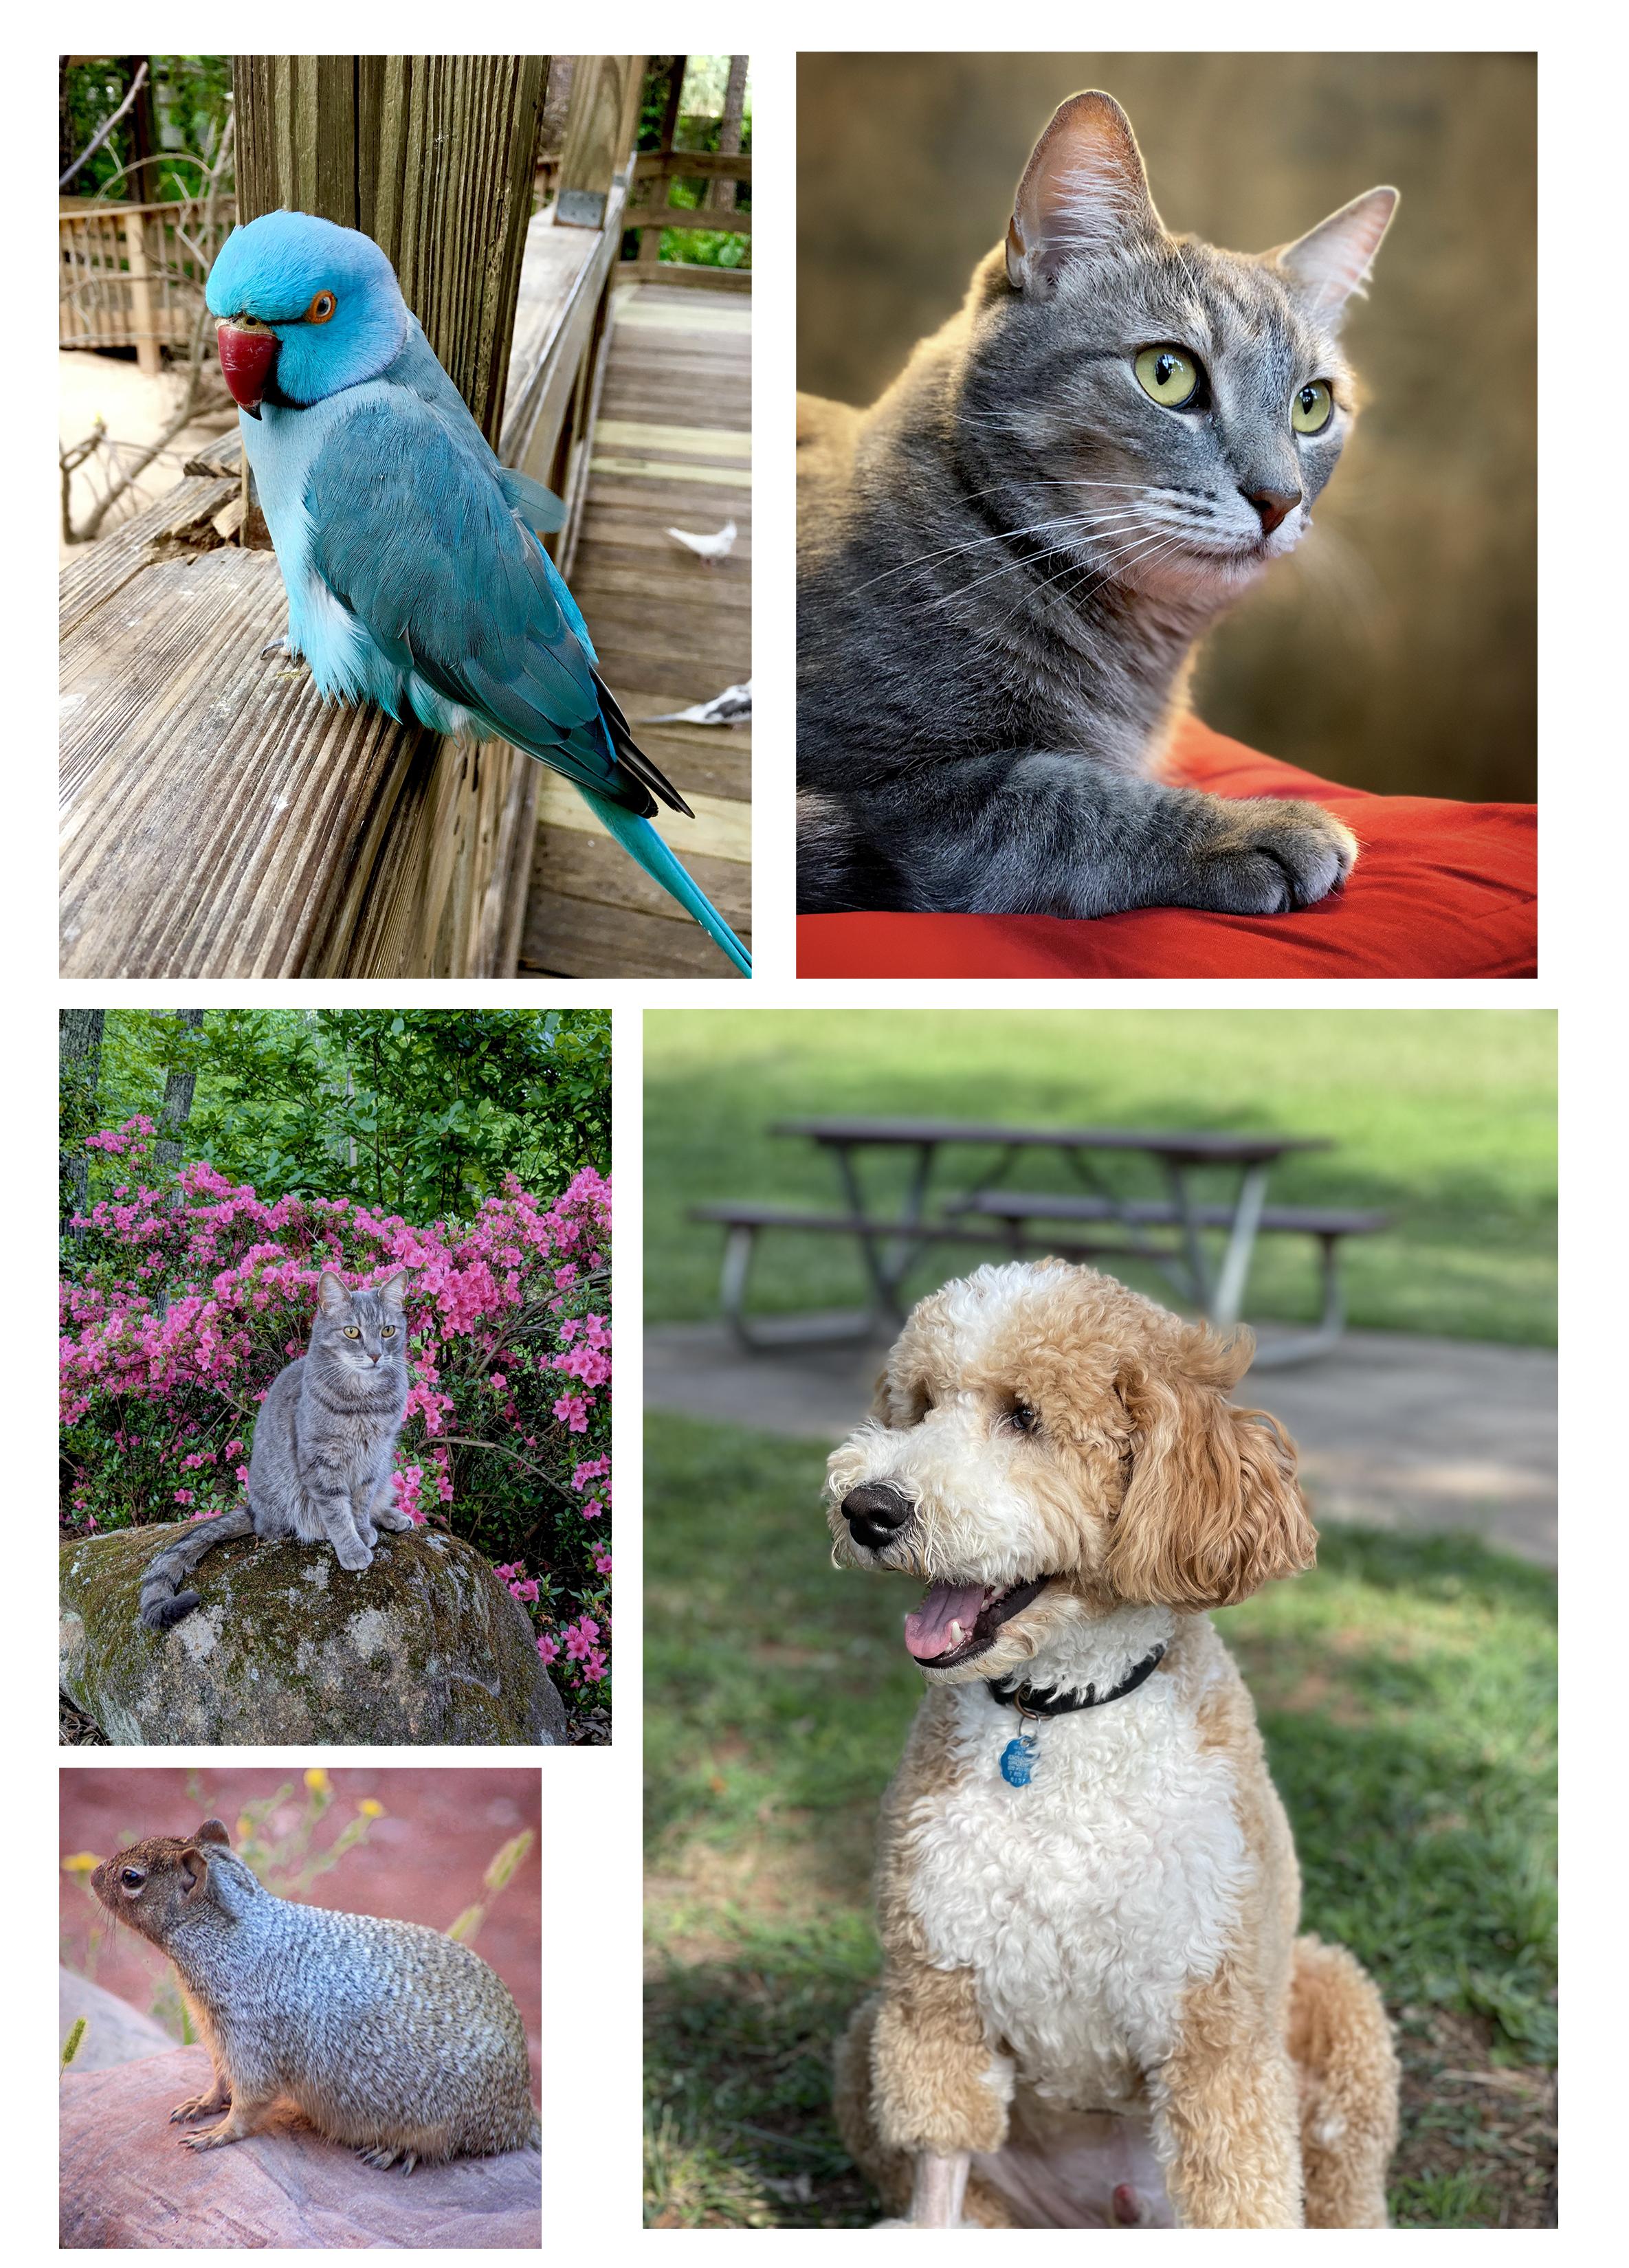
4. Cat Sketch Part A: All right, Welcome to the video. So in these next three videos, we'll be drawing on paper using our red. And so I'm using this 0.7 millimeter prints. So as well as to Prisma credit principles. I have this one, cerium will, and it is number one, our SRE. I also have this red, which is crimson red. Number 9, 24 surveys are the ones I'll be using to show you this example of blocking in using lead and paper. And you don't have to use the same materials. These are just the ones I opted to use. So anything you have is great. This is fun to be a steady, not a final piece. So whatever you're most comfortable with, his work over the paper I'm using is Strathmore, Bristol board, 100 pound. And it's great highs it for current pencil. So easy with marker and just running around. So I like this and it's going to use today. But again, whatever you have handy is what we use. And I'll be showing the image I will be drawing from on the left-hand side. So to begin, this is a picture of my cat. His name is Ray, no, silver phone is turned to him. And like we discussed in the first three videos, square bracket. So we're thinking about the big shapes. So first we're going to start and we're going to start by drawing a top of his head and establishing his size. So the area that he takes up the paper. So what I'm doing is I'm analyzing and viewing different angles. Searches at the bottom of his rear end to the front heavy street. We see this page nine basically then we get in there. And then we have another side right here as a friend from maybe a friend and a one at the very front. The one that's over to the right is rare. And so on would be here. And then there's basically a straight line and I'm going to adjust. This has raised some of this. And then we'll try and his friend grant. And what we see. And so you have this vague shape right here, this triangle. So basically we have one side, 2345. So basically what we have are five hedges. His party had it makes up. So now that we've got a very broad shape, will start going in and adding more details.
5. Cat Sketch Part B: I'm going to use here the blue cerulean blue with a nice fine point we're going to add in is here. Thinking of them as the shape that they are paid triangles. And then we can analyze top of his head between the years which would make that much anything you want to remember is that you don't need to stay inside, exactly inside of this. For this shape, you don't want to stay close to it. But if you know out and around bit like you see, I'm doing here. So K and now we're going to start drawing his face. Again. We're not drawing curved and ions. We're drawing very straight lines that are around and curve around. So we're not drawing curves. We're also thinking about his shake, how that may come out here and around here. So we're going to leave that has his head and then we're going to draw it in back of his neck and they fuse in front leg right around here. So if we look at the photo, we see a pink shape coming down and turned here to write them out there. And we're trying to square a square. And this shape is just giving us a basic starting point. If we throw in a bit at the edge and don't take out and Anna all the way to the very edge. That's okay. Then Plato out and bit isolated here. That's okay as well. Serenity, I say that this sign of his money comes up to right around his shape, right here. And then we have this drawn, it goes down to there. And then we have the back of his body. And if we notice this right here is where we see is back start almost comes right into this chain. So if we flow out from his train, is bad. Start an RVU, heaven start right about here. And so I'm drawing this heart. When we're drawing, it must not have nine, very linear. And we see another shape right here. Maybe this one comes a bit more forward. I think this is where his tummy is right here. So add that in.
6. Cat Sketch Part C: And then we need to add in his tail. And if we think about where his talents, we can find it by comparing whether it is in relation to this friend Paul, and even to other areas such as his tummy right here. So I don't want to do is I'm analyzing handle photo over here and I'm saying that there's this angle random amount. Thank this. Between this front car and his tail and the end of his tail. So I'm just going to draw this shape here and then start mapping out his tail and his tail in a way froze how whatever the Money Magazine. And The last thing we need to do is adding his back over here and it's right around here. So we're analyzing how much space there is, prejudice, friend, car on a red eye material there is here. So from here up, how much area is there? So I will say it's out here and start squaring off his rent car. Okay. Now that we've done that with her veil over it, let me go back to our crimson red and start adding in some more details. So we're going to analyze first starting off his eyes. So what is the angle of his eyes of meditative photo is the angle back. This is between the eyes if region or nine. Very XYZ right here. What would the angle B. So I'm nothing at the photo and one underdamped have heres to be a bit higher than the one on the right. So how and draw a very faint nine right here just to establish where the top of his eyes are. And then his nose will mean right in here with his muzzle coming up out at this angle like this. So now I'm going to add in his eye and I'm not going to add a round eye when I'm going to do is add a very drawn out with corners. So it's not a perfect line. Okay? And then we see that the teardrop over the edge of the eye to make them red around here. And there's one here that we see there. So because it is on the edge of the nose or the ulnar side of the face. So then we can draw the nose. And that movie it is similar angle and the top of it well with as it's going this way. So we're not drawing curves this time. I'm just drawing this basic pay for his nose. And then we draw his mouth. So as math is very simple, and it curves around here. And then all say, let's have it on the other side. So this trick modulus here, is it aware of the curve of the mouth and then it wraps around the face like that. And then maybe we'll come in and establish some more of these parties for smaller this side of his face, like this, has the edge or the head goes up. And the sine of is I will bring out his eyes and bet more red in here. For similar the eyelashes. Say, maybe shade this hin und bit. I'm going to bring up this edge of his nose in order to establish a separation between this side of his nose and the scientists face. Over here. Add in some of the other details over his eyes. And maybe even. M. Cats typically have on their face RNAs. Now we're going to start adding in some more curves, making these edges be less. Track, S, square, and r. So we need, we can do some adjustments array. Now i'm, I'm adjusting this high, fixing it, so it's not quite as pointy as it was before. Our list. Here is a bit too big. When you see the sign of it ran around here. So our interface that we can add in some of the fur patterns on his chest. So it can have a ready this one right in here. It kind of comes down and goes out. I'm standing in. And in a way we have another one right here. We have a few patterns. Here. We can just lightly shading to give it some texture. Already this curve and Peace Prize and add some details to them. So we're looking at a pause in. We say they're nice and round and a friend. So we went around the song right in here. Maybe adding some shading model that's not necessary. This car, the striatum is part, comes in to the right and then and comes out again. Now appended in the rest of the body, height in here and it dissolves into it. And then the same thing would apply to the side. And then over on this part, over here, making it more curved. I think I might bring this in and put more than when it is drawn in with some brown. And then over sine. So this comes out and has a bit of a cold right around here, where two curves, curves in two right there. And then we can soften up this right in here. It's not hard to show Chang make north and this portion right here make it rounder and softer. We added the lead-in for the regular lead principle, taken our basic shape, and then we came back with our blue to establish or refine it and add some more details. And then we're finishing off with how read my adding in some more detail. So we're sculpting. We're starting off with a basic shape. And then curving increases shrimp enough pieces and sculpting it down to when it really is. And then we'll work on its tail. We see how it's nice and dragging. And we want it to me curved and soft. And it's tearing even has a bit of a grade. Right in here. Is black pole, somewhere around here, and a hidden biographer. We can even add in some remind cocaine. So that's our first example of looking in and drawing a simple cat.
7. Dog Sketch Part A: Okay, so in this example, while the join Gonzalo, the doc that you see in the right hand side of your screen. And so we'll be starting out with our 10, so our LED. And so to map out his head and body. So I'm going to start by establishing top of his head, which is around here. I'll draw a line. And then if we run, he's very tall and thin frequencies setting. We have one edge right here. There are blocking in and it kind of turns right about here, turns in red and this area. And then from the right side, m is Pi. We can add in some more area for us. And and then we'll start bringing this town. It comes out a bit more red in here to allow room for his back feet. And then it goes up image, we don't have that part of the picture right around here. That's our basic shape. And again, I'll put in the numbers, have the sides. So in this case we have eight sides and we could obtain with less. Now we're going to start out with Bayes sides of our block. So now we're going to start drawing in his head. So I'm looking at the line. I can go from the bottom, have a strain and kinda goes back through the bottom of this here in the photo. And then we can draw in the front of his nose right here. And then supposing that this is the chain. And then point have this chin. And I've visited a photo that's where his body is, where the front edge is, part a, an right. We see. So Irvine is start adding that finance for a party and his leg. So it comes down to here and then turns in and then surround here and joins in with his body. And his party comes in here right about here. We also see pit of his or his leg in fact. And in other leg in back over here. Okay. So we have two basic shapes. We have a head here and then his body, which includes his legs. So that's our second step.
8. Dog Sketch Part B: Now we're going to no end and start adding some details. And just regulated on the cat. We're going to look at his eyes and see how their angle. So I think the angle is very slightly angled down and to the right. So first have to find where the eyes are. And I think they're right around here. So draw faint red line right here. And then our draw a line to represent the top of his nose. And we can draw in his nose. Then there are snout right here. And then we have the division of his upper lips right here. And then our curve and flow down for this side of his face. And then this one goes up and around and disappears around his head. Right now we're going to go back to his eyes and they're very hidden. This one is special in a way where one right here. And the second one is about here. And then we need to draw in is lower jaw. So the bottom, which would come out. And if we compare where the front of is lip is, compared to his approach 0, we see that this right, I'm burden nine right around here. And the division of the middle, half of the snout and the little nose right here. So if we loaded on mine where the middle of that is and then come down and I'm being right around where a friend, a very strong appears in our Florida. And we can even shade to this tongue in more real honor. And then we can start working on top of his head. So starting over him beside the eye to the left, start curving it around, working in those curves. And then we need to find where the ear is on the right. So I'm looking at a photo and planet finding the angle Free Sale can use AI. And then where's there's no line? Where were the Air B, where the ear meets somebody with a p here? Or maybe up here. I think we'll be around here, right about there. And it comes to sway to the right and then turns and goes, it's going to adapt up. And then we have a little tuft of hair that comes. However, there will add that end where racism maybe we'll curve is head, right? Okay? And then we need to recline is party. Well we can do is we can add in some of these for details. So some of the division between the brown and white. So we see the angles that occur. There's a minimum income going to the right and down right there. And then it curves down and through his neck. And again, we're thinking too much scope. Jane Eyre removing areas, maybe adding Sumerians in, working with they. Remove some paint and you say, Hey, I went to had somewhere in here. And so you're always editing in, moving this, removing that, tweaking it. And that's what we're doing here. And I'm just going in and adding a bit of a shadow to measure that a bit more real. Curves around, It's not necessary, but I just wanted to do that. Okay. And then we have this side of his body, my blindness chart working on as it curves around. And we see there's a bit of a bump here. And then it pumps back down and hamate here. Go ahead. N is for, so he has this color red in here indication. And then this nose down. Tim Brown first provide it with a white and it flows into his leg and around it. And we can even add a bit of a division right here where this shadow is with the tummy. And his chest kind of turns in right around here. Curving those, making those blues into more curves and this angular, and that's sharp. Alright? And then we're going to shade in some of this red side just to make it a bit more real. To make it appear as if this part is white and then a red tip him is brown. And something I wanted to add in to the colleague who has this line right here is for between brown and white fur. So it curves out of his high and town and turn right about here and ran into a straw. So it's almost like a river or an S that flows down. And then I can shade this in. Every time plan of an impression.
9. Squirrel Sketch Part A: In this third and final example, we will be drawing this squirrel from Zion National Park in Utah. This is a photo I took when I was out there at some point years ago. So we're going to start out again by dragging in the animal. Razi this nice way for odd shaped flattened front, right here. And then on top of his head or her head. And then it goes down and neck. And then down the back of his or her Varney. 79, 30 seconds high that this shape drawn out my next favorite in draft, the first cornerstone of our animal, of our general shape, of our swirl. Now we're going to start sculpting and adding some more details on with our blue. I like to start out with the head. And when you see it has a nice point right here. Quaver known as a bit of a triangle back here behind the eyes. So we can add that in. Pin. We have an ear right in here. And if we reference where the Treasury and the other side is, even rewrite hair down tennis here. So we go from this runtime, we draw that nice, This may arrive at this address here. And then we're going to reference where I is. So noticing the 0.5, the ear right here. And then we kinda finder angle of where that eye is. Maybe it's a bit further down to right around. Here is where I'm going to place my high. And then they come in and then go out for its chest. Then we see we have the two friends feed on there. Anyone says in terms of fate, has our most parent of a bridge. And the foundation. That comes in the mid more than when we just did. And then the other one would be right in this vicinity. Henry come back with its tummy. That an town. And then certainly have one small foot right here. And we'll just add any basic shape tumor and present that foot and remembering that feeling of animals usually bigger than the front. And then I'll try and put our red. So that's the second step. And now we're going to switch over to our bread.
10. Squirrel Sketch Part B: Okay, so we're going to start adding some more details and softening up similar these edges in here. To struggle with the nose and the head will shade in the eye. We can add in and bitter this lead down here. Maybe we'll add in some shadows. Here. They are, here, goes in here. Curve the slope around here too. I'm going to shade in his front part of his head. And then we can notice then the picture and then a friend of his chest. It goes in hand like that. And then froze out down to the leg on our side. And then this curves town maybe a bit more than what we have. And we're adding some. Were the leading, some like right in there. We don't need that much have is whack. I think this should come down to pick more. And then we have a nice Tammy right in here. And then we can TTL someone's ACE toes. Just very basic. Routing them in thinking of them is ten fingers. And I'm just drawing a basic rectangle right here to represent has a toes and back. And I can do something similar. And the front right here. So let's review this one. We've gone from these basic shapes such as drawing a parks, let's say. And then we've gone in and we started adding curves as we go in with our different containers and editing it and changing it, adding more details as we fill it out. And so is try it out. Metabolome vague shape and we're working toward are more complex. So we start out with the pay per odd shape. And we know working in, and working and working as we know, take it this more. We defined simply in more detail and hybrid innateness method because it allows me to really establish the size of the thing. So in this case, the size of it, well, get it down quickly and then go in and add lithium's. If not, here's what might happen. He might've started drawing the head and then it turns out infinity r this time into drawing the head and it's ready to be NFP drawing the body can overrun up as a pinprick whereas gaping crowd in the party ticket in 19 of the entire thing we want to draw, then it's established. It is this size and the scale. And it allows you to put down something really fast with this basic shape them maintained at the beginning, predicate in town and get it on the paper in under a minute. And you can be a bit more detail and protein don't want to take too much time with A1 to be quick and have it be maybe have a few sides. So think of this, like I've said, as starting with a big brown and it's cropped in January. Moving, moving material, adding some here, adding some, they're learning it and working with the Pen tool kit. What you want.
11. Thanks for Watching!: Thank you so much for watching. I really hope you enjoyed this class and we're able
to learn something from it. Please feel free to post a
picture of your drawing below this class so that
all of us here on Sco chair can see what you did. If you have any questions, don't hesitate to start a discussion in the discussions
tab below this video, and I will be happy to
answer your questions. Well, if you would
like to support me, please check out my website at www.andartitude.com
And feel free to visit me on Instagram and
Facebook where you can see daily updates of my artwork
at Andy's attitude. Stick around here on
Skillshare and follow me because in the coming weeks I will be uploading
more classes. That's been it for now. I hope you have a wonderful day. See you in the next class.
 Andy Villon, Fine Artist