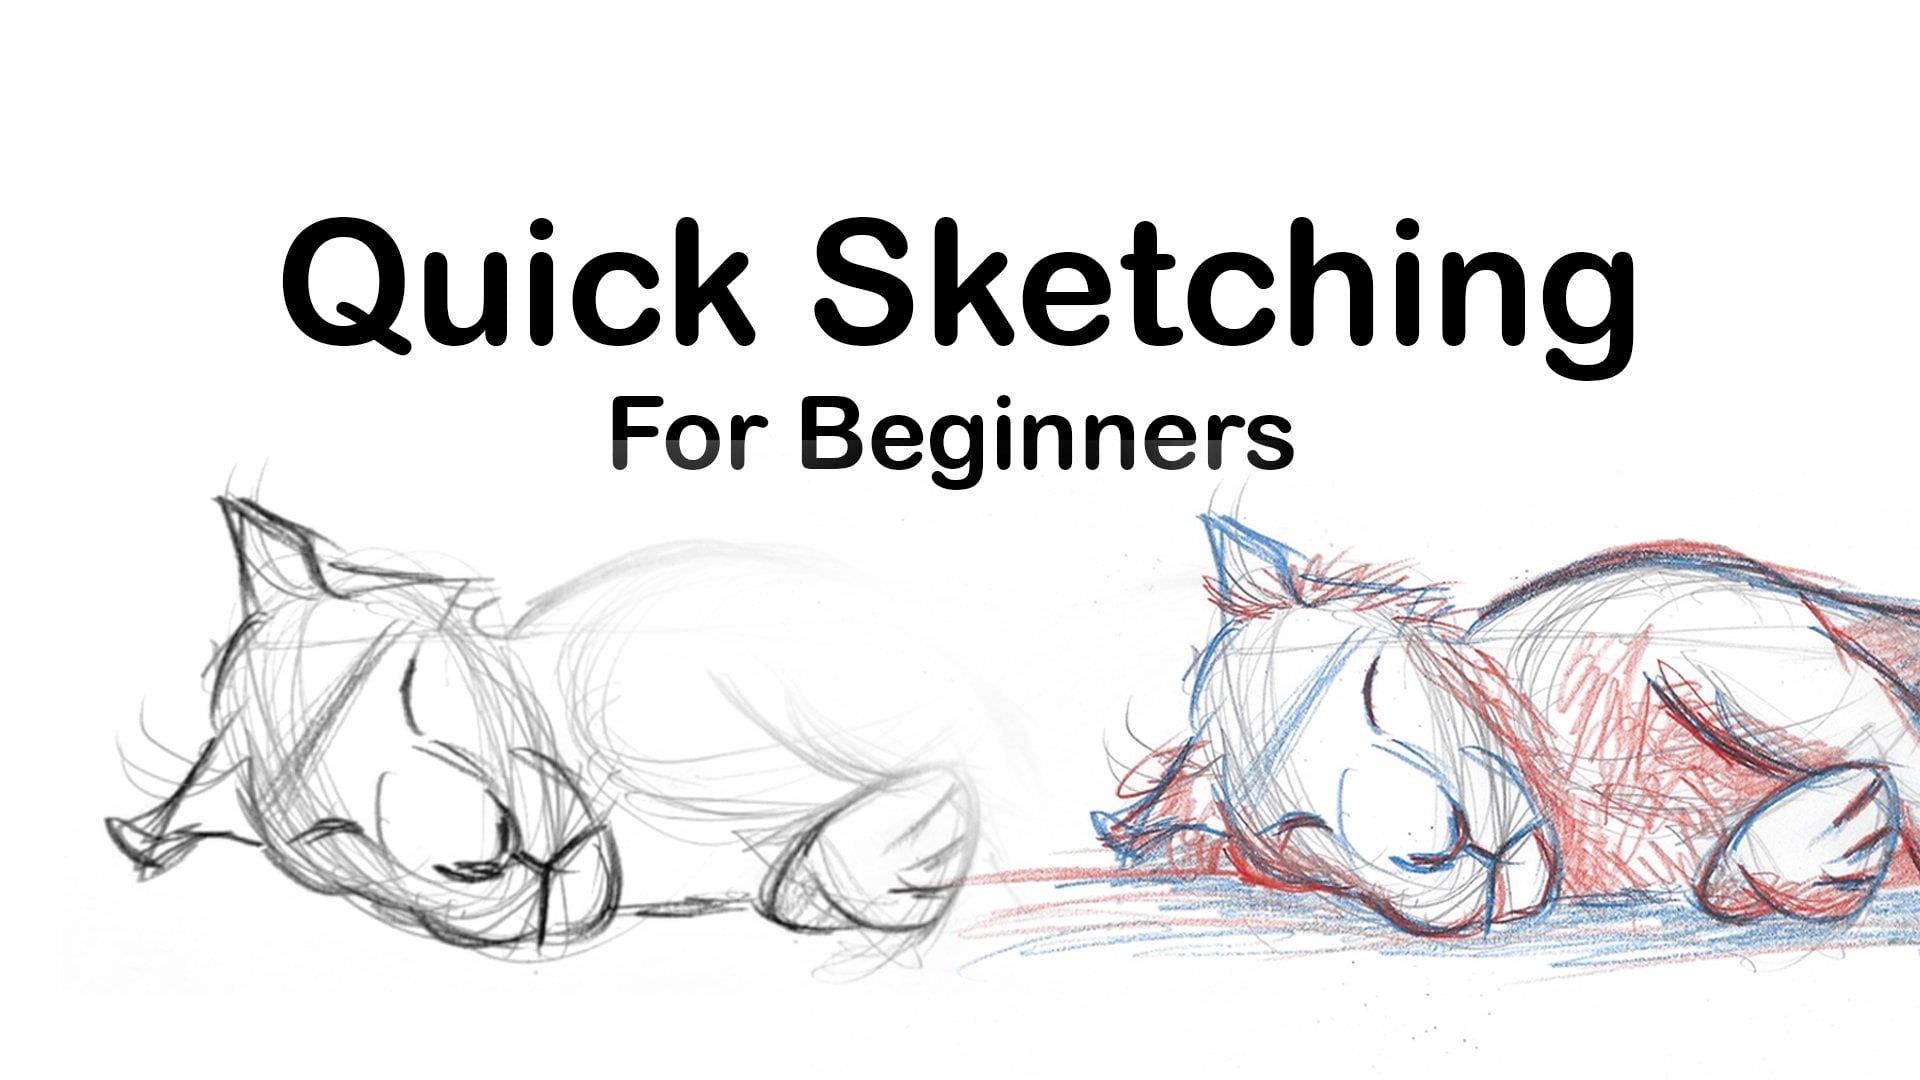
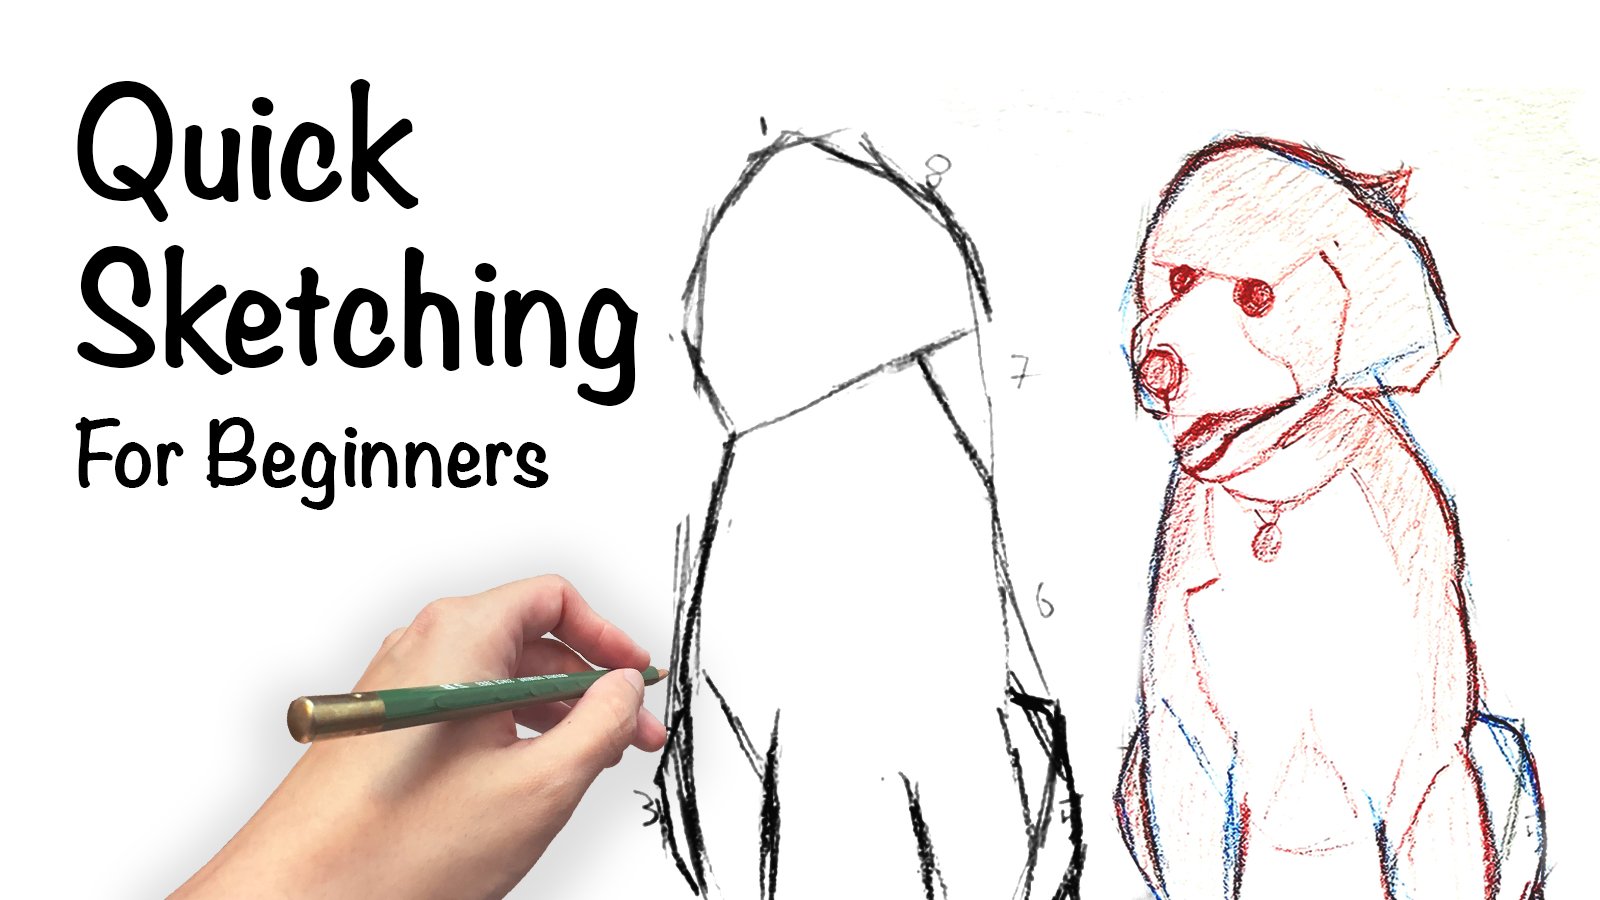
Transcripts
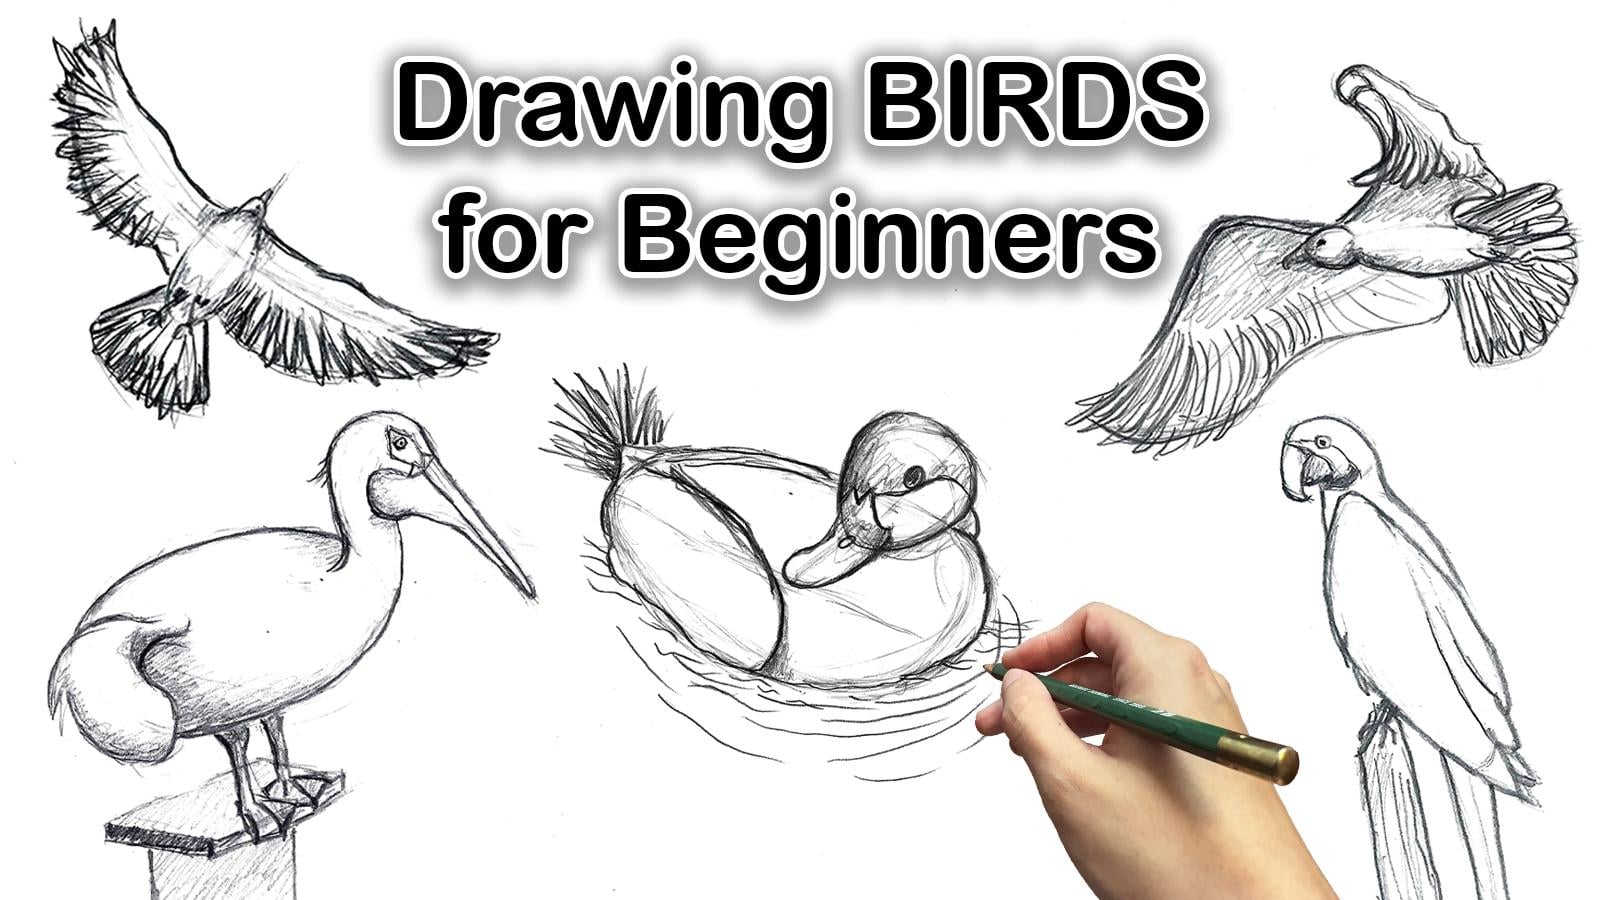
1. Welcome to Class!: Hello. How are you? My name is Andy Bon, and I'm a fight artist. Today, you'll be learning
to draw birds in five different poses and five
different types of birds. You'll be using a
reference photo to draw each bird and we'll use our pencil to draw
very fine wispy lines and build up our bird. Drawing. My goal for you today is to be able to take
what you learned in this class and
apply when drawing other words and other subjects
on your own in the future. The goal of these
drawings is for them to be simple and not
overcomplicate them. We're not going to add lots
of detail, lots of shadows. We're going to keep it simple. So without further ado, let's start with our drawings.
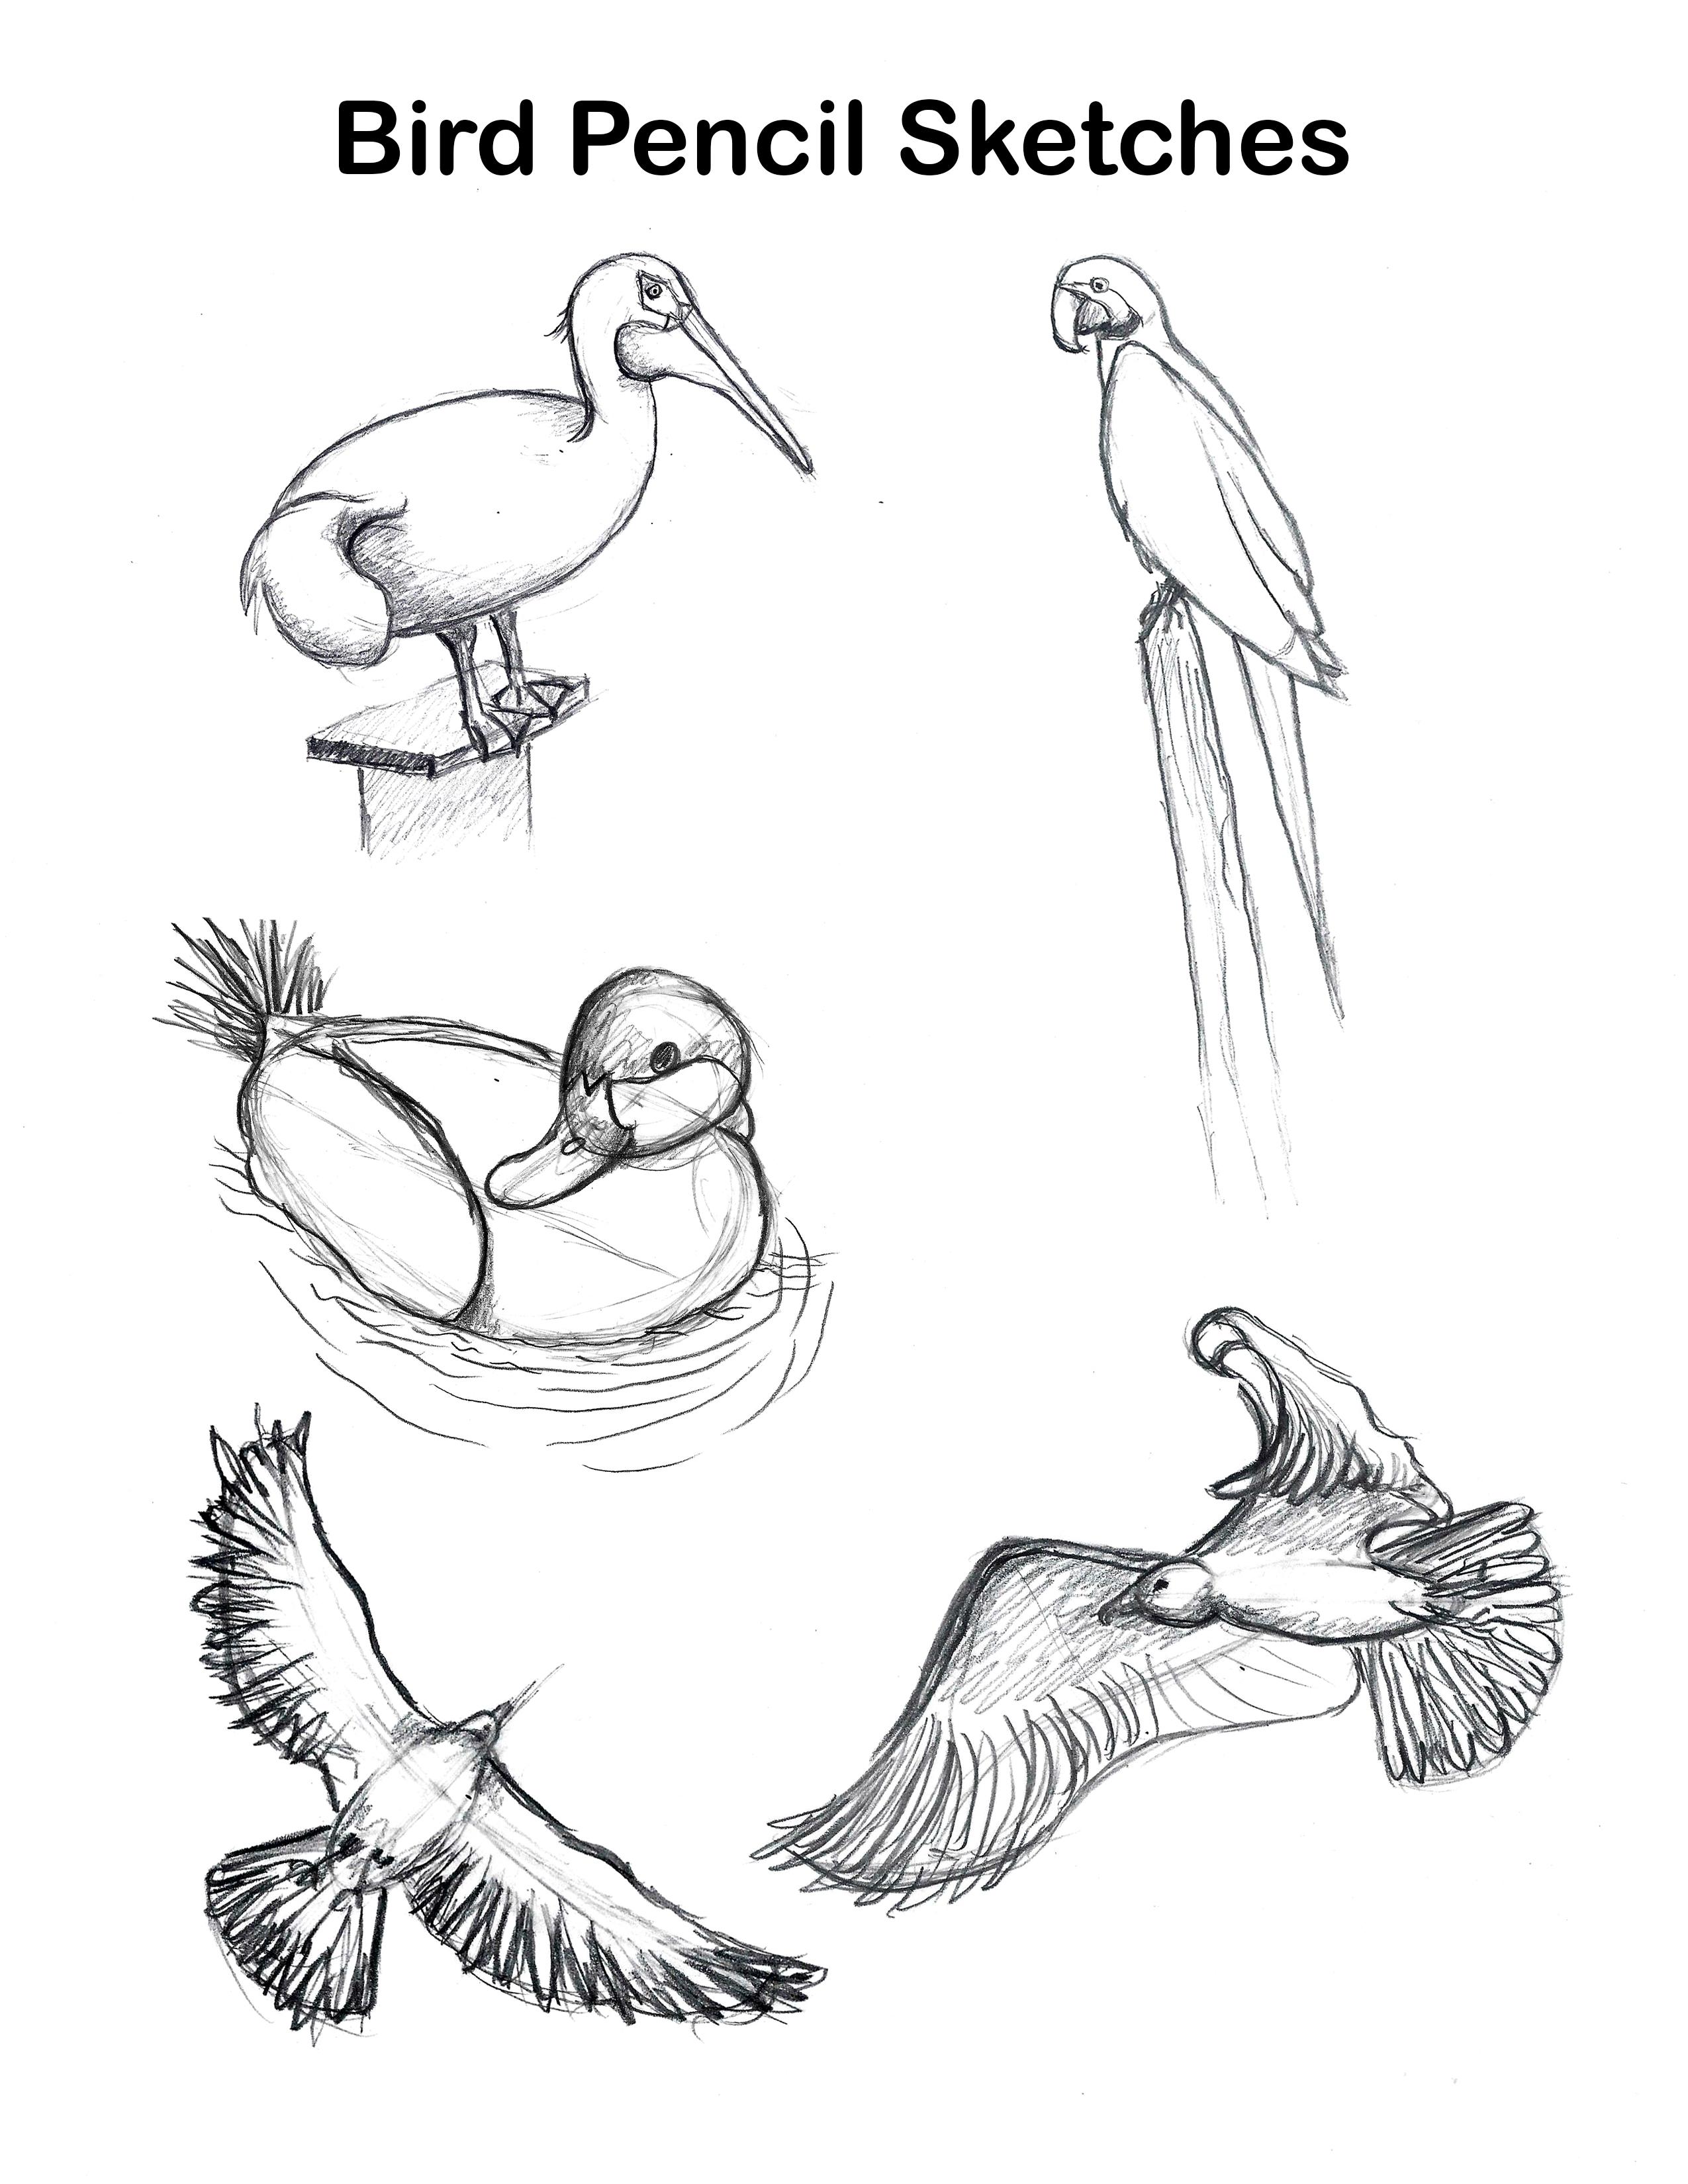
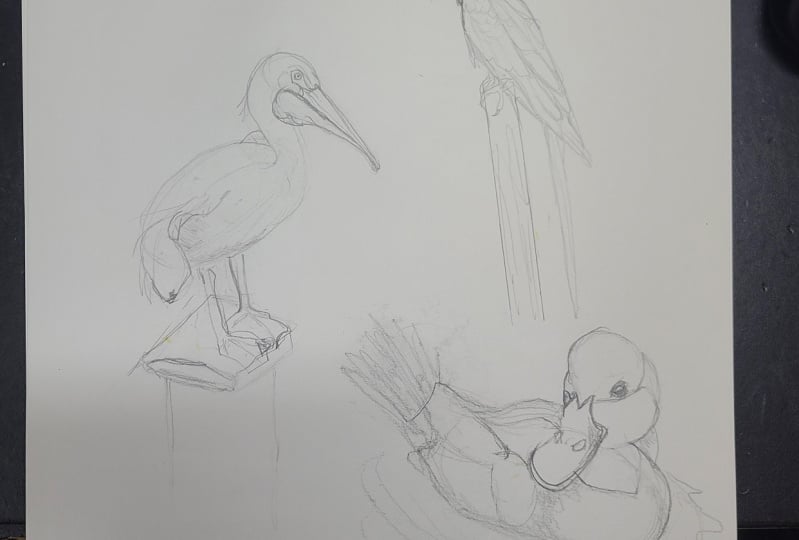
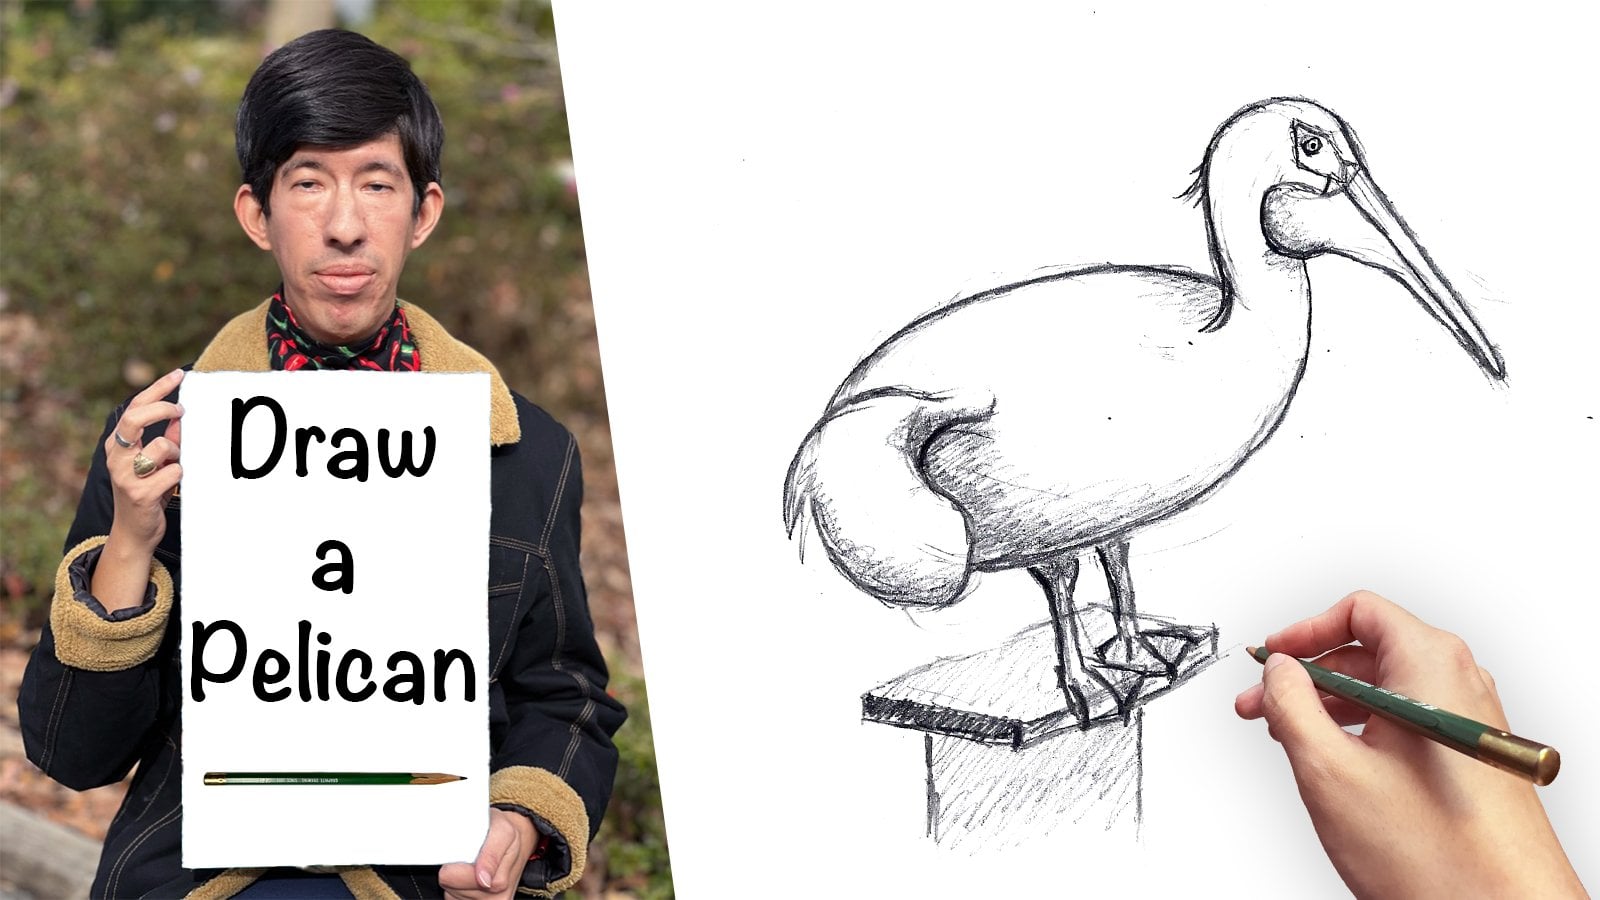
2. Pelican 1 - Initial Sketch: All right, so we're
going to draw our first bird and we will
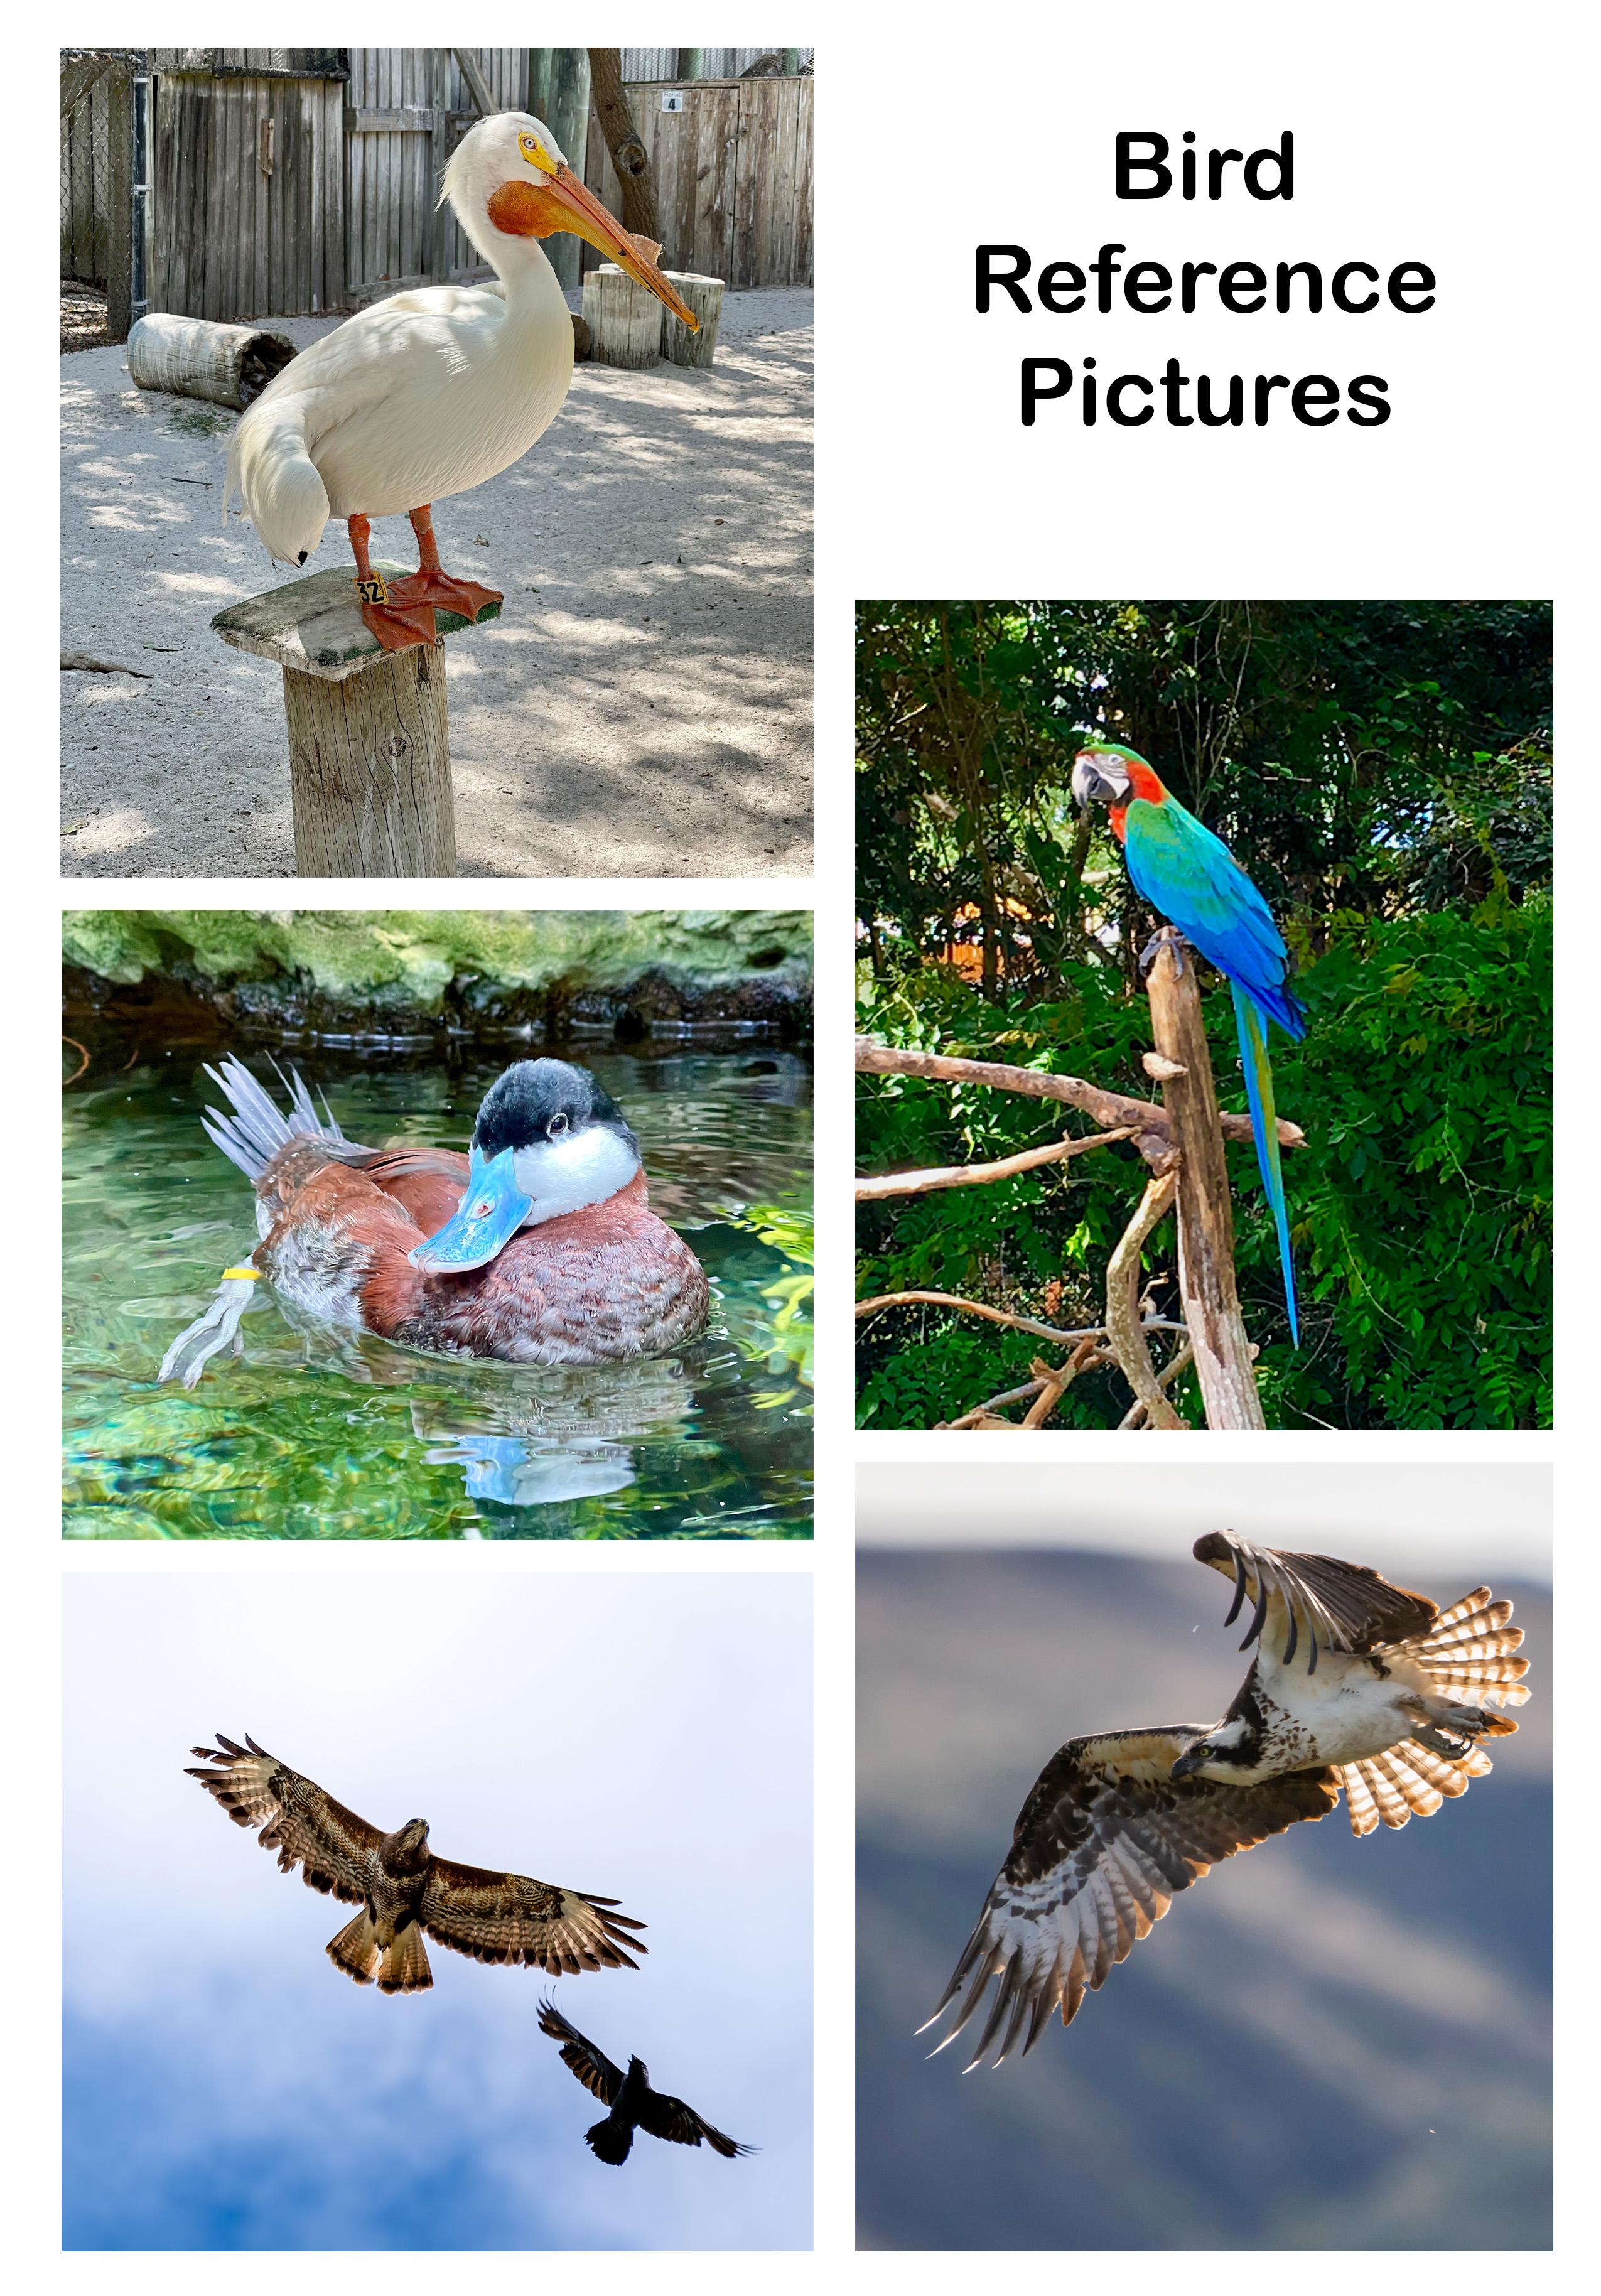
begin by drawing a Pelican. I took this fixture
in Florida in Tampa, so we'll begin by drawing
the body of this bird. When drawing animals, whether it be birds or cats or even people, I like to figure out what's the overall flow of this animal? What's the movement
in the overall body? In other words,
what's the gesture? And this should only take maybe 30 seconds to figure
out real quick. What I'll do is I'll go in here, start mapping out the beak. This is all I want
to begin with. And then I get the head, comes back forward, and then we have the
body down in here. What this allows me to do is establish the size the animal, where it basically sits in
space on my piece of paper. At this point I might
want to say, hey, I need to make this bigger or
I need to make it smaller. And I should do this before going in and adding
more details. And before getting carried away, I'll add a little indication
for the wing down here that spent
and also the legs. We may modify it
going down the road. We make it bigger or smaller. We will see how things proceed. So similar to what we did in the warm up video where you
saw me throwing on my ipad, I will now go in
and start throwing the body of the bird that
kind of resembles a barrel. Most birds, whether it be
pelicans or flamingos, parakeets, their body is very similar to the
shape of an egg. So think of an egg or a barrel, like we saw in that example
in the previous video. So we'll go from there. You may notice that I'm
not adding one solid line. I'm adding lots of
little gradual lines. This allows me to modify and make my line or shape
bigger or smaller, and adjusted size
whenever I want, instead of just drawing
a long random line. And it's recommended to add these little constructive
lines, so to speak. And we're not adding in
too much of a hard line. We're working softly and just
easing into our drawing, trying to find, think
of this as trying to find the shape
of your animal. Trying to carve it out
out of a piece of marble. Trying to find that
body inside of the. Marble inside of the clay. All right. So that's my body that
I'm happy with you. So I was able to adjust
the size back here. I raised a little bit of it, made it a bit smaller. I also, if I were to
try to find the axis of this overall angle that this body is going
in the length wise, I put my pencil here in the
middle, it's pointed up. If you were to put your pencil through this shape wrong ways, you can see this overall
angle that the shape is going and you can compare
this to how it is in the photo that
you were working from. All right, we will
proceed with the neck, kind of swoops back again. We're adding
these grad war lines. The body basically
flows off of the neck, and in this case, this to the Spelican has
a very long neck. Other birds have very short
necks or no necks at all. They do have a neck but
it's almost hidden. It's basically the body going from the body to the
head very abruptly, and then right in here is
where we have the peak. If we look at the shape, we get this nice
curve right in here. Try to notice the overall
shape that we're working in. Maybe you notice that
there's something that looks like a box or something
that looks like a, or maybe a horse shoe. Try to think of simple
familiar shapes that you have in your house
or wherever you live. Try to think of those
simple familiar shapes and then apply them to
whatever you're drawing. Looking at the photo, if we look at where the
end of the beak. If we were to draw a line over to the left from
the end of the beak, I'm trying to find
where does it end? Does it end if we
draw a line below the body here or
below the neck line, basically what I see in the photo is that
it ends down here, right here in the body area. The top of the beak is basically a continuation of
the top of the head, so the top of the head
continues to flow down here. You have a bit more skin flowing to the bottom of
the baker right in here.
3. Pelican 2 - Adding More Details: I'll add in a few details here. For the very top of
the beak, up here, what I picture right here
is looking at the photo, I see a few little triangles. So I'll simply draw those in rather. Then I will draw the
middle of the beak. It comes right through these two triangles and
goes all the way down. And I believe the
bottom begins a little bit before the top begins. So well there. Okay, Before we had
any more details, we'll go down and
work on the and feet. So what I see when I look
at the weighing down here is basically
the body continues to curve gently down and around. Adding it curves back a bit more and that kind of comes into this body here. There's a little segment right in here that
comes forward. It's very hard to
see right in there. And there's a little part
of the wing right in here. And then we have a few feathers
that straight down here. Okay, we got that
far for the feet. What I'm going to do
is come down here and draw a simple shape
of this piece of wood. Nothing too complicated. Just a simple box right in here to indicate that there's a
platform it's sitting on. All right, and so we're
drawing the legs. Now we do notice that
I'm going to follow these lines that I drew at
the beginning as guides. I'll just use them as a center column and go around adding the
shape of the legs. We see there's a bulge here. Then it gets thinner. I'm like I said, using these as an access or a center column. And then basically our
foot is like a triangle. Composed of other triangles. So what I see is I see
a triangle here and a triangle here composing
the webbed feet. And here we can see this one overlaps
this one right here. All right, and the
final thing we'll do is we'll add the eye detail. So we'll go in it right near
these two little triangles. Here we go a little
ways up the head. Add in a simple circle, and I'm going to make
necessary around the eye. I may go and extend this
part of the wing where the wing connects to the
body just a little bit. This is where the wing right
here connects to the body and it comes out and the
wing bend right here. We think of the
wing as two parts, the main inner part
and the outer part. When it spreads out unbend.
4. Pelican 3 - Final Details: All right. To have gone in and erased some of the
initial line work I did when I added in the gesture or the initial
framework of the drawing. What I will do to conclude this Vatican is going
with a five pencil. I'm just adding a bit
of shading ever so much just to give it a bit
of a three dimensional look. I will re draw some of the lines that I erased a bit
of a while ago. We're going to go in now and
add just a bit of shading, a bit of three dimensionality to this basic sphere of the body. And just a bit of shadows over here underneath
where the wing is, where the lakes are. Down in here we notice we have a bit
of shadow red in here. This is a bit of a
Ford, a white part, red in here on this
fleshy part of the beak. Okay, so there is our Pelican, our first drawing that
we've done of a bird. Again, just to review, thinking of the body as an egg or a football.
Very simple shape. And then we started
out by drawing in the basic curve of the body
and then adding onto that, adding very simple shapes
that are familiar to us. And building on that.
5. Duck 1 - Initial Sketch: In this example, we'll be working and drawing
this picture of a duck. Starting out by finding
the basic gesture and flow the basic
curve of the body. We'll just go in and start mapping out where
we want to have our duck. What I see when I
look at this photo is the dug the body
is flowing down to the right at the head
on the right and here sitting on top almost for what I see
as a question mark. That's really all I want
to lay in right now. Then I basically know
where the body is. The back end will be here, the front chest here, the top of the
head will be here. At the side of the neck will
be somewhere over here. This really helps
me get basic layout and idea of the area that I want my drawing
to be at this point. If I said, hey, I want
this stuck to be bigger, then I would have to make this, this line longer and maybe the head a bit taller and so on. This is what I need
right now to know what area I'm going to take up on my paper. This
is what I want. I'll start, I'm going to
add in a nice big long oval sweeter in the body. Will now add in a quick head by adding in another oval oval. If it had an axis or a line fluid would
basically come like this, with the front of the head being here and the back being here. At this point, I might check, I need to make this front
of the body a bit bigger. So I might extend
it ever so much, I might widen out
this back just a tad. I might make this sign, that curve what I'm doing, you may see this and say, hey, this looks like a mess. But I'm really trying to
avoid just going in and throwing the bird outlining
it and throwing it in. I'm trying to think
three dimensionally. I'm trying to really visualize what's
happening with the head, with the way it's pointing, the direction of the body, the basic size of each
head and body and neck. I'm also using this time to figure out what size
everything needs to be. By adding in the simple shapes, it allows me to really find the dimensions of each
object and in other words, of the head body. And those are the two biggest
that I see of the stuck. And that have to
really pace myself and not get carried away
adding details too soon. So let me go in now and
clean up some of my lines.
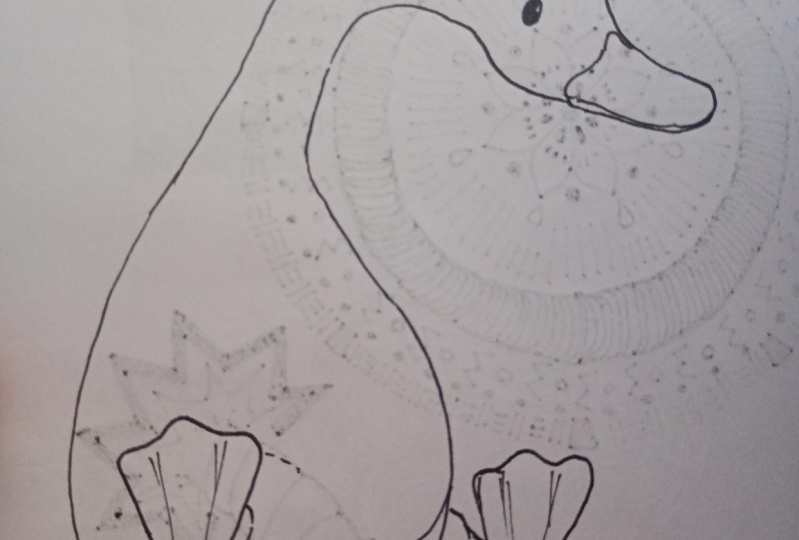
6. Duck 2 - Adding Details: Okay, so now I'll
start dividing this up and adding in some
details little by little. I know I have the wing back
here that's folded up. It comes out from the
middle right here. Let's say this is the middle
of the back end of the duck. We come forward, if we compare where the
end of the peak would be, I think the end of the beak would come forward,
right in here. The end of it would
be right about there. Wing comes in this view, right about there to the end where the end
of the peak would be, where different things
are in this picture. And that helps me
construct my bird, my animal and put it together. In the scene, I'm comparing
where the peak is, where the end of the peak is, to where the end of the
wing starts to curve. And then we have
the water line of the tuck at the edge
of where the water is. Right along here. We have a little porch right here of
the neck, I believe it is. We have a bit of a
triangle right in here, and they look a
bit like cat ears. Whenever I draw, I like to
think of what I'm drawing, what it looks like for the
shape that it looks like in comparison to something
that I can visualize. And I have around
me for example, like I said, phase two look
like cat ears and so on. This shape is very
similar to a skateboard, Comes very flat and wrong here. And then a nice gentle curve, we have a bit of a bow effect. It bends down, right along
here, and then goes up. I'm going to add in where
edge of this white and black. I notice it's right
near this point of this cat ear that we
said it comes wrong. So it curves a little
bit down and then, and then down like this. We'll go ahead and
add in the eye. And the eye is ever
so much oval shape, it isn't a perfect sphere. It's right in the crest of this division of the
white and the black. The final things
we'll do is we'll add a little point back
here to the back end. Then we have our feathers. For the feathers,
we really don't want to add too much detail. They basically think of this as a center point and they
radiate out from there. The longest ones would
be in the middle. We don't have to add
too many details. We could show the other edge of the other wing over
here if we want. Looking at this, I think my
dog came up pretty good. I could have been a
bit shorter here. A bit less area right in there. May go in and adjust
my wing a little bit.
7. Duck 3 - Final Details: So now I'll come in
with my charter, my five pencil just to
add a bit of detail. I'm going along this spot
of age and adding a bit of waves basically from red out here where the
end of my pencils is, where the water level and
the techs body starts. So I'm going around with a very gentle wavy line just some indications of
little repose in the water. Okay, so there is our book. I added in a few ripples
right around here. And that concludes our drawing. Just to review, we added in our basic line of our axis
of the body and the head, and we found the size
we wanted the B to be. Then we added in
our barrel shape of the body and the oval
shape of the head. And then we went on
adding our details. So really simplifying, thinking
of simple shapes, ovals, spheres, basic clamar shapes, and then working and adding
more and more details.
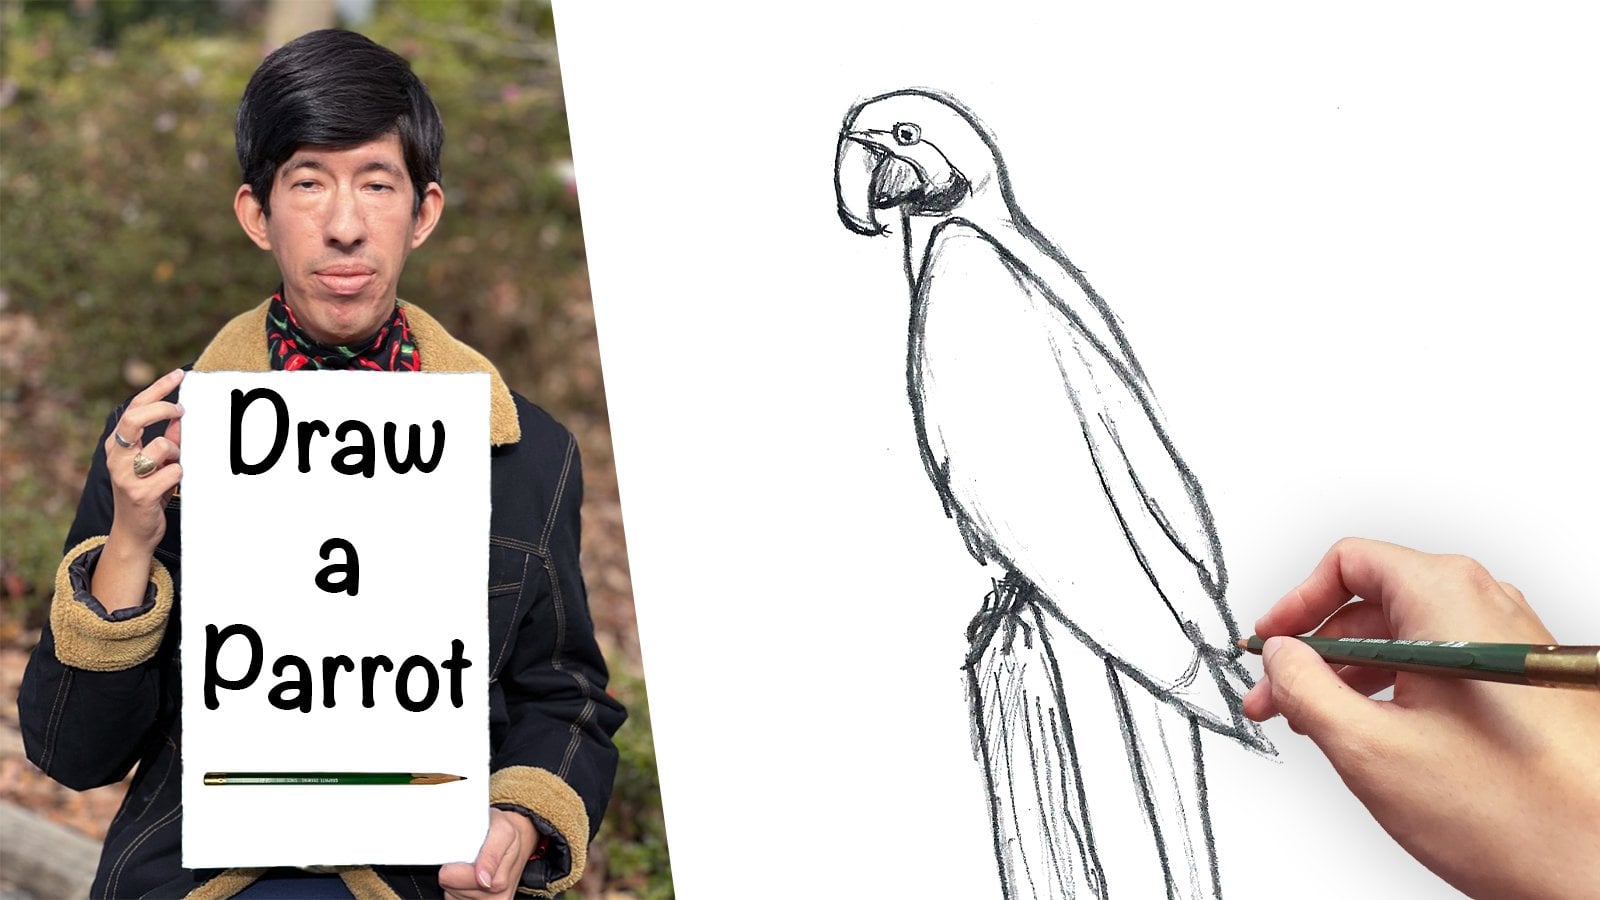
8. Parrot 1 - Initial Sketch: Now we will be throwing
a call for this video. What I will do is start by adding in where I think
the piece of wood, the branch that the
bird is sitting on is. I know I want the top of the bird's head to
be around here. Not too far from the
top of the paper. I see the top of the bird's
head is right about there. Then I need to figure out, okay, the piece of wood looking
at the photo is right. If you go straight down from
the top of the bird's head, the wood would be around here. I'll put a mark there. This is where the
wood branch starts. I'm going to just draw a line to represent the wood and
which way it leans. Because it leans ever so much. That's really all I
want to start out with. I know my bird is
going to go right in this area sitting on
the top of the branch. So what I will do
to start out with start by adding the
body of the bird. And I'm going to add
a long said oval. Okay. And then this is the body composed of
the wing and the body. I had to covid and add a bit more size to the front
of the chest, right in here. That's all I really
want for now, this long oval shape. Now I'll add the head. The top of the head needs to
be right along this height. I'll just go in,
right around here, and add a circle. I'm looking at
where the head is. It juts out ever so much in front of the
front of the chest. So looking at where, if I drew
a line from the chest up, where is the front of
the face would be? Right, just forward of
that area. Just like this.
9. Parrot 2 - Adding Details: Okay, so I will now
add in the neck. And if you notice the
back of the neck, it swoops in just a bit as
it joins the body here. So basically, that's our first
step that we want to do, as we've done with
the other birds. Adding the simple shapes to
establish where our bird is, where the main features
of the bird are, the head and the body. All right, now I'll go in and just a line here to indicate
the length of the tail. That's all I want for now. All right, so let's start
adding in some details. We can go in and start
adding in the weighing. I'll have the wing
coach out a little bit. Here we look at these ends of the wing. The end of the wing
is it's basically have these triar forms, but we have these
triangle shapes. Some are more pointed
than the other ones, others a bit more rounded
and they're fairly long. And we can even add a small indication of a
the other wing by adding a smaller triangle here just to show where
the other wing is. Okay. And then going back to the head is at the eye and I'm looking
at where the eye is, it's basically right in line
with the front of the chest. So the chest, front
of the chest is here. We go straight up and
we end up at the eye. We have this white
area around the eye. And then right around
here we have the peak. The upper peak comes almost
out from the eye in a way, and it sweeps out from the head. And then we have the
lower peak right in here. And I want to extend
the top of the head a bit forward like that.
10. Parrot 3 - Final Details: All right, so what
I've continued to do is to modify the head. Looking at it and
comparing it to the picture of the
photograph reference. Really comparing the
size of the head, where it charge, where it stops in the angle of the curve. Really going back
from the drawing to the photo and editing
the pile ticket, what I see is more
accurate at this point. I'm going to go in and modify the top of the wing just
to extend it a little bit so I got it to be a bit higher up. Right now are
working on the tail. So basically the tail
is one long triangle, if we think about it like that. It's just we have a center line axis like
we've talked about. And we'll throw the
triangle around it, coming to a point right
at the end of this line. At this point we've got
the bird to where we want it to be before we added
in the final details. Right now what I
will do is go in and do a few additions
to the tree here. So I'll go and inform it around this main axis that I threw, I'll add the trunk
right in here. I'm using this line as a guide for the feet. What
I'll do is go in, We're not going to add too
much detail to the feet. Some lines here to show
the toes and the legs, the cooks around this
top piece of the wood. If you were drawing
a bit bigger, you might be able to get a
bit more detail of the leg. That's all I really want. All right, so now I
will step in with my five pencil and just go in and clean up
some of these lines, then add a bit of depth to this. All right. So that rubs
up our call drawing, you were able to
see how I added in these lines for
both of the bird. Establishing where the
head top of the head was and then finding
where the wood went and allowed me to the place the bird to
the size I desired. I added that long oval in order to show the
size of the body, and this allowed
me then to go in and add the circle for the head. Again, we're working
from simple lines and shapes and then going to more
complex shapes and designs.
11. Bird in Flight 1.1 - Initial Sketch: The four previous birds we drew were all on the ground
or on a tree branch, and they all had
their wings closed. I want to take a
moment now and do one or two drawings of birds with their
wings expanded open, so that we can learn a
bit about drawing wings. We'll start out using
this reference image, and we'll begin by establishing
the size of our bird. We'll start off by looking at what takes up the most space, and that would be the wings. What I want to do is draw. Just to get an idea of
how big these wings are, I'm going to establish where the top of the upper wing is, then mapping out how it
flows down and curves. Then the body will
be right around here and then we flow
into the lower wing. The right wing, we get a bit of this form here, just imagining a line
going through the wings. This will be the bottom of the lower wing and this will be the top of
the upper wing. Notice how this wing is, so we know it's for shortened. In other words, we're
not going to see the whole wing expanded like this one down here
because it's a bit bent. We only see part of it in
this view, in our view, although in reality they both
wings are the same size. All right, now we'll draw the body just to get an idea where it is
looking at the photo, the body slopes down. The angle, overall angle
of the body sloping down. Here I have just
a Q idea of where my wings are and where
the body of the bird is. All right, so *****, toe, start throwing the
body of the bird. Two is playing a long
oval for the body. I'm doing this right along
this axis of the line that I drew going along
the middle of it. And then I'll throw the head. I'll draw the head now by
drawing a bit of a oval, a smaller oval, more
of a short oval. I'm also going to draw
the tail real quick. And this tail basically
comes out like a V, but it's a very wide V. What I'd like to do is imagine if the tail had a line
along the side of it, and it went along and kept
on going in my imagination. Where would this line
or edge lead to? By doing this, it helps
me visualize the angle, the size and length of
the line, and so forth. We have a nice curve. It almost reminds me of a fan, like a handhold fan
that you might use. All right, so I will now
draw the upper wing. I'm noticing that the upper
wing flows dramatically. Looking at it right near
the edge of the head. It doesn't come out
of there in reality, but in this picture,
in the view in this scene that we're
looking at in the picture, and it comes off of here and it swoops back and forward. And then back again, right here at the very top. What's happening here is a bit weird and complicated to draw. We'll start up by
throwing wavy line here, coming, then it turns
abruptly and meets the body. Then we need to throw in the outer part of
this upper wing. G, G, at these nice long, curving feathers that are
at the end of the wing. And then we have the
edge right along here. And this right here,
this area here, is the bend in the wing. So it would be right along the mid area of the lower wing. So what I did was I extended
this fact just a bit about this end of the wing
pack and this tail forward, so it looks more like
what the picture shows.
12. Bird in Flight 1.2 - Final Details: All right, then we control
in the lower wing. Now it really is
very high up because this bird is tilted.
It's at an angle. We're looking at it
a bit from below. And looking up at it, we're seeing the bottom
of this lower wing. It starts up by having a
very shallow lean to it, right in here,
then it curves in, it swoops out a bit at the end. We also see where the fact of the wing starts and starts near the tail
right around here. We swoop forward and then tur, and then we swoop in a bit and meet up with
the front of the wing. All right, Can add in
some of these feathers. Of the feathers along here. All right. Interrupt this up. We'll go in and ready to
find the face and the eyes. We can add in the fong. And here it swoops
down to a point. You also have the
eye right in here. The next comes down and
then joins the party. And I'm going to erase this line right here at the
tip of my finger, because the wing and the party kind of join
together right in there. And we don't really want to have a line of dividing the two. All right, so I'll go
in with my five pencil. And what I can do is I can add just the indication
of the legs here. Nothing too complicated. I also added some indications of the tail feathers and how they radiate out
from the middle. I was the back of the bird. I will add in a bit of shading, right to show that this is
the underpart of the wing. Add also a bit of shading under the party
right under here. So I've extended the feathers. Read in here just a bit more, giving them a bit of freedom, a bit of separation
from each other. We don't want them to look
like one single mass. I'm also now adding what I might call the leading
edge of the wing, just a border right around here. So that wraps up that drawing
of our bird in flight.
13. Bird in Flight 2.1 - Initial Sketch: Okay, for this,
we're only going to draw the main bird, the big one. We're not going to draw the little one that's further away. I will begin by drawing the angle that
the wings are going in. And I'll give it a bit of a bend that represents the end of the two wings
and the length of them. Then right in the middle, which will be along here, I will add the length of the body as we've discussed. If I get to this
point and I say, hey, I want this bird to be bigger, then I should pause
and make it bigger, or smaller, or whatever I want. But this is the time, as we've talked about before we add more details to really say, hey, do we need
this to be bigger, smaller, or what
do we need to do? Or maybe we don't
need to do anything. All right, we're looking
at this bird from below. The body will be
one big long oval. Then we have the head
and it will be more of just in addition to
that oval with the beak. The tail will come
out from here. Similar to how we
have a triangle we talked about on the previous. We have a tail
forming a triangle. If the edge of the tail
were to continue on, imagining it continuing
on through the bird, it, it forms a triangle
but it's rounded. This reminds me of
a slice of pizza. Again, taking a familiar things, familiar shapes and objects. Applying those helps me, at least when I draw. Then we'll start by adding in the upper wing curves
out from here. And then there's a bit
of just a slight bend. We get to the end and
we have the feathers, the long feathers right in here. And then we would bend in the nice curve and
then out of it. So now I can go in and add
my feathers right in here, knowing that this is how
long I want them to be. All right, so now I can
repeat this process for the other wing,
the lower wing.
14. Bird in Flight 2.2 - Final Details: Okay. So now I can come in and clean up some
of these lines. Get rid of some of this
mess that I have in here. Some of the lines
I no longer need. I noticed that I
went in with my car, and I just kind of lightened
this line in here. I didn't get rid
of it all the way. I left it more out here and
out here near the edges. So that way we kind of
indicate that there's a body. There's a division between
the wing and the body, but we still have a it's a
bit lighter and less obvious.
15. Thanks for Watching!: Thank you so much for watching. I really hope you enjoyed this class and we're able
to learn something from it. Please feel free to post a
picture of your drawing below this class so that
all of us here on Sco chair can see what you did. If you have any questions, don't hesitate to start a discussion in the discussions
tab below this video, and I will be happy to
answer your questions. Well, if you would
like to support me, please check out my website at www.andsartitude.com
And feel free to visit me on Instagram and Facebook where you can
see daily updates of my artwork at andsartitude Stick around here on Skillshare
and follow me, because in the coming weeks I will be uploading
more classes. That's been it for now. I hope you have a wonderful day. See you in the next class.
 Andy Villon, Fine Artist