Transcripts
1. Intro: Hi, and welcome to
this mini course. It's time to use
vibrant colors on your art easily and quickly. Think about your favorite
digital artworks. What truly makes them pop. Maybe it's the bold
colors of a sunset, the subtotons of a portrait, or even the eye catching
palettes of a fantasy landscape. In this class, we'll cover all the essential procreate
coloring techniques you need. We'll explore different
coloring methods, learn to use selection
tools like a P, and even experiment
with color thresholds. By the end of this class, you'll have the
skills to quickly and beautifully color any
artwork in Procreate. Plus, I'll be here every step
of the way to guide you. So are you ready to add a splash of color to
your digital journey? Join now, and I'll see
you in the next video.
2. Your Quest - With Resources!: Hello, and welcome. Before we start learning, I just want to give you a
quick and simple assignment. Since this is a coloring class, I would like for you to
draw something simple. It doesn't need to have a lot of details and you only need
to draw the line art. This drawing will
be used throughout the class as we explore
different coloring methods. If you don't want to be drawing
something from scratch, another option is to
find a drawing you already have and save
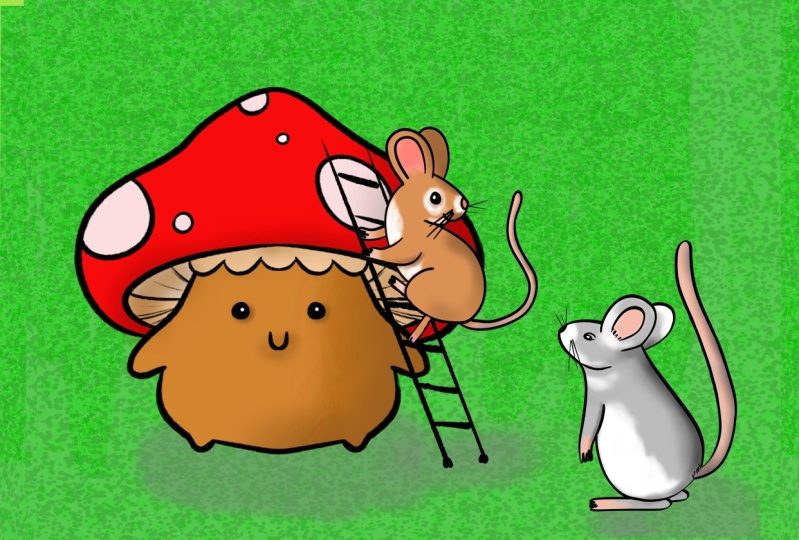
only its linear. Finally, I also have
this drawing right here. This is the one I'll be
using in each video, and I'll also leave
you a copy of it. So you can download it
and use it instead. So in short, there
are three options. Draw the line art
of something new. Use an old drawing of yours or download
the one I give you. All right, this is it for now. I'll see you in the next video.
3. Method 1 Using A Reference Layer: So hello and welcome back. We're going to start
with our first method, which is using the
heifers option. I'm going to show you
two methods of doing these two different ways of
using the heifers option, and I'm going to explain you why and when to
use each of them. Let's start. I have
here my line art. Now, what I'm going to do
first is go over here to the layer menu and I
have here my line art. First, I'm going to
create a new layer and bring it below my line art. Tap and holes and
bring it below. I'm going to change the
name right here just so we don't get lost to colors. We have a layer for the line art and a
layer for our colors. Now, what I'm going to do
is go to the inart layer, tap it again so we can see
all the options we have, and now I'm going to tap the
Hefras option right here. As you can see in your
layer beneath the name, you have the option
hefernce activated. If you tap it again, you can
see this little check mark, which means this layer
is set up as hefrance. Now, all we have to do is
go to our color layer. Choose any color you want. It doesn't really matter
which and press, hold ops. Press and hold it, and then drag it to where you want the color. As you can see, it painted within the lines of my drawing. What does the
heifers option does? What it does here for coloring is that Procreate will take into account
everything that's on this layer when you're
working on the one below. It will always have into account all these lines and feel
only inside the lines. As you can see right here. For example, I'm
just going to show you if I don't have
the heifers option on, I'm going to turn it off
and now I'm going to grab another color and bring it
over and bring it over here. Drop it, see, it goes
out of my lines, it goes out of bounds because procreate is not taking my
lines into consideration. Let's undo this and once again, set up preference on our
line art. There you go. With this, if you have a line art like this one
where there are no gaps, all you have to do is
just choose colors and then drag them to
where you want them until you have your whole
illustration colored. Now, here's the problem when using the Heifers
method on Lent. Let's say, I'm going
to delete this, I have a gap on my drawing. For example, right here, going
to make it a bit smaller. I have here a gap. Let's
go back to our color. Layer and now I'm going to
drag and drop the color here. See as you can see,
the color goes out of bounds once again
because there is a gap. In conclusion, using
this heifers method on your line art in the
inart layer is really good and very helpful if
you have a line art that is completely closed off and
there are no gaps on it. However, I do understand that sometimes when doing inart
and you want more expression, you might have some
gaps on your inart. It's normal, it's
perfectly fine and okay. It depends on everyone's style. Obviously, but it can
be a problem if that happens and you might want to force yourself to close all
the caps on your line art, but honestly, you might lose some expression
when you do that. Follow me to the next video where we'll be doing
another heference method. I'll see you right there.
4. Method 2 A Different Reference Layer!: All right. Hello,
and welcome back. Here we are for
our second method. In the previous method, we talked about having or using the heference option
in your inart layer. I still have this layer right
here marked as reference, but you don't need to use
this on your inart layer. You can do this another way. I'm going to go over here and select the option
heference. There we go. Now I'm going to go to my
colors layer and in here, I will mark it as reference. I'm going to go over here to my Lin art just so
it's easier for you to see this and add a
few gaps here and there. Another gap here
and another here, so you see how it works if
you have gaps on your inart. Go to your colors layer. Instead of holding the color
and dragging immediately, first, we're going to try and do the shape we have where
we want to color. I'm going to go right
here and there we go and close that
shape as you can see, I went a bit out of
bounds here and there. It's fine for now. Now with that done and be sure there are
no gaps when doing this. Now, yes, we're going
to hold and drag that color into the
shape we just drew. There we go. This is an
optional way of using the hefraz layer without worrying about the
gaps on your lines. Yes, it might take a bit
longer than the other method. Mostly because you
have to be creating some shapes inside
your line treat as you seen me doing it, but it doesn't take that long. Of course, it depends
on the on how detailed your drawing
is or how big it is. But with time and practice,
you'll get there. As you can see, yes,
I might miss here some places or go out
of bound with others, but usually it's
small stuff and I can just go in and finish coloring. Same thing with
the mistakes here, I can go in and just
erase what I don't need. This is it. It's very simple. To ways of you using
the hips layer, it really depends on
preference or as I said, if you tend to have some gaps on your inart and you don't want
to lose that expression. Personally, I really like using the Heifers option on my inart, but my inart is always very
simple and there are no gaps. I like to have
everything very clean. I use the Heifers option
on Lin art and then use another layer and add
colors to it as I go. The other option is doing this. One thing to pay attention
to and that might change the way you'll do this is that some brushes
have texture. Another reason to use this second method with a reference using the
reference option on the colors layer is
because your brush is too textured and Procreate won't really recognize where
the gaps are or not, that might be useful
in that way as well. Reference method, two
ways of doing this, use the Heifers option
on your line art and then Color everything
in a layer below or turn on the heifers option on your colors layer and then draw shapes
inside the area you want the color to be and then drag and drop
the color and so on and so on until you're finished with your drawing
with coloring and drawing. This is it for this video. We've seen two methods
using the heifers layer. Feel free to practice
the bit and see how it feels for you and
whenever you're ready, follow me to the next video, where we'll talk
about a third method. This is going to be
a bit different. I'll see you right there.
5. Method 3 Using The Selecting Tool: Oh hello and welcome back. In this video, we're going to go through a third method of coloring your drawings as quickly as possible
on Procreate. This time we're going to use the selection tool right
here to color on drawings. Let's go here to our
layer menu again and I have here my line art right
and then my colors layer. I'm going to leave the
colors layer selected because this is where we
want to add our colors. Next, I'm going to
go over here to the selection tool and tap it. Now, as you can see, there are many options in your
selection tool. You have the automatic
in which you tap and it will select, in this case, need
to be on my Lanart. If I want to select
just this area here, I can use the automatic and then continue selecting things. This is one way of
selecting your drawings. Let me go back here, get
to the selection tool. Then you have the free hand. So with the free hand option, you can draw any shape
you want like this. You have total control of
what you're selecting. Just go over with your pencil
and draw different shapes, whatever feels better to you or whatever you need
to the free hand tool is very useful because you have total control over the
selection you're making. Then we have these two
options over here, the rectangle one, you'll be able to make
rectangular selections. This is very useful
if for example, you want to select
some buildings or anything very geometric, you can select them, make different squares or
rectangles and so on and so on. Finally, you have
the ellipse option. Here, it's similar with
the rectangle option. You draw circles, ellipses, whatever you need
in any shape and size until you have the
selection you need. This is useful, for example, for the circles perhaps or anything circle if
you want to select. But again, you have
a bit less control because you are limited
by those shapes, either the circle
or the rectangle. Either way, you can still
use it for this method. How are we going to use the selection tool to
color our drawing? So I'm going to go over here
to the free hand option, mostly because it's
my favorite and because it's the most
useful in this case. Now, all I have to do is go over my drawing,
draw the shape. I want to have
colors. There we go. See, I selected
this whole shape of the mushroom and
now I'm going to go over here to my color, drag and drop it, and this is it. What I did here was make
a selection and when I drag and drop the color
inside that selection, procreate will only color
inside that selection. Makes sense. This is another way you can color your drawings by
using the selection tool. You can also use, again,
the ellipse tool, I can create here an ellipse
and then drag and drop it. The fun thing about
using the selection tool is that you can create
very interesting shapes. For example, I could
draw a shade right here, drag and drop, and there we go. You can create right away some the base colors and then
the shading on top of it, you can decide what to do. For example, if I go over here, I'm going to select
the whole body using the free hand tool. I'm not being
perfect about this. It's better to
have a rough shape drawn first and then
fix whatever needs fixing instead of just spending a lot of time having
that selection perfect. As you can see, I
color the whole body. Now let's do this
again and I want to create a bit of shading on
my mushroom right here. I draw the selection, now
go over to my colors, choose a darker tone, and then drag and drop
inside that selection. There we go. As you can see, I very quickly drew and shaded my character
using the selection tool. So choose whatever
option you prefer. Either the automatic, the automatic can also
be very useful, especially if you have very simple shapes like these ones and everything
is closed off, it can be very useful
because again, Procreate will have
your lines into account and select things
according to that. But for that, you have to
select your line art first, select, and then go to the colors and color
whatever it needs coloring. Let me just show
you very quickly. For example, go over here, automatic and I want
this shape right here. Now I'm going to
go to my colors, select my color
and drag and drop. See? Using the automatic tool, unless you want to color it in the exact same layer
as your Lin art, usually it's good to have things separated into
different layers just because if you want to edit some one thing and not the
other, it's much easier. So, to use the automatic option in the selection tool first, select, be sure your
line art is selected. Do the selection, so
you just need to tap wherever you want
to select and then don't forget to select your colors and then you can
drag and drop the color. I would say for you to just
explore the selection tool, explore all the options you have over there, the automatic, the free hand, rectangle, circle, and just
have fun with it. Play with it, see what kind
of selections you can make. And have fun collecting
your drawings. We've gone through three
different methods of flooring your drawings,
but don't go yet. Follow me to the next video
where I'm going to just talk about two little things
that can be very useful for you when
coloring inappropriate. I will see you right there.
6. Easy Color Drop Threshold & Continue Filling!: All right. Hello,
and welcome back. For this video, I just want
to give you two small tips on things that can be useful about some features
here on Procreate. The first one is the
continue filling option. I have here my line art. I activated the Heifernce option and then I have my color layer, and now I can drag and drop my colors. I'm going
to go over here. I'm going to go over
here and there we go. We have here the
continue filling option. Simply tap it and now you can just by tapping your pencil, continue to filling
your drawing. But you don't need to use
the exact same color. While this option is activated, you can go over here,
choose another color, and then do the same. Just continue, tapping,
tapping and tapping. This can make your coloring a bit quicker because you don't have to be continuously dragging and dropping,
dragging and dropping. Until you have the
whole drawing colored. I'll just activate the color filling option
like I showed you. If you drag and drop
the first time, disappears here,
continue filling, tap it, and then you
just need to tap everything until
it's fully colored. You can change
colors as you want, and there we go. Tap, tap, tap. Now, the threshold
is something you can change when
coloring, for example, I'm going to draw this
circle right here and I'm going to drag
and drop my color, as you can see, there's
here a bit of white, there's a limit
there and my color can't fully occupy
the shape I want. This is a threshold,
the color threshold. You can have it higher
or lower if it's lower. Things like this will happen the small white gap or bigger
throughout your shape, or if the threshold is higher, then it will go over your color. So how can you change and
control the threshold? Very simple, drag your color
but don't lift your pencil. Don't lift, and now
go right and left, see the threshold
appearing right there. So if I go lower,
you see the gap. If I go higher, it
starts filling my shape. But if I go to overboard, it will go over my layer. Just slide your pencil to one side or the other until you're happy with the threshold. Another way you can
control the threshold is do the dragon drop,
drop your color. Now, tap continue
filling and do you see this blue bar
beneath the color drop? This is the threshold. Again, you can just slide your
pencil to the right and to the left until you're happy with the threshold
of your color. So these are two things to take into consideration
when coloring, change the threshold
of your coloring, if you see some white
gaps or the opposite, if the color goes
beyond your shape, the shape you're coloring
and the continue filling, it's very useful to just continue filling your
shapes and coloring without having to drag and drop your colors
over and over again. I think this is it. Three
very simple methods and a few tips when coloring, just so you can fully master
coloring on Procreate, but don't go yet, follow me to the next video where we'll talk about
your assignment. I will see you right there.
7. Final Practice Time! Assignment: Hello, and welcome back. All right, we went through
three different methods on how you can quickly color
your drawings on Procreate. So now it's time for
your last assignment. Simply choose one
of the methods we talked about and
color your drawing. You can use the reference
option on Linart or on the coloring layer or use the selection
tool for coloring. Remember to download the drawing I left you if you
want to use it. That's it. Take your time,
coloring your drawings. And once you're done,
don't forget to post it. I always love to see your
work and available to give you any feedback or
answer any questions you have. This is it for now.
Take your time, and I'll see you
in the next video.
8. Conclusion - Before You Go!: Hi, again, artist. Congratulations on
finishing this class. I hope you had a
blast and learned a ton about coloring
Inprocriate. Also, thank you for joining. It's been a pleasure guiding you through each colorful step, and I'm excited to see how your artworks
have transformed. If you've enjoyed this class
and found it valuable, I would greatly appreciate it if you could leave a review. Your feedback helps
me improve and helps other students find
the right courses for their coloring needs. Until next time, happy coloring Inprocriate and as
always keep on drawing.
 Patricia Caldeira, Illustrator | Digital Artist | Designer