Transcripts
1. Introduction: Hello, and welcome to this class on creating a seamless
pattern on Procreate. I know that this might sound too complicated,
but trust me, it really isn't and
I will show you a way to make this as
uncomplicated as possible. For this class,
all you'll need is your iPad with Procreate on
it and your Apple Pencil. This is all you need
for the whole class, and we'll go through
the several stages of creating a pattern, such as setting up your canvas, making a sketch, coloring and finishing your
pattern, and finally make use of your pattern. You'll also have an
assignment to make, so you'll end up with
actually something that you've made
your own pattern at the end of this class. We'll be also seeing
and using some features of Procreate such as
drawing guide and Symmetry. We can make our
work a bit faster and as uncomplicated
as possible. I'll be also giving you a few resources and at
the end of this class, you'll be pro at making a
seamless pattern on Procreate. Are you ready to start? I'll see you in the next video.
2. Resources & Assignment: Hello, and welcome. Now before we start drawing, I just want to talk to you about resources and your assignment. First of all, as for resources, I will leave you a sketch that I made that I'm
using in this class. If you want to download it
and use it for inspiration or even to use as a base drawing for your own
pattern, you can do that. Of course, I do motivate you
to create your own pattern. Since it makes things a
bit more fun and you'll be feeling really proud at the end of this class when you
finish your pattern. But I do understand that
sometimes we just don't have ideas and just want to start drawing something,
you can use that. It's totally up to you. You can use it as
inspiration or you can use it as a base drawing and
continue from there. As for your assignment, all you have to do is share the pattern that you
made in this class. It can be just an image of
your pattern if you want. Or I also will leave you some mockups that
you can use to put your pattern in to
make it a bit more beautiful and so it can
feel really completed. You know what it looks
like in different devices. It's totally up to you
just share work with me, I can't wait to see the patterns that you
can come up with. I always love to see your work, so be sure to share it with me. This is it for this video. Follow me to the
next one where we're going to start setting
up our Canvas.
3. Setting Up Your Canvas: Hello, and welcome back. We're going to
start our pattern, but first let's
set up our Canvas. Open up Procreate, then we're going to tap the
plus sign here at the corner at our right corner and we're going to
choose a preset. You probably have the square
preset that is 2048 pixels, and that's the one
we're going to choose. We want to make a
squared canvas a squared file so our pattern can be
as seamless as possible. I'm going to pick
the square one. Here we are and we
are ready to draw, but there's something else
I want to make first, which is setting up the space where we're
going to draw our pattern. First of all, let's go over
here to our actions menu. It's this tool icon
over here, tap Canvas, and then we're going to go
over here to drawing guide, and we're going to toggle it on. Now it already has a
drawing guide over there, but let's edit
first and I want to divide my canvas in
four equal parts. Here we have the two degree, we're going to keep it for now. We're going to go to
the Symmetry option over here at the bottom, and then we're going to tap
options and choose quadrants. We have these two lines dividing our canvas and be sure to have a sister drawing toggled on
that is here at the bottom. Now we're just going to tap the check mark here,
and there we go. Now, I'm going to
grab a pencil brush. So here at the brush menu, I'm using the Procreate library, pencils and then pallon. This is what I'm going
to use for sketching, but you can choose
anything else, use the brushes that
you enjoy using. Or if you want just
take a bit of time exploring the brushes and
see what you prefer to use. I'm going to do
something very simple. I just want to have a
diamond shape here so I know where I want
to draw my pattern. I'm going to create one
line that goes from here to this other bot. There we go. This is it. This is all we're going to
do for preparing our canvas. We don't need to
do anything else. This is it for now.
Open up, procreate, set up your canvas, and I will see you
in the next video.
4. Sketching Your Pattern: Hello, and welcome back. We are ready to start
sketching our pattern. Now, the theme of your pattern, it can be whatever you want, and it can be as simple or as complicated as
you want as well. I'm going to make something a bit in between, but believe me, it's not going to be too complicated because
I'm going to use tools that will help me make this process
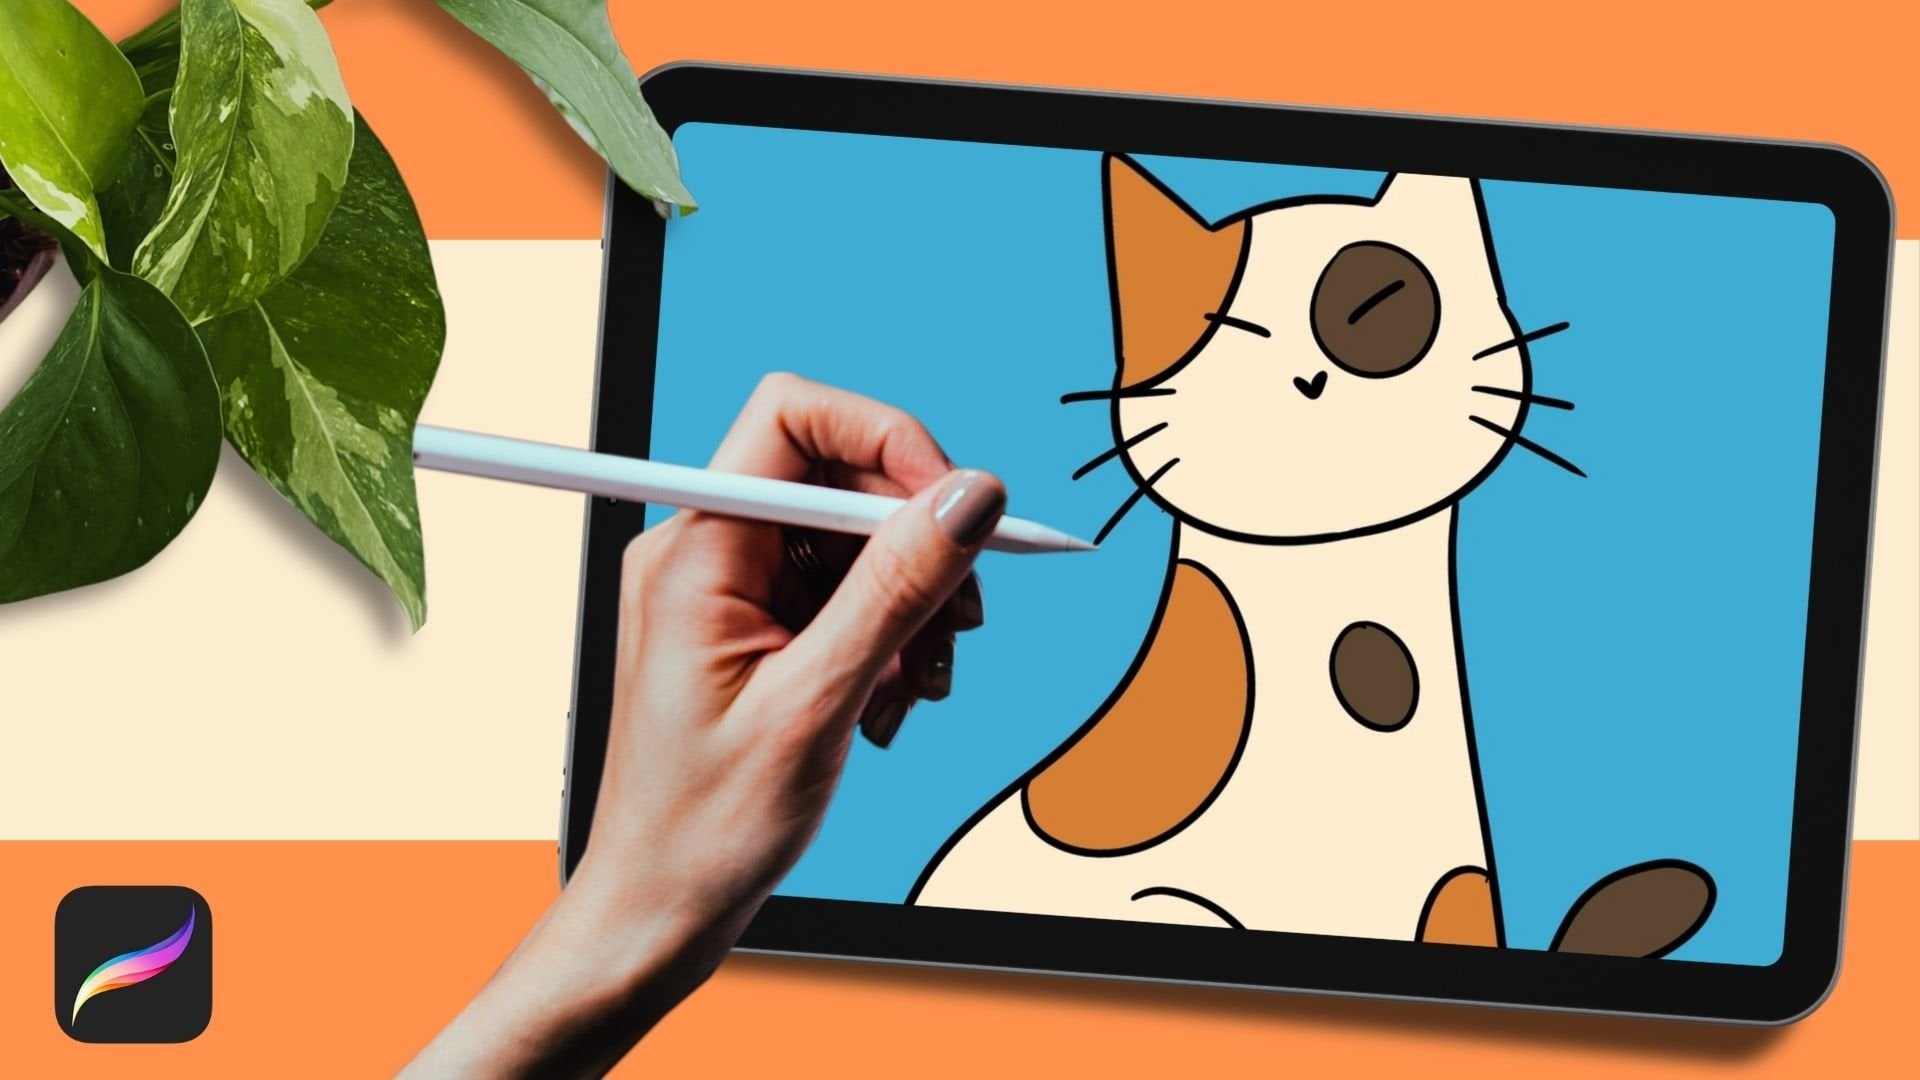
go a bit faster. I'm going to be drawing my favorite thing to
draw, which is kits. And I'm going to start by drawing
something in the center. I'm going to make here
a new layer by tapping the layer menu and then
tapping the plus sign. This is just I'm going to
lower here the opacity a bit. This is just to have
things a bit more separated and I don't do
anything wrong by mistake. I'm going to start by drawing
a cat head very simply. This is just a skew. Don't worry too much about
making a perfect drawing. I'm going to go over here, draw a novel shape. Now two triangles for the years, then I want some whiskers, eyes, and the nose. This is it. Now next, I want to
draw two more cats, one at the top and
another at the bottom. I'm only going to
draw one of them. Let's start by drawing
here a bean shape, the legs, and let's
not forget a tail. There we go, and now the head, a circle or an oval shape, two triangles, some
whiskers and the ice. Now, I'm going to go over
here to the selection tool. This one over here and
using the free hand mode, I'm going to select
this cat and then tap the moving tool right here and I want to move it a
little bit because I'm not too happy
with its placement. There we go. Now
I'm going to select it again and I want to
duplicate this cat. Select it again and then tap
Copy and paste. There we go. Now going again to my moving
tool or transforming tool, tap it and I'm
going to tap here, flip vertical and horizontal, and I'm going to
move it downwards. There we go. See a big chunk
of a pattern is already done and I only drew through things I've used very simple
shapes as you can see, and you can copy this one if
you want or create your own. Don't forget it can be
as simple as you want. If you want to draw
just some shapes, you can do that as well. Now I'm going to
go over here and I'm going to merge both
of these layers together. So just make this movement
and you have them together. Or if you want,
you can tap one of the layers and then press
merge down. And there we go. Now I want this one to
be drawing assisted, so we still have our
guidelines there. And if I tap here,
drawing assist, we will have the Symmetry
activated once again. This means I can
draw, for example, in here and it will be creating this drawing
on both sides. I'm going to do it again
so you can see it. I'm drawing on one side. And two stars are being
drawn one on each side. Now I'm going to do
the same thing here at the top and there
we go, it is done. Now, do I want more of this? No, let's just draw some simple lines a bit
of some elements here, some abstract elements here, something like this, perhaps. I think this is
enough. I like this. The only thing I'm
going to change is I want to start
to be a little bit smaller and
I'm doing the same with the one at the
bottom, and there we go. Now, don't forget this is just a sketch for
now, as you can see, it isn't perfect,
but we're going to perfect it in the next steps. This is going to
be my base sketch, and if you remember in
the previous video, I said I was going to leave my base sketch available for you if you want to
use it in this class, if you don't want to be creating your own pattern or if you just want to use
this as inspiration, I'm going to leave this
sketch for downloads, so you can download it
and use it if you want. I will see you in the next video where we're going to
work on our line art.
5. Drawing The Line Art: Hello again and welcome. We're now going to
refine our pattern a bit more and we're going to
create the line art for it. What I'm going to do first is I'm going to lower the opacity of my sketch here and then I'm going to create a new
layer on top of it. I'm going to select
the black color. Also, I've used the
red for the sketch just because it is my
personal preference, but you can do it
however you want. Now I'm just going to
pick a brush first. I'm going to be using the inking brush studio pen that is available in the
classic library of Procreate. This is the one I'm
going to be using. Now, what I'm going
to do is I'm going to activate the drawing
Tis to this layer as well, but I'm going to change
it a little bit. Let's go to our action menu, then Canvas and finally
edit drawing guide. And on the Symmetry menu, we're going to tap options, and I want to have a
vertical mirror here. I'm going to choose this option, and now we're going
to start drawing. I'm going to zoom in
here a little bit. What we're going to do is that I only need to draw on one side. We go now triangle for
the years the whiskers. As you can see, I'm just drawing one side of my cat's face here and it will duplicate it on the
other side perfectly. This makes things
especially for a pattern, it makes things much quicker
and even less difficult. So if you want to have
this perfect drawing, it will make things
much easier for you. We have our cat here. I'm going to edit my
drawing guide again, but I want it horizontal. Let's go back to the
drawing guide menu. Tap options and
choose horizontal. There we go, tap the check mark and now we
can draw our other cats. Let me show that it's being made on the other side as well. As you can see, I'm just going
through my initial sketch, but giving it a better shape and better lines even just perfecting my drawing
a little bit more. If I see anything that
needs a bit of fixing, I will do that as well, but I am basically drawing
two cats at the same time. Now we can draw here the ears, the whiskers, and the eyes. I'm going to draw only yes for this as I want this sket to
have a little less detail. Now, as you can see,
the cat at the bottom is faced the same way
and we don't want that. That's not what we
have in our sketch. I'm going to go to
my selection tool, use the free hand mode, and I'm going to select it. Then the transform tool, tap it, and choose flip horizontal, there we go, it's done. Now all we are
missing is our stars. I'm going to go over here to my edit drawing guide
menu options again, and choose the quadrant option once again and now I'm going to draw my stars and those little elements in there are still in
the same layer, so let's do this. Don't forget that you can redo your drawings as many
times as you want. Sometimes things don't go
according to plan right away. That's all right. I
think I like this one best and can I do a
smaller wing here. Of course, there's always time to change anything
in your drawing. If you want to add any element
to it, feel free to do so. There we go. Now
I'm just going to add this little elements here, just a few lines,
and this is it. We are done for now.
Our line art is ready. Let me hide here. My
sketch, and there we go. See, we have a very
simple drawing for our pattern already made. So our line art is finished. Our next step is to
color our pattern. So we'll be doing that
in the next video.
6. Coloring Our Pattern: Hello, and welcome back. Our main drawing is almost done. All we have to do is color it. I have here a color palette for my drawing already chosen. I have a few colors
for Leonard and others for the color itself. The first thing I'm going to do is I'm going to the action menu. And then tap canvas and then toggle off
the drawing guide because we don't
need that anymore. Now I'm going to create
a layer below my inart. I'm going to hide my
line art very quickly, tap and hold for a
bit to choose one of these colors there we
go. Hide that as well. I'm going to drag and drop
this color for my background. This is going to
be the background of my pattern in general. Now let's show here
our colors and inart again and I'm going to create another layer below my line art, so I can start
coloring my cats here. The cats are going to be in this light blue
and the stars are going to be in this
very light yellow. I'm going to once again
tap and hold for a bit, so I can select
this color and then I'm going to go over here
to my lin art layer. I'm going to tap it and
then toggle reference. Now, whatever I add to this
layer below will have into account the layer I have
chosen as reference. It's going to have my
liners into account. When I drag and
drop a color here, it will paint inside
the lines like this. Let's do that again so I
can show you something else to make your whole
work a bit faster, drag and drop the color
to the place you want to color and then tap
continue filling. Now, all you have to do
is tap the places you want to be that
color. There we go. I have my cats all Colors, now I'm just going to tap here the check mark and it's done. Now I'm going to select
the other color I have for the stars and
do the exact same thing. Continue filling and tap
all the little stars. Tap the check mark,
and it's done. Now for the line art, I don't
want it to be in black, but of course, you
can keep it that way. But for me, I'm going to go over here and select my
inart layer once again. I'm going to select this darker blue here and I'll do the same
thing I did before. I'm going to drag and drop it, but I'm going to be sure that I drop it on the lines
and not anywhere else. I'm going to drag and drop
it here, for example, continue filling and I'm going to do the same with the rest. You just have to
be careful to not tap outside of the
line. This one is done. Now we're going to
do the same with the lines for our stars and
the tiny lines in here. Continue filling, and let's find the others
and that is done. I'm going to hide my colors because I don't
need them anymore. Basically, the drawing
itself is ready. Now, all we have to do is create the actual pattern
and we're going to be doing that
in the next video.
7. Creating A Seamless Pattern Easily: Hello, and welcome back. Our main drawing is ready, so now it's time to actually
create our pattern. This is going to be the most
stressful part of this, but all we have to do
is pay some attention, and believe me, it's
going to be very simple. First of all, I'm
going to create a copy of both my line
art and the colors, so if I mess something up, I always have a copy the
original one somewhere. I'm going to select
one of these layers, then swipe left and tap duplicate and do the same
thing with my line art. Now I'm going to
grab my line art and then swipe right on the
colors and bring it below. I have this kept safe
here on my file, and now we're going to
merge these two together. I'm going to tap the inart
and then tap merge down. There we go. Now I need help of some drawing
guides again. I'm going to toggle on
drawing guides once again, don't forget it's
the action menu, then Canvas and
then drawing guide. All right, so this is done, what we're going to do is we're going to
duplicate our drawing. Now we're going to start
with one corner and fill out all the space
around our drawing. What I like to do is go
over here and line up these two dots with the limits
of my canvas like this. Be sure that those orange
lines appear there, so we're sure that it's snapped to the place we want them to be and we're going to repeat
this with all the corners. I'm going to duplicate
my main drawing again. Move it this side and
there we go. Well, see. We have to pay attention because sometimes when we
lift our pencils, we move the drawing a little bit again and that's
going to mess things up, so we have to pay
attention to that. Again, there we go
and just once more, duplicate the main
drawing and move it to the last corner
and there we go. Now it's going to be the moment of truth and we're going to check if we did our
seamless pattern correctly. What I'm going to
do is I'm going to merge all of these
layers together, the ones that made
up my pattern. I'm just going to do
this pinch gesture on all of these layers,
and there we go. Now what we're going
to do is resize this so it fits each of
these quadrants. Resize one first, be sure
it snaps to the center, then I'm going to duplicate it until I fill
the whole canvas. So far, I think we did great. See, I lines up
perfectly. Look awesome. Now what we can do is we
merge both of these together, and then we duplicate it
and bring it down below. There we go, Look, it's so cute. We can merge all
of this together. Let's hide here our
drawing guide so we can see our pattern and this is it we managed to make a very simple seamless
pattern in no time at all. Now, all we have to do now obviously is make, I don't know, maybe a wallpaper out of
this so you can put on your phone or your
iPad even or computer, and of course, you can use
this pattern in anything else. But for this class, I think it's easier
to use it digitally. So for now, this is it. Take your time making
the seamless pattern. There's no rush in doing this
and if you have any issues, just try to do it again because I know that
sometimes it's just not paying enough attention
and we move things a little bit and that will
mess our pattern right away. Just be sure that your drawing is snapping with
the limits of your canvas and I will meet you
in the next video where we will make a
wallpaper out of this.
8. Finishing & Exporting Your Pattern: Hello, and welcome back. I have here my pattern right. I want to create a wallpaper
out of this to use on my phone or on my iPad even. The first thing we need to
do is export our patterns. I'm going to go here
to the Actions menu and then tap Share. I'm going to choose JPEG. You can also use
PNG if you want, but I for me, JPEG is enough. Now I want to use it here on my iPad and
Procreate right now. I'm just going to
tap Save image, and it will save on my gallery. If you want to export to
somewhere else, you can, for example, save to files and you can choose to
save on your Cloud, or you can save to any other
Cloud service you want or even send it through email or AirDrop to any
other Apple device, for example, it's
totally up to you. I'm just going to
tap Save Image. And that is done. Now we're going to
create our wallpapers. First of all, we're going
to go back to our gallery. Here we are back to our gallery, and then I'm going to tap once again the plus sign over here. Yeah. I have a
file preset that I created that is full HD. It's 1,000 1920 per
1008 resolution. And that's the one
I'm going to use. Now, this all depends on
where you want to put your wallpaper because let's say that you have a screen
that is bigger than this, then you might want to
make a bigger file. But if you want to
create a new file, just tap this plus sign
over here and you have it. Just put the measurements
you want for your canvas. And I'm going to use
this one. There we go. I have here a horizontal canvas where I'm going to
create my pattern. This way, I'd like
to use this size because it will fit most
of my devices screens. Even if I want to put
it here on my apads, this is going to be enough. What I'm going to
do right now is I want to import my
pattern over here. I'm going to tap
the action menu. Then tab ads and
finally insert a photo because I saved mine into
images into my photo gallery. But if you did choose to
put it somewhere else, such as in the files, you will have to go and choose insert a
file, for example. Before moving, I'm going
to do the same thing. I'm going to duplicate
it and keep here a copy. And I'm going to move it to one side until it is
centered just like this. Now I have here the other one and I'm going to do the exact
same thing. There we go. This way, everything is lined
up and my pattern is ready. Now I'm going to do the exact
same thing I did before and I'm going to tap the
action menu, share. JPEG and I'm going
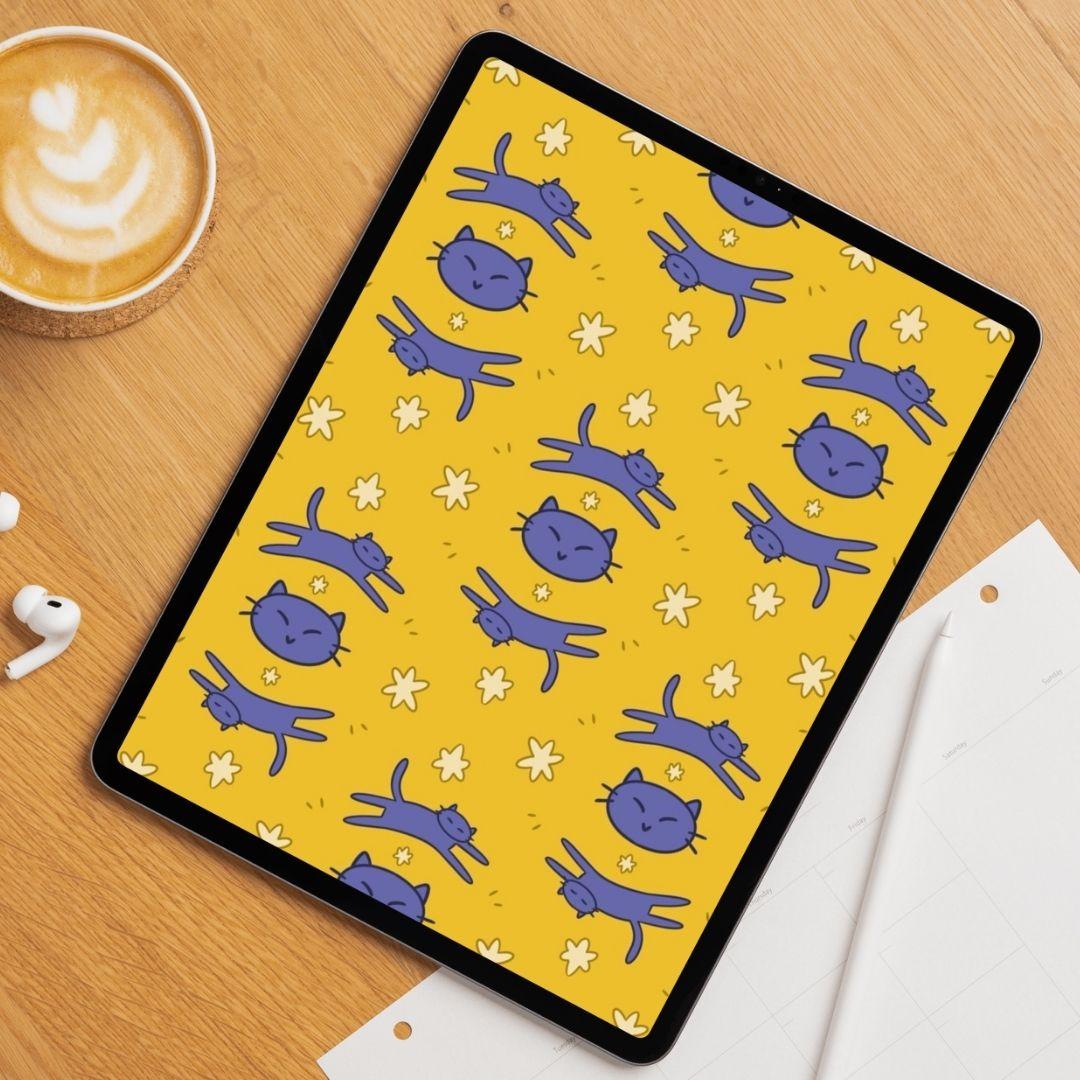
to save it as image. Now I'm going to go to my iPad and I'm going to set
this as a wallpaper. I finished setting it up, setting it up and as
you can see here is my wallpaper on my iPad screen, let me lock it. You can see here as
Logscreen as well. I think this looks really cute. I also show you right here on this side
or on this side or both. I don't know how it looks
on the mockups that I left on the computer mockup or on iPad mockup but basically, you can now use this
pattern however you want, whether as a digital wallpaper, but you can also print
it out for cards. For example, you can even
print it out in some kind of fabric and you can do with this pattern
whatever you want. Once again, don't forget
to make your sandwich, which is just create your own
pattern and then share it with me because I always love to see what you guys
can come up with, and I will see you
in the next video.
9. Conclusion - Before You Go: Hello, and welcome back. First of all, congratulations. You've made it to the
end of the class. By now, you know how to make the cutest seamless pattern on Procreate and you probably
have your own already made. Don't forget to share it with me because I always love to see your work and your art and
how creative you can be. Just be sure to have fun. Of course, if you
enjoy this class, I would really appreciate
if you could leave a review of this class so other people can
find it as well, remember to check out my
other classes as well, and hopefully I will see
you in another class. So I'll see you then and
remember keep on drawing.
 Patricia Caldeira, Illustrator | Digital Artist | Designer