Transcripts
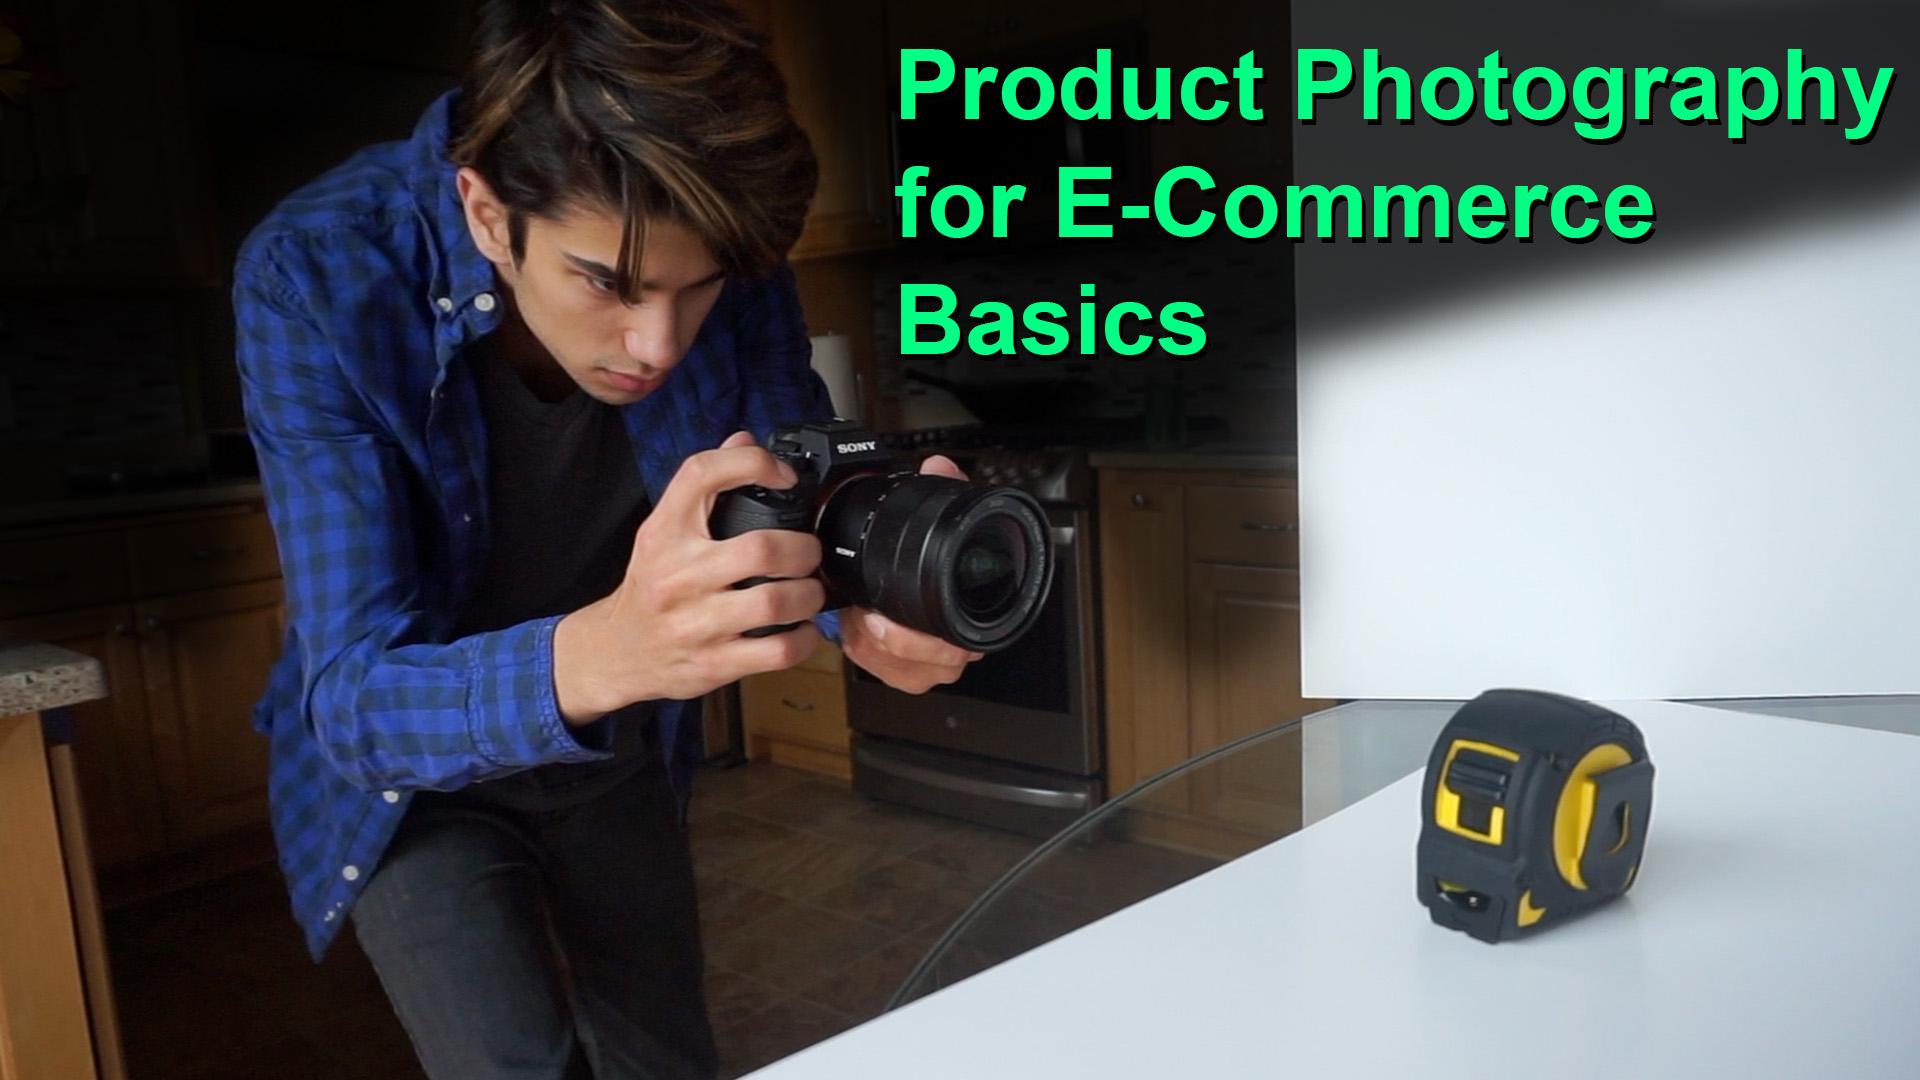
1. Intro: Hi, I'm James Morland. Welcome my online course about product photography. If you clicked on this video, you probably understand the value of having good product photos. Personally, I own two online stores as well. A sell on eBay posh mark in Amazon is becoming the norm online to have crisp and clean product photos. And in this course I will be teaching you all the basics as well as some advanced features on how to step up your photography game in a comprehensive course. If you're ever causing online your product, photos are the first experience that your customers have of your product, and it can be the difference between having a customer or having your customer go to a competitors. This class is mainly meant for beginners that want to create amazing images. Or even some people that are currently taking product photography want to boost their skills or possibly learning to new techniques that I personally used on thousands of different products. In this course, I'll be teaching you how to take amazing product photos that showcase your products to the fullest. It is important that you know that you don't have to have an expensive DSLR or expensive editing equipment. We're going to be teaching you some bare bones techniques that you can use with your cell phone or other free software. And the skills that I teach in this class are universal throughout photography and other aspects that you may be interested in in the future. This is a compressed class, and you'll be learning these techniques very fast. So feel free to pause this or rewind any of these clips that you can relearn things or even bookmark them. I will also be here. If you have any questions or anything that you need to be clarified and with skills taught in this video, you will be well on your way to taking amazing product photos and boosting up your social media game. See you in the first lesson.
2. Gather Materials: Hi. Welcome to our first lesson of this course. In this lesson, we're going to be talking about the materials that you need most of materials for. This course can easily be found at home or very inexpensive and can be found at almost every general store. For this class, you will need any camera that you're comfortable with using most commonly a DSLR or Marylise camera or even a point shoot for my camera. I will be using the Sony A seven mark three. If you don't have access to a camera, you can always use your cell phone, and you do not need prior knowledge on how to use these cameras. But it does help, and learning the basics is not hard. More affordable Cameras are great, but with a more professional set up, it can dramatically increase your photos. There are many intra level cameras that are great for first time photographers. I will include some of my recommendations as well as where to get them later in this course again, If you do not have access to these cameras, your phone is a great option, and most phones have really high quality cameras that can produce amazing photos, and sometimes it may even be easier to take the photos on your phone and post them on social media without having to transfer them to your computer. You also need the product that you're taking your photo off. I'd recommend practicing at first with a small household object that you are comfortable with. Adobe Photo Shop is highly recommended, and that's what we will be using in this course. But there are other similar programs that offered the same availability for seamless and flatly photography photos. You will need a backdrop that will be behind your product, and what you use will depend on your size, your product as well as the color of your product. For seamless backdrops, you will need a backdrop that concurred behind the product and go underneath it. I tend to use posterboard that you can find it a dollar store for about 50 cents. If you can't get that, you can always use fabric. But I recommend for the fabric to be thick as well as wrinkle resistant. Flatly, photography is a little more forgiving. You're able to use different backdrops such as posterboard, wouldn't backdrops, planks, cutting boards and more You can also have some accessories that we will talk more about later in the styling part of this course. In this course, we will be using natural light. But for more advanced photographers, you may prefer a studio lights set up. We will be using a simple light reflector to provide even lighting on our products, which will require a second whiteboard. Next, you'll need a table or surface to shoot on. I tend to use my kitchen table, and it's a great source of light. And it's always in a constant position, which makes taking different photos easy. Some things that might be helpful are a tripod to get consistent angles. Ah, step stool for flatly photography and styling props, you may even want to use a curtain to block light if it's too strong from your natural window. Now that we have all our supplies, I'll be showing you how to set up your home studio in the next video
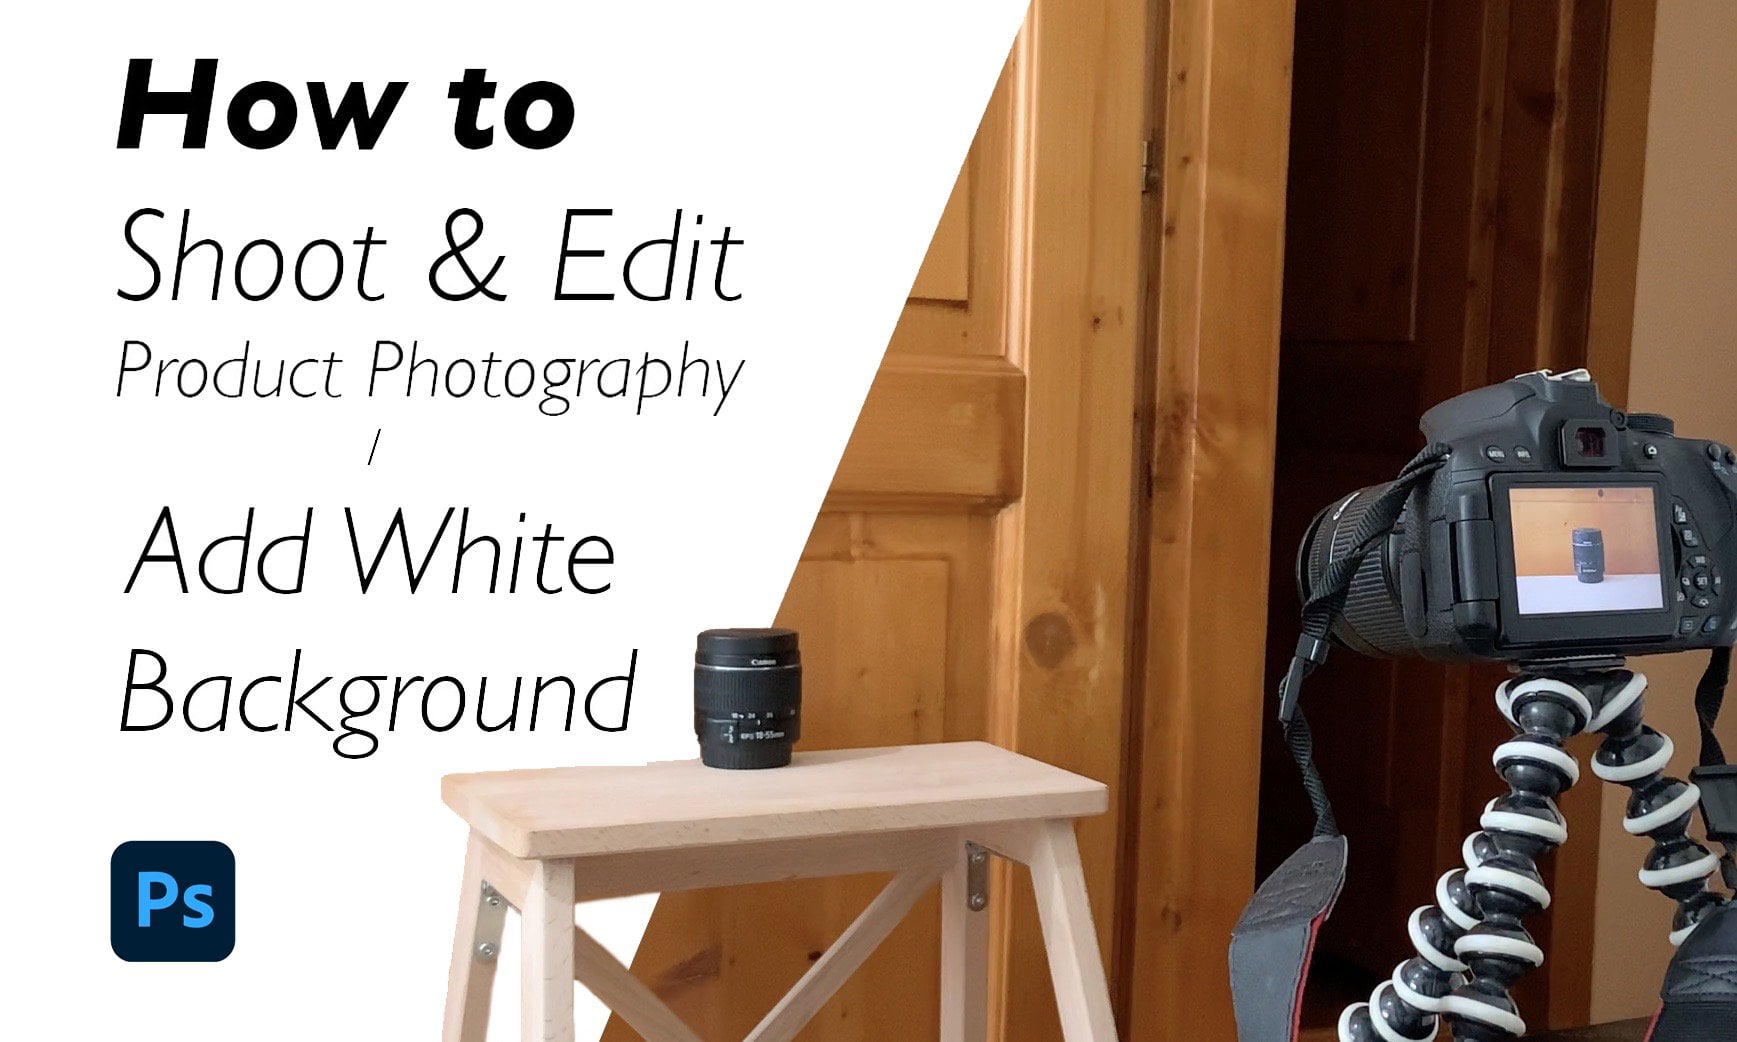
3. Photo Studio Setup: In this video, I'll be showing you a simple photo studio that works both with seamless and flatly photos to start clear your table, an area that you will be taking your photos. If your table is not narrow window, I recommend moving it as close as possible to get the best lighting. This process should only take about five minutes, even if it seems like you're rearranging all your furniture. Natural light is the easiest light source to get service product photography. Not only is it free, but also is perfect colors, and it looks very natural. If you're shooting on a sunny day, now would be a good time to use a curtain to block some of the light from coming in. If you're shooting on an overcast day like me, you won't have to worry about it. Gather all your photography equipment so that they're in arm's reach. I have my camera as well as my white poster backdrop, my white poster that will also work as a light reflector, a backdrop stand as well as tape and my product. Now you're only a few steps away from taking amazing product photos. In the next video, I'll be showing you how to take seamless photos, followed by how to do flatly photos
4. Seamless Photography: seamless photography uses one seamless background, also called a sweep, to create a smooth surface that goes under and behind the product. This focuses attention on the product and does not distract with a Massey background. A seamless product photo is great for e commerce because it puts attention on the product. I'll be demonstrating how to set up a evenly lit shot. One light comes from one side and is reflected on the product with a simple but very important set up their reduces shadows on the product. Set up your sweep by taping and onto a box or angling and off a wall. You have to make sure that you have a curve that has enough room underneath the product, Then place the product in the center of the sweep. In this video, I'll be using a tape measure as my product that we will be taking photos off as you're setting up. Light may change from the outside world, so you might need to readjust your photo studio to get the bass slating using your light reflector balance. The light by are flaking and onto the product to get rid of shadows and dark spots create increasing the Reflector papers that it can stand up on its own, as you can see when I move the reflector. That product changes next year to focus on the composition of the photo. Typically, product photos have the product centred in front of the backdrop. Depending on your product size and how you intend the final photo to turn out, you may need to adjust your white space that you have around the product to shoot your photos. Angle your product at the same height and in front of the product. Now is a great time to use a tripod, or you can go handheld like me. Thanks to pay attention to are the camera focus and ensuring that all parts of the product and focus that the camera lighting is even the lenses clean. And there's no debris blocking the product and making sure that your white balance is adjusted. Mostly cities will be automated if you switch your camera to auto mode. Ah, highly recommend auto mode for anyone who's brand new to photography. Take multiple photos from multiple different angles with different compositions and different distances. In the next video, I will be showing you how to take flatly photos that are great for social media and websites.
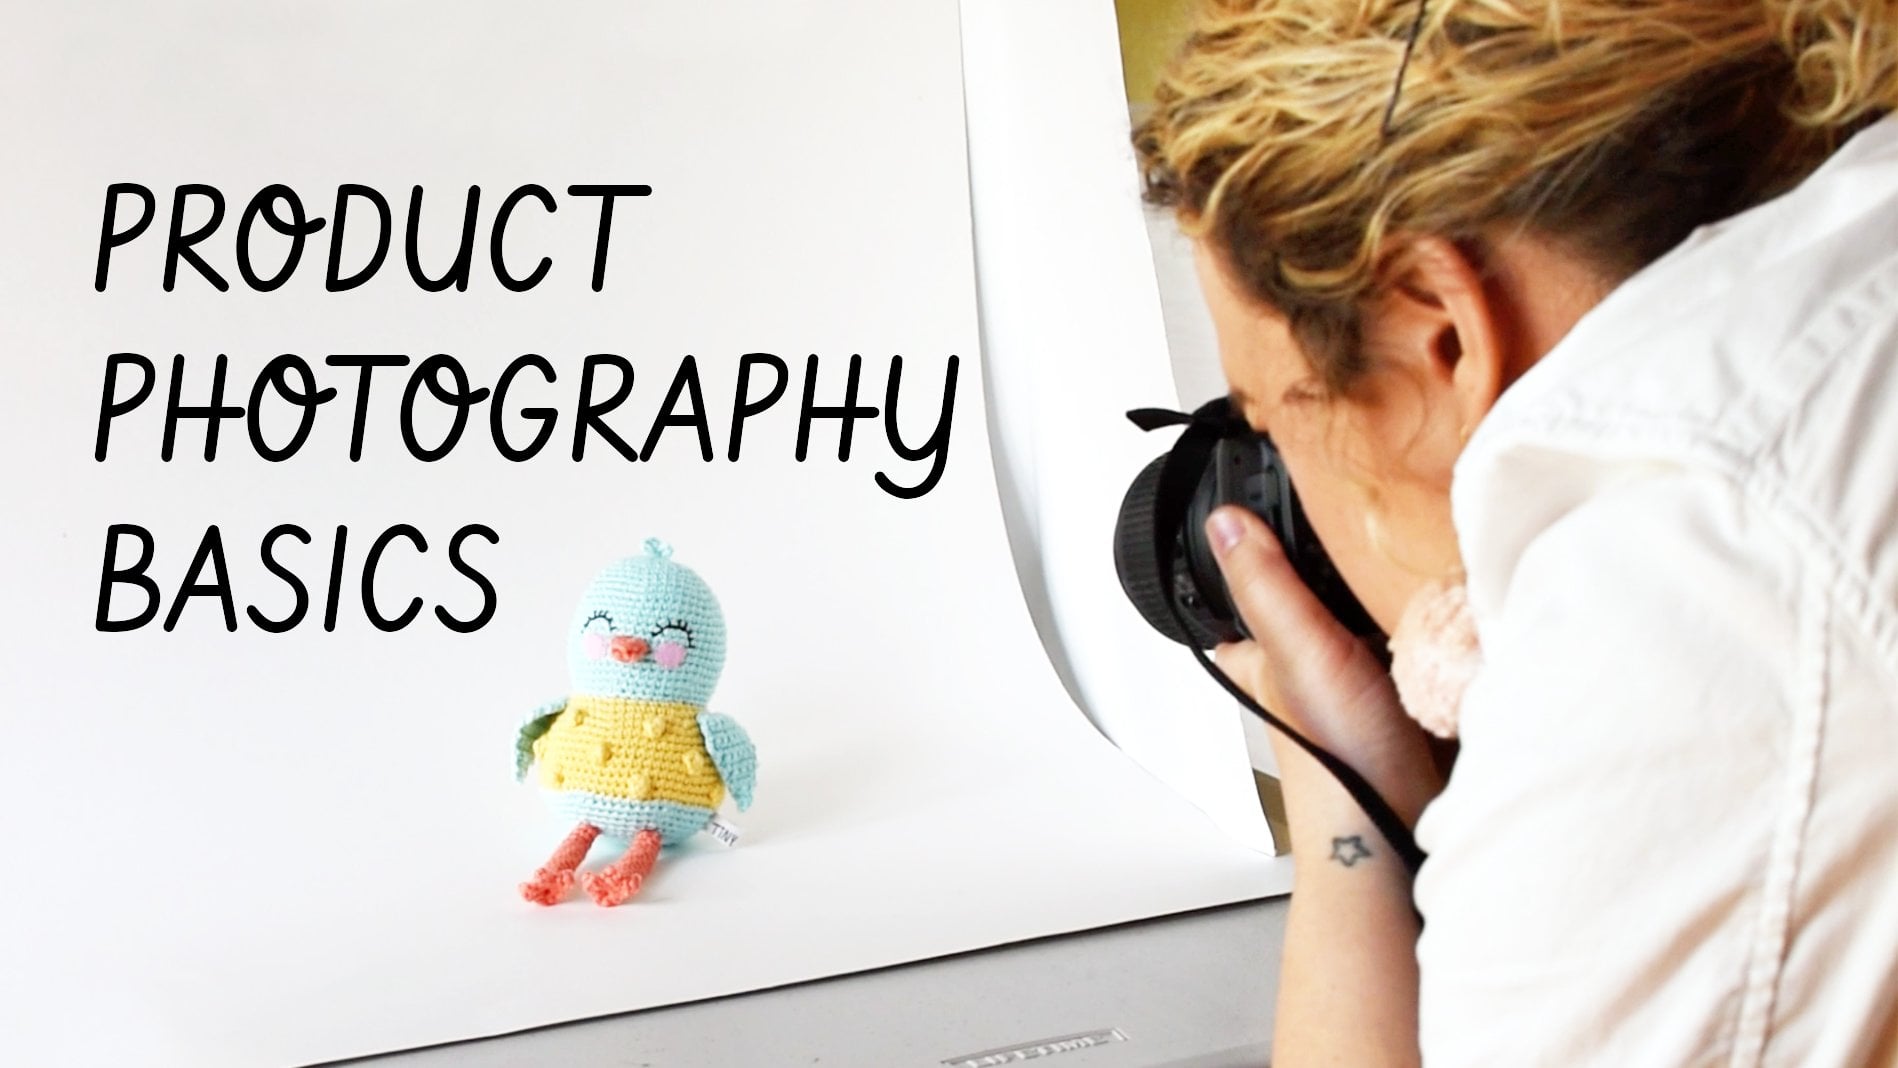
5. Flat lay photography Basics: in flatly photography, you're wishing the subject from directly above flatly. Photography can be a primary form of photography and can replace Seamus photography if your products air flat and don't stand up on their own. For example, books, T shirts and art prints. Flat life photography also is an easy way to add extra style to your photos with the use of props, which will be talking more about in the next video. Just like our seamless photos, we will be using even lighting. But the only difference is that you're shooting the product from directly above and using a flat backdrop. First, we need to find your backdrop. I will continue to use my white backdrop that I was using in my seamless product photos. We could have also opted to use a wooden backdrop or cutting board. Center your product on the backdrop or adjust your backdrop to get good lighting. Position your light reflector to reflect light onto your backdrop as well as the product. Finding the best composition may be difficult on your table. She might want to move your workspace onto the floor, which makes taking photos easier. Next, we have to focus on the composition of the product. Photo typically products air centered in the backdrop. Hold your camera directly above the studio with your studio on the floor. This step is easier, but if you decide to keep using the table, you may prefer to use a step stool like with the sea. Most product photos Make sure product is in focus in your composition is correct. I recommend taking multiple photos from different angles and from different distances to have multiple options. Well, editing and the next video. We'll show you some different styles and techniques you can use to make your photos stand out even more.
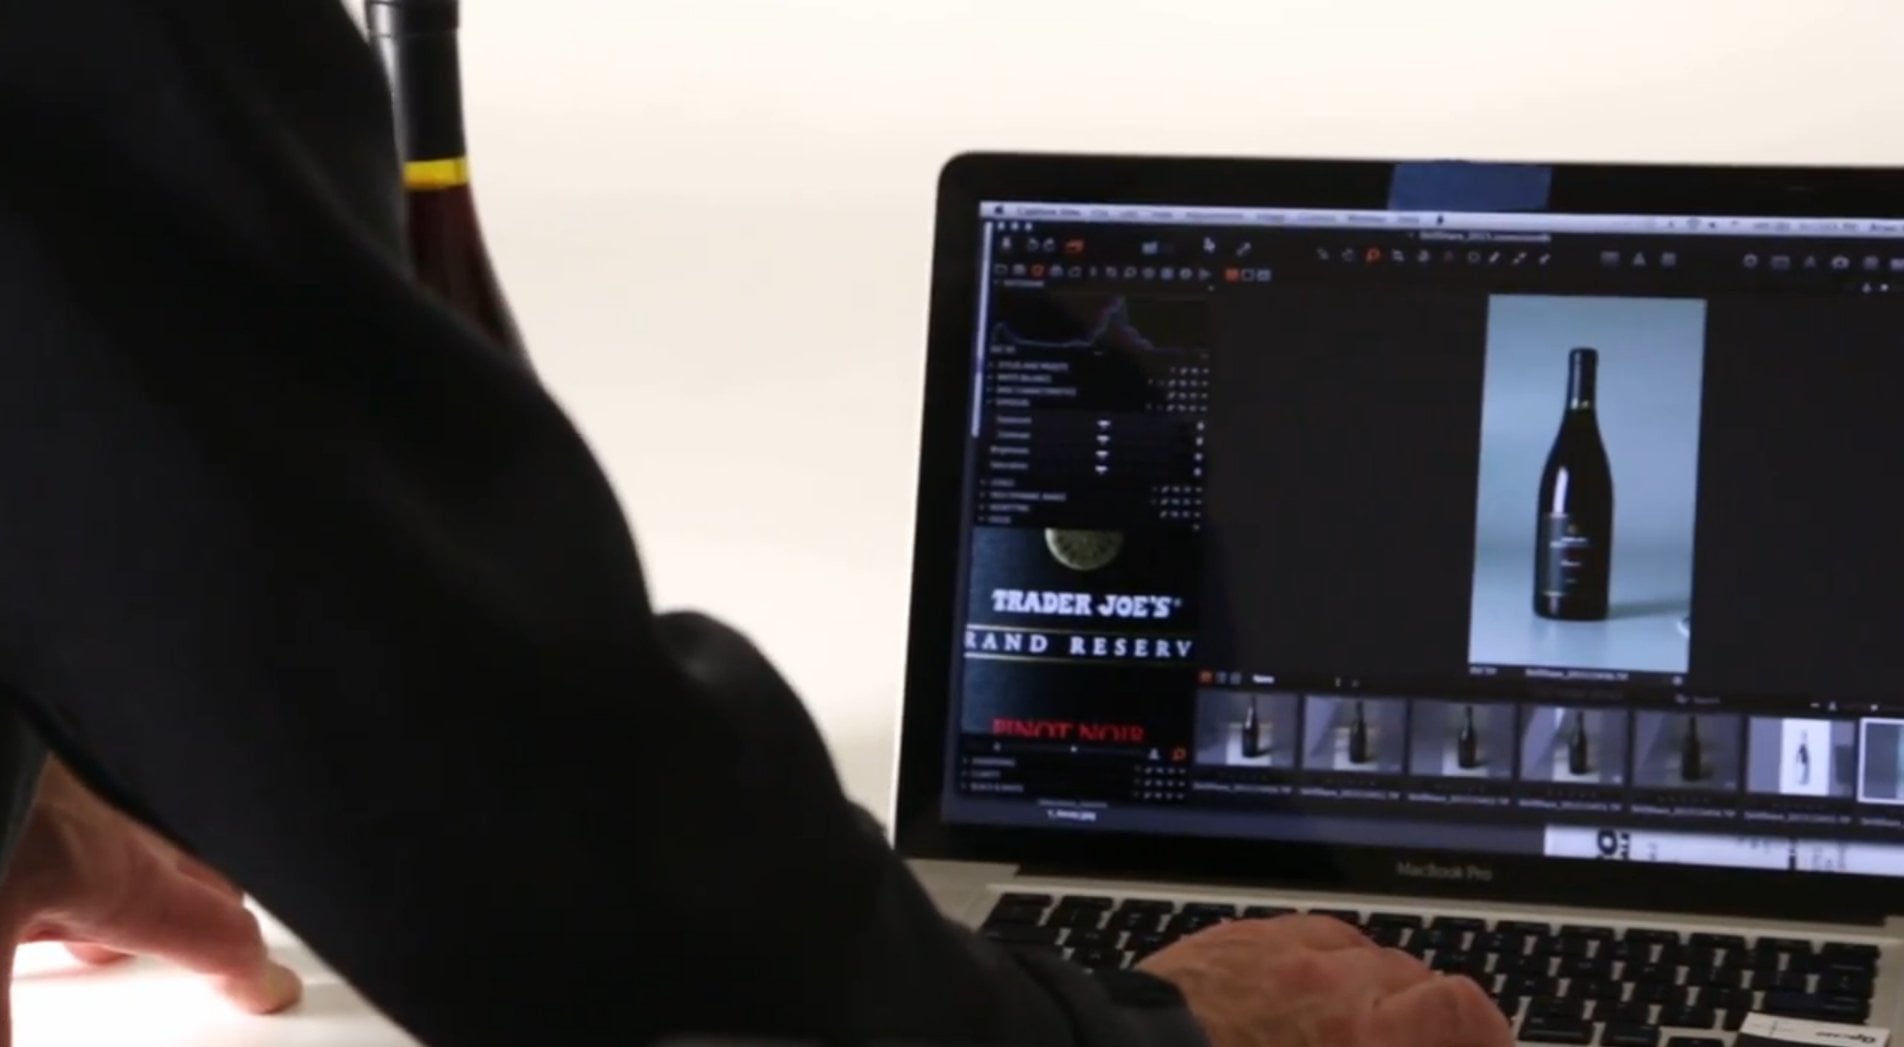
6. Product Photo Editing 1: when it comes to product photography. Editing the photos tends to be my favorite part. As you can see, I've already created a folder and imported my photos for my camera. You can also import your photos from your phone. I included some of the photos that I took. As you can see, they're two different photos. I included some examples of some bad ones, in particular this photo. As you can see, some parts of the photo were out of focus, and it's off to an angle that I don't really like. So that's why it's important to take multiple photos. As you can see, this photo is perfect. You can see the product is perfectly straight, the cameras lined up and it everything is in focus. So this is a photo that we will be able to use. This is an example of the overlay photo, and as you can see everything in a sharp and clear, and on this section it's not. You can see some of the things have moved. There's a little bit out of focus, and there's a smudge on the camera. Here's another overlay photo that I decided to take. You can see we're gonna have a clean some spots up, but overall, it looks pretty good. And this is another creative shot. I feel like if you were to include this on an instagram photo, it stands out to your eye. You can just see it in use. I think that's really cool photo. And then this is using some of the styling aspects. You can see some of our crinkle paper, and I love this stuff. It makes the products look really good. And then here's another example. This photo isn't as appealing, but it still would be pretty good on your instagram page. Just another thing to post an advertiser products. So we will be using Photoshopped 2020. This is not necessary, but it is very, very helpful. There are many similar applications, but I really recommend installing photo shop in late room. I believe it's 9 99 a month through Adobe. That's the best bang for your buck. You can also use it on your iPad and your iPhone for free, so I'm going to select the photos that we will be using and drinking them in. So there are multiple different ways that you'll be able to edit this and I will be showing you my example. And I'm not going to say that I am the best and this is the best method. But personally, this is what I prefer to do, and I've been doing it for a while, and all my products tend to look pretty good. So first we're going to start with the crop. I prefer to do a 1 to 1 aspect ratio crop. This is really good for most social media platforms as well as most product websites. Shopify really likes the 1 to 1 and Google as well, so we're just gonna crop in a little bit. Just the product is completely in the center hit, enter and there we go. So one method that you can use on some products is using this quick selection tool so we're able to select and it's smart, and it's able to select all of the parts of the product. Um, sometimes it goes a little over a so you can see in the shadows, but you can see it just smooth it out. We can hit the minus and go in to clean up some of these shadows. We can also use the eraser tool later on SAT looks pretty good so far. So I'm going to hit command. See, then we're gonna go down here and we're going to create a new layer, and then we're gonna do command V, which is paced. And if we go over here and hit the little eye icon now, you can see the product is by itself. So, as you can see, that turned out really, really well. And now we're gonna add another layer underneath it, and we're gonna throw a quick white backdrop on it so you can see that is already a great product photo that can be perfect for Amazon. There are some couple spots down here that you might want to clean up using the eraser tool so you can just see will clean this up a little bit. And many people ask me how I get my products to look so good. Most of the time, I'm just using auto mode on the camera, which tends to make it look very, very good. But you can also had over here and hit adjustments. One thing that you might want to change if you're not getting rid of the backdrop is the levels which can help change the brightness and make different aspects of its standout says . You can see if you just need a break in the photo up, you can pull these over to the left if you want to expand it just to make it a little bigger, Center it. There you go. There is a perfect product photo that you made in a matter of minutes, so let's go over some harder ones. This is the overlay example, and as you can see, they look pretty different. It's pretty hard to get this angle when you're using on a background, so using an overlay is very helpful. We're going again. Use the 1 to 1 aspect ratio. We're gonna shrink it a little bit, and we're gonna center the product and hit enter. We can do the same method as we used before, but in this one we're going to just do some adjustments. So this is what the photo looks like right now, and simply by going over to the levels, selecting the highlights and dragging it to the left. We're changing the brightness, and we're getting rid of that background and As you can see, that looks already very, very good, and we didn't even have to select it or mask it like we did in the previous photo. You can also do some other adjustments. Such is the hue and color balance. But I think this photo already looks good moving on to the next one. We're also going to do that. The levels adjustment just because there's more that we'd have to select sluts tried out. A lot of this is traveling here, and you may see things that work better for you on some photos. But some things might not work as well on other photos, so it's good to have multiple different ways to do this now. For this crop, we're also going to be doing a 1 to 1, and I'm just gonna hit, enter and crop it as a square. There's a couple of things that we can touch up over here. You can see there's a little mark here, and it wasn't perfect. So we're going to use the heel brush right here and select it and you can see it's gone. And then there was also a smudge on the lens, which I should have cleaned before, but you can see we're about to get rid of it in a couple seconds. And there we go. That's gone. So this is really why I love photo shop. And if you're a small business owner, I'd really recommend you picking this up. You can see how fast it is to make these photos. You could be doing so much so quickly. This is another photo. This is a little bit harder to edit. It's not as simple as the other ones, but let's try our best. We're gonna actually do an unconstrained crop. So we're gonna be able to Dre this to the sides, will be able to include some more of the tool we're going to hit enter, so crops it and we're going to go over to the adjustments and the levels again. Now let's drink it to the left, and you can see how brightens up the whole photo. We're going to go back to the healing brush, get rid of the little lens smudge, and we're also gonna get rid of the smudge right here so you can see right there. That already looks really good. This could be good for your home page or you can always resize it now, on to our next product. I really like this product because I actually use the underside or the glossy side of the backdrop says you can see there is a little bit of a reflection of the crinkle paper. So hopefully we'll be able to preserve some of that by going over to the adjustments levels and raising it to the left says you can see that is already looking really good. There is some smudges over here, so we're gonna be able to crop that out like before. I'm not going to do a square aspect ratio. I'm gonna bring it in a little bit. This is great. And if you want to go over here, if you want to put sale over here, this would be great for your home page. And I think that photo looks really good right there. You can do some other icons, but this is a home page. Photo would look great. And then our last one, you can see our crinkle paper with some Sharpie markers starting to be the same levels. Put all the way to the left, bring some of these down, and I always say that it's important to take many photos while you're shooting. If I didn't like the way that this photo turned out in particular, I have a couple of different shots and different variations of this. So again, I'd really recommend taking multiple photos when you're doing it, so I think it's already good photo. So that's the basics for photo editing on photo shop. All of this is done so fast, so easy, and for the program that you're paying for, it's really worth it. There are many different things that you can do different than this in the next video, actually showing you how to change a background color and get rid of this white one so that will be able to stand out even more when you're on social media. See you in the next one
7. Product Photo Editing 2: welcome to photo editing to in this part. We're going to talk about how to change the background color to make it stand out a little bit more, using a different style. So we talked a lot in the previous video about styling and how you can do different aspects to your photos to make them stand out, for example, using crinkle paper or different props. As you can see, we're using a different prop. And on this one, we're also using in different prop with a piece of text. I think that looks really, really good, but one cool thing that you can do while you're advertising is having different background colors for specific products. So in this photo, if you miss the previous tutorial, what we did was we originally started with this product photo. Then we selected this product. We erase the background, and we copied it and pasted it on to a different layer. So this project is by itself, and as you can see, everything around it is transparent. Then we added a white background to it. So instead of weight, we're actually going to be choosing a different color. So I'm going to go over to the bucket tool, and we're gonna be able to select a different color. So in this case, I'm going to see if we can get some of the yellow a little bit of a brighter yellow, and we're gonna be able to use that as the backdrop background color. So if I select that you can see it stands out, you might also want to shrink this, and now we can add some text. So if we were to say, brand new and if I were to change this color to maybe, let's say white, and if we select a product and move it up, maybe if we center it and then if we add another text saying 15.99 it's completely center it and then you have that text and there you go. You can also change this color if you don't like it. Ah, we could try for a brighter yellow. I think that looks pretty good. We could also change the text color to black, but let's do another darker color that looks pretty good. Let's try a red. This will get people's eyes you can see right here, and as you can see, since we did get rid of the background, this looks perfect. We can also change it to a nice magenta and let's even try a nice blue says You can see if your product area websites theme was blue and you had this on the home page, it would look really good. I really enjoy adding different background colors. I think that makes the products look really, really good. But if not, you can always switch back to that white backdrop. This is a really easy technique that you can do on almost every photo shop. And yeah, I hope you enjoyed my techniques on how to edit these photos and the next video. We're going to be talking about our final thoughts on this lesson.
8. How to Style: styling. Your photos could make them stand out when advertising online or well, posting on social media. It can also be a great way to inform your customers that their different variations of the same product it is important not to mislead your customers with your product photos. So ensure that you have a good product description that says certain times may not be included. My favorite products styling is the use of different backdrops and different colors to make them stand out. This can easily be done in photo shop, and it will teach you in an upcoming lesson. Another style that I like to do is by incorporating physical props in the photos, for example, using crinkle paper that could be found any craft store. It is a great prop to make your photo stand out and can work in different occasions in different products. Another easy style to incorporate is by showing the product often everyday situations, for example, using a peeler on a carrot to show that it's in use. This is an easy way to help the customer know what the product is used for when adding styling to your product is important not to distract your customer with unnecessary objects . Sometimes it's better to have your product on a plane sweet backdrop rather than unneeded distractions. Another tip for selling is to keep your photos constant with your brand. If you're adding extra props, make sure they're relevant to your product and your brand. In the next lesson, we will be talking about photo editing tips.
9. My Own Products/Ending: Okay, guys, it is our last lesson. So before I go, I kind of want to show you some of the work that I do in some of my websites. I'm just going to show you this one. But some of the product photos that I have taken Ah, I hope you guys can look at this and possibly use it as an example, and you can see just some of the product photos that I have done. So as you can see the crisp white background, this product photo I remember, was difficult in the first place just because it was kind of transparent. So I was pretty difficult to work with. But as you can see, there are some other product photos. I try to incorporate as much white space as I could because a lot of the social media's and a lot of the other websites that you're using preferred having a clean white background. I know specifically Google Shopping really prefers to have a white background on products, and that's probably why my store does so well with Google advertising. Another store, like Amazon does require your product photos to be white with the background, says you can see this product. I remember this one was also difficult because you are taking a photo of a white object against the white background. But after time, you'll get more experience and you'll get better at it. So I'm gonna try seeing some of the other products, and hopefully you guys will be able to learn from it. Um, some of these photos I did not take some of these photos I did get from my wholesaler and my suppliers, Um, let me actually show you this one. So I did take this photo and this photo in particular was kind of weird. It was hard to photograph a dog leash, but what I actually ended up doing was taking a portrait photo of my dog and with a dog leash. But I was actually able to add some white borders, so I think this turned out pretty well because it still is a portrait photo, but it's still matches the square photos. Um, with all the photos on the website, one thing that I really want you guys to pay attention to is when you're taking your photos and if you sell a lot of the same product really spend some time on these product photos? I know this one under particular. I've sold many units off, and I think I only I only have one left. So I spent a lot of time when I was taking these photos with editing them and getting all the backgrounds off. But once I was done doing that editing, I was able to sell many and many of this one product. So it's worth spending the time up front to do the product editing so that they'll be able to get return on investment later on. So if that's the one word of advice that I can give, just spend some time, makes you focus on it. If you need to re watch this lesson feel free to. This course is my first, So hopefully you enjoyed it. But there's a lot of things that you can learn from it. And yeah, I hope you enjoy this course. If you can leave me a review, that would be awesome. If you want to check out my online store or my YouTube channels, I should have those linked Ah, thank you so much. It's been a pleasure and have a great one
 James Morelan, Hello, I'm James.