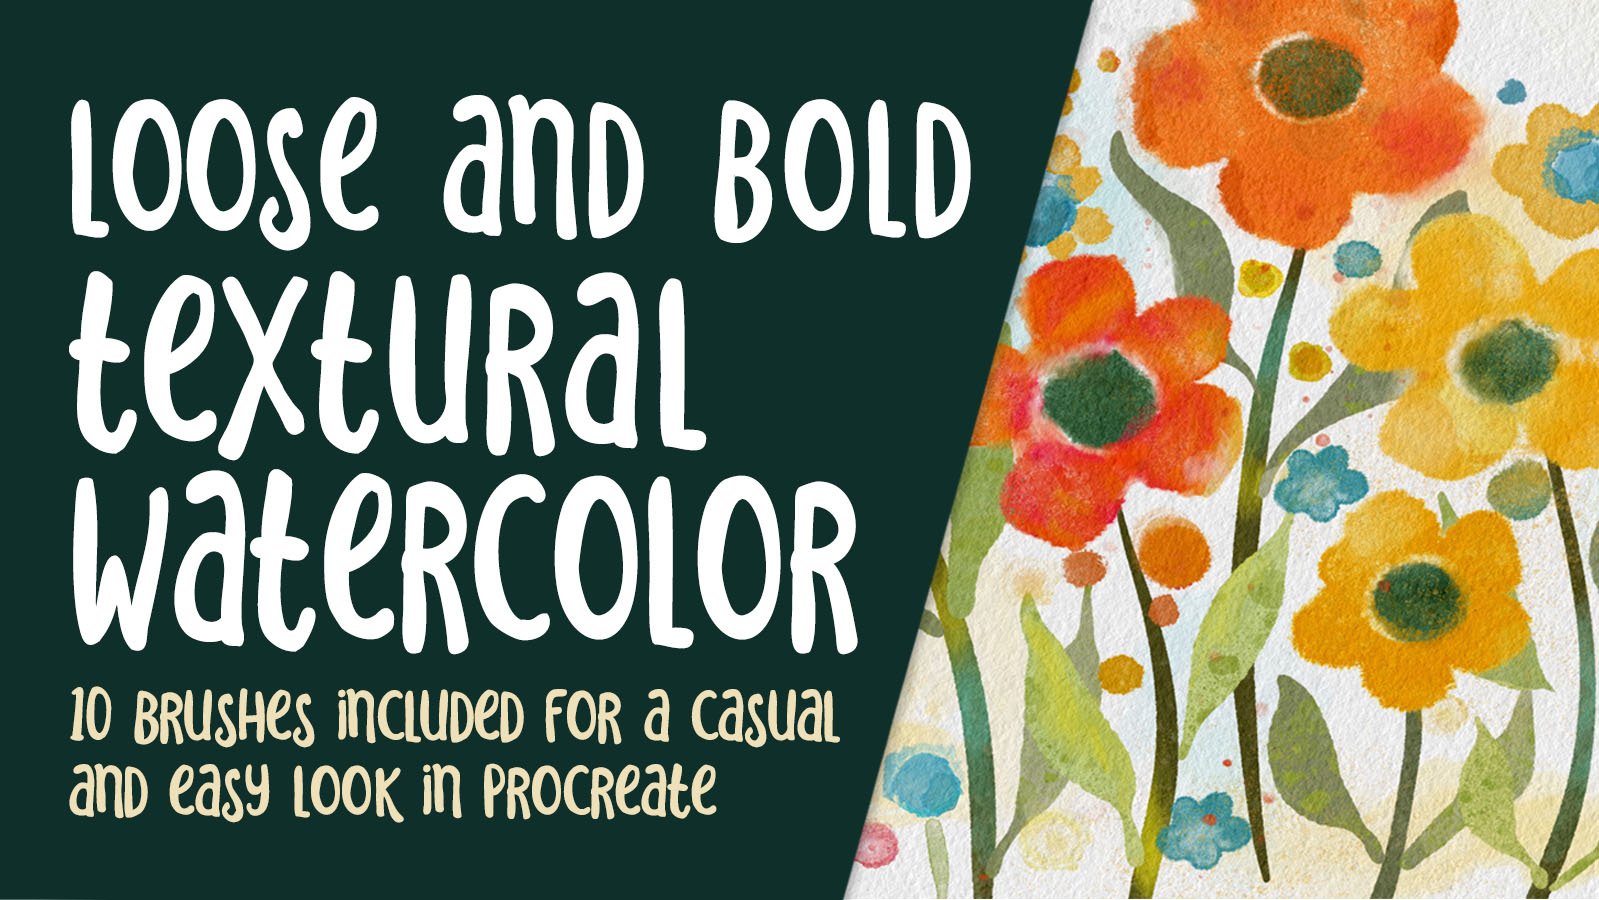
Transcripts
1. Intro to Procreate Watercolor with Stencils: Hi guys and welcome. My name is Dolores nascar
and I'm coming to you from sunny and cold Manitoba. Today's class I'm
bringing you will bring some sunshine and
spring into your house. At least I'm hoping you will. We're going to be painting
some watercolor flowers. Before you flinch. I just wanted to tell you
that I'm gonna be showing you some strategies that
even if you can't draw, you're going to be able to
get through this cheating. Heck, no. This is just a strategy that graphic designers have
used for ages and ages. And I can attest to that
fact because I've been a graphic designer for 40
hears if you can believe it. I learned early on that sometimes we need a little
bit of help and that's what I'm gonna be showing you is some techniques to help you
with the initial drawing. My last class, I
taught you how to create mixed media
art using stencils. And we're basically going to use the same process here today. Once we have the
stencil created, then we're going to add all of the really painterly
watercolor locks. And I've provided a bunch of different resources for you
to use to get to that end. You're going to have
everything from brushes to backgrounds. And I'm gonna be
showing you how to add all kinds of details like textures to make this as
realistic as it possibly can be. We're gonna go through the
process from start to finish. So we'll start with
creating the stencil. And by the end of it,
you're going to have a complete full watercolor
piece that is very authentic. It is detailing. Does that sound good? I hope you're interested
in my classes and I hope that you
liked me as a teacher. And if you do, I
suggest that you hit that follow button up there. You can wait till
the end of class to make sure that you like my teaching style and that I
don't go too fast for you, but I do have a suggestion. If you are running
into the problem of me speaking too fast or you just can't catch everything
that I'm saying. There are two things
that you can do. You can slow down the speed and that can
be done in a browser. And you can also go to the transcripts and you
can print off or even just have on a sidebar or a notepad the information
in written form. Sometimes that's very helpful. Now if you have any
questions at all about any part of the process, be sure to post it here in
the discussion section. If you're running into trouble, That's the best way
to have me help you. And it always helps other people if they hear the explanation
that I'm giving you. So don't hesitate to
ask questions at all. Are you ready to get into this? Alright, let's get to it.
2. Sourcing Photos for Stencils: Hi guys, welcome to lesson one. Lesson one here
all we're gonna do is discuss the sourcing of photos that we can use
to make our base stencil. I'm gonna be explaining the whole process as we
go through this class. The first part of the process
is definitely finding good reference.
Let's get started. So there's a couple of
places that I go to when I'm trying to find a good photo to use
for use in my artwork. And one of them, of
course, is Unsplash. I've gone to this site
before and showed you. This is a site that
has free resources. The important thing is to
remember to cite your source. So be sure to, if you are posting a picture
or using a picture in your artwork by one of these photographers that you give them some credit.
It's only fair. Now, for my intents
and purposes, I must say that I'm
not too worried about the licensing and what you
would call appropriation, I guess from another artist. This kind of project
that we're doing here, we'll use tracing as
one of the techniques. And that's one of the things I, like I said in the intro. I know it's hard
sometimes to start a project when you
feel like you're drawing skills
aren't that great? And this is a strategy a lot
of commercial artists use. We have to often produce things. We're asked to draw things. We're not necessarily
all that comfortable with drawing or something
that we haven't drawn before. We would maybe
struggle and spend a lot of time doing a drawing. And in this case, I think tracing is
not going to be an issue because
all we really want is the overall shape of a flower in order to
create the stencil. So it's up to you. Of course, your ethics are
going to decide for you whether or not it's okay
for you to do a tracing. But if I did a tracing of, let's say this yellow
sort of sunflower Daisy, I guess it's a sunflower. It's by the time I'm done not going to look
at all like this. In the examples that I
produced for this class. For example,
something like this. I originally traced
these flowers and I'm going to show you the
image that I use to do that. And I've done some things like
manipulated the shapes and move them around a little
bit once I have them drawn because sometimes
when you do trace them, you're gonna find that
your shapes don't look quite right and you do
have to do some adjusting. So I feel completely justified in saying to you it's okay
in this case to trace. Alright, so that was just a
quick little ethics lesson. What I have done, I'll show you here is
started in new document. Actually, this is the
document where I did do a tracing and probably can't remember what
flower that is, but maybe I have it in my
gallery or in my photos. So I'm going to just take a
quick look there and see. So open up a
document ten by ten, That's gonna be our source
to create the flowers. Ten by 10300 pixels per inch
is a standard that I use because I find that I can create really high-quality
Sharp Brushes this way. I think you can go up to five
thousand, three thousand. I have found to be more than
adequate even when enlarged. The next step would be to insert a photo and let's just
scroll through here and it passed my Florida
photos and maybe I can find one of the
photos that I've used. Let's use this one
as an example. Now you want to try to find photos that have the
flowers kind of separated. So chances are if
I use this one, I might not use that flower
in the background there. So I would probably just
be tracing out the shape. One thing I really like on this one is these little
stamens and things. So that would be
something that I would draw and create as
a separate brush. I'll show you the brushes that I have created for this project. This is one flower
silhouette brush. This is a second one,
and this is a third one. But I've also created some of these little
groupings of stamens. So you may find the stamens are fantastic on one photo and really hard to kind of figure out and draw with some
of the other ones. So I'm always looking for sort of separate
pictures that are good for statements and separate
photos just for the flowers. So that would be one that
would be fairly easy to trace. Let's take a look and
see if we can find another one in my eye
was first of all, I'm going to show
you this one here. This is, I would never trace this because this is
another artist's work, but this is the file that actually gave me the
inspiration for this class. So that's something two is go and find some
inspiration if necessary. I'm going to give you
a ton of it today, but if you find something
that you prefer to use, then definitely have it
there as a reference. So I'm just gonna
get rid of that one. Just take a look again here. The other thing I like about
doing these watercolor ones, and I think this is one of the
ones I actually have used. That's probably the
one I was showing you. But one of the things
I also tried to find is flowers that have really big and wide petals
because that gives you a lot more room for creating the watercolor
look that we want. And then what I do is
I enlarge it to fit. The image area is as
large as I possibly can. That way I'm gonna get the
best possible tracing. And yes, I know this is
the one that I use because I drew those little
statements there as well. So that's what this
grouping is, that one here. So like I said,
we're we're tracing, which normally I
would say is a no-no. But in this case, I think it's okay because of the way we're going
to use it finally, so that one was
possibly this one here. No, it was this one here. So this is the brush
that I created. Let me just stamp it in
white so you can see it. It's gonna probably
be too small, but you can see that grouping is basically that right there. How did I not told you? Would you have known? Likely not and you'd
likely could never find that photo very deep
in the internet, even have that ability
to compare it and say, Hey, that's an idea that somebody else had
you're stealing. I think we're justified
in tracing these to use for our next step
in the next lesson. And that's exactly
what we're gonna do. We're gonna start
producing the stencil. Alright, I will see you there.
3. Producing the Stencil: Hi guys, welcome to lesson two. Now that we've ethically
sourced photos to use for our project, I want to show you how
I create the stencils. And don't worry, you will
be changing this so much that you'll never run into problems with copyright
infringements. Ready to get into it. I've kept this picture here because I think this will be
a really good one for creating the stencil. I've got it on a layer here. On my ten by ten document. I'm going to add another
layer and I'm going to switch to black for my pen. And the pen I'm going
to use is one of my favorites that I
use all the time. My tapered pen pressure brush. I will supply that to you. If you've been in
my other classes, you probably haven't already, but just in case I'll
throw it in there. Let me just do that right
now before I forget, when you've got it pinned
here in your recent brushes. And you want to locate
the actual brush, you can just go to find here and it'll take you
to the actual brush. I'm gonna duplicate it and I'll slide it into that
set right now. I've got two here, the
tapered pen pressure brush, and then I forgot I've got
this line will cut rough edges brush already put into
this set for you. And I'm going to
actually use that even though I told you
just now about this one, this one I like because it's got a rough edge and I'll show
you that in a minute. And that actually
lends itself well to creating the watercolor
look that we're after. One of the things I also
do is I usually lighten up my image just by reducing the opacity and
I'm going to turn that one off so we can't see it. One of the reasons I do
that is because I've so often thought the picture and started tracing and then realize that I'm not
on another layer. And the main reason
is because I can see right away that this is
not an opaque black brush. So I know I'm on
the wrong layer, so I would undo that. Then I go onto the new
layer and then I can see it's a pure black brush. So you can see the
texture on it, the edges a little bit rough. And that's a really nice look for watercolor
because watercolor, being painted on usually
very textured stock, does tend to have
kind of a rough edge. At this point really
all I do is I trace just the outlines with just the shape of
the flower itself. I don't go in and put in
all those extra details that I would if I was creating a line art
version of the flower, I usually go through all of these lines
and things as well. I'm not gonna do that because
what I really need is just sort of this
outside periphery. As you are tracing, you can also be kind of
changing the petals. This a little bit. So that
was a little extreme, but I could be changing
the shape of the petals. And that's another way to mitigate that toll
tracing kind of a dilemma that a
lot of us artists don't love to admit that we do. Now, when it comes
to watercolor, a lot of times separate flowers are separated by a little
river of whitespace. So that's something
to also keep in mind as you're
doing this tracing. So here I might do something like this
so that the flower, the next flower could
then be separated. And that's so that the
watercolor doesn't run between the two flowers. Now there are a lot
of instances where watercolor does run between
two different flowers. And that can be something that you add just to
give it a character. So that's totally up to you. One of the things that
I remember doing when I was fixing up the stencil that I was drawing is I relocated that pedal
a little bit because I've kind of thought
that it looked like it was off once I went to use it. So I had done a bunch of
alterations after making it. So at this point I know that. So I might as well just
kinda change the shape or the position of that petal
right at the get-go. Pretty much. You just go through and do
a fairly quick tracing. You want to keep
it fairly casual. Now in a case like that, you saw that I ran
into that other petal, less just do it that way
for this particular spot. And I'll show you a way to get a nice River up
white in-between. And I'll do the same thing here. So as you can see, I'm sort of following
the flower, but not, not
absolutely perfectly. I've got my four flowers there. I'm just going to drag and fill and make sure that you
check when you're filling, that you're not getting a
little bit of whitespace. Like if I had this only
at about three or 4%, you would see that little edge, the jagged edge of the brush, but I've pulled
to over 50% here, and then it feels nicely without leaving that little
jaggedy inside line. So I've got four flowers here. At this point, you could
choose to keep it exactly like this or you could do
that river of whitespace. What I usually do
here at this point is fill the background
with white. Now if you look at it
in the layers panel, you can see that it is solid white in the background
and not transparent. And then here I would change, I will keep the same brush, but I would change
it to be white. It is actually just set it white because that's what I
just used for filling. And then I could go
in and just kind of draw that river of
whitespace in-between. So if you've never painted
with watercolor before, you may not have ever heard
of something called brisket. First kid is another
thing that helps us to create these
rivers of space. And that's a painted on
sort of a plastic key, almost like rubber cement. You can even use rubber cement
to do these little rivers. After you've got, let's
say a pencil drawing, you would have these
little overlaps that you could mask out with
the first kit. So you would paint
that little strip on. Once it's dry, then you can
actually peel it right off. And then your watercolor is left without the paint's
running into each other. At this point, usually what I do too is take a look at it. Am I happy with it? Do I want to make any changes? I'll go back to my black
and maybe on this one here, I'll just kind of fill
that one out a little bit. I might take white and increase the depth of these little
bits here, make them wider. Those are the kind
of things that you could go through and do. Just be sure that
when you're doing it, you look around and you make sure everything is consistent. This one here, it
might be just a little bit too crazy too. So in a case like that, we go in and fix it. This is another one
of those things. That's your judgment call, but the way they are right
now will be just fine. I could do something
like this where I select one of the flowers actually selected with
the automatic selection. So I just get the flour three
finger swipe down to copy, three-finger swipe
down to paste. Now I've got a duplicate of that flower that if I wanted to, I could use to make this into more appealing
sort of grouping. And of course now it's
on its own layer. So I merge it down
and go back with the white and just kind of increase that little
river of space there. There's a perfectly usable
grouping in order to make it into a brush if
you want to use it in the same way as we're
going to do it in class. You can three finger
swipe down and copy. You could duplicate any one of the brushes that I've created. So maybe this flower bunch
three I'll duplicate because technically this is the same flower bunch
that I'm using. I would go in and change
it, change the name of it. We're going to shape,
going to edit. It looks almost exactly
the same as what I had there before I
added the fifth flower. Here, I would go and paste. And now I've got this
five flower groupings. So that is how simple
it is to create those different brushes that you're going to
use as a stencil. I've walked you
through that process now you know how to do it. I'll, I'll be giving you
this brush tool and it's actually going to be
number four here. So 1234 for the flower bunches. And I think at this
point we're ready to start doing our
watercolor composition. So let's start that
in the next lesson.
4. Using the Resources: Hi guys, welcome
to lesson three. Less than three here
I want to explain all of the different
resources that I've included. Mainly those are brushes
and brush settings, but we'll cover a
few things here. Let's get into it. Okay, So we've created
our brush here. Now we're ready to get
into the actual painting. I'm going to use a 12
by eight document. At the moment, there
are no layers, but what I'm gonna
do is switch two. I'm gonna do it. It's kind of
a light gray or light color for you to be able to see. I end up actually
wanting pure white, but I'm going to
just stamp it right now in a darker color just so that you can see
the layout, so to speak. Right now, I've just
stamped it in the middle. You can make adjustments
for positioning or sizing. If you want to go
bigger, you can do that. My document is 12 by eight. The brushes come out really
nice and they've got that little bit of a texture that we want for this project. Like I said, I normally
have this as white, but it will be a little bit hard for you to see what's going on. If I do it in pure white
right at the moment, I'm going to show you
the whole setup first. So what we do now is create
this to be like a stencil. We did this in the last
class that I posted, which was creating mixed
media art in Procreate. So consider this
to be a stencil, but basically what it is
is the base layer on which we will add another layer
that will be a clipping mask. And we do the clipping
mask so that we can do the watercolor painting
on this alternate layer. But it's only going to
show up on the flowers. So if I was to take the watercolor brush that I want to use, I'm
going to go darker. So you can see, as
I start painting, you can see that
it's only going into the areas that are
designated there in pink. Of course I want to
change that to white. So I'm going to go in here and I'm going to select
the layer new, change this to white. And then I'm gonna go back
here and feel the layer. Now it's white. At the moment, you
can kind of see a little bit of an outline. They're not gonna get rid of that because that's
on that layer, the bottom layer anyways, and we may be able to use that
for something else later. I'm gonna talk to you about that towards the end of the class. But now I can go into this layer here and I can start
doing my paintings. So now you could choose
a color palette. And I personally recommend
that you stick with a fairly basic palette
that has just a lot of different values and
tones of those two colors. Let's go with
something like, Well, we'll do it like this just
because I think that this is good palate for
flowers and it's also going to show you quite well. It's gonna be nice
and contrasty. So you can see at this 0.1 of the things I would
recommend is that you have, besides you some sort of
a reference you can use that you might just be able to draw some
inspiration from it. Remember, I had that one image. What we can do here is go to
Canvas and go to reference. And then I can import an image. And that one that I
had was this one here. So we can move that reference, we can make it smaller. We don't even have to have
an onscreen all the time, but that'll be a good
way to kind of take a look at how some of
that watercolor works. And you can see here that there
are light and dark areas. There's quite a bit of contrast. There's a lot of
different colors for different tones of the color that had been dropped in there. So let's start with a mid tone, and I've got two basic
watercolor brushes here, the regular watercolor and
then the dark texture, which is just a different
version of that same brush. So let's go nice and
big, which we are. And let's just start laying down some of the basic
color that we have. You can see that if
I lift my brush. So in that case, I lifted my brush and the second time I went down with it, it kind of just darkened. And I like that effect because I think that that looks quite a realistic or something
that could happen to you when you are doing
your watercolor painting. And you can see
here that there's a lot of built-in texture. I've already got the brush
with those textures in it. If you go to the green, you can see the texture there. This is a dual brush. So there are two
textures at play here that really sort
of watercolor look. And then this one was
just more of a texture. So you can go in
and affect those. If you don't like
the look of them, you can reduce or enlarge
the grain based on your own and sort of look that
you're trying to achieve. I would go through and
draw the flowers and you could switch colors at a
certain point like this. You could go a
little bit lighter sometimes actually what I do is I grab that and how both
of them on the side here. I find that that's
handy so it's easier to get up the changing the colors. And like I said, I'm
just being rough and loose with it because I think a lot of watercolor these days, that is the style. You can see that these darker
kind of blotches and blooms that are put on there are kind
of mistakes but then not, you know, I'm going through and adding what I
consider characters. So that's what I call it. You can also go in there and grab something like the
course texture brush here. And you can choose to keep the same color or
you could go to a lighter color to start
with almost like it's erasing away because
I've got a white paper. But this is another
thing that's also really inherent in
watercolor paintings. That sort of, I don't know, what you'd call it
a casual sort of a look at is what
makes it so appealing. So this is something you
could do to add texture. Now if you wanted to do some blending on
something like this, you could go to
your blending tool here and choose the same brush. I could go into
the brushes OSAT, use the coarse salt texture or any one of the
other brushes here, even the one that we
were using originally and use it to do
some blending here. So I blend more. You can see that hard
edges are disappearing. So I'm able to get that to
sort of blend in a bit more, but don't do too much of that because it's
actually really nice to have that
extra roughness, you know, that, that casual
sort of a feeling to it. Now this lesson was
all about using my resources that
I've supplied here. So we're gonna move
on from this part of the composition to work on, let's say the backgrounds. One of the brushes
I've included here is regular dark
texture watercolor. That's a good one
for doing leaves. So you could go in and just grab a color that you
think would be suitable. And I'm kind of looking at this one here and I'm thinking, yeah, That teal is sort of nice. So I'm gonna go with a bit
of a teal color for leaves. And of course I can't paint it on this layer. You
see what happened there? I did a little stroke, and of course it's
hidden because it's being protected because
this is a clipping mask. So I'll undo that and
I'll add a new layer. That one's not a clipping mask. But now you can use the
provided brushes to do things like create
stems or leaves. Now, if you're not
super comfortable with doing this kind
of free hand drawing, you could use my leaf brushes
that I've provided as well. I would also try this
line will cut brush because I've got
this one set up so that it's got some
real variability with the weight
that you put on it. So if I press really softly, I get that point
and if I push down, I get that fatter section
and then I ease up on the pressure and I get sort
of your little stem piece. That's another way
that you could use these resources
to draw your leaves. Third possibility is brushes
that I've created here, and these are scatter brushes. These are the ones that I
did use in my compositions. They are very easy to use. You simply paint with them
and you can see what happens. They scattered the
leaves for you. So that's another look
that you could go for. And of course, this
layer you would have down here at the bottom. I combined usually
I went and did some of these as well because this has that same
type of brush. So you could throw
in a few leaves. And this also can be painted on. You can see that they
switch positions each time. But if you want to have a little bit more
control over that, then you might want to add a
new layer, brush the leaf. And then before adding anymore, you can move it around to
wherever it is that you want. So add a new layer. You could do maybe a couple
on this other layer and add a new layer and do another
one and move it around. And slowly you're building
up that background. Now these can have that same effect as this by adding a
clipping mask to them. So this one here, if we were to add a layer
and create a clipping mask, we could actually select this one and let's
switch this to white, go back to the
layer and fill it. Now it's filled with white. You can, you can barely
see it there it is there. You can see that just
very fine outline. But then you can
take your brushes, make sure you back to
the clipping mask layer and paint your picture. I'm gonna switch more to this color. I think
I like that better. So you could do the leaves in the same way as you
did the flowers. And remember to go in and add
texture and stuff to them. So I've covered how
to use the resources, everything for the
flowers and the leaves. And then very last
thing would be to use these little brushes that I created for stamens and whatnot. And those are another
thing that I would recommend that you do
on a separate layer. Let's go with that green there. And I would paint one on
and then position it. You could actually go in and
put five of them on there. You can see that I've
got the brush set up so that every time you stamp it, It's stamps in a
different direction. And I've also got
two versions of it. They're slightly different. So that can also work to
give it some variety. And I don't think I
would even really need to change any of these, but if I did want to,
I could just go in. And in this case, I'm gonna
use the freehand selection, get my uniform selection here, and do the rotating. Or I could even flip it, which also is a method to make it look a
little bit different. So unless than
probably ten minutes, you could have the
basics of your design. Now we're gonna do a lot
of adjusting to this. When I'm off camera, I
might do a little bit of color changes to the leaves
because I think I want to go back to this palette. But we'll do that. And then I'll do that and then I'll meet up with you in the next lesson. See you there.
5. Painting and Erasing to Create the Watercolour Look: Hi guys, welcome to lesson four. Less than four here we're
going to continue with the painting and texturing
that we talked about. I'm gonna be showing you a
bunch of different things that I've done on
my painting here. Just to make it work and
make it look up benthic. Let's get to it. Before starting the other
one that I want to show you, I'm going to finish the
other one I should say. I wanted to show you this one
which I consider finished. And I want to point
out a couple of the different things that we're going to do
in this lesson, just to bring the other one
up to this finished stage. You can see here I've got
kind of two groupings, basically of the same
flowers down and I had them on separate
layers originally. Way back here, I had the
separate layers and it was the same flower grouping
and I think I just rotate it tucked in behind. That gave that added
sort of requirement of putting a shadow in here. I could have separated it, like I said before, with the little sort of river of whitespace or release
of whitespace. I chose to do it
differently for this one. So that's just another
option available to you. You can also see
here that I've done a lot of softening of the deep, sort of coral color
that I have there. I'm gonna show you some
methods for doing that. I added some detail here in the middle below
these statements. These statements, I think I drew one real quick and then I
duplicated it and rotated it. So these are all identical. You wouldn't really know it unless you took a
really close look. But basically it's the same
idea in just in this case, I had the drawing I hadn't
made into a brush yet. Advantage to that was that I had some of that color
on the same layer. I guess it's an advantage or
it could be a disadvantage having that dark
brown in behind that, Stephen, I hope I'm
saying the right thing. Stamens, I think
that's what they are. I had done kind
of a softer color in behind them originally. Obviously, you can see
I brushed in some of the darker color as well as adding the darker
color with these. So these are all
things that you can do as your working your way through and trying to make this look more and
more realistic. In this case, I just used
hand painted leaves, so I'm going to maybe give you a better demonstration of
the hand painting of leaves. It's one of the options. So if you want, you
know, this sort of more casual painterly look at that's the way
you want to do it. If you're okay with the sort of harder edge flowers
here are leaves here, then you can use the
ones that I've provided. I provided those just
so that you have an option and I would
suggest you try both. Think about how you want
your final one to look. This is gonna look
way different than that one I just showed you just because of adding
believes done in this way. Now I'm looking at
the leaves here. I've changed the color,
but I also would like to change the positioning
on some of them, like this one here. So I've just isolated it and now I can just move
it somewhere else. And we haven't done
any work really on adding texture to some
of those additional leaves. So let's do that real quick. What I would like to
do here I think is to put them onto
all onto one layer. So I'd like to change
these to be white as well. So I'm gonna start
by doing select. I'm going to put my brush to white and I'm going
to fill the layer. And then the same
thing with this one. Select. And all it selects is whatever
is drawn on the layer, it doesn't select
the background. And then there I would also
fill, oops, select Fill. And then let's do
this one as well. So select Fill and all of these white ones
here I'm going to put together so I'm moving
them closer to each other so that I can do that
three fingerprint pinch. And now you can see that some of the green is still there. Same with this layer here. I'm going to move that layer and we can see some of those
a little bit better. Actually, I'm going
to temporarily hide that one and we'll see if
we're going to use it at all. I don't think I want to actually combine it
with this layer. I thought of doing that,
but I think I won't. And on this one I'm going to add that extra layer and make
it into a clipping mask. So now I can go in and
actually just paint those. I'm going to use that
regular watercolor and grab one of
these colors here, make it nice and big and
you can barely see it. I'm sure there is a very slight outline there
from when I did the fill. I can kind of see where
those leaves are then I'm needing to be working on. And you could even
just sweep across your whole screen to get
all of that color on there. I'm going to get rid
of that layer there at the moment because we're not using it anymore as
a clipping mask. And I'm going to brush in a little bit more
on the leaves here. And then remember
that you've got that ability to build
up your paint so you can go in and darken areas of it like this
if you choose to. On this set here, I want to point out there's two different blender brushes. I'm going to use this blender because it's got a lot
more texture to it. The first one is more of an
overall watercolor look, and the second one is more
targeted sort of texture. And with that, you can go
in and do some blending on that second layer of
green that you applied. So as you lift your brush, kinda starting over
each time and I liked that you can't just
do a continuous blending, it doesn't really work. So you're lifting a little
bit as you're doing it. Now with this one, I would also add maybe one
of these other textures. I'm going to add the course. Salt texture. Let's just change the
color ever so slightly. And then you kind of see that salt texture a little
bit more prominently. Now, we've got these
on their own layer, so we haven't done that
little river of whitespace, but I think it's
okay. It's up to you. You could go in and erase if you wanted to or mask out that area. But I think for the look, I'm after it's
working just fine. Now I'm gonna go to this layer, add a clipping mask, and I'm going to go in
and paint this time maybe I'll try this darker
texture in some. You can change your
color throughout so that your leaves end up
having a bit of variety. And look how quick
and easy that is. I mean, it's a real
watercolor look happening without a
whole lot of effort. Now we can also add some of that salt texture to some of
these that we just painted. Maybe go a little bit
darker in some spots. And the other thing
you can do is go to a pure white and paint some soften edges because that's something you do see
in watercolor a lot too, where you've got paint
not really opaque at all. So I'll go and do that on some of these
bigger leaves as well. What that also
seems to do is give that illusion of
texture at the end, these were fairly sharp
edges and this is something that does a great job of giving you a little
bit of variety there. Now the other thing
I really find with watercolor that makes
it look realistic is having kind of pulled
and darker areas. So edges that are darker really add to that illusion
of pooling watercolor. I'm going to try this
regular watercolor and I'm gonna go in really dark. In some areas, you forgetting
which layer I'm working on. I think that some of these almost like flaws
that you're putting into it are what make it really look like authentic watercolor. So try out all the brushes. It's kinda figure out what works the best for the
look that you're after. I would suggest definitely going back to floral watercolors, maybe in Pinterest or just
Google search it and just see what sort of
look that you're most attracted to you and
that you liked the best. That's what then
becomes your style. I'm gonna go into
these flowers again. I'm sampling the colors so
I get that darker pink, which of course is
here in my palette. I can actually select
something really dark like this and
do some areas. And you're gonna
find with my brush to that because
it's a dual brush. As I apply deferring Of
amounts of pressure, I can get these little
hard edges that looked like authentic
watercolor blooms. So maybe I'll go a little bit lighter or a little
bit darker than the color that I sampled and just add some
of those blooms. But you could take
the exact color and it's still going to give you
that sort of a bloom effect. And then let's go quite dark. Blue book quite small. And then just in some areas, add a little bit of darkness. And it would make perfect
sense to have darker areas along something like that
where it would be underneath. And if it doesn't blend
in as well as you'd like, go back to one of those blenders and use it
to lighten up the area depending on the color you
choose here can also be used to add some of
that detail in there. So let's choose sort of an
intermediate pink color. This is the blender, remember, and let's go a bit darker. You can see that if I just tap, I can kind of get just a bit of a texture bloom showing up and adding some
authenticity to it. Now if I go back to
the lighter color and I use it for blending, I can blend out any hard
lines that I didn't like. I think there we've
really accomplished that goal of giving
dimension with shadow. I'm also going to add
some shadow in here. So I'm going to grab one
of the darker colors. And I don't know if
this one will work, then I'll go to the
dark texture brush. And here I just wanted to add some real depth by building
up the shadow area. You can go even darker. In some cases, if the flower
is darker, for example, that might be a
time to bring out a darker texture and blend. If necessary, you can go
into the brush itself, go into the grain, and reduce the grain, which will give you
a smaller texture. I like how the light
and dark areas really start to
make it look like there's some real depth there. And I will meet you
in the next lesson.
6. Adding Leaves with Alternate Methods: Hi guys, welcome to lesson five. Less than five here
we're going to continue adding authentic
watercolor detail. Let's get to it. So
I've taken a lot of time to demonstrate that sort of addition of detail
to my different motifs. I want to go back to
painting leaves and stems. So I'm going to grab that
regular watercolor brush. I think that's the
one I was using. And let's go into I'm not
sure what this layer was, so I'm just going to clear it so I don't see
anything there. And we're gonna use that one for drawing some additional
stems and things. Now this brush here I really like the regular
watercolor brush, is a really nice one for doing these little swirls and
branches and things. If you look at it real close, you'll see that it has
really nice built-in, sort of wet edge
or pooling edge. And it has great watercolor
texture in there. You don't have to
do anything at all. And that brush will give
you great looking details. So if you wanted to go in here, and instead of using the leaves that we've
got on this layer, paint in some of your own. You could definitely do
that with this brush. Remember that if you don't lift, you can get the color to blend. If you do lift and let go. When you go into do some
additional color or fill, you're going to get that
kind of a buildup of colors. Just maybe practice with that a little bit
and just kind of get into the habit
of maybe drawing the outline and then filling in. I also liked that this brush has already kind of rough
watercolor edge to it. Now if you wanted to, let's say sharpen up that leaf. That was the first thing I saw when I finished painting it. I could go in with my eraser. I could choose that brush, which is the regular
watercolor brush. And then that's the one that I would be using as an eraser, of course, because it's a
bit of a buildup brush. You see that when I'm erasing, I'm not necessarily
getting all of the color off of there because of the
way the brush is built, you might have to go back
and erase a couple of times, but I do like that. You can use this
brush to get some of those irregular edges that
watercolors do end up with. So you could go in on this leaf, Let's find it here. So that would be this
layer and this one here. And you could do some
erasing with that brush. Let's go quite a bit
larger and create that sort of soft edge that
a lot of watercolors have. Now that outline
there is something that I would have gotten rid of. So what I would do here
is select that layer, go to hue saturation
and brightness, and then go to full brightness there and you're going
to lose that edge. Reason I had left it there
was just so that we could see a little bit when we were
working on it initially, now would be a great time to
get rid of that completely. So you could go through now and then use that brush
as an eraser. So the regular watercolor as an eraser and go
through and do some of, some of that sort of
thing like reducing the opacity on the edges. That gives a nice sort of authentic watercolor
sort of mistake. Look that makes
these watercolors just so pretty to look at. Same thing with this one here. You could go in and do
some erasing there to cap a few spots that have
kind of a lightened area. Now remember that you can also reduce the amount
like right now, it's erasing Fairly brightly. If you didn't want that, you could reduce the
opacity of it and it would do just a
really light erasing. The other thing. Remember
that that brush, if you put a little
bit of pressure on it, will give you that sort of an authentic pooled
watercolor look. So that's something
that you can do to add an authentic detail. And then you could
use that brush and go in and maybe even
darken some of these again. As we're nearing
completion on the project, this is a good time to go
in and add a little bit more of that sort of
look that pooled edge. And then remember about
that pressing hard to get what looks like
natural pooled watercolor. Know in a couple
of other classes, I've also explained a method
for getting a pooled line on the inside that is created with a duplicate
of that original layer. So we can do that here too. What I'll do is I'll
duplicate this layer. The one that's underneath
is not linked. So this one here, we could select it and let's pick a pretty
deep purple here. Go back to the
layer and fill it. So you can see here we've
got that deep purple color. What I want to do is make a selection with my
automatic selection. And you can see here
what I'm doing is I'm selecting the background. What I want to do is
invert so that it's the inside part of the flower
that's now being selected. And then I want to feather
it with the feathering. You can see what happens here. We're actually sort of
softening the edge. And then what we would do is a three-finger
swipe down and cut. You can see that we're
left with just in purple lines and they're
actually kind of fuzzy if you were to
look at them separately, let me move it off of this
flower so that you can see it's kind of blurred edge. And that's really great
because it really gives us that impression of pooled water along the edges are pooled pigment along the edges. And you see how I got it as a
clipping mask that prevents any of the fuzziness
to go beyond the line. If I was to undo
the clipping mask, you might see a little bit of
it come out past the edge. So I like keeping it as a clipping mask so it stays
within the edge there. And then that you can affect in every way that we've
just been talking about. So we could be
erasing some areas, just lightening up some of it. Fooled pigment would
not necessarily happen on every surface or every side. Especially if you've got some of these areas like this
that are lightened. So you'd go in and erase
on some of those that you have wanted to be a
little bit brighter anyways. So like that, probably
along this edge here. And then there might be some areas that
you'd want darker. And if you did, what you
could do is select an area. I'm going to just
select this area here. I'm going to go into hue and
saturation and brightness. And there I'm just going to darken it so you can see
that edge getting darker and you can even
change the color of it or the hue of it
slightly if you wanted to. So these are all different
strategies for helping us to really build up that
authentic watercolor look, turn these back on and decide whether or not we
even want to keep them. Throughout the process of
creating an artwork like this, you're always making those
decisions. Should I keep this? Should I take it out? I'm going to leave it. I think for now, I'm
gonna go back with my regular watercolor on that stems layer and just add a couple of other sort
of STEMI looking pieces. Press harder if you want
the lines to be thicker. This one is really sensitive to the amount of
pressure you put on it. So creating leaves with
this one is quite easy. You can even just
do it, like I said, by different amounts
of pressure, you could produce some pretty
authentic looking leaves. It might be good, Let's say
down at the bottom here, where it's almost
like a grasp that grows in with the flowers. Especially if you look
at my flower garden, you will definitely see grass. I could spend a few minutes here just kind of tightening
up my design. In the next lesson,
what we're gonna do is talk about the background. I think I'm getting pretty
close to feeling like I'm ready to put in a background that I'm close to
being finished. So I'll maybe do a couple of little tweaks behind the scenes, and I will meet you
in the next lesson. See you there.
7. Adding Interest to the Background: Hi guys, welcome to lesson six. Less than six here
we're gonna be adding some authenticity
to the painting by adding background details and
textures. Let's get to it. I've gone ahead and done
quite a few corrections or additional
details on my image. And I'm going to
show you how to do these little flower
buds and things. I just wanted to
circle around to our original inspiration
that we were looking at there to point out
to you how super casual these leaves are
and how really rough. A lot of those other details are like these statements
and whatnot. I'm probably tighter here
than what needs to be. I'm just pointing out kind of a difference or an
alternate sort of look that we've ended up creating as compared
to our original. I'm just going to
shut that reference off and go back to my
piece of work here. And I just want to
show you how to do one of those little buds. And it was really super easy. I used that regular
watercolor and I just sampled one
of the colors here. Let's go a little bit darker. You could also have gone into your palette or your disk
to darken the color. And what I did is I
just drew it very simply by just applying
different amounts of pressure. So I started off really light
and then I went heavier. And then what I did is
I just went over it and did a couple of
other layers to it. And I think that that makes
a really nice little bud. I think it is totally
in keeping with what we've got there is, again, one of those really
super simple things to do. You could still go back and add a little bit of detail
in a different color, for example, just to make
it even more intricate. And I think I'm
going to stop now. You're going to definitely
be learning a lot as you go through this and making a lot of these
images for yourself. So I don't think I need to go over and over what I've done. I might just add a stem
to that guy there. And I do find this brush really
nice because like I said, you can have a lot of
pressure and then just reduce your pressure and do a lot of different
things with it. So, and I think that,
that one works out nice. Now this lesson was gonna be
all about background though, so that's what I want to
start working on now, amongst the things that
I've given you here in the resources are some textures. One or two of them. I think these two watercolor
background or 12, because I should
number that one, are both just kind of a
wash that have been done on watercolor paper with blooms and all that
sort of thing. But it's also quite textural. So I'm going to
actually grab all of this stuff here and group it so that I can
shut that off for a second and show you these
different backgrounds. So this is the watercolor
background are number one. And of course you're
going to experiment with different sort
of sizes and so on. I'm going to grab that
and move it underneath. And let's just paint that
down so you can see it. So what this one has is a
little bit of a second texture, which is sort of like
crunched up wet tissue paper. So that's the one background
and the brushes super big. So it's really quick to
fill in the background. And this one I like because it's kind of a
color changing one. So I've got it set up. So even though you choose
this particular color, you're gonna get a little
bit of variation in there. And it's got some really
nice blooms in there. So that's something that
you can use to really give some authenticity to
your overall painting. Now, I mean, just,
you could stop here. You really could. But of course we're going
to do a lot more. One of the things I've
done too is I have, I'm going to undo that painting, turn that back on. I'm still on my
painting layer here. And you can kind of limit
where you are painting. You don't have to necessarily do the entire background
behind the flowers. You can get your brush
nice and small if you wanted to put a little bit
of color here and there, but it puts an overall
pattern on there, which is really, really, I think quite pleasing. I also like varying, going a little bit
darker and then in some spots to just kind
of adding a little bit, It's sort of shadowy,
kind of darkness. One of the things that
you'll see when you're using this brush is how much
texture it actually has. So that's something that you might like to use,
might or might not. I have also included in your package overall watercolor texture that you can import. So for that you would just
go to Add, Insert a file. And the file that you'll get is this 24 by 16 watercolor paper. I'm actually going to move
that above everything. And for that one will
apply prior Linear Burn. And if these burns will work or build-up like multiply works, seem to often end up
with this linear burn. So maybe I'll just
leave it at that. I'm going to lighten
it a little bit. And that gives an
overall texture. So even though there was
texture on the background, we didn't really have it on
the flowers, but now we do. So that's another way that you can add to your background. And I've got just a ton of fun. You don't sort of
additional details that you can throw in there. The spatters are always great. So again, I would suggest you
add a new layer for that. We can do a few spatters. Let's try something lighter. I'm just putting in
a light spatter now. Oops, I don't want that there. In fact, I might pull that
underneath my floral. In my floral layer
so that I'm not actually adding too much
to the flowers themselves, but you can see that that's
added a lot of rich texture. This is another one of
those really big one. So it kind of spatter
is everywhere. So you can decide on whether or not you want
that brush smaller. If you do go into your
spatter brush settings here, go to Properties and bring
that right down in size. You can mess around
with the grain. It's not gonna show much
because that green is really just showing up on
those individual dots. But now we've got
a smaller brush and maybe that one could be used for details on the
flowers themselves. So you might want to
have another layer in your flowers group that is going to be strictly for adding texture to the
flowers themselves. Then of course you can do that by making it into
a clipping mask. So I've pulled it down
into this area so that it'll clip to everything
else that we've got here. So I'm just adding a
little bit here and there. Let me go a little bit
darker so you can see it. But you can see that addition of a little bit of spatter
really adds to it. And there's three or
four different spatters here for you to experiment with. I like this one on
the background. So I would put that on that
layer here that we had made. And you can see that the individual dots
are a lot bigger. Let's go with a brighter pink. And I think that's
really, really pretty. I think that really speaks to this really loose style
that we're working with. Let's grab some of that
green and do that down here. So those are some of the
things that I would do to really kind of add
interests to our layout. This fibers one is
one that you can use as an overall
texture as well. I usually go with a
neutral color there, but we're going to
use blending boats. So let me take a nice
dark green so you can see it really clearly. So you can see all these
little fibers and things. And again, go into your
blending modes here. And a lot of times I
do use Linear Burn, Color Burn works quite
nicely for that one too. So you can still see a lot of those little
fibers and things, but they are a little
bit more blended in. And you can reduce the opacity a little bit on
that one as well. And if you feel like it's too strong or too heavy
in certain spots, you can certainly go
in and do some erasing and that's something that you
can do on all the layers. So maybe now that
we're looking at it, it's getting just a
little bit too dark. Then go in with a
really big eraser and do some erasing and spots. And that just adds to the overall looseness and
texture of our piece. I think the eraser becomes a really useful tool when you're doing a
project like this. I'm hoping that I've gone
through pretty much all of the different things
that you can do. Let's just want I may not
have reviewed with you, and that's just kind of a bloom. And let's go on one
of the flowers. Let's add a layer that's
still a clipping mask. And I'm gonna go with kind
of a bright color to see maybe at this point
we've built up so much that we can't
really see it there. Let's try it on that background that we created this one here. And that might be
just a good way to add a little bit of grunge. Grunge is also a very
good thing that looks quite good with these
kinds of layouts. If at anytime you could change
your brush to be white. And in some cases, it works nicely just as
a really nice lightener without being too harsh like
a regular eraser might be. I mean, we're at
the point now where we've done almost
everything that I could think of to
enhance the layout. One last thing that
I didn't touch on was these little stamens and things that you can add a
layer two and a clipping mask. And you could go in and add some highlights and
things to those. Try a little bit of a lighter,
Let's go for a lighter, pink know, maybe
greenish color actually. And just adding a little
bit of highlight like that can make these a little
bit more interesting. And you can add color
using lots of the brushes, even an airbrushed from the
procreate standards set, and use it to add just a little bit of
additional color in there. So remember that the base being black makes it a little bit
harder to see the colors. So if you wanted to change that, you could go to Select. And then let's say that's the color we wanted
to fill it with. Now we can go back to Phil. And that underlying layer now is more of a golden color
and that might be easier to then work on adding
highlights and so on to so you could add just kind
of a contrasting color. You could work with
white and black. If you go with deep shadows
at the bottom where it goes deeply into the flower
then highlights throughout, I mean, it's up to
you and that's again, another reason why
you can look at some reference to C. And
that reference that we had brought in didn't have
much of a variation in there, but it had a little
bit and you can see some highlights in that
middle part there. So I mean, that's something
you could do as well. Just a quick look at those
other ones that I have done. Just to show you a few
of the things that you probably now know
how to do really easily. This is a scatter brush, just like I showed you the use of in one
of the first lessons. I like it. In this case we haven't
added any stems at all. It's just sort of leaves that have dispersed
in the background. That's quite pretty also
in the background here. You can see I've got a
duplicate of this brush, so I've used the brush itself to add some interests
in the background. So we could go back to
this one, grab that. Any one of them really, any of the florals that I've got here and go really light, add a new layer and put them in, and then mess around with the blending mode and
opacity until you get just kind of a
slight suggestion of the flowers in the corner. And that is also a
really cool way to add some additional detail
just to make it interesting. So I've given you
so many ideas here. You're probably overwhelmed. I'm hoping that I
went slow enough so that you could catch
the main just a bit. At this point, I usually
take the time to reassess and take
a look at it at different angles and
different sizes. And maybe put it on a
mock-up or two just to see if it worked out
the way I wanted it to. But in those six lessons, I think I have showed you how I would go about doing this. Probably a few other
things I could do to really make
it more authentic. I think this lesson has
gone on long enough. So I will see you
in the last lesson.
8. Tweaks to Finalize the Illustration: Hi guys, welcome
to lesson seven. Of course, there are always
little tweaks that we can do. This lesson is gonna be about those little tweaks and how I've used them to improve my design. Let's get started
on this lesson. I just want to show you some
of the finishing that I did. I went through and added a few other little buds
here and there. And I added a lot more leaves and I made sure that every leaf, like this one which
just sitting there without being
connected to anything. So I added a branch. In this case, I'm not
doing that loose leaf kind of look that I showed you
from the other artwork. But like I said, a learning curve when it comes to working with watercolor. And I think you just
have to do this kind of experimenting at the
beginning to figure it out. I would suggest when
you're first starting out, when you first want to get
going with the brushes is to just have
another document, a blank document, and just
go through and practice with the brushes and just
see what they all do. You can get a good
look at it that way and you get a
feel for what your different weights or the amount
of pressure that you add, what each of these brushes will look like when you
go to use them. So do a little bit of practicing like that to start out with, take a look at each of
these textures so that you get a good idea of
what they eat and do. Some of them work
his brushes and some of them are just stamps. So check that out first before even starting
your project. Once you have your project
completely finished, what are the things I like to
do is go into the gallery, select the one that I've been working on and duplicate it, then go into the
duplicates and merge all the layers so you can
either pinch them together. Well, let's just do that. That's probably the fastest way. Or you might have trouble, like I just did there
where the blending modes don't translate once you have
pinch them all together. So if that happens, but everything
into its own group and then flatten the group. There's the odd time
like this where the blending modes
don't work properly. In a case like that, just
make whatever whatever adjustments that you have
to I'm going to undo that. And it was just that very
last thing that I added. Where it is. Here.
It is right here. So in a case like that,
maybe just turn that one off or instead of
a blending mode, put it back to normal
and just use opacity. Sometimes you just
have to deal with it, maybe even eliminate
it if it's a problem, I like flattening the whole
group because then I can go in and make some slight
adjustments to the curves. So I go into the
curves here and maybe brighten it a little bit or build up the contrast
a little bit. So usually for brightening, I pull that dot left a little bit and I move this one to the
right a little bit. And then you can also
fine tune it here by grabbing different parts of that line and just
adjusting them. So when you've got
things set here, you can use your double-tap
if you want to go back and triple tap to reapply. So I'm going back and
forth, undo, redo. That way I can get
a good idea of how my overall design looks. That's just one of the
little tweaks that I do to further enhance the
design at this point, it's fun to also take that and export it
to use on a mockup. So what I do here
is I go to Share, share it as a JPEG. I'm going to save it to my
files and to my class assets. I would have a folder here, save it, and then I can
use it on a mock-up. I saved it into my
last classes folder. I'll remember that,
but you can save it wherever it is that
you need to save it in order to create your mockup. And then I go and a switch to Photoshop
to create mockups. I have done mockups
here in the past, but they're a little bit
harder to deal with. I've got Photoshop on
my iPad and I can open up certain mockups and
make changes to them. But overall, I'm just so much more used to doing
it in Photoshop on my desktop that that's where I tend to go to do my mockups. So I'm going to do a couple
of those off camera, and I will show you
those in the wrap-up. Alright. I will see you there.
9. Outro: Well, you've made it
to the end, you guys. How do you like your
finished product? I'm sure it's just stunning. Sometimes it feels like it takes a while for us to really
pick up a technique. One of the best things I find is to repeat and repeat and repeat. The more you do a style or a technique over
and over again, the better you get at it, and the more comfortable
you get to using all of the different features in the brush sets that you buy. I don't know about you,
but I fought brush sets before and then not being able to fully achieve what it looks like the artist has been able to deal
with the brushes. Sometimes it really
is a process, even though the brushes
can do a certain thing. Sometimes it just takes
a lot of practice to get it to do the thing
that you wanted to do, takes time to just
sit and play with those brushes before you
even get into the painting. If that helps you as you go
along and probably produce a few of these stencils that you can use
over and over again. And remember what I told
you about being able to manipulate those
stencils and change them. And I'm sure you could use a lot of these stencils
more than once. The goal is to be
able to produce these artworks in an
efficient and timely manner. That's how you actually end
up making money with them. Once you have your
beautiful artwork, makes sure you try it
out on some mockups. I always do this
in order to just reinforce that I'm achieving
the results that I wanted. And it also helps to add typography or
any other elements. For example, doing a greeting
card with the artwork. That always helps to further solidify whether or not you've been successful
with your attempts. I also strongly suggest that
you do a lot of research. So checkout my two
Pinterest sites. I've got one Dolores, Dolores gas print and the other is teacher Dolores Nas Grant. You'll find some really great watercolor reference
in the Dolores, Dolores nascar Sprint site. And of course just do
Google searches and go onto Pinterest and just type
in floral watercolor. And there'll be some
amazing different looks that come up that you can then try to apply with the techniques
that you've learned today. Now if you like my
teaching style, you enjoyed the
class and you think you'd like to see
some more from me, make sure you hit that
follow button up there. That way you'll be
informed of all of my classes as I
release them and make sure you check out my profile
because on my profile you'll find the other 100 or
so courses that I have here. The more you learn about
a software program is, the more comfortable
you get at using it, the more comfortable
you are using it is, the better everything looks that you produce
in that program. So it's all about practice,
practice, practice. Repetition is the key. I'd really love to see
you in my other classes. And I love it when
you post your work, I love commenting on it. I love getting ideas from you, so don't hesitate to
do that at any point. We all start somewhere, so don't feel like
you're gonna be judged. I guess that's it for today again and I'm gonna
say bye for now, and I will see you next time. Bye.
 Delores Naskrent, Creative Explorer