Transcripts
1. Intro: Ever wondered how to bridge the gap between
efficiency and affordability while crafting a pattern designing workflow? Well, this class
will show you how. Hello everyone am. And my an artist and surface
designer from India, I'm so excited to welcome
you to this class, Procreate to Affinity
Designer Workflow. In this class, we will
explore the process of transforming hand drawn
motives created in procreate into stunning patterns using Adobe capture
and affinity designer. Don't worry if you're
not an expert. I am here to help you
every step of the way. We will start by taking those unique drawings
from procreate and converting them into vectors to make them more
precise and scalable. Using adobicature, which is a free application and you don't need a
subscription for that. Once we have our vectors, we will transition into
affinity designer, where we'll use a
simple diamond template to create stunning patterns. Trust me, it's easier
than it sounds. Throughout the class
I will share tips and shortcuts to make the entire process
smooth and efficient. Whether you are an
experienced artist or just starting to play with affinity
designer and procreate, this class is crafted for you. However, having a
fundamental knowledge about both procreate and
affinity designer will be really helpful. Overall, the process
of converting procreate drawings into
vector pattern is a simple, yet effective way to turn your unique artwork into professional grade
scalable designs. By the end of this class, you will be creating beautiful
patterns like a Pro. And I'm so thrilled
to have you on board. This is the third
class in this series. My goal is to save you the
trouble of searching through various workflows by
sharing with you all the pattern designing workflows that I have tried and tasted. By doing so, you will be able to speed up your creative
process and also experiment with a
variety of workflows before selecting the one
that works best for you. Join me in this Kasha
class and let's turn your sketches into
impressive patterns together. I'm so eager to see all the unique creations
that you will come up with. If you're ready, then
let's get started.
2. Project & Downloads: For the class project.
You can create a pattern in affinity designer using the diamond template. And export your
pattern as a Jpeg, which you can then upload
to the project's gallery. You can use the free procreate brushes and color palettes that I will provide with this
class to draw your motifs. Or you can use your own
brush and color palette. But either way, I would
love to see what you create. Watch the lesson. To know how to
export P or a PNG, which you can upload to the project's gallery by clicking on Projects
and Resources. And then on Submit Project, Upload your image,
and click on Publish.
3. Draw Motifs In Procreate: In this lesson, we will draw some simple motives in procreate using the
diamond layout. I will tell you my reasons why I use the diamond layout
to make my patterns. To start with, I'm going
to take a canvas of the size 3,600 by 3,600 pixels, as I'm used to this canvas also, I like to have options, but since we will be
vectorizing the motifs letter, it doesn't really matter, even if you take a
smaller canvas than this. To create a canvas, tap
on this plus sign here, and then tap on this icon. And here you can put your desired width and
height and the DPI, You can also change
the units here, and then I'll tap on
the color profile. Then choose the second option
and then tap on Create. Now I'll first create the diamond template using which we will
design our pattern. Dragon, drop any color
onto the canvas. Then tap on the move
tool in the bottom here. Tap on rotate 45 degree
to rotate it once. And then tap on fit to canvas. This is the diamond
template that we'll be using for
our pattern layout. Now go to layers and tap on the n here and decrease the
opacity to your liking. And you can also keep the
blending on multiply. Now for the brush, I'll tap on this brush icon and then go to caligraphy section and
tap on the monoline brush. I'm taking a free
procreate brush so that everyone
can follow along. But if you want to
try any other brush, you can go ahead and do
that for the color palette. I have made a few palettes here, which I will provide
in the projects and resources section
for you to download. I'll be using the retro palette
for drawing my motives, but you are free to
use any palette of your choice and still you
can follow along with me. So I'll use the retro
summer palette here. Now first of all, I'll
make a background layer. So go to the layer panel, tap on this plus sign to create a new layer and bring
it below the template. I always like to
keep the template as the first layer so that I can easily toggle it on and off. Now I'll take the
desired color and just dragon drop it
onto the canvas. Then I'll take a dark color and we will start
with sketching first. Here on this side bar, you can see these small bars which I have used to
save my brush sizes. Which you can do like this. First, set your brush to the
desired size that you want. And if you tap once
on this rectangle, then tap on, plus you
can save the size. Saving the brush size is
important if you want the line weight to be
consistent on all your motives. If you want to increase or decrease the stabilization
of the brush, then duplicate the brush first, then tap on it once, and in the brush studio,
go to stabilization, where you can
increase or decrease the stream line and
also the stabilization. If you want very
flat vector shapes, then increasing
the stabilization is a good idea to
delete the brush. Just swipe towards left
and tap on delete. Okay, now you can first roughly map out where you
want to place the motives, like some big flowers, some medium ones, the
fillers and leaves. Sometimes I start with a rough sketch and sometimes
I just start drawing. I have a rough idea in my mind about how I want my
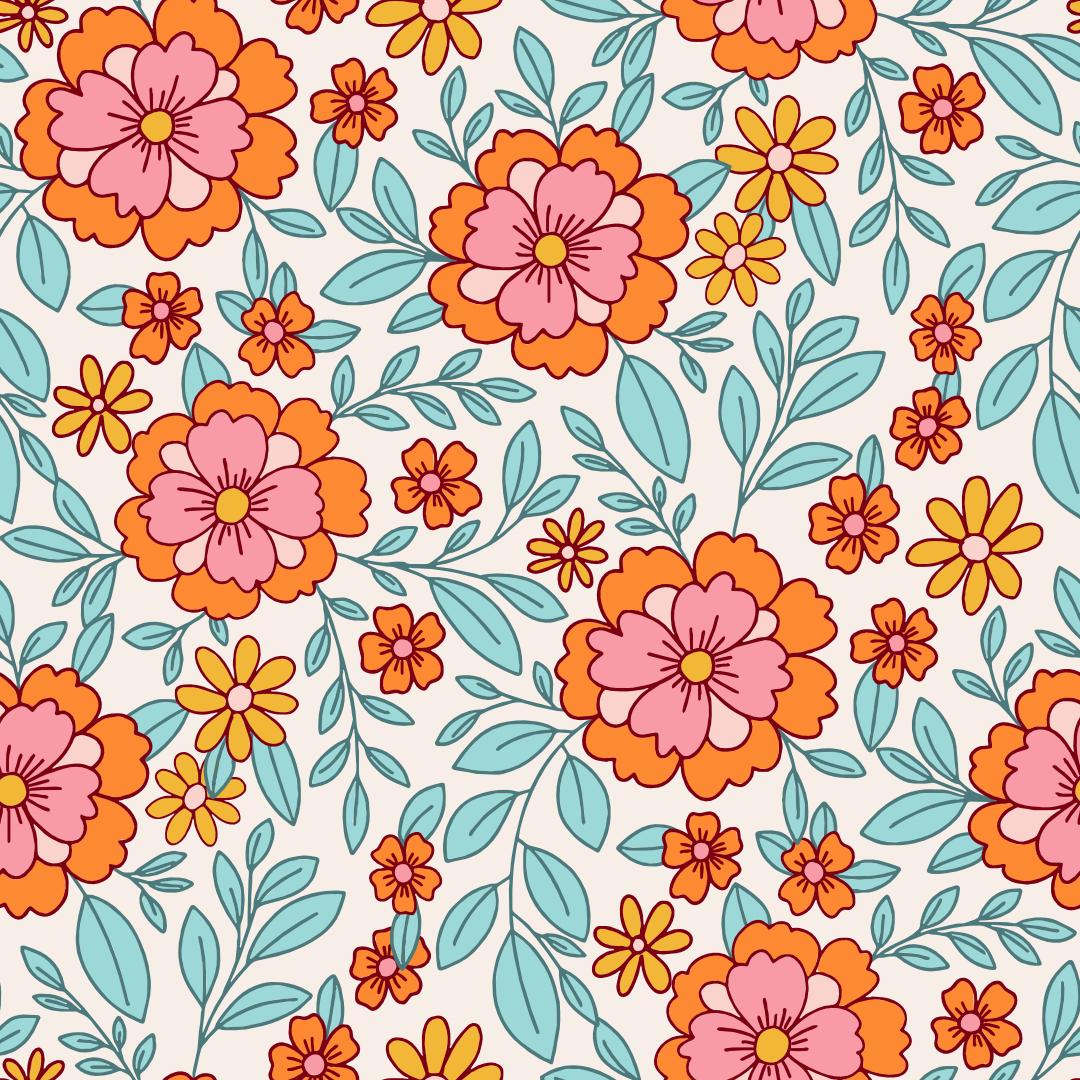
motives to look. Since I'm planning
a retro pattern, I'll keep all the
motives pretty simple. With some simple shapes for
the leaves and flowers, you can easily follow
along with me. But you can also plan your
own motives if you want. You can draw
butterflies or animals, birds or even abstract shapes. There is no rule here. Just follow your creativity and use this layout to
plan your pattern. While drawing, I
constantly zoom in and out to see how the
motives are looking. So take some time at this stage to plan
your pattern properly. It will save you a
lot of time later. After drawing the big flowers, I now draw some smaller ones
around the big flowers, and then I add the leaves. You'll see that some of
the flowers are crossing the edges of the diamond
template, which is okay. We will adjust the template
while testing the pattern. Also, it's a smart way of hiding the diamond layout unless you want the diamond
layout to show. Like I had said, there
are no rules here. Do whatever feels good to you. I like using the diamond layout because I can easily
plan both a very simple as well as a very
complex pattern using this. And also it helps
in easily hiding the repeat tile edges if you place the motives
correctly in the layout. I'm also trying to draw
the motives carefully and slowly so that we don't have
to do a lot of corrections. After vectorizing the motives, you can take some more
time on each motive, but for the sake of the class, I'll try to draw
them a bit quicker. After drawing the leaves, I'll try to fill any gaps with some more
flowers or leaves. You can see I have
kept the flowers and leaves on different
layers so that I can easily add colors to them and also keep
the colors separate. Okay, now let's test
first and then we'll move to adding colors to first style group all the
layers except the template. Tap on one layer and swipe
the other towards right, and tap on group.
4. Test Pattern In Procreate: In this lesson, we will test our pattern before exporting
the motives so that the patent making process in affinity designer will become
even easier for us later. Also, I will show you
the easiest method of making a pattern
inpprocriate. Like I said, I will show you the easiest way of making
a patent inpprocriate, by which I meant using a
patent making template. This method will
not only help you to make patents very
easily and quickly, but also you don't have to
worry about any pixel gaps, which may happen if we are
making a pattern manually. Here, we'll use a
template for that. To make a template, first
take a canvas of your choice. For example, I'm taking
a canvas that is 3,600 by 3,600 pixel at 300 DPI. You can take any size now, whatever color you have
on the color wheel, just dragon drop
it on the canvas. Then tap on the move tool. Make sure magnetics
and snapping is on. And then drag it to
the top left corner. Make sure you see
the yellow lines on all the four sides and you can remove your stylus
from the screen. Then without touching anywhere, tap on the layer s panel. On the layer on the select. Now at the tap on save and load. And then on the sign
to create a selection. Now you have to repeat the same exact steps
for all the corners, That is the top right,
then bottom left, and bottom right, until
you get four selections. Once you set up this template, the patent making process
will be so much easier later. If you want, you can also
download this template that I have provided in the projects
and resources section. I'm already using
a template canvas where I'll test my pattern. But if you have drawn your
motives on a separate canvas, then just select
everything along with the diamond template and
background and tap and hold it. Go back to gallery. Go inside your template without
leaving your stylus. Then go to the layers
and drop it here. Now to test the pattern, I'll first duplicate
the original group once and make the
original invisible. Then tap on the selection tool. Then tap on seven
load at the bottom. And then on selection on E. Now tap on the
move tool and then tap on flip horizontal and flip vertical at the bottom
like I'm doing here. And then de select
the move tool. Now tap on the selection
tool again and repeat the steps for all the
other three selections after you have flipped
all the four quadrants. Now delete the background
layer here and make the original group visible to see how the
pattern is looking. When you have to repeat this
process again and again, the pattern making template
will be really helpful. Now I will see if there is any visible gap in the pattern, or if I need to move
any motive and also see that the diamond layout
is not very evident. If you have planned for your motives to
overlap each other, then you can move
to the next step. But I think I need to make some changes like
moving this flower. I'll take the selection tool, make sure the free
hand is selected, and I'll draw around the
motif that I want to move. And then using the move tool, I can move it or rotate it also, since everything is
on a separate layer, so there will be no problem. Now to fill any gap, I'll take a different
color and draw the motif on a separate layer
so that I can recolor them. I'll keep on adding and moving, or removing the motifs, and keep on testing my
pattern using the pattern making template till I'm happy with how my
pattern is looking. Taking time at this tape will not only give you a
beautiful pattern layout, but also save you a
lot of time later. Now, once I'm happy with
the pattern layout, I'll test the patent tile. To do that, I'll swipe down with three
fingers on the screen, then tap on copy. All. Swipe down again with three fingers and tap on paste. This will give me a flattened
layer of the pattern. Now, duplicate the
layer three times more. Tap on the first layer, tap on the move tool, then tap on the blue.in
the top left corner, type half of the
size of your canvas. In my case, since the
canvas is 3,600 pixel, so I'll type 1,800 which
is half of the canvas. Do this for all
the other corners, that is the bottom
left and bottom right. Select the layer by
tapping on it and then tap on move tool and
then repeat the steps. Now I can move on to adding colors to my motives
in the next lesson.
5. Add Colours To Motifs: In this lesson, we
will add colors to the motives before
preparing them for export. You will find the color
palette that I'm using in the projects and resources
section for downloading. Before adding colors
to the motives, I will first color the outline
to the desired colors. I want the flower outlines to be this dark maroon color and
the leaves to be dark teal. First on the layer and then
alphiloc take the color, tap on the layer again
and then tap fill layer. After recoloring I'll
tap on the layer and tap on our fill again
to toggle it off. Or you can also swipe with two fingers to the right
to toggle it on and off. Now I'll see if any
shape needs to be closed or if there is any stray marks that
I need to erase. Because I'll be dragging
and dropping the colors, The shapes must be
closed for that. Now, I will use the
reference option to add colors to my motives. Using the reference feature is especially helpful if you have outlines and you want to keep the outline color and the
field colors separate. I'll first color the flowers. So I will tap on
the flower layer, then tap on reference. Then I'll add a layer above
or you can add below also, depending on the line thickness
that you want to keep. Now I'll take a color and simply dragon drop
it in the layers. You'll see it is on
a different layer. But if the reference
option is not on, then either you have
to dragon drop onto the same layer or it will
fill the whole screen. That's why I like using
the reference layer. Now, dragon drop the
color and then tap on, continue filling
and just tap inside the empty spaces
that you want to fill for every different color. I'll create a separate
layer and keep on coloring the motives after
coloring the flowers. When I want to color the leaves, I have to make the leaf
outline layer as reference. Otherwise, it won't work. Now, I'll follow
the same process and color the leaves too. Now here you'll see depending
on whether you are keeping the outline layer on the top or bottom of the fill layers, the line thickness will change. Go with whatever
feels good to you. Okay. Now, after
coloring everything, I'll see if any correction
is needed somewhere. I'll make a new layer to
add some more details. You can skip this
step if you want, but I'll quickly add some
simple lines to my flowers. Now I'll taste my pattern once again before preparing
to exploit the motives.
6. Prepare & Export The Motifs: In this lesson, I
will share how to prepare your motives
in procreate so that you can export it properly
for vectorizing and also import it to affinity
designer efficiently. First tank delete all the
extra layers and then create a flattened layer of
the pattern which we can use as a reference later. If needed, use the method of
swiping three fingers down, like I had shown in
the previous lesson, to get a flattened layer. Now delete the corner
layers group and duplicate the main diamond layout
groups and name it original. I always like to keep a
backup of the original. So I'll keep one group invisible and do all the
changes to the duplicate group. Now I'll toggle on Alphilock on all the layers by swiping with
two fingers towards right. Because we have to recolor
the motives at this stage. Since for vectorizing
the motives, I'll be using Adobe Capture, which is a free software. That's why I need to have all
the motives in black color. But if you're using Adobe Illustrator ipad
app to vectorize, then you don't need this tip. Also, you can see
how to vectorize in the illustrated
app in this class of mine where I have
shared the whole process. Okay, now I'll take black color. Just double tap here to
get the purest black. And then tap on the layer. And tap on fill
layer to recolor it. Do this for all the layers. Now delete the template or
just make it invisible. Then I'll make alphaloc off on all the layers by swiping with
two fingers to the right. Now mark the corners on each layer with a
thick line like this. This step will help us to place all the
layers perfectly in affinity designer because otherwise without these markers, affinity makes it really difficult to keep
everything in place. Now, I'll also make
a separate layer to export the color palette. You can of course, use
the flattened image of the pattern to create your
palette in affinity designer. But I'll just create a separate color
palette layer and switch all the colors
on the canvas. Now I'll first export
the flattened image. I'll tap on the Actions menu. Then tap on Share,
and then tap on J. Pick if you want. You can save everything in your camera role by
tapping on save image, or like me, you can save everything in the files
folder on your ipad. By tapping on save to files. I'll go on my ipad and create a new folder
and then tap on Save. Similarly, I'll save the color
pallet layer as a Jp to. Now to export the motive layers, I'll make everything
visible first, then go to Actions,
tap on Share. Then at the bottom here in
the shear layers section, I'll tap on PNG files
and in the same way, safe to the folder by
tapping on Safe To Files. Now in the next class, we will vectorize everything
in Adobe capture.
7. Vectorize Motifs In Adobe Capture: In this lesson, we
will see how to vectorize the motives
in Adobe Capture, which is free to use
without any subscription. You can also use the Illustrator ipad app
for the same purpose, but you'll need a
subscription for that. If you still want to try it, then I do have a class where
I show you how to do that. When you open the capture app, you'll see this interface, you can create new libraries to save different items
like I have done here. To do that, tap on
new library and give me this will be like a folder where you
can save all the motives. Now at the bottom, if
you tap on import, you can choose from where you
want to import the image, depending on where
you have saved it. Since I have saved it
in the files folder, I'll tap on files and then go to the folder and tap
on the first motive, and it will open like this. If you see on the
right hand side, there are a few options, but we need to make sure that the shapes option
is selected here. And then I'll drag this
circle here to the very top. You can play around with this
depending upon your motive, but I usually take it
all the way to the top. Then I'll tap on
this stick here. You'll again get
some more options to erase or draw over the motives. I don't use these
options generally. Then you can save here. You can give it a
name if you want and choose a folder where
you want to save it. Then click on Save. Do this process for
all the other files. Tap on Import, then
tap on Import Image. Then on Files and
select your file. Now I'm done with vectorizing
all the elements. Now I'll tap and go
into the folder and send each file to affinity
designer directly from here, tap on the three dots, then tap on share, then on export, and then G. Now if you have already downloaded
the affinity designer app, then tap on the three
dots here and then on the app it will
directly open in affinity are make sure you go back from this screen by tapping here and
stay on this screen, otherwise this error
message will pop up. I'll go back to
capture and repeat this tape for all
the motor layers. In the next lesson, we will get started with a
fidgety designer.
8. Get Started With Affinity Designer: In this lesson, I will show you a few basics
that you need to know to get started with affinity designer
to make a pattern. But please note that this is
an intermediate label class. Which means that I
won't go through every single tool and
options provided in affinity designer and show you only those tools that is
required to take this class. But don't worry,
you will still be able to follow along to make a pattern in affinity designer using your motives,
John, in procreate. I also want to make
a note that I'll be using affinity designer
two for this class. There are two versions
of affinity designer, but both versions are
very similar except for a few tools that have moved to different spots in
the newer version, like the snapping tool
and the geometry tool. But whether you have
the version one or two, we will use only
those tools that you can find in both the versions for making a repeat pattern. I'll tap on the affinity. You'll find all the
motives that you had exported on this page
as live documents. Then below the live documents, you'll find the new option where you can create
a new document. Then comes the open option to open or import a
document or image. After that, you'll
find templates. Then in the Help button, you can learn more
about this app. Then comes the Account, and then the settings
where you can make some changes to customize
the app as per your liking. Now let's see how to create a new document. I'll tap on new. Then on new document
here on the left side, you'll find many presets
that you can use. But to create a custom
size tap on the page width here and type
whatever size you want. Since while drawing the
motives in appropriate, I had taken 3,600
pixel by 3,600 pixel. I'll type the same
size here also, both in width and height. If you tap on DPI, you can change that too. At the bottom here, you can change the units to
whatever you want. I'm keeping it at pixels and I usually don't change
anything else here. Just check the color profile
once before tapping on. Okay, also another thing to keep in mind here
is to check that the create artboard
option is not on as we'll be creating
a template later. This is important
now if you want to save this canvas
size for future use, then tap on the first option
in the bottom left corner. And save this as a preset. Give it a name. And below that you can see various
options which are the categories like you
see for all these presets, you can create a new
category by typing on this second option at
the bottom left corner. If you want to delete anything, then tap on this setting, will want to delete a preset tap on it again
to delete a category. And tap on it again to
deselect everything. Now I'll tap on okay, to create the document. I'll go back to the gallery. Now here if you
tap on the 3 bars, you can rename the document. And you can also save it by tapping on the save
or save as option. If I swipe on the
document towards left, then I can duplicate it
to delete a document, just tap on this cross and then tap on close
without saving. But be careful with this option, because the document will
be deleted permanently. Always save your documents
as an affinity file. If I scroll below, you can see I have stacked my documents
in different folders. Each folder here is
called a new project. To create a new
project, tap on new, then tap on new project, name it, and tap, okay. It will be created
at the very bottom. But the good thing is you can move everything
on this page. If you hold and drag
this new folder, you can place it
anywhere you want. Now I'll drag each document
and drop it onto the folder. Dragon hold it till you see the gray lines and
then you can drop it. Now if I go inside the folder, I can also move everything here. If you tap on the 3
bars on any document, then you can move out of the project to remove
it from the folder. It will be again, move to
the very bottom of the page. Now I'll bring in
the color palette. Also, I'll tap on open,
then import document. Go to my folder and
tap on the document. In the next lesson,
we'll see how to create a color palette
in affinity designer.
9. Create Colour Palette In Affinity Designer: In this lesson, I'll go through the process of
creating a color pallet in affinity designer and
also show you some of the basic tools and functions that we may
need to make a pattern. First, tap on the
color pallet document and it will open with this interface where we have
all the tools and functions. The first tool I want to
show you is this question. If you tap on this
question mark, you can see which
symbol is whenever. You can't remember a tool, just tap on the question mark. And it will show you,
as I had said earlier, that I will not go
through everything here, but we will learn the tools as we go through the
process step by step. Some of the important
tools that you need to know are the move tool, which will be used the most. Then below that, there
is the Node tool, which you can use to make
changes to your vector shapes. Then if you come down
here is the shape tool which we will use to draw our background or
any other shape. To delete anything you can tap on the trash can icon here. If anytime you see that you can't find a tool that
I'm talking about, then also check the interface
or the persona here. The affinity icon
must be selected, which is the vector
persona and not the pixel, because each persona has
its own set of tools. Now beside that, if
you tap on the 3 bars, then you'll see these
options where you can resize the document or
export it, and few others. Then if you tap on
the three dots, you'll find functions like copy, paste, duplicate, and group. Now if you come to
the right side, you'll see this magnet which needs to be turned on always. If you want the snapping option, you can further tap on the
snapping options and toggle on the force pixel alignment to ensure that the snapping
will be perfect. If the background here
is dark or black, then it means snapping is on. And if it's gray, then snapping is off. Now if you come to
the further right, then you'll see
these functions of which the first one
is the color panel, then there's the stroke. Then the layers panel. Another function
that we will use in this class is the symbol panel, using which we will
create our template. The other two important
functions are the assets panel, where you can save all your
motives for future use. And the transform panel, which we will be
using for this class. Okay, now to create
a new palette, tap on the color wheel, Then tap on swatches below. Then tap on the 3 bars and tap on add application palette. Because if you tap on
add document palette, then you can only access the palette inside
this document. But the application
palette you can access in any document
that you create. Now you can rename
it and tap on, okay, then tap and hold
the eye dropper tool here and hover it above
the color you want. And you'll see this circle
will be filled with the color. Now tap on the filled
circle and when you see this circle is filled
with the same color, now you can tap
on the 3 bars and then a add current
fill to palette. This can be a confusing step, so let's do that again. Tap and hold the eye dropper. Hover it over the
color you want. Tap once on the filled
circle on the right, tap on the 3 bars, then tap, add current
still to palette. I'll do this for all the
colors in my palette. If you want to delete a color, just tap and hold and
then tap on delete. Similarly to delete or
rename the palette, you can tap on the 3 bars
and then tap delete palette. Now we can move on to creating the diamond template to make the pattern in
affinity designer.
10. Create Template In Affinity Designer: In this lesson I will
show you how to create a diamond template using
symbols in affinity designer. So that you don't
have to calculate anything manually to make
the repeating pattern. Since I often use the
diamond pant in procreate to either draw the motives
or test the pattern, I thought making
the same template in affinity designer
would make sense. I don't need to make
the repeat manually. Let me show you how.
First I'll tap on the document that I had
created before in the lesson. Getting started with
affinity designer, then tap on the rectangle tool and select the rectangle option. Take a color by tapping on the color panel and
then on swatches. Now start drawing a square, Don't worry about
the dimensions Now, I'll then try to align
it to one side and drag these white dots so that it will exactly snap to
cover the whole document. Now go to the transform panel and double check
if the width and height is 3,600 pixel or
whatever your document size is. Also the position
should be all zero. Now I'll go to the color panel, Then tap on the stroke ring
and give it another color. If you want, you can
increase the stroke width by tapping on the stroke
panel below the color panel. Now tap on the rotate handle on the top and start rotating by 45 degrees while keeping one finger on the screen
and it will snap properly. Here I had faced a small problem
and I wanted to give you the solution so that you won't face the same problem
while making the template. As you can see, some portions of the square is getting
cut off after rotating, but actually the full
square is there. This problem is due to the
clip to canvas option, which happen if the preview
mode is toggled on. But here, even though the preview mode is off,
it is still happening. I'll tap on the small sidebar here and toggle off the
clip to canvas option. Anything that is light
gray here is on, and if it's dark gray, it's off. Make sure to check this
before moving forward. As you can see, the full
square is now visible. Okay, now I'll tap
on the corners. And drag it towards the
edge of my document while keeping one finger on the screen to maintain
the proportions. Do this from opposite corners
till it snaps to the edges. Now tap on the symbol panel. Then tap on the 3 bars, and then on add symbol
from selection. You'll see it will
be added here. If you go to the layer panel, you'll see the symbol
will be added here. Now, while it is still selected, put two fingers on the screen and drag the whole
symbol to duplicate it. You can now remove
your fingers and drag it to the top right corner, make sure it has
snapped properly. And you can see the
green and red lines on all the edges before removing your stylus
from the screen. Remember how we made
our pattern template in procreate by dragging each
layer to the corners. We will do the exact
same process here also, so that the motives
will repeat seamlessly. I'll again duplicate the symbol while it is still selected. And drag it down by putting
two fingers on the screen. Select both the rectangles by swiping right on the layers. Now drag it to the opposite
side and make sure it's naps. Now I'll select all the
duplicate rectangles by swiping towards
right on them. Then tap on this icon
and tap on group. Now bring it below
the original symbol. You can rename the
group if you want. Swipe on it towards the left
and tap on rename layer. You can stop here
because this is what we need for the pattern
to repeat seamlessly. But if you want to
see more repeats, then duplicate and drag the original symbol to
complete the diamond shape. I'll now tap on the original
symbol in the layer panel. Then go to the color panel, give a brighter stroke color. And then tap on the fill. And remove the fill by
tapping on no fill. Now take the rectangle tool and draw a rectangle covering
the whole template. And this will be the background. Then in the color panel, give it a fill color
and remove the stroke. Now in the layers panel, drag it and bring it
to the very bottom. You can then adjust the
size a little bit to save this template on the
3 bars on the top here. And export as template. Give it a name and tap on save. You can keep on re using this template to make your
pattern in a Finity designer. Now that our template is done, we will move the motives onto the template in the next lesson.
11. Move Motifs Into The Template: In this lesson, I will
bring all the motives inside the template made
in affinity designer, where I will make the pattern. I'll go back to the gallery or the folder where I have
saved all the motives. Tap on the motive, then
select everything except the corner markers by dragging with the
move tool on them. You can also de
select the markers in the layers panel by swiping on the layer
towards the right. You can now tap
on the three dots and but I'll make everything
as a single shape. I'll tap on this icon, which is a geometry tool, and then tap on Add. Since I have brought everything from Procate in the
form of a layout, therefore I want it as a single shape and
not a group of lots of curves as you can see
in the layers panel, It is now a single shape. I now select the shape along
with the markers by tapping on the first layer and then tap on the last layer
with two fingers. Then tap on this icon
and tap on group. You can also recolor the motives at this stage
before grouping them. If you want, like me, you can recolor them after
taking into the template. Now select the whole
group by tapping on it, Then tap on the three
dots and tap on copy. Now go back and tap
on the template. Tap on the three dots
here, and then paste. Then align it to one of
the edges and drag it. And it will automatically snap perfectly because
of the markers. But if the markers
were not there, it would have become really difficult to align it properly. I'll go back and do these
steps for all the motives, one by 11 tip here. Start from the
last motive layer. First, I started
from the first layer and later I had to rearrange everything
in the layer spanel. If you want to avoid that, then start with the last
motive layer first. Initially I had thought
I will show you another method where you can
save the motives as assets. Like you can see how I
have saved my motives as assets and I can access them anytime even if
I use a new document. But the problem is,
without the markers, it would be difficult to
place the motives correctly. Okay, so let's go
through it again. Select everything
except the markers. Tap on the geometry
tool, then tap on Ad. Now select everything again, tap on this icon
and tap on group. Then tap on the three dots, and then on copy,
go to the template, tap on the three dots again, and then on paste affinity. Designer now remembers
the previous actions and it will paste it
exactly at the edge. Then from there you
can just drag it from one of the corner and
it will snap in place. I will do this for
all the motives and then recolor the motives. And after that, we can make our pattern using the template
that we have created.
12. Recolour Motifs & Create Pattern: In this lesson, we will
recolor all the motives to their original colors by using the reference image that we
had saved from procreate. Also create the pattern
using the diamond template. In a Finity designer, I will first bring in my reference image to
recolor my motives easily. Tap on the 3 bars and
then tap on place. Find your image on your
ipad and select it. Now, just tap on the
screen to place the image. Tap on the first layer
or first motive. Then I'll tap on the
color panel and tap on the color from my saved palette. Now in the layers panel, tap on this arrow here
to open the group. Select all the markers and
tap on Delete if you want. You can make all the other
layers invisible by tapping on the circle here and keep on recoloring the
motives one by one. I'll now repeat the steps for all the motives and then we'll move to
making the pattern. After recoloring
all the motives, I'll select all the groups, hold and drag it, and then drop it on the
symbol like I'm doing here. Just like that, you have
your pattern ready. I'll then delete the
reference image. Since I no longer need it, you can keep it
invisible if you want. Now, tap on the preview
mode or the clip to canvas and you'll
get the patent tile. I could see here that the colors were
looking a bit muted. And that's because
the opacity here on the symbol layer
by mystic was at 80% I'll change it to
100% my colors are back. As a final step, let's
check the pattern. To do that, I will
first expo it as a Je. Tap on the 3 bars
here, tap on export. And then on JP you can export it as a G to I'll not change
anything else here. And tap on Share. Then tap on procreate
to send it directly to procreate if you tap on. Okay. At the bottom. You can also save
it on your ipad. I'll tap on, cancel and open the image in procreate app now. I'll duplicate it
for four more times. Then tap on the first layer, tap on the blue dot on
the top left corner, and type the size that is
half of the canvas size. For me it's 1,800 pixel, as my canvas size
is 3,600 pixel. Do this for the
other three layers and then merge everything by
pinching with two fingers. As you can see, our
Patentile is lining up perfectly without any
gaps or white lines.
13. Save & Export Pattern: In this lesson, I will share
how to save the patent tile in different ways to
export the pattern. Tap on the 3 bars
and tap on export. And like I had shown in
the previous lesson, you can export it
as a Jpeg or PNG. If you want to take
it to Illustrator, then you can save it
as an EPS or SVG file. There is an option of
saving it as a PSD file. Also, choose the file format that you want and
then you can tap on, okay, to save it onto
your ipad in a folder. Or you can tap on
Share and then save it to a cloud service like
Dropbox or Google Drive. You can then tap on cancel to go back to save the pattern
as a low resolution Jpeg. First, go to the gallery
and duplicate the document. You can rename it. And then it now here, tap on the 3 bars
and then tap on size on the left side here, you can change the
width and height. Let's say I want to
save it for Instagram. I'll tap here on the number, then type 1080 pixel, which is a standard
size for Instagram. Both the width and the
height will change. Now on the top here, you can change the DPI
to 72, also the units. Then I'll tap on the 3 bars
again and tap on Export. As you can see, the
dimensions have changed here. You can save it
as a Jpeg or PNG. Now I'll tap on, okay, and rename it then
save it on my ipad. If I go into the files folder
and hold on the image, then tap on Gate and you'll see the dimensions
and DPI has changed. Now you can use this image on your social media and also upload it for
the class project. Also, don't forget to save the document as an
affinity designer file, go back to the gallery, tap on the 3 bars
and then save as, rename it and save it in
a folder on your ipad. I hope you'll enjoy
making patents using this template and upload your beautiful patents to
the project's gallery.
14. Why You Would Like This Workflow: Here are a few reasons why
you would like this workflow. You like drawing your motives in procreate to get that
hand drawn look. Even if you don't use a lot
of textures or shading, you still like to
utilize procreate to achieve an organic
aesthetic on your drawings, you want to increase
the scalability of your pattern by vectorizing it. One of the advantages
of using vectors is that they are
resolution independent, meaning that they can be scaled up or down
without losing quality. This makes them perfect for use in a variety of
mediums such as print, web and even large
format displays. You want to have the whole
patent making process on your ipad. This was one of the reasons
that I was tempted to try this workflow because one of the main perks of using an
ipad is its portability. Allowing me to design patterns without being tied
to a specific location. This means you can continue to work even while traveling
or taking a sick day, ensuring you never fall
behind on your work. You don't want to invest in a subscription plan
as a beginner, as a begner, it's
understandable to want to invest in your
growth and learning. However, subscribing
to a plan might not be the most efficient
use of your resources. We have all been there. But cutting costs where possible can make
a big difference whether you are motivated by personal interest or a desire
to learn something new. There are several reasons
to dry out this workflow. I hope you find value
in this class and enjoy exploring the patent
making process even further.
15. Thank You: Congratulations, you made
it to the end of the class. I hope you enjoyed it
and found it valuable. Remember, turning your
hand Draw motives into a stunning patents is now
in your creative tool kit. Whether you're creating with
purpose or just for fun, the possibilities are endless. I encourage you to practice
what you have learned, experiment, and
most importantly, have fun with the process. Your unique style is what
makes your patents special. I would love to see
your creations. So feel free to share your patents in the projects
and Resources section. And also I would really, really appreciate it if
you can leave a review, which will not only help
me to make better classes, but also others in deciding whether this
class is for them or not. And you can do this
by going to Reviews, then click on Leave Review. Thank you so much for taking this class and
sharing your work. If you have any doubt or
need any clarification, then don't hesitate to reach out and put it in the
discussion section. You can follow me on Skillshare
to stay updated about the future classes and also subscribe to
my Youtube channel, Create with in mine
for short tutorials, or follow me on
Instagram at Calabi, my where you can share your work and tag me so
that I can reshare it. Thank you again and I hope to see you in my other classes. So until next time,
keep creating, keep exploring, and
most importantly, keep having fun with your art.
 Mrunmayee Das, Artist and Surface Designer