Transcripts
1. Introduction : Procreate master
class consists of seven fun projects to get
you drawing digitally. Join me as we draw everything
from a cute line character, funky sardine tin to a
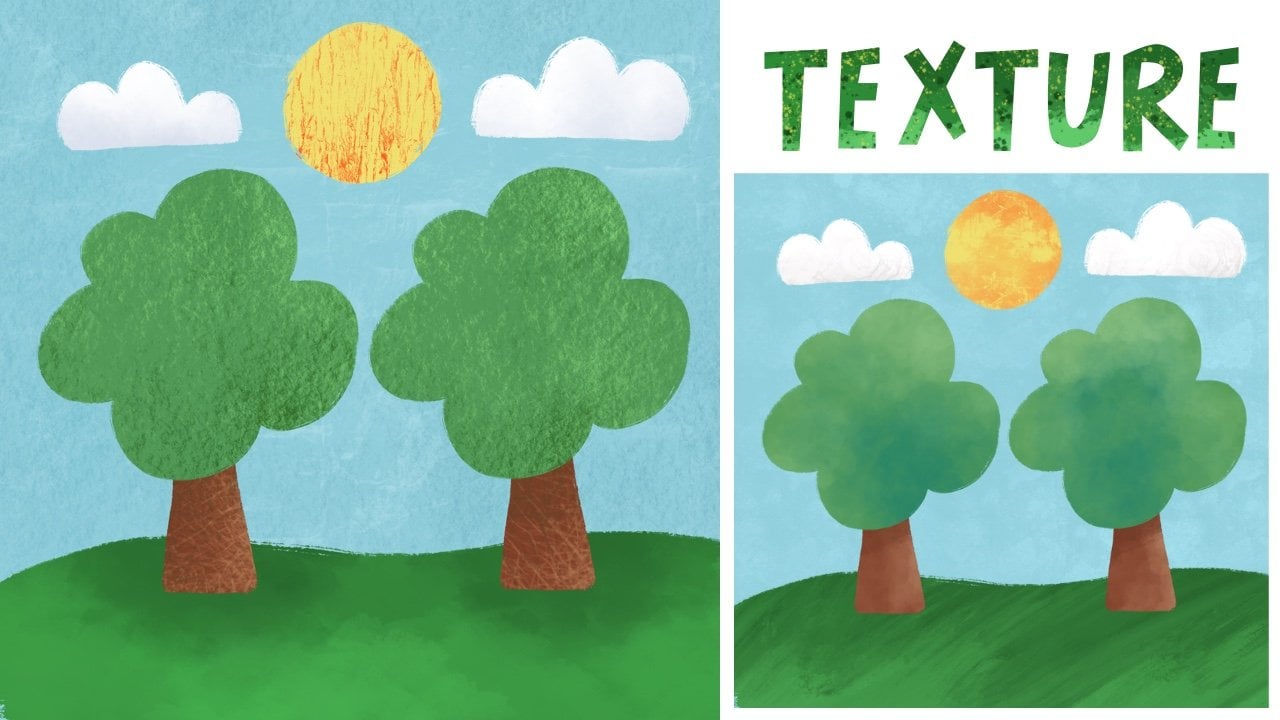
gorgeous greenhouse scene. You'll learn how to
sketch from reference, how to use blend modes
to apply texture, which will transform your
illustrations and how to use cool tools like symmetry to
make gorgeous art in minutes. We will explore Procreate
brushes and I'll share to tricks like using color fill to color your
drawings in seconds. The class is packed full of
resources to get you started. I've included sketch
templates, color palettes, custom brushes, and an
adorable star stamp, which is a great timesaver. The course also
covers key art skills like shading and digital
watercolor techniques. By the end of the course, not only will you have a better understanding
of procreate, you'll also have
seven masterpieces you'll be proud to share. I'm Dee Smith, a
professional illustrator and qualified teacher based
in Scotland in UG. I have illustrated
everything from children's book to
greetings cards that have been
licensed wild life. I use Tolkate for all
of my art because it's super intuitive
and it's great fun too. In this class, I will share all of my skills
and experience with you.
2. Getting Started and Saving your Work: To access the class materials, head to the project and
resources section of the class and scroll down
to download resources. Select the resource
you need, for example, Boho butterfly swatches, and then when prompted,
select Download. In your iPad downloads, tap on Boho butterfly swatches and then in
your iPad downloads, tap on the file which will import directly into Procreate. If you open the color library, you can scroll until you
see the palette you need. Then tap on the three small
dots and set as default. Your color palette is now
saved and ready to use. Go back to Skillshare and repeat the process for other resources. Let's tap on the winter
foliage sketch this time. When prompted, select Download. In the Downloads menu,
select the sketch, and this time, it should import directly into your
appropriate gallery. Then simply tap the
sketch to open this. To set up a new
Canvas and procreate, tap on the plus sign
on the top right. Choose one of the
existing templates or set up a new Canvas by tapping
the black folder icon. You can input the dimensions
for height, width, and DPI. I tend to set my Canvas at 30 times 30 centimeters
with a DPI of 300, but you can choose dimensions
that suit your needs. To access your Canvas settings, you can open the Actions menu, which is the small wrench icon. Select Canvas, and then
in the settings menu, you can see the height,
width, and DPI. You can always change these
easily if you need to. To save your art, tap back on the Actions menu
and select share. There are different
options here, but let's choose JPEG. Then select Save Image. Your art will now be saved into your camera roll ready
to share or print. When printing, I would
recommend using a DPI of 300. And when sharing online, I would recommend
using a DPI of 72.
3. Boho Butterfly: Let's set up our Canvas by
tapping on the plus sign. Choose the new Canvas icon in the top right and then
set your dimensions. I like to work on a
big square canvas, so I'll set my width and
height to 300 centimeters. Make sure your DPI is set to
300 and then tap on Create. Tap on the brush icon to open the brush library and
tap on the drawing set. From here, select the
brush called Blackburn. Go to the color library, which is the small
circle of color on the top right and tap to open. From our Boho butterfly palette, select the lilac color, then tap on the circle to close. Next, go to the wrench
icon on the top left. This is the Actions menu. Toggle on drawing guide, tap on Edit Drawing Guide, and then from the menu at
the bottom, tap on symmetry. Tap on options and note that we can set our symmetry
guide in different ways. But for this lesson, we
want to select vertical. When we have selected this, we can tap done. You will now see a vertical line down the middle of your canvas. Go to the brush size slider on the left and make the brush
bigger by sliding upwards. Mine is set to 19%. Start to draw a horizontal line. If you feel the brush
size isn't right, you can easily adjust
the size to suit. Continue to paint the
edges of a square shape. Make the brush even larger and paint inside
this to color it. As I get to the edges, I tend to make my brush smaller so I can
stay in the lines. Our background looks great. Next, we are going to tap
and hold on the eraser tool. This ensures we are erasing
with our current brush. Set our eraser size to about 10% and begin to erase
the body of the butterfly. Next, erase out the antenna. Then we are going to erase out the top and
bottom wing shapes. Using the symmetry function makes this process super fast. If you make a mistake, you can undo this by tapping
two fingers on the screen. To redo, you can
tap three fingers. That's a two finger tap to undo and a three
finger tap to redo. Let's tap on the layers menu. At the moment, we have
the one layer with our background and
eraised butterfly shape. Let's add a new layer by
tapping the plus sign. Tap on the layer two and
select drawing assist to activate the
symmetry function. Tap on the colors and select
the pink from our palette. Adjust the brush size down
to about 10% or smaller. You can zoom in on your canvas by pinching and
dragging two fingers. Paint some love hearts
on the body shape. Next, paint some lines
for the antenna. Go to colors and select
the light green. Paint on some long leaf shapes
and then color these in. To tidy up the edges, select the eraser tool and adjust your
brush size to small. Erase away any bits you don't like and sharpen up those edges. Go back to colors and
select the darker green and paint some lines to follow the curve
over leaf shapes. Now go back to colors and
select the light green again. On the bottom wing, paint on a curved stem shape and then paint on some
leaves at each side. Now, I haven't left much
room to paint in the flower, but we can easily adjust
the size by tapping on the selection tool and drawing a free hand
shape around it. Tap the gray node to
close the selection. Then go to the arrow
and drag the nodes at the corners to adjust the
size and move the position. Repeat the process at the opposite side by using the free hand selection
to draw around the leaves and then
use the arrow to drag the nodes and adjust the size and position
to make it symmetrical. When happy with that, tap
the arrow to deselect. Go back to colors and
select the yellow. Using a small brush size, paint on some petals. Then choose the lilac color and paint a circle for
the middle of the flower. Next, choose a pink color and add some curved strokes
to the bottom wings. Remember to use the two fingertp to undo
anything you don't like. Select a lilac color and add some strokes
to the top wing. Next, I'm going to
fill in any spaces by drawing some spots using
the colors in my palette. I feel the top needs
a bit more pink, so I'll draw some curve strokes
beneath the lilac ones. Let's tap and hold
on the eraser tool and erase some details in the
leaves to look like veins. The final step is to
add some texture. Let's tap on layers to open and merge our layers together
by pinching them. Tap the plus sign to add a
new layer above and then tap on the N. This opens
the blend mode menu, and we are going
to select overlay. Blend modes let us add
interesting effects to our work. Tap on our layer and
select clipping mask. Anything we do will now be
clipped onto the layer below. Go into our colors and
on the color disk, double tap on the middle gray. When using the
overlay blend mode, we have to choose lighter
and darker shades of grey. Choose a light shade and then
tap on the brush library. Select the textures, brush
set and choose Dove lake. Tap the brush icon
to close the menu. Move the brush slider
up to increase the brush size and begin
to paint on some texture. Go back to the color disc and choose a darker
gray this time. Experiment with
different shades of gray and different brush sizes while painting on the texture. Repeat this process for the details inside
the butterfly too. I think this subtle texture adds so much more
interest to our art. When you are happy with it, go to the Actions menu and
toggle off drawing guide. This gets rid of the
symmetry line and gives us a better idea of how
our final piece looks. I think that looks so cute. Great job, everyone.
4. Cute Lion : Open the brush library
and select the painting set and then choose the
brush called Oil Paint. Go to the color library, which is the small
circle here on the top right and go to
the cute on color palette. Select the yellow color and then tap back on the small
circle to close this. On the brush size
slider on the left, set your brush to about 18%. Paint a round shape in the
middle of the canvas and then increase the brush
size and color inside this. Decrease the brush size to about 13% and paint on two ear shapes at
either side of the face. Tap on the layers icon to open layers and swipe
left on this layer, then tap on duplicate. Merge the layers together
by pinching them. This makes our shape more
opaque and bolder in color. Tap the plus sign to add a new layer and then
drag this below. Go to colors and
select the mid orange. Increase the brush
size to about 30% or larger and paint
in the lion's man. I love the painterly brush
strokes this brush makes. Open layers and swipe left on our main layer and
tap duplicate, then pinch to merge
these together. Tap on the plus sign
to add a layer above, and then tap on this layer
and select clipping mask. Now, anything we do will be
clipped onto the layer below. Go to colors and select
the darker orange and set the brush size
to about 8% or smaller. Paint some line
details on the man. Remember, you can pinch two fingers to rotate
and move your canvas. Open layers and swipe
left to duplicate again, then pinch the layers to merge. Now, let's add some
features to the face. Tap on the yellow face layer, and then tap on the plus
sign to add a layer above. Open colors and select
the mid orange. Paint a long triangle
shape for a nose. Duplicate this layer and
merge them together. Tap back on the
yellow face layer and then tap on the plus
to add a layer above. In colors, select
the dark gray color. Reduce the brush size to about 5% and paint on a
semicircle shape for the nose. In layers duplicate this
and then merge by pinching. I'm going to tap and hold the eraser tool and erase a
bit from the top of the nose. Stay on the nose layer
and reduce the brush size slightly and paint on some curved shapes for
the eyes and mouth. Open layers and
duplicate this layer, and again, merge these together. Add a layer above and then select the pink color
for the cheeks. Set the brush size to about 19% and paint on
some round shapes for the cheeks and then
reduce the brush size to about 11% and paint the
inside of the ears. Open layers and duplicate the layer and merge
these together. Now tap back on the main
layer and add a layer above. Then drag this layer below. Tap on colors and
select the teal color. Drag and drop the color to
fill the entire background. I really like the
contrast this creates. Let's add some texture. Open layers and add a layer
above the teal background. Tap on the little N and change
the blend mode to overlay. Tap on the new layer and
select clipping mask. Open colors and select
the color disc. Double tap on the middle gray. We will be selecting
lighter and darker shades of gray to add subtle
texture to the background. Choose a light shade and then open brushes and select
the charcoal set. From charcoals, select to be compressed and increase the
brush size to about 65%. Start to paint on some
background texture. If it looks too intense, we can open our layers, tap on the little O, and then move the slider
to change the opacity. I'll set mine to about 84%. In layers, merge
the line main layer and the line details
together by pinching. Tap on this layer and
add a layer above. Change the blend mode to overlay and tap and
add a clipping mask. Next, decrease the brush size. Paint on some texture, and it will clip only onto
the orange main layer. Try selecting a
darker shade from the color disc to apply
some darker texture. Tap on the yellow lion face
layer and add a layer above. Repeat the process by
setting the blend mode to overlay and setting
a clipping mask. Add some light texture to the face and then add
some darker texture. You can change the brush size
and experiment with this. Add texture to the nose layer
by selecting this layer, adding a new layer above
and repeating the process. Do the same with the
pink cheek layer. This looks really cute as it is, but we could go a step
further by adding a simple body and tail
into our illustration. Go to the tail background layer and tap plus to
add a layer above. Select the yellow color
from our palette and go back to the oil paint
brush we used at the start. Pain on a simple body
shape and fill with color, adjusting the brush
size as you need. Duplicate this layer by swiping left and
pinch them together. Stay on the same layer and
decrease your brush to about 14% and paint on a tail. Then select the
darker orange from the palette and paint
the tip of the tail. Open layers and go to the
texture layer we have already above and select a darker
gray from the color disc. Then go to our charcoal set and to be
compressed for texture. Decrease the brush to about 9% and add some
texture to the tail. Then with a larger brush, add some texture to the body. Next, choose a lighter gray and paint on some
lighter texture. I think the body really
finishes off this piece nicely. Acute and simple line.
Great job, everyone.
5. Winter Foliage: Open the winter foliage
sketch and go to the color library
where you should have the winter foliage
palette already imported. Select the lighter brown
color and then open the brush library and select
the drawing brush set. Choose the brush called Oberon and select the brush
icon to close the menu. Go to the brush size slider
and set it to small about 6%. Go to our layers and add a layer above the sketch layer
by tapping plus. Drag this layer below
our sketch layer, then tap layers to close. Using two fingers, pinch
and zoom in on the sketch. Begin to paint in
the plant stem. Go into layers and turn off the sketch layer to
see how it looks. Turn back on the sketch layer and zoom in on the next plant. Adjust the brush size as needed
and paint over the lines. Use two fingers to pinch and rotate your
canvas if needed. Go to layers and turn off the sketch layer again
to see how it looks. Turn the sketch back on and repeat this process for
the remaining sketch, adjusting the brush
size as required. Again, turn off
your sketch layer and make any adjustments
that are needed. Go to layers and tap on
plus to add a new layer. Drag this layer to the bottom. Turn back on the
sketch layer and go into colors and select
the lightest green. Zoom in on the biggest branch
and paint on some pines. Rotate your canvas by pinching two fingers and do the
same at the other side. Keep building up these strokes until you are happy with them. Tap and hold on the
erased tool and erase away any bits that you
can see through the brown. As before, turn off the sketch layer to get a clearer idea of how
things are looking. Repeat this process for
the rest of the branch. Remember to use a two finger tap if you want to
undo any mistakes. You can use a three
finger tap to redo. Our first branch is complete, and I think that looks lovely. Let's keep on the same layer and make sure our sketch
layer is turned back on. Go to colors and
choose the mid green, and we will stick with the
Aubern brush here too. Zoom in on the sketch
with the berries and begin outlining and
coloring the leaves. Open layers and tap on
the background layer. From the color palette, select the cream color. Tap on layer two and tap the
plus to add a layer above. Open colors and double
tap on a white. Zoom in and paint
on some berries, adjusting your brush
size if needed. Turn off the sketch layer and zoom in to double
check your work. Go back to colors and
double tap on a black. Make the brush size
really small and paint on some tiny black
dots on the berries. I think that looks really great. Open up our layers and tap back on the green layer,
which is Layer three. Go to colors and select the
darkest green this time. Turn the sketch layer back on and adjust the brush
size to about 5%. Begin to paint over
the round leaves. As the leaves get smaller, you'll want to make your
brush size smaller. Go back to layers and turn
off the sketch layer. I'm really pleased with these, but I want to add some texture. Let's delete the sketch layer by swiping left and
selecting delete. Tap plus to add a layer at the very top and tap the little N to change
the blend mode. Set this to overlay. Open colors and double
tap on the middle gray. We will be choosing lighter
and darker gray shades to add some interesting
texture and shading. Select a lighter gray
and then go to brushes. Choose the texture set
and select Tarkin. Set the brush size to about 47%. Paint over the entire canvas. When you zoom in, you can
see a subtle lined texture, which looks really interesting. Open layers and tap on the green layer,
which is layer three. Add a layer above and then tap this and
set a clipping mask. Change the blend mode to overlay
and from the color disc, select a darker gray. Open brushes and
choose rectangle. Decrease the brush size to about 8% and paint some subtle
texture onto the leaves. From the color disc, select a lighter gray and adjust the brush
size to about 6%. Pain tone some lighter texture. Now, select the branch layer
and repeat this process. The differences are subtle
but really effective. Our winter folage
is now complete, and I think it looks really
lovely. Great job, everyone.
6. Gingerbread Person: Let's begin by tapping on the wrench icon to
open the Actions menu. Select Canvas and then
toggle on drawing guide. Tap on Edit Drawing Guide
and select symmetry. Tap on options and note. There are four different ways
we can set the symmetry. But for this lesson,
we will use vertical. Tap done and note the vertical
line down our Canvas. Open the brush menu and select
the set called Charcoals. From here, select
Charcoal block and then open colors by tapping
on the little colored circle. Go to the gingerbread person palette and select
the lightest brown. Tap on the circle to close. Set your brush to about 11% and begin to paint on the shape of your
gingerbread person. Draw some feet shape
onto the legs. I'm happy with how that looks. Open brushes and choose D's star stamp that is included
in the project resources. Set the stamp brush to about
60% and stamp on some stars. Reduce the brush
size if you need to and add some stars
at the bottom, too. Open layers and
add a layer above. Tap on this new layer and
apply a clipping mask. Go to colors and on the disk, select a lighter version
of the current color. Open brushes and scroll
down to the industrial set. From here, select heavy metal. Increase the brush size to about 50% and begin to
paint on some texture. Reduce the brush size and
add texture to the stars. Experimenting with
different brush sizes can add lots of cool effects. Open layers and merge these
layers together by pinching. Add a new layer above and
apply a clipping mask. From our color palette, tap on the lighter brown to activate this color and
then from the disc, choose a darker shade. Open brushes and scroll
to the spray paint set. From here, select flick. Set the brush size to 45% and tap on the gingerbread
to add some texture. This brush can be a bit random, so I like to tap outside
the shape at times. Experiment with
different brush sizes to see how it looks. Next, go to colors and
select a lighter shade from the color disc and continue
to add some flick texture. Once you're happy with this, open layers and merge these two layers
together by pinching. Add a new layer above
and open brushes. We are going to choose
the calligraphy set for some line work because these brushes have a nice
steady flow to them. Select the chalk brush or any other one you
like the look of. Go to colors and double tap on white to select a pure white. On layer two, you'll
need to tap and select drawing assist to activate
the symmetry function. Set the brush size to about 16%, and begin to add some
white for the icing. Reduce the brush size and add some white details to the stars. Now, paint on some eyes, a mouth, and some hair. On the body, you can add some cute details
like a bow eye, mittens, socks,
and some buttons. You can always have
a quick Google to get some inspiration. Open layers and tap back on the gingerbread layer and add a layer above so that
it's in the middle. From colors, choose a red and set the brush
size to about 16%. Don't forget to tap
on the layer and set drawing assist to
activate symmetry. We have to do this
with every new layer. Color in the bow and other details using the different colors
from the palette. Choose a pink color and paint
on some cute cheeks too. I'm going to add some color to the stars so to make
sure they are different, I'm going to go to layers and
toggle off drawing assist. From colors, select dark
green and color one star, then choose the
pink for the other. Open layers and tap on
the background color. Select the light pink, tap on the gingerbread layer, and then add a layer above. Drag this layer below
the gingerbread layer. In the color disk, choose a lighter pink shade
over current color, and from brushes, select
industrial and then heavy metal. Set the brush to about 43% and pain toon some color
on the background. Let's tap on the Actions menu and toggle off drawing guide
to see how that looks. That looks super cute, but I want to make it
look more three D. To do this, let's open layers and tap on the gingerbread
layer, which is layer one. Swipe left on this
and select duplicate. We now have two of these. Tap on the top gingerbread
and set Alpha Look. You should see a
checkered pattern now. Go to colors and select
the darker brown. Then go back to
layers and tap on the current layer and
choose Till layer. Now our gingerbread is darker. Let's drag the darker layer down and then tap
on our arrow tool. Ensure that snapping is off, so it should look like this. Drag your pen down and left, and you'll see the
darker shape move. Take some time and set it
to a position you like, and then tap the
arrow to deselect. I think the shadow
really makes this pop. We have a super cute
gingerbread person. Great job, everyone.
7. Funky Sardines : Et's begin by gathering
some reference. Go to Google and type in
vintage sardine tons. Observe the different
shapes, colors, and designs you
see, and screenshot or save some images you
like onto your camera roll. Let's open up Procreate
and set our Canvas. I'll set mineet centimeters
and make my height and width 30 centimeters
with a DPI of 300. Tap on the Actions menu
and toggle on reference. Tap on image and then import. This will take you
to your camera roll where you should hopefully
have some saved images. Tap on one of these to import. You can tap and drag on the reference box to move it into a more
suitable position. You can also pinch and move
your image if you need to. Once you have possessioned
your reference books, tap on colors and select
agree to sketch with. Open brushes and tap
on the sketching set, then select six B pencil. Begin to sketch a
rectangular shape for the t. Once you're happy with this, you can begin to round
off the corners. Remember, you can pinch two fingers and rotate
your canvas for this part. Refine the tin shape and
then draw a ring pull. I'll put mine in the corner. Draw a line around
the edge of the tin. Next, draw a sardine
in the center. I'm doing a very
simple shape here, a curved line at the top, and then again at the bottom. Refine your fish sketch
and then draw in some fins and other
details like a face, gills, an eye, and
a smiling mouth. Select the eraser and erase away any parts
that you don't need. I'm not happy with the
position of the sardine, so I'm going to tap on
the selection tool, make sure free hand is selected
and draw around the fish. Tap on the gray node to
complete the selection, and then select the arrow and move this to a more
central position. Next, draw in some
other details. I'm going to draw two tomatoes. At the top, draw a
banner shape and then add some hand lettering to the bottom and also
in the banner. Refer to your reference image
for some inspiration here. You can pause the video
while you complete this. Next, open layers and
tap on the little on your sketch layer and change the blend
mode to multiply. Set the opacity to about
23% by sliding the bar. We want to still be able
to trace over our sketch, but we don't want it
to be too distracting. Tab plus to add a new layer and drag
this below our sketch. Open the brushes and choose the calligraphy set and
select monoline. Adjust the brush
size to about 65%. Trace around the sardine tin. Remember to use a two finger tap if you need to
undo any mistakes. You can also use a three
finger tap to redo. Go to the color.in the top right and drag and drop this to
fill in our shape. You must ensure
that all lines of the shape are completely
closed for this to work. Let's go to the Actions
menu and toggle off our reference image
so far so good. Open layers again and
add a new layer above. Tap layer three and
apply a clipping mask. From the color disc, select a lighter
version of pink, or you can choose a different
color from the palette. Trace over the sketch line. Then tap on the colored dots and dragon drop to fill
this shape with color. Open layers and turn off the sketch layer to get a
better idea of how this looks. Open layers again and
turn back on the sketch. Add a new layer and then tap on this layer and
apply a clipping mask. From the color palette, select a blue and reduce the brush size to
about four to 5%. Pinch two fingers to zoom in and trace the
outline of the sardine. Fill this with color as before. Next, do the same for the fins. Again, turn off the sketch
and check your work. Open layers and add a new layer. Tap on colors and
from the color disc, double tap on a white
to select pure white. Reduce the brush
size to about 9% and trace over the banner ensuring there are no
gaps in the lines. Once complete, fill
this with color. Next, choose the darker pink and trace over the ring pool. Close any gaps in the shape and then
fill this with color. In colors, choose a red and
trace around the tomatoes. We can make a
perfect circle here by holding down our pen
at the end of the shape. However, I prefer a more natural look
in my illustrations. When you are happy with your
shape, you can color fill. Next, open layers
and add a new layer, and from colors, choose
the darker green. Paint in the tomato stalks. Because these details
touch the red color, it is best to put them on a separate layer in case we want to make
changes later on. Next, open colors and
choose the lighter green. Trace over the
bottom label shape. I've decided to
make this an oval. We can easily drag and
drop different colors from our palette if we aren't
sure which color works best. I'll stick with green
for the moment. Open layers and
add a layer above. Go to brushes and from the calligraphy
set, choose script. Tap on colors and
select a yellow. Reduce the brush size to about 16% and trace
over the lettering. Change the color to red and trace over the
lettering at the top. In layers, turn off the
sketch to see how it's looking and make any
changes if necessary. I want to change my
lettering slightly, so I'm going to tap and hold on eraser to erase with
my current brush. I'm erasing away the edges of the letters to give
them a straight edge. This step is
completely optional. Let's add some details
to the fish layer. Tap on the fish layer and toggle off clipping mask because we don't
actually need this. Tap plus to add a layer above. On this layer, tap on it
and add a clipping mask. You'll see a small arrow, which means anything we add will be clipped onto
the sardine layer. Open colors and choose the
darkest blue from the palette. Tap to open brushes and select the Kununi brush and set the
brush size to about 12%. Trace over the
sardine line details, adjusting the brush
size if you need to. I'm going to add some
extra line details on the tail and fins.
8. Funky Sardines Continued: For a bit more visual interest, I'm going to add some
scales to the body. I really like the
texture of this brush. Change colors to a white
and paint on an eye. Then go back to the
dark blue color and paint a small
dot inside the eye. Turn off the sketch
to see how it looks. I think that is looking great. Open layers and swipe right on each of
the colored layers. Tap on group and then tap on the small arrow to
minimize the group. Swipe left on the group
and then tap on duplicate. We now have two groups, tap on the top group
and select flatten. Tap on the bottom group and tap on the little arrow to
maximize the group, and note that all
the layers are still intact in case we want to
make changes at some point. It's really good
practice to keep an unflattened version of art, especially when
working professionally for clients who might
request changes. Tap on the arrow
again to minimize or group and hide this
group by unchecking it. Go back to layer two, which is the flattened
sardine tin. Add a layer above, tap this and set
a clipping mask. Tap on the little N and set
the blend mode to overlay. Open colors and double tap on a middle gray
in the color disc. We will be working with
lighter and darker gray shades to apply different textures. Select a darker gray
and open brushes. Open the textures set
and select grunge. Set the brush to 100%. Paint on some texture
around the edge. In the color disk, select a lighter gray and paint some texture
on the inside. Open layers and uncheck the texture layer to
see the difference. If it looks too intense, you can change the opacity
by adjusting the slider. I'll set mine to about 78%. Turn off the texture layer completely and add a new layer. It should automatically be
clipped to the layer below. Change the blend mode
to overlay as before. In brushes, select
the industrial set and choose rusted decay. Set the brush size to about 53% and paint on
some light texture. We're just having fun here and experimenting with some
different textures. In the color disc,
choose a darker gray and apply some
darker texture, reducing the brush
size when needed. Add some textured shading
to the details too. Open layers and turn
off this layer. Let's compare each texture by turning them
on one at a time. I'm going to try a final
texture layer here, let's turn off both texture
layers and add a new layer, and then in brushes, select the painting set. Choose the brush called Nico RL. Set the brush size
and opacity to 100%. Don't forget to change your
blend mode to overlay. Apply texture and
experiment with different, lighter and darker shades of gray and different brush sizes. You can change the
brush opacity too. Playing about with
texture is one of my favorite things
to do on Procreate. In layers, tap on the O and change the opacity
of the texture layer. I'll set mine to about 87%. Turn on each texture
layer one at a time to see which
texture you prefer. I like the industrial
texture best, so I'll keep this layer turned
on and uncheck the others. Next, tap on the
background layer and select a background
color from the palette. Try out a few colors to
see which you like best. I'll stick with the
dark blue, I think. In layers, tap plus to add a new layer and drag this
above the background layer. Change the blend mode to overlay and set the
brush size to 100%. My opacity slider
is down slightly. Paint on some lighter
background texture, then paint on some
darker texture. I'm using both Nico RL and rusted decay for my
background texture here. If the background texture
looks too intense, you can change the opacity. I'll set mine to 72%. Next, let's add a drop shadow. Open layers and add a new layer. Drag this layer right to the bottom above the
background layer. Tap on the little N
and set the blend mode to overlay and choose a
black from the color disc. From brushes,
select the painting set and choose the stucco brush. Set the brush size to 16% and paint a shadow along
the bottom right edge, following the shape of the tin. N layers, set the opacity
of this layer to 23%. Refine the shadow
if you need to. Next, I'll show
you how you can go back and change the
colors of this piece. Open layers and uncheck all of the active layers so that all
you have is the background. Go to the layer that says new
group and check this layer. This is our
unflattened sardintin. Tap on the little arrow to maximize our layers
and go to layer three. Tap on the color dot and from our color palette,
choose a yellow. Drag and drop this
to fill the shape. I really like this new color. Tap on the circle again
and from the palette, choose a different color. Drag and drop this to
fill the active layer. Experiment with
different colors. You could go back and do this
with each of the layers. This for me is one of the
best parts about digital art, the ability to make quick
and easy changes and the creative flexibility
and freedom this gives. Have fun and play around with some different
color combinations. Be sure to share your final
project in the gallery. I can't wait to see it.
9. Pretty Lemon Branch : Open the sketch which is
included in project resources. Open the brush library and
select the painting set. From here, choose
the Tamar brush. Go to colors and
from the color disk, select a lemon color. Tap on the color dot
to close the disk. On the brush size slider, set the brush size to about 7%. Then open layers and tap plus to add a new
layer for our color. Drag this below
the sketch layer. Begin to trace the
lemon on the left. You can pinch and drag two fingers to zoom or
rotate your canvas. Once you have
traced the outline, you can paint inside the lemon. Let's open layers and add a
new layer for the next lemon. Drag layer three to the bottom. Let's check layer
two to turn this off so we can see what we
are doing a bit easier. Paint the outline of the second lemon and
then color it in. Don't worry about the
leaf for the moment. Open layers and turn
back on layer two. Let's tap on layer two
and add a layer above it. Open colors and from the
color disc, select a green. Tap the color dot to close this. Reduce the brush size to about 5% and begin to
paint on the stem. Then reduce the size slightly and paint on
the thinner stems. Next, increase the
brush size back to about 5% and trace the outline of the leaf
and paint this with color. Then repeat this
for the other leaf. Reduce the brush size to refine the shape of the
edges if you need to. Open layers and turn off the sketch layer to get a better idea of how
things are looking. Tap and hold on the eraser tool to set this to erase with
your current brush. I'm going to erase some of the leaves to sharpen
up the edges, and then I'll do the
same with the stems. Open layers and locate the
lemon on the right hand side. You can always turn
off the layers if you aren't sure
which is which. Add a layer above layer three, then tap on the new layer
and apply a clipping mask. Hold a finger on
the lemon color, and this is now our active
color that is selected. Open colors and in
the color disc, choose a slightly darker
shade of this color. I'm dragging mine towards
the orange for this. Open brushes and choose stucco. Set the brush size to 30% and begin to add some shading around the edge of the lemon. Reduce the brush size to 16% and paint on a
shadow under the leaf. Next, increase the brush size again and paint on
some more shadows. Open colors and from the disk, choose a darker color. I'm choosing a more
reddy orange here. Again, paint on the shadow under the leaf and add some
shading around the edge. We are building up
the shading here. Open layers and tap on the other lemon,
which is layer two. Tap plus to add a
layer above and then tap on this new layer and
apply a clipping mask. Paint some texture
onto the second lemon. We will paint a bit more on the right hand side because this would be the shadow cast
from the other lemon. Next, open layers and tap plus
to add a new layer above. In the color disc, double tap on white and set the brush
size to four to 5%. Paint on some highlights in
the center of the laymen. Open layers again and
tap on layer five, then add a layer above. Now paint on some highlights
to the other laymen.
10. Pretty Lemon Branch Continued: Now let's tap on the leaf layer. Add a layer above, then tap on this layer
and select clipping mask. Put a finger and hold this on the leaf to
activate this color. Then open colors and
in the color disc, select a slightly darker
shade of the green. Set the brush size to about 31% and then add some
shading to the leaves. I'm keeping mind to
the edges mainly. Reduce the brush size to 9% and add some
shading to the stems. Open colors and select a lighter green and add
on some highlights. Increase the brush size and add some highlights
onto the leaves. Next, open colors and this time, select an even lighter green and continue to build
up the highlights. You can reduce or increase the
brush size if you need to. Open layers and tap on
the background layer. On the color disk, select a background color. I'm going to go for blue because it will really
make the lemon pop. You can drag your pen in the color disc until you
find a blue shade you like. Let's open up layers by
tapping on it again. The first thing I'm going to do is clip the highlight
layers as I've realized I haven't done this now that I'm seeing it
against the dark background, tap on each of the highlight layers and
apply a clipping mask. That's much better. Now
because the brush we use for the lemons was quite transparent and we've gone
for a dark background, we can see it coming through, but we can easily fix this. Swipe right on each of the colored layers
except the background, and then at the top, tap group. Beside the new group, tap on the small
arrow to minimize the layers and then swipe left on the group
and tap duplicate. On the bottom group, uncheck this so
that it's hidden. On the top group, swipe left and duplicate
the layer again. Repeat this once more by
swiping left and duplicating. We now have four groups
with one of these hidden. Merge the top three groups
together by pinching them. You can see that our
lemon branch is now more opaque and we can't see
through it as much. It's always good to keep
an unflattened group just in case we want to go back and make any changes
in the future. I want to add a bit more
shading to the lemons, let's open colors,
hold a finger down on the shadow part of our painting to activate the orange color. Then in the color disc, I'm going to select
a darker orange. We are still using the
stucco brush here. Let's reduce the size to 5% and begin to
paint on a shadow. Open layers and add
a new layer above, and on this layer, tap to apply a clipping mask. Set the brush size to 17% and paint on some of this darker
color around the edges. Just be careful you don't
paint onto the leaves here. You can always erase any
mistakes using a two finger tap. Let's add some texture
to the blue background. Add a new layer and drag it
above the background layer. Hold a finger on the background
color to activate this. Drag and drop the
color onto the layer. Now add another layer above, then apply a clipping
mask to this layer. Open colors and in
the color disk, select a lighter blue. Open brushes and select
the industrial set. From here, select the
brush called heavy metal. Set the brush size to 100% and reduce the brush
opacity to about 57%. Now paint on some
background texture. You can experiment by changing the opacity and the
brush size here. I'm happy with mine, and I
think it looks really great. Excellent job, everyone.
11. Watercolour Greenhouse : Open the greenhouse sketch included in the
project resources. Tap on the wrench icon to open the Actions menu and
tap on Insert a photo. From your camera roll, insert the watercolor
paper JPEG, which was also included
in the project resources. When this has
finished importing, tap on the arrow and then
drag the blue nodes at the corners until it
covers the entire canvas. Tap the arrow to deselect. Open layers and tap on
the inserted image layer, tap on the little and set
the blend mode to multiply. Drag the opacity slider
and set this to 36%. The sketch layer is
already set to multiply, which means we will be able
to trace over it more easily. Open colors and make
sure that you have imported the greenhouse
color palette from the project resources. Next, open brushes and go to the watercolor
essentials brush pack, which is also included in
the project resources. Select the brush
called cotton one, tap on the color dot, and from the palette, select the latest
lime green color. Open layers and
tap on layer one, which is our sketch and add
a new layer by tapping plus. Drag this layer
beneath the others, set the brush size to 21% and paint on some color
inside the greenhouse sketch. Reduce the brush size as you
get closer to the edges. Open colors and choose the
darker lime green and set the brush size to 15% and then paint over this
with some darker green. Tap on colors again and choose the darker green and set
the brush size to 9%. Paint around the edges
of the greenhouse. Next, increase the brush size to 16% and paint some darker
green in the middle. Reduce the brush size to 6% and add on some darker green around
the bottom and top edges. To make this more blending, let's tap and hold on the smudge tool to smudge
with our current brush. Set the brush size to 13% and begin to
paint over the green. You can see it start
to blend together. Tap back on colors and
select the darkest green. Tap on brushes and
select Rainforest one and set the
brush size to 10%. Paint on some darker green
around some of the edges. Next, increase the brush size to 14% and reduce the
opacity to 45%. Paint on some green
in the middle. Tap and hold the
smudge tool again, reduce the brush size to 16% and Blaine some
of the darker green. Next, go to layers and tap
plus to add a layer above. Tap on brushes and
select classic round. Open colors and select the mid green and set
the brush size to 8%. Paint on a stem and then add some leaves to
make our first plant. The shapes can be
simple and stylized. I'm not going for a
realistic look here. Good. Go to the opposite side of the greenhouse and paint on some long thinner leaf
shapes this time. Repeat this process by
painting in a few more plants. Try to change up the shape and sizes to add more
visual interest. You can pause the video
while you do this. Open colors and select
the darkest green. Tap on layers and
add a layer above. Paint on some darker green stems and leaves in the spaces. Don't worry about them
overlapping as this creates a nice look and gives
the picture more depth. Tap on layers and add
a new layer above. In colors, select
the bright pink, set the brush size to 11% and paint on some
big flower petals. Reduce the brush size to 6% and paint on some smaller
flowers in some of the spaces. Go to colors and
select a yellow, and then open layers and
add a new layer above. Open layers and add a new layer. Drag this layer
below the plants. Open colors and select
the darkest green. Set the brush size
to 3% and paint on some long thin stems
coming from the pink flowers. Go back to each stem and
add some small leaves. These should look like they are behind all the other plants. Tap and hold the eraser to to erase with
our current brush. Erase away any parts of the stems you can see
through the other plants.
12. Watercolour Greenhouse Continued: Go to layers and
add a new layer, then drag this layer
right to the bottom. Open colors and select the
lightest lime green color. Open brushes and select classic flat and set the brush
size to four to 4%. Trace the sketch outline
to paint on the grass. I'm doing long quick
strokes for this part. Open layers and
add a layer above. In colors, select the brown and reduce the
brush size to 19%. Trace over the sketch outline
and then paint with brown. Open colors and in
the color disc, choose a lighter shade
of the current color. Reduce the brush size to about 8% and paint on the
bottom front of the greenhouse. I want this part to
look more opaque, so I'm going to open
layers and swipe left on the layer and
then tap duplicate. Then using two fingers, I can pinch these
layers together. I think that looks much better. Open layers and tap on the
grass layer at the bottom, and add a new layer above. Go to colors and
select the mid green. Next, open brushes and select cotton one and set
the brush size to 7%. Paint in the bush shapes at either side of
the greenhouse, reducing and increasing the
brush size when you need to. Go to layers and turn off the sketch layer to
see how it looks. Turn the sketch back on and tap the layer
with the bushes. Then tap on Alpha ok. In layers, you should see
a checkered background. Go to colors and
select the mint green, and in brushes,
choose clouds one. Set the brush size to 22% and then paint on some
lighter cloudy texture. Next, choose a
darker green and add some texture to the bottom
and the top of the bushes. Open layers and tap on the grass layer and
add a new layer. Drag this layer
right to the bottom so it sits below
the grass layer. Open colors and tap
on the lightest blue. In brushes, select wash one and then set the
brush size to 40%. Paint on a sky, adjusting the
brush size if you need to. Tap and hold on arrays and begin to erase
away the cloud shapes. Next, add a layer above
and choose yellow from colors and select round
basic from the brushes. In layers, tap on the layer with the bushes and add
a new layer above. In colors, double tap on
white to select a pure white. Open brushes and go
to the sketching set and select six B pencil. Begin to trace over the
lines of the greenhouse. I'm going to open
layers and drag this layer right to the
top and set it under the imported image and sketch layers so that it is in
front of everything else. Continue to trace over
the green house lines. If you feel your
sketch is too faint, you can change the
opacity to suit. I'll increase the sketch
layer opacity to 92%. I'm going to add in some extra
lines at the front here. I want to add a bit
more blue in the sky, so I'll tap on the sky layer and select the darker
blue this time. In brushes, go back to the watercolor essentials and select water and pigment
cloud brush one. Set the brush size to 100%
and paint on more blue, especially around the
edges of the greenhouse. This will really
make it stand out. Let's add some subtle
shadows to the grass. Open our layers and tap
on the grass layer and select Alpha ok. You'll see
the checkered background. In colors, select the mid green and paint this along the
edges of the canvas. Reduce the brush size to 28% and paint on a drop shadow
underneath the greenhouse. Increase the brush size slightly to make the
shadow a bit larger. In colors, select the yellow and add some
yellow to this too. Our greenhouse is complete. I think that looks so cute. Great job, everyone. Oh
13. Conclusion: Congratulations on completing
Procreate Master Class. Let's celebrate our success
by sharing our work. Go to the Projects and Resources tab and click Submit Project. Fill in the details such as project title
and description, then add your image
and click Publish. I really hope you continue
your appropriate journey and apply these new skills to
your own unique work for bar. I can't wait to see
your finished project. If you enjoyed my class, then please give me a
follow by clicking on the Follow button next to my name on top of the
video lesson player. You can learn more
about me and my work by visiting my website or by
following me on Instagram. You can share your work
on Instagram if you like, but please tag me so I can see your post and offer you
some positive feedback. Thanks for drawing
with me. See you soon.
 Dee Smith, Professional Illustrator and Teacher