Transcripts
1. Intro: Hello and welcome back
to draw the vulva. Today I'll be showing
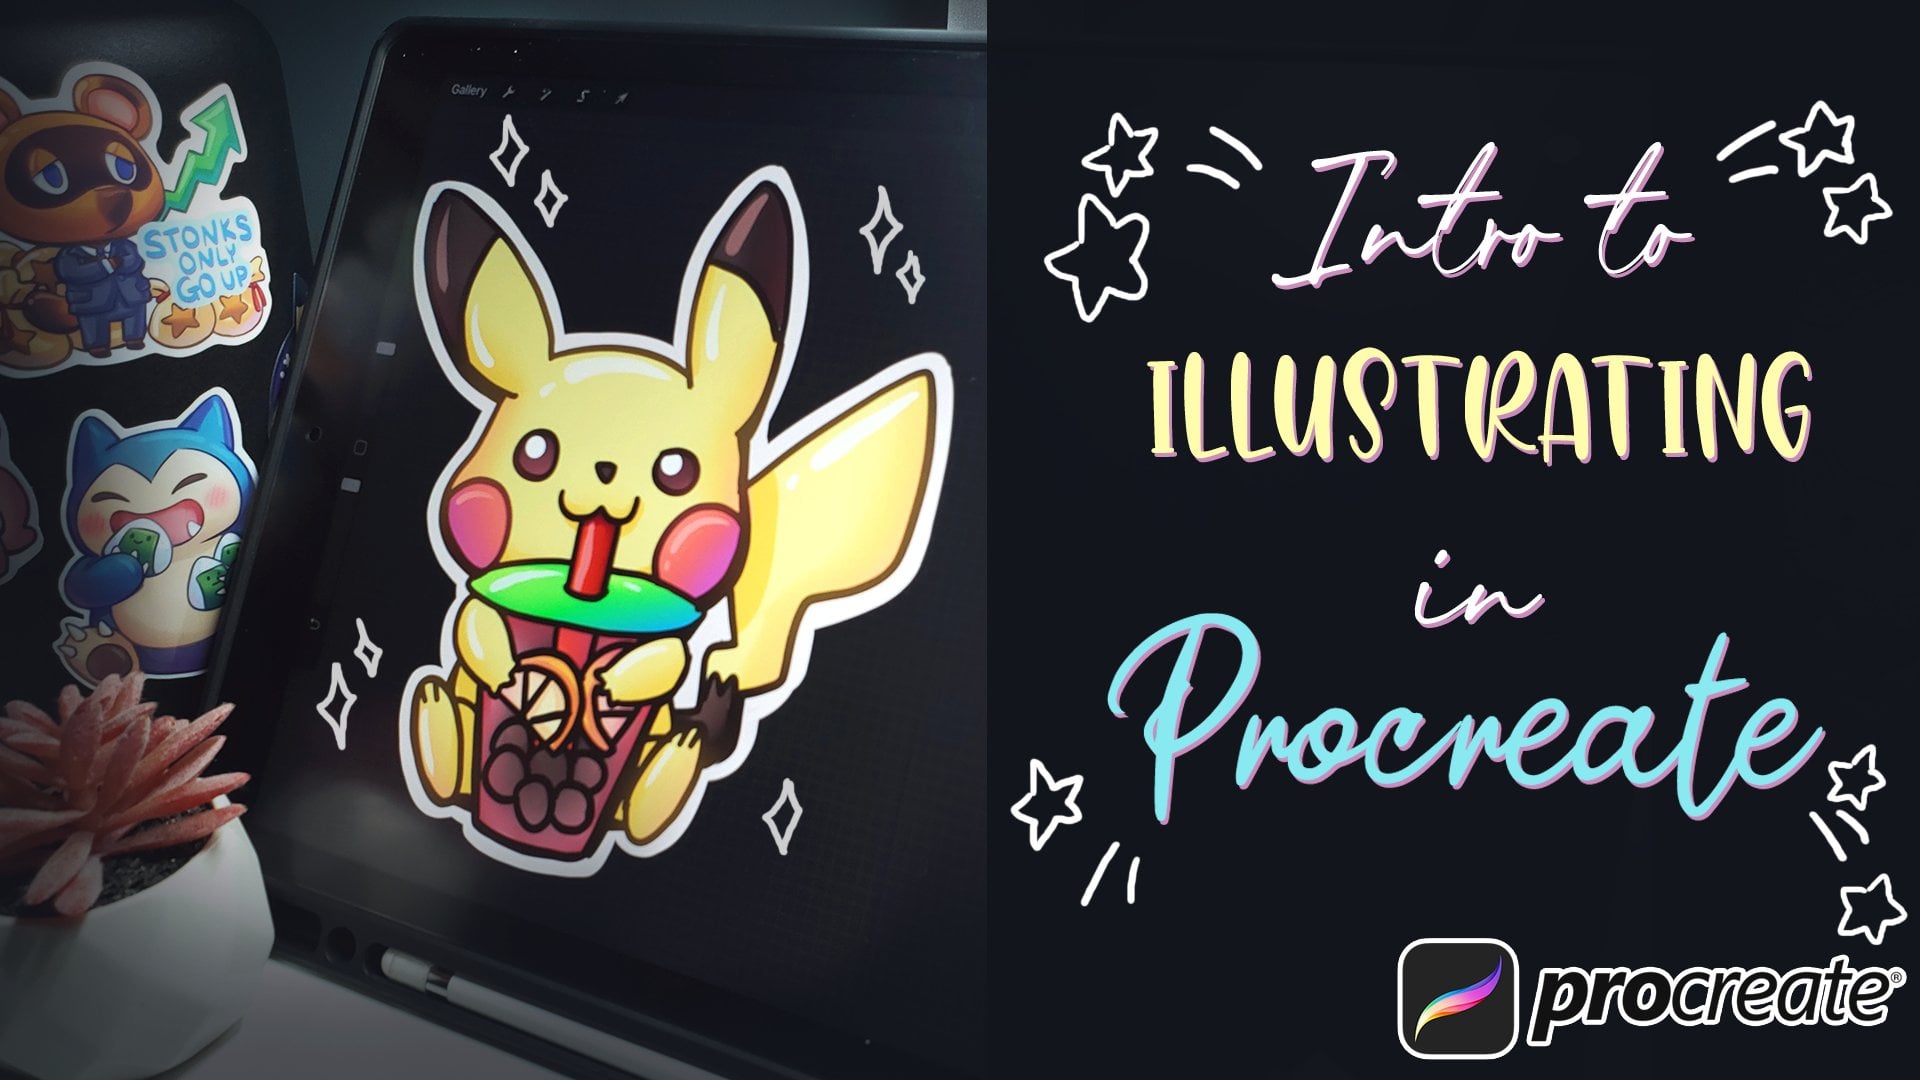
you how to design your very own TB Tacoma. We will be using Procreate
to do the sketchy liner. Finally, a quick, easy method
to color these drawings. Learn how to draw
step-by-step today.
2. Sketch: Hello, For the first
step of this tutorial, please choose a book a month
that you want to chip if phi I used the default
brushes in Procreate. So we're gonna go to sketching
and then we're going to choose the HB pencil for
the sketching phase. I usually like to do
a simple blue color. To start. We're going to take this dry. It's pretty cute already, but we're going to chip
if phi and simplify it. And it's gonna be similar to the designs up my
previous stickers. Some examples. As you noticed while
picks this up extra cute. And then let's start with
the head shape first. Usually you want the head to be bigger than the
rest of the body. So we're going to
draw a pretty big Ed. Since this is just
sketching phase, you could go a little messier. I'm going to target this just
so you can see it better. You don't have to
worry too much. And then for the body, I like to scale the body down, maybe not too small, but maybe like 30% smaller. Just so we have a
good difference. Then with that done, we can just put in the
elements and then size them according to the original dry. So for the ears is pretty big so we can even scale them
up just a little bit, just to get them a little cuter. And then as you notice, I'm just trying to
very simple shapes. I'm not doing any details yet. You'll want to start really simple with the sketching phase. For the feet are together. Just start simple and just kinda do these two ovals,
pretty big feet. I'm gonna make them sit
down so the feet are just like pointed forward. It's going to be very
similar to this site. They're dry. With that data. I'm just going to
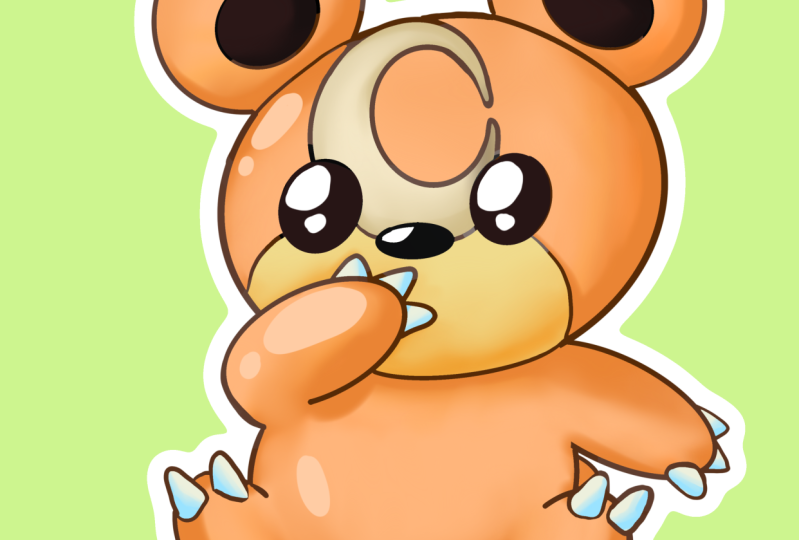
add a little knob on the back for the tail. Went, that's done.
I should've let the pose where he's
holding his mouth. So I'm going to draw
in list, I do that. Let me just draw it
a little smaller there and then
connect to the body. And then this one, just sideways right here. And then we're going to split the face into force by drawing a center line right here and
a center line right there. And this is going to help
us put all the details in. We're still at the
sketching phase, so we could just go in
and sketch the eyes two circles using the center of this leg right around here. I wanted to make it even
distance from the center line. So I'm just going to do
circle here, circle here. And then right in the middle, we have the little cute nose. Then let's sketch in the
crescent moon on his head. So Pokemon are a
little bark complex, so you have to
simplify a lot more. But to start off with the
easy one. If you need to. Add in the little circle
for the highlights. Let's draw in the
muscle which is a pretty simple shape like so. Then the two dark
details either side. And then for the fingers are
just simplify it by Mickey, a little bit more round. Little toe, toe, toe, toe. What's your sketches done? We could move over
to the inking phase.
3. Line Art: Is just so I could lighten up
the sketch lines felt like the kind of lighten it. Maybe around 20% just
so you can see it. Then we're going to add
a new layer on top. You don't want to do it
right on the sketch layer. And then we're gonna go and
use the inking brush here. Then let's just
use a studio pen. See how that looks. That's looking pretty good. Go pitch black for this. Now we're just gonna go
through and eat the drawing. Start off with the
big stuff first. For the head shape, I'm gonna go maybe around this thick and we're going
to actually go all the way around with
this ink brush. Tip for Procreate is you hold
it for a little bit longer, it will turn into a
perfectly round shape. Once you're happy with
that, you can let go. I'm just going to erase. Use the eraser and
let's go to painting. Let's do flat brush. Just so we have a strong edge. Erase the areas where
you don't want that. Just called thorough
when you're sketching lines to ink the cuts up, make sure to hold
down and wait for a few seconds if you want it to be a little bit more round. Looking pretty cute
out the ISP around. So I'm again definitely hold it. Get them to be the same size. Circle it'll highlight. Let's actually fill these in black by dragging me the
color for the top-right. Finally, the news. Looking pretty good. Little aren't going to actually start down here, out. Down. Just a little neo detail. Let's try the other arm. We actually want to
complete the head to this point. Then we drill other. As you notice, I'm
undoing a lot. I'm not the best
with clean lines, so you can always undo
until you like the line. I need to improve that skill. Trying with a little
bit more confidence. But for now, it's a
digital drawing seat. Just undo as many times as
you want until you like it. This time I'm going to
actually put it in front. Sorry, I just need to
erase a little bit. First because the toes are
good at beginning the lake and then draw the lake
right below it. And do the same for
the other side. A toast roof of the tail. So you just add that
their trial, the face. It doesn't feel as
roundness this drawing. So I'm gonna actually use
the liquify tool, just this. And we're going to
push out a little bit, just share around it out. Just accepted by going
to the pen tool. And then let's draw
in the crescent moon. The muzzles with
just the two pieces. Get it right. I wanted to look that is looking good and then maybe just a little
detail right there. Once you're at this stage, we could turn off the sketch
layer and then just clean up areas that you can see a little
bit of nuances like here, we're going to have to
clean up this area. Maybe thicken up some areas
like so connection points. It is yours to design
your sticker, your style. So at the end of the day, if you don't want
to add too thick this, you don't need to. I just like it. That's a preference.
Look at real kit. With your line art done, we're going to actually
get it ready for coloring. Sudden the next step we're
just going to color it.
4. Color and Paint: For coloring, it's very simple. We're going to actually
use procreates feature, which I use this as a reference. This is going to make
the liner a reference. So anytime you put color in OU's the
lines of the outline. So we're going to
add a new layer. We're going to cheat
and just select the color from the image and
just use our pouring tool. Make sure you have a new layer. This is a reference, so you
want to use a new layer on top to do the porin. I like to do one
color per layer. And you notice when
I pour this in, it went into the cheeks. It's because there's
a little gap here. To fix this. You just go into the
original drawing and then just close that gap. Go back, select the color. And then it was
one-color is done. Let's move on to the next
color with a new layer. Pick this yellow. Pretty easy. And I have one more
for the Paleolithic. Pretty easy. And then actually one
more for the white, Double-click on the
top-left to get the white. Then we're just going to
fill in the white spots. Sometimes you could
use this with the color fill automatic
and then you could just chlorophyll it by tapping
the areas should fill it. As you can see here, it
didn't fill it and then I'm missing a little bit of
orange area down here. What else are we missing? Weren't missing that dark areas. I'm going to
actually add that to the liner area. Actually. Let's do a little dark brown just so it's
not pitch black. Like so. Let me kinda adjust
this because it is a little too
dark for my liking. So I'm just going to make
it a little lighter, a little baby. Don't want to stray too
far away from the concept. Then a final step, we're
gonna do some color path. I like to keep everything
pretty simple. Again, add a layer
and you're going to click the Layer
angle Alpha Lock. Actually not Alpha
Lock, and do that. Where do I go clipping mask. And this is gonna
allow us to paint only where the
color is available. We clipped it to
this orange area, so we're going to now color it with only the orange area in my go to painting and
then just select it. Let's just flip. Any brush would work. Let's just do a flat brush. Inhale up just a little bit. And now he'd go in and paint. Just paint in the
shadow area could be a little messy because we're
actually going to use a blending brush
to blend it out. Try the blending brush. It's just gonna be a brush. Let me just get to
use soft palate. Then it's going to
smooth everything out. Hide all the little
imperfections. Rarely simple. And let's go a little
darker and then scale, see if there's any
other brushes. Maybe this was that bad. Medium brush. Go in details much as you want. The clipping mask
will allow you to just paint within the
lines really easily. Just amping up some details. Going just a little saturated
on the transmission line. Just to see how it looks. Not a big fan. So I'm just gonna use
the full heavy brush to blend it a little away. Once you're done
with that, let's just move on to the next color. And then 15 years,
same process we're gonna go. I didn't go there. Clipping mask. Make sure you're on the
new layer and then just select a little darker
color and then we're getting color in the shadows. Very simple process.
It's very clean too. Like you don't have to worry too much about cleanliness
since he had the clipping mask to keep
you within the life? Family? This one maybe a little darker. The more saturation,
nice little blending. If it looks too
dark or too harsh. Do it for the blue brown area, just a little darker
in the shadow areas. Finally, the whites. I personally don't
like to go to gray. I like to just use a
subtle little blue, maybe even lighter than
business as a shadow for white. Just to keep the
saturation vivid. This is blended to soften it up. Finally, let's color in
the liner. To do this. Just so it's not
just to pitch black. So we're gonna add a new
layer and we're going to go clipping mask on
the liner itself. Let's select a pretty dark color because we want the
line art to show. We're just going to
color everything brush, and then just start gaining
some areas where you want the lights be a little
darker and then you get lighten some areas where you
think it should be later. Softly. This should give it a more
soft look to the liner. I think the eyes could
be a little brighter. Say what the news I
personally like to do. I'll highlight path. So we're going to
add a new layer. We're going to go
back to inky select maybe a pretty fat pen. If you don't have
one, you could just make this one is just gonna be, this one actually is
a little too fat. So let's go to studio pen. Scale this up, see
what it looks like. It looks fine. Just going to go a little lighter layer on
top of everything. And just do these
highlight shapes. Actually, maybe even one more
highlight for the eyes. Q. Really bright for
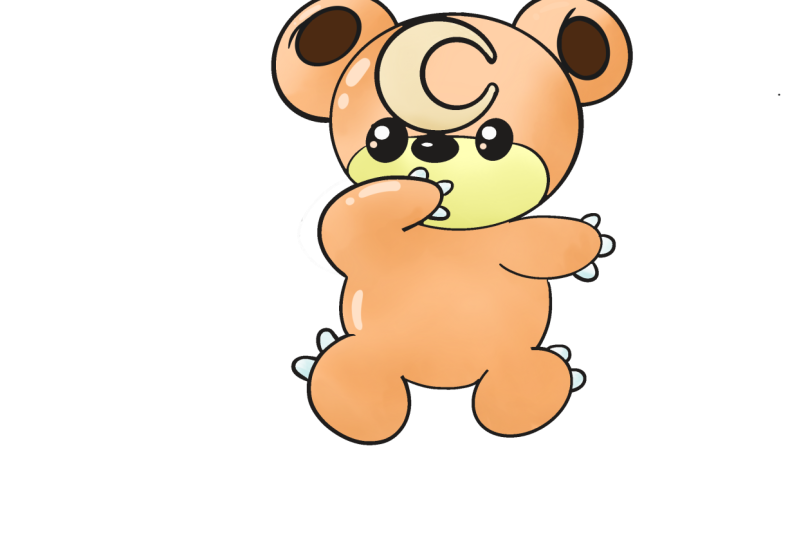
this, you can see it. There you go. Hey, method to typify your favorite
book when I'm drawing. Now you can take this design, turn off the background
saved as a PNG. Actually, let me see you save as a PNG and create
stickers with it. I have a few more examples of
six cubed stickers I like. Here's a pretty cute
little site up. Little cute statue. Actually. Now that I noticed
there's a white outline, we can actually add that in.
5. Final Thoughts! : We're gonna actually
do a copy canvas. Go here. Go to Canvas. I actually go to Ad Copy canvas. Then we're gonna go paste. This is going to
copy everything on the Canvas and paste it on top. We're going to duplicate this. So we have one on top. And then for this one
again and actually go hue and saturation, brightness all the way up. We're going to make
it pure white. Palsy and blur. Go a little bit out. Maybe that much. We're going to
actually use select Automatic on the outside. We need to call them blur
it just a little bit more. Actually. Just duplicate it. To get
a little bit thicker. We're gonna use select under
the colorful automatic. See that works. Go invert to a new layer. We're going to fill
it in with the white. Turn off the audio. You notice that it only did the
white outline right here is because we actually haven't
turned off the reference for ink or line art. So we got actually turn this off before we do this process. We're gonna use this and
let's just paint everything. Then. Now let's turn
off the Gaussian blur. Hopefully it should
be a little bit. Let's see what I did wrong. Let's delete. This is the Gaussian blur image. It's a little bit outside, but we just need to harden. Let's just duplicate
it a few more times. Unless do a selection toy again. You want to select the middle
and then expand it out. Again, a paint that all white. Maybe even more,
paint it all white. And there you go with
the Gaussian Blur layer. Do that real quick
again, hold this, invert it, and we got to
actually erase everything else. Just so we don't have
any loose pixels. There. You have it. You're a little sticker
is ready for printing, cutting with any machine or you could just
use sticker meal. But yeah, it was
how the process I use to create this
little sticker designs. Thank you so much for watching. And if you have any questions, please feel free to message me. I'll like to reply
probably weekly. But yeah, hopefully I make
more of these videos. And if you enjoyed it, please subscribe to the class. And thank you for watching.
 Boba Tea, Art Teacher