Transcripts
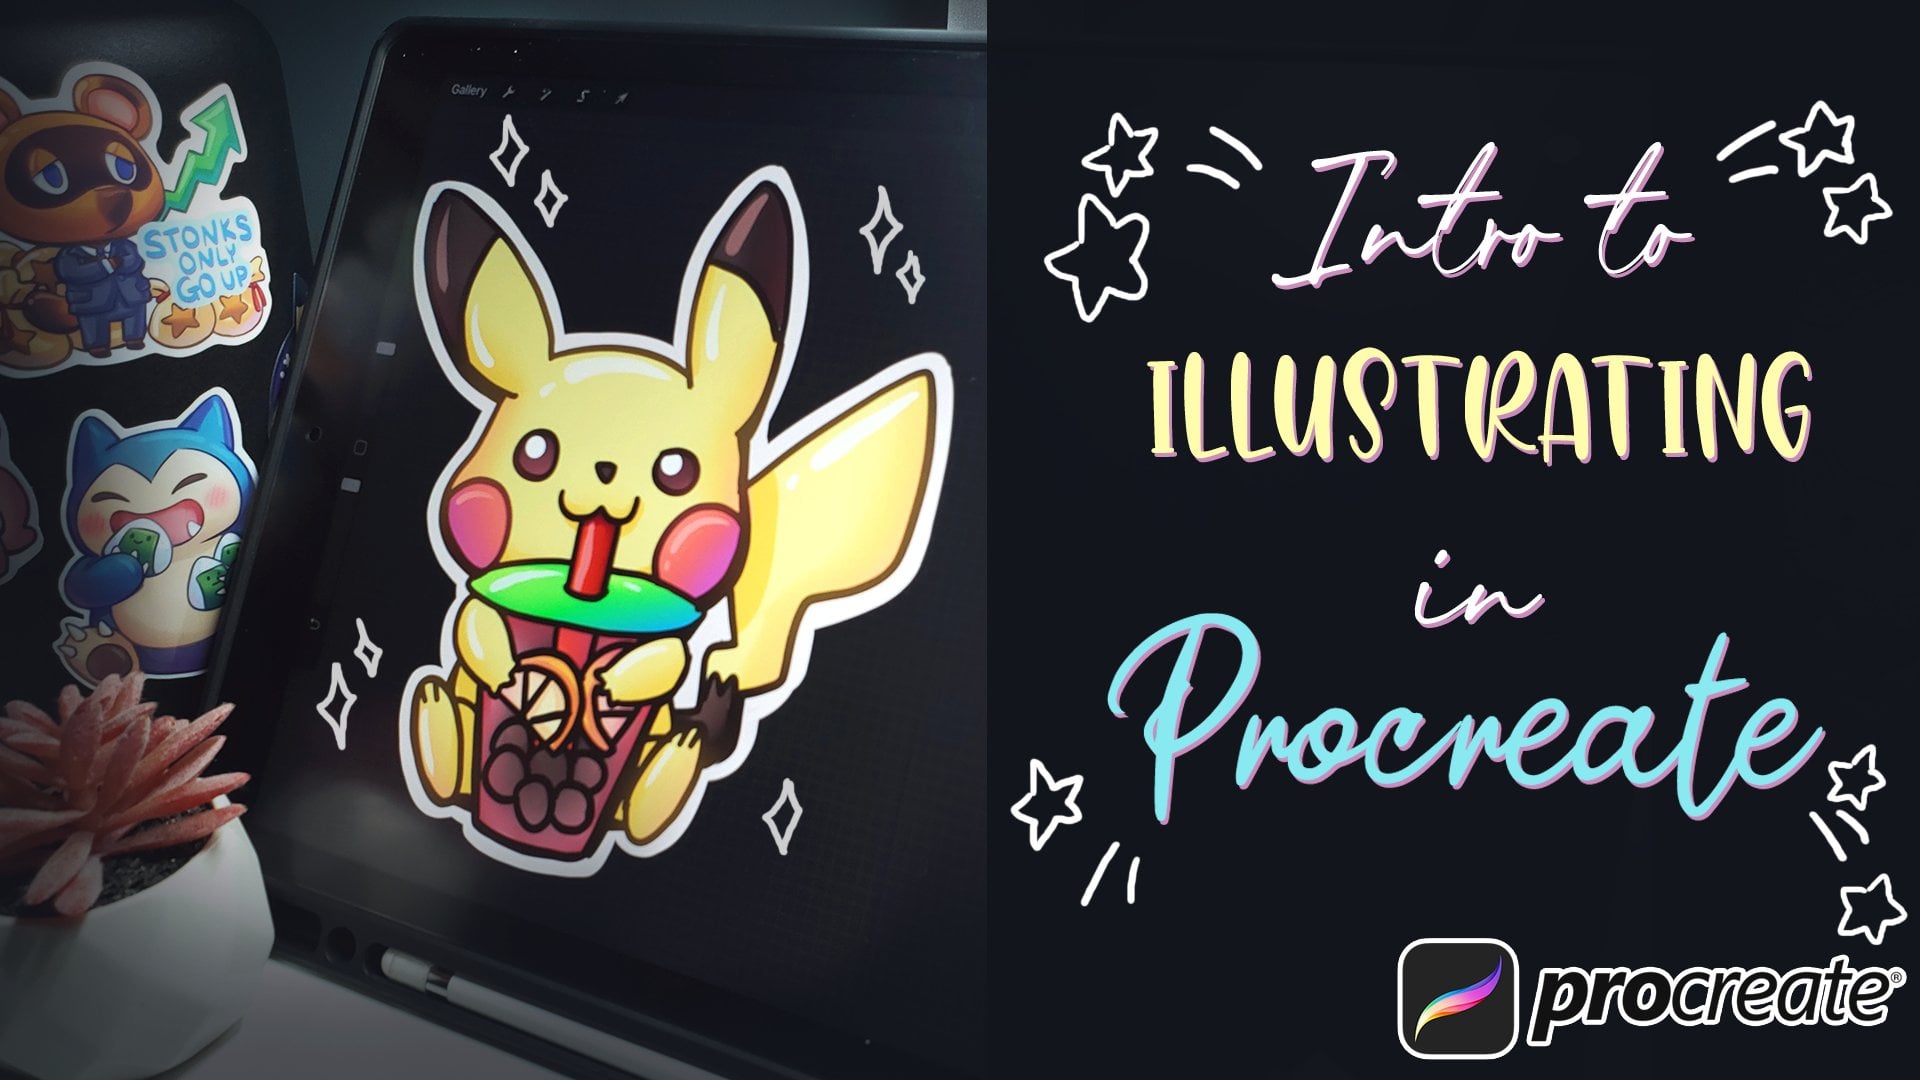
1. Intro: Hello, and welcome
to draw with Boba. In this video lesson, you will learn how to draw. Hello, Katy, step by step Kami, Cine Maro, and finally rope for our final
drawing for Volume one.
2. How to draw keropi : Oh. M.
3. How to draw cinnamaroll: H.
4. How to draw hellokitty : Go right at the top of page, and then just want to
go round but also wide. Sketch it in lightly, then we're going to go a
little better. That's me. Don't worry about having. We're going to draw over it
with a black line afterwards. Let's put the face in half. So we have a good indication
of what the middle point is. Let's go right to the middle and then
we're going to go a little lower for the eyes. I go right here, draw cross section to the eyes. And before we draw into details, let's block in the
rest of the right. Let's go ahead and move
this a little bit. To get started, I have a
reference photo of your drawing. Today we'll be
drawing hell kitty, and then we're going
to add another layer, and this is where we're going
to do the sketch layers. Let's just rename this sketch. Just sell me know. And then we're going to
start with the head. It's just going to be a circle. A bit, so it's on val, so lightly sketch it in. That's look good, and then we're going to go
line down the middle. And right there,
right in the middle, we're going to go a little
lower and we're going to draw a line across to the eyes. Don't worry about being perfect. We're going to draw in
inking lines afterwards. For the body, we're
going to start off with the middle of the hip right
around here, both sides. I' go down two lines a
little bit outwards, and we're going to
end it down here. For the body and split it
right down the middle. And one side, we're
going to add one leg. The other side it is
going to be an oval for the other lake And then we just need
a little bit of detail in the color and then to. Super easy. For arm, let's draw in a line. Start from here, we're going
to draw a line from here for the body the leg is right in time and
middle of the body. We go up and then a
circle right here just to catch the arm and a little circle right
here for the thumb. On the other side, same thing, we're going to go downwards,
middle of the body. Circle circle for the thumb. The yes, it's just
going to be two eyes right using the center
line that we earlier. So and I nose right
in the middle. A little lowers the yes. And the whiskers, 21 right here, just trot some in below the
cer later. And two more. For the ears, let's go right almost like split
from here to here or go up go back down to the head and same
on the side for the ear. We're going to draw the ear
before we draw in the flower. And the floor of the flower, it's just going to be a
circle right around here. Then we're going to draw in
ovals just to make it easier. We're going to draw in
five ovals all around. It looks a little messy,
but this is a sketch. We're going to do this.
We're going to go to sketch, go to opacity, 30%,
add a new layer. Let's go out and go to inking. Let's find a good ink pen. Let's try pan, black to
dark. Let's create our own. Let's go into pan duplicate. You go to Let's
see a pencil size. Let's go a little bit. That a little Siplization
go to amount. Just add these up, and this should give us a
really smooth pen to work with. D a new layer's call it in. Make sure it's black,
and we want to zoom in and start
inching our drawing. Give it a nice big size.
That's something good. And if you hold it for a little, I'll go, I'll go
to a perfect hold. Good. Here. Continue to a here, and then we're going to
stop here for the Ears. T. Then whiskers. The whiskers. So good for the arm. And then we have a little
bumper here in the body line. The body here. Just following their sketch. Takes a lot easier. Sketch down. We're
just cleaning it up. All drawing is done. We just need to turn
off our skit layer, have a clean ne turn
this into a reference. Add a new layer
below this color. Then we're just
going to color pick and in to complete our drawing. Super easy. You can use this method to draw any story of character you'd like. Let's take a step further. We're going to add a new layer. Actually, go back to the same. You need to pour in the white. This next step is
really important. We're going to go
clipping mass, multiply. Add a little bit
of a blue color. Then we're going to go to this. Make sure it's free
hand color fill. We're going to draw
in some shadow lines to create nice depth
part of character. So shadowy. Quick way
to add some death. Just give her a nice big a
little bit for the ball. Ears. Go white. Hear the eyes. There you go. You very
own allocating try. Thank you so much watching
and see you in the next one.
5. How to draw keromi : Okay. Take your
time with this one. Big oval. What? Split it right
down the middle. Then go in the middle, but a little lower, maybe one
quarter down line across. For the body, let's just drop in let's do one
circle right here. And another circle
right below it. Can give us jelly be cheap. And then for the feet, it's
just going to be board here and one right
in front of it. So Hand's going to
be two circles. Right around here from son the elbows in the middle of
the arm and circle here. All right once we're done
with the sketch lines, let's draw in the collar. Color, let's start up with the paper right around
here on either side. I go out Opike. Let's just draw collar one, two, back to the arm. On the other side,
just give you one. Then we just need one, two, three circles for the tail, it just going to be a triangle, let's go right here, simple triangle and
connect it to the body. Now, let's go the
details of the head. It's going to be a little
bit more complicated. Let's go and draw a line
right in the middle also. This is going to help
us with our design. Splitting the thing.
We're going to use the center point
right here a little lower and we can go
V shape from that. Top around here, and
then go back out. Either side, and then
draw in two big ovals. Draw in the whole oval first, and then draw a line
to cut in the eyes to give her the angry face. Now we need a little
nose in the middle. Smile. And two teeth. And for this cold, it's just going to be
right around here. We're going to draw
in another oval. To and then two notches,
two smaller circles. For the ears, let's
go over here a little bit like an inch
across two lines straight up, and we're to draw
in two triangles. One, two connected back to the head and two circles
at the end of the tangles. That's looking like
a sketch to start. Same thing. We're going to
lower sketch light capacity. Add a new layer and
it's going to be, we're going to go
back to black pen. Let's use the pen
we created before. We're going to use the pen
that we created earlier. So give us a nice smooth. Let's go and zoom in
and use our sketch. Draw in file drawing. Let's go with the nose first. Mile For the eyes, make sure to go for
the bottom line across to line across two
little eyeshes. Side of the face go in and
throw in the helmet cheap. See if we can do a slower one. For a little longer
and shift do the bell. They we could do a better one. Take your time. Okay. Let's split it
into multiple strokes. Forward here, Bruce. In
the middle back around. That's looking
good for the ears. Top around here. Go back. Do around here. I the fall outside. Okay. I rode the hands start off of the circle. Elbow. Collar. And the other arm it's going to be right. And file a straw in the button. C for little butt
back into the leg. And right in front the
tail to be from here, triangle the tail and
back to the body. That's a dry, withdraw
tide our ski lines, add a new layer and
ski before the color. We could just color pick. Make sure the line
is a reference. I just fill in the
correct areas. Super black. Peak. I was black. To the light to add shadows Mi M. Go to this free hand color cell. Turn to light and draw
into the shadows. You see. Make sure it's multiplied. Darkens dark areas, too. That's looking great, and
there's your picture of. Thank you so much watching, and I'll see you in
the next drawing.
 Boba Tea, Art Teacher