Transcripts
1. Introduction: Hello, I'm Masha Wurda. I'm professional artist
and illustrator. We did collaborated
with global brands such as Adopt Bly Elish Prime Videos, Lord of the Rings
strings of Power Series, Stadal and Well of Time
Series, and many more. In this class, we
will deep dive into Procreate's main interface
and you will learn Procreate's interface
and tools by hands on projects and
it is totally for beginners and we will
paint geometric shapes and portrait and
portrait practices, and we will paint dragons and different objects in
the end of the class, you will learn fundamentals of Procreate and you will
be able to create your own unique illustrations easily and see you
in the lessons.
2. Procreate Basics - Abstract Art Practice: Welcome. In this class, I will show you how
to paint abstract art in Procreate in just 10 minutes. At first, start with
an empty layer, and at first, I will start
with the shape tools, and I will use free hand tool, and I will paint some
free hand line here, like something spiky and
interesting looking here. Just like this. And I will go to the colors and I
will select red color. And with a smooth
shading brush or directly holding
your brush and drop here and tap to the selection tools for
cancel the selection. And we have great shape here. So if you don't like it, you can use your two
finger tap on the screen. To undo selection and go to B. So I decided to make
background much more dark red. So I'm dropping the dark
red just like this. And after this, I will tap on the selection tool
and tap to ellipse, and I will paint
one ellipse here. And if you tap on your secreen with your other finger
and hold your pencil, you can create perfect circle. So after selection, go to
the colors and select white. Then move your white
color to middle, and it will be like this. So after it, go to layers and tap to new layers and go
to selection tools and select free hand tool
and go to colors again and select some green tom and starts to adding some
different shape over here. I will start with this shape, and it will be free hand. And after it, I will paint
all area with my brush, and again, I will tap
the selection tool, and I will paint another
different shape here and we select yellow color and
we'll fill this selection. You need to directly go to the selection area
and drop your color. And after it, I will go to the shapes and
will select rectangle. And this time, I will paint one rectangle
here, just like this. And it will be blue,
just like this. And od from the selection
and go to the layers and tap tonive layer and go to
the brushes and select some inking brushes or
some drawing brushes. I will select drawing brush, glow ink, and with
on the ve layer, I will start to put some
lines here, just like this, maybe with a much more light
blue here, just like this. With a random line, I will create some shapes here. If you don't like shape, you can tap to screen with
your two finger to backward. So I like it, and I will add some yellow color
here, just like this. As abstract artwork
here, just like this. I will add, and I
will go to the here and maybe some orange tones
or purple tones here. If you go to the colors and
switch to hue from here, you will catch much
more effective colors for your abstract artwork. And I will show you
another method. Go to layers and open another new layer and go to Selection tool and
select Ellipse. Then select this place and
drop the color. And ester it. You need to tap the layer
and tap the layer options, this button here and maybe
these colors look really nice. You can apply this method, for example, with another layer, I will make a short here, and with the same color, I will paint, and I will change the layer modes again,
just like this. And it makes your
colors different. So it is really great for
creating abstract artwork. I will go to here and
select rectangle. And this time, I
will select here, and with the new layer, I will put color and will change this option to make
it much more interesting, for example, with much
more interesting colors. Yeah, I will use it. Then
you can go to layers now and pinch your two fingers together. It will
look like this. And it will make your
illustration merge. So go to the adjustments, and I will play with the hue saturation and will give a bit much
more saturation here. And I will go to the glitch and I will give a
glitch a bit much more. And again, I will go there and maybe chromatic aberration, just like this and go again and at bloom and increase
the details. It will give a really
good effect here. And our painting
is almost ready. So in this abstract artwork, I will open a new layer
with artistic brush. And with this brush, I will keep increasing
details and put different colors
into my illustration, and it will be like this, maybe this place
will be like this. You can add many details at your illustration
depending on your choice. For example, I can give it some washed look here and
other color drops here. Maybe this color
will be even better here like this merging effect. And you can manipulate and add details your
abstract artwork. Depending on your choice. So I'm making these parts much more interesting with
simple bright strokes that gives the illustration much more vibrant and
great look just like this. And this place
will be like this. And maybe this
place can have some extra different maybe wilt light effect here,
just like this. And it makes our abstract
work much more interesting. For example, there will be
maybe some brush strokes here, like waves, maybe like this. And this place will be like
this, much more stretchous. And you can mix everything like adding extra colors
over your artwork. These kind of practices will
your brush control increase, and you can test your brush and create something
experimental and amazing. So you need to, like, test the brushes just like this and experimental
rocks around all illustration
and feel like you are creating in freedom
and no borders. So unless you're artistic vision and create something
interesting. So it need to free. So you need to add something interesting and something eye catching maybe or
interesting colors. For example, these
textures here. I like this, and I will add
some black colors here, just like this
because I really like this effect here, like waves. And I will continue
to create this
3. Layer Basics - Eye: Welcome. In this part, we will paint eye. At first, select
some sketch brush, and start to rock
sketch of your eye, and it can be lousy sketch, and it is not important to make the lines visible and
clean at first parts. At first parts, you
need to focus on the general look
of the painting. So I start with simple shape, and I'm adding some
place for eye socket, and I will be like this. It is our base layer,
just like this. And after this, we need to
paint under the sketch layer. Tap two layers, and layer
one is our sketch line. Tap on the neve layer button and create another
neve layer and hold with your finger
and leave it to here, like under layer one. And after it, go
to the colors and select some uh skin color, like middle tones
of the skin color and apply over the
eye just like this. And as you can see, our base color will only
affect the background. So it will be under
the sketch line. So we need to paint under the sketch lines for not lose those sketch lines. So select wider color and apply over here a
bit light color. And now, go to the layers
and open another new layer, and this one will be
our second color. So it will be some
blue color for eye. And I will paint all area
with this simple color. Then I will select much more
darker color for eye lashes. And I will add the lashes
here just like this. And it will be a simple and easy way for create the base for
the eye just like this. And I'm using
airbrush by the way. Then I will go to
this middle point and we'll make this
part much more darker, just like this and these
parts will be also darker. Yes, after this, we will play with the layer modes at the next part. Thank you.
4. Layer Modes - Eye: Welcome. Now go to the layers and open
another new layer and tap to these layer modes
and select the multiple. Multiple makes your
color much more darker, and it doubles the
darkness like this. Let's select the base color of the skin and paint over it. As you can see, it is much
more saturated and darker. And if you select
the darker tone, it will also make
it double again. So it is a great method for adding extra colors
over your illustration. And these parts will be darker and these parts
will be darker too. And maybe these parts can be much more darker,
just like this. And it is looking
really great right now. And go to skin color and select much more
saturated color and apply over all areas. And open another new
layer, and this time, select color Dutch
for layer mode. Color Dutch makes your color like lighten with
like burning effect, and it lights up the current version of your selection with increasing the saturation and brightness. So you can use this for light areas of your painting and add some highlights
or shiny parts. For example, I want to make
this part much more shiny. So I added this gluton
here just like this. And, yeah, it is looking
really great right now. And I will open
another new layer, and I will put the white
color here and here, maybe. And this time, I will open a new layer with
the overlay mode. Overlay works like color Dutch, but it adds much more natural and soft
light over your illustration. So I will use some
light blues here, and I want to add much more green colors
here for mixing the color. And maybe these parts will be some pink colors
here, light pinks. And you can use overlay mode
to these corners for make illustration much more brand and make the color s is
much more interesting. I will do it like
this and like this and I will go to layers again
and with another new layer, I will add I will select color. And color makes the hue change, and it only affects the hue. For example, if I
want to add green, it only changed the hue. It's not affect the brightness and contrast or
the other effects. So it's looking good right now, but I want to add a bit, much more yellow colors here. And yeah, it is looking
really great right now. And I will make these
parts maybe much more less saturated and go to the layers and
open another new layer. And this time, we will
use different kind of option and maybe
use saturation. Saturation makes your current selection
much more saturated. For example, I will select
this color and apply over it. And it only affect
the selected layer. So make sure you select the current location of
your layer, just like this. And I will open
another new layer, and this time with some
different vivid light option, and vivid light adds basically vivid light
over your illustration. So I will use this options for increased detail
and go to layers again. I will select some
skin texture brush. And with the new layer, this time, I will use multiplay. And multiplay is basically
creates the texture, and without or overlay, you can use overlay to without losing any detail over
your illustration. And these parts will be
look some thing like this. And yeah, hope you
enjoy this part, and its next part, we will increase the detail
level of the illustration.
5. Coloring - Basic Shapes: Welcome. In this part, we will do basic geometric
shapes with simple brush. At first, for your background, use some interesting
color as you wish. And after this, I want to
start with the rectangle. So I'm painting the
shape of the rectangle and painting the base
color for my rectangle. And at corners, I'm
holding with my brush and collecting the corners
holding with the brush. So these parts will
be look like this. And after you putting this, go to the colors and
select lighter brush and apply over the edge
you want to see the light. For example, in my painting, light comes from the laptop. So these parts will be much
more lighter, just like this. And I will make this much
more soft just like this. And from the other side, this part of the
object in the dark, so we will need to add some dark shadows
here, just like this. And this corner will
be really dark, and these parts will be
really, really lighter. And at the parts, we will have some
reflected light. So it helps us to turned object. So I selected blue
color this time, and I will create
some circle here with holding with my finger and
pencil, just the size of it. And after it paint all in it, you can use color
fill if you wish. But I want to paint
manually in this class. And I will put the dark
shadows of the painting. And I will add some dark shadows and always think about
where light comes from. So you can adjust your details depending
on this light source. In my painting, it
comes from the lefttp. So I make the left
toup much more light. And I will continue here and put some much
more lights here. And it is looking
really great right now. And I will select darker color and we'll put
some shadows over here. Yeah, it will look like this. And after this, I will
paint with green. And let's paint with much
more darker green, maybe. And this shape will be
something like this. At first, always try to paint the base colors without
adding any details. So after adding these details, you can put the shadows
over your illustration. For example, this part will be in the dark,
just like this. And I will add extra lights
over here, just like this. And lights will come from the
left again, the left top. And yeah, it is
looking really great. And I will put this like this and we'll add some
yellow color here. And much more dark green over
here for turn the object. You need to add really
dark shadows too. After it, I will select the background color with
much more darker color than add the shadows over
here, just like this. Here another part will
be here and it is looking really great right
now and I'm adding shadows and lights over here
just like this. And for example,
for the background, you can use really
light brush or create some extra textures like some maybe fabric or much
more natural things. So this thing will give
texture over your background. You can create the shadows
of the surface and will give some wrinkles over your illustration to make
it much more interesting. So it is looking really great, and I will add touch
shadows over it, and Tau shallows means the darkest planes
at the painting, the touch point of the object and the surface like ground. So these parts will
be really darker. And at the light parts, I will use really vibrant
color just like this for give much more Sutron light
over here, just like this. And I will finish this
lesson and hope you enjoy. And I can't wait foresee
what you create from this class and see you
in the next lessons. Okay, I edit this detail
here, too. Thank you.
6. Brushes - Eye: Welcome. In this part, we will work with
the brushes and will increase the
final look of our eye. Go to layers and collect all layers with pinching
your fingers together like this and make them all in one layer and you can decrease the opacity
of the layer one. And at this point, I will work
with some textured brush, and I will add some shadows over all areas and will increase
the detail level of the eye. So textures makes
your illustration look much more interesting
and realistic. So you can use some
textured brush, for example, for winkles here. I will use extra short
but textured brush, and it gives a really
good amount of detail and also these
parts can be much more darker just like this and maybe this area and this area can be much more
darker, just like this. And it's looking really great. And with another, for
example, with a lime brush, I will add some different kind of brushes here, just like this. And if you don't have
any kind of this brush, you can tap the brush
settings and go to taper, and you can make the taper size much more
like mix with maximizing it, your brush will be and thin. So your lines can be great
for represent the eyelashes, and I find it really
helpful for create much more easy and much
more sharp looking lashes. And I will continue
here and here. And this time, I will go to brushes and we'll select
smooth shading brush. You can use any
airbrush for this step, and I will add some
dark points here, just like it's like makeup. And maybe these parts
can be darker too. And, yeah, it's
looking really great. And make sure you use
your brush softly. And I will go to the brushes, and I will go to the Carcle and we'll select
the first arcoal brush. And with a much
more light color, I will add texture with
this charcoal brush. And you can clearly
see you can create easy textures with
different kind of brushes like texture brush, and I will make these parts much more darker here,
just like this. And maybe I can use this brush over these corners to make things look much
more interesting. And especially this left
part can be darker too, and yeah, it is looking
really great right now. And maybe I can add
much more light here and some red colors
over here, just like this. And yeah, it is looking
really great right now, and I will end this part after I add some shadows over here. And yeah, it is
looking really great. And thank you for
joining me in this part.
7. Brushes - Portrait: Welcome. In this part, we will paint with
the drawing brushes and do experimental brush study. At first, I will start
with this brush. But I will paint
randomly line like this, and as you can see, it creates really good texture
over the illustration. So we will use it for create
some character portrait. So at first, I'm
just trying to put the basic shapes of
the illustration. And with the brushwork, we will do much more realistic
and textured illustration. And sometimes go to colors
and switch in the color we. When you're trying to
paint the different hues, I created this pink
color for the hue. And I will add some extra
details over here and here. And maybe this one is look like much more
abstract artwork. At the illustration,
you don't need to do some specific things when
you're trying to do brush work, and you need to be experimental for test the brush and
create something different. For example, I will start with this color and maybe
some hair here. Like maybe some punk
hair like this, and for creating really
different illustrations, you need to be open for experimental things and don't
stick to just one brush and trying to understand the different brushes and
strokes that bring the realism. And for example, I
bring many colors with this brush because I really like the brush work
of this illustration. And maybe something like this. And this time, I will
select some flame brush, and maybe with the red color, I will I didn't like it because some brushes
have different effects that like filters or different kind of effects it given like
multiplay or overlay. So you need to see a is it work for your
illustration or not? For example, I like this one, and I will select charcoal and we do much more brush work. And textures creates the realism and neutral feel for
your illustration. So you need to test the
painterly brushes and try to do experiments with these
brushes and try to understand which brush
gives which effect. So with trying and understanding what
the brush gives you. And experimenting with
the different brushes will improve your workflow. So it is really important
to understand how brushes work and understand the
effects of the brush. And with this way, you can improve your brush work. For example, this time
I'm using airbrush. So I can manually add some highlights
without any texture. And if I want with
pressing less, I can create the natural and quick color
change just like this. And for example, like
this and like this, it is looking really great. And maybe this part will
be something like this. And you can create anything
with the brushwork, and it is really fun
to experiment it. And for example, this time, I will select some
vintage brush, and it gives some textures
over your illustration. So it is another great brush
for creating textures, different kind of colors and experimental look for
your illustration. So I will add some lights here. And something here
and something here. And with this experimental work, you can see clearly see
different kind of brushes, creates really good textures. So you can mix them for
create something interesting. And I will add but don't overuse anything
because balance is the kay. So
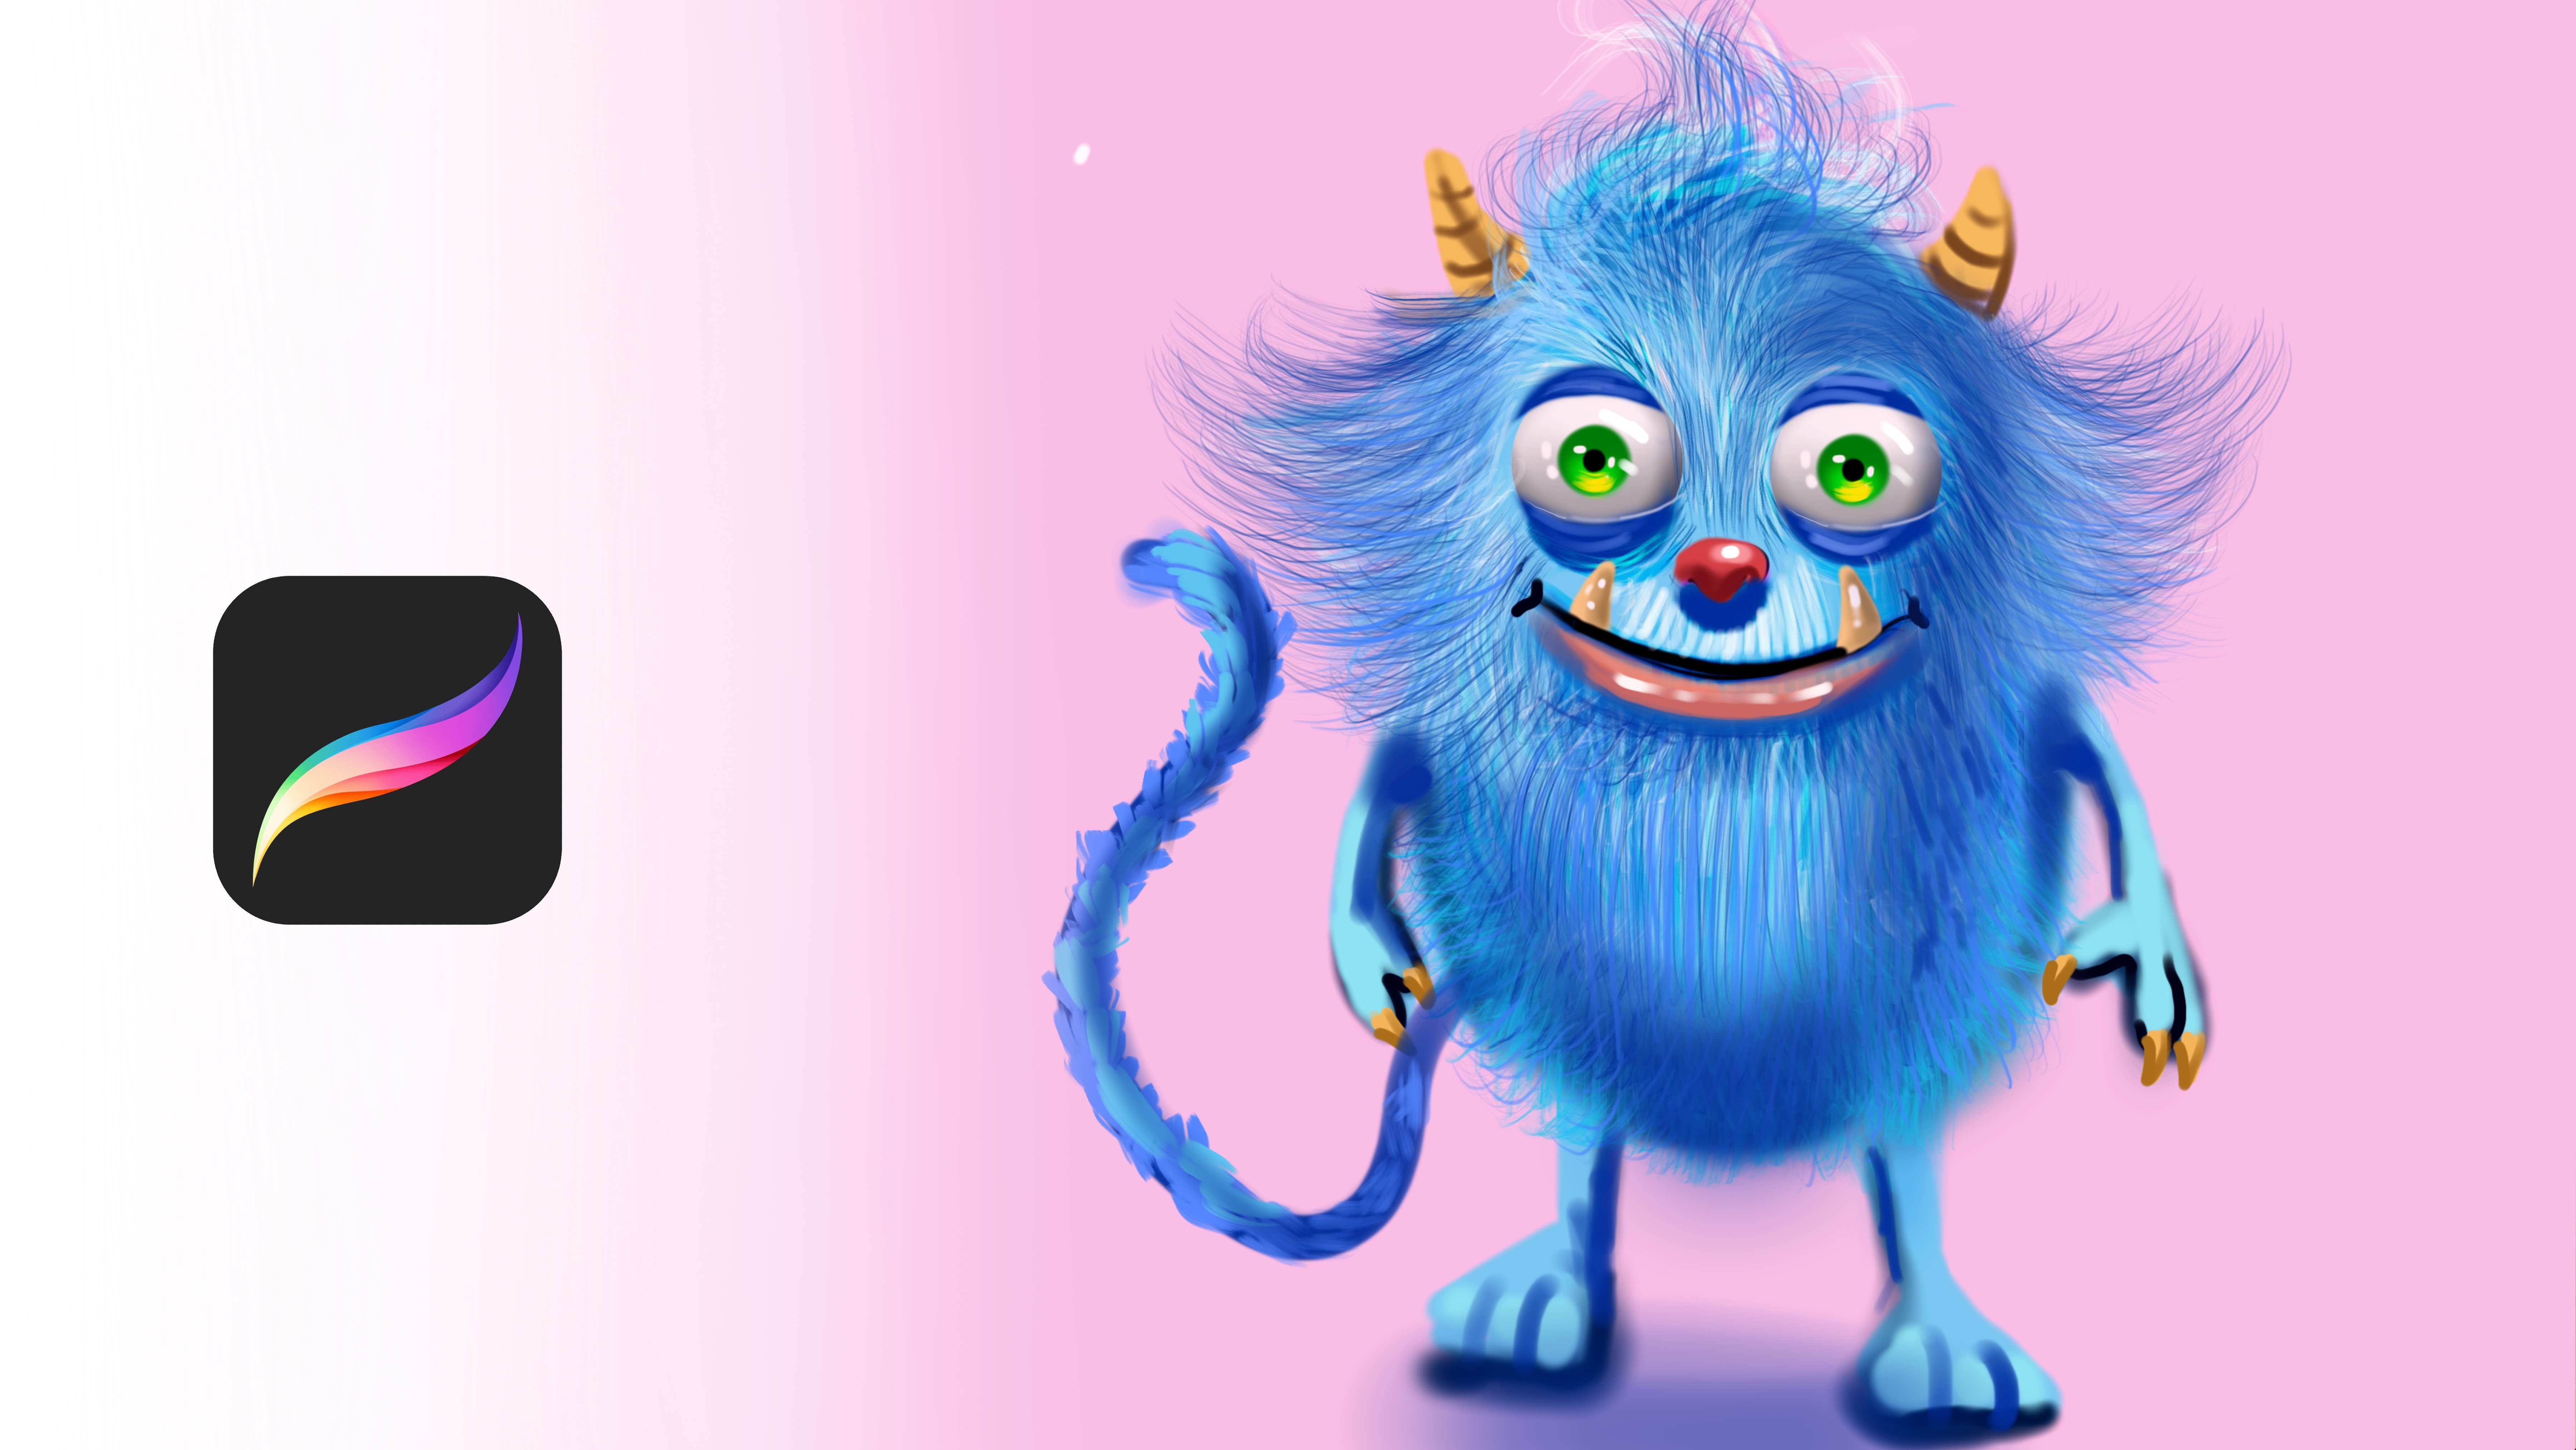
8. Brushes - Character: Welcome. In this class, we will paint cute
character with airbrush. At first, start
with the gray scale and make your
background gray scale. And after this, I will do my
character with a blue color. So I selected blue, and I will continue and
create my creature's head. At first, I started
the simple shape. For example, I'm defining
where is the ice. For example, my
character will have really big eye and
really big nose, and maybe these parts will
be nose and happy face. Like maybe we see the teats of it and a huge smile on the face. And after this, go to much more lighter
brush and to find the corners of the character. For example, for example, if it is so floffy, you can add some floffy
and soft lines like this. And to show your character
is really smooth and, uh, Let's make the eye
a bigger and zoom in. And I will use
green for the eye, and I will paint this
part with full green, and other parts
will be green, too. At first, just put
the base colors. So after putting this color, you can add the
lights of this color. And both sides
will be like this. And the middle of the
eye will look like this. So after it, I will
go to blue again, maybe much more dark blue, and I will make a
nose just like this. Of course, we need some lights
in it for make it natural. So I added some lights. And nostrils will
look like this. And yeah, it is looking
really great right now. And for the upper part, I can make the end of
the eye look like this, and maybe I can even
put some eyebrows here for make the character
much more interesting. So it's looking
really great for now. And for mouth, I will use
really darker color and will paint who area of this
mouth part just like this. And yeah, it is
looking really great, but you need to
dilate some parts of the mouth or give
it a realistic look. For example, if it is fluffy, we need to see the fur here just like
this for understand it, it is actually fluffy
area and the corners of the mouth can
be really darker. So maybe with dark blue, we can add really dark and interesting a
texture for mouth. So after it, I will select
dark red and create these lip details because we
see the lip in the mouth, just like this, and zoom in
and select some yellowish, color and start to
adding the ****, and it need to some cuteness in it because
it is cute, not look scary. But at some parts, you can use it much more soften
or much more interesting, for example, not
with the triangle, but you can create a it's like, much more human like. So your character will
look much more sweet because if you make it
like a predator like this, it will look dangerous. So if you're planning to
create really cute character, you need to make the eye
and all the tails cute. For example, I can make
this part much more bigger, and let's continue to
adding details over here. Just like this and maybe
much more brow here. And after it, I will paint much more fur
details over the face. And for increased the
cuteness of the character, I'm making it much more sweet with these highlights and maybe another highlight
here, just like this. And the end of the
mouth can be like he's loving and have some
happy look at the face, and I will add much more
detail over here as a tit, just like this, and I will continue and increase
the corners. And at this point, I will create much more fur
with some textured brush. And if you don't have any
textured brush or hairbrush, you can use at this part. So I will start with
the base color of the fur and will increase
the details of the fur. For example, here will be
like this and like this. Yeah, it is looking
really great right now. And with adding these details, much more softly and slowly, our character will look much more interesting and realistic. So at the corners, you can use much more dark tones for create the character's edge. So I will continue from this part to increase
the details. And maybe these parts, for example, darker, and
these parts are darker, and maybe these
parts have much more this curly look like
maybe like this. And after it, you can also make darker tones at this parts. And yeah, it is looking
really interesting. And I will add much
more light blue at these parts and create some much more fur texture here for increased
characters sweet look. And at these corners, maybe can be much more
fluffy look here, yeah. I will cover these parts
with much more fur detail. And maybe these parts will be much more
fur, just like this. And after it, I will add
some ear here like this. And you can use darker tones
to create this ear detail. And another part will be
here, just like this. And yeah, it is looking really, really great, and I will
continue to adding details. And for mode, you can
modify and add details. For example, I will open new layer and will make this part really
darker just like this. So after making it, you can create this part, much more like fox like or some different parts
will be similar to it. And with this way, you can always change the details
of your character. So painting without sketch, can be a bit tricky, but you can always try something new and put details
over your character, and add much more creativity. For example, I will take this and make it much more
smaller and after it, I will make the background
same color just like this. And now I will make this part
with much more brand color. And after putting this detail, I will add really brand
lights over here. Just like this and maybe another light over
the nose, just like this. But it will be experimental. So try to see what is best way for make your character
much more interesting. So I decided to change the face and it turned it
out to some animal, but cute one like maybe
wolf or some ice creature, but it is sweet because
ice looks sweet. And for example, mouth looks
much more soft and friendly. And let's continue. So I will add much more fur textures here
at the body of the character, and maybe these parts are down
here like this, like this. And, yeah, it is looking
so fluffy and great. And maybe you can create it like a human or
different kind of animal. For example, as I say, you can always play
and manipulate. For example, I dilated the eyes, and I will define new
eyes for our creature, and it will be much more like dog eye and much more like this, much more sharp, and
maybe looking like this. And these kind of details will describe the hold
your character. For example, this time, I will make eye much more
orange tones, maybe like this. Or let's try to make it a
bit purple, just like this. And it is all depending
on your choice. You can play with the
colors to see what works best for your design and how
your painting look better. For example, I made
it purple like this, and it's looking really great, and I will put some lights
over it just like this. And it is looking really different
and much more dog like like wolf or
something else. And I hope you enjoy this
character design part. And in the next lessons, we will do much more fun
projects together. Thank you.
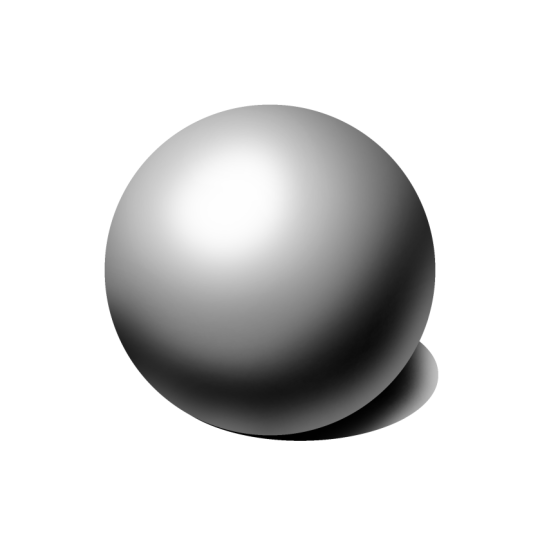
9. Alpha Lock, Selection Tools - Painting Red Ball: Welcome. In this class, we will paint realistic circle. At first, start the ellipse and select ellipse and
create a circle and hold to color and
drop over here and go to the settings and
alpha lock the layer. Then with smooth shading brush, select a bit lighter brush. And with really large brush, apply over your painting
just like this. And as you can see, the light comes from this point. So change the hue of the brush and add some
orange tones here and make it a bit
much more yellowish color and continue to adding details over
here, just like this. And this point is
the light point. And again, select much
more lighter brush. And apply over here like this. Sometimes use bigger brush, sometimes much more short
brush with small brushes. And this corner is
reflected light. So you need to make this
part much more lighter and this point is the
darkest point of the object. So it will be really, really, really darker
at this point. Zooming and as you can see, we created really
realistic look of the TD circle and go to the adjustments and give
it a bit, much more hue. Like saturation and open
the brightens a bit. So you can also play
with this point, make it like this gamma. And it's looking really
realistic and looking so treedy and you can add
different textures on it for increase the detail
level of the rendering. And I hope you enjoy this part, and in the next parts, we will try to improve
our painting. Thank you.
10. Alpha Lock, Clipping Mask - Painting Red Ball: Welcome. In this class, we will paint a realistic
Sapir and at first, go to Selection tool and select ellipse and
paint over here and hold with your other finger while you holding with a pencil, and it will create the
shape much more beautiful. So after it, select
the red color and apply over the area
with a color drop, then go to the layers
and tap on the layer and tap the Alpha Lock this
will be ed pixel area. And it means your painting
will only affect pixel area. For example, if I paint
with a large brush, it only affect the pixel area. So I will add shadows
to this place and maybe much more
shadows and light parts, this part, if you think light
comes from the left top, this place will be really
light and just like this. And from the other hand, this part will be
reflected light. So it will be like this, much more like lights here. And yeah. And around the light corners, I can add some lights
just like this. To create the light,
much more effectively. So it is like this, and from the colors,
open new layer, you can select much
more yellow hue here for much more
natural light transfer. And with a much
more yellow color. I will apply here smoothly
and softly and open the layer and add much
more yellow colors here, just like this for make
it look much more shiny. And go to the layers and swipe your finger with layer three swipe your
finger to do right, just like this and select group. And it makes your painting
in one layer like group. You can ungroup it with
tabing name or flatten. And let's make it flatten. And it means we
collect the layers. So again, do it and flatten. So each layer is
combined and merged. And these parts will be
lighter just like this. And yeah, it is
looking really great. And I will open another new
layer and tap the layer, and I will select Clipping Mask. So it means we will only paint over clipped pixel.
So it is layer one. So our painting will only
affect the selected area. So I can play over it
without losing the tails and adding extra colors at the corners without
painting the background. And I will add some
yellows here and here. And thanks a lot
for joining me in this quick shading class. Thank you.
11. Selection Tools - Basic Cat : Welcome. In this class, we will paint cat with
the simple shapes. So go to the selection tool and select ellipse and apply over camas at the
middle just like this. And from the color selection, move the color into this shape and with the move tool,
move it to the middle. Just like this. And after it, open another new
layer and hold over layer and move it to
the under layer, too. Then make another ellipse here and with a much
more darker color, apply over selection
and make sure you centered it and you can
place just like this. And after it, all you need to do is open another ellipse and
paint two ellipse here. One is here, but
it will be under this layer and will be much
more darker, just like this. And duplicate it with pinching your finger
to the left or swipe, duplicate it and move
duplicated layer here. And Zoom again here and put
another ellipse and paint it. And maybe undo it.
I will check it. Yeah. Maybe we can have some thing like
this, much more smaller. And for the bot place, we will put some ellipse
here and colour it. And at the middle
this area of the cat, with the free hand tool,
it is a bit tricky. Go to top of those layers, paint something like this. I will do it. If you do wrong, pinch with I mean, touch the secreen with
your two finger to undo. It will be pas over here. It is one, and I will
make it much more discolor and duplicate it
than with this uniform, philip horizontal and move it to the right, just like this. And it's looking really great, and I will go to here, and I will select
rectangle here. And with the airbrush, I will gently paint over here for blend colors much more easy. And it looks great. And I will open another new
layer under the head layer. And with the ellipse, I will paint here, and I will use darker
tones again here. Maybe much more darker tones and select this
selection tool and arb. And with the arb, you move these corners like this and make ear
depending on your choice. I make it like this. Okay, 1 second. Yeah.
And duplicate it and flip vertical and
move it to here. And we have great
eyes, I mean, ears. And there is another
tricky tip pinch these two ears together and swipe your finger to
the left and duplicate. Then tap on the layer
seven and Alpha Lock. And with the dis
color paint it and make it small right
now and center it a bit much more maybe here. And it looks really
great right now, right? And you can use arp for make this part much more fit
into your painting, depending on your choice. And this time, I will open another new
layer over the top, and with the ellipse
I will paint the eye. Maybe like this one eye is here, and it will be pure
green and duplicate it and move it to this area. And we can paint eye over it, and I will do it with the
ellipse again like this. Okay, 1 second. It is like this and paint it to these
color and again, duplicate it and move it. And after it, you can
put some white here, just like this with the ellipse again to give
reflections over eye. And like this, maybe
here, it will be better. Yeah, like this and like this, and for this area, nose, I will make big nose here and we use some pink
color over here. And it looks really great. And you can modify and
add the tails over nose. For example, with ellipse, again, I can make
another ellipse here, and I select much
more darker pink here and will apply here
like another detail. So after it, you can add
many details over the cat. For example, I want to put another line here and
paint it to discolor. To make nose much
more interesting. And again, I will use this
line here and with dark color, I will make it like this. And with two other ellipse, I will make this part
much more like Mut. And other parts will
be like this again. Just like this. I was looking
really great right now. And for the face the tails, open another new layer, and with the rectangle, create one line like this, and it will be pur
black and duplicate it, then move it to here and rotate. And after it, collect
this and duplicate, then horizontal, and like this, we have really cute cat design
with the simple shapes. And for the last part, with a free hand, I will paint
the tail here like this. And it looks like really great. And you can go to last layer here and open another
new layer under it. And with the ellipse tool, you can create some shadow here and paint
over it like this. 1 second. One eye is missing. I don't know what happened. Let's go back, B, B. Okay, let's make it
again with the ellipse. Maybe let me check it. Yeah, okay. It is closed. And under this part, I will add some shadows
with the ellipse just like this here and
finish this lesson. Hope you enjoy this
Quick Shape painting and can't wait for show you much more process in the
next videos. See you.
12. Selection Tools - Cute Character: Welcome. In this lesson, we will paint Alvin character
with simple shapes. At first, go to selection and select ellipse and
create one ellipse like this and paint the ellipse with the skin tone and go
to the layers and lock the layer with Alpha Lock and select some skin
texture or spray brush. And with much more darker colors and saturated darker colors, I will apply the
texture over here, and these parts
will be like this. Gently try to add shadows at our character
and keep your brush small because it is
really important for create the details
and just like this, it will be really darker at some place of the character
will be really darker. And I will continue to adding
details just like this. And this place will be darker. And I will add much
more light effects here and maybe much more
light colors over here. And after it, open another
ellipse over this part. But at the new layer, don't use the same layer and select here and
open the ellipse. And this time, select airbrush and paint all over to black. And you can make some
parts of it whiter. For example, these corners
can be white just like this. And maybe these parts
can be shiny like this, this part too. And oh, we need to make it on another
new layer, not this layer. So I dilated it, and with the new layer, apply here and duplicate it. And move it here, like symmetrically and after it, select this ellipse tool again and paint some ellipse here. And this time, select
the skin color, but with much more darker tones. Apply over this part, not all of them with airbrush. And as you can see, this creates really
great nose effect. You can add some lights
over this part too. For example, at the top part will be really, really lighter. And after it, you can, add some white dots to
this corner for create the eye much more
looking interesting. And for the Much I will
use, again, ellipse, just like this and
make it full black and go to the selection
tool and select arp and move your
painting just like this and make the mouth much more
interesting, just like this. And maybe you can create some interesting
mouth like this. And after it, you can
go to shapes again and select free hand tool and
select this area like this. And with much more Tongu color, you can add the tongu. After it, this
character is Alvin and it needs to have
some Alvin ears. So go to the layers and select
ellipse again and select this ellipse and put color to the skin
color, just like this. And now with the warping tool, move it like this
from this corner. To this corner to make the Alvin ears
much more interesting. And with the uniform, move tool, move your ear here. And after it, you
need to duplicate it because we need to
make the other ear too, and I will select this ellipse tool again and we'll paint one
ellipse like this, maybe similar like this. And this time I will make it green because it is forest elf. And with the arb tool, make this part like
this and move corners. And at the top of the head, you can make it much
more like this, and it will look cute like this. And Alpha Lock it Alpha Lock, and with the darker color, apply over corners to make your head look much more
tready just like this. And these corners will
be darker also under it, open another new layer
with the free hand tool. Spontaneously create
some hair and select white color or a bit yellowish color
and apply over here. And as you can see, we added really great hair in short time. So after it, we need a body and open new layer
under these old layers. And use the rectangle
tool and paint this area like this and
with a warping tool, make this part much more oval. And the down part will be
and maybe here and here, like this, and we
will put the legs of it later and lock
the layer again. And add some dark shadows
here at the corners, and this time open
another new layer under these layers and use rectangle tool and paint
again the same color. And with the varp tool, make it oval like this. And this place will
be in here for make the shoes and duplicate
it with the uniform. Just like this and put the ellipse tool over
it, just like this. This area will be like this with much more darker
color, maybe brown. And with a warping tool, you can adjust how it looks. For example, let's give
it a much more like this shape and duplicate
it and with uniform, move it to the here,
just like this. And this time, open
another new layer and paint one ellipse here
and paint it to green. And with the warp tool, at first uniform here, put the arm and
with the var tool, move it like this much more
natural and duplicate it again and philip and with
uniform, move it here. And we can add some
scarf here on the body, and I will use rectangle
tool here, just like this, and I will use red color, and I will add some hues like maybe this color
here, just like this. And with the warping tool, I will make it like this, like it covers the whole
area of this place, and it is looking really great. And you can add
details over body, such as, for example, minimal details like this
and maybe one more here. And forehand, I will
open another new layer. Again, with an ellipse, I will add a simple shape of here and other parts
will be like this. And we have really
cute character of elf. And at last, I will add belt with a darker
color. Just like this. And I will use War tool and at corners like this and like this to create some
belt for our character. Hope you enjoy this
quick lesson and can't wait for show you much more in the next
lessons. Thank you.
13. Color Fill - Bean Shape Animals: Welcome. In this part, with the bean bag, like some shape like
this, I will paint. It is like bean shape. And with this shape, I will teach you how
to create animals. At first, do not
rush and just paint some a bean shape like bag, and it is like maybe like this, and it is on line and like this, some areas for describing
the corners of the bean. So like the planes of the bean. So you can create
every animal with it. But in this illustration, let's paint a bunny. And ears will be here, and eyes will be here, and it will be like
this, some mouth here. And again, maybe
hands like this and, uh anatomy of two feet
will be like this. So after you put
these all the tails, you can open another new layer. And with the bold lines, you can create the main
shape of the bunny. For example, it will
be ellipse like this, and nose will be like this and maybe a bit
much more larger. And the mouth will be like this. And teeth will be something
like this, just like it. And for head, I will use some different shape here like this for out
of the beam shape, and another one here,
another one here, and the outside
will be like this. Maybe this part
can be like this, and I will paint the hand
will look like this. And it will be similar to it. Yeah, it is looking great. And maybe this
part is like this. And yeah, it is
looking really great. And for the details of the body, you can add or increase
every detail you wish. For example, for the checks, you can use these lines for the much more detail over the
bunny and close this layer. And after it, all you need to do is edding details
over the bunny. For example, colors or maybe some cute
colors here and here, and yes will be black like this, and maybe nose will be some red or this color. I mean, you can create really cute
characters with the bin. And let's do another
one example. I will select my line
brush again and this time, I will paint different
kind of bin shape. For example, like this. And let's paint a
cute cat from it. At the ears on it, and planes will be like this. And to find eye sockets here, and maybe give a bit much
more emotion into your cat, for example, like this. And after these details, put the main details of cat. For example, legs and
another leg and the tail. And after it, make your
character opacity down. And with the new layer, apply the details over it
and define how it looks. For example, this nose
will be like this, something like this here, and also, ears can be like this, and other will be like this. And it is looking
really great right now. And with small details, I will finish this cat
and some details here, and paws, and maybe the paws
can be looked like this, like outside of the pow and we see the details of the pow. Yeah, it is looking
really great. And let's paint the tail
to after these details, the this sketch and add
color over your cat. For example, I want to
make this cat gray, and these parts will be gray, and I can be green again, just like this, and
nose will be red, and this detail will be also red and these
details are red, and the puse will be discolor and hope you enjoy
this quick character sketch. And in the next part, we will talk about the different quick
projects in Procreate
14. Color Fill - Drawing Basic Dog: Welcome. At this class, we will paint dug
with simple shapes. And at first, start
with the circle, and it will be our head. And after it, you need to paint the body line
like how it goes, for example, like this. And this line will define our body and paint
another circle here. You can hold and paint a perfect circle
with a quick shape, and after it paint another one, it is the backline and after it, there is a tricky one. We need to define the middle
of the head, for example, where it looks and add some beam here like this
or some cylinder here, and you need to turn the cylinder head to
this shape like this. And after it, you need
to add the neck here, for example, here,
just like this. And ears will be triangle. But you need to create the shape much more
interesting like this. And it will be
something like this. And after it, go to the
body and connect the lines, and this part will be
like this and like this. And you need to define the lake and add
the lake like this. And the other hand, there will be another paw, and it is like this. And another one will be
similar to like this. And we'll add some
tail just like this. And zoom into the phase. And this time, this is
a bit much more tricky, and we need to start from these emotions here and
paint the emotion here, just like this, like this. It is looking really great. And I will paint the nose
much more like this. And it is looking really great. And I will add the tail here, and neck the tail will be
here and will be here. And it is looking
really great right now. And I will add the This part will be
something like this. And yeah, we have really
nice shape for our dog. And now I will go to the layer and make the
layer less visible. And with the much
more confident lines, we will create the general shape of the dog just like this. And like this, I'm adding some emotion over
the dog, like this. It is looking really great, and it will be much more perfect with
certain lines like this. And this part will be really smooth like
this and go to the here and connect to lines and paint the pow area
much more confident. And yeah, it is
looking really great. And this leg will be like this. It is looking really great. And yeah, it is like this. And after this, you can
delete this first layer, and after it, you can select
a base color for the dog. For example, you can go to this color and give it a
bit much more natural color. For example, I will
put this color like this and it is a
bit golden color, and it will be maybe blue. Soft blue and nose will
be like discolors. And this part will be, again, discolor and for coloring, I will select darker color of this base color with a
much more saturated one. And I will add shadows
over here and here. I will add some dark colors
over here, just like this, over this area also
and this area, it will look much more great and maybe these parts are
darker and this part, dark, yeah, it is
looking really great, and I will continue
and add some details. For example, this
part can be much more darker, just like this. And these parts will be
really dark, just like this. And yeah, I'm going to finish this class and hope you enjoy this quick
dog painting class. And in the next part, we will do another impressive
paintings. Thanks a lot.
15. Curves, Gradient Map - Landscape: Welcome. In this part, we will paint landscape. At first, create a new layer and select this smooth line and start the shape and paint
some landscape spontaneously, just like this and
paint the whole area. And after this, open
another new layer under it. And this time with much more softer brush,
apply over here, but it will be less black like this and
open another new layer, but under the old layers, and this one will be
much more lighter and maybe some sharp shape
like this and painted. And again, open and make sure
you open under the layers. And after it, make the
color much more light. And let's paint another sharp
edge here, just like this. And paint the whole scene with the color like this and yeah, it is looking really great, and I will use the
lightest color here and this shape will be
under the area here, maybe some thing like this. It is looking really great. After making this landscape, what you need to do is
collect all layers with I selected layer two and withholding my two fingers
layer two and layer five, pinching my fingers together, and I merge layers. So tap to adjustments and tap
to gradients map and select the most effective and
most interesting color depending on your illustration. For example, I
selected this one and but this air should be
some thing like this. And yeah, it is looking
really great right now. And you can add details over
the illustration right now. And I'm going to the layers
and selecting free hand tool. And with the free hand tool, you can create
different shapes just like some thing like this. And you can color the selected area with smooth
shading just like this, forgive a bit much more detail
over your illustration. And this technique
is easy and creates really great shadows and light effects with free hand
tool and some airbrush, you can combine it and create these textures
just like this. And I'm continue to
adding detail over here. And yeah, it is
looking really great. And I will continue from here to add much more
details, just like this. And after it at Sky, I will add much more clouds or cloud like the tails over
here and maybe here too. And yeah, it is
looking really great, and it is looking
really soft and great. And at the end of the painting, you can add the shadows and highlights with
the free hand tool. But for now, I will
go to the curves and will make the shadows
much more darker, just like this and light
areas much more lighter. And after it, I will
open another new layer with color layer
modes or screen. But let's try color
Dutch at first. And I will apply some
light over here, but maybe some orange
light comes from here. From all areas of the
painting just like this. And yeah, it is looking
really great, right? And after it, collect the
layers just like this with pinching and go to gradients Map and give some gradients here. And you can add many details as you wish over
the illustration, and hope you enjoy this
part and can't wait for show you much more in
the next videos. Thank you.
16. Quick Shape - Portrait : Welcome. In this class, we will paint portrait
with quick shapes. At first, select one line brush and paint circle and
hold with your pencil, and you will see this
ellipse will be created. While you holding
with your pencil, tap with your one
finger over cavas, and you will create
perfect circle. And after this, paint
another ellipse here and hold with your pencil. And rotate directly like this and paint one line here
and hold, just like this, connect the line and
divide the ellipse from the center and to another
point for from centers. And this line will
define the eyebrow line. For example, is your character
looking down or middle? Let's make it middle. And create another shape
from this corner to here. But at first, paint another line from this point at the
middle for crate like arc. But this thing defines
the rotation of the head and paint another one and connect
it to this point. And it is our eyebrow line. I will make it like this and
maybe much more like this. And I will paint another
line here with Quick Shape. This one, it is the hair line and I will
paint another here. This will be noslineT part. And I will paint here
like this and like this. And paint another line
under eyebrow line. This line will be eye
sockets and paint ellipse. And paint another ellipse. And yeah, these two ellipse
is sockets for the eye. And after this, I will
paint the nose here. And here will be Mut
and ear will be here. And neck will out from
this part and this part. If you complete these
steps in the next step, we will create the
details of the portrait. Thank you.
17. Quick Shape - Portrait : Welcome. In this su tab, we will create portrait
details with drawing brushes. And I will select sketching brush instead of
drawing brushes because maybe sketching brushes
will be much more artistic and come
to the layers and make this layer opacity down because we will paint over it
and open another new layer. And now this shape
was our eye socket. You can create
another shape in it, just like this for create I. But you can create some boxer for defined
main start point of the e and the endpoint. So I will paint like
this and at the middle, I will put I just like this. And depending on your style, it can be much more
detailed or less detailed. So after it, I will
paint another line here. And eyebrow will be at the eyebrow line which
we paint before. And let's do the same
thing for this eye. At your first try, it might be a bit different
than my painting. But if you keep practicing
to this method, you can improve your portraits. For example, I paint
eyebrows here like this. And nose will start from here and it will be here
at the nose line. So you can create the
details of the nose. For example, these
parts will be darker, and these parts will be also
darker at the shadow points. And I will continue to adding
details for this part. For moat, you need to
paint the center area like this arc and create another
arc here and another that. This tree that creates
really shape of the lip. So I paint like this, and also these parts
will be darker. Maybe if your figure
have mustache, you can add, but I will not
add anything for customize. And this part will be hairline. So hairline means your hair
starting from this point. And for example, this
character is a bit stylized. So if you want to make
much more realistic one, I will dilate it
and I will sketch again with another brush. You can use any brush for C, which brush is much
more helpful for you. And now I will paint
here with this brush and define the path of the I. And I will add this
part just like this and put the I and if you are working
with textured brushes, it is much more experimental
and you can create really huge brush strokes
for define how it looks. For example, I want to
make it look like this, and maybe with some mustache, you can create any character
you wish with this method. For example, his mouth
will be like this and maybe hair starting
from the hair line. Don't forget it and paint details for hair,
just like this. And it is looking really
nice and just like this. Yeah, it is looking
really great right now. And I will add some details for I and nose will be like this, and these details
will be like this. And anytime, for example,
I will close it. You can go to these
settings and select Verb, and you can modify the portrait. For example, if you want to
play with the specific part, you can select with
the free hand tool, then go to verb and play
with this selection. For example, I want
to make it much more maybe bigger and much more smile hill
here like this. And with playing
with these details, you can create anything much more easier
with modifying the. For example, if it makes smile, maybe this will be
like line here. And let's make it much
more interesting. Hope you enjoy this
process and you can practice with playing with
the details of the portrait. See you in the next class.
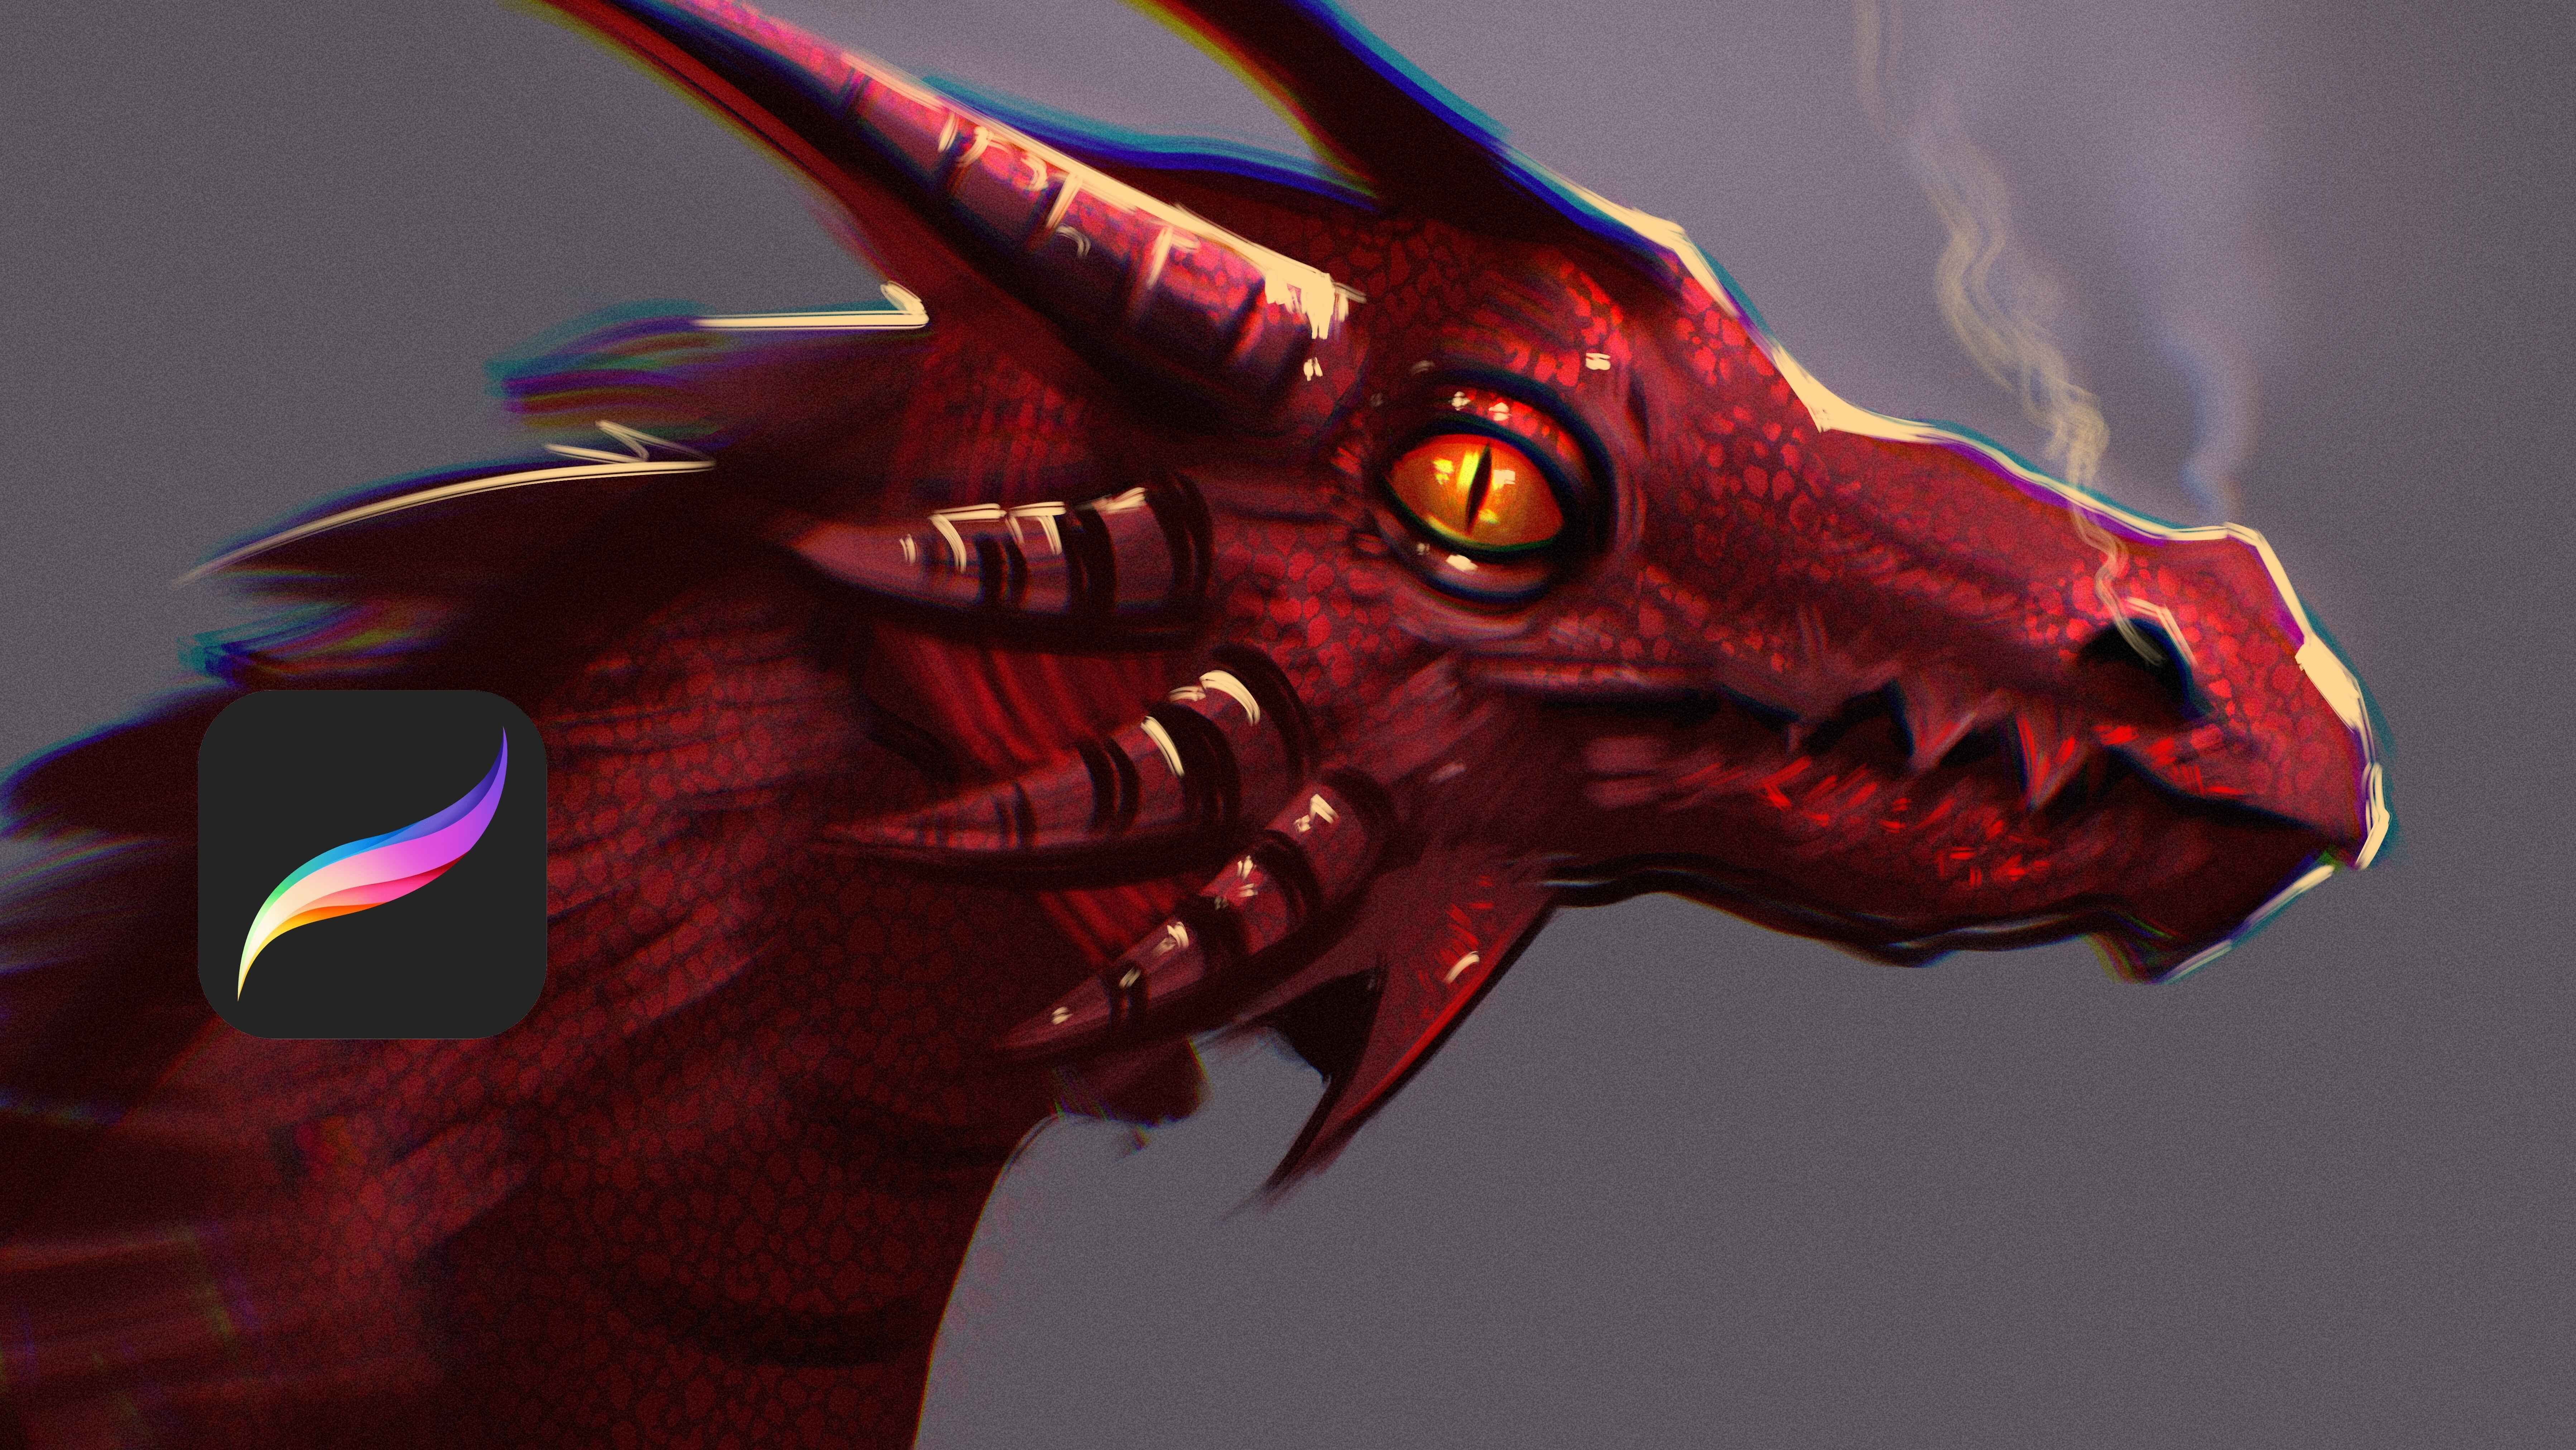
18. Adjustments - Dragon: Welcome. In this part, we
will sketch dragon together. At first, I started
with the sketch. You can sketch the dragon before you start to creating
lines for it. But don't stress over it. Just try to do some concepts. And after this start to create the general
shape of the dragon. For example, the nose will be like this
with the sharp edge. It will give it a bit much
more angry and dangerous look. I started with these details and I'm building the
general shape of the dragon, for example, these parts of the head
will be spiky like this and it will give to dangerous look because sharp edge make lesion
that might look dangerous. And let's continue. For example, these parts are spiky also, and I will make the wings look
like a out from this part, and these parts also
have these bones, and it will be bigger because dragons are
really big creatures, and I will do another
one here because the other wing is at the
other side of the painting. So let's continue to shading. For example, these parts will be darker and these parts
will be also darker. And after you
making this sketch, go to the layers and make sure you collected everything
in one layer. So go to adjustments and tap the gradient map and
select some darker colors, for example, maybe,
yeah, like this. But it will be much more darker, so noir is better. So I selected it and go to the curse again from
the adjustments, give it a really dark tone
with playing with gamma, and I will download this Gamma to and go to the adjustments
again and this time, tap bloom and play
a bit with this. And let's go to layers,
just like this. And from the layers, select much more lighter brush. So with the overlay layer mode, continue to adding colors
over your illustration. So I selected lighter
brush just like this, and I'm adding the lights
over it, just like this. And these parts will
be also lighter, and the wings will be lighter. And these parts of the dragon
will be dark, for example, the ear part and
this part of body, and the wings will be really
darker, just like this. And yeah, it is looking
really great right now. And this time, I will
go to the adjustments, and I will select glitch and
will play with it a bit then chromatic abrication which will add extra color over your
illustration, as you can see. I will make it maybe from this angle or this angle
for make it interesting. So after it, again, go to the adjustments, and this time, we will play with hue saturation and
play with a bit hue. I will play a bit and
we make saturated. Then after it add noise and wipe your finger to do after collecting the layer, swipe your finger to the right and give it
a bit noise effect. After this, I will open another new layer
with color Dutch mot. And with darker tone, I will apply all over the scene at the back
light like rim light. I will tap one time here
and with small brush, I will add a bag light to
the portrait of the dragon. And I hope you enjoy this video, and I show you the basics
of the adjustments, and we did experimental
work over the adjustments, and in the next lessons, we will do much more practices. And let's add these
lights over the dragon. And you can sometimes
select yellow brush or different kind of brushes
for at many lights. And after all done, collect layers and go
to the adjustments. Then give perspective blur a bit much more, just like this. And then you can play
with color balance, and mainly our painting
is full of red. So red will be affected much more when you're
playing with the colors. And after you did
these all details, you can select some
sketch brushes or texture brushes for continue to add details
over your dragon. For example, you can add many details and
mini details over the scales and the
texture of the dragon because the dragon's
body is full of scales and have
textures for it. And you can also use some lighter colors for
creating these textures. And it is all depending
on your choice. Yeah, it is like this. You can add smoke over
here, just like this, and you can increase the
smoke and also maybe a this eye can be
yellow pop up the eye, and you can also add some
teats here just like this. Yeah, it is looking like this, and we did really good
design for dragon, and I will add many details
right now just like this. Yeah, it will look like this. I will increase the shadows
and this part for the arms, and I will finish
this illustration. And I hope you enjoy this quick painting process with using the adjustments menu. And in the next lessons, we will continue to
create many practices
19. Adjustments - Perspective: Welcome. In this class, we will do some basic painting exercise
with quick shapes. At first, paint one
line over your canvas, just like this and hold with your pencil and with
your second finger. And this is our
perspective line. And every line will go to
the center at the scene. At first, start with the
painting Suqua and hold with your pencil and select
rectangle from this part, yeah with maybe new layer, you can create a rectangle
just like this and select rectangle and we created
really perfect rectangle. Paint lines from this line. All lines will go
to do this dot. And after creating the line, you can connect
the lines together and paint the box just like this with the quick
shapes. It is easily. You all need to connect
these dots to the center. So let's do another try. Make a triangle here. I mean suc and you can
play with these corners of it to make it much more maybe
small here, just like this. And all lines will again, go to do this line. So make sure you painting
the lines going this way. And after this, connect
the corners and you can zoom in and paint
with some smooth line brush. It will be better,
like for sketching and every line will
go to this center. So basically like this,
and, for example, paint another shape
here, and this time, we will paint circle and
this part will be darker. And let's paint
another box here. For example, I paint like this, and I will select a rectangle, and I will paint this part
with playing with the dots. And yeah, it is
basically like this. And all corners will go to
do this line just like this. And yeah, basically like this and I
will connect it from here. And as you can see, in scene, you can create everything. And after this, we need to
paint the corners of it. For example, I will duplicate it and connect all
layers together. Maybe I can delete this line. And this time in perspective, we see everything
going to this line. And open another layer under
it and make everything gray. And after it, you can select much more lighter color
and continue to fill it. And for filling it, for example, 1 second, you can tap to continue
filling and make tree hold much more darker. So with darker brush, you can make things
light and dark. For example, I want to
make this part light. And again, this
surface will be light. So all you need
to do is defining the light points and dark
points of the painting. For example, these surfaces are light because light
comes from the left. And yeah, basically like this. And this part can be
much more lighter. And in this perspective, if light comes from the left, you need to put the shadows over you need to put the
shadows over the left. So for example, I will make this right part will be darker because light
comes from the left. So I will put the background
to maybe like this. And let's make another light
parts over illustration. For example, these parts
can be much more lighter, and these parts will
be lighter too. And this part and it is
depending on the light source. So I hope you enjoy this process and I can't wait for show you much
more in the next lessons. But before we finish, I will collect all
layers with pinching my two finger and go
to the gradient map, and I will give gradient the illustration for make
it much more interesting. For example, Blaze or Venice
is really good or 1 second. Select blaze and it will look
like this and you can open duplicate it and Gradient
Map neon or Venice, then go to the layer settings
and mix the two colors with experimenting with maybe overlay or some multiplayF example, if you check it, I added
much more darker color over it and I can use different tones of
it like overlay maybe. Or let's make it linear
light with this tone. So you can add many details as you wish with
playing with the colors. I hope you enjoy this lesson and see you in the next lessons.
20. Sketching - Eye: Welcome. In this lesson, we will do practices
for create Is. At first, I will start
simple sketch for creating I and I will add details
over the sketch. So it will look like this, maybe some I looking like this. And from the left angle, I will continue to create
the I just like this. And yeah, it is
looking really great, and I will continue to
add just like this. And yeah, it is
looking really great. And if you say, I'm painting really quick, it is about to practice. So you need to paint a
circle like this and try to think it like tread and add the tail
over the painting. So you can add details and do practice for understand
how the eye looking. For example, if your painting
is angry like expression, you need to paint eye
much more like this, like much more because this thing is about the
expression of the painting. So let's start again
from this part, and this time, it will
be look angry again. And let's continue
to practicing. And this time, I will paint some not real looking eye this time with a painterly look. So as you can see, I'm not painting any detail, but a silhouette of the eye. So it will be much
more easier for you to practice over
the silhouette. And let's continue. This time, I will paint eye looking at the
top, just like this. And I will add the main
detail of the eye, and eyebrows will be here. And quickly, I'm
sketching how it looks and for
example, like this. And let's continue. This time, I will paint eye just like this, and I will create the
eye just like this, looking at this part maybe
and looking really great. And the sweat of the eye will
look something like this. I will continue again and try
to paint another example. For example, this time, I will paint closer eye, and eyebrows, I mean, eyelashes will be at the down because eye is closed and
the Vs is skin at this part, and eye is hiden in it. So you can do many quick
practices with painting ellipse. For example, painting
ellipse like this is another helpful thing for your eye paintings because if you can paint quick
shape like this, you can turn it to eye
in just with five lines. For example, I'm
painting ellipse. I edit one line, two line, and three line and
painting in it, and de tails over it. Let's practice painting
realistic eye. At first, start with
the Quick Shape, ellipse and paint circle. So paint one fish shape over here like another
ellipse or fish shape. I will make it
ellipse like this. And you can click over here and edit the
shape of the eye. And after it, I will start
to adding detail over it. For example, if I
looking this angle, you need to paint it
slowly and with adding the lashes and thinking
about how it looks because, for example, if you
imagine this upside, like up part of the eye Leshes
will not look like this. It will follow the pad, for example, like this. You can do practice on it
with painting this shape. These parts will
follow this pad, and this part will
follow this pad. So these parts will
look to this area. And other parts will
look this part. So after it, I will paint
the main part of the eye, and I will continue to paint the main shape of
the eye, just like this. And these parts
will be like this, and it is looking
a bit painterly, but with adding the details such as highlights and dark shadows, for example, I
added the shadows, and with adding these shadows, you can increase the detail
level of the eye and add many details as you wish and complete
the illustration. And for example,
after this part, you can go to the adjustments and use Gaussian blur over
your eye just like this. And after making the blurting, you can add searching details for make the illustration
much more realistic. So imagine it is like filter. So you can add details in it
after you put this filter, and you can always do it again and again until
you satisfy and you can play with the
curves for make shadows darker or add lights
over the illustration. And with Sharpen, you can give a sharp look over
your illustration. And for example, with
the gradient map, you can give a gradient
over your illustration. Or you can basically open
new layer with multiplay and add some darker color over your illustration and open another new layer
with the overlay and add lights over your illustration and
complete the eye. For example, I will make
this part lighter like this, and I will make the eye
brown or orange like this. And it is all about your choice and how you paint or
render the colors. I hope you enjoy this lesson, and in the next lessons, we will practice a
lot of Loomis head. And thanks a lot.
 Yasar VURDEM, Creative Art Director