Transcripts
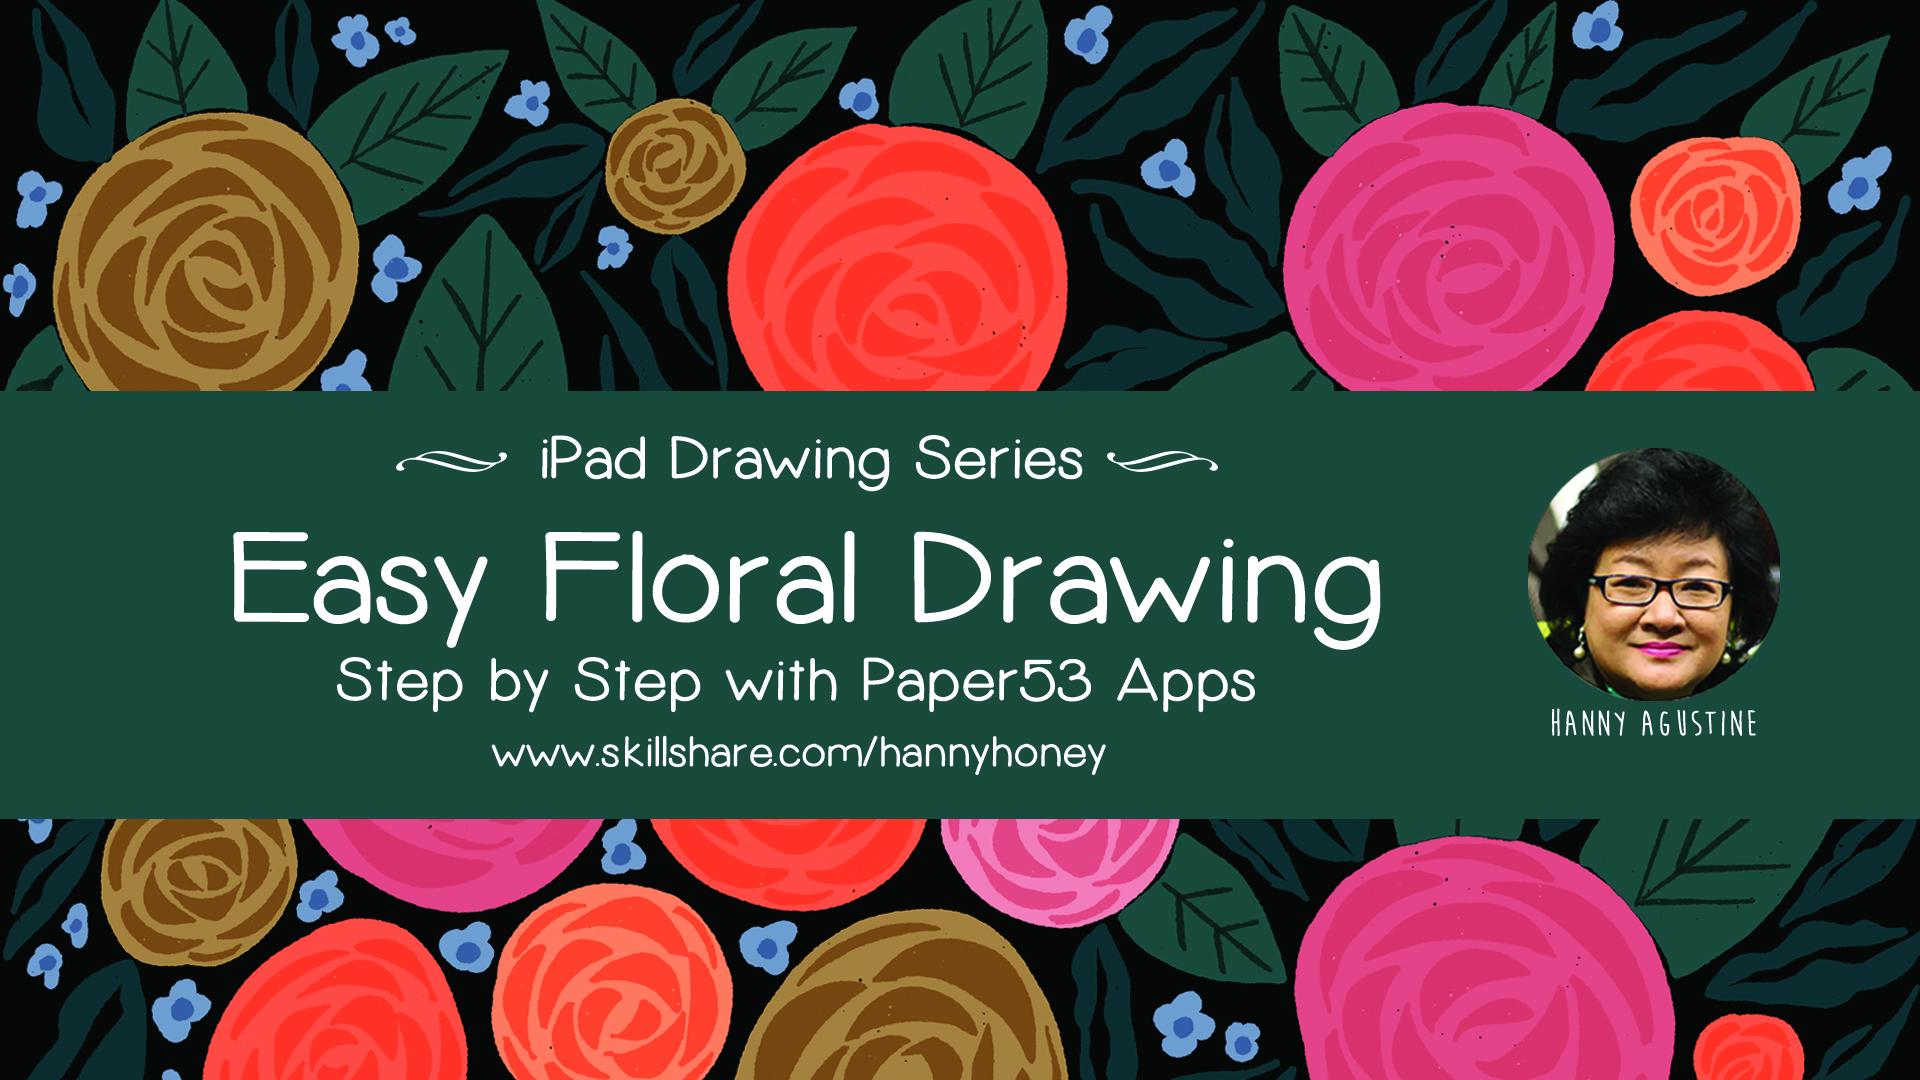
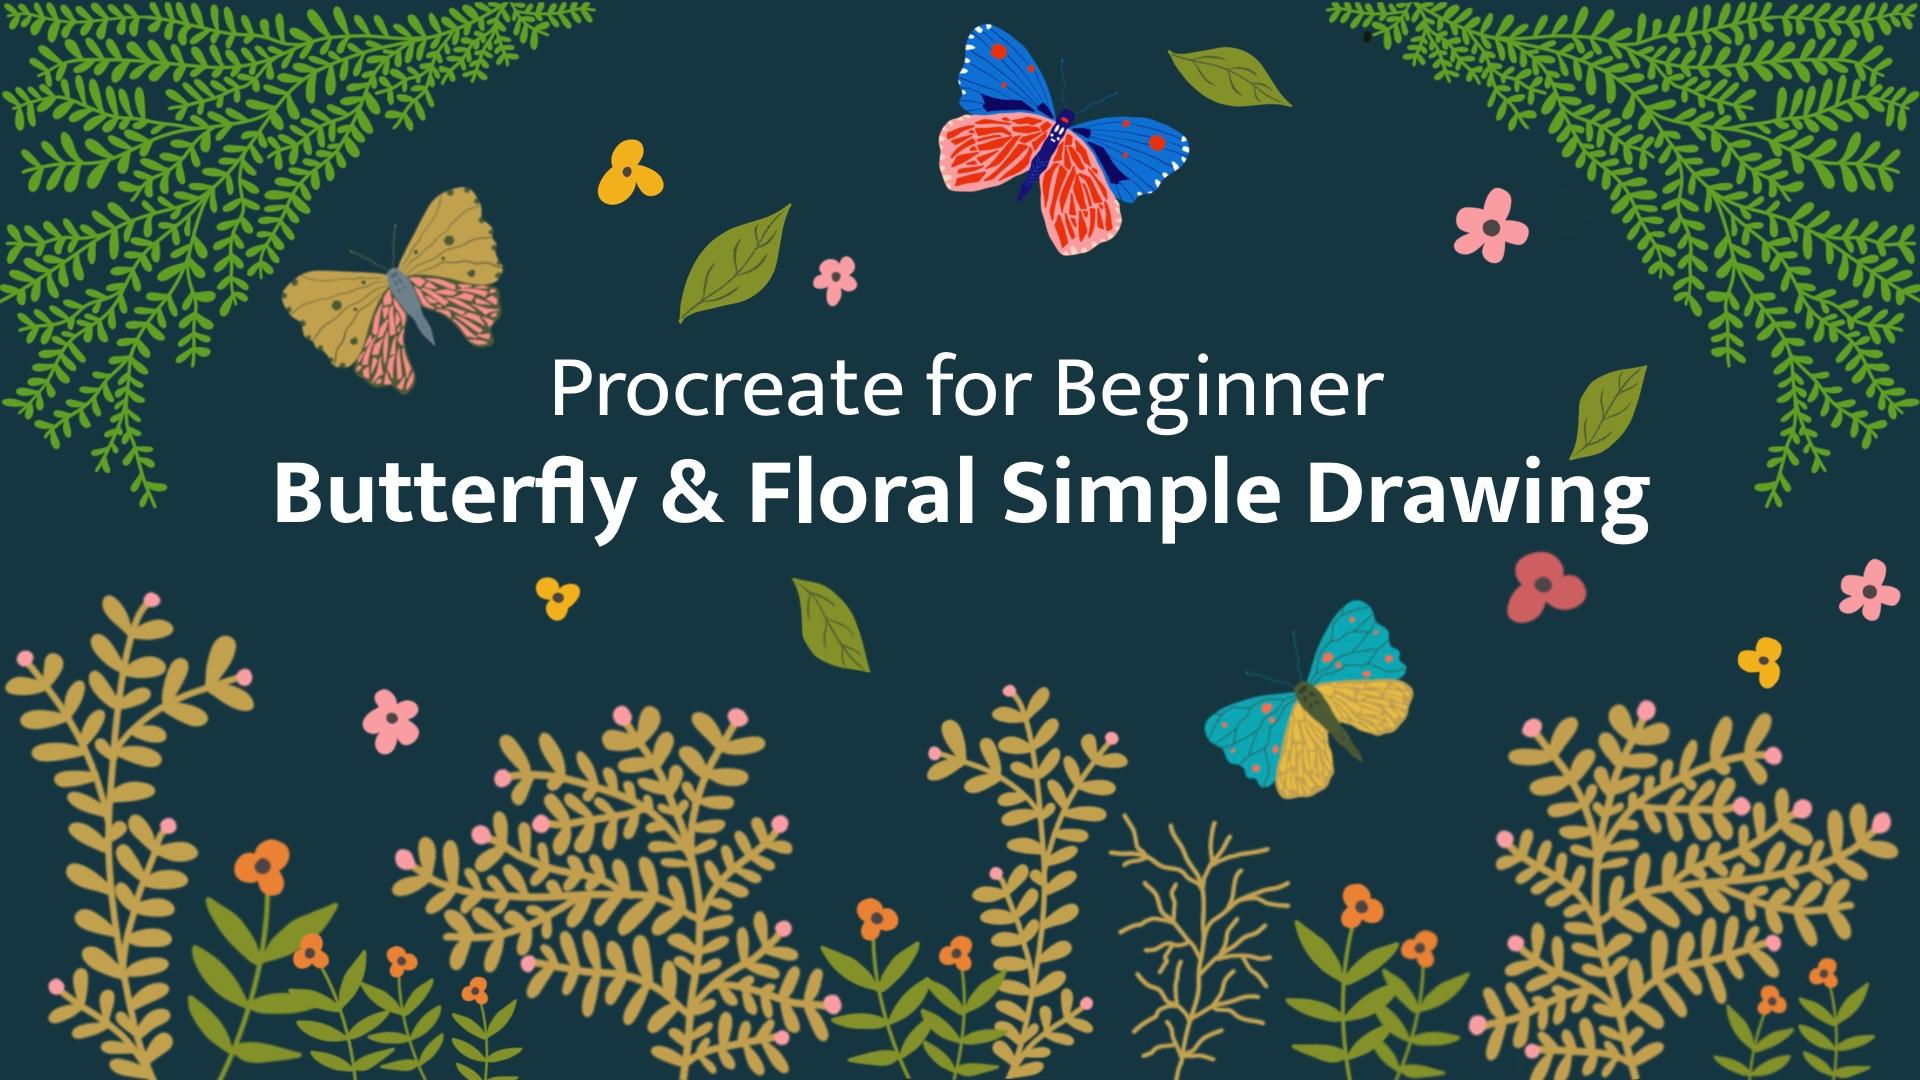
1. Trailer: Thank you for joining my class. This is Procreate for Beginners,
draw symmetry designs. In this class. I will did you not only one
but three designs Indonesia, but they don't go overboard. In this class, I will
teach you step-by-step how to use symmetry
tool in Procreate. You can use vertical, horizontal quadrant
and also read. And also I will get you one by one how to create Indonesia. But di Marco. And also I give you some ideas how to
change the background, how to change the
color in each layer. And they have a
different style of drawing between two tails or line or shapes or
floral style drawing. You will be surprised
with the result using this very simple
but medical tools called symmetry in Procreate
and in this glass, I only teach you how to draw the design using symmetry tools, but I will give
you some ideas how this beautiful design will be transformed into many
kinds of projects. But don't underestimate this
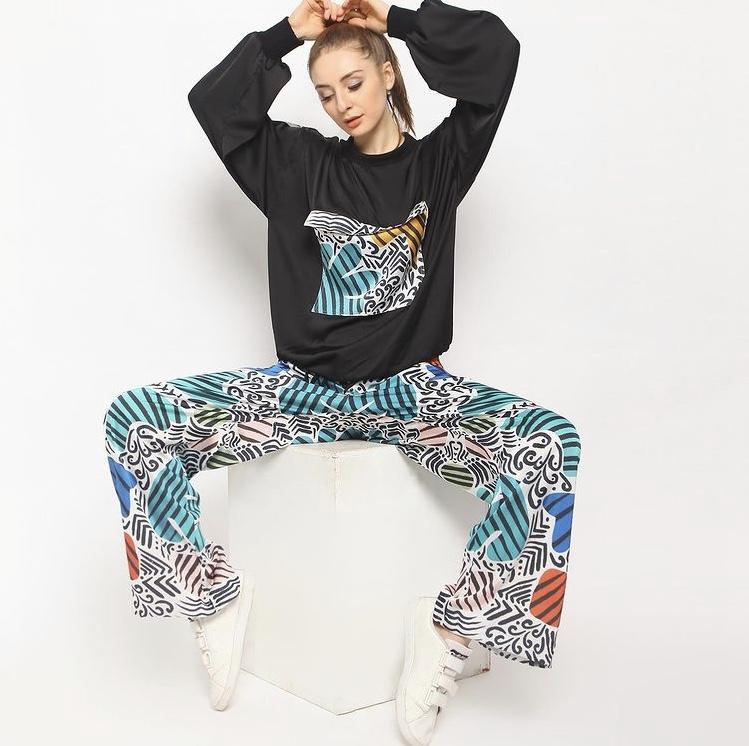
simple drawing because later on you can also have some
ideas from this e Marco. We can create a clothing
line like this. We can bring in Mongo on the fabrics and
then it will become a check or beautiful dress
or t-shirts like this. So why wait for it? Just grab your iPad, your Apple pencil, and
let's draw with me.
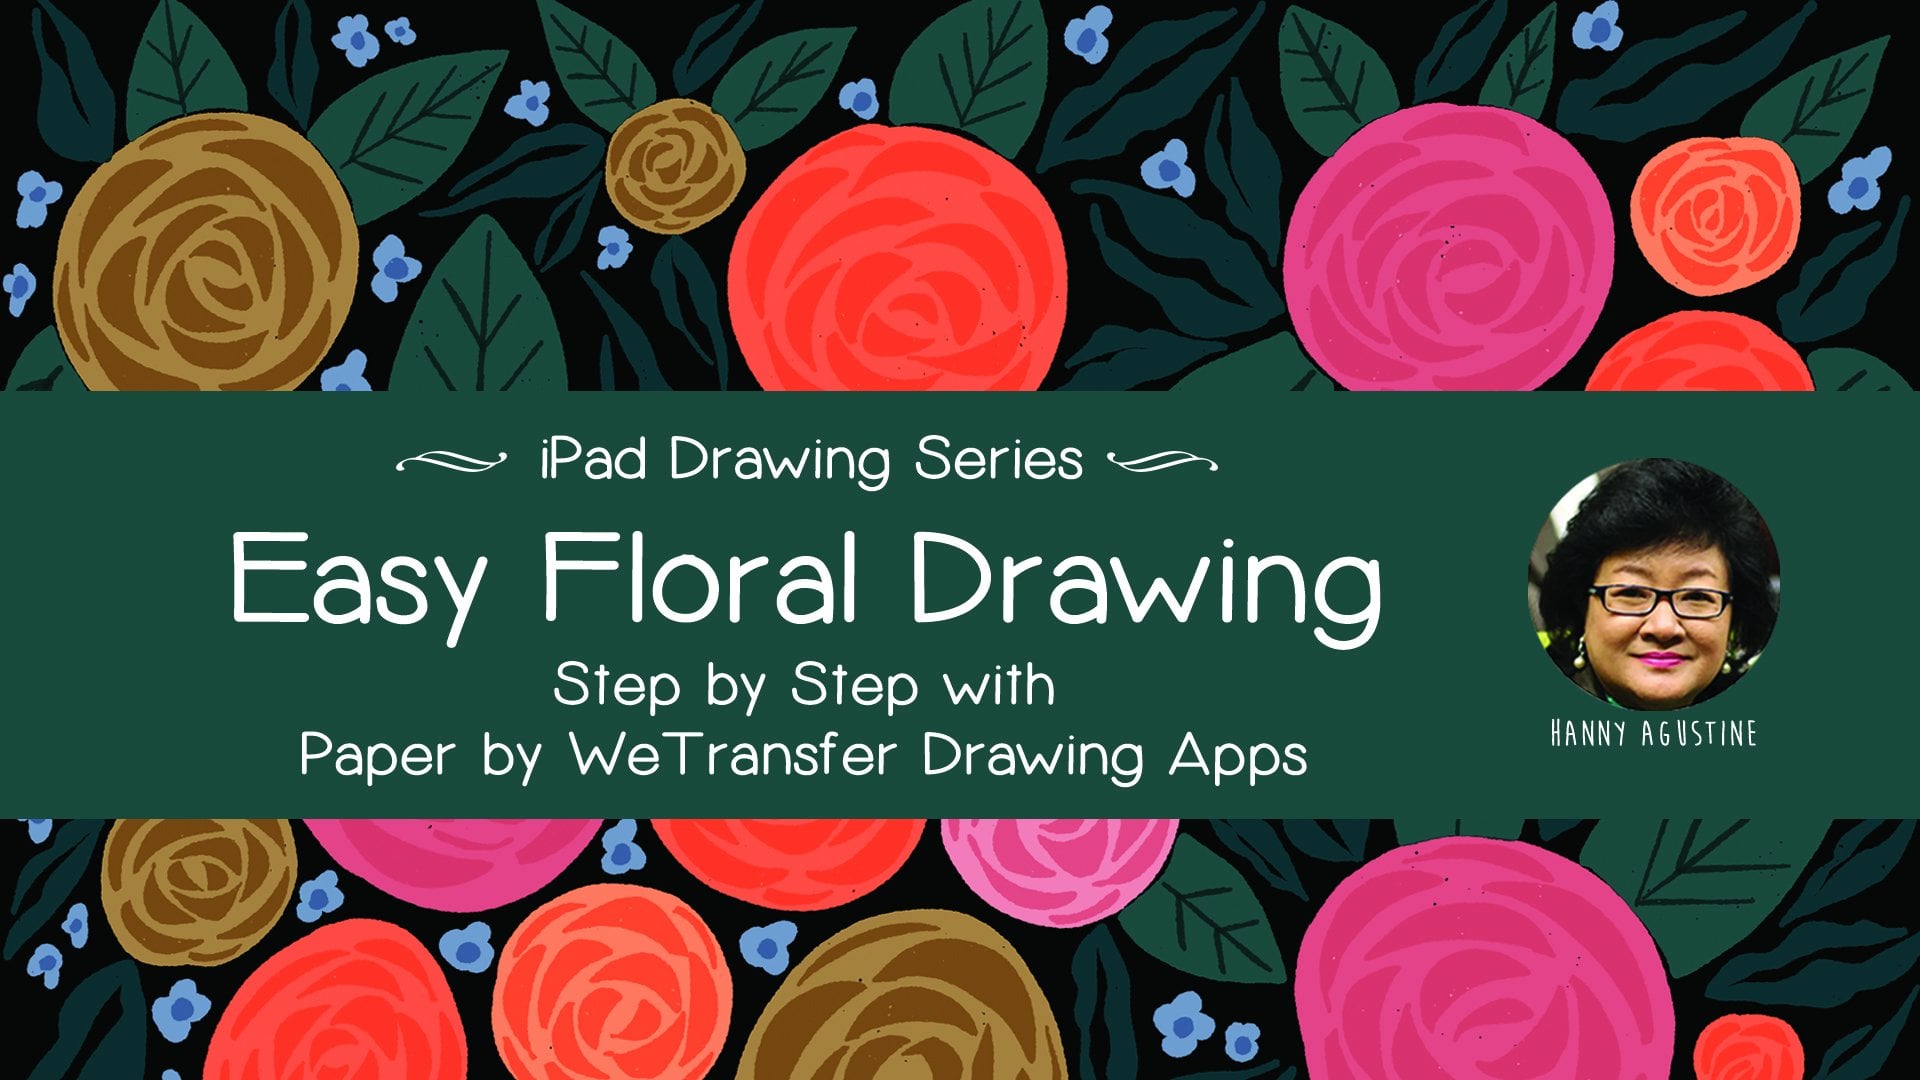
2. My Art Journey: Hi, I'm Julie. I'm an engineer, but
I love art so much. I bought my drawing
tools in 2014, but only in 2016, I start to draw every day, everywhere I can, mostly
of my drawing our flower. Because when you draw
colorful Florida like this, you can feel happy. You can release your
stress and you can sue them in your mind
and meditate like me. So I draw a lot on birds, also on my iPad. This is another freedom for me because no water,
no messy, terrible. And I love it so much. And then finally, I
realized that I have so many drawings on my table. One day I counted about 800, but another day I found
more than 1 thousand. And because each of my
drawing has a story, then I start to create
the story card of each of my drawing so I can
remember what is my feeling, what is in my mind when I
draw each of it and then I digitalize it and I
transform it into fabrics, papers and lead there to be what we call it
a wearable art. It's like scar or two
elite for your bag. Also, not a botch
wrapping paper. And also d tau. And of course the
packaging box that also originally is my
watercolor hand drawing.
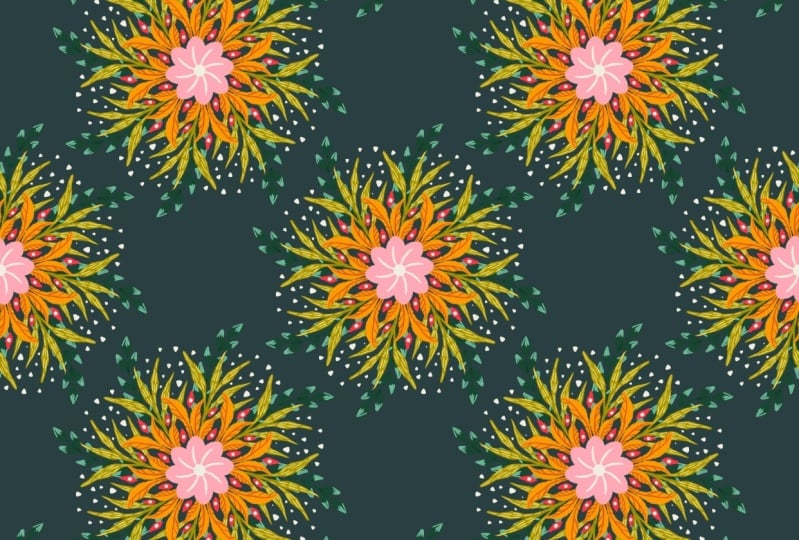
3. Your 3 Beautiful Projects: All right, this is your three
projects in this class. Our first project, I
call it Indonesia, but because I come
from Indonesia and ethic is our signature art. So I say that this is a
kind of fatigue drawing. If I open my procreate, you can see here that my
Indonesia has five layers. Usually I draw layer by layer
by separating the color. Later on, if you want to
change the color of insulator, you can do it by
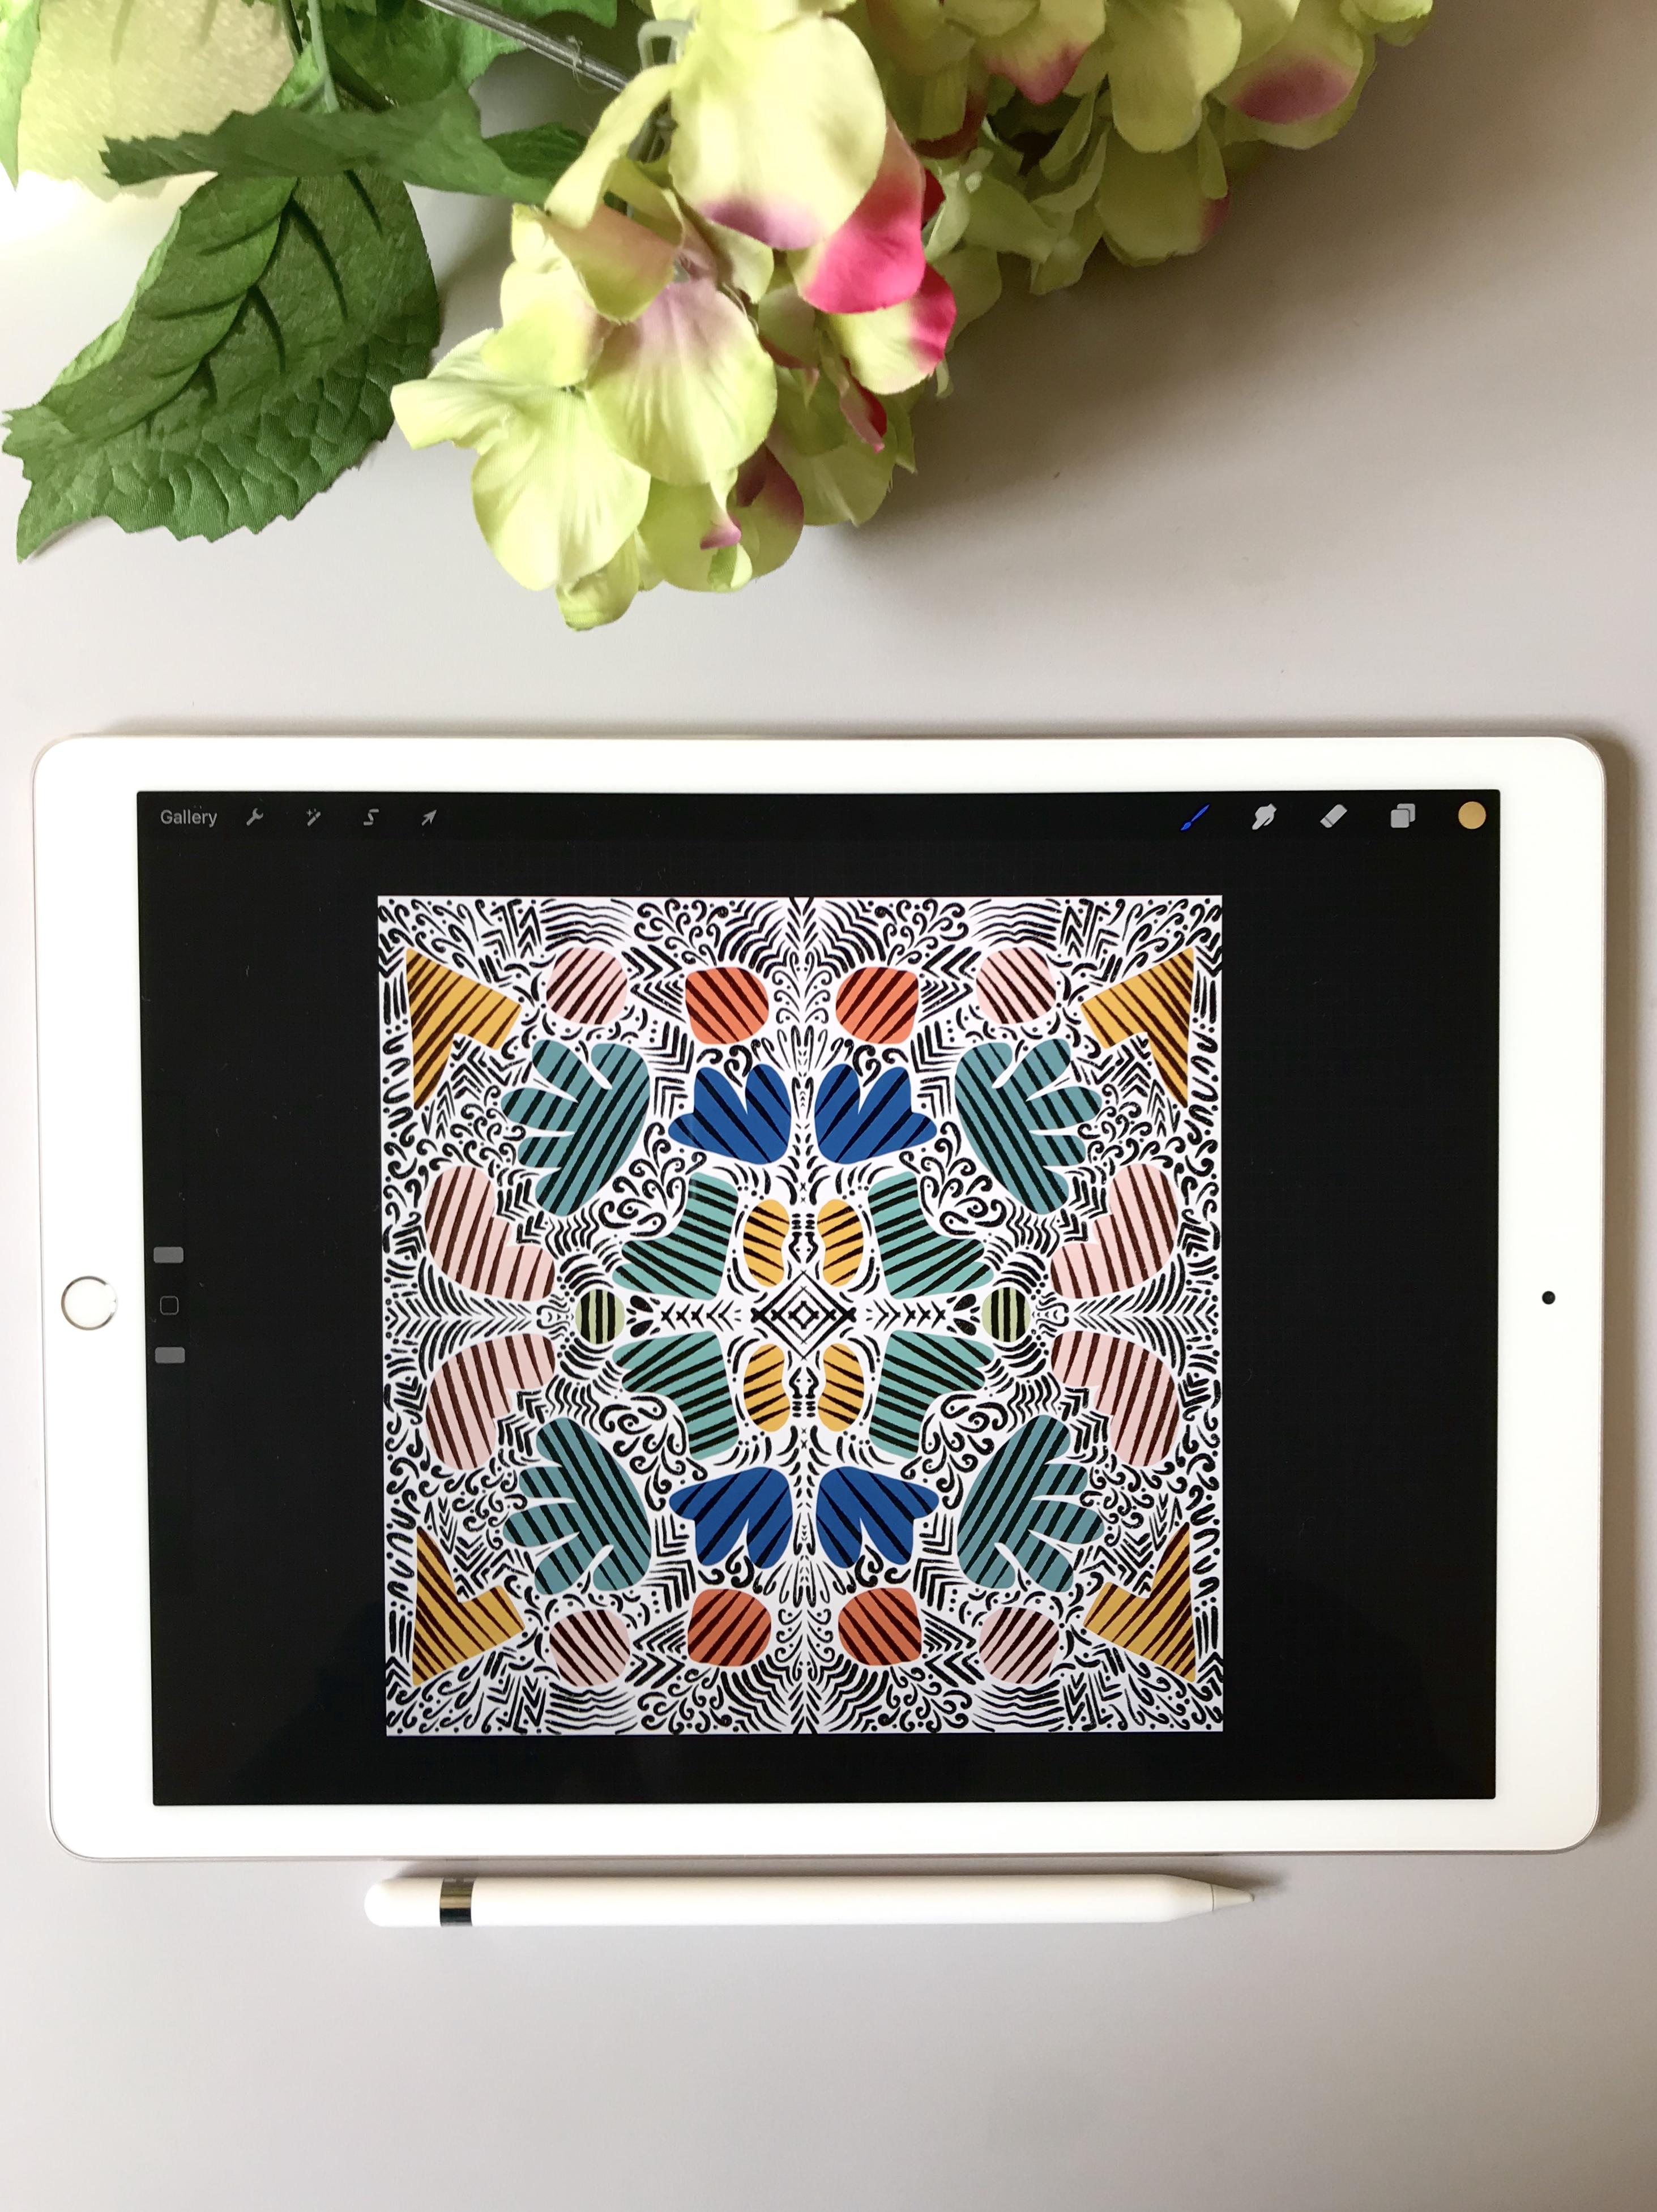
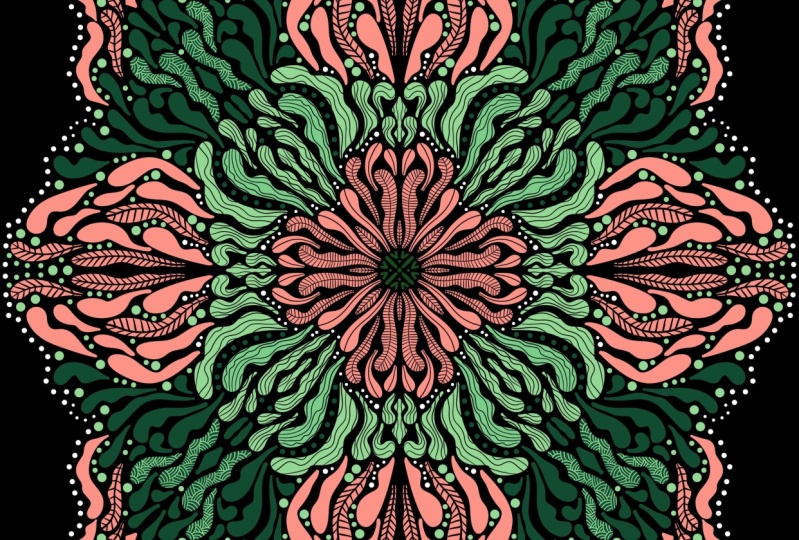
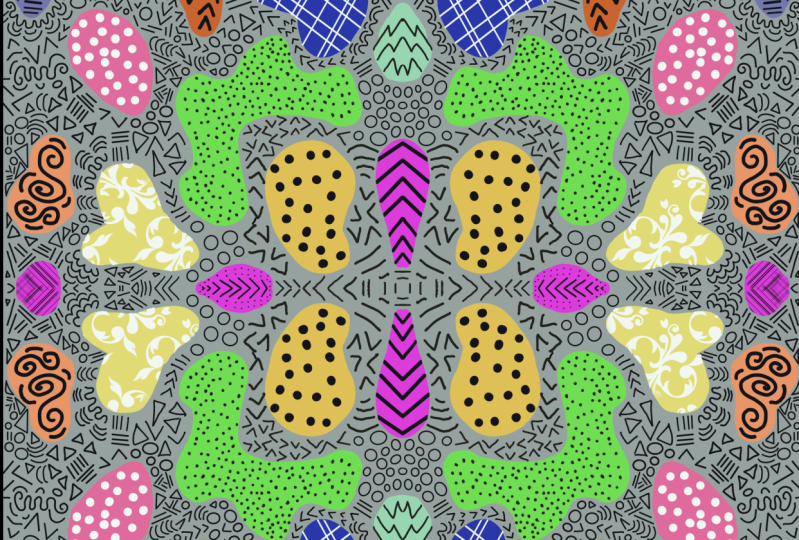
working on its layer. The second project,
I call it a Marco. This is aligned are
and shape drawing. It looks very complicated, but actually it's very easy. The first you draw the
ships and then put the color inside its
ships, give the textures. And then you act with line
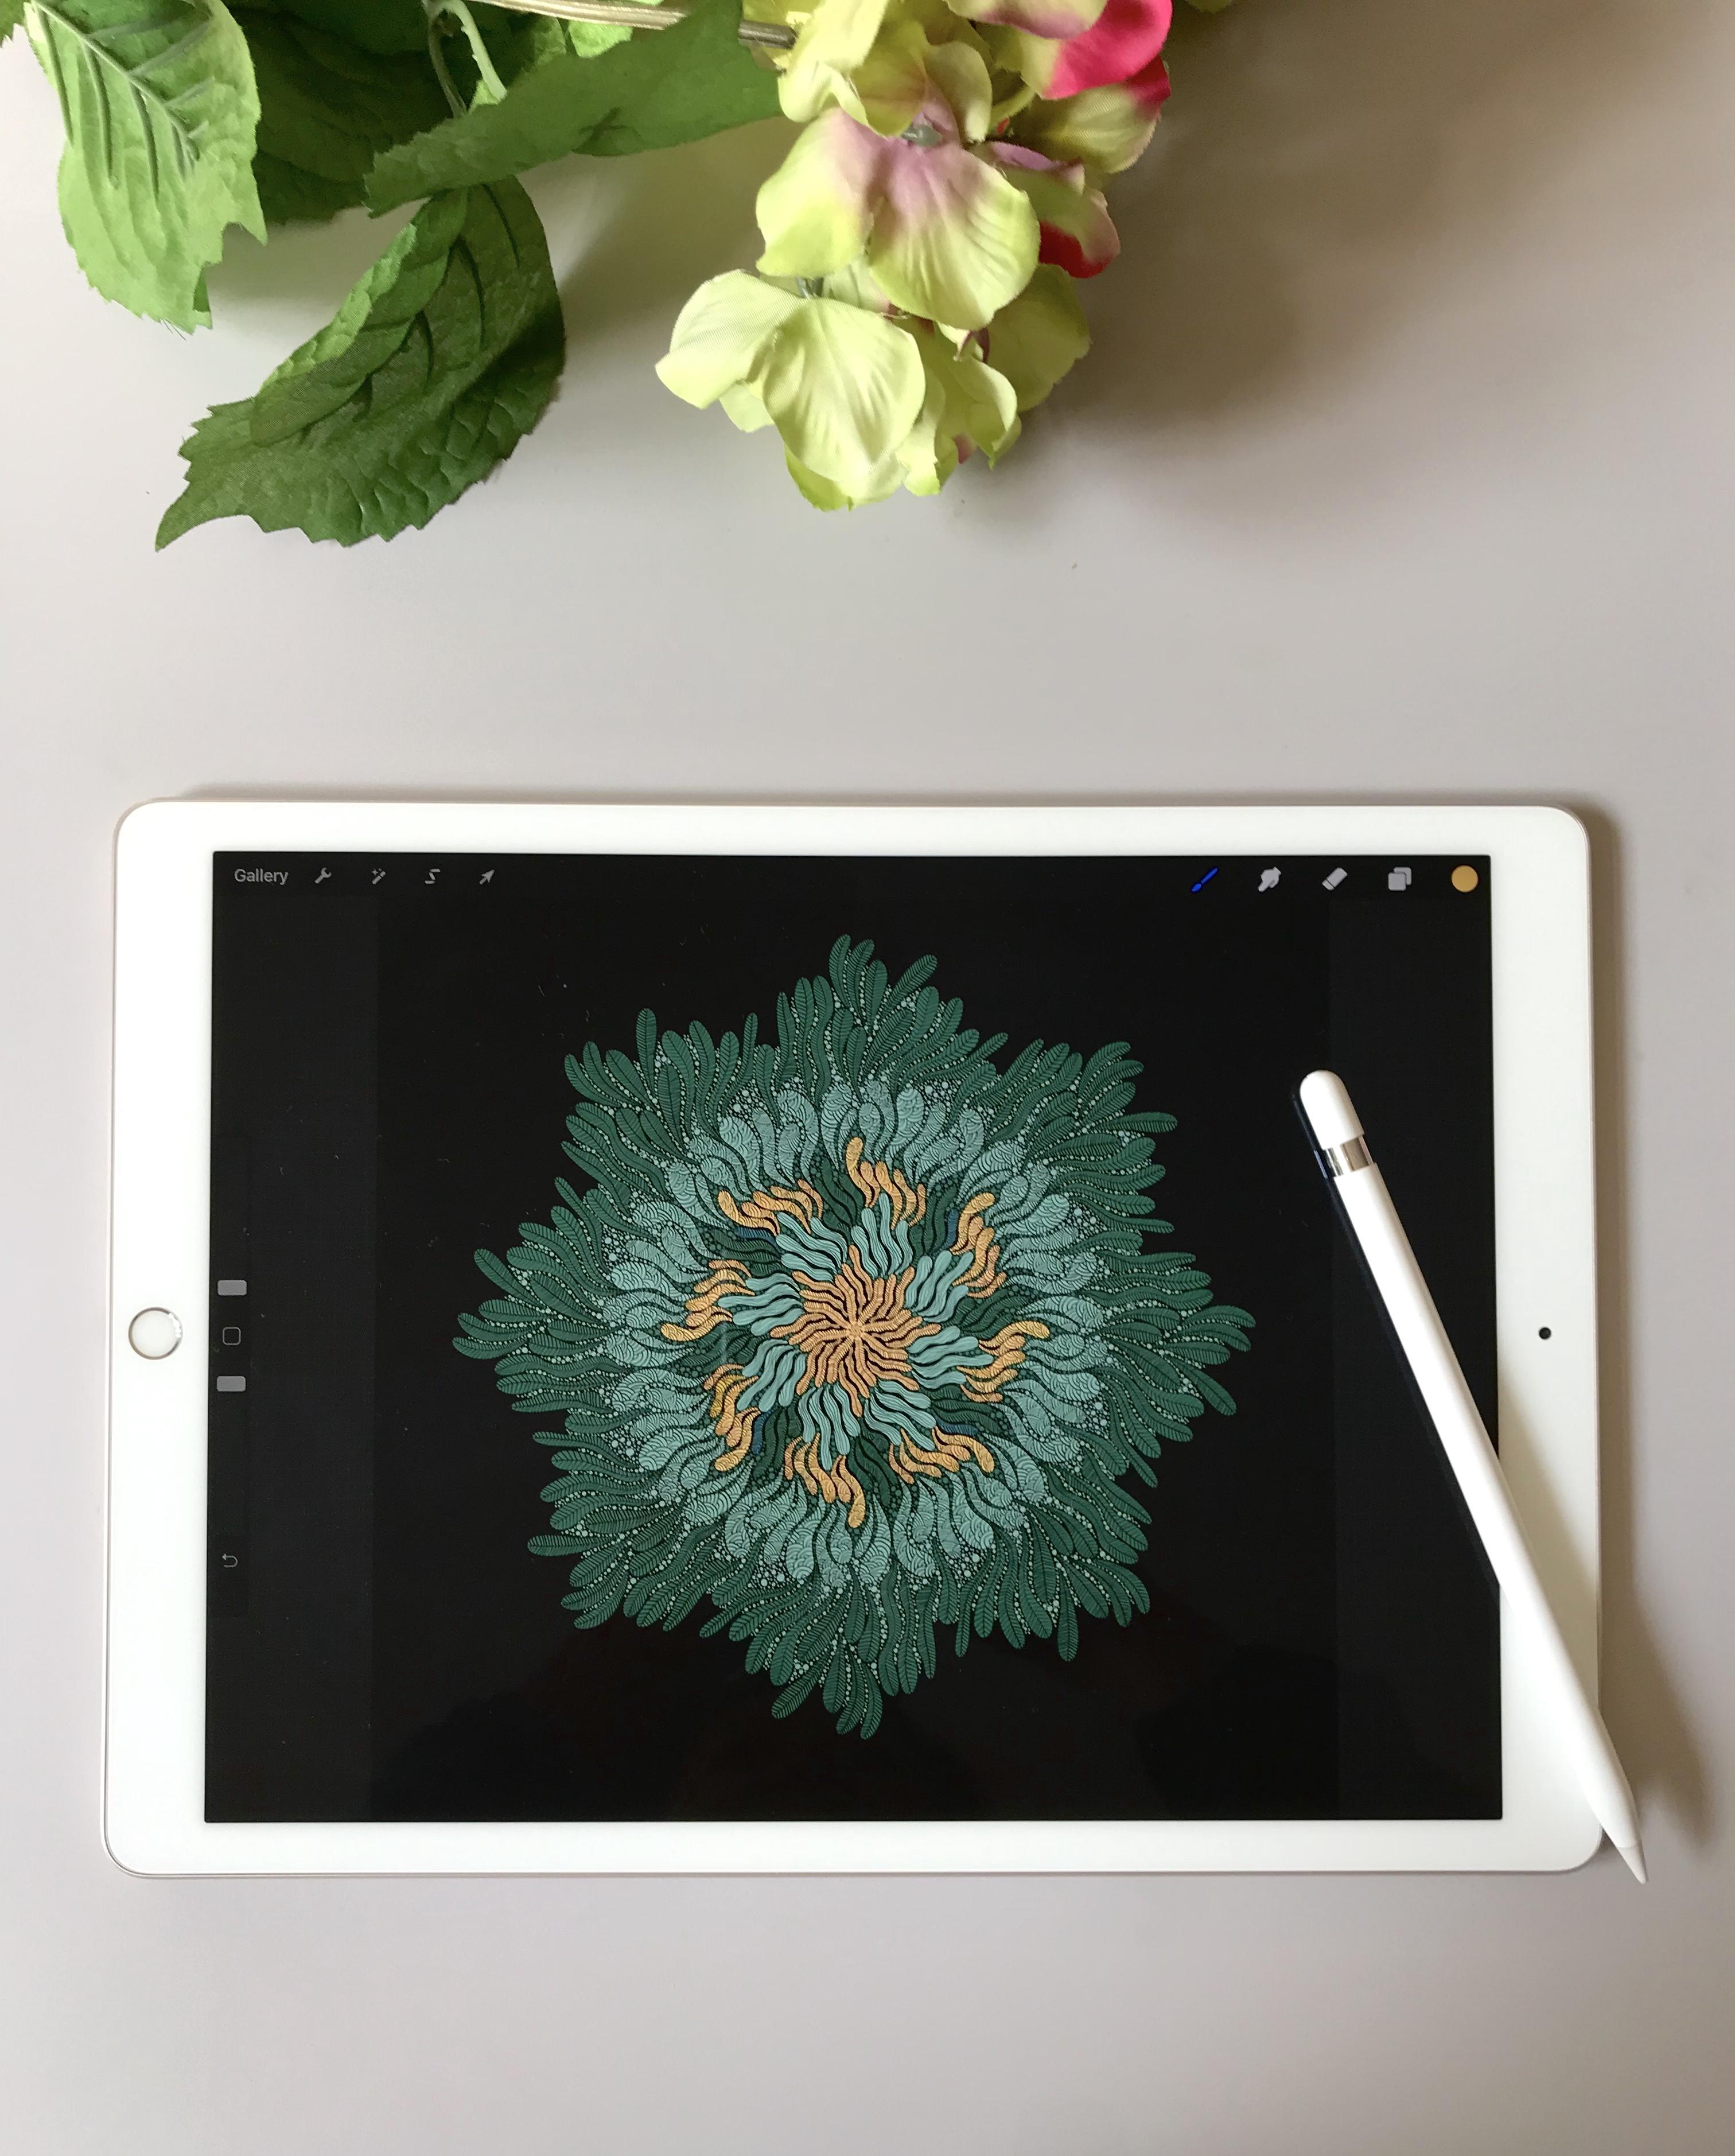
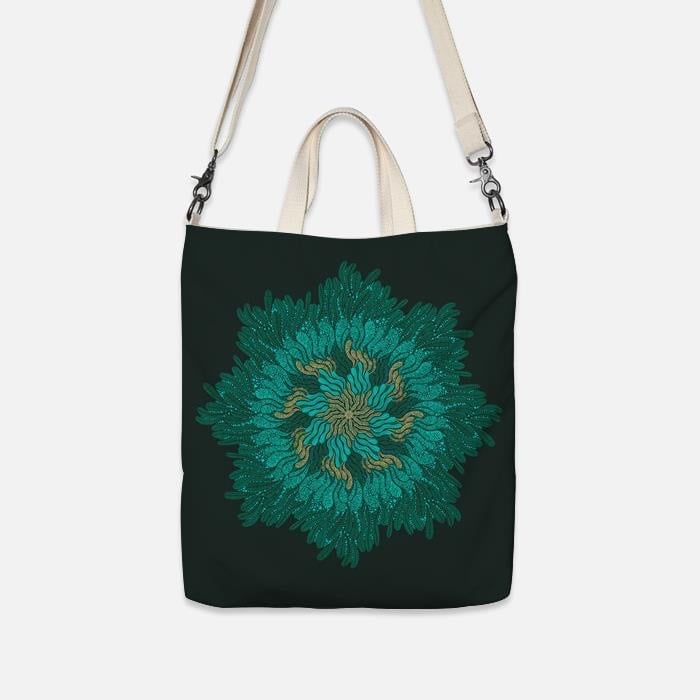
art with black color. The third project,
I call it a boot because we'll put this
once it did Valley, my preferred in
place for traveling. And you see here this
is a kind of today. Do the art that you draw
each shapes and then you add a line like you are doing
doodles in its off this one. It looks very complicated
too, but, well, you will see that using
symmetry tools in Procreate, you will save your time
to draw this much. And at the end you will be
surprised with the result.
4. Introduction to Symmetry Drawing: Next is the introduction to
symmetry tools in Procreate. Now we start to
create a new Canvas. There is a plus sign. You must fill in
the width and hate. I put 7 thousand pixel and
7 thousand B cell makes your dpi 300 and you
will have six layers. And I think the
maximum layers is enough because in
this geometric tool, we don't need so many layers. This is your new canvas. And if you click layers, you have background
in layers one, and then go to action that is
confess with a blue color. And that is drawing guide. Tap on the drawing guide. And then you have edit
drawing guide. Click this. Double find symmetry. You can change the opacity of the drawing guides and the thickness of
the drawing guides. So you can arrange like 85
per cent and the thickness, you can arise until 64%. And then in option menu, you have four menu, you have four options. Vertical means the
drawing guides will be straight vertically. And then this is how
recently and quadrant it means you have vertical and horizontal drawing
guides together. And the last one radio, you have eight parts of
your drawing because it goes radially a 360 degree, and then makes your
Rotational Symmetry off and please turn on
assisted drawing. Now we have a vertical
drawing guide. But a sample, I just
get v at mono line. I like this grass because it's very straight and very clear. And you can choose
the color here. And then if I draw something, because this is symmetry, you will have the
same drawing on the left and on the right side. Will save your time because
you only draw once. But you may have two drawings on the
left and on the right. If you have a mistake like this, this is because you
don't close the lines, so make sure you close
all of your pattern. So if you fill in
with the color, it will not go through
all the columns. And this is an example how I draw using party girl
throwing guides. I call it this drawing angels. So you can see that
I draw one NGOs and it becomes two NGOs on
the left and on the right. Then I have many
layers separated for its leaves and flower. And then another sample, this is called a Malibu. I use both the horizontal
and vertical drawing guides. And now we practiced for
horizontal drawing guide. This is the color to change the color of your drawing guide. Loop. If I move to the lines become blue and I can still
adjust the thickness. I like it. Now we have the top
and bottom bar. I use the color red now, and I draw something here. I use thicker line. And you see With
one time drawing, you have two times better and at the top and
at the bottom, tap with two fingers to undo. And now, as you, You
quadrant drawing guides, it means you use both the vertical and
horizontal drawing guide. You will have four bars. And then if I draw it one time, it will be for pattern
together on the left and the right and also at
the top and at the bottom. And then you can fill
in with a color. And you see now suddenly you have for part of each drawing, again in the options. Now we practice with radio. You will see eight
bars of your drawing. Just the color blue. If I draw this, and then it will be available
on parts of your drawing. It will save your time very much because you only
with one drawing, you have eight drawings. And again, remember
you have to make a closed lines to
fill in the color. You will make. The whole canvas becomes blue. See how much you save
your time with one, but you can have eight drawings. This is, I put it in layer one. So if you want to
create another color, usually I create another layer. So at layer two, and then I use the light
blue and I draw again. Whoops, nope, it didn't
work symmetrically because I forgot to turn
on the Drawing Assist. So I tap with two
fingers to undo mixture. Drawing assist is on now. Once you draw, you will see it. Same drawing on your canvas. This very easy, right? Easy and fun. Again, if I need another color, I add new layer,
layer number three. Make sure you turn
on drawing assist. And then I use
gray for a sample. And then I add
some more pattern. Is this only a sample? And then you can see
how you see this. You meant three to
source in Procreate. And later on we can try to create three projects that
I've shown to you before. Now it looks complete and I only need three layers
to draw like this. And then there is a
background layer. You can change the color of your background just
by moving around. This. If I choose the dark purple, it will be like this
is really serious.
5. Create Color Palette: It says Yet we will
create a color palette. If you have an email from Pinterest or from
your photo library, you can create new palace, click Plus sign, and then
choose Create new pilot. Then you can fill in
the phallus width. It's off the color. I use my fingers to
choose the color. This is for the dark green, and then I use my
fingers again to pick up the color yellow. And then I put it
in the pellets, light green and then
the light is green. The orange one. The white one. Ready? Light green. I think it's in now. So this is the way you
create your own palettes. And then you can also name your palettes for a
sample with, yeah, you can double-click
and then you choose the keyboard and you decide
the name of your band. Let's, for example,
take and then duck. And now you have batik
pellets with your own color. It's fairly easy, isn't it?
6. Indonesia Batik : Draw The Center: Now we are going to create
florals throwing that, I name it as Indonesia. But the first withdrawal, the center, we will
draw this tile. It will be not the same. This is only the example. But you can see Florida in the middle draw the
shape, the big shape. And as overall, we will create the center of our
drawing like this. And later on we also fill in with the textures
in its ships. Okay? And then for the color
we already prepared, but the color palettes and
again create new confess. But here I already have 7 thousand times seven
cells and B cells. And in our gallery now we have new confess with two layers,
background, layer one. Action can first turn on the drawing guides and then
click Edit Drawing Guide. And then you'd use symmetry. You would choose options, and you choose squadron
because I want to draw with vertical and
horizontal drawing guides together, I click done. Now I use the lightest green. With calligraphy and
mono line brush. You can adjust the
thickness of your line. Okay. That two fingers to undo and then use drape
fingers to redo again. This is the opacity
of your brush. So now I create the shapes. I feel in with the
lightest green I have. Then no, I choose different color and I
create a ship again here. Because we use vertical and
horizontal drawing guides. So with one drawings, we have four drawings. And then I continue again
with the dark green. Now. I still work on the layer once for the center
of our Throw it. Yes. Here I draw again
different ship. Okay, this is the
center of my drawing. And you see you have the same symmetrical chips
on the left and right, but also at the
top, at the bottom. So this is layer one. And then make sure you
turn on Alpha lock. So alpha lock and
drawing assist on. And now we're going to fill in the text doors off it shapes. I'm going to choose
the next two hours and I will choose select. And then you can try. If you need a bigger size, then you can adjust the
size of your brush. I will make it smaller, but this is a small. Yes, I think there's
enough here. Now, I fill in all the shapes with this isolated
next two hours.
7. Indonesia Batik : Give Textures to The Center: Let's continue with gift
tax dollars to the center. So again, I do
calligraphy, monoline. Make it big now
because I want to make a dot and then I
already just the color. Or if you use your fingers, you just step on it. Then I step my Apple Pencil. And because we use alpha lock, the textures will not come
out of the ships is inside. This is very fun, isn't it? I can do it like
this all day long. Don't be afraid because you've already done on the alpha lock so it will not go
outside the shapes. Then I do different
background color. I just jumped, put a
ball and you can see how our drawings looks like. Again, I just the
white color and then I continued to
fill in the textbook. I will just artistic
and I choose Aurora. Let's see. I will fill in this dark green and I choose
the lighter green. I test it first. Adjust the breast size as
you lie and make it smaller. Okay. And now I feel in
those ships, because again, you already done
on the alpha lock, the dexterous will not
go out off your hips. And now our drawing
looks like this. And then we continue again. I'm looking for
another textures. I do spray paint, and then I do splatter done. In now, I feel in this
part I just lighter color. Then again, you can try the
thickness of your grass. Okay. I like it. You can add some more on the blank space with
your Apple pencil. Now, this bar. And then I just went there
and then I lie metal. Now, we try on our ships. I make it bigger. Yes. What's my hand? I draw it without lifting
up my hands at all. So I can go through
all of the bud of ETFs without
lift up your pen. What happen if you live up? I drop and lift up and then
throw again and lift up, and then draw again
and move apps. That is a difference because you see the result is not the same. Because it's like layer
add to the previous layer. So just draw without lift
up your head, drop ones. You can move everywhere
and you will not create a stack of the layer, so you only see one layer, one Dexter's on these
ships is very good, okay? Therefore, the
background color you can see much better if you change it with a dark
background and then you can see how it looks like. It's off to Techstars.
8. Indonesia Batik : Add Another Colors: And now it's time to add
with another colors. Okay, so we have done our
center of the drawing. Then I gently again the
background color to be white. And now we still have another layer with
yellow and orange. And then I will draw
with yellow color. Just calligraphy monoline. And then now we will continue to add with some more other colors. Okay, I add a new
layer, layer two. And then I turn on the Drawing Assist desk again
the size of your brush. If you are happy, then start to draw. And then I will create
yellow pattern. Don't forget to zoom in
and zoom out your iPad. Because if you can
see close like this, it will be very easy
for you to draw. And then I fill in
with the color. I think I need to change the
color with bright yellow. Okay, I think this
is good there. So you can replace the
color with a new one, Greg, and fill in
into its shapes. Again, I forget to turn
on the drawing essays. Undo, undo, undo, undo. And show you this because I also make a mistake like
this so many times. So this is the difference. Once you've done on the
drawing assist and it will be drawn symmetrically at the
top and at the bottom. I repeat it and then I put
it close to the color. So it's very easy for me to drag the color and fill
in to all the ships. And now you have at the
top, at the bottom. So don't work, get done
on your Drawing Assist. Layer tool for yellow. And then still the same I
still working on layer two, I draw again another bed done to continue
this yellow layer. You can also rotate,
your can pass. This is UNCLOS. So I will close it in line and
I can fill it with yellow. Now. You can rotate the
canvas as you like. So it will be easier
for you to draw. So it will face to me, and it will be better and
easier for me to draw. Now we have layer three and
it's for the orange one. I draw again a freestyle
floral shapes. And we can put orange
to fill in the color. I think that's two tabs, so I just with a lighter and
then I keep it as my palate. Now, we replace it
with a new color. Looks better now,
I will continue. It looks like the leaves, but this free style of floral
drawing is very addictive. Once you did it like me, you cannot stop
drawing like this because you just make a curve and the line width freestyle without drawing at all actually. But it looks very beautiful
when you finish it later on. Again, with a symmetry horizontally and
vertically drawing guides. Now you have four same
patterns on the left, right, top, and the bottom. Now I go back to my layer one. I keep drawing, assist on, but I turn off the
Alpha Lock and then I add the cane with green color. If you don't like it, just tap with two fingers
to undo and draw again. Now I've filled in
with the color. Wow, I like it. Now, I moved to the
lightest screen. We have three kinds
of green I think, but I put it in one layer, which is layer one. But if you want to separate dark green and then middle
green and the light the screen in three
layers is also okay because the
benefit is at the end, if you want to change the color, you just go do is layer and you can fill in with a
new layer that July. I continue drawing, just
listen to the music and it will be very
meditative for you. It will come to your mind. Just enjoy the music. And if you want to
fix your drawing, you can make it bigger. You can zoom in and then
you can draw again. You can fix it again. And it's okay. Now, I continue at something here in the
middle of two orange color. If you want to delete it, make sure you click the eraser
and then you delete it, and then you go back
to brass and you continue drawing and fix it. Okay. We have done
hub of our joy. Now we continue again. I move to layer 34, orients, makes sure that
drawing assist is on. Now, I will add something here. I go back to orange and then I draw triangles,
little triangles. And then fill in with
the colored later on. You can zoom in and
zoom out as you like, just to see how the composition of your
drawing will look like. And then you continue again to add with some more triangles. When I draw my symmetrical
drawing like this, I really, really liked to draw it at night
before I go to bed. Because instead of drawing, it helped me to suiting my mind. My mind calming down and then
my sleep will be so cool. You can try. I go back to layer one. I do the green color and we'll add some
green anymore here. When drawing this,
sometimes I put the music on Spotify or, oh my, I bet. It's very beautiful
moment when you draw the symmetry doors
in the Procreate. Now I continue again feel in the whitespace
with another grid. I like to put it
close to the color, so I just drag a little
bit and see how it looks. Very nice. I like it. So we will continue again.
9. Indonesia Batik : Fill In The White Space: Now we will fill in the white
space with the details, so it will be very beautiful. Leather or not. I'm still in a layer one. The green color I tried to fill in, again, the whitespace. If I don't like this shape and just undo and you can draw kin. Now, I feel in with
the color kid. Looks like this. Well, now it knows, nice. That is a still whitespace here. So I will draw again. Okay? Okay. Then I move the layer 34 orange. I will add some triangles, the little triangles here. So let's just make sure
you have a balance that will not be so
much whitespace. Just fill in detail as you can, because the more details you are drawing will be so beautiful. In this class because
this is only a sample. I just show you not
so detailed drawings, just fill in the white one. But later on, after this class, you still can add some
more in the whitespace. All right, we have done so far. And if you want to
see the result, you can also change the background color
to be the dark one. And this is your Indonesia, but I like it so much.
10. Indonesia Batik : Add Details: Okay, This is the last
part of Indonesia, but we add details. So far we already draw
with three layers. And if you change
the background, it will look like this. There are still whitespace, so I will continue. I choose Layer one and I use a series of our green color
to fill in the whitespace. You can make lines like this. You just draw a half part of it. Sometimes you can make a circle. I continue and I use a
different green color. That's still, I'm in layer one. I add some more details here. And then I will find
another whitespace. And again, I add some
more detail here. Find the whitespace again, and then fill in with
a little shapes. So it will be bare lands. And the construction of your
drawing will look nice. Mix the color between
the dark green, the medium green, and
the light, the screen. So you can have the
color composition also. And I add some more here. Okay? Okay. I want to see with
a darker background. So I danced the background to see the details
of my drawing. You still want to add
some more liberals. Shapes are little marks
on the whitespace, or this one is just spits. You still can add it some more. Just the dark blue and
it looks fit also to the color that we already
chose for this Indonesia. I like it. How about you?
11. Imago : Draw Shapes: We continue now with our
second project called image. And this is about line and shape with symmetrical drawing. But first, we draw shapes. This is an example of my symmetrical drawing
that I've already done. You will make a similar of this. And you know, what
is the good thing? I use this drawing to design a Tumblr and then I create a story car
about this drawing. And also I prepared
the packaging and I can sell it
to my customer. Or I also use this drawing
to create a drawstring bag. This is so exciting for me
to create a drawing and then transform it into products that says Tumblr or drawstring bag. If I can do this, of course you also can do this. You draw and then you find the supplier to
create this product. And you will have
another happiness when you see your drawing
becomes project. So let's start now. We will see more detail
on this example. So this is my drawing, and you can see this
is the only shapes and lines due to
the line actually. And I have only three layers, the background, layer
one and layer two. You can change the
background color by changing the
color on the color. And you can see your
drawing will look differently if you change the background and I
choose white here. And then actually on the
first layer you have chip or freestyle ship and you
fill in with the textures. And then on the other layer, you can see this is
my doodle lines, which is fill in the whitespace. So if we combine, it will look like this. That's it. Look complicated. Know, this is very easy. You will see shortly that I
will teach you step-by-step how to create the shape and the textures inside its shapes. And also, we will have fun
with the duty of the lines. Let's make a new confess. I just 7 thousand times
7 thousand B-cell. And then in the Layer one, I activate action Drawing Guide, turns on and then you
tap Edit Drawing Guide, and then end about
the financing my three and I choose vertical. And then let's make the
color palette here. I taste the name of the pellet, become a monk, go through. It will be easier for
us later on to draw, because all the colors already stay in the
color palettes. Now, I adjust the color. First, I choose blue, and then you can tap
on the color palette. And then I moved to green. I find the green that I like. And again, dab the
color palette. Now Oren's again, this time thing and I tap again. So I've already had
four colors here. And then the one I
would do is yellow. If you want to delete
just that the color, and then tap Delete and you
can change the color again. Now, we have six colors
ready in our color palette. On layer one, make sure you
turn on the Drawing Assist. So it will draw it symmetrically on the
left and on the right. Now you click action
and you turn on the drawing guide,
edit, drawing guide. And then I choose quadrant
here to draw in Moscow. So there is vertical and
horizontal guidelines. I still use
calligraphy mono line. Adjust the size of your
breath until you like it. And now I feel in
with a yellow color. So layer one, I use for yellow and I separate another
color in different layer. I add mid layer to mix
your drawing assist is on. And now I choose the green one. And I draw a freestyle
shape with the green color. This is so fun because there is no rules to draw this shape. You can draw whatever
shapes you like. Sometimes an organic shapes sometimes and I'm ordinary ship. And again, I add another
layer, layer 34, blue. And I draw again another here. For blue. You can fix. If you see your hip is
still need some correction, you can make it more perfect. And then layer four for orange. Drawing assist is on. And then I just draw is laser
chip and I feel in wave, oops, I fix it the Qin slowly. Yes, I love it. We already have 1234 colors. Again, layer five,
drawing assist is on. Then this is warping. I draw another shape. I failed in pink color. And I go back to green layer. And I add some more
freestyle ship to vote it as lighter green. So I combine dark green and
light green in layer two. And then on layer
for yellow color, I add another ship. You can zoom in, zoom out your drawings
so you can see from far and you can see the
construction of your joy. It's UP balance. I feel in the whitespace here. And I fill in with ping. Use your two fingers
step and it will be undo or three fingers
step for lead to, okay, It looks better now
I go back to layer blue. I add some dark blue here. You can fill in little
whitespace completed with colors. I like it.
12. Imago : Fill In With Textures: And then for our
in-market drawing, we will fill in with text. Now, it's time to give tax
dollars in aid shapes. I use calligraphy, Chopra, and I choose black color. Try floors. And you see, I loved this job
for us because it looks so natural and it gives a
beautiful line textures on it. It's ships. Now, I move to layer one, I make sure the Alpha
Lock now is turned on. So if I draw on
the yellow shifts, the lines will not go
outside of the shifts, but it's only inside the shapes because we already
love our drawing. So that's why it's called alpha. If you forget to turn
on the Alpha Lock, know if I draw the lines, it will be outside of the ship. So at this time, make sure you're
drawing assist is on and also the
alpha lock is on. Now I move to layer two
for the green color. I'll follow up on
drawing assist on, and now I can draw the text
with calligraphy, chop grass. I continue to the lighter green. It's up to you with the
angle of the lines, but I like to draw
in different angles. So you can see here
from the yellow, dark green, and light green, the angle of my lines will be different each
other side-by-side. So it will look so much better. Now I continue with
the blue layer. And now layer four, or the orange one. Oops, I forget to turn
on the Alpha Lock. Two fingers to undo, and three fingers step to redo. Now I've done on the
Alpha Lock and I can draw the text without
going outside of this shape. Now, layer five, I turn on the Alpha Lock
for the pink color, and I changed again the
direction of the line. So between green, orange and paying the angle of the
textures is different. Now I move again to layer one, alpha lock and
drawing assist on. And I use a different angle
again and I draw the text, width, calligraphy
and chop rats. You can continue with layer six. Now. I still use calligraphy, Chuck Brass, because I
love this brush so much. And after the drawing
assist is on, the colors still black. Now, I draw the line
on the whitespace. And again, if you do like it, you can do fingers step, adjust the thickness
of your breasts. Okay. I love it not just saying
and not too thick. Now I start to create the line in the center
of this drawing. And again, I start doodling
with another lines. Oh, I love this. This is very easy, but the effect of your
drawing will be tremendous. And I add some dots here. Again, I continue with
this curly lines. This is a freestyle to do. So whatever lines are
due till you make it, it will be loves spirit D4. And I can draw like this every day because
I do need to sing. I just move my hand and the
duty meal comes out so easy. Again, fail in the whitespace
with the small details. And I'm looking again
the whitespace. And now I draw a free ships. That's the ship. So the lines should be separated
from the ship. Zoom in and zoom out
to see from the fire. So you can see the
whole drawing. Here. I add again
the curly to dose. Is this the kind like
meditation for me? Because I like to do this before bedtime and it's
still saying my mind. And also you can listen to
the music while doing this. It is so fun, isn't it? I enjoy some more lines. Here. I draw more
currently details and also a kind of a
flying bird. Fine. It's up to you. It is your freedom to add some more details in
each of the whitespace. So it will be full of
your doodle lines. Zoom in and zoom out to see
the whole of your doodles. And continue again while
you enjoying the music.
13. Imago : Doodle On White Space: Okay, Next, this is so fun
to deal on whitespace. I'm still using my
calligraphy job for us and I continue of gifts
sale with black color. Just fill in the
whitespace and enjoy it. I draw the curly lines again. And when you want to undo, you use two fingers step. Sometimes I like to position
the first in front of me, so it will be easier to
draw with the right angle. So you can also zoom in
and zoom out, done around, rotate your canvas
as much as you need it and it will make
you easier to draw. Four, it's two dose
in the whitespace. I continue again. I'm looking for
another whitespace. This is in the upper corner. Draw kind of flying bird lines. The curly lines. Yes, enjoy the
music and sudden D, you will be surprised with the whole result of
your project later on. Now, I continue again with this whitespace between the
green color and whitespace. Sometimes I use dots to fill
in this mall whitespace. You can zoom in and zoom out. And if you see that it's
still a big whitespace, then you can add dots or simple lines or any
doodles you like. I make a scratch here
so you can erase with plague eraser and then
you erase that scratch. Now, I continue again. Fill in with the ship
lines on the wide space. Continue until the whole
West space is full. And you can change
the background. I tried to change it to
see how it looks like. Go be better if you choose the background color
with a lighter color. So its fitness and good job. You already done two
projects with this video. And later on we continue
with our last project. The third one is
called throughput.
14. Ubud : Create The Center: And now this is
the third project with freestyle router
and the drawing I called Ubuntu is a very famous
city in Bali, Indonesia. And I like to go to open because this place is very peaceful
and everything you go, you will see so many
greens over there. But first, we create the center. We will see now the
details of output. If I zoom in, you will see that I draw
many lines on the leaves. And then also I draw dots, dots and little dogs and also the freestyle line and
doodle here and also here. And neither lives
with lines and dots. So it looks complicated, but actually it needs
only three layers. 123. So if I close, I only draw the
yellow part and this is the detailed
dots and the leafs. So I will teach you one
by one to draw this. And below this, there
are some examples for my practice because I love
to practice every day. You can see here
using symmetry tools, you can draw very
abstract drawing like this or this one. I love this one because you will see this is a red
d and symmetry. This is also, I try
another breast. The breast looks very nice. And also this one. And this one. I love this. So again, we will draw
with three layers. And we separate the
drawing in its layer. They'll first, we
will start with the center of the drawing. Then we draw the
leaves like this, and also we put the lines. This is how you see if
I enclose each layer. I draw the center for hours. And then in the mid
and the last one, I draw the dots to
finish this drawing. So again, we create
a new confess, and I choose 7 thousand
times 7 thousand pixel. Now, we create the
parallel plus sign and then create a new pallet. And then I go to the color
to choose the color. And I start with the green
and that on your palette. And then I continue again
with lighter green. And also I take yellow. So now I have three
colors in color palettes, the dark green, light
green, and yellow. Okay, now our canvas is ready, go to XEN than on drawing
guide, edit, drawing guide. And in symmetry option, we choose red, yellow. So now we practiced with radio. You can first will
be divided into eight parts. Click Done. And now I start with
the dark green color. In this drawing, I still
use calligraphy mono line. And then I adjust the
thickness of the breast. And I start to draw the
sector all Detroit. So I just make a little line and then act with
the other lines. And it will look like that
because we now use rapier. So I drove this in
layer one and then I continue with yellow. I draw a flower here. If you want to undo just that, your two fingers and
then draw again. I just draw a kind of petals. And it becomes a
flower like this. This is in layer one. And now I feel in the color
into it off the ship. And surprise look very
beautiful right after you fill in with a color
then in the middle and you can see the
beautiful flower. I choose, lighter green. And then I will add new
layer, layer number two. Now in layer two, and I draw again
a freestyle chip, which is fine Monday, it will look like a flower. Oops, bad, this is wrong. I make a mistake because I want to turn on
the Drawing Assist. So now I turn on the
Drawing Assist and you can see my lighter green has been in a part
of the drawing because we use radio
drawing guide. Zoom in and zoom out again
to see from the bar so you can see how this
construction will looks like. And each of the whitespace you can fill in
with the freestyle. She. And again, I
fill in with a color. This color, the
green and the yellow reminds me when I stay in Bali. Okay, I like this one. I like the combination
between yellow and the lighter green and also the darker
green in the center. Now I go back to
layer one and then I turn on Alpha lock
because I want to fill in the lines inside of each shape and I choose
black for the line. And I use inking
and technical pen. And then now I see how
the lines will look like. I adjust the thickness. Make sure this is in the layer one and Alpha Lock
Drawing Assist on. And then I draw the lines with a black color in the middle
of each of the ship. You can draw the line just by following the form of the ships. With one time drawing. Because we use radio guide, it will draw in all
parts of the drawings. Now you feel any of the
small lines like this. So it's a kind of
leave that it will looks as a flower as overall.
15. Ubud : Fill In With Textures: Good. Now we continue with freestyle, do Jill for input and we
will fill in with dexterous. And we continue to
draw the little lines. This is like live. Live has a middle lines
and also the small lines. But when we finish, we can see that the whole lips will create a form of a flower, a yellow flower in the middle. Use two fingers to undo. So be careful when
you draw the lines. It should not go into the other lips to just
do it one by one. And this is very
meditative activity because you do the same
thing so many times, it will, again, help
you to associate your mind and make
you very meditative. And I like doing like this. And hopefully you also can feel the benefit when
drawing this geometric go with many repeated to dose like this fully
it will make you wake up in the next morning with feeling peaceful
and make you happy. Now, I go to the second
layer for the green color. And then I just draw
a zigzag lines. And because I already
turn on the Alpha Locks, the black lines will not go
outside the green shape. You just zigzag lines
and enjoy the music. And suddenly you finish all
of this green. Do two lines. Very good. Now you've
finished with the grid one, and if you want to see better, you can change the
background color. Here I tends to be
black or dark purples. So you can see how
this drawing so bright and so bored with a
darker background color. Now I add a new layer, layer three, and then makes sure that
drawing assist is on. Now, I choose darker green and I adjust the thickness
of my breasts. I moved to calligraphy
mono line, akin to create this shape. And I continue with
the darker green. I'm fill in the whole wide
space above the lighter green. Zoom in, zoom out to
see the whole drawing. And now I continue again here. Make sure you draw each ships close to each other and
fill in the white space. And now we will see if we
fill in with the color. So I like to put it My can
pass close to the color. I drag it into the ship and it will fill in the
color for each year. So again, because
we choose radio, it will suddenly feel in the
whole parts of your drawing. And if you see a mistake or
you want to fix your drawing, just use the eraser to erase that part that
you don't like it. And then you go
back again to brass and fill in with
darker green color. I saw this, so I tried to
erase and then I move again to brass and I draw my shape and fill in
again with color. Now, after we fill in
all darker green and then makes sure that drawing
assist and alpha lock on. It's time to fill in
with the textures I'm going to use in
King and technical pen. And I choose the
lighter green color. I adjust the thickness. Okay, I like it. And then I start
to make a doo-doo. See, this is very easy to do. You just draw that line and after four or
five or six lines, you can draw again with
the upper side direction. This activity is also my favorite one because when
you create this doodle, it seems like your hand just moving around without thinking. So after going to the left, now going to the right, just the opposite side of
every 45 or six times. So after fitness
with layer three, now I go back to layer one. And I had done off the alpha lock because
I want to draw again. And here I draw with
calligraphy mono line. I draw again the same shapes and fill in the wide
space over there. So I tried to create
layer with its color. So after you can still change
the color for each layer, and it will be easier
for you because you already separate the
colors in many layers. Continue your drawing. And later on we will see the next video to
finish our drawing.
16. Ubud : Add More Details: Well, let's continue. This is the last part. We will add more details to the new with
fill in the color. So one-by-one, you put it closer to the color
icon and then drag the color and suddenly your flower will be
filled with yellow. This is another one. Continue again, one-by-one. Thinness. Let's see now. Okay, I love it. This is a part of our
joy, has been finished. And now I add a new layer, layer four, and turn
on the Drawing Assist. And then I choose the color, the light green again, and I continue to fail
in the whitespace. I adjust the thickness of the brass and I
just the big size because now I want to fill in
the white space with dots. If you want it to
be smaller than adjusted before you draw, can just step your Apple pencil and it will create
dots everywhere. It's like making love it. And I reduce the size of the breast because
I need a smaller dots. And I continue a kid with a smaller dots everywhere
in the whitespace. The more detail on
the white-space, a more beautiful your
pattern in this. Now to see the dots, you can change your
background color is black, so my drawing will look smoother and you can see the dark
mix, our joint beautiful. Now I do black color
and I moved to inking technical pen because I want to feel in
the yellow shape. I adjust the brush and then I make sure alpha lock and Drawing
Assist are on. And now I start to draw the lines in the middle
of each yellows here. As I told you, it's like a leaf, but overall, it looks like a flower later on, just one or the
forum of this year. And then now you make a lethal lines. Continue until all
the yellows ships has all the textures
that you use, inking, technical pen with black color, and so on. You can continue until *****. This is only a sample for you and when you use the black
for the background color. So all the details
that dot the dot, the small dots, I
can see it clearly. So it's finished now. And this is my drawing on
my iPad at inspired by, because when I stay in Newport, What I see is only the green paddy fields
and also the yellow rice. So later on, see the video, what you can do with three drawings like this
with symmetry tool.
17. Other Ideas: This is the other
ideas that you can use an inspire you to make a
project from my class. From imago. You can also change the
background color like this and also the color of
each ships you can change. That is elite because I told you before that we create
each color in its layer. You can change the whole color
one-by-one in your layer, and it will become another in Marco with another
color combination. And also for Indonesia but
**** and for Indonesia. But you can also
change the background. This one I didn't to be a
dump for ApoE and it gives you another different drawings
that you can use later on. But also in each layer, you can also change the color of each node met each
of the vector, and it will become
yellow is like this. Oh, I love this. This is for me as Indonesian, I saw it as the real but tick
because it's very detail. The flowers, the leaves, and also the combination
of the color. I love it so much. And then for your inspiration
as you, you also Mike, and this is ideas
with radio. Guy. I draw from the center, I draw the pings
cubes and then I draw on in their
life due and so on. And then the outer one
and then what is sample? This is the way I
could use that one. So you adjust your thickness of the brass and just
draw a line like this. And later on you
can fill in with the color and then it will be the drawing like
what you see now. This one, I also use
radial drawing guides. I draw leaves and I throw lower, and I separate it
into 1234 layers. I separate the layers and the blue one and also the leaves. It's very nice when you use this drawing for a
pillow or a dog. Another one. You can see I draw a flower. This is very simple
because once you draw, it will be 85 of your drawings. And then I combine
it blue and orange. Before throwing, I create
my color palette bars. I like this combination
between light blue, pastel blue and then
origins and deaf audience. And this become beautiful
circle drawing. This is another one. I do zigzag lines, many types and it
creates a sender. And then I moved out
and I mix the color. This is beautiful. This one, I also again
draw a flower and leaves and maximize
their guidance guide. I love this one because
you see there are so many details you can emit in how many days I draw this. I mean, maybe 30 minutes before my bedtime and
then the other day 30 minutes again before my bedtime or just Then
minutes in the morning, I drive to finish the detail. And this is so beautiful. This is another example. You can combine leaves and
flower in different color. Fill in the blank space with
lethal details, ornaments. This is so amazing. I loved this all much. Maybe five hours total. I make this one because
death is ready detail, but you can feel in a different color and
then you move out again, you draw the leaves and you'd bought a little details again. And then suddenly wow,
I love it so much. It's drawing. I call my angels. So for us I throw angles using the vertical lines so it become two NGOs on the live
and then on the right. And then I continue again using the drawing guides
to throw the flower. And also you can use the same boat shifts
with symmetry tools. And when you've done this one, you can create a mask, dots bed or a laptop
sleeves or infant, a fork keys and gents, The big groan color and then suddenly went with
the same drawing. You can find this
become a flag or if this beautiful
blue or indigo color. So that's why you need
to separate your layer. Later on you can change
the whole color SQLite. I hope this example
gives you an ideas or inspiration to start
to draw your project.
18. After You Draw, What Next? (An inspiration!): So after you draw what next, you wouldn't believe
it if I tell you what will happen with this monk who I collaborated
with a fashion designer. And since my Instagram and
C likes my drawing very much the order of fabric from
me with a marker drawing. And I didn't have
any imagination how citizens the drawing to
be a closing like this, you will be surprised. And even me until now, I'm still surprised
with this image. Go and look, this
is so beautiful and I never ever imagined my
drawing will be like that. What's this? Amazing? It's very unique and actually
you can build your own red clothing
lines with your drawing. And also, I use this drawing by myself
to create a Tumblr. This is a flask does Tumblr, and you can bring your hot
the hot coffee or just water. And I create a thank you
card and also the story god, because when I draw something, I always have a story about this drawing
and width, this scar. Plus I design also the
drawing for the packaging. I sell this and this is so, so excited for me. And another thing, as
I told you before, I also create a
drawstring bag and I also sell it to customer,
including the packaging. If I can do this, you also can do that easily. Next, what will
happen with Ubuntu? I create a dog back and
forth and also this mask. So I enlarge the drawing to be the focus of the mass like this, and also the pillow
and drawstring bag. And I use POD or print on-demand
platform to sell this. So I just upload the
drawing they will produce and backends and
send to my customer. So it's very nice to
have your own passive in GMB through print
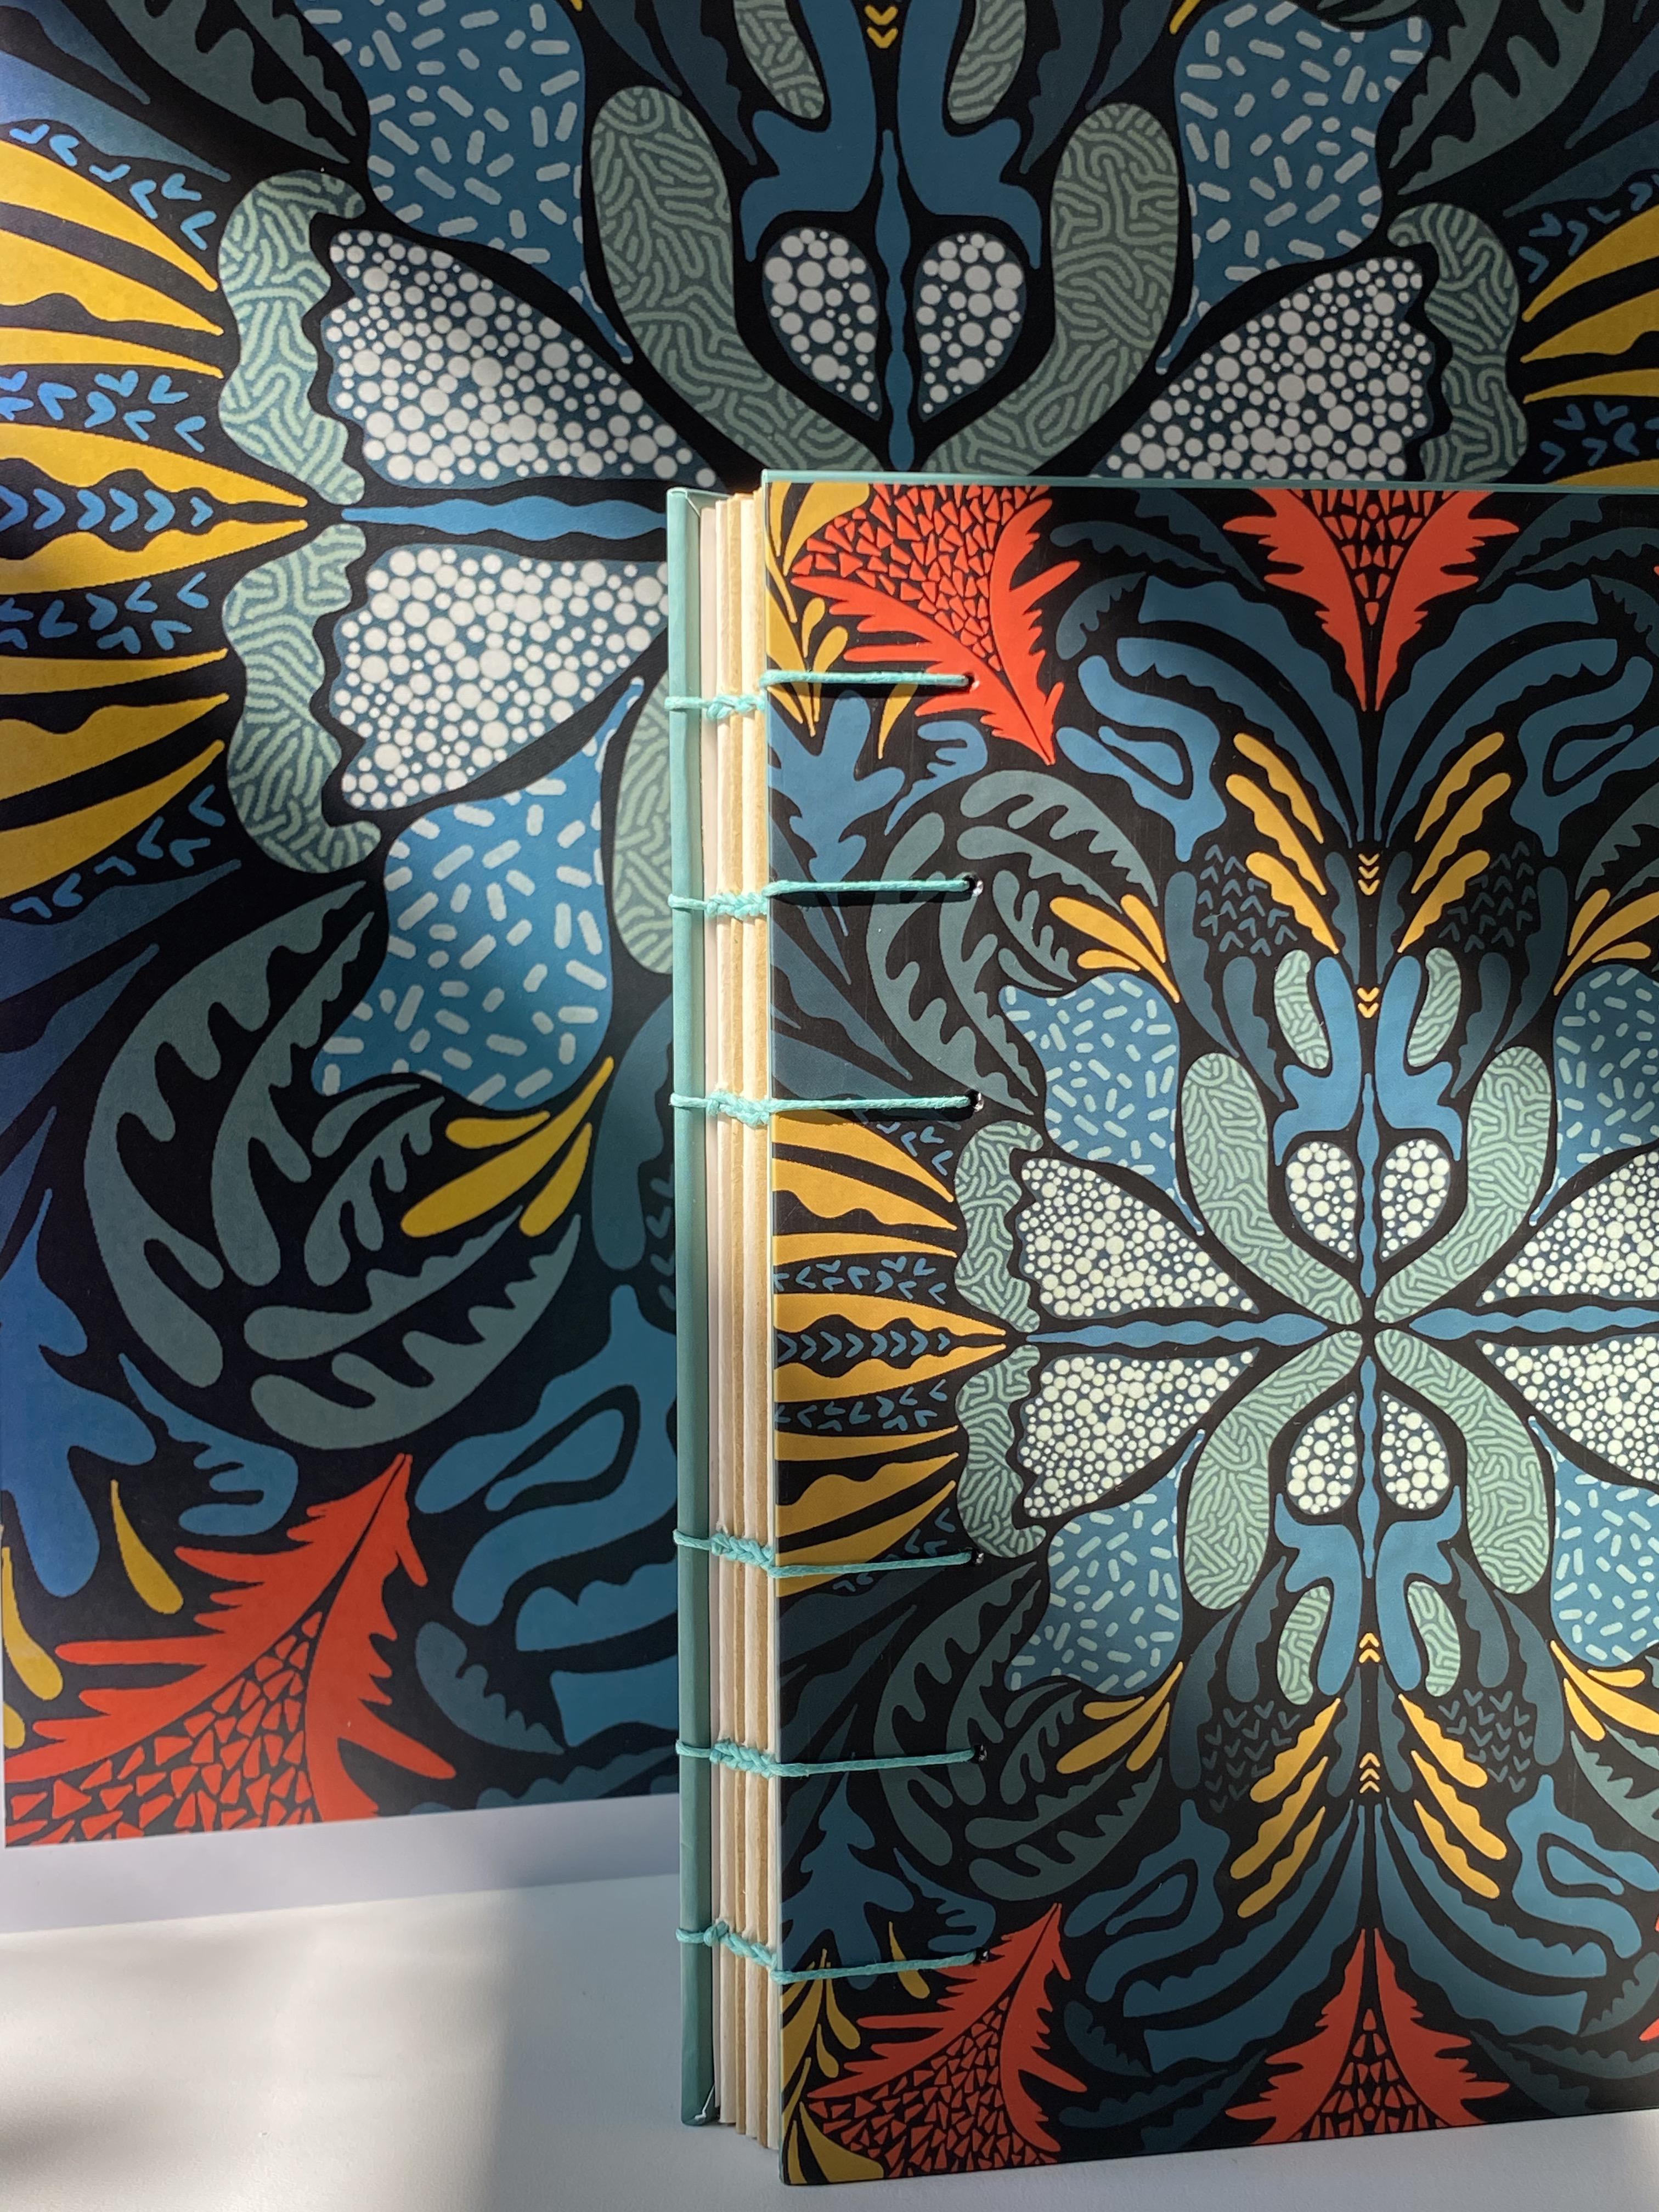
on-demand platform. The last one, what
happened with Indonesia? But the against
someone who are fair, The expert in creating
Coptic steps notebook. See make this notebook by hand. And this is a Japanese Coptic
States is very beautiful. And then my drawing become the Khafre and
also this McManus, very surprised because I never allowed that my drawing
with symmetry tool, which is looks very simple, but when it becomes
the product like this, I'm still feel overwhelming. And also I use my story when I draw this Indonesia
buddy and then put it on the notebook as well. The second one, I also
create assembler with all of the design for packaging
and story cards like this. And I sell it to my customer
who loves my drawing. And this makes me happy because I just imagine
that when I draw this, I'm very happy and I want to see at this happiness
to other people. So I always happy
when people use my drawing as a
project like this. This is the things that
you can do as well for your older drawings
that you have been created through this class.
19. Your Assignment: Okay, I'm so proud of you. You already watched
all the videos and now it's time
for your project. This is your assignment. Dropping your resume
entry, beautiful design, whatever you like with a
freestyle tutor or with flour, or with any ships. And then submit your drawing
and create project up here. And don't forget to
leave the review for me. You can feel the student
read table here, so I can teach you
better one next class. Then don't forget to post it on your Instagram and
tag me at her knee, dot Augustine with hashtag, honey, honeys skills here, just grab your iPad, Apple Pencil, and have fun. I can't wait for your
project very soon. Thank you.
 Hanny Agustine, Artist | Technologist | Educator