Transcripts
1. Trailer: Hi there. Thank you
for joining my class. This is Procreate
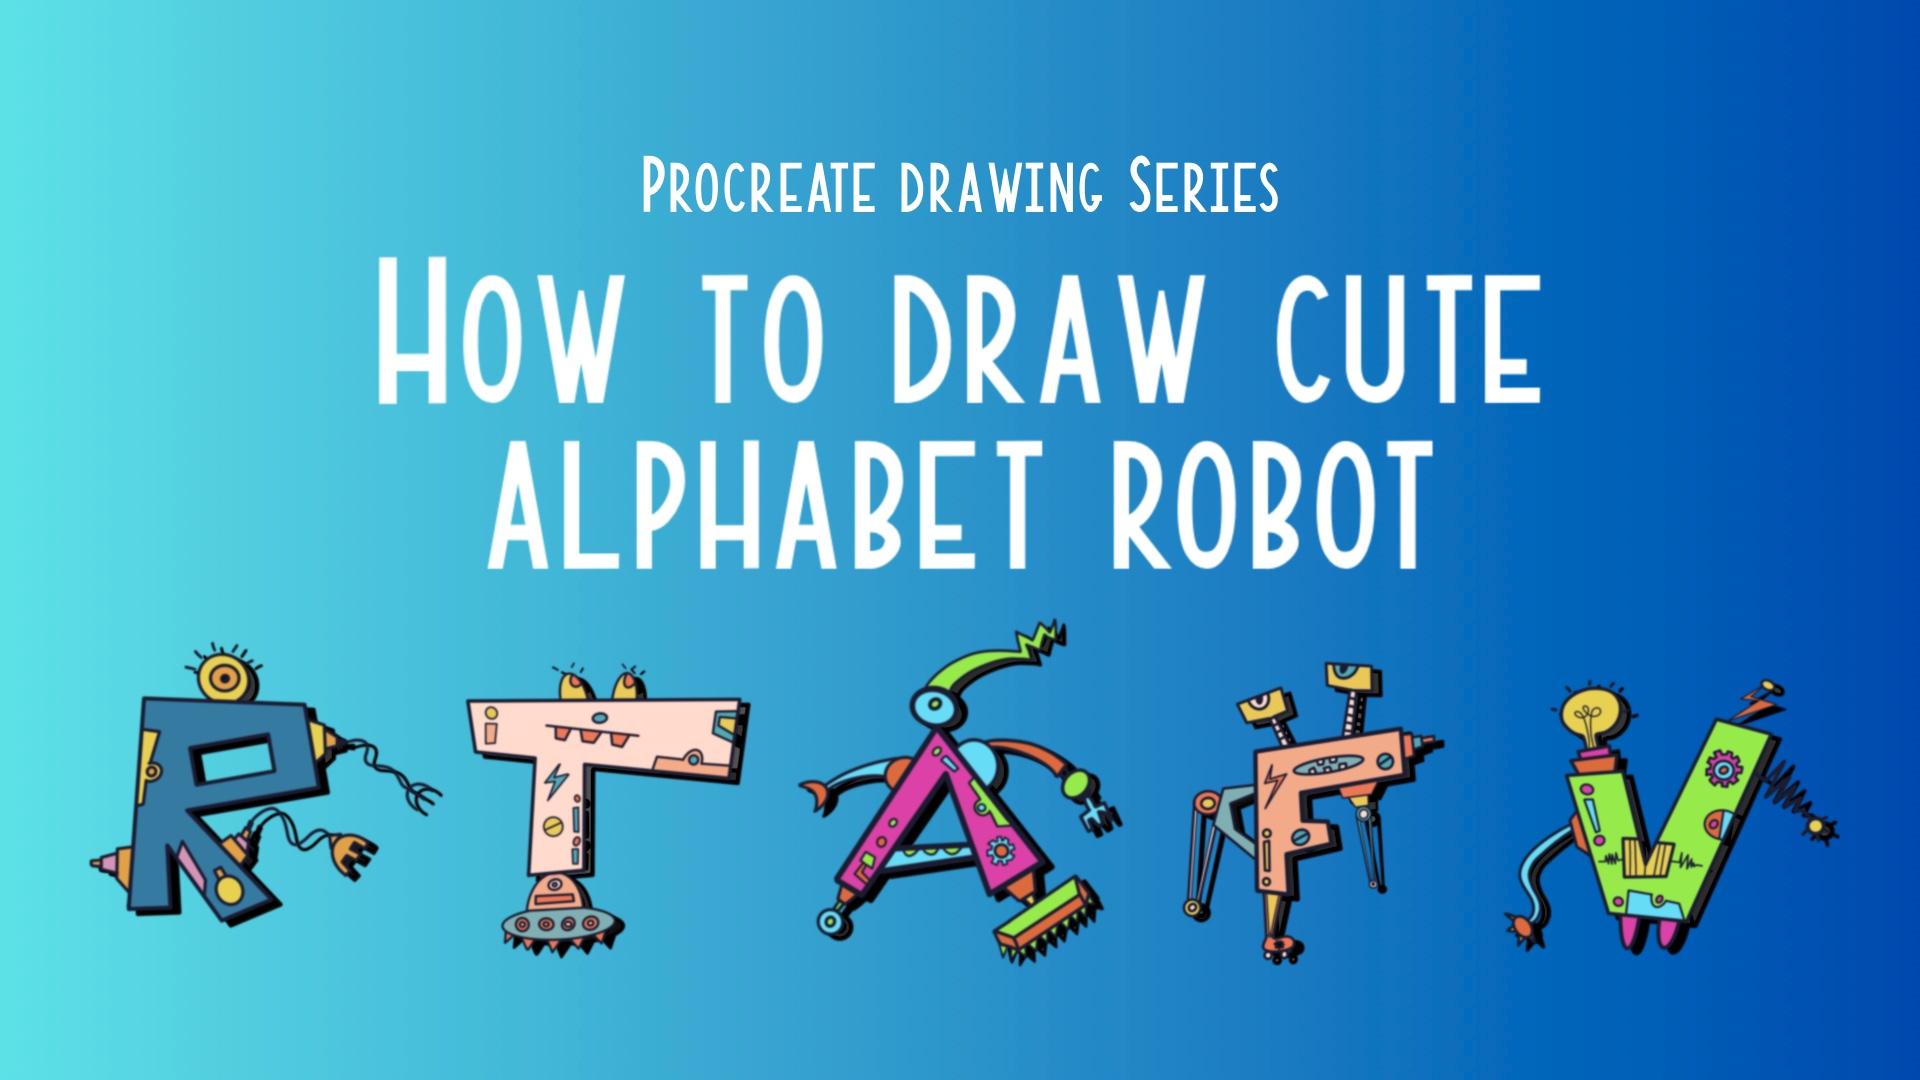
drawing series. How to draw cute alphabet robot. Alphabet robot that
you can see here, I create R T A, F, and, and all these robots
are so cute, isn't it? How about if I teach you to
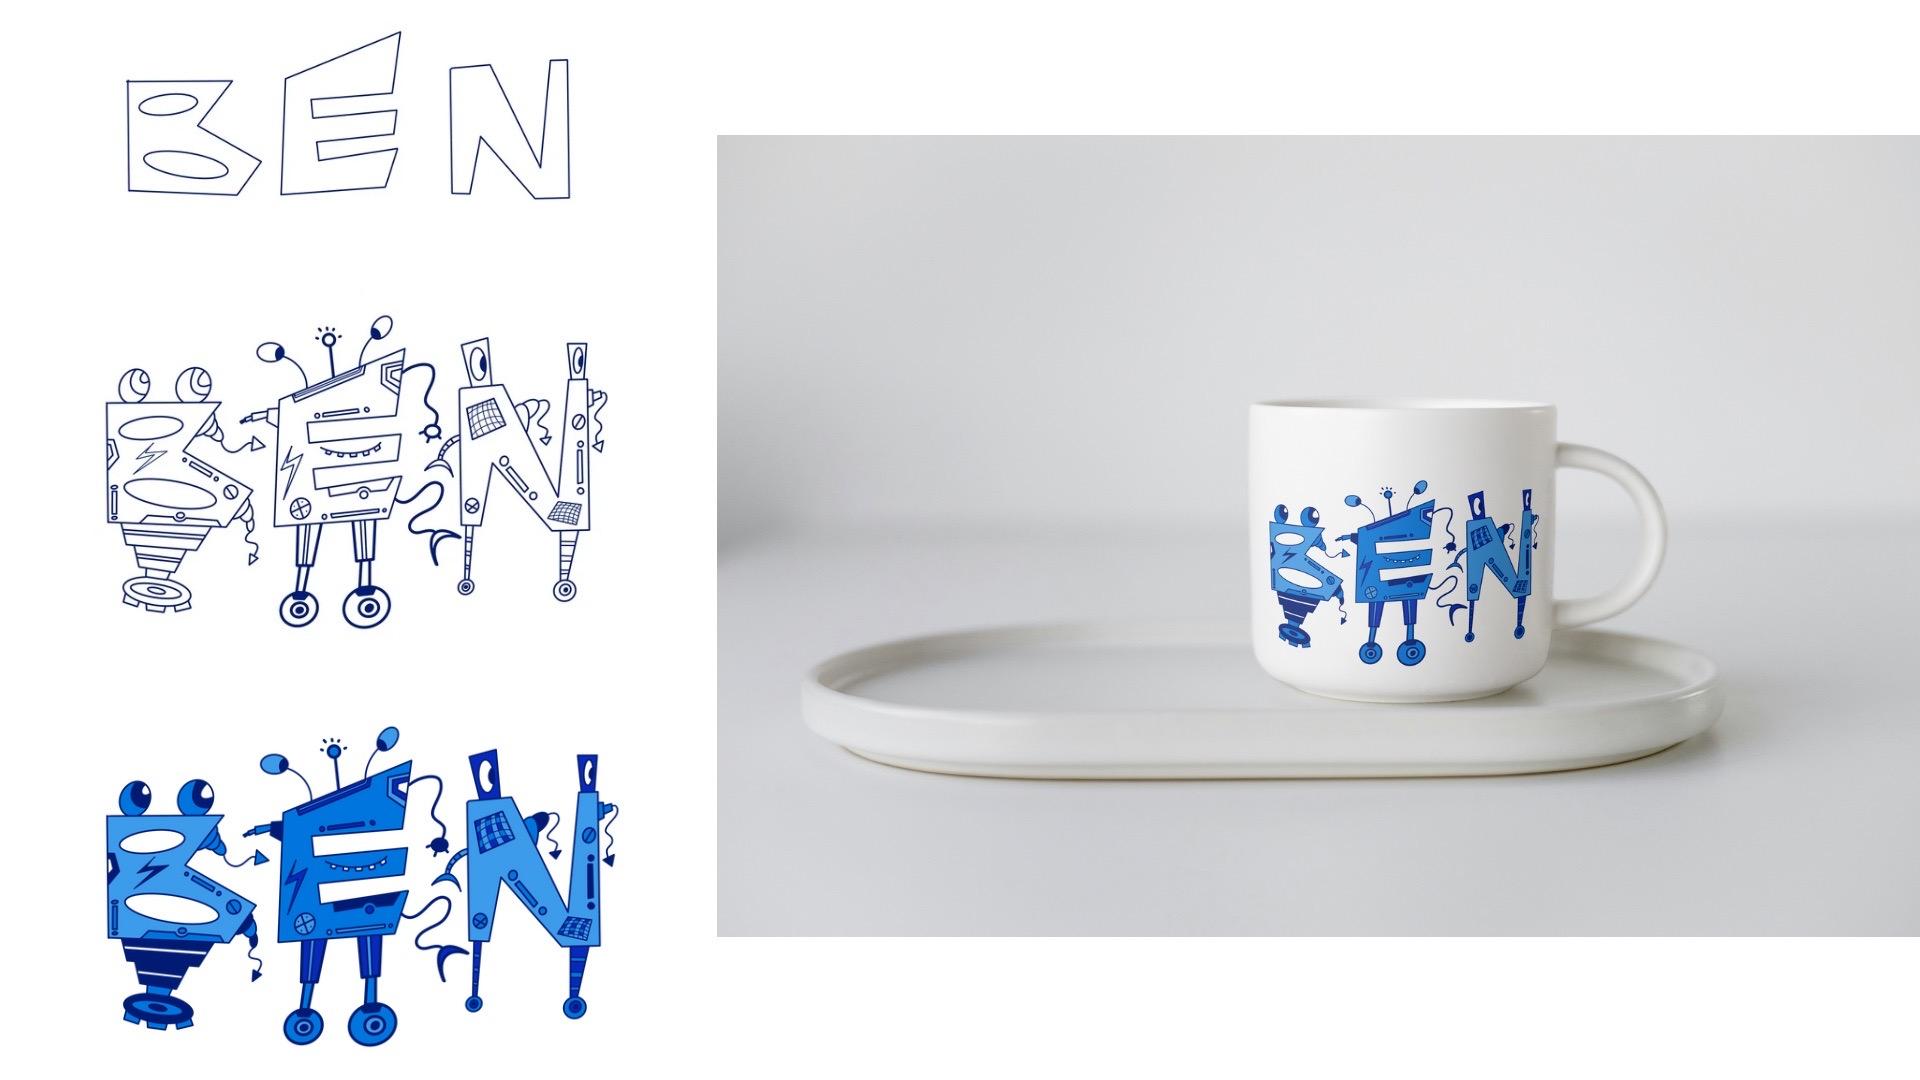
create B for P bot robot, and then you can use it
as a more design for a Desert or F robot
for a coffee cup. And another one is robot for your product robota we apply
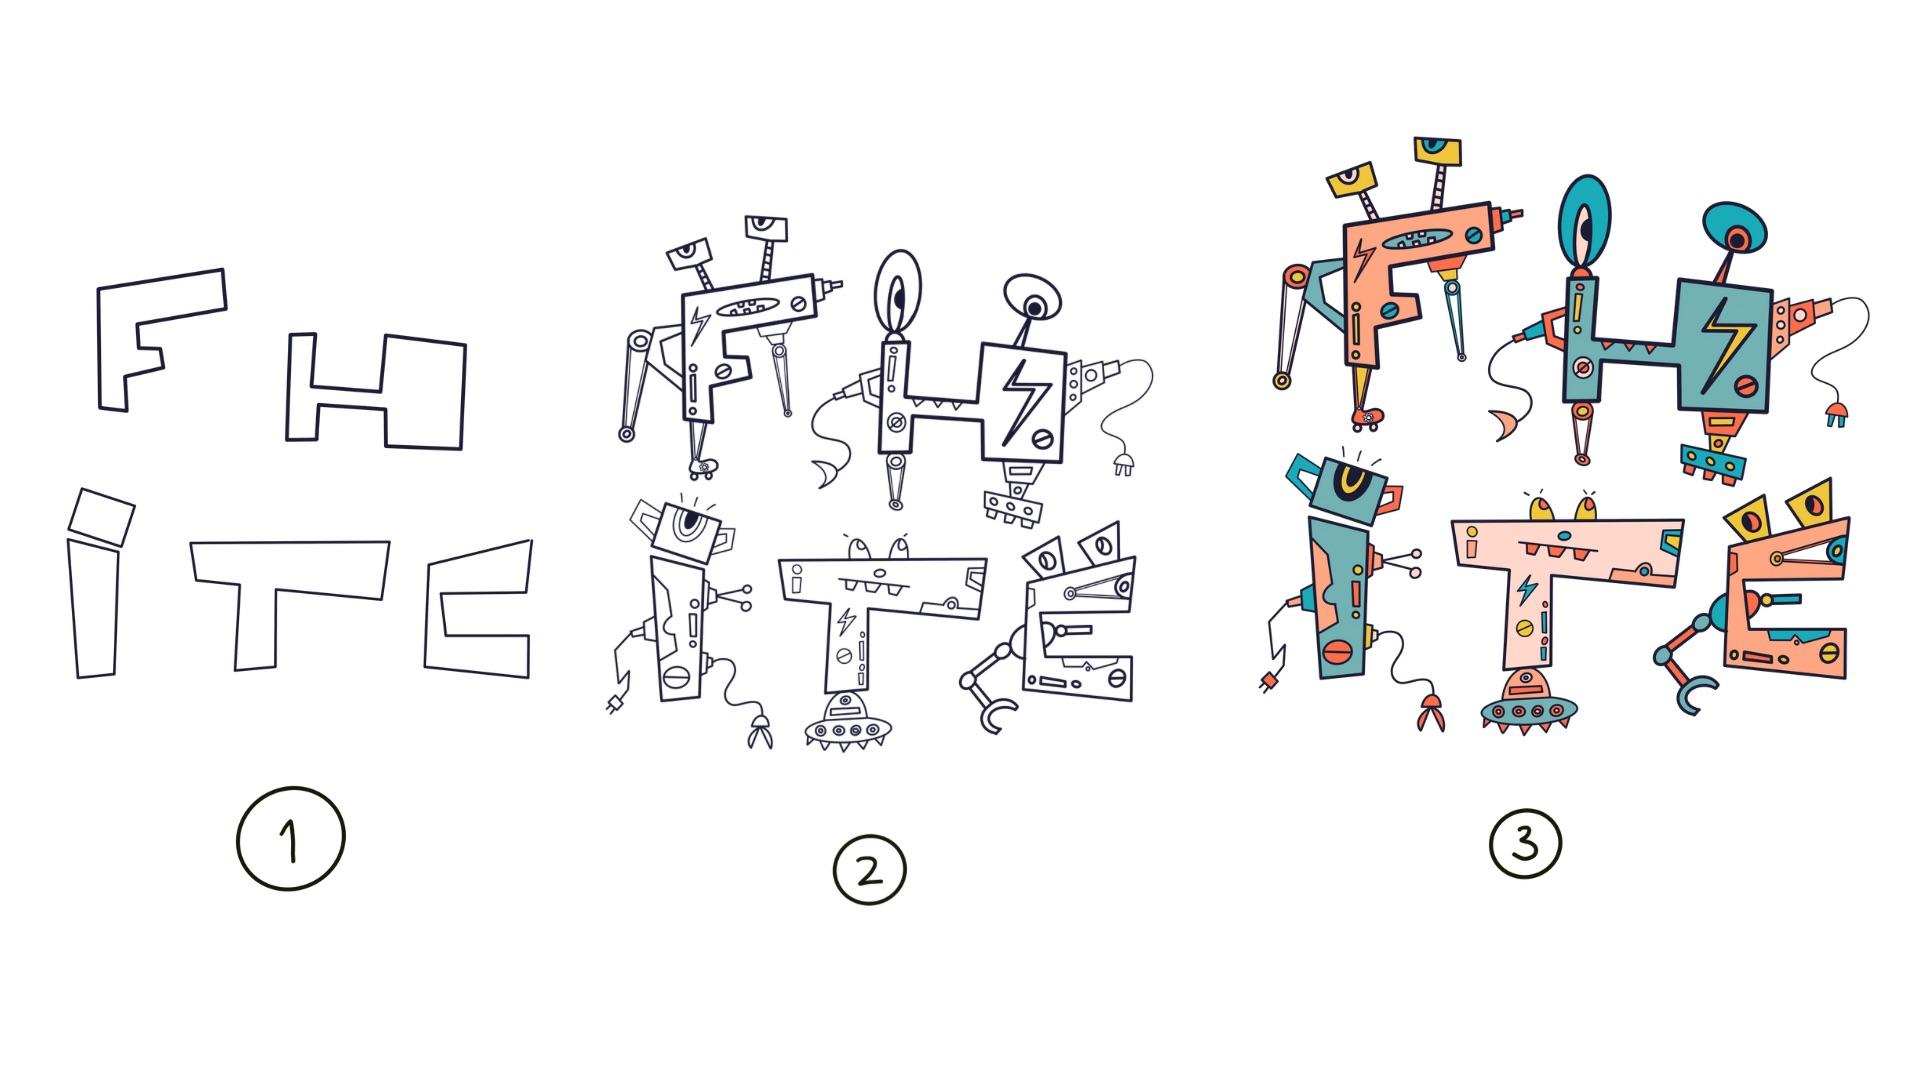
it to a packaging like this. This class is very simple. I will teach you three steps. First, we draw the
alphabet in freestyle, and then step two, we draw
robot for each alphabet. Then next we give color for
each of the alphabet robot. But I also teach you how
to practice to draw eyes, hands, legs, and
robot accessories. I will teach you how easy to draw A that I call
it a pot like this. First, you draw the alphabet
A with your own style, and then we draw the
robot part like eyes, hands, legs, and
sauris on his buddy, and then the last one,
we will give color to this A pot to be
a very cute robot also you will find in
this class it's very easy to create a mock up with
KF mock up generator. And also, I give you a
bonus to write your name, for example, this pen, and then you can
apply it to a desert more or with this skill
after join my class, you can create a
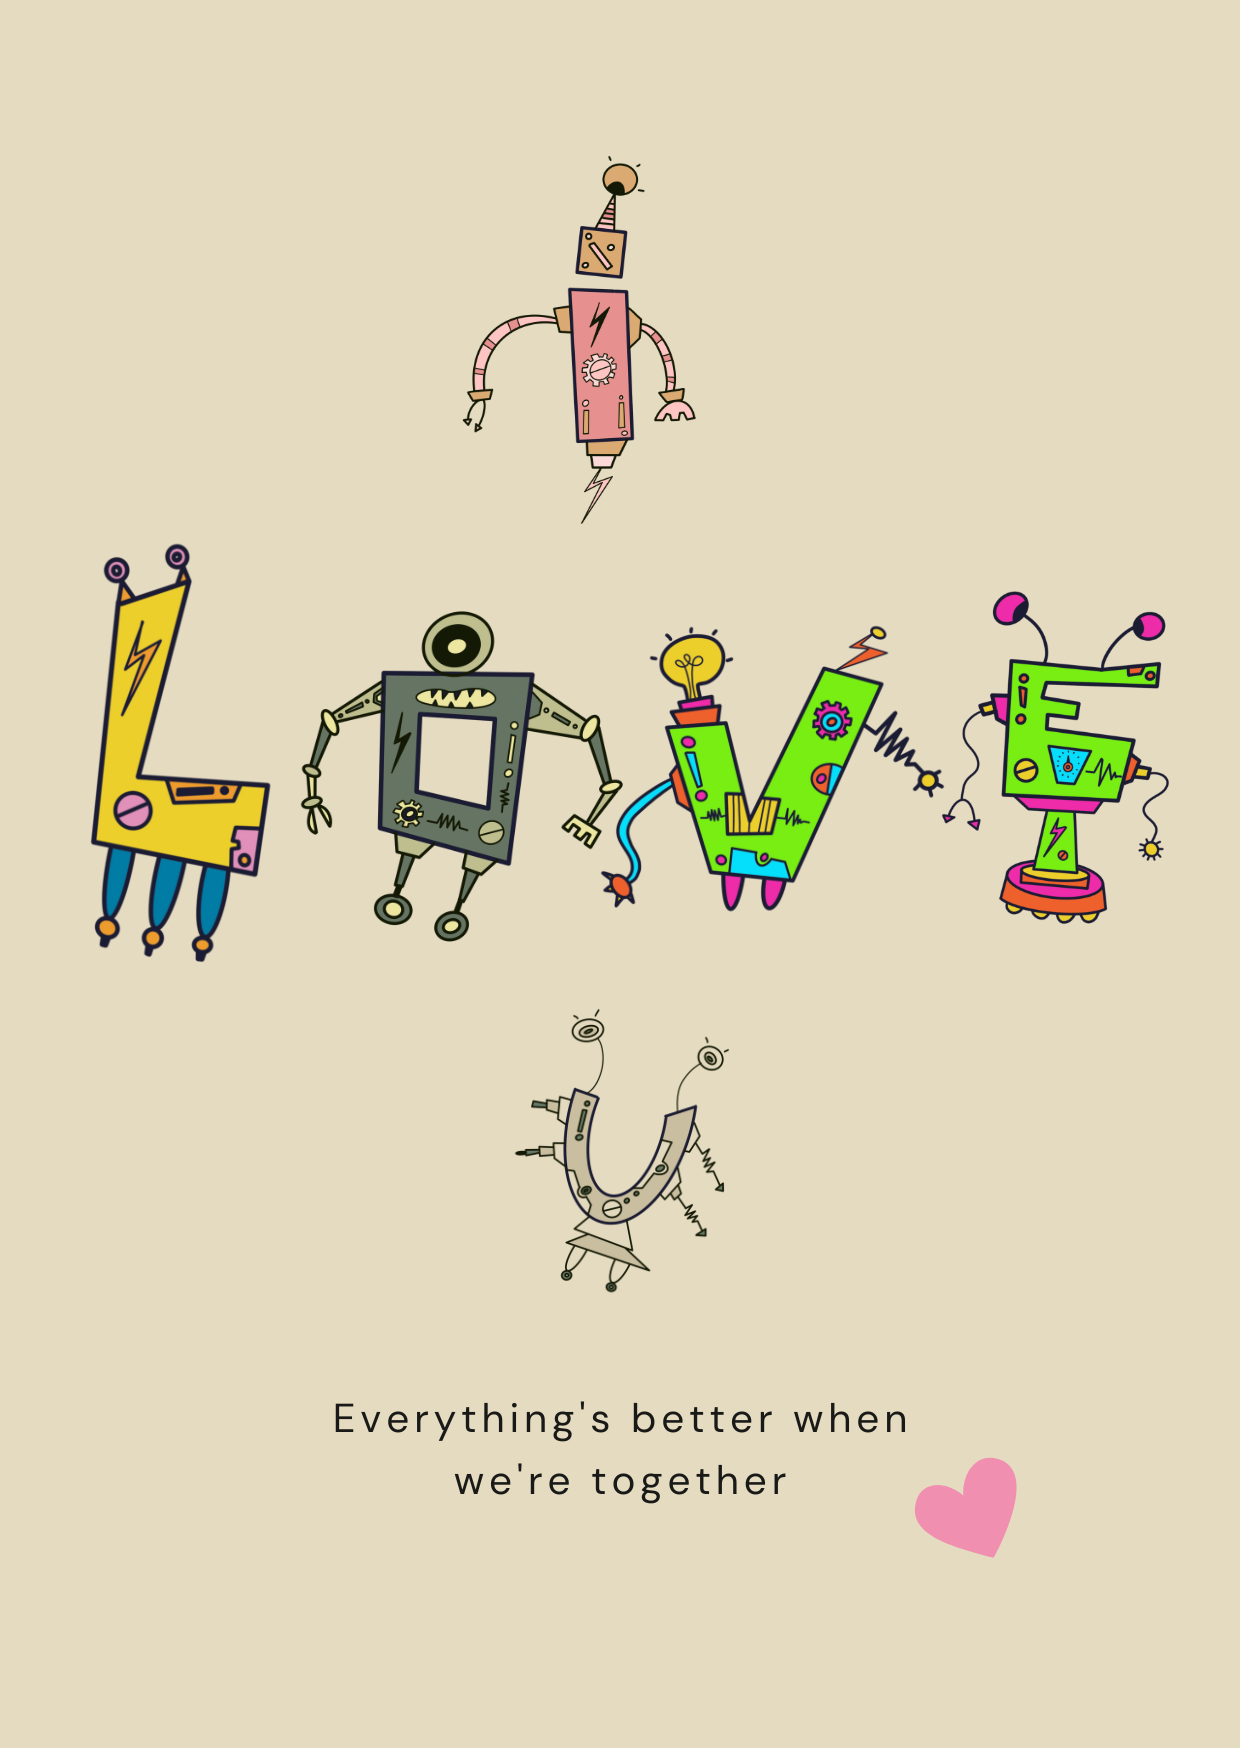
special Happy pers card for pen or you can combine ILUot to create a
special card I love you. I guarantee in 30 minutes, you can throw robot coloring, create more and you
will love it so much.
2. My Art Journey: Hi, I'm Haney Acousti Actually, I'm an engineer, but
I love art so much. I buy my drawing tools in 2014, but only in 2016, I start to draw every
day, everywhere I can. Mostly of my drawing are flow because when you draw
colorful flora like this, you can feel happy. You can release your
stress and you can soothe your mind and
meditate like me. So I draw a lot on papers, but also on my iPad. This is another freedom
for me because no water, no messy table, and
I love it so much. And then finally,
I realized that I have so many drawing
on my table. One day I counted about 800, but another day I
found more than 1,000. Because each of my
drawing has a story, then I start to create the story card of
each of my drawing. I can't remember
what is my feeling, what is in my mind when
I draw each of it, and then I digitize it and
I transform it into fabrics and papers and leather to be what we call it
a wearable art. It's like scar or t for
your bag also not a pouch, wrapping paper and also
tatwel and of course, the packaging pops that also originally is my
watercolor have drawing.
3. Your Project: Your project in this
class is very easy. After you draw the alphabet per, you can make a mock up for Tel or packaging box like
this or even this map. It's very cute, isn't it? There are three steps
in this lesson. Step one, I will teach you how to draw alphabetic in freestyle. Then step two, you draw the robot for each
of the alphabet, and then step three, you color the robot one by one. Then next, you can
draw your name, and in this project, I will use N you draw and, and then step two, you
draw the robot for B, and. And then you color it with blue or other colors
that you like. It will be look nice when we
apply it to a mock up for dessert for a max like this
or even a pillow for pen. In this class, how to
draw cute alphabet roper. Of course, you have
to draw the body, the eyes, the hands,
legs, and accessories. But first, I will teach
you to draw the eyes.
4. Draw Robot Part - Eyes: Let's start. We will
draw robot part four. In Alphabet robot,
it has five part, it has a body, and then yes, and then the
left hands and right hands, and also the left
leg and right leg. Within his body, there is
a small drawing like this, like a circle,
electricity, and so on. That's what I call assures. It has a body, eyes, hands, legs, and assures. Now, I will close this layer. This is an example of our
practice to draw yes, hands, legs and accessories. First, we will draw yes. I close this layer, and then I will
click plus sine to add new layer, layer three, and then click action, choose fast there
is drawing guide, don on, and then click
Add drawing guides. At the bottom, choose
symmetry options and choose vertical because we want to draw on the
left and on the right, the same thing or
is like mirroring. I draw this line. It will be two lines on
the left end on the right. I reside the brass
and then you can see that with one time
drawing using symmetry, you will have the same drawing on the left end on the right. And then make sure
drawing assist is on, y tree is assisted, and then we will use
Calgraphy and monoline brass. I will choose tlor now I start to draw e.
In this drawing, I will use symmetry
because I want to show you how to draw yes on both
sides, left and right. But later on your left
eye or your right eye can be very different or you may have drawing robot
with only one eye. Okay. So I draw a circle and then I give an and I
fill in the wide space here. Now, I draw again the
heat three times. And then tap again to create a perfect circle and now the eye is looking up
before it is looking down. This one is looking up. You may also draw a
very small circle, tap with your left fingers, and this is very simple eyes. Or you may draw a curve
like this and then hold. Then again, it's looking up. I throw three more heads. Now, I draw different eyes. Circle and and at a t. A Circle and Another circle. Then I draw a shadow here. If you make a mistake, just double tap to undo, and then the eyes
will look like this. I draw a circle and step for the second white space, I colored it with black. It will be a very
nice robot eye. I draw two more heads. So the eye is simple, on the line, and then
circle and that. Another dot and the dot
is who's surprising eyes. Now, I draw a triangle,
circle and tap. Again, this ice is
very interesting. You may draw ice with a symbol one with circle or
Kirk or rectangle, triangle and so on. Next, we will draw
both part four hands.
5. Draw Robot Part - Hands: Let's continue.
Now we draw hands. This is an example of our
practice to draw hands. There is simple hands like this. You can see there are many
types of weapon on his hand. This is also a very simple hand. We can also draw a very thin or very
thick hands like this, including all the weapons. Now, I close this first
and then layer three. I will rename it with e
for the previous practice. We name every layer. Later on, if you want
to see each layer, it will be easier for you. Now I click at signs
to add a new layer, and then I rename it as hands and make sure
drawing assist is on. Now hands is assisted. We can draw with
Calligraphy monoline press here with the mirroring
or symmetry tools. This is the body of our pot, and the hands can be
very simple like this. Just draw a line
and hold or you see my left finger tap
to the iPad screen, so it will be straight
line or a real circle. And then I draw again
the body one and two. Now, we draw a curve like this. Again, a make sure that
after you draw something, you hold your Apple pencil, so the drawing will be
straight as we like. I add a little line here. And then you can zoom
in and zoom out. I fill in the wide
space on and off. Now for the third row pot, hold and draw hold
draw again and hold, you can see that
after hold our pen, then the drawing
will be straight. I re the precise to be 14%, and then I throw a free line
and then for the weapon, I throw a curve, a weapon on his head. And then I go back to 35%. I draw the body again. One and two. And three. Okay. Now, we draw a different handcraft
here and then draw lines and hold line and hold a little and
leapsward his elbow. I feel in the white face. And then I draw a small line and half circle to create a kind of scissor weapon on his head. Okay. Hold and row and hold and hold and pH straight line, holaon You can and and then I use 9%
to fix this weapon. Okay. One more time. I go back to 16% freestyle line. And then for the weapon, I throw half circle
a line, a circle. When you hold it, it
becomes perfect circle. And then you can fill
in the blank space. I a line small small p, small again and so on. Then for the small area, I can fill in with black color. Later on, you can combine one or two or three style of this practice into
your alphabet. I draw the body again. We draw two more hands. Triangle, and then a circle, 14% line and hold it. And this is the weapon
again with two triangles. Trow and hold row
again and hold. Lose line. You can see actually, it's a very simple
shapes that you can use to create
your robot hands. Again, this one is
kind of a scissor. I feel in the wide plan space. So this is our practice
to create hands, later on, we will
continue to draw legs.
6. Draw Robot Part - Legs: Now, we draw robot legs. We already done with
eyes and hands, and now we are going to
practice to draw legs. Sometimes it's very simple with one or two
circle like this, so we create a lines, triangle and so on, and also a weapon. The last one is very big legs. So now let's start to practice. I close this one,
and then again, I click plus nine
to add a new layer, and I rename it with leg. Make sure drawing assist is on. Leg layer is assisted. We use algraphy monoline press. Now we draw the body force. Okay. And now I set the
precise to be 40%. And then I throw first body
and then the second one, the third one, and the fourth. Now, let's throw the legs. Okay. I draw a circle. My left
hand is tap on the iPad. It will be a perfect
circle, tap again, perfect circle, and
that's it. Very simple. I tap again my left
fingers on iPad. Then again, I a perfect. Now I throw the cir, and then just fill
in a part of it. It's a very cute legs. How and circle and tap, perfect circle again,
tap Perfect one. We have done four less. Let's continue now. I draw again three bodies for our practice,
one, two, three, row and how Trow and hold. Circle and that. Perfect circle. And then I just fill in a
little bit on the legs. Now, rowing *** is off because I want to make only
one leg, not two legs. Row and hold. Row again, and how and I add a
little accessories here. Again, one leg, draw and
hold, throw and hold. How about a rocket
for this straw bot? So I throw a kind of fire, and then I resize it to be 12%, very thin line, and then
I fill in the wide space. Yes, you can fix with
zoom in and zoom up. Now, our practice for legs
is sometimes it is simple, but sometimes you can
draw a rocket like legs. Next, we will continue throwing
robot part four assures
7. Draw Robot Part - Accesories: Now, the last part, we will draw assor. After we draw eyes,
hands, and legs, Robot also has assorsF example, the antenna on his head. It can be a simple one
or it's like a redder. Then on the body, is on his tummy, we have a kind of ps, electricity, sins, Even you can draw robot
inside his mouth. You can also draw many
circle like this. It's very interesting. But also, you can draw like this part. It looks like a heavy tummy
with many accessories. I close this, and then I click plain to create a new layer, and then I rename it as assores. I don't turn on the drawing
assist because we will only draw the hat and Montana. I change the precise to be 40%. Let's draw the head first. Just a curve or a
straight line like this. This is the head. Now
we draw the antenna, a straight line
and then a circle. If you don't like it, double
tap to undo and then again. This is a very simple
antenna on his head. Or you can draw a triangle
like this, draw and hold. And then a circle and tap. And then now I want to throw
a kind of radar on his head, a small square, and then
I changed the size to be 6% Trow and how and and hole. And then hosly we also draw
and hold draw and hold. The antenna is peeping now. Here, I will draw again drown electricity icon and then fill in the wide space. Now your robot has antenna
with electricity on it. Now, I turn on the drawing
assist because I want to draw both sides on
the left and right. I create the body for
one and two, and three. I can draw the
mouth smaller size, and I create a little
triangle for his teeth. Or just a simple line like this and also a
simple tie like this. A little circle. And a leptle and line. Then I go back to 36% the body. Again, we have two bodies
Tro and hole and T and it's like a belt on
his tummy with the ps over there and I add a little circle. Tab. I put a 7%. I create two electricity icon. I fill in the plan space. Okay. C and that cc rectangle hold we finish practice to trow assures. We have a simple on his head, the mouth with the teeth, and also the tummy on his. Next, we will start to alphabet. It must be very interesting. Let's do it. Okay.
8. Draw Cute Alphabet: Now, we come to the very
interesting lesson, draw cute alphabet. This is my alphabet A pot. I call it a pot. It's cute, isn't it? You can see his eyes and hands and legs and also
accessories within his body. It's very cute. I
love this a pot. As I told you before, first we will draw the alphabet. Then step two, we draw
root for its alphabet. Step three, we will gall it. So now we will create a new fast with 5,000
times 5,000 pixel. For the press, we will
choose Calligraphy monoline. After this, I will show you
a good features from create. Now, if you throw freely, just any shape almost a circle like this and then tap with your finger left hand and here is a choice
and lips or circle. If you choose circle, then it will be a
perfect circle. When you draw a triangle, and then that you will
have a perfect triangle. You can tap or hold
with your finger. This is a perfect square
and this is a rectangle. This is very interesting. Just draw free line
and then hold, it will be straight line. A curve like this will be
perfect one or this one. Later on, you will draw easily. Now, I use two taps to undo. Let's start to draw A. Just draw and hold
throw and hole. Okay. I already done with my
A and then in the middle, I add two straight lines, and it will look so cute. Okay. I continue now with, so we will draw
for first A and E, draw, move around your hand, hold, and then it will be a
perfect and straight line. Therefore get to rename
each of your layer. Later on, it will
be easier for you to find which alphabet
that you want to see or you want to draw and
color then I add new layer. Now I create. Draw and hold. Yes, this is my,
and then I throw. Perfect. Draw and
hold straight line. Draw again and hold and perfect. I rename it as. A new layer again. Now I create a simple I draw and hold and
then I create a small square. Yes, this is my. But you can
create another like this, a bigger one, and
then I put ellipse with left finger and it will be. We rename it S.
The focal is done. Now we create another
alphabet, for example, K. In one move, one row row k, and then hold and it
becomes very perfect. Now fum hold perfect F. We name it again as k. A new layer. Let's draw T. Q T. Now, let's draw R. Woops
I give a hole here. Yes. This is my T
and R. Rename it as R. We will draw o A and
in the next lesson. Okay.
9. Draw Cute Robot - A and E: Now, let's throw cute robot for A and E. This is my a bot. I liked it so much
because she looks so cute and her leg
is not the same. One is small and one is big, so I can imagine. When she walks, it's
like, boom, boom, boom. Let's draw a bot. Now, I open A and E layer. Make sure you already
activate A and E layer, and then the size is 30%. Now I start to draw eyes. I throw one big eye and
then another smaller eye. It's like my a pot
is looking up. Now we draw hands,
Trow and hold. Trow and hold. Okay. Now, we draw the left hand. Draw and hold. Then I draw a loose line
and for the weapon, I draw a curve, and I create
a very sharp weapon here. Now we continue with
the right hand and lose line again curve. Hold hold. And then we will make a
kind of scissor here. So draw and how and hold. Yes, this is his weapons. Now's leg. Draw and hold. A circle, another circle. Row and hold. Throw again and hold. Okay. So yes, hands and leg is done. Now, we create accessories. And because it's like her mouth, then I just a very
sharp teeth here. Okay, this is the teeth, and now we throw
the accessories. Lips and throw the line. Tangle and tap. Row and hole. Row and hole. Here is another
ellipse or circle. Tango and hole. Pot is done with the eyes looking up as a
source is completed, well, this is
another white space. I will add a little bit
Trow and. It looks nice. I think my pot is finished. Now, we call it. This pot will look
so cute as well. She has two hands, one big and one small, but she has only one leg, and then her eyes is looking
up to the right and she has an ten let's throw pot. I throw one tall eyes and
the other one is short eye. Then I give a curve here. So she looks like
looking at the right. And then I want to
create an ant here. There's a straight line
and a circle or ellipse. Now we draw hands. I want to make a big here. Baker You can zoom
in and zoom out, and then you can move
around your screen. So your drawing is
easier for you to draw. It has an angle that
mats to your hands. Here for the leg, I make only one leg. I create two p. So it's like
the pot will run woohoo. Okay. Here in the white space in the
plan space. I draw the te. And then another hand, I just draw the loose
line and the weapon. Well, I will add a little
bit here for his arm. So I will fill in here. So the loose line attached
to this rectangle. Now we throw the accessories, caps, and straight line. This is an electricity. I color it with
black but later on, you can still leave it as white, and then you can color
it with different color. Rectangle, Circle tangle and hold. Dow and hole a curve hole row
and at a circle over there. Another electricity I change the size to
be 5% row and hole. Again and Okay? It looks nice. I will do some more on his arm. A little space here. I will add something in this
play space. Another curve. Draw and hold. Okay. I love it. My pod is ready now. It has antenna, two, and one leg, and also
the teeth and access. I love it so. Next, we will and.
10. Draw Cute Robot - O and U: Now, we draw Q draw for O and. After A and E, I close this layer
and I open and layer. Still with Calligraphy
mono bras. Now we draw the yes. I want all to have
a very big one. Another circle and that. Another one and that. Now this hand. Draw the line and hold and
lives for his elbow and tap. Other lines and hole. Another elbow. And the other line and And for the weapon, I draw a kind like
four on his hand. Interesting. Now, the left hand. We draw the same style
for the left hand. So two lines and hold and
then lives and tap lines and hold lives and tap. S and t. Now for the weapon, I draw a kind of scissor
for his left hand. Wow. Ora looks so
strong with his hands. Now this leg. I draw a legs and another leg. Circle and Ciro I love it. Now as a sorry part. I recite the press and
then draw his mouth. And I add some tea. Circle and the
rectangle and there. If you don't like it,
just double that to undo. Circle and straight line. Circle and that and then
draw a gear like me. Don't forget to hold at the end. One more. Yes. I draw an electricity mets here, and then I color it with plat I add an electrical here. Row and hole. His hand again row and hole. The left hand. Okay. So I'll. Oh, p looks so strong
and ready to walk. Now, you put I draw a curve line and
then for his eyes. Another one, and that I add some later lines here. Another lips and tips and tap. I love the features
from procreate because now I'm not
worried to draw anything. Draw and hold and it becomes a straight line by itself
automatically. I love it. I and then triangles and Electricity again, triangles, two
hands on the right. Now, two hands also
for the left one. Okay. Another hand, if you
scratch the screen, just double tap to undo. Okay. Hand is finished now. This area is legs. Both has one leg Trow
Draw and hold Okay. Circle and tap another
circle and tap. Okay? Finish. Now as a Sp Trow and hole row and hole and lips and T Okay, we finished now. I love this I.
11. Draw Cute Robot - I: Now, we draw row four. After O and, we continue with another
four wall. The last one. This is too high,
so click arrow. You can move around your
and put it in the middle. Now, I start to draw
the triangle and a big lips I feel in the white space. So it's like the eye robot is
looking down. It's so cute. You know the eye has a very important role
robot body parts because just looking at the eye, you can see that
your robot is happy or angry or frightened
or even looking up, looking down, and so on. Now the left arm. And also the right arm. I make a two curve like this. And then I create the
weapon, Trow and hold. Another curve. And then I kind like a and
hold and for the left. Just double up to undo. I create two lines, and the weapon is
a sharp triangle. Okay, I hand is ready. Now, I will something here. Trow in hot Trow in hot rectangle that
will be the head. Now for the body, I reduce the breast size, and then I throw the
electricity icon. This one, I color
it with plaque. But you can leave it still
white and then later on, you can color it with
different color. Here, I want to throw a key, so I throw an ps and then a six sec follow
through all the lips. One more, and then. Yes. It looks so nice. And then I add a straight
line in the middle. Drawing rectangle rectangle again. I want to do some
more with the arm. I want to give a
little space here. You know that this step
two drawing rubble for its alphabet is my
favorite one because in this step I explore our creativity imagination and this could be very wide
and as free as you like. I like this step so much. Now we draw the leg
one and hold two. Then I want to give
a smaller size for the electricity icon. Okay. Okay. So it looks like the ye pod is flying
with the fire under his body. Let's continue with
the second iPod. That is the eye looking
to the left side. I just add a simple mouth
lines and a simple teeth. But you may also
regard it as eyes. The curve curve again and hold So actually, you can play with any shape to draw the alphabet and
also the row pot. You will use circle, rectangle square,
triangles, and so on. Look nice. I prefer
to call the tee, not teeth but yes. Can we continue with
the left hand draw and hold, draw and hold. Look nice. I want to add electricity so hold until you can position
it to the right place. Now for the party, I want to b the square on his and then I live
in straight line. Draw and hold at
a circle or lips. And then I put 8% to throw
a little curve here, Trow and hole, Trow and hole. Again, trow hole, trow and hole. It looks nice. It's
like something on his chest that protect
them from the enemy. Again, the electricity I will add something
in the middle. I will create a care again. Don't forget to hold at the end. Yes. I keep across
lines in the middle. Yes. Very nice. Now for the legs, I go back to 60% and hole. A. Another. Okay. Another strip for his life. And how and hold. I love this iPod. Well, for this arm, I will add something more. It will not look
like play space, left and right are the
same. That's good now. It's like brother and
sister. It's so cute. I love this iPod. Next, we will continue
with robot K.
12. Draw Cute Robot - K: Let's continue to draw
robot K. I close, and then I open K and f. This is to slightly
to the right. I want to change the position. I want to position it in the middle and I
resize it a bit. It will be easy for
me to draw the part. Then again with
Calligraphy mono. Now we draw the I. I use 41%. And then I draw a
small ellipse here, and then a small circle. I give a dog. Okay. Scale
robot not only has two eyes, but C has four eyes. There is no rules.
This is our creativity and our exploration and you
can be wil as you like. Here, I add an antenna, I draw a line lips
and d d again, I draw a line an ps. Well, now it's time to
draw hands. Draw and hold. Draw two lines and
hold leaves and. Now I want to make a kind
like crane for his hand. So I draw a line and
hold line and hold. Another circle here again. And again for the upper arm. And then 14%, I want to
draw a thin line here, and then again, draw and hold. So it's like a
crane for his hand. Now we draw the weapon,
we draw a curve. A sharp weapon on his hand. That's nice. I love it. Now for the right hand. Go back to 38% draw and hold. Draw and hold. And again, the shock
weapon for his right hand. Next, the legs. And hold. A earlier Throw and hold. Big
lips again and that. And then I add some
small triangles here. And triangles here. Okay. No, it's an accessory. A Ali Line and hold. Line again and hold. A little circle. D. Trow and hold. Little circle as if you
want to erase your stress. Throw and hold Trow and hold. Electricity image here, I don't want color
it to be black I just leave it as we and later on you can fill in
with another color. Draw and hold an ellipse here. So if you want to ease, this is too mus. Just click eraser, and then
you can read again the line, so it will be closed
because later on, you will give a color to it, it must be a line. And ps here Now, we'll add something a little
circle, rectangle and hold. Circle and hold,
rectangle and hold. For the legs, I will
add a lines one, two, three, and four. So you just the line and hold. It will be straight like that. Okay. I want to add little ellipse here and also
cessories for his leg. Now for the left leg, small ellipse and hold, and then circle and hold Okay. So that's four K Robot. And next we draw robot four F. Okay.
13. Draw Cute Robot - F: Next, we continue to draw robot F. K and F are in
the same layer, so I want to separate
F from this layer. To do that chose this menu. And then choose free hand. You can draw the desk line
surround the F. Ue three fingers to slide down and you have cut copy cut
and base click. Now you have separate
f that you can move F is in the different layer. And then now I rename it as f, and the previous layer now
only four k. If I close k, this is only f and that's
f. That's the way you cut and paste to create a different layer from
the previous layer. Now I'm free to position
f as I with the arrow, and then on the f layer, we start to draw. I draw long rectangle for his I create an tear. And therefore the hands row and hold row and hold a loose line. Agase line. Position, your screen. So it will be matched
to your angle and it will make
your drawing easier. This is the weapon. Again, we create a kind of
scissor for his weapon. That's so cute. I will make a
line on his arm later on we can col almost finished. Again. Okay. Now
we draw the leg. I make a big curve
and then line and hold and then I create
a square under his leg. This is for his right hand, row and hold a loose line. Draw lives. So lines and sharp
triangles for his weapon. I resides to be 25%
for the accessories. Now I draw ellipse and tap, and then I want to
create a gear here. Just draw like me. And don't forget to hold your
hand at the end. A cross lines. Okay, is ready. The circle and that
circle and draw and hold. Tangle and hold. Draw and hold. Draw and hold and add an ellipse
and a little circle. I add a small circle above his eyes. I love it. Next, we draw and robot.
14. Draw Cute Robot - T and R: Now we continue
with T and R pot. F is done now I close this and I go back
to T and R layer. I can feel that the more you
draw pot and its alphabet, I know that you
enjoy the drawing so much and maybe this T and
R is very easy for you. Now we draw the yes. I tap with my left fingers to get a perfect ellipse or circle. And then I resize the press
with 30% to create the sit. Don't forget after you
draw and then hold. Go back to 53%. I make it a bigger size because
I want to color the set. Now for the right I
In my experience, I also enjoy so much
drawing this robot because when I draw
five A, for example, so I have five A and
then my a bot on the first day will be very different with the next
day when I draw again. This is really about gratiftys about your wild imagination
to draw this cute robot. Also, it's your
decision to combine eyes and legs and hands
that you already practice. Or sometimes you will find your own style to draw
eyes and hands and so on. Now, I continue 34% to
draw his right hand. I will draw three
square like this, draw and hold draw and hold. Now I create a loose
line also three times. This robot will have
three different weapons, h one is a triangle. And then a kind of
electricity weapon. This is too long, click the eraser and then erase a part of it and
then throw again. I Trow a triangle
again for his weapon. Looks cute. Now for the left hand, Trow and hold Trow and hold Another loose line. And the weapons is very sharp. Now, he's like a loose line. The circle and that circle or ellipse and that Hmm. This tea bot is running, I think, or is flying. This is his mouth, and I draw the teeth one
and two, three, and four. Now it's time for
the accessories. Circle and tap
rectangle and tap. Circle again, I and
ipse straight line. I will add some more
here and how and hold little circle here and that This t bot is so cute. It's flying everywhere with the flying hands
and the flying leg. Now, I want to separate R, so it won't be too close
to T to this menu. And then make a dot lines around r and then use three fingers
and then slide it down, stop and pace, and then r
will be in different layer. I rename it with
r and then tr now become only t. I close t now, I'm in R layer, use the arrow to position r in the middle and you are
ready to draw the yes. I'll throw a one eye. Another ellipse. Another circle and that. Another one. Yes. Only one eye, the big one, and I give this
three small lines. Now the d Two time I draw curve
lines, hold it. Now, the weapon, another
curve line straight line. And again, a kind of s weapon. Now for the right hand. Grow and hold. A circle and line and
another line and hold. And for his elbow. I draw another ellipse inside the elbow and then
a thin line here, and then again and hold position it and it's like a crane
for his right hand. Now we draw the legs. I draw an ellipse here Okay. Nice. For the small leg here, I draw a curve circle,
another circle. Here you can add
again another circle and some circles
inside this lip. To. I love it. Now, it's sores time. I resizes 8% to draw a
thin electric signal. I leave it to be white. And then I draw lips another lips and across straight line, Trow and hold, Trow and hold. Trow and hold circle
all leaves and tap. One more. Okay. I like to position the
screen on my pad like this. So from any angles, I can draw much better. Ectgle and tap Circle and hold. You still plan, so I will
add straight line like this, Trow and hold Trow and hold. And then leaves a circle
and that A one and that. I like that part. Next, we will continue
with the robot A.
15. Coloring Robot A: Let's go. This is fun. We will give color to my bo. Remember, in your layer, you have A and E, but I want to separate it
like the above layers. Those are already tingle layer, single alphab Use this menu
and then just free hand, create a desk line or
a dot line around, and then use three
fingers slide down, you will have cut and paste. Now is cut from A
and separated layer. You can rename it as And then for the previous
layer because it's only A, you name it as a. If I close a, I close
now, they are separated. Now we will color A. I want to resize first to be smaller one because I
want to duplicate A. Yes, I click duplicate. We have two A layer. But now, this one for a color because we
will color a pot. So we have A and a color. I close A. Now, I'm in
a color just the arrow. You can position your A. Now we can see they
are still the same. But let's go to if color to
this ap In my color palette, I have some colors
already safe here. But you can choose
your own color. Now, I chose gc monoline, and then in floors
palette, I chose green. I track green to his body, and then there is
continue filling. This is a good feature because
you can continue to fill green to any part that
you like. It's very easy. And it's very fun. Click the color drop first and then You can choose your
next color, the dark brown. Track to the legs
and then again, continue feeling and then click to any part you like
for dark brown. Don't forget to always click color drop before you
choose another color. Yes, click first, and
then now light orange. I track to his eye,
continue feeling. Again for his leg, color drop, and then I T one. Now I d two hands. Click continue feeling, and I continue fill
in the other part. It's fun, isn't it? I like to do this all day long. Just and it's now so colorful. Now for the teeth, I go
back for dark color. You can use your fingers
hold to the du color Now, you hold on your breath and then
you can have breath. Continue feeling. I hold my fingers green
and green is there. Okay? Now I open the
old a black and white, and this is the color pot. I love it. It's so fun. It's so fun. Next,
we will color pot
16. Coloring Robot E: Now, let's color pot. We will do a different
way to give color. After we color pot, now I close this A
and now I'm in pot. Without color, I already
fall in love with pot. We duplicate force. We have two layers. Color. Then now we position this on the black and white, smaller and over there. And then now for color, I will use it as a
reference to give a color. I will take this and then just reverence now
color as our reverence, then above E, I create new layer and I
rename it as color. This is only color that
we like to give two. This is the second
way to do coloring. Now I'm in color layer. I chose the color from
my palette. This blue. I track to his body. I click continue filling. Now I continue color the part that I like,
including this antenna. Click again, the color drop. You are still in color layer. If I close this one, the black outline is not there. So I color layer, you only have your color. Now, I Ons. I drag to his eyes. Continue feeling, and I
continue to feel in the ins. And then for the third one, I just this dark blue color. I drag to his eyes,
continue feeling. You can go on give color to the teeth hand also for his left arm. Now, I tap blue because
I want to go back to blue and I add to his hand
with continued feeling. I still have one more color. I taps. Now, I just continue to
color with orange. Now, I choose from this palette. I choose the pale ins. If you make a mistake
to draw the line, tap with two fingers
or double to undo, and then you can fill in
the lights to this square. Yes, we finnes. Okay. We finished now,
with color layer. Now I rename it again
with color one. I add new layer. I want to create color two. You will understand why I create this because if I
don't like color one, then I can create
color two without duplicating the
original part layer. Now I'm in color two. I can create a
different color scheme. I start with red for his party. Okay. And then the light green for
his eyes continue feeling. Also for his hand. Now, I just blue. You may call it blue or
turkeys, I think, Turkeys. Color of Now I pick light
green for his teeth. Now, I pick place for his eyes. And then I chose a light color for this square
with continue feeling. Now, we finish, we
have black and white, and now we have two colors Color one and color
two color one, and this is color two. Without deleting the
first color layer, now you can have a different color four
pot by using reference. You can pins up two
layers later on to combine the pot with
the color that you. Next, we continue
to color and bot.
17. Coloring Robot O and U: Okay. Next, N but after we draw, now I close color. As I told you, your
color and color two, you just pins with your fingers to create
a single image of EPO. Now, I activate color, I dublicate and then
rename it as color. Position to the right. I resize it to be a bigger one. Then I will use the first way to color just by track
color from your palette. Again, Calgraphy mono line, and I track this slight
continue feeling and color. So after several coloring, I can feel your excitement, and I think you are happy
and enjoyed so much as I am. I just here. There is a tiny hole in his eyes to Zoom so you
can find your tiny hole. I picked the color
from his left, and now I feel in the two
tiny holes on his left. But this fits. Now, we continue to
coloring to bot. I already duplicate the layer. Now in color. Again, using the
first to color it, I just drag and drop the color. I choose a green here, continue filling and take
the part that I like. Now, his eye. I pick the color for black. And then I just light
yellow for the elbow. Continue feeling. Also for this gear, I pick cream color now. Then I track to his leg. I missed his right leg,
continue feeling again. This tiny white one. A very tiny. Sum in to get the right holes. I pick the light yellow
again for his leg Continue. I still need another color. Choose black for his teeth. Continue. This auto pot looks
so scary pump pump. His hands are ready
to grab the enemy. Okay. It looks nice. I love it with one eye. Next, we will coloring the
brother and sister. The eye.
18. Coloring Robot I: Honestly, I'm so happy
if we talk about color. Again, now is iPod. I have two iPods here, so I want to separate
it into two layers. Use this new free hand
separate the iPod, three fingers down,
and then you have copy and choose cut and paste. Now you have a separate
layer for this one, and I rename it as two. This is iPod number two, and the previous one, I rename it as one, the iPod number one. Now I close this one, I color the twos. Okay. Now you can
choose your color, and I will choose from this. Continue feeling
clear color drop. And then now the dark
orange for the head. And also yes a pops
head hands and legs. This iPod is so cute, isn't it? It's like he wants
to dance right now. Now I choose the light
brown for his hand. Continue feeling and then just choose the
part that you like. For coloring, you can choose a bright color or like this one. I prefer to choose a
soft and pastel color. Or even, you can choose
monochrome color only black and white or gray and
white, and so on. Now I chose this pink color. Continue feeling
a very light pink Now for the accessories
on his chest, I will use a gradation color. So this is the light p, and then I choose this. You can choose a different pin. Then continue feeling again. Okay. Then for the last one, I want a dark ping. I move again and
find colors in this. Continue feeling. Yes. So it's gradation from
light to dark ping on his. I love it. I. Uh huh. I cancel it, so I
prefer the pre one. Now, I will color one. I close this two. Now I'm in one, and let's color the siblings. Looking this two iPods brother and sister are dancing together. The one dancing, not with leg, but with electricity on his leg. It's like robot
dancing in the air. Now I choose choose the lighter one. And then the Decker. And then the one again. Continuing I like this pastel
color so much, but looks softer, looks nicer, not scary one, not
frightened one, but it looks so sweet
and cute, isn't it? And this ping for the ke I think it is finished now. This is I one, and
this is I two brother and sister are ready
to dance together. Nice. Next, we color K Robot.
19. Coloring Robot K: Now it's time for K
board and I will choose a bright color like orange
and blue and so on. After we finish I one, I do. Now I'm in K layer.
Look at the bottom. You will find this and
then classic harmony, and now we will use harmony. Procreate will give
you three colors, which is fret complimentary. This is what we call harmony. You just follow what procreate
suggests to you with orange will be complimentary
to light blue and dark blue. And then I just slight
green for his eyes. Continue feeling. With harmony, you don't
have to choose one by one, but Procreate will
give you automatically three harmony colors
for your option. This board has four eyes, all are light green, and then now I choose the third color from this
harmony, the dark blue. Continue filling I go back to the light green. Continue feeling. Also for these tiny
triangles on his feet. I see again, the
ins for the weapon. This line his elbow and arms. Also for this antenna. So by using harmony, you may have three colors. Three colors are
complimentary to each other. I continue with knee
holes on his leg. Now, I just. You
know, the new Okay. It looks nice, very bright
and very different. Next, we will continue
to color T and R robot.
20. Coloring Robot T and R: Now, we will color
T and R robot. This is our t with a Q, and I already activate layer t. You see arrow to
position it in the middle. Now I will choose color. I will choose this color
and then continue feeling. Okay. Do ever get to take color drop first before you choose another color light one. And also for his eyes. Now, I just the third
color continue feeling, and then I feel into
his teeth as well. I hand and accessories. Now to his leg. My tot he moves very easy with
his hand with loose lines, and also his leg. He can dance, he can run
very fast for t pot. Okay, teapot is finished now. Next, we continue with
R. After the soft color, now I will choose
a bright color. And then I will work with
this very bright pink. And then I choose sparkle. And then I to the life being. Continue feeling. She has many accessory, so I color it one by one, and also for the weapons, led. Sometimes I call my
robot his or her. I don't know. Sometimes
it's so cute, so I call it. It's like this R robot. I pick black color with my fingers and then
I color her eyes. This is also black. I pick verbo color, and then I track to this electric senal and
this accessories as well. I beg the light being
now for her arm, and then continue
filling this tiny hole. This one also little bit for his life. We have four holes here. So I will choose puss and then I pick with my
fingers and track, then continue feeling one, two, three. Finish now, I think. Oh, and I pick purple color again to
complete her hand. Okay, I think it's
finish so cute, it's so funky, it's so curly. Next, we will practice
to draw your name.
21. Draw Your Name: Now it is another fun but
let's draw your name. Here is Lina. We can make
Lina from separated alphabet. Here, I already separated for
its alphabet and its layer. So this is Lina with L A. You can position it with
the arrow, remember. So four alphabet becomes Lina. This is. I call it from C O R and E. So we can create a
name from those Alphabet, and it's a fun way to combine
Alphabet to be a name. But here, I will teach you how to draw a name from scratch. Let's make a new gun
with 5,000 5,000. Make sure your drawing is
on and click drawing guide. At the bottom, you have to, turn it on, and then you
can slide the create size. I will create about 118 pixel. I use al graphy monoline
and I choose my pallette, and then I create new pallette. This is entitled. This is new ballot
that I created. Then now I try to find
four blue colors. I have blue light blue, the lightest blue, and one
more for the darkest blue. After color. Now we
start to draw pen. I will create pen from B, and With this grade, we can give a touch just to see where your B and E
and will be position. This is only a help for us. And then we start
to drow bed now. Draw and hole. Then I will add an ps here. Another one, bigger lips. I like it. Double tap to
undo and re draw again. I like this, and then now for E, I will use this eraser to date the dots because this is
only our reference to draw, and then I draw and then. Now it becomes a straight line. But there is a little bit here. I use eraser again, and then I delete it. And then now, I draw. I delete again with eraser, and then I go back to my press. And then hold. So this is pen. We don't need this
one, I delete it before I draw the
robot on its alpha. So it's up to you
how you make pen, but I will try with this one. Pen is in layer one. I duplicate it, and then we
rename layer one as n one. That means this is
only the alpha. Then the next layer, we call it pen two. Now we draw pot but I
didn't like this one. I use eraser again, and then I delete it. I go back to my
press and now we are ready to draw on each
of the alphabet. Don't forget to turn off the drawing *** because we
don't need the clip anymore. So your gunfs will
be clean like this. Now, let's start
to draw the eyes and a big eye for Now, I throw the hand row and hold and lose line, sharp triangle as the weapon. Again, you have two ways
to create your name. You can throw a single alpha in separate layers and then you
combine it to be a name. Or like this pen, you draw a name and then you
draw the robot on its alpha. If you see here, you
may say that p and n is two close to the left
and two close to the right, but later on, again, you still can separate
P or as a single layer, and then with in the middle, you can rearrange the
position as you like before you draw robot
on its alpha bit. We continue with assures for P. Circle and straight line. Draw and hole lips Also, there is no
rules for accessories. You can combine your practice
to each of the alpha, and also you are free to
add your own ideas to the accessories or to complete
the lags what I do here. Now, for, I draw a straight line and
then L lives and tap. Another L lives and tap is
so cute with different eyes. And then I fill in this wide space. Okay. It's acute, four E, and then I drown the antenna. Now for the hands, I just draw a loose
line and the weapon. Another loose line again. And a sharp weapon with curves. Now for the legs, I make a long leg here, and then circle and
that another circle. I fill in this part and
I draw a thinner line. Now we already finish eyes, hands and legs and now
the accessories part. In this class, I only show you after we create
alphabetic robot, then you can create your name. But actually, the way you use the alphabetic
robot is limitless. For example, you can create your custom happy per
cup for your friend Ben, also, you can create
a thank you card. Thank you so much This
is the best part. You can arrange your ILO and to be I love C you can add
everything when you together. So nice, isn't it? This is just an idea for
you that you can use your alphabetic robot to create any greeting
card that you want. The left hand is in
Hands and left are qin. Now the last we
our and the eyes. So for rubble, the eyes is
looking up to the right. It's so cute. I like it. Now for the, The hand is also in limited space. That's why I told you, if you want to separate p and n into three different
layers then, you can resize, and then
you can position it again. So you have more
space for the hands for and N. But this one, I just and show you
whatever it is. Another legs for row and
hole circle and hole. With this skill, you can create a custom and special card for your friends because he or she cannot find
it on the shop. That is very custom from
you to throw their name, and then you robot and saying, Happy Birthday, my friend. Now, I continue with
the accessories here. I resize the brass,
draw and hold. Trow again and hold. And then now I throw
another accessories here. Rectangle and hold. Circle and hold. Here is the plan. So another lips and hold. Circle rectangle and hole
circle and 10:00 P.M. Is complete now. I love it. Next, we color your name.
22. Coloring Your Name: Now, we continue to give
color to your name or pen. We already finish N for pen
completely with each robot. This robot I duplicate
to be pen three. I rename it Pen
three is for color. I close pen two, and now
we are on layer pen Tree. For the color, I've
made my palette from four blue color from the
darkest to the lightest one. I choose the slight one, and then I track for p and
n. The darker one for. And then I continue
for this eye. Again, I just choose
which part that I like to color it
with dark blue. After we have done
so many times, this coloring process
is so fun, isn't it? There is no rules to give color. You can choose the bright
color or sometimes you can choose a pastel or
soft color with its gradation. You can also find the
color scheme in pints. There are so many
color schemes in Pintrest that you can just
drag to your procreate, and then you will have
the palette according to the image that you
choose from Pintrest. Here I continue to color
yes and osaors and so on. But if you want to
keep the part of the osores to be
white, it's also okay. But here I try to color
each of this part. And then again here,
continue filling, and then I can color each
box with lighter blue. Don't forget to take color drop first before you
choose another color. I speed up the video
a little bit here, so you won't waste
your time so much. Take color drop, and then again, I try to complete all parts
with this blue color scheme. If you don't like it, just
double that, to undo. What you touch is the
space, not the line. If you touch the line, then just do is easy. Don't worry. Now it's almost finnes but we
still have a bit here. Continue the light blue for this part in and
zoom out as you need. Okay. Gain for the leg and this one this arm finished now. We have pin three
for the color one, p two for robot and pin
one for alphabet only. I like this one. Next, you
will see my robot collection, and then I will
teach you how to add so and save your project.
23. My Robot Collection - Add Shadow - Save Project: Next, you will see my
other robot collection, and then I will teach you how to add shadow and safe project. This is my bod. I love the combination of this bright color and he
has a brass on his leg. It's so cute, isn't it? This is B. I call it per depot. This looks like a
bird this is D D bot. This is my bot. And another pot,
and this is for f, and this is another F bot. This is for H. This is for my p k bool for u. And then this is nano
this is a pot for po. This is my R pot for R bota. This is S, and this is T, this is bot, and this is x bot. This is b y for you, and this is Z both
cute, isn't it? Hopefully, by looking
at my robot collection, you will be inspired. Now, I'll teach you
how to add shadow. Previously, we already
created pen and then I duplicate pen because I want
to show you to make a so. I renamed this layer with ito. So we have original pen Tree, and then we have ito, and then click adjustment, and choose u and saturation. Slide to minimum. Then for the brightness, you can choose very black
four zero or I choose 29%. Then if I turn on
pen three layer, you'll be like this
and for layer, you click arrow, then you can move or change the position. I do a double tap because
we only want to create a so a little bit under
the original bend. So you see that I use my pencil or you use your fingers to tap
tap tap a little bit. This is the way you move your so to a very little movement. This is with do and
this is without so. You can see the difference. Then next we continue
how to save project. For example, pen is in. We have a background color
white and an active. We want to save it. Click action save here, you can save as PSD, PDF, chip pack and so on. I just chip and then it will be exporting save mates
to your photo library. Then how about if I
save it with a bagrom. I close the background. And then in action, say you may choose PNG then your project will be exported
as PNG without background. Next, you can use this pan
for our mockup design.
24. Apply It To Mockup Design: Okay. After you finish
your Ava robot, you can apply it to MC design. A MoCap is a template, for example, the shopping bag, and then we can
use our drawing or your project and then apply
it into this packaging box. After you combine it
with your project, it will look like this shopping bag with
your robot drawing. To get this anfa create
a new t just type three KF MCA And then you will see F free
dessert mop generator. Just click that one, and then you will
see this screen. Free desert generator, and then you create
desert Moka click. You have two options. You run in CFA apps or
browser. I just browser. I click continue, and
then I don't need this. I will close this screen
and then now you have a mop with many categories
from technology, print packaging, apparel
and home briefing. For example, for a better. You also have a sweet
ser tert and so on. If I choose desert, you have a long sleeve,
men, women, kids. Let's try now to
apply it to T sert. In desert, you can choose
free templates for your mop. Now I will choose an emg for this desert for
ban see pen here. Now Ben is on his dessert, and then here is a chest
image. You just click. Now you can resize
your image and positioning as you
like. It looks nice. The been robot is
already on his chest. This color is for dessert, so you can change the
color for your dessert. With whatever color you
like, but of course, you have to see what
is the best for the combination between
your drawing pen and the desert color. I like this one. Then
I click Save Moca We have two options and then choose download because
I want to download it. Click download, and
then this icon, it means it's
downloading now and will be saved in your oto library. You can image and then you can select different
images that you like, for example, this t. I select and then I will
just a little bit. I wrote it a little bit, and then I make it bigger
just to see the hand, the body, and the eyes. Okay. I resize
again a little bit. Okay. Save. So it looks nice. I save then you can
combine the color of your ts the
position of a robot, and this looks nice with robot only on the
pocket position. And this is my favorite A
on the darker T sort color. And for the name, I in and this is Lina
on the long sleeve. This Now, let's continue
to apply it to packaging. In Fa Minertor you can find
many types of packaging. Then here is you see your mgs. For example, you want to upload, click Upload, and then
you to photo library, and then you go to your robot
that you want to use it, for example, this R, and then you click and
then it's uploading now to your Fa and then choose
the RN, click Select. Then here is adjust image. You can choose
fill, you can fade, you can choose top middle bottom or horizontal
vertical and so on. Okay. So now I just save it and then we'll
see it's right in the middle. But if you want to
make it bigger, just enlarge your image
and then see it again. If you want to put it lower, you just track and
you'll see there is a centered line
that you can use it. Here, you can see
other templates. You can choose it, for example, this blue with hand. For example, you have a product, and you will use R
robot for your logo. Then here I text
robotaF example, your product is a robota robotic learning
center for kids. Then you choose this image
and then click Select. You will see the
packaging will be like this and make it bigger and position it lower a pit save Par you just put it higher
a pit and in the center, and it will look like this. You can see your
drawing with text on pox packaging on coffee cup, on a paper pack like this, or you can make the mate
speaker like this one. It looks so nice, isn't it? By using more template, you can show to other people how your design or your me
will look like on things. Again, now we try to apply it to mats here in home and living, if you play Then you
have an option of masks, pillows, candles, and other. You choose mats. In Mm cups, there is a ceramic
mail and class mass. I will choose the
symbol one ism. Now, I see, click. Then again, you can adjust
your mags as you like. Click. Then if you already like it, save mock up, download
and click download, and then this down arrows
show ups downloading now in your library and your
mas will be like this. I love this so. This is room. And then in clas max, robot will look like this. Even if you make pen
for your kid's name or your product logo R robota will be look so
elegant in this map. Again, you can use pen as your children's name
and you can show it to him if you apply it to a p. You can try many mock up
in F mockup generator, and I hope you like it so.
 Hanny Agustine, Artist | Technologist | Educator