Transcripts
1. Intro: I think all filmmakers
should have access to the same tools as giant
production companies. You should have the ability to work with anyone
across the globe. You shouldn't be able
to work quickly, efficiently, and
at very low costs. I think the black magic cloud
workflow does exactly that. And it's great for
solo filmmakers that have nothing but themselves
a camera and a laptop. But it's also great for bigger production companies or smaller production companies, made up of a few friends. In this class, I'm
going to cover the black magic cloud workflow. And I promise it's
going to change the way you look at post
production and filmmaking. I'm Fri Trevino and I've been a professional colorist
for over ten years. I've worked on over 60
feature length films and hundreds of short form projects
for companies like Gucci, Ver, Sachi, ESPN, HBO, and a lot more. I've also worked as a post
production supervisor. So I know all the challenges
that filmmakers go through in post production to get their
films to the finish line. The black magic cloud workflow is definitely the
way of the future. The world has gone remote, everyone's working remotely,
including filmmakers. And one of the
biggest challenges is making sure that
everyone's on the same page. Everyone has the same cut,
whether you're a colorist, an editor, a director, a
producer, a sound designer. The black magic cloud gives you all of the tools and
makes it insanely easy to sync your project across multiple devices
all around the globe. And even if it's just
you and your laptop, you'll love the freedom of
being able to go out shoot, edit on your laptop,
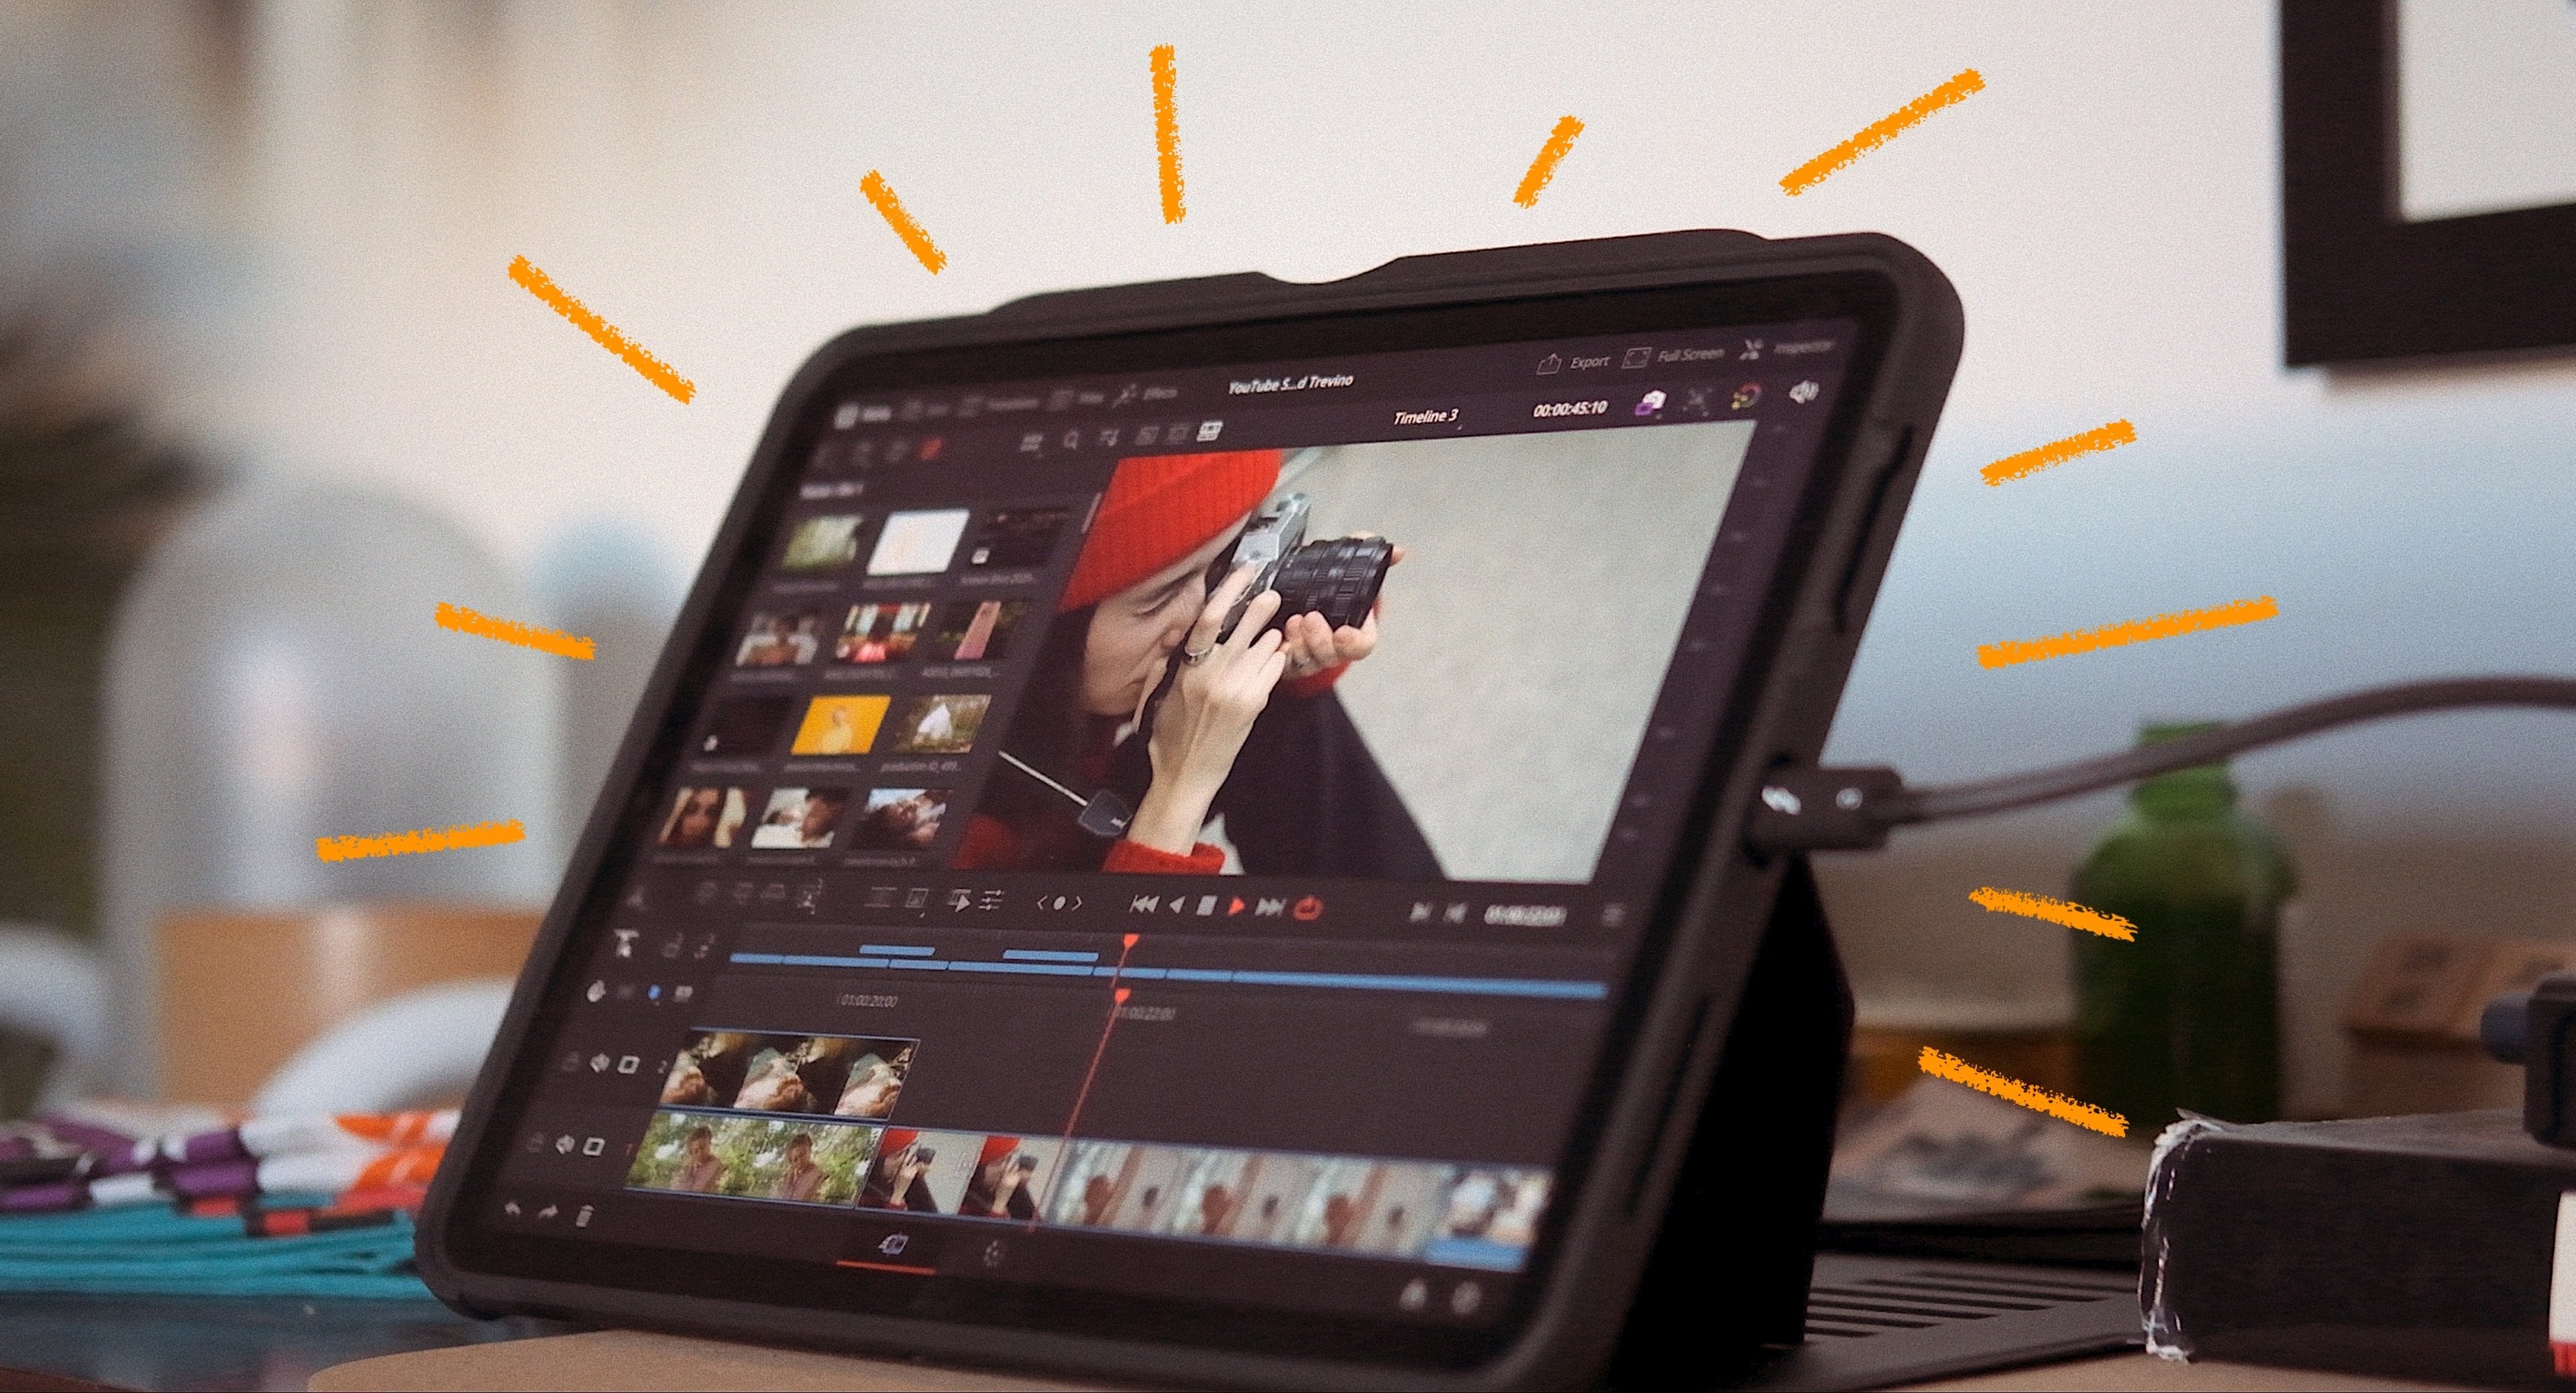
edit on your desktop, even edit on your ipad. I think you're
going to be shocked at how easy it is to do this because honestly resolve does everything for you
in the background. You just have to
know what boxes to check off and how to
set up your project. And I'll cover all of
this in this class. The benefit of this class, whether you are a solo filmmaker or a bigger production company, is it is going to basically
make your life a lot easier. Which if you're a
production company, is going to save
you a lot of money. And if you're a solo filmmaker, it's going to save
you a lot of time. And as you expand and scale and possibly start a
production company, you're also going to
love this workflow. And you're going to feel
like what you're doing now is very old fashioned, very slow, very expensive. It's made my life way easier, way simpler, and I know it's going to
do the same for you. So if you're ready,
let's jump right in.
2. The Power of a Cloud Workflow: Okay, so before we jump in, I just wanted to very
quickly explain what a cloud workflow is and
why they are so powerful. And I wanted to explain
this mainly for beginners, but maybe even if you're a
little bit more advanced, because sometimes you don't
know what you don't know and you might just be stuck with a workflow and think that's
the best way to do it. And you're just so
used to it, you don't question it to put it. Simply the power that a
cloud workflow has is this. If you're a filmmaker, you know that you go out and you shoot. And then you bring your
footage into your computer. Depending on the
camera, actually, with most cameras now, you have to have a very fast computer. If you're a bigger
production company, you might have
multiple computers. Again, bring it into a
system that has to be very, very fast, and then you
have to have an editor. If you're editing
the piece yourself, this all is kind
of the same thing. Um, but if you're hiring an editor and you have to
get that footage to them, that can become a headache. And the same thing
goes for the color, the same thing
goes for the sound design, the visual effects. You have to make multiple
copies of all your footage, put them on hard drives, ship those hard
drives out to people, or upload that footage, which might take forever. And then you have to worry about all these logistics like
how fast is their Internet, how fast is your Internet? You know how fast
is their computer, How fast is your computer? What version of the
software they have, the workflow are using, XML's are using the
venture resolve timelines. I could go on and on how
complicated this can get. And as a professional colors and post supervisor
for over ten years, I've seen a lot of
time wasted on films from 32nd spots for TV to two
hour feature length films. I've seen a lot of
time wasted because of the workflow and people not
being on the same page. So again, this is for
your solo filmmakers and it's also for the bigger
production companies. So the power of a cloud workflow is that honestly it
works just like magic. Imagine you are working
with a few filmmakers, let's just say small scale, like three or four people, okay? You, an editor, a producer, a colorist, or a sound designer. You go out, you shoot, you bring that footage
into your system. And then imagine that you don't
have to do anything else. That footage is now in the hands of the producer halfway
across the country. It's also in the hands
of the sound designer, the colorist, the director, the editor, your best friend who wants to see the footage, the DP, Just by doing that. Just by importing the footage. Everyone has the
footage and then I imagine you start
editing. Okay. All of those people
at any time can open up Davinci resolve
and see what you're doing on their system with the same footage
that you're using. And honestly, all you had to do was set up the
project correctly. That alone, if you've ever
made any project, any film, whether it's small, medium, or large, should tell you how
powerful this workflow is. Now imagine that maybe the director wants to try
a few things in the edit, and the color est is grading and the sound designer is doing their thing and it's all
happening simultaneously. Everyone is seeing the update. You can leave notes
for each other. You can type in chat boxes
and divention resolve, tweak this change that I
just put in this song. Whatever notes you have,
it's all together. It's all synced up across
all of these people systems, across all of these
different devices. And it's even scalable
that if you have an ipad, you could take that
ipad to a coffee shop. Open up the project
right there, look at it, leave notes, do some minor
edits if you'd like. It's pretty awesome.
It's very easy. And so again, if you've
ever made a project before, you will know how crazy this sounds and I think you'll be shocked with
how easy it is to set up. So I just wanted to put
that out there in case you're not totally sure
what a cloud workflow is. With that being said, let's
move on to the next lesson, where I will show you how to create a black magic
cloud account.
3. Blackmagic Cloud Account: Okay, so in this lesson, I just wanted to go
over very quickly how to create a cloud account. So the first step, all you
have to do is just go to Blackmagic Design.com which
will obviously take you here. I would presume if you
have Da Vinci resolve, you're familiar
with his website, because that's where
you would go to download the program as well. But the next step would be to go here in this little
cloud icon says login. So we would click here, and that brings you to
this page here. And then it's very
easy down here. Don't have an account sign up. You click on this, fill
out the information here, and then just click sign up. Now I already have an
account obviously, so I'm just going to jump over
to that one so you can see a little bit behind the scenes what's involved
with the account. Okay, so once you
create your account, this is the first page
that you should see. What I would say is, you know, you'll see these different
icons here and very quickly I will go over
these in more detail later. But basically what
these are is you have your project server and your cloud storage
ignore presentations for now and the ignore
Davinci resolve for now. Honestly, all that
does is take you to Black Magic's website weird. It's there at all, but
I'm sure they have a purpose for that
for the future. The simplest way I can put
this for the cloud account is simply think of it
as a hard drive, just like you would have
a physical hard drive on your computer or an
external hard drive. And then think of the project
file on Davinci resolve. You create a new project, you have your different projects for your different
videos that you're making or editing or
anything like that. That's what project server is. These are where your Davinci
resolve project files go. Only the Cloud projects. I want to make that clear. That does not mean
that all your projects from now on will
go to the cloud. It's optional on a project
per project basis. So if you want to make a
cloud project, you can. If you don't want to,
you don't have to. Obviously, this class is about black magic
cloud projects, so just keep that in mind, don't let that scare you away. So that's what the
project server is, where all of those
projects live. And then this, to put it simply, is your hard drive. It's your cloud hard
drive or cloud storage so that when you make a project, your proxy media, if you're not familiar with proxies,
don't worry about that. But basically all of
your files go into your cloud storage and then all of your
projects are here. So initially when
you click on it, what you'll probably see
is like if I go here, you will probably see this. So let me talk a
little bit about the different plans that
Black Magic has to offer. I will click on the
gear here in the top, and then once you go in here, I actually just click on Managed Plan with
a free account. Because this is a free plan, what you get is for storage
you get 2 gigabytes. Now that is a very
small amount obviously. But to get started, that's
what I use to get started. The proxy files are tiny, the stuff that's going
on the web is tiny. I'm not saying that
you can use this for an entire big project, but it is just so you can kind of get started with the cloud, see how it works, see
how it functions. And with the free plan, you get two gigs and you get
no project libraries. So I will say if you want to
follow along in the project, which is totally optional, you will want to have a project library as
part of your plan. And to have the plan
that has comes with a single project library,
which is all you need. That's all I have. That is $5
a month and it's optional. It's month by month,
which is what I love about the flexibility that
black Magic has to offer. You can sign up for one month,
not use the next month. Your stuff will still be there. Or if you just
want to, you know, save it somewhere
else, you can do that. But you can use it whenever
you want as long as you want. It's not the kind of, you
know, subscription, you know, that we all are tired of where you're kind of locked in
and all your footage, all your media is locked in and you have to use it and you
have to have a monthly plan. You can use it for a single project and then
forget about it. Come back and use it
on another project or just pause your plan. You can, you know,
export your media. Your media is never
locked into the video. So I just want to say that because I know a lot of people, including myself, have
subscription fatigue. And this is definitely
one of those things. I'm very cheap when it
comes to these things. And I have a plan, it's
definitely worth it. And when I want to stop using
it, I can stop using it. So just keep that in mind. What I would recommend,
if you want to follow along with the project, is at least do the
project library, which would be upgrading here. Like I said, the free
one comes with two gigs, project libraries, $5 a month. You would simply add that that's all you're going to get right
there. Five bucks a month. You'll have your two
gigs of storage, you'll have your one
project library. Then again, for now, I'm going
to ignore presentations, it's not really needed
for this class, and then also members, it's not very important
for this class. Then from there you just
simply hit continue. And that's really all you need. Now if you do want to go all
in on black magic cloud, then what I would suggest is
turning this off and then just going boo here
to the 500 gig plan. Because that comes with
500 gigs of storage, which this is the plan
that I'm on currently. It may not seem like a lot
of storage because we're used to 48 terabyte drives, but for online proxy media which is tiny and
black magic has done a great job of making very
high quality footage at a microscopic size, 500 gigs. It's going to last a long time. Okay. If you want to go crazy and if you're just like a massive
production company, obviously you can
keep going and even, you know, pay that
crazy amount a month. But I presume we're
not there yet. So I would say if you want to go all in on Black Magic
Cloud, do that. And it comes with
the project library. And then you're paying
15 bucks a month, okay? So I'll leave that up to you if you don't want to sign
up now and just keep watching the class and then maybe decide to do
the projects later. Once you've learned
more about the cloud. That's totally understandable
and I'll just keep moving forward here and I'll
see you in the next lesson. Well, we'll start jumping into using the cloud, so
I'll see you there.
4. Creating a Cloud Project: Okay, so this is going to be
a very short lesson where we're simply going to
create a cloud project. And I'll show you
how that works. So the first thing
you want to do is you want to open
vientre resolve, which I already have open here. And then you want to
make sure that you have cloud selected up here. By default you probably
have local selected, which means it's stuff that's on your hard drive,
on your computer. But if you then click on Cloud, you will come to this page where it's going to ask you to log in, enter your free account, enter your paid account,
whatever it is, and then you want
to log in here. So I'll go ahead and do
that with my account. And you can see the name of my cloud library here,
Maxiocloud library. Then I am going to
simply go down to the bottom right and
create a new project. Then we have this window here. Okay. The first step will be
simply naming your project. I am going to name this project Skill Share Cloud
class that easy. One thing that I would
say at this point is just to make things a little
bit easier to understand, I would name your projects and add the word cloud
in there somewhere. You'll know what I
mean in the future. But I think especially when
you're getting started, it's going to help you kind
of wrap your head around the whole cloud process and what is a cloud project
and maybe what isn't. So I would highly
recommend doing that. And so for this project here, I'm just going to call this
skillshare Cloud class to make things very easy. And then the next thing
that you do is to choose the location
of your project. Media, long story short, that basically means select
a location where you want to save the media that you're going to have
for your project. It's that simple. That's
where all your cloud files, so to speak, are
going to go, and all your source camera
files, all that stuff. So the first thing
I'm going to do is simply click on Change Location. And I've already premade
this folder called Resolve Cloud
Projects just to keep everything organized
and keep all of my resolve Cloud projects
in one location. You don't have to
do that, but that's just the way I like doing it. And then I've also premade
this folder here called camera files with all of the media that I'm going
to use in this project. I would highly recommend keeping everything consolidated
in one place. Because not only is it better for organizational purposes, but it also helps wrap your head around where everything is,
where everything's going. So I'm going to make
my media location, this folder here,
resolve Cloud projects. And I'm going to open
that and then from here. So the cool thing about cloud
projects that's going to blow your mind is
that you can make them single user projects. Just think of that as the traditional way you
think of a project. You create a project
and resolve. And you're the editor,
you're the only editor. You're the only person that
works on it, and that's that. Now imagine a scenario
where you and a friend, or you and five
other filmmakers, or if you have a
production company, you and your three
editors you hire, or whoever you can have it
so that multiple people have access to this project no matter where they
live on the planet. Which is really cool. I'm going to stick with set
project, a single user. We will cover this later, which is one of the coolest
features of a cloud project. But for now we're going
to start with this to keep things easy, okay? And then the next
one is synchronized storage with black magic cloud. So this is a no brainer. This should be pretty simple. And just as a very
quick overview, what happens with
cloud projects is the nuts and bolts
of how they work is that you go out
somewhere, you shoot, you import that footage
into your project, your cloud project and then
resolve will automatically convert that footage
into a small file size. I don't want to say low quality because it's very good quality. It converts it to
a small file size which are called proxies, and it will then upload
those to your cloud account. If you created a cloud account, that's where it'll put them. It'll put them up on
those 2 gigabytes or 500 gigabytes or
whatever you purchased. So it's asking, do you want
to sync the proxies only? Which is what I would recommend, which is why it's
a default setting, do you want to sink
the proxies and the original footage
for this one is the only one where
I would say you obviously need a lot of storage, but it's really not necessary. I think it's a
very small portion of the population that
would need the originals. Like if you have a big
production company, otherwise this is the
beauty of the cloud. Projects then don't
sink media at all. That basically turns it into
a project as you know it, where you just jump in there and work and edit and nothing
goes to the cloud. I would always
select this minimum sync proxies only for now. And then another cool function, this is nothing
but cool features, allow remote camera access. There is a new app that's called Black Magic Camera
that you can download to your iphone or ipad. And what's really cool that
shows you where the world is heading in terms of
shooting and multimedia, and filmmaking is with this app. If you download it to your
phone, it's absolutely free. Which is awesome, because
there's a lot of apps like this that sell for
30, 40, 50 bucks. But it's free. It's a very
high quality camera app, much better than the camera
that comes on your phone. And what turning this on allow remote camera access,
which I will turn on. It allows you to be able to have a project
you're editing, you're working on it, and then anyone who's associated
with this project, like if you have a multi user project or
even just yourself, if you're using it as
a single user project, you can whip out your iphone, open the app, record
whatever you want. A short interview,
some B roll footage. And then the second you
hit stop recording, that footage is going to go
straight to your project. Straight to the cloud,
downloads to your hard drive. And when you open
your project again, that media is going to be in your media bin for you to
edit with and work with. It's really cool, I would
say, let's turn that on. And then you just
simply hit Create. Okay, now I have
a cloud project. In the next lesson,
we're going to jump into actually making something so you
can see how all of this works and how all
of this flows together. I'll see you in the next lesson.
5. Importing Media: Okay, so here we are. We have a Cloud project
and now we're going to import some media and go
over exactly what happens. I am simply going to go into my footage here and I'm going to go over into
the folder I created, if you remember, resolve cloud
projects, my camera files. I'm going to just
select all of these and drop them in to add
them to my project. Now here is what's
happening now. As the second I drop them in, the footage starts
getting that little P X, Y icon in the bottom left, which stands for proxy. Okay, by default these clips are actually a very high quality Apple Prores 444 and they are
in ultra HD 38 40 by 21 60. So basically pros 4444k files. For a lot of people this size file is way
too big to work with, way too big to edit with. But what right now
Diviner resolve is doing. It is generating
proxies of all of this media in the background and then it is also
uploading them. If I click on this little icon
in the bottom right here, that just tells you what's
happening in the background. If you want to click on that, it'll show you what's happening. But really as you're going along and you look
at your files, if there's the little
cloud with a check box, you can see how
that's showing you here one at a time
as it's popping up. But if you see that cloud with the check box, for example, that means that file now has
a proxy file associated with it or a very small file size
but high quality file size. It's been created for you to work with or other
people to work with and it's been uploaded
to your cloud storage. And you can see that already. It's that fast. It's already media has been uploaded
as it says there, any clip that has the Xy and the little cloud checkbox
means that that clip is done. And really you don't have to
wait for this to be done. You can jump in and
start working right away because it does all of
this stuff in the background. And that is a huge part of what the cloud workflow
does and it's that easy. You really didn't do anything. I literally just drop
the footage here and resolve is doing all of this on its own in
the background. This used to be
way harder to do. You used to have to do all
this stuff on your own. Think of your file structure, link up your clips, unlink your clips, and
remember all of that. It's as easy as by default
in a cloud project. If you go up here
to the top right, this little proxy dropdown
menu is selected. That means that whenever
you are editing, that resolve will use the
proxy files by default. If you click on this,
you can see it says prefer proxies right here. Prefer proxies, prefer
camera originals. At this point, there's
very few situations where you would turn that on. Especially if you're editing on a laptop on a really
small screen, you probably won't be
able to tell a difference between camera
originals and proxies. Even me here, I have a
four K monitor, it's 27 ". And comparing the proxies
to the originals, I mean, it's really hard
to tell them apart. That extra quality is really only necessary when you're doing stuff like visual effects, color grading, and
things like that. Or you can disable all proxies completely for the project. Also rare that you
would do that, usually you would have just
prefer proxy selected. And really from here you would
just start editing again. You don't have to wait for
all of this to finish, you can just jump right in. So with that being said, in the next lesson I
want to go over it just for all of you
nerdier types out there. I'm going to go behind
the scenes and show you what exactly is happening
on your hard drive, What's being created, where
is it, How do you find it? You really don't
need to find it, but I'll just show
you all that stuff for those of you
that are interested. So I will see you
in the next lesson.
6. Behind the Scenes: Okay, so here's another
nice and quick lesson where I'm going to show you what
happened behind the scenes. When you added your high quality four K progress files
into Vincia resolve, what did it do in
the background? Where do these proxies
live? What's going on? So here we go. If you remember, I created this folder here called Resolve Cloud
projects, right? And then I also had camera files created where I put all of
my original camera media. Okay, so the second that I created this
skillshare cloud class, Davinci resolve made
this folder here, which we'll talk about
in a little bit. This is the folder, you could call this
your Cloud folder, where all of the
cloud media will go. Again, we'll go into that
in a few seconds from now. But the next thing I want
to mention is the second that I dropped in all of
these clips into my project. Okay, resolve
created this folder here called proxy media. When you saw all this
little proxy icons and you saw that it was
working and that it was saying generating proxies, it automatically
created this folder and it created proxies. For example, this first shot
here is now 4 megabytes. It went from being a
four K prores 444 file, that's 615 megabytes, to
be a four megabyte file, that is an HD H 264. Now don't go going
crazy if you think that's not a high quality
file. It looks great. And again, proxies are only
temporary working files. They're not going to
be your final file that you explore
in full quality. Whenever your individual resolve and do your final export, it's smart enough to know, hey, we're not exporting this stuff, we're exporting this
high quality stuff. So that's just something
to keep in mind. These are only for
working purposes and you can see how
tiny they are now. Okay. And it did that
with all of them. You have all these
tiny little files. So now you can see how 2
gigabytes might be okay to work with when it comes to the cloud storage that we talked about in
the earlier lesson. And you can see how you doing the 500 gigabyte plan
is a ton of footage, probably more than you'll need for a very, very long time. And that's what happens
in the background. Then it takes these files
here and it uploads all of these files to
the cloud, okay? If you have a black
magic cloud account, whether it's the two gig, the 500 gig or more, all of these files here are
on the cloud now, okay? Then if you work on
another computer, another system, or if you
share with someone else, if you create a
multi user project that we also talked
about earlier, then everyone has access
to this stuff here. And then I'm going to
actually go a little deeper and go into
the settings here. I'm going to go into
black magic cloud. These are the settings, you
can always change them. The project metered
location that I selected. Skillshare, demo drive,
resolve cloud projects. Then here's the black
metric cloud storage. I remember I had it
at the sync proxies. If I selected sync
proxies and originals, then what would have
happened is it would upload all of these original
progress files and these, but we
don't need that. I have sync proxies and then generate
proxies automatically. Great for all you tech
nerdy types out there. Proxies are created as H26 48b 42010 P. That's all
you need for editing. However, you can have the option of going in here
and you can always switch it up to be H 26510 bit
or even Prores ten bit 422 in ten P. If you have
a very slow computer, this should be enough
for most computers. But if you have a
very slow computer or ipad because vent resolve
does run on the ipad, you could even switch it
over to this 2648 bit 420. That's everything I'll
say about this for now, but I just wanted to show
you what is happening here. And then this, as I
mentioned before, is your Cloud folder, which is kind of why I told
you to for your projects, add the word cloud to it. That is what's resolved is
going to zip up to your cloud. So it makes this automatically and then resolve Cloud projects. It mimics my original folder
that I made camera files. And it's showing me the
file structure that I have for my proxy footage. And that's basically it. That's a very simple behind the scenes look of what's
actually happening. It created these extra
folders automatically. It uploaded stuff to the cloud, and it basically has
everything ready for you to work either by yourself
on multiple computers, on multiple devices, or to share these projects with other people so they
can start editing. Okay, so that's basically a short class on what's
going on behind the scenes. In the next lesson, we're
going to start editing a very, very basic project to see how it works across
multiple devices. And so you can see how
cool this really is, so I will see in
the next lesson.
7. Working on Multiple Devices: Okay, so now in this
lesson I'm going to create a very basic timeline and
show you how this works, what happens across
multiple different devices, and how you can edit on
multiple devices and have everything automatically
synced up and okay, so now what I'm going to
do is I'm going to go over to the edit page and I'm
actually just going to, you know, grab a few shots. This is actually already
a pre edited short film, so I'm going to grab,
just say these first six. Drop them in and
keep it super easy, super simple, so we
know what's going on. Okay, so there we go. And it's just this kid is
driving through here. I'm actually going to mute that and we're going to edit this across
multiple different devices. That's basically, that's all
we're going to do right now. And what just happened is it
created this new timeline. I want to name this cool
movie, There we go. The only thing
that happened is I created this here and now this timeline information
went up to the cloud. And it's now on
my other devices. It's on my Macbook Pro
and it's on my ipad. Now I'm going to switch over
to one of those and to show you how seamlessly
everything syncs up. So let me switch over to my Macbook first to show you how everything
is going to come in. Okay, so now here we are. We are on my Macbook Pro. And as you can see, because I am under cloud and I am logged into my Cloud
account automatically, that project that I made is in my project
library skillshare. Cloud class
automatically showed up. I didn't import anything,
I didn't do anything. That's the whole
purpose of the cloud. And now here it is on my laptop. Okay. So now I'm
going to open that. I've never opened
that on here before. So what will happen is when
you move to a new device, or if you share the
project with someone, which I will get to
in the future lesson. But if you're sharing
this with someone, or if you're opening it
up for the first time, you double click to open it. We're somewhere that
looks very familiar. It's basically the
same page that you got when you created this, but now it's called Open
Cloud Project, Okay, So just like before you can see, you simply just
choose the location where you want to save
this project media. In other words,
where do you want to put the media that is going to download
automatically from the cloud? In other words, the
proxy media that vientre resolve created on my desktop and then
also the usual stuff that you should know by
now, sync proxies only. Yes, that's a great default. So I'm just going to go in here. And I created a folder here called Resolve
Cloud Projects, MBP for Macbook Pro. That's where I want
to save this stuff. I'm going to select that
as my project location. Hit open. Here we go. Same symbols that we got before. You can see how
quickly it populates. And you can see the little
dash mark that's done. The proxy logo, the proxy icon and the little cloud media. Downloaded media, downloaded. That's how fast it was. And you can see my movie
here, my cool movie. You can immediately
start working. And you saw how fast in
real time is downloaded. So now if I click
on my cool movie, there's the movie that you know, it's muted and everything's
as we remembered it. I can go through here and
scrub it and you can see that it's going to play it back with no issues whatsoever. Then I can then you take this. I can be traveling, I
can be at a coffee shop. Wherever I can start working on this project, I
can take this here. And let's say I want to just cut out one of those shots here. And then maybe I will take a few more shots here and just tack
those on at the end. I'm going to do a few edits. I'm going to go into effects. I'm just going to grab a title
and I'm just going to say, add this here regular, well, let's do a
different font here. We'll go with this one. And, you know, nothing fancy. I'm just doing this
so that we can kind of see this
on my next system. I'm just going to
do that like that. Okay, but you can see we just made a very quick edit here. We added the title here, and then we added
these extra shots at the end from the short film. And then we just
basically save it. And then this will
automatically sync up on back to my desktop, or if you have an ipad with
Davinci resolve on it, it will also sync up there. So I'm now going to switch back over to my desktop
so you can see how these different changes took effect in my other
system, on my desktop. So I'll see all
there. Okay, so now here we are back on
my desktop system. And again, here's the project. I'm going to open that
up. And here we are. Here it is once again with those exact same changes that
I made on my Macbook Pro. And you can see
the same changes, there's the text and the additional files that
we added, the other clips. And that, in a nutshell
is the very basics of how this black magic design
cloud workflow works. You import footage, Vinci does all these things in the background where it
throws it on the cloud, downloads it to other devices. Okay, everything I've shown you so far is for single user mode. I would imagine that's how the vast majority of
you would use this. That's how I honestly use it. Most of the time is
on single user mode. For me specifically,
my workflow. As an example, let's say
even my classes, I go out. So I come home studio, I import my footage
into my desktop. It works its magic
in the background. I grab my laptop. I can go to a coffee shop. I can work on my edits there, or if I'm traveling and
I can grab my ipad and do that and work on my ipad
Pro with Divine Resolve, I come back to my
desktop, I keep working. I do my grades, I
do my soundwork, I tude titles, graphics,
all of that sort of thing. And another great
benefit of this, it's that it has all
of your footage, all of your media,
your timelines backed up on multiple
different devices. If you don't already
have a backup system, you know, the cloud kind
of helps with that. So now I know that
this project here, it's on my desktop, it's on my time machine backup, it's on my Macbook Pro, it's on my Macbook Pro
time machine backup, it's in the Cloud, it's on my ipad Pro as well. And it's just, it's backed up in a ton
of different places. So hopefully that
showed you the basics, what's so great about the cloud. In the next lesson, I'm going to jump into multi user mode. So you can see how cool that is if you work with
multiple people, or if you work on big projects. Or if you have a
production company where you want to work with different people from
around the globe. So I'll see in the next lesson.
8. Multi User Collaboration: Okay, so here we are. In this lesson, I'm going to do a brief overview of
the multi user mode. That's definitely a mode
where you could spend, I could make a whole class on, but I think this will
give you the basics. And then from there, if you want to explore a
little bit more, it's also pretty intuitive. Here we go to set that up. The first thing you have
to do, if you remember at the beginning we actually
set up a single user mode. But if we go into
the settings and go into your black magic
cloud settings, all you have to do now is turn on multi user collaboration. Check that off. Hit save yes,
say before collaborating. And then watch down here
at the bottom right, you get a few new icons. You get this guy that pops up here for collaboration mode, you can see just opened
up a blank timeline, but you can easily
just switch over back to your coal movie. Okay, if I want to
share this project now, all I have to do is
go to the little cloud icon here in
the bottom right. Click on this little globe
here that says go to Black Magic Cloud
Storage. Click on that. Then what it does is
that it takes you here to your project library. Now your project library is what has all of your projects. Think of it as the container, the bucket, it has
all of your projects. Here's the one that we created for this project
skillshare Cloud class. But what you want to do, you actually want to
click here, okay. And then click on
this little here. And you can see it's
showing all of my projects. Here I go. Here it has my
account right there. And then I want to share
down here at the bottom. One thing to keep in
mind though is that you are sharing your library. So in this case, Beam Box
Studio Cloud Library, I'm sharing the library with
all of these projects here, so keep that in mind. But basically, if
you want to share just a single project, that might be a case where for that one month you
pay the five bucks. Have that one individual
project library for this one project and
then you shared that. But if you don't want to share all of your
different projects that might be related or
unrelated to something, then that's just something
to keep in mind. And you might just want
to have to purchase an additional project
library for $5 for that month and then
you can go that way. In this case, I'm
going to go ahead and share this project library which includes the project that we've been
making right here. So you simply just go share, then you end up here and
then you just type in the e mail address to whoever
you want to share it with. So I'm going to go ahead
and do that share. Okay. And you can see
here that's the person, obviously not a real
person, Editor Jim Smith. That's who I'm sharing it with. Okay, so let's switch on over to their end to see what happens. Okay, so here we are back. This is say, the
editor's system. If you can see what
happens is now here that says shared
with me and it's loaded. That project library that
has been shared with me. Here a new icon, we see the multi user icon under the same project
Skillshare Cola. If I open this, two things
will happen depending on your set up in your system is it'll either ask
you like before to select your location to
save your media files. In which case it's easy enough just select where you want
to save those proxies. Or if you have a drive
already where you've already downloaded
the proxy media, then it may just open up
automatically like this and link up to the proxy files
that are on the cloud. And you can see I'm here. So I can just go straight into the editing window,
my cool movie. And I could go in here
and start editing. I could say, let's say we
want to go in here and do something very basic
like maybe I will, maybe I'll go here and just
delete this title here. And then maybe go to the end
and just delete that there. And then what you will
see on the other end, and then you can
see on this system, I now have this
little icon here. Okay? Which basically
means that if I hit that, it refreshes my timeline. And you can see the
opening title is missing. And then that last clip
at the end is missing. We now have the little icon of the user on the other end
that is editing right now. If someone has opened the timeline before I have,
they're working on it. It will not let me go in
here and make any changes. You see, I can't grab anything, I can't move anything because this person is currently
working on the project. Really, it depends
on the situation. Sometimes people are working
in tandem with each other. In most cases they won't. This is just for the purposes of showing you how it works. If you are in most cases I'd
say you would open it up, you would click on the little refresh icon and see the work that
the editor has done. You could also go into the
chat window, for example, leave a message and say, hey, bring back the title. And send that over the, over here on this end you
can see that I now have this little icon there and hey, bring back the
title. No problem. There we go. And it's very cool, you can send messages
back and forth. Again, this is just showing both people on the system
at the exact same time, which may or most likely
not be the situation. But then I can go here
and I'll just do it. Undo the edit. There we go. I brought back the title. Then maybe I will also take this trim that down a
little bit. There we go. And then here we have on
this end the response, the little refresh icon there. Now it's updated,
there's my title, I'll have it back again. And the edit looks
just like that. Basically, that's the nuts and bolts of how the
multi user project works. You can have multiple
people involved. You can have the colors,
you can have an editor. This can be just so that you are viewing something in a
higher quality live. It very easily cuts out all the middle steps of
having to export a new file, upload it, e mail it to someone. You can do everything inside
Veny resolve right here. You can edit, you can have
remote editing sessions where you're watching someone edit and you're refreshing the edit. I mean there's endless possibilities of what
you can do with this. And then when you're done
you can just, you know, move it over to color and
have them do that or, you know, the Falte page
or for the sound design. And it's just a great way for multiple people to
collaborate to work together, whether you're honestly in the same building or in different systems
across the globe. And with the power
of the proxy files, I mean, you can see
how great they look. I can go into full screen. No issues with the
quality there at all. And it's that simple. So in the next lesson I'm actually going to
show jump into one of the cool features of using
the black magic camera app. Let's say you're out somewhere and you need some new footage. I'm going to show you how to use that app so that it works
really well and you have that footage right
back in your project seamlessly. So I'll
see you there.
9. Blackmagic Camera App: Hey, what's up guys?
So in this lesson, I'm just going to
very quickly show you the black magic camera app. So first off, it's very easy to just go into the App store, search for black magic camera, and you can see you can grab
it here, download it easily. I'm just going to go
ahead and open it there. And you can see right away that it's a
pretty heavy duty app. I'm not going to go
over every bell and whistle in this lesson. I would say do play with it. But the one thing that
I did want to show you is if you go into the chat, you can see that the chat
that you had is in there. And if you go into
the media button, you can see that all of the different Cloud
projects are here. I have Skilture Cloud class selected because that's what
we're going to be doing. So now I'm going to switch
back over to the camera, sorry for the bad audio. I'm just basically using the iphones built
in camera for now. But I'm going to switch
over and use a lob as I'm recording directly
from the camera to integrate this
into the project. Okay, so now I'm recording directly into the black
magic camera app. And what will happen
is this footage will, as soon as I stop recording, it will automatically be
uploaded directly to the cloud, directly to the project
that I have this set to. And it'll download on both the desktop version and the Macbook
Pro so that who's ever working on that can
use this footage from this phone in any of the edits
that they're working on. So let's switch over so you can see exactly how this works. Okay, so now here we are
back in the Cloud Project, and what you'll notice
is that now we have this new folder here that's
called camera uploads. So if I click on that, you can see here camera
uploads resolve, automatically creates that
when you use the camera app, the black magic camera app. And here is the clip that
I shot a few minutes ago. It's honestly like magic. You shoot it, you hit Stop. Even if you're on cell data, even if you're on Wi Fi,
no matter what happens it, it'll create proxies on
your phone, in the app, and it'll upload those
proxies just like any other camera and it downloads them directly
into your project. And if I go here, we
can play through this. And you can see here is the video clip that
I just recorded. And so you can easily
go through here, you know, mark your end points, work out that hit out, drop that in and okay,
so here's the clip. So let's watch through
that. So now I'm recording directly into the black
magic camera app. And what'll happen
is this footage, as soon as I stop recording, it will automatically
be uploaded directly to the cloud so you can see
how that can be very useful. This is just a guest,
but I can see how in the future black magic
cameras will have something like that built in
and other cameras to come. But it's very cool that you
can just shoot something on the app and it automatically
shows up right here, directly into the program. So that is the black
magic camera app integrated into a cloud
project workflow. Very cool. We're coming up to
the end. In the next class. I'm just simply going to go over the export options,
so I'll see there.
10. Exporting a Cloud Project: Okay, here we are at the
end and now we are going to simply just render out
export the movie we made. Really, this is no different than any other Davinci
resolve project. The only word of warning
as I will tell you, is it doesn't matter on
this little drop down menu. It doesn't matter if you are on proxy or if you are
on preferred camera. Originals. Davinci resolve
will always be smart enough to export at the
highest quality you have. But the only thing I'll say
about that is you want to render on the system that has
the highest quality media. Right now I'm on my desktop. That's the version that has the Apple Prores 4444k files and that's where
I want to render. If I tried to render
on my Macbook Pro that only has proxies resolve would give me an
error message saying that the source
media is missing. But if you went down
and just checked off this use proxy media, it would let you export. However, again, a
word of caution. You can't export a four K
file out of ten DP footage. Just remember that proxy
media are smaller files. They are 108 P files, they're H 264 files. If you were doing
your final export, you would want to use the
full quality Pros files. Always use your computer that has the highest
quality files. One other thing I will say
is that whenever you see this little purple
line here that is telling you that
that is proxy media. I'm going to show you
something Right now. I have proxy selected. Which is fine because I know I have the
source media here. But this purple line
telling me that this is a lower quality
proxy file here. Okay, watch. If I then go to render resolve is warning
me one or more clips have missing or offline. Source is the key word, source media or frames. If I hit ad, it'll show up here. That's where I'm rendering
it Then if I hit Render, okay, all of this stuff here is using the progress
4444k files. All is good. Then
once we get here, I'm going to get an
error message because it's telling me or reminding me, hey, this is the proxy file, you do not have the
media on your drive. You see here is
the error message, render job one failed
the clip A 00112111, clip 17, which is
this clip here, you see which is
that clip there. It stopped. It failed because it doesn't want me
to render low quality media. That is something to keep
in mind when you are rendering render footage when
you have the source media. If I then go in here, delete this render
file here and then go back to deliver,
do the same thing, Add, then if I hit
Render No Error Message, it's going to go through, it's going to render this
entire project. It's using the highest
quality footage that you have that will give
you the best results. That's it for this lesson. Let's move on to the
last lesson of all. We're near the very, very end. I will see you in
the next lesson, but you can see this completed. No error messages,
highest quality media. It's just something to
remember for your exports. I will see you in
the next lesson.
11. Final Thoughts: Okay, so that's the class. I hope you've got
a lot out of it. We've covered a
lot from creating a black magic cloud
account, multi user mode, the black magic camera app sinking your footage
across multiple devices. Do leave a review if you can. That really does help a lot. Also, feel free to follow me on my Youtube channel right here at Fre Treno Color and also check out my other
classes on color grading. Let me know if you
have any questions in the discussions below. And thanks again, and
I'll see you later.
 Fred Trevino, DP/Colorist & Top Teacher