Transcripts
1. Intro: HDR is a mystery to
a lot of people, but it's already in
a lot of the shows we watch and movies we see. HDR allows us to take
full advantage of the cameras we use and see every bit of
information we capture. If you ever wanted to get a clear understanding
of what HDR is, then this class is for you. I totally understand new
technology coming out and seeming overwhelming
and confusing, especially when you hear so many tidbits from
all over the place. In this class, you're
going to learn not only what HDR is and isn't, but the different types of HDR, what makes a monitor
a true HDR monitor, and a little on
grading HDR footage. It's for anyone wanting to be on the cutting edge
of video technology and wants to learn a new skill
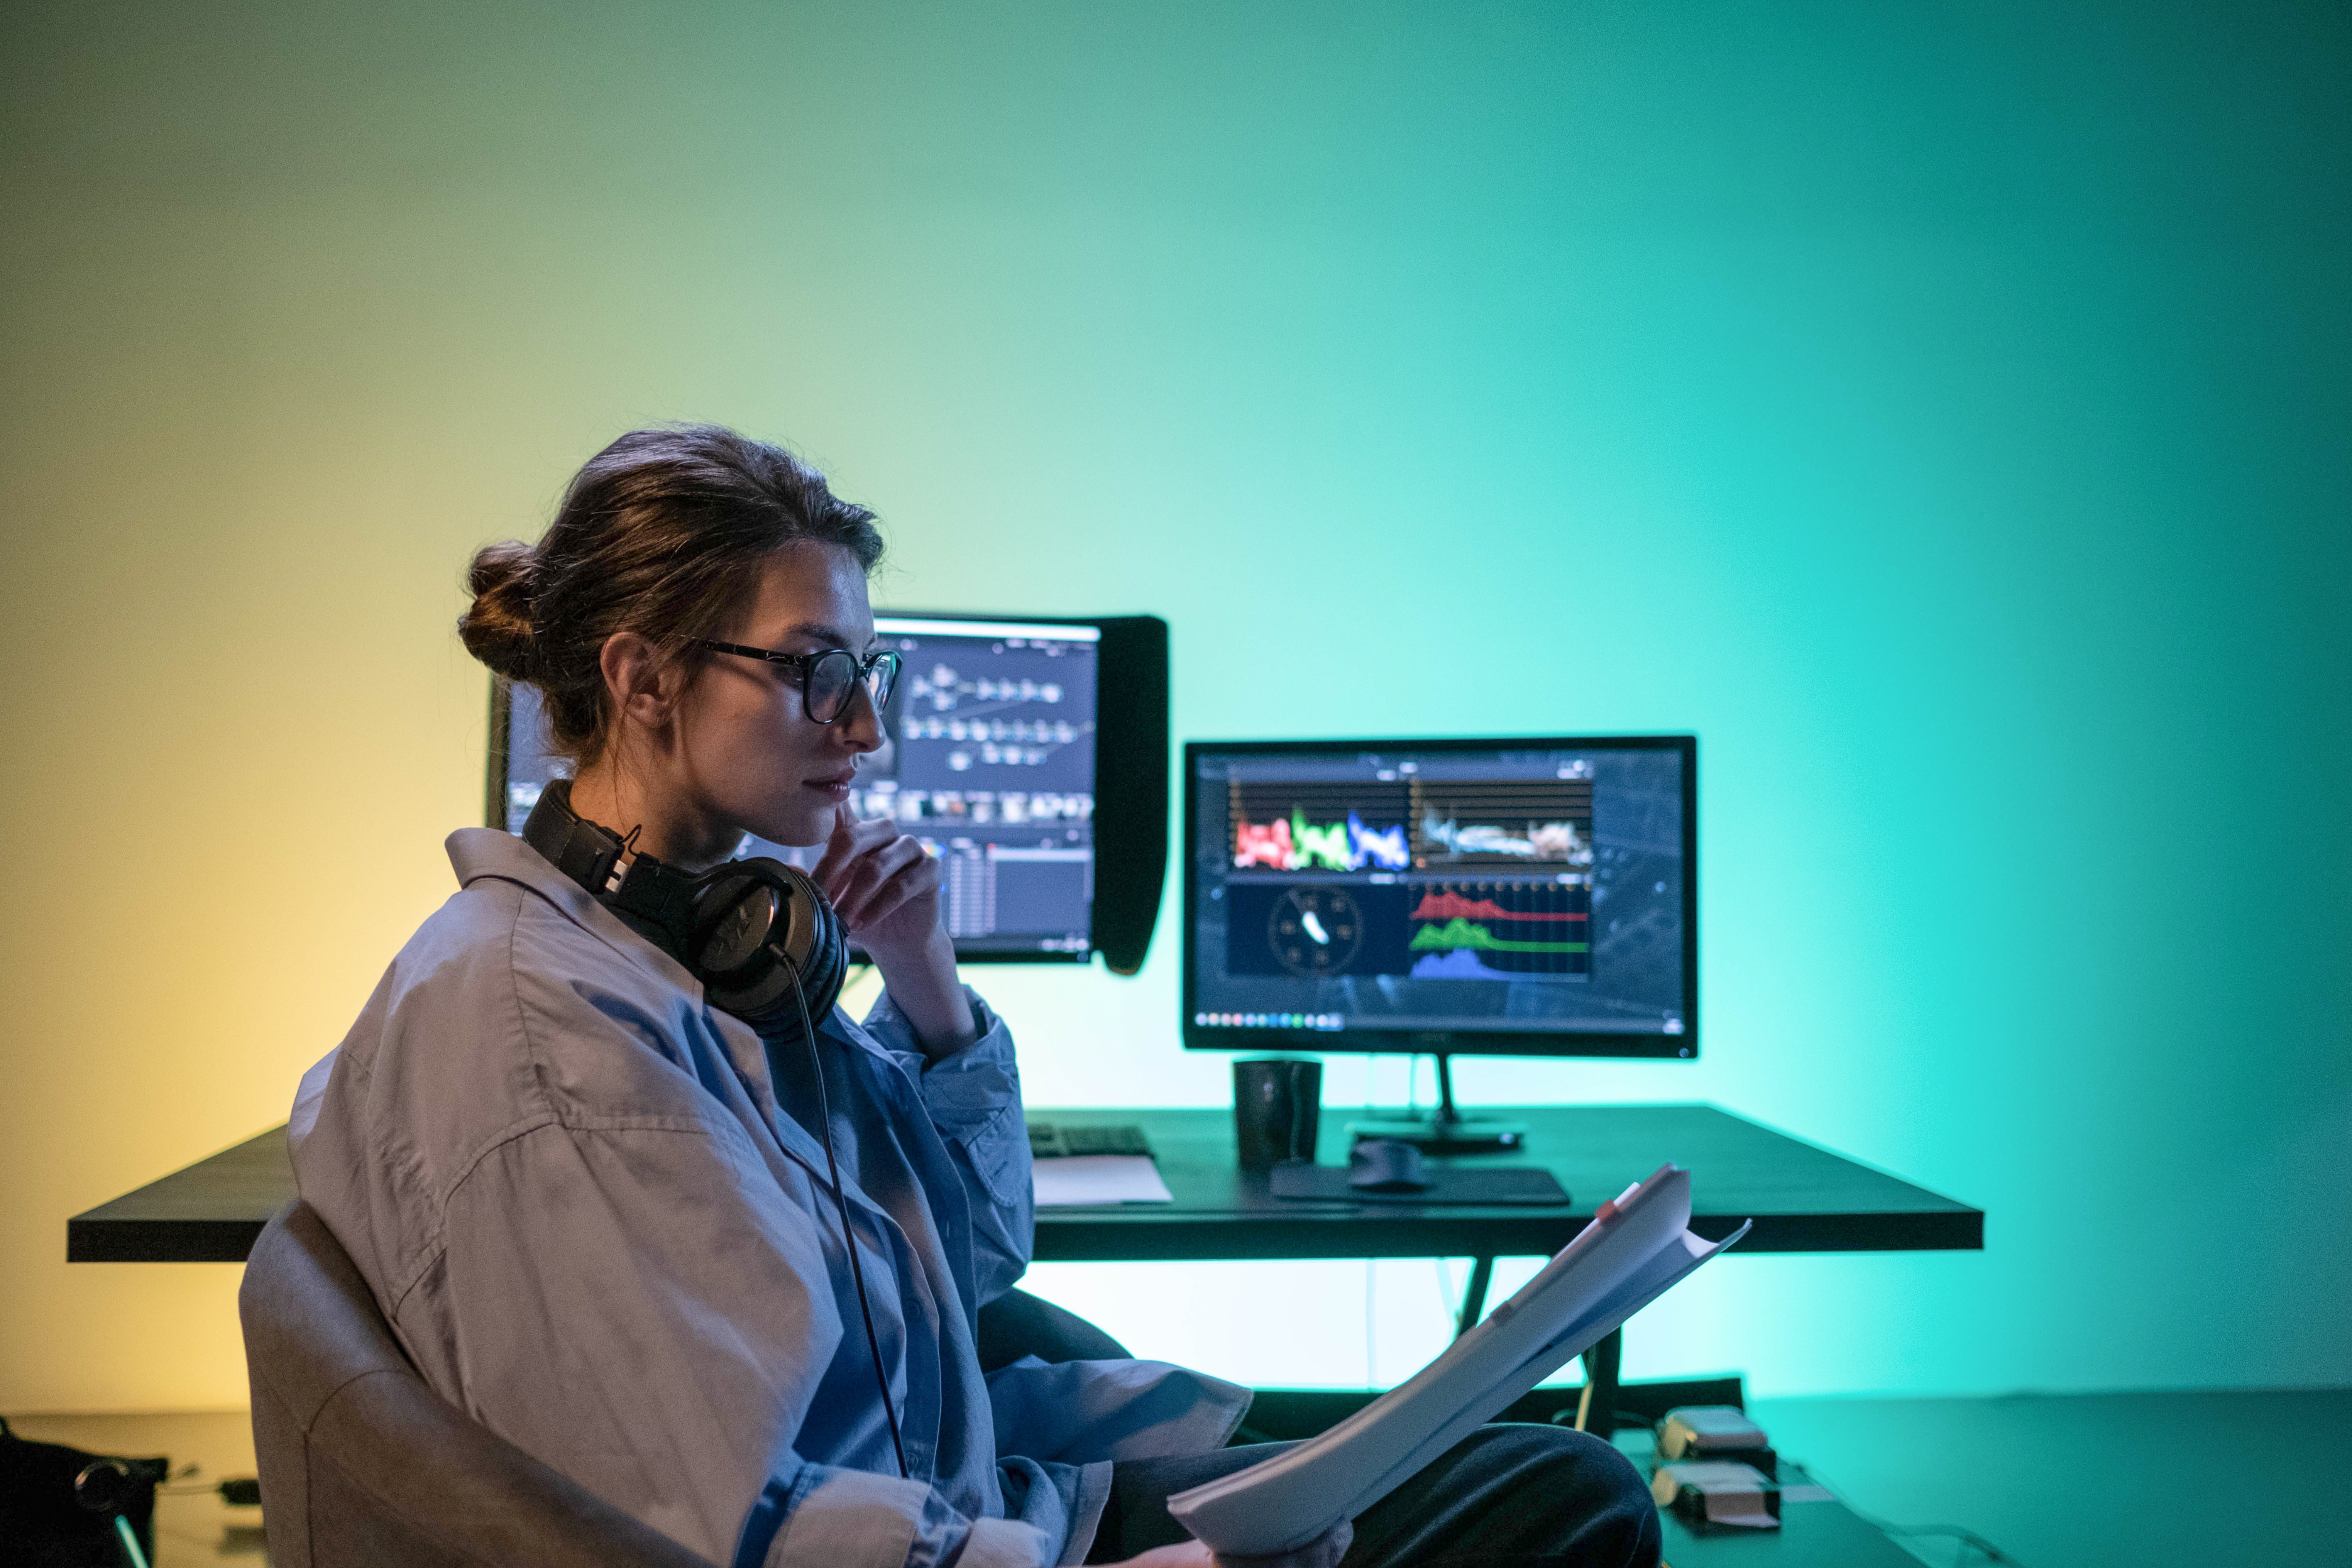
to bring to their projects. I'm Fred Trevino and I've
been a professional colorist for over 10 years for
bean Studio in New York. I've graded hundreds
of projects for clients from HBO to
Versace, to ESPN, and more. I've also worked with tons
of filmmakers from all over the globe and have graded
over 50 feature-length films. I know what you'll learn
in this class will put you ahead on so many
levels and afterwards, you'll understand more clearly
what HDR is all about. I even have a project for you where you'll grade a
single clip and HDR just to get that experience. So if you're ready to
make your footage go from this to this, let's get started.
2. What Exactly is HDR?: First things first.
Before we get started, let's go over what
HDR is exactly. HDR stands for high
dynamic range. A high dynamic range image
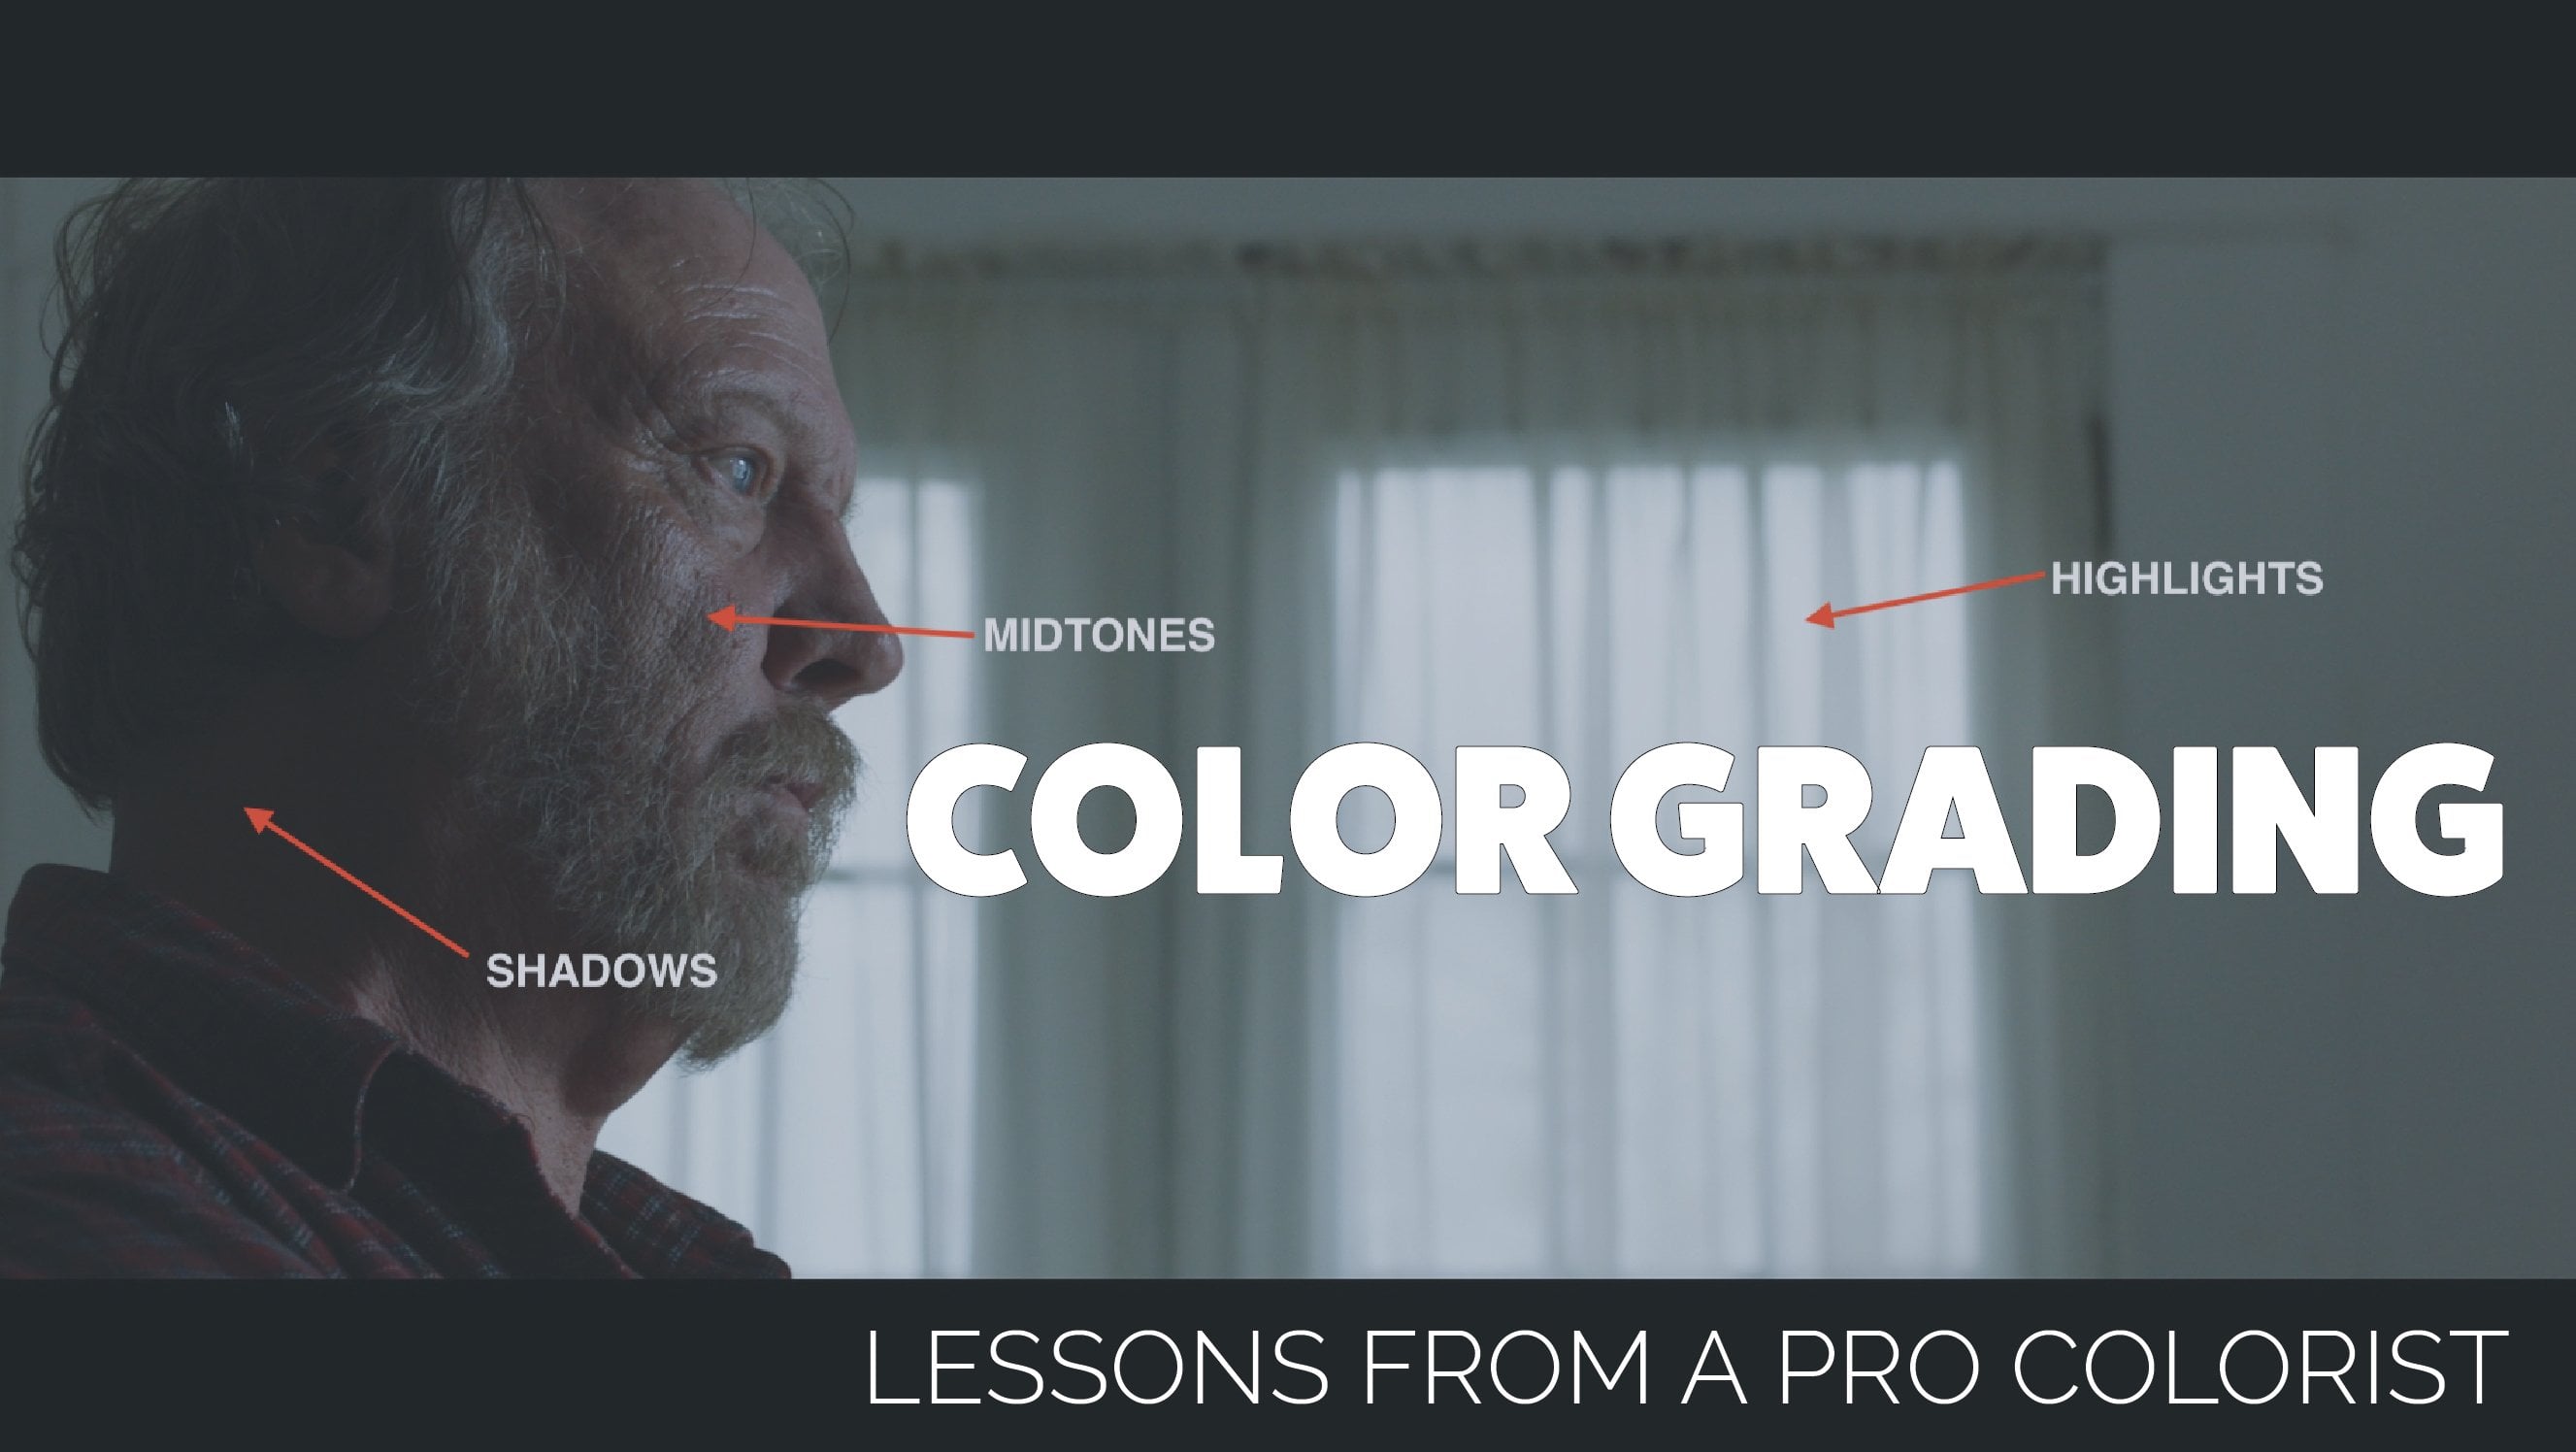
is when a high level of detail is captured and
shown on a HDR monitor. This is especially the
case in the highlights or brightest parts of
the image and shadows or darkest parts of the image. Usually, NSDR or normal
standard dynamic range images, you basically have to choose one over the other or
in other words, do you want to capture
detailed highlights but underexposed shadows, leaving no details or capture details
shadows but overexposing highlights and blowing
out the details? HDR gives you the benefits of both capturing nice
detailed highlights, mid-tones, and shadows. Then with the HDR monitor, you can see all the
information you captured. On a normal SDR monitor, you wouldn't be able to do this. That's basically it. Dynamic range is the range of information a camera can
capture and for a monitor, it's the range of information
that monitor can show. This also gives you the ability in post-production to do
more in the color grade and really get the most
out of your HDR footage. In the next lesson, we're going to cover
some terminology so that we can make sure
we're all on the same page. See you there.
3. Know Your HDR Terminology: For you to really
understand HDR, I think it's important to
understand the specs of SDR or normal standard
dynamic range images. These specs are really based
on old technology like tube TVs which is why HDR
is an important update. Here is a chart of those specs and then I'll
explain what they all mean. Let's start with the specs
and how they compare to the most common HDR
format, which is HDR10. First, let's talk about nits, which is a measurement of how
bright a display can get. For SDR, video
footage is graded and mastered for a display which can have a brightness
of 100 nits. For HDR10, that range is much larger and can
be up to 10,000 nits, but the most common peak
brightness for HDR10 is 1,000 nits or to a
lesser ex10t, 4,000 nits. With this, you can see how
much more luminance values you can see an HDR versus SDR. Now let's talk
about color space. SDR is typically graded
and mastered for a Rec. 709 color space. Color space is basically how many colors that video
footage can contain. What you see here
is the range of colors the SDR footage can show you and now this is the range of colors that HDR10 can show you, which is known as Rec.2,100. However, the most common
color space that HDR10 is graded in mastered
in is this color space, which is called P3-D65. Now why is this? Well, the most common reason
is that there's very, very few affordable
monitors that display Rec.2,100 but there's a lot like Apple
displays that do P3. The same goes for
the nits by the way. This is another area where consumer technology hasn't
really caught up yet. Even though most HDR10 con10t is mastered for 1,000 nits, your average monitor can
do 350-500 nits at best, which means that
most monitors can't display all HDR information, but we'll get to that later. SDR is Rec.709 and
HDR10 is up to 2,100, but the most common mastering
color space is P3-D65. Next, let's talk Gamma curve. Without getting too technical, a Gamma curve is
basically how blacks, whites and midtones
are displayed on screen to show you how the
image is supposed to look. This isn't anything
like color space or nits where there's a number
value and more is better, it's basically the math to apply the correct Gamma curve to show you what the
image looks like. Now these Gamma curves have
names and for SDR they are Gamma 2.2 or 2.4 and for HDR10, they are PQ or HLG. I know that's a lot
of information. There's not much more
to say about these, but their names are important
to know for when you're setting up your timeline
in DaVinci Resolve. If you're grading for HDR10, you'll want a PQ or HLG Gamma, and if you're working in SDR, you'll want to 2.2 or 2.4. Now on to bit depth. HDR10 is called HDR10
because it's 10 bits. HDR can be 10 bits or 12 bits, but SDR is usually
eight bits or 10 bits. Among other things, this
determines the range of colors that can be reproduced
from 16.8 million, which is eight bit
to 1.07 billion, which is for 10 bits. All HDR is a minimum of 10 bits. The next important
term to know is static metadata and
dynamic metadata. SDR is static but HDR formats
can be static or dynamic. What this means is that the brightness
range can change in a HDR master project
on a scene by scene basis and even on
a frame by frame basis. So what does this mean
in regular terms? This means that if you're
grading a film and have a bright sunny day
scene followed by dark nighttime scene, each of those scenes can have their own nit range to make
them seem more realistic. The beach scene might have
a peak brightness of 1,000 nits and the nighttime
scene may have a peak brightness of 500 nits. In static metadata, one fixed Gamma curve
is applied based on the brightest scene
in a film and then that's applied across
the entire project. In HDR formats with
dynamic metadata, each scene has its own tone mapping to make each
scene look as intended. In HDR10, which is the
most common form of HDR, the metadata is
static and for SDR, metadata is also static
or non-existent. Which versions of a HDR
have dynamic metadata? In the next lesson, we'll find out when I go over the other types of HDR
formats. See you there.
4. The Different Types of HDR Formats: In the previous lesson, I went over the most
common HDR format, which is HDR10. In this lesson, I'll
go over the rest. But just for a quick refresher, here's those HDR10 specs again. Most of the specs are same, but their differences
are really important. Now onto the next one,
which is HDR10 plus. HDR10 plus has the
exact same specs as HDR10 but this format
has dynamic metadata, so it's the same max
peak nits of 10,000, but more common nits
of 1,000 or 4,000. A PQ or HLG Gamma curve, but PQ is most common. Max color space of Rec 2,100, but common color
space of P3-D65, and it's also 10 bits. Now the next one is an HDR
format with an asterisk. HLG is considered an
HDR format but what separates it from
the rest is that it's backwards
compatible with SDR, hence the name HLG, which stands for a
hybrid log Gamma. Some would call this
extended dynamic range and not high dynamic range because it's very similar to SDR and simply extends the
upper range of an image. This basically means
it's an SDR image, but with added nit
values on top of those, in that peak is only 1,000 nits. One thousand nits is great but it's not 10,000 like
HDR10 and HDR10 plus. Here are the specs. It has no metadata, a peak nit range of 1,000 nits, only uses the HLG Gamma curve, has a max color
space of Rec 2,100, but the more common
color space is P3-D65, and it's 10 bit. Now the last one
and probably one of the most well-known HDR
formats is Dolby Vision. The main difference for
Dolby Vision is that a $2,500 a year license fee is required to master
in Dolby Vision and that the bit depth
is 10 or 12 bits. Here are those specs. It has dynamic metadata, a max range of 10,000 but more commonly
mastered nits of 4,000 can use the PQ or
HLG Gamma curve, but PQ is the more common one. Color space is up to Rec 2,100, but commonly uses
P3-D65 like the others, and as mentioned before, a licensing fee is
required to use this. Another very cool feature of Dolby Vision is that
it can use metadata to optimize the viewing
experience based on what specific TV or
projector you're viewing on. It knows if you're viewing on, say a specific Sony TV, knows that TV's
capabilities and uses the dynamic metadata
function to tweak the image based on
that TV's abilities. Hopefully, this helped demystify the different HDR formats. In the next lesson, I'll
briefly go over what makes footage you shoot
on your camera HDR. You can't just grade and make HDR footage out
of any footage you shoot. In the next lesson, I'll
go into more detail.
5. What Makes Footage HDR?: Now onto what makes
footage you shoot HDR. If you want to shoot
grade and deliver an HDR, you can't do it on
just any camera. Luckily though, you can do
it on a lot of cameras. As long as your camera
shoots in 10-bit, you should be good. Common video formats
that are capable of HDR are RAW, ProRes and h.265. If your camera only
shoots eight h.264, then unfortunately, your camera won't be
capable of working in HDR. Also technically,
color space is not part of what legally
make something HDR, but a wide color gamut like P3 and above are always
used with HDR footage. Even though
technically 10-bit Rec 709 footage can be HDR, it would be considered fake
HDR to a lot of people. Also, if your camera
shoots in log, that will be a big
added to and shooting something for a HDR workflow. This lesson was short and sweet, now onto what makes a
monitor a true HDR monitor.
6. What Makes a True HDR Monitor?: In this lesson, I want
to go over HDR monitors and what makes a monitor
a true HDR monitor. To get the full benefits
of seeing HDR footage, you need monitor with
the right specs. A lot of monitors
get close to being HDR and have some of
the specs needed, but very few have all
of the specs needed. The most common
of these is nits. Like I mentioned before, the average monitor is only 350- 500 nits and HDR requires
a minimum of 1,000 nits. If you're wanting to
see Dolby Vision, you'll most likely need
a 4,000 nits monitor, which is very rare
and very expensive. What makes a monitor
an HDR monitor? Well, simply put, it just needs to match the format you're
watching and also state in the monitor specs
that it supports that format. If your media is HDR 10, your monitor has to say
it's support HDR 10 media and have all of the
minimum specs for HDR 10, which are all of these. If your media has Dolby Vision then your monitor
has to state it's capable of Dolby Vision and have the following
minimum specs. Here are the minimum
specs required to call a monitor a true HDR monitor. As you can see, it's
basically HDR 10 specs. Let me use a few
common monitors as an example and we'll find out
if they are HDR monitors. First, let's start out with
a very common monitor, which is the MacBook screen. This display specs are 500 nits, P_3 color space, has a contrast ratio of 1,500:1, and support for
millions of colors, which means it's an
eight bit display. Ten bit displays should say support for billions of colors. There higher-end 16 inch
MacBook Pro, on the other hand, has a 1,000 nit sustained brightness, 1,600
peak brightness, P_3 color space, a contrast
ratio of 1 million to one, and support for
billions of colors, which means it's
a 10-bit display. This monitor would be able
to show you HDR content. Now here's just a random
monitor I found online. It's specs are 300 nits only
claims a sRGB color space, has a 2,500-1 contrast ratio
and is a 10-bit monitor. This monitor is
not close to being a true HDR monitor yet
claims to support HDR 10, so what does this mean exactly? Well, in most cases, it means that the
monitor can process HDR 10 content and detect it, but just can't show it. This is one of the
things to watch out for. Companies can say monitor is HDR capable just because
their monitor can detect HDR footage even though it doesn't have
the hardware to show it. Hopefully this helps
clear a few things up. In the next lesson, I'll show you the
steps to set up a project and resolve
for HDR grading.
7. Bonus: Setting-Up a Project for HDR Grading: Now, in this quick bonus lesson, I really just want to
go over a very broad, very general overview of grading something in DaVinci
Resolve that's HDR footage. This class was really
just more of a, I guess, you could say an intro to a more advanced topic and it's really just about
going over what HDR is. Now, that you know what HDR is and the
different types of HDR, I just wanted to do a
very quick overview of settings in DaVinci Resolve and the workflow for grading. First things first,
I really just have a single clip that I've
brought in here into Resolve. The reason I selected
this clip, honestly, is because it's a good candidate
to see HDR and what it does and it's mainly because
of these bright lights here. There's a lot of highlights
and brighter areas and clips where you can really
see what HDR is capable of. Clips like this that have a
very broad dynamic range in terms of very bright highlights and then very dark shadows. Because something you'll
probably see once you actually put this through an HDR workflow is how bright these lights can get compared to an SDR image and just how much more range you can really pull
out of the image. The first thing we want
to do is we want to go into the little gear
here in the bottom right and we want to make sure that we're under
color management; that's going to be the most
important thing right now. You can see that the default
settings are selected, which is for a Rec 709, Gamma 2.4 SDR working space. But what we want to do is
actually switch this over to DaVinci YRGB Color Managed. Again, it's still on the default SDR workflow and this says this is for
SDR grading environment best used when the majority
of source material is SDR and it's suitable for
SDR and HDR deliverables. But we're working in HDR, so we want to switch this
over, turn that off, and just uncheck this little automatic
color management box, and then we want to
switch this over to HDR DaVinci Wide
Gamut Intermediate. This is something we haven't
talked about before. Basically, the reason
you want to select this is because this is a wider color space in color gamut than any of the color gamuts that
we've talked about. So far the largest
one is Rec 2020 but this is actually
much larger than that. What you want to do
is if you're working in a larger color space, when you're done with the grade, it's easier to then output to a smaller color space
and one way to think about that is think
about resolution. If you shoot something in 4K, then it's okay after you've
finished your edit is to export and say HD or
a lower resolution. But you don't really
want to shoot something in HD and
then try to export in 4K because even though a program might
let you do that, you're not really getting
any more quality out of it. You're actually
reducing the quality, and that's just the thinking and the concept behind choosing this HDR DaVinci Wide Gamut over anything that says Rec 2020
or P3 or anything like that. Because we want to be
able to have a very, very large color gamut so that we can then afterwards
output to anything we want. I'm going to select this, and you can see what
this says is it's for extra wide gamut log
grading environment suitable for SDR and
HDR deliverables. Preserves maximum image
fidelity and highlight detail. Then from here, the next
thing is output color space. Again, it's selected by
default to Rec 709 2.4 but we now have all these
different settings which by now should look
familiar for example, P3-D65 HLG, P3-D65 2084, which is again the other name
for PQ and then 1,000 nits. Basically, what we
want to select here, it should match your monitor, and with that being said, your monitor should match what the final deliverables will be. In this situation, I'm going
to pick the most common one, which again is P3-D65 2084
1,000 nits and again, that's PQ where it says ST2O84. Again, this is just going
to be a quick overview so I'm not really going to go over the Dolby Vision
tab because again, you do require a
license to even use that or the HDR 10 plus tab because this is going
to be a quick overview for just basic HDR grading, which I guess you could say in this situation would be HDR 10. Now that we have
all of this stuff here selected then we can hit "Save" Now I want to take this
opportunity to talk about, as you all know that
to do HDR grading, we do need very
specific hardware for example an HDR monitor. Again, that is also another reason why
I just want to make this a quick general
overview and that's because these HDR monitors
are so expensive. I'm going to presume
that a lot of people may not have them to do the grading but you
can play with it, experiment with it,
even if you have your own monitor just
to get things started. But let's say even if you
do have an external monitor plugged in and you happen to have a playback
card or output device, which is another piece
of hardware that's required to do not
just HDR grading, but any color grading. For those of you that
aren't familiar with those, I do have this
lesson here that you can look over from
another class that goes over the type of
monitor required for grading and what setup
you need to do that. That'll still give you a
overview of what is needed. In the case of a
playback or output card, I'm talking about something
like this that is required to plug-in in HDR monitor or even a grading monitor to
your DaVinci Resolve system. For HDR grading, you
would need something like the UltraStudio 4K
Mini or possibly, depending on your situation
an UltraStudio 4K Extreme 3. Then for grading as a whole, you would need a minimum of
the UltraStudio Monitor 3G. With this device
plugged in between your DaVinci Resolve system and your computer via
the thunderbolt port, this is what plugs into
your grading monitor. Once you have that set up and you have your
HDR monitor setup, you are ready to start grading. But as I was saying, if you simply have just, you can say an SDR monitor
plugged into an output card, what you might see
is that your image, as soon as we were here and select our different color management settings
and hit "Save" When you see this change on an external device or
an external monitor, you might see the image all of a sudden look flat, desaturated, very log like, and the reason for that, it's normal because that means that honestly your settings are correct and the settings are going out correctly
to a monitor. However, the HDR
settings do go out in a very log like fashion
to an HDR monitor and that's because it is
then the responsibility of the monitor to translate
that information, read the metadata, and
make it look correct. The only reason this here and your viewer looks
this way and it will look different
than it looks on an external monitor if you
have an external monitor, and that's because
one way to get a general preview of what
the image might look like, because in your settings, this may or may
not be turned on, but if I go onto my preferences, and then under
system in general, if you have this option here, use Mac display color
profile for viewers. If you have that checked on, which if you check it on, by the way, it's going
to require you to restart the Vinci Resolve. I believe this by
default is off, but in this situation, I'm leaving it on so that you can actually see
something here that's a, I guess you could say
a rough estimation based on your monitor and whether your monitor is a HDR monitor or
whether it's not, whether it's a newer monitor, whether it's a MacBook Pro. A lot of variables
involved in how this is going to look as I call preview of the HDR
image in the Vinci Resolve. I have this on, so we
can see something here. Now we are ready to grade. I pop this clip here. Now I will go into
the color window. Another thing you want to
change is in the scopes, you want to click on the
three little dots here, and then under waveform, you would want to
switch over to HDR. I'll just switch over
to the waveform. Now you can see that you have
the scopes in the waveform for HDR grading versus
standard definition grading. Then from here, I'm not
going to do anything fancy. I'm just going to
honestly just a very slight adjustment or
something like that. The workflow will be, is
that you then just create the image and then you go
into the deliver window, and then you basically select your output settings for
whoever you're delivering to. One of the important things
to keep in mind here, for example in this situation, if I'm exporting H.265, one of the things that you want to make sure that you have selected is under
encoding profile, that it's set to 10 bit, which is what main10 is. It might by default
be set to just main, but you may want to
make sure that because HDR is a 10-bit format, for example HDR 10, then you have that selected,
and then of course, this is just based on
your video footage, whether it's 4 k ultra HD or whatever the
frame rate might be. You set your format, your Codec, your resolution, makes
sure it's set to 10 bit, and then from here I'll just
say I'll call this HDR, clip at it, render this really
quickly just to show you what we will get. Once it's done,
you can open it up here and here's the shot. The important thing
to look at here is, I'm just going to hit Command I and then look at
the video details, and you will be able to see that the spec say 10 bit, HDR type, HDR 10, color primaries, P3-D65, transfer function, you can see that
the ST 2084(PQ). That is an important
thing to know that you export
things correctly, besides of course just
being able to see, which you should be
able to very clearly see if you have a monitor that can understand the metadata in an HDR clip and play it back. If you have a MacBook
or anything like that, it should be able to do that. Then you shouldn't be
able to see this as a much more vibrant, brighter, more
saturated clip that just like pops out a little
bit has more information. These neon lights here
should pop off the screen. If your monitor is translating that information in
the metadata and showing you what the HDR
image should look like. If it doesn't do that, you may export this and it
looks exactly the same, or it'll just be a very
subtle difference. Again, the settings for this
are for a 1000 monitor. What you see will
be based off of what your monitor can reproduce. If your monitor only
goes up to 250 nits, then that as bright
as these tubes, you'll get some of the
highlights on the face, some of this stuff down here. The differences may be subtle if your monitor can't
reproduce that, but if you have a monitor
that's on the higher end, that can even do 500
or 800 or 700 nits or something like an iPad, then it shouldn't be a
very big difference, if you were to export
this in SDR versus HDR. Again, that was a very
general fast overview of what the workflow is. Again, you set up your
color management, you set up your output with
your color processing mode, your output color space. If you have the
correct hardware, the monitor or the
output playback device, and then you do your grading with that and then
output it correctly, then you have your HDR files. The only differences
from here would be, is if you have Dolby Vision, you have different
output settings, which again is for a
totally different class. In HDR 10, there's a few more steps
involved because again, with that dynamic metadata, one of the benefits
is that you could, in this situation for example, you exported this is HDR 10, and because it's
static metadata, you export that one file. That's all you get. One set of values for that clip. If this were Dolby Vision, you would have the
ability to not only export your Dolby
Vision HDR file, but then do a color
space transform to SDR so that you would
then have that metadata, so that if this file is playing on whichever monitor,
a HDR monitor, it would look correct
and if this file is playing on something that
maybe doesn't have 1,000 nits, has a different nit value, maybe 500 or 600, or an SDR monitor, then that metadata would
be read by the monitor and play back the
file correctly, which if you're watching, for example a show on
Netflix or anything like that that says Dolby Vision, what's happening is that
when you hit play that Dolby Vision movie or show is then being read by your
television or your computer, and it's reading that metadata
and it's playing back the correct information
based on your monitor. For this, is just
one set of values. If you play this
back on a monitor, they cannot produce
these values, it won't look correct. Maybe the highlights
will be clipped like in this situation, but anyway, that's an entirely
different class when we start going into Dolby Vision and the
different output settings and how you grade the
different versions, whether it's SDR or 1,000
nits or 4,000 nits. I hope this bonus class was helpful to help you
get started with that. Definitely download the clips
in the project page and do the project and experiment with it because as
I've mentioned before, this is a great
valuable skill to have especially as it's still, even though it's been around
for a little bit of time, it is still relatively
new and it's not, I guess you could
say mainstream. It's still something that only
big high-end studios have. If you can get an early, jump on something like this, I think you'll be in
a very great spot because if you have
this initial knowledge, even this initial knowledge
that I gave you in this class really will be on the cutting
edge of video technology, which is a great
skill to have for your career or anything you wanna do in
the film industry. Here we are. In the next lesson, I just have some
final thoughts for you and I will see you there.
8. What's Next?: You did it, you finished
the class, congrats. Thank you so much for taking it. If you can, please
leave a review. I always love knowing
what you all think. Also, if you haven't
taken the time to do the project, download the clip, grade it in HDR, export it in HDR, and share it to
the Projects page. Also, I'm fully aware that
I covered very dense topic, a lot of technical
information there, so you may have to go back, re-watch a few things
to really absorb it. But if you have questions, that's what the
Discussions page is below. Write your questions. I'm always more than
happy to clear things up. Again, thank you so much and I will see you
all next time.
9. Check Out the Project!: Now I want to go
over the project. This one is really simple
and I hope you try it out. The project is this, simply download a single clip of your choosing and
grade it in HDR. Next, upload it to YouTube, which has HDR support, and post a link on
the projects page. In the projects page, I add the link to
the YouTube specs for uploading HDR footage, and give it a read
and let me know if you have any questions. Just a word of advice though, even though P3-D65 is the
most common color space, YouTube does ask
for a Rec. 2020. Again, the link to
the YouTube specs are in the projects page. I'm looking forward to
seeing all of your projects.
 Fred Trevino, DP/Colorist & Top Teacher