Transcripts
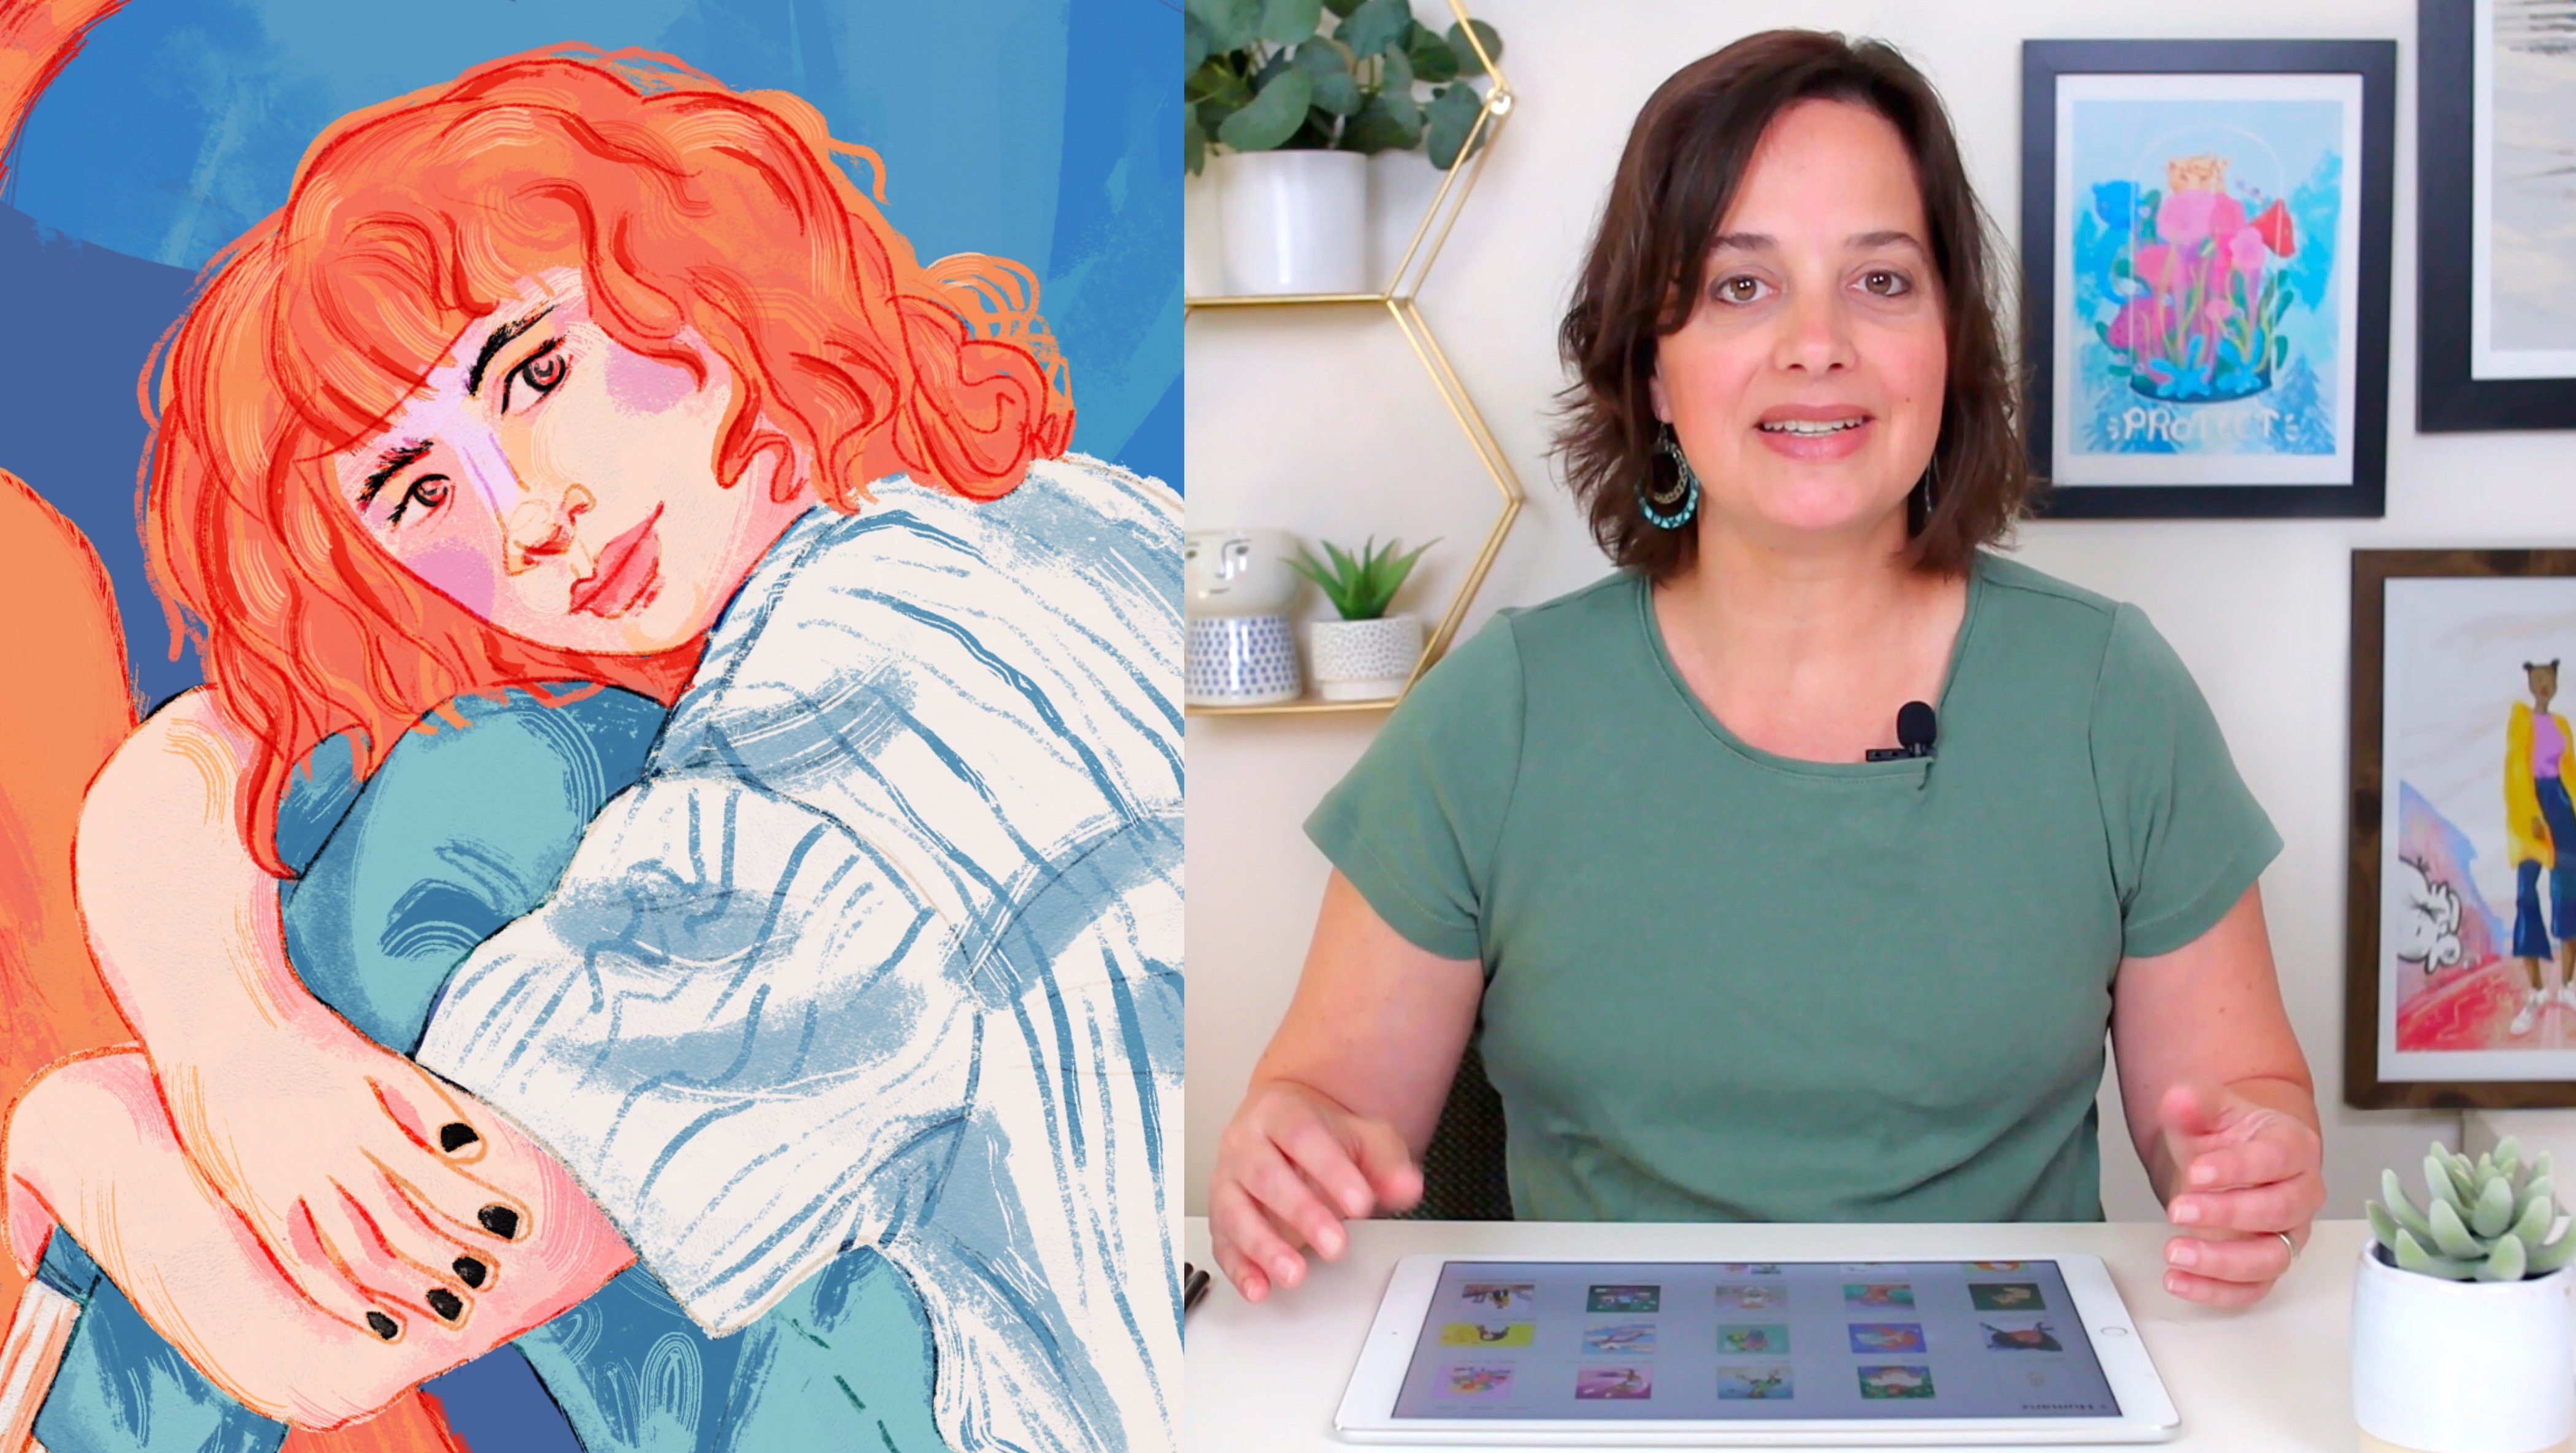
1. Introduction: Hi I’m Yifat And in this class you and I are going to draw faces. I think that drawing people is sometimes really challenging for artists. And even if you're just a beginner, you've probably seen people work on portraits and wondered if you can apply it to your workflow as well. In this class we'll be doing that together. We'll practice drawing many faces, and so that you'll have the skill of capturing a portrait really quickly with just a few pencil marks. It doesn’t take a lot to capture that identifiable feature of a person. And the thing is, that what I found and I want to show you in this class, is all you have to do is be very quick about it and kinda skip that doubting process in your mind that tells you that you can't really do it. Let’s open a metaphorical, fresh page in your sketchbook, alright. I've already done all the research for you and I to sit down and do this practice together. This is a fine morning here in Texas. It's a great way to begin your day as an artist. And you can never know, because one of those sketches, when you look back at them, might inspire a new idea or an art project that you may want to carry on and develop later on. You can look back into those memories that you've kept in your sketchbook and at some point in your artistic journey, you may be more ready to take it into the next level. So the challenge is to fill up a page with portraits. You can call it the 100 faces projects, however you want to call it, the challenge is yours to follow up and find out how you illustrate portraits.
2. The project: Once again, welcome to class. I'm so happy that you're here. In class we're going to be sketching together and each lesson is dedicated to another aspect of the portrait drawing process. I have already done all the research for this class. So you can find a few links to photo search that you can use to draw in your own time and pace. If you like, in class, you can follow the small pictures that will be located in the left side of this screen. And they'll show you exactly the kind of photo that I'm looking at when I'm drawing. So you can follow those photos or do your own research, or use the links that I've already provided for you in the class description. So I hope you're excited to begin. I know that I am. In class We'll be drawing much slower. This is just a very short demo to what we'll be doing later on. So let's grab our pencils, open a new fresh page in the sketchbook, and let's begin.
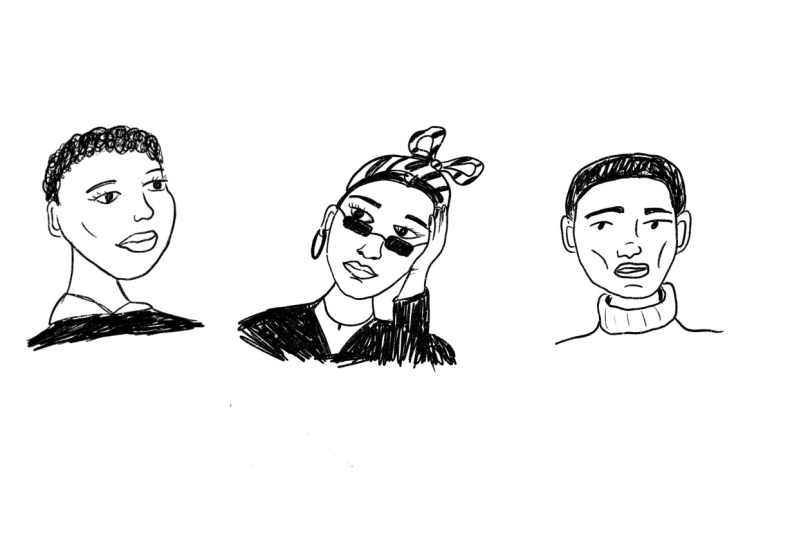
3. Exploring The Basics: Some people dread the empty, blank page, but I see it as an opportunity to start something new. So here is the first face that we'll be drawing. Let's start with the overall shape. You can start with an oval, but you can also pay attention to the details and the chin is a little pointy. So I want to show that. Next I'll be doing very quick lineart. So I'm drawing a line from the eyebrow all the way to the nose. This face is very symmetrical. So whatever you do on one side, you repeat on the other side. The eyes are just a curved line with a circle for the pupil. And above that I'll do another curved line for the eyebrows. And that helps bring out the expression of that face. I used to think that lips are very tricky, but look how quickly we can draw a mouth with just three lines. For the hair I'm drawing very quick shape, outlining the way the hair falls over the face. And then drawing the outline of the hair. Here is a portrait of this guy, and his chin is pronounced and squared. If we just find the ears, they can help us place everything else on the face. His nose has this crooked line and I find it really interesting and I want to show it in the portrait. And although it's very pronounced, I think it's gonna be an interesting detail. So I'm not afraid to draw it in. The eyebrows are very thick and they start a little bit above the line that can be stretched between the top of the ears and right beneath those eyebrows we'll find the eyes. So the ears really help with placing all the other features. This time around, I'm trying to find the shape of the lips, getting to a bit more details in this illustration. And next he has this interesting details on his face, like the mustache and beard and the facial hair. Those are really interesting features that I want to show in the portrait. I'm really playing around with the shapes of his hair. Kind of finding the direction of where the hair is going and drawing it in. And before you know it, we have the whole hair, and the whole face, and the whole portrait sitting on the page. The whole idea behind this technique that I'm using is to be really quick. And don't stop to think if you're doing it right, if you're doing it wrong, because whatever you draw your drawing, It's going to be fine. We're letting our eyes dictate the pace because we're not following the anatomic approach of dividing the face into a grid and then placing every feature on the grid. Personally, I find it really limiting and boring and not really super creative. Just my idea. Don't quote me. So I want to offer you this opportunity to trust your hand and draw quickly. And with this practice, you'll get better at it untill it comes really easy to you, and you can identify the main features of a face and draw them with ease. And something else that I like about this technique is that it really helps you find interesting shapes in a face because we're not afraid to show the cheekbones or the big nose or anything that stands out in the portrait. And it's really fun to go with bold shapes and experiment when you're sketching portraits, like in this one. He has these full lips, and I'm kind of boxing in all the shapes in his face and his cheek bones and the strong jaw line. The turtleneck sweater, with texture of the sweater even, these are all tools and language that I'm using in this portrait. And I think it's really fun to experiment and try different approaches to sketching portraits in this project. But sometimes you'll enjoy drawing this big nose and sometimes you'll enjoy finding the exact line of a nose. And eventually you look at your page and you'll decide which one is more you and which one is more your style. And you want to carry on to the next portrait, those features that you find that you like. This lady's face is turned in half profile and that allows us to trace the nose, show more of the nostril on the one side and less on the other side of the nose. She has big pronounced eyebrows, which I really enjoy, and big open eyes, round eyes and full lips. I'm also really interested in her cheekbones. So drawing the cheekbone lines at character to her face. Her short and curly hair is really fun to draw and creates a fun texture that adds to the portrait. And next I'm kind of enhancing her neck, exaggerating with the way the neck is very slim and long. And really this exaggeration helps create the sense of fragile, gentle portrait. And I'm really getting a little bit into the mood of this short sketch. And I like it because it helps me connect with what I'm drawing. And it helps anybody else who enjoy the, enjoys my art to connect with the subject of my drawing. Now this portrait of a girl is pretty interesting because there are so many fine details going on. The way her hair, the full mouth, the loop earrings, and maybe I'll get to her outfit as well. I Don't work with certain order, but I kind of draw the details that catch my interest, and I find and placing them on the face. So sometimes I'll start with the ears and sometimes I'll start with the nose, and usually I'll start with the chin. So I'm really following what my eyes see and very quickly putting them up on the sketch. So her hair is really interesting, I want to make sure I just get everything, that had fluff of hair just above her head, the way it kind of spreads around like a flower. The long strands of hair that gently follow her jawline and slightly cover her ears. Of course, the loop earrings are really interesting and I'm looking at the way the hair covers half of her eye in a diagonal. All these shapes are guiding me in my sketch. And I think for her it's really interesting to add the details of her outfit really, really quickly. It's just something that grabs my attention away and I draw. So definitely, when you practice, follow your interests, follow what grabs your attention and let it guide you. And here we have an opportunity to draw a profile. You definitely want to make sure that you practice some faces in a profile and some faces at the front. We really need that for our practice. I think that curly hair is really fun to draw, and facial hair is really fun to draw. And notice how the facial hair has smaller curls than the hair on the head? We want to make sure we show it in our sketch. Okay, this last portrait is really bland. I'm trying to find an anchor point, something interesting to make the sketch kind of pop. So what can we do? Maybe the mouth is a bit kind of on the side. Maybe want to show it. We definitely want to catch that smile, those pronounced eyebrows, and the outline of the hair and the weight divided on his head. These are the details that are going to guide me. Maybe the shape of the eyes. They're kind of like half circles where there is a flat line at the bottom and an arching line at the top of the eye. His neck is very thick and masculine, just like his square jaws. So we want to make sure we show that in the sketch. And after that, all we can do is just add a little details to kind of frame the portrait. The collar of his shirt, and the way it's tucked into his sweatshirt maybe some buttons. The line of a T-shirts that showing, those are the little details that add interest to the portrait.
4. Drawing Hair: Let's look at this face together. What are the immediate features that you look at? So I think we immediately see the big eyes. Notice that the nose is long because of the angle that the face has towards the camera. That also makes the forehead wide and the chin very narrow. We want to make sure that we represent that shape in the sketch of the face. Even if it seems a bit odd, go ahead and just draw what you see. Try not to erase anything. Put the eraser aside and just go and flow with your work. Because when I started drawing this sketch, this face, I was really not sure that I'm doing it right. And it actually turned out one of my favorite on this page. The thing that we can learn here is to just trust yourself and keep going, keep going and don't stop, don't try to make anything perfect. In fact, we want to try to be a little bit ugly and a little bit odd because it helps us exaggerate the details that we notice. Okay, let's talk about the hair. First of all, we can start with just capturing the general shape of the hair. So again, it's kind of narrow when it's closer to the temple by the ears and it goes wider as we go up, up, up the head and all around. And then we can sketch the direction of the hair and that's basically it. Okay, Moving on to this guy one immediately stands out. Okay, blue eyes. That's right. The nose that is kind of wider. He has a wide nose, facial hair and mustache and some hair on the chin, freckles, lots and lots of freckles, which makes it a really fun portrait to draw. So how do we want to represent those freckles in our sketch? Do we want to cover all the face with dots? I would say no. I would think that just drawing a few fun dots will give the impression of a freckled face. Now with this photo, it's very clear the way the hair direction is going in. You can practically see like every strand of hair on this guy's head. So what I want you to do is look at the hair and see it as lines, and then take those lines and draw them on your page. Okay, with this girl's portrait we'll start with the very basic approach of drawing an oval for the face and then finding the eyebrows and the eyes. And since her face is tilting upwards, we'll make sure that we get the line on the tip of her nose and then her nostrils. And that will show us that she's looking upwards. In this portrait and the one before, I added some more details for the eyelids, right? So we can play with the eyes and not just taking the shape of the eye or the direction of the gaze. But we can also draw the lower eyeline or the upper eyeline just for fun, added detail. The mouth is slightly open. Here's the thing about teeth. They don't always look right in a portrait. They sometimes look rather scary, but it's kind of a trial error if you want to show them or not. Okay. Let's move on to the hair. If we see a strand of hair that is flowing in a certain direction, we draw, it so we can draw strands of hair and we can draw individual hair, and we can draw the whole outline of her hair. And together, we'll get kind of a good depiction of the way her hairstyle works on her head. And I'm getting a little bit distracted by the flowers. So we'll try to move on. So I've got to say this one is not my favorite portrait on this page, but still, I'm reminding myself that I'm practicing. So we're letting ourselves do our worst work and our best work here. And eventually you'll figure out which one works best for you and which one isn't. So I think what's interesting about this portrait is the way she's looking directly up at us at the camera. What stands out most for me is the way her hair is kind of stretched out. That's wet hair, so it's kind of sticking to the head. So I think a few lines will help see the direction of the hair and the way it's positioned on the head. And here we have kind of half, almost complete profile. So let's see what details stand out to us. Well, we're immediately drawn to the eyes, but I would say, let's start with the nose. In the nose, it's really easy to slide down to the lips. We can go back to the eyebrows, which are kind of thick eyebrows arching over these eyes. I think interesting details in the eyes are the eyelashes and the eyelids. Okay, let's move on to the hair. Again. Let's look at these shapes that we have in her hair. It's bended up in sections. So they create interesting shapes that we can sketch. We can almost see different hair strands and the direction of the hair in each braided section. So let's try to show that in our drawing. Let's try to summarize drawing hair. We actually don't look at hair per-se. We look at shapes, we look at directions. We'll look at lines. We look at strands of hair. All we have to do is let our hand draw what our eyes see. So with this portrait, for instance, we can see a block of hair over the head. So I can just capture that shape, then draw the direction of the hair. I'm drawing what I am seeing, not what I think it should be looking like. As artists we let our eyes be our guide, and we learn to trust ourselves.
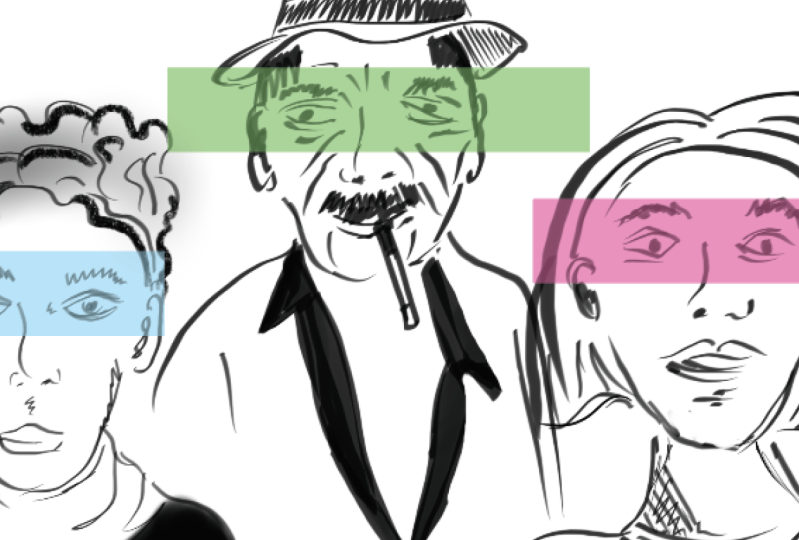
5. It's All in The Details: This portrait is super interesting because there's so much going on. We have fashion items like sunglasses, necklace, there's a little tattoo on her neck, earrings. I like the thick eyebrows and the way they are trimmed, the partying of her hair, the hand with the nail polish and the striped bandana with the bow. So there's really a lot going on here. I think it's one of those pictures that I would love to get back to in more details later on. So I think the challenge in this portrait is to be able to capture the face and the expression without putting too much emphasis on the props. We want to capture the likeness of the woman and then add on all the other details. So I think the solution to all these challenges is to prioritize your work. For me, I would say, yes, I want to capture all those fun details, but I want the portrait to bear likeness to my subject in the photo. So that would be the challenge that I had set for myself when illustrating. Okay, let's move on to the next one. In this portrait the hair is braided in a very interesting way. And what grabs the attention most, I think, is the eyebrows and those big eyes that look directly at you. So those are the things that we'll try to make sure that we capture in our sketch. She has this crooked smile that I really want to exaggerate. And I like to draw those lines on her upper lips, connecting the lip to the nose. I think they're fun little detail. Thing that I'll try not to draw are the line smiles because they might make her look old. If I'll put that line in the sketching, sometimes it works, but other times the portrait just comes out really weird and old looking. So we may want to avoid that. Let's look at this next image while I'm busy drawing flowers. I think the biggest challenge here, and this is a new one, is of drawing this baseball cap. So let's analyze it. We have two shapes, the white big one and the black mesh on the side. You'll find that the visor or the bill are the most challenging. Now we can look at that shape and see a very flat, narrow, bendy eight figure, if that makes any sense. Okay, So this is what we need to be drawing and then just adding a little bit of shading to give this all dimension. So in this portrait, the hat serves as our anchor point. So below the visor we can put in those thick eyebrows and the eyes, and the gaze is slightly to the side. After that, I'll be moving on to the nose, we see of the nostrils than the bridge of the nose. And something that I really like about this face is those sensual full lips. So I'm going to exaggerate them, make them bigger and more pronounced in my illustration. So basically as I work, I'm already stylizing the sketch because I'm exaggerating the details that stand out most to me. And for instance, his neck seems kinda long sticking out of the t-shirt. So I'm choosing to exaggerate it a bit just like I did with the lips. And after that, just putting in all the final touches finishes up this quick sketch of a portrait. Sometimes it's easy to start your work with a very faint line just to kind of gently mark where everything needs to be placed. So that's a technique that you can use when you're working. What I'm doing here is just roughly sketching the face and then starting with the features that stand out most to me, like the eyes and the eyebrows that kind of arching up on the forehead over the eyes. What else do we see in this photo? It's a narrow nose. We can see the nostrils. The mouth is full lips and slightly open. We can see the ears very clearly. So we want to show that in our drawing because the hair is going to fall back behind the ears. Right. And once again, we have this gentle neck that is sticking out of the t-shirt. I like the gentle features of this woman in the photo and I am trying to show that in my sketch. And I think the challenge here is doing it with very few lines, just capturing the nose, the full mouth, and the tilt of the head will provide me with a gentle appearance that I'm looking to express in my sketch.
6. Diverse Humans: In our last drawing lesson for this class, I'll try to touch on subjects more deeply. Be sure to reach out to me in the discussion board if you have any questions or anything that you need more instruction on. So let's begin. I find this portrait really interesting. There's so much going on. The glasses, the way his head is tilting and his gaze is really alert and watching us. I like his outfit, so I'm pretty sure I'm going to get into that in my drawing. These are the details that capture my attention as an artist and make me want to draw this specific portrait. I'm going to start with the general shape of the face and move into the details. As I work in this portrait, I think it's important to try to get the shape of the glasses accurately. So marking them down and then moving on to sketching in more details is key to succeeding in that. And now let's frame the hairline and the jaw line with the beard that will enable us to get into the details and the line in the direction of the hair and the facial hair more easily afterwards. I've already drawn his head in a bit of an angle. Like in the picture. I think the way he tilts his head kind of makes him more approachable, likable. It's a fine little detail that we don't want to miss. Pay attention to his shoulders of very, very broad comparing to his head and neck. So this is something that we can exaggerate, maybe make the shoulder slightly broader. And overall, the shirt is going to be a stark contrast to his fair skin and features. So this is something that we want to pay attention to when we draw, but maybe we'll take care of this detail later on when we digitize this work, and hint this is in the next lesson. Alright, one last thing that I wanted to sketch is the calligraphy on his shirt, just kind of mentioned it very briefly. Text help to really anchor your work on the page. It's kind of a device that we can use as illustrators. Okay, let's move on to our next portrait. I got to say, I'm starting this portrait thinking that I did not capture her right. And that it's really not going to come out nicely because she's a pretty woman and I wish I can represent her nicely in my work, but still we soldier on. We keep on drawing and you'll see that in the end, she'll come out Okay. So I'm marking down all her features generally, and then I get into the details and I don't let these doubts trouble me, I just keep on working. And it’s pretty clear in this portrait that the hair has so many different directions and angles. So this is something that I'll try to show in my work. The overall shape of her hair cut is something that I find interesting and I want to make sure that I get it right. Getting into her outfit in some detail, I think helps anchor this portrait on the page. It kind of helps give the face of context, right. And finally, adding some extra shading to her lips, kind of sharpening her nose. And I think that these final touches really helps her portrait pop. Look at this girl. Her smile is shining. She has such good vibes and great energy coming out of her portrait. And this is something that we really want to capture when we draw, since her head is tilting back when she laughs then the tip of her nose is going to be closer to her eyes and will leave more space for her chin and her mouth. We get that shorten perspective when we draw a face that is tilted back in this way, These are the details that you want to pay attention to, the eyes that are slightly closed because of the laughter. Interesting details that I like in this portrait is her hair, the long curls and the butterfly clips, they are colorful on her head. And frankly, I think this portrait will we look really nicer in color. Well, this is a more mature portrait and it's more challenging. So I’m starting with marking the jawline. And then let's move on to the nose. That's really the center of the face and draws a lot of attention because it's wide. This is a very interesting portrait because the feature are very bold and big in kind of rough. It's not a pretty face, it's an older face. The ears are big. And then we can draw some of the defects of the skin, wrinkles, the sun damage, all those interesting lines that add personality to this face. And now let's move on to the fedora hat. Let's look at the rim line. It's not straight line and it's not an arching line. It's a line that deeps in over the forehead and then rounds out around the perimeter of the hat. And we can use the texture on the hat as a device to add shading without completely covering the hat in crisscross pencil marks. And last touches for this portrait, I would be sure to add some of the shirt because it adds a lot to the posture and the personality of this character. It is flat on one side and nicely posing on the other side. It kinda shows the confidence of the old age. And here is a portrait of a young, pretty woman. I think we are immediately drawn to the colors. We have these transparent sunglasses that costs the shades on her face. We might want to show that. I really like the outlines of her The way the shirt is kind of revealing and not revealing so we'll see if we'll get into that. So with this portrait, once again, it's a good idea to place everything with a faint line and then draw more confident lines on the sketch. And I want you to pay attention to the way her glasses are sitting kind of low on her nose so that the eyes are positioned at the very top of the sunglasses frame. And above that we'll have the eyebrows and the hairline. These are all details that we want to make sure we pay attention to before we even start drawing. And with that, my friends, we filled the whole sketchbook page with portraits. Let me give you a little tour of my sketchbook with all the faces that I've drawn so far. I really love this project. I think it's really interesting to work on and look at all these different portraits and diverse human faces that we can capture with our pencil in this sketching practice.
7. Inking in Procreate: Fun way of digitizing your work and say that you have one of those portrait sketches that you really like and you would like to have it printed on a t-shirt. So to do that, we'll need to first work with a sketch and enhance those lines maybe ink it and then scan it, or work with it in a digital form, like in procreate, which is my preferred tool. You can also do this in Photoshop. So in order to do that, we need to first import a photo of the sketchbook page onto the digital canvas. It's a good idea to lower the opacity of the photo so that you'll be able to see more clearly your ink line. And then we'll head over and pick up goods ink brush. The one that I'm using is very pressure sensitive, I'm setting it down to about 10 percent so it draws very thin lines. And if I want a thicker line all I need to do is press on the pencil. And I'm using the Apple Pencil here to produce thicker lines. So when we draw over our sketch, we want to make sure that the lines that we draw change in their pressure so that we are drawing more interesting lines. And this is another way all stylizing your artwork. First we did it with a photo as we translated it into the sketch form. And now we're adding another layer of styling when we work with our ink pen, which in this case is a digital pen. All right, so let's remove the sketch layer and check how our inclines are looking pretty good. I like the new styling. Okay, Let's bring that sketch back in and add a new layer and start drawing our second portrait. I just want to put it out there that this is kind of an extra exercise, way beyond what we're doing in class. It's totally optional and I'm putting it out there just for you in case you're interested in digitizing your work. If not, I hope you'll just enjoy watching this process because I think it's really fun seeing how we can draw a portrait in ink lines. One thing that I want you to pay attention to is the artistic choice that I'm making here. Like for instance, in this men's beard. I'm using the beard to create this fun texture. And I'm not drawing the jawline because that'll be kind of a harsh line over his chin. It's in there in the sketch, but I'm not using it when I'm drawing in the ink lines. Another thing that I want you to pay attention to is drawing in the text. Text is a wonderful device to anchor in a portrait or an image on the page and using the logo that this guy has on his shirt. And it's a very simple inked in calligraphy. All right, last thing that I want to show you is a way to add color to your image. For this exercise, I'll be using just a black and white, and we can do a lot with black and white images. The inspiration for this is obviously the black shirt that was in the original photo. So the black shirt creates a stark contrast to the fine ink lines. So just blocking in a black background for the shirt adds a lot of interesting contrast to the image. When we look at the final drawing that I've already made, you can see that I've played around with some white. All right, and up next we're going to take this dude on the left and play with his image on the T-shirt.
8. Creating Art Prints: I wanted to show you another example of what you can do with your digitized sketches. So let's look at this one that I have already prepared. I'm going to head over to the Layer menu and look at the layers that are already have. I have the ink layer, I have the sketch layer, and I have the background layer. We're going to remove the background layer by unchecking it. So basically what we're doing here is creating a transparent image that shows only our ink lines. And now we're going to export our work. Or as we say in Procreate, we're going to Share it. The one that is right for us is the PNG because that would allow us to share a transparent image. And this is going to be just great to put on any background that you already have. And this is basically, how we share files to print on T-shirts. Let's work with this mock-up. For instance, I already tried a design. I love the colors of the rainbow, but I really don't think that spreading all these portraits on it is a good idea. So let's scratch it and start a new one with our image. We're going to import it and position it on the shirt. And basically what we're creating here is a mock-up that we can present to clients or just share it on social media. So we can place our print on the side, like on a pocket, but I really like them to be bold and front-and-center, so let's place it there. And now we can play around and test my designed. How about some hand-drawn letters? I like to call these humans with a z. So maybe this one can be a human being or part of a human being's group. We can certainly move things around and clean up our design until the text really sits closer to the image. And that's basically it. The design is ready, but I want to add some splash of colors. So I'm bringing in a colorful logo that I've prepared and placing it on my t-shirt, adds that pop of color that I'm happy with.
9. Final Thoughts: Thanks for joining me today. I really hope you enjoyed the class and come out of it with a lot of skills and practice under your artist belt. I'll be looking forward to seeing your full sketchbook page of diverse portraits. So please share your project in the class project gallery so that we can all take a look. I'd love to see what you create. Also tag me on Instagram if you post there and follow me here on Skillshare to learn ran my next class is ready for you. I really loved this project and I think it can be a wonderful beginning for more well-developed artwork. This is the kind of something that I like doing. So I hope you'll be joining me with doing it on your own, wherever you are in the world. So thank you for taking the class and joining me today, and I'll be looking forward to seeing you next time. Bye for now.
 Yifat Fishman, Artist & Illustrator