Transcripts
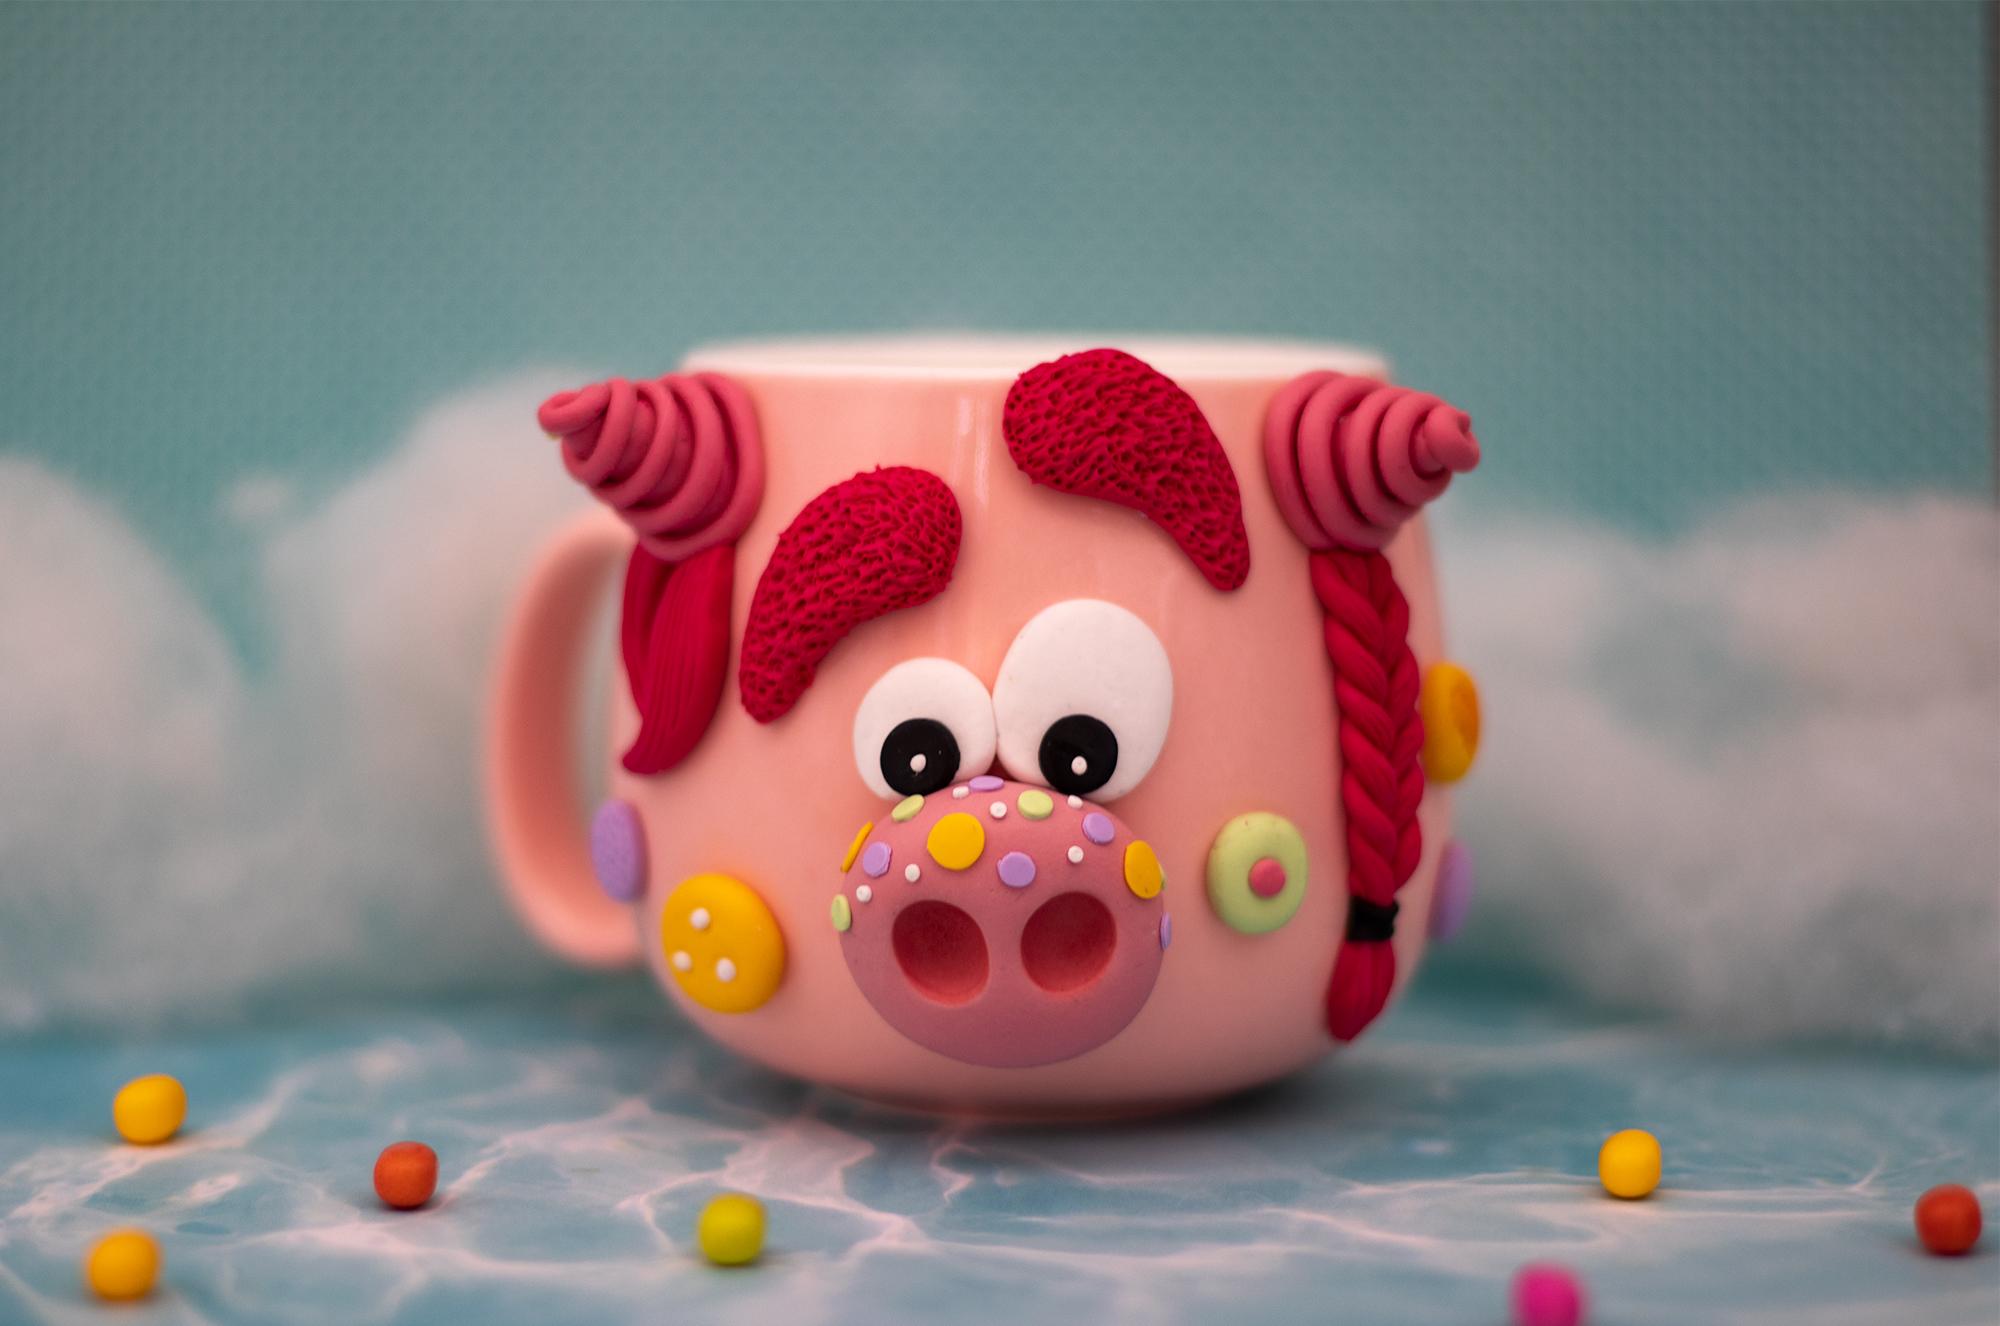
1. Introduction: Do you like coffee, do you like monsters? Then this course is for you.
2. Coffee Monster 1: So first of all, clean your
working surface, your tools, and your mug with wet
wipes so that there is no particles or dust
involved. So for this project, I use a mug with round surface so that it
imitates the face better. As you can see in this
other mug that I did, because of the round surface, it looks more like a face. And then for the clay, I choose the colors that
are really similar to my mug and they are not in contrast with the
color of the mug. I chose some darker
and lighter shades to have variations for each of the face components. I make a ball in
palm of my hand. Just make sure that
the ball is perfect. Then I press it
gently on the mug, the handle on the mug makes it, stable on the surface. So I'm just gonna put it on the mug and then press it gently with
the palm of my hand. As you can see, I still
have some sorts of dust and particles
sticking to my clay. So I should clean them
up with a baby wipe. I just use a baby wipe to
clean any impurities, that are sticking on my clay. Then
with doting tool, with a very big ball, I make two dents
two round dents on my clay. We're going for some
sort of a pig shape nose. I use my baby wipe, frequently to erase any lines that are
unwanted or any dusts that are sticking to my clay. I'm making two balls in palm of my hands. I ham going with one
bigger and one smaller. So we can have two
asymmetric eyes. And I think it will look
better on this mug. I clean because there are still some dusts sticking to my
clay, so clean it. Then I add the other eye, I clean the other eye aswell. Then I flattened a piece of black clay with
my pasta machine. And then I use a
round shaped cutter that the size is
good for my eyes. I cut two round shapes
with my clay clay cutters Then I flatten out another
piece of white clay. And the thickness should be much less than
the black clay. And then I use a
very small cutter to cut two round pieces. If it stuck in your cutter, you can just use a
needle to take it out. Then I put it on
the black parts. Then I take the
black parts with my blade and I put where I want them
on the eyes then I use some hot pink color
to make the eyebrows. First of all, I make a
ball in palm of my hands. Then I cut it in half so that I can have similar
amount of clay. And then I make a long drop shape by rolling just one
side of the clay. Then I press it
against the mug. I do that with the other half. Will just roll it
with your finger, from just one side and make
long drop and out it on the mug. and press it against the mug Polymer clay will stick
to your mug as it is. After we baked the clay, then we will take it out and
glue it back on the mug. But for now, you can
just stick it as it is. Then I use my
needle tool to make some tiny strokes
on the eyebrows. This is my way of
making it more fluffy. I do the same thing
for the other eyebrow. Now I use some brighter shade of pink clay and make a ball and then cut it in half, it was not exactly similar, but I try my best to have
similar amount of clay. And then I make a ball in palm
of my hands from each half. Then I just put my finger on one side and roll
it to have this shape. Then I cut ball shape Then I will do
the similar thing for the other one. I'll just roll it from one side and Cut the ball shape. So we have these horns, sharp and pretty Then I roll a piece of clay to a very long rope I want to use it for decoration
purposes for the horns. And then I just wrap it around the horns. At this point, you can use
other colors that you want. Or it really depends how you would like to
design the horns. Then l roll another piece
of hot pink color. I want to make a braid
for my pretty monster I cut it in half. And then I bend one piece and twist in outward direction. And another piece, inward direction. When I place two pieces together. I would have a braid. Then I cut as much as I want. And I placed the piece under one horn I try to place it perfectly. and if the length is not right. I am cutting more. Then I grab another small piece. I want to make the
end of the braid. The part that the
hair is not braided and after the scrunchy part. I make some lines with my needle tool both on the braided part and on the end part. Don't worry if the lines
are not perfect we are just imitating some
hair texture here. I use black clay to
make rubber band or scrunchy, I just place them together, place it on the braid, and cut the extras
from the sides Then I take another piece. I make a long drop by just
rolling from one side. And then I use my needle tool, to make some hair texture. I shape it
with my fingers. Cut the end and place it right
under the other horn. With extra piece that I have, I'll make another one. A little bit smaller. At this point, it's all
about declarations. Then I use my blush. I always use this essence blush. Or you can use any dry
pastel or old eye shadow to just color the
inside of the nose. Then I flattened out
some pieces of clay in these beautiful
pastel colors. With my round cutters, I just cut some pieces in different sizes
from these colors. And then I placed
this round shapes on the nose. Then from those colors, I just make some balls and then press each ball on the
face to make some moles for my monster mug. I made five of those. Then make some
texture on the moles For example, with
your dotting tool, you can just make three dents
and fill it with white clay. As I'm doing at this point. Or you can just make some dents with your dotting tool
and leave it as it is. You can be creative also. For this one, I'm using
small ball dotting tool. Just making a beautiful
texture on it. Maybe just one in the
middle and fill it with pink. For this one. I'm going for a heart because she's just so pretty. We have a tattoo on the mole. Maybe. I clean the extra blush, from the surrounding of the heart. So now we have our Pretty Monster mug
ready to be baked
3. Coffee Monster 2: For the next month series, we are going to go a little
bit faster over the radio. But if you need, you can always just lower
the speed of this video. So I take a piece of clay and I roll it until
I have a long rope, and then I make a
little bit of pressure to two specific
parts that I want to put the teeth and make them a little bit narrower than
I placed it on the mark. Then I grab a piece
of white clay. I shape It's like a
sharp teeth and I place it on that specific part that I need a little
bit narrower. Then I claim that on both
tastes, good. Baby wipe. I grab this pretty color that is a bit darker than my mug. And I think a ball in palm of my hand and I shake it like a triangle with my fingers. I positioned it on
the mug and then I use my dotting tool, the big bowl to make, to round for them. Then I grab a piece of white
clay and I make them ball. And then I cut it in half. And each half right above
the nose, the eyes. Then I flatten out a
piece of a black leg. I don't use my round cutter to cut too small blight pieces. Then I put two small white clay for that license in the eyes. And then I placed
each of them on each. You can put it funny and away
from each other like this. Then I met the eyebrows as I
did for the previous month. And I place them
right above the eyes. I use my needle tool
to make some strokes. I've got eyebrows and make
them as glossy as possible. And then I make
the moles by just making balls in different sizes and press them
gently against them. I also decided to use this beautiful purple
color as well. And for the homes, I'm using, again this treaty, purple color. I make a long drop and then I roll it like so and cut the end. Acquisition is right
beside the, I. Use this ecliptic plane tomorrow to make
some polka dots on the color will stick to
the clay when you bake it. So for decoration on the malls, I use my dotting tool to
just make some textures. And that's it for this one.
4. Coffee Monster 3: So for this light blue mug, I follow the same principles. I make a ball and then I roll it until I get a very long grow. I will use it for the mouth that I
placed it under mug. I want it to be a
little bit Smiley. Then I grab my white
clay to make some teeth. I caught a similar amount
of pieces from the clay and I just flattened it with
my fingers to make a shape. And then I place it right
above the lower lip. Shape it with your
finger and place it. After doing this, I
grabbed a piece of a pinkish color and I
make a very small talk. And then I use my needle
tool to make a dent in the middle that I use an old toothbrush to just make some textures
on the tongue. And then I use my
blush to come to the edges of the tongue
and I place it on the log. And then I close the lips. I use my dotting
tool to just press a little bit on two
ends of the mouse. Then I grab my white
clay to make the eyes. I just make a bowl, cut it in half, and make two. Then I grab my baby
wipe and clean any dust or fingerprints. Then I flatten out a piece of clay similar
color to the mark, and I caught it to
almost half circles. Then I position them
right above the eyes. If it's too small for the odd, you can just pull it, pull the clay a little bit
so that it fits the eyes. And then I have
flattened out a piece of black clay and cut
to round pieces. I can use for the
eyes, the eyebrows. And also I use the same
color clay for the horse. Can really make any horn
shape that you like. Then the texture on the eyebrow, my needle tool, and
then some declarations, a piece of roles clay. Then don't forget
about the moles. You can use practically
any color that you want. This moles of it. Pretty colors is from another
project, the dislike, gold color blue, and the
green that you can see, there are just
mashed up together. Some textures. That's it. Pretty easy to make this
beautiful monster MC.
5. How to bake and glue polymer clay on mug: So now our art is
ready to be baked. I preheat the oven to
110 degrees Celsius, and I put the mug on a piece of baking sheet and put it in the oven and bake
it for one hour. After one hour, I take it
out and let it cool down. So now that my mug cooled down. I put my finger nail under the doll, and push it a little bit. Then it comes right off. Sometimes it comes off as a
whole and sometimes like now it comes off in separate pieces. In this case we
glue each piece separately on the mug. First I clean the mug thoroughly Then I put a block of clay under the handle so I can glue the
doll exactly in the center. Please attention at this point, if you are making this mug for right or
left handed person. Because if the person
is left handed, you should glue the art on
the other side of the mug. I use Uhu epoxy glue
for my projects. This one is the strongest
one I found in the market. and it takes 90 minutes to dry. I mixed the equal
parts, of both glues. I put the mixture on the back of my work and I'm being
careful to not make a mess. I leave some areas without glue so that I can put superglue later. I also use a toothpick for smaller parts.
So I don't make much from it. I also use superglue so the
doll doesn't slide on the mug. Until the epoxy glue dries and make
bonds. Now I use few drops of
super glue so that my art will stick instantly. Now I placed the art in the center wait a few seconds until super glue dries. Then I do the same steps for the head or any separate parts. I use the epoxy glue. and some drops of superglue. Now I place it exactly where it supposed to be. wait a few seconds until it dries. I check if any glue is where it doesn't supposed to be. Now, we should wait for 90 minutes until the
glue dries completely.
6. 2 Bonus tutorials + Project : I hope you enjoyed this course. If you need more tutorials for other mug monster designs, I have two free tutorial of these two designs on
my YouTube channel. You can find the
link in my profile. Please don't forget to share your projects with the class
in the project section. Thank you very much for watching and see you
in the next class.
 Ela Piero, Polymer Clay Artist