Transcripts
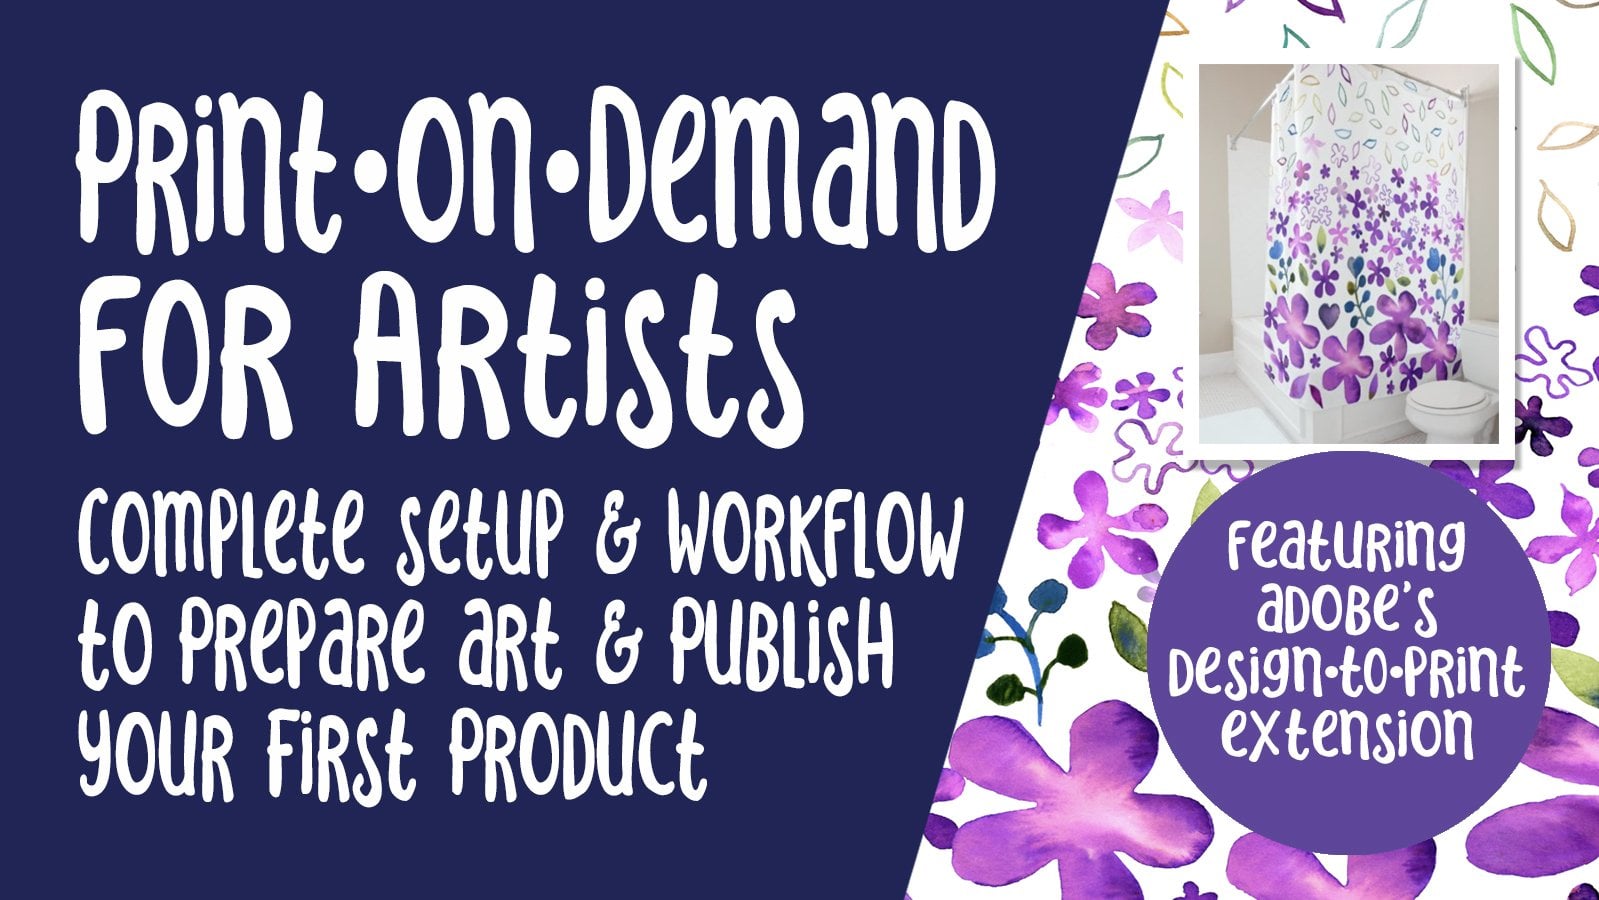
1. Introduction and Overview: Hi guys. Welcome. My name is Dolores Nas grant. I'm coming to you from sunny, Manitoba, Canada. Up until recently, we weren't being really affected by the covert 19 crisis here in our little community. Unfortunately, that has changed. We've seen an alarming rise in the cases that we have locally, and it's really scary for the foreseeable future. It looks like we're going to be required to wear a mask almost everywhere we go in public. So if we go shopping, if we go to the doctor, even sometimes visiting friends and family, if they aren't in our direct bubble, we're going to have to be wearing masks. I'm finding it really challenging. Trend forecasters are predicting that as a result, mass are going to become a fashion statement. It's going to feel a 100% natural throwing on your mask, just like you would a scarf or a hat when leaving the house, I had a friend recently asked me if I had made any custom masks yet. That got me to thinking, why not develop a class based on this particular project? And why stop there? I mean, why not have the scars? Why not have the hats? Why not have the bags? Let's put together a whole line of products. So in this class I'm going to be featuring the new Adobe designed to print extension, which allows you to publish directly to this nozzle website. But I'm also going to be explained to you how to get on these POD sites and upload your own fabrics to your products. You don't even need to have Photoshop experience to take this course. I'm designing it in such a way that even a beginner can feel completely comfortable working through the material. By the end of this class, you will have designed an entire line for yourself or something that you can have for sale in one of your shops. Are you ready to get started? All right, I'll see you in lesson one.
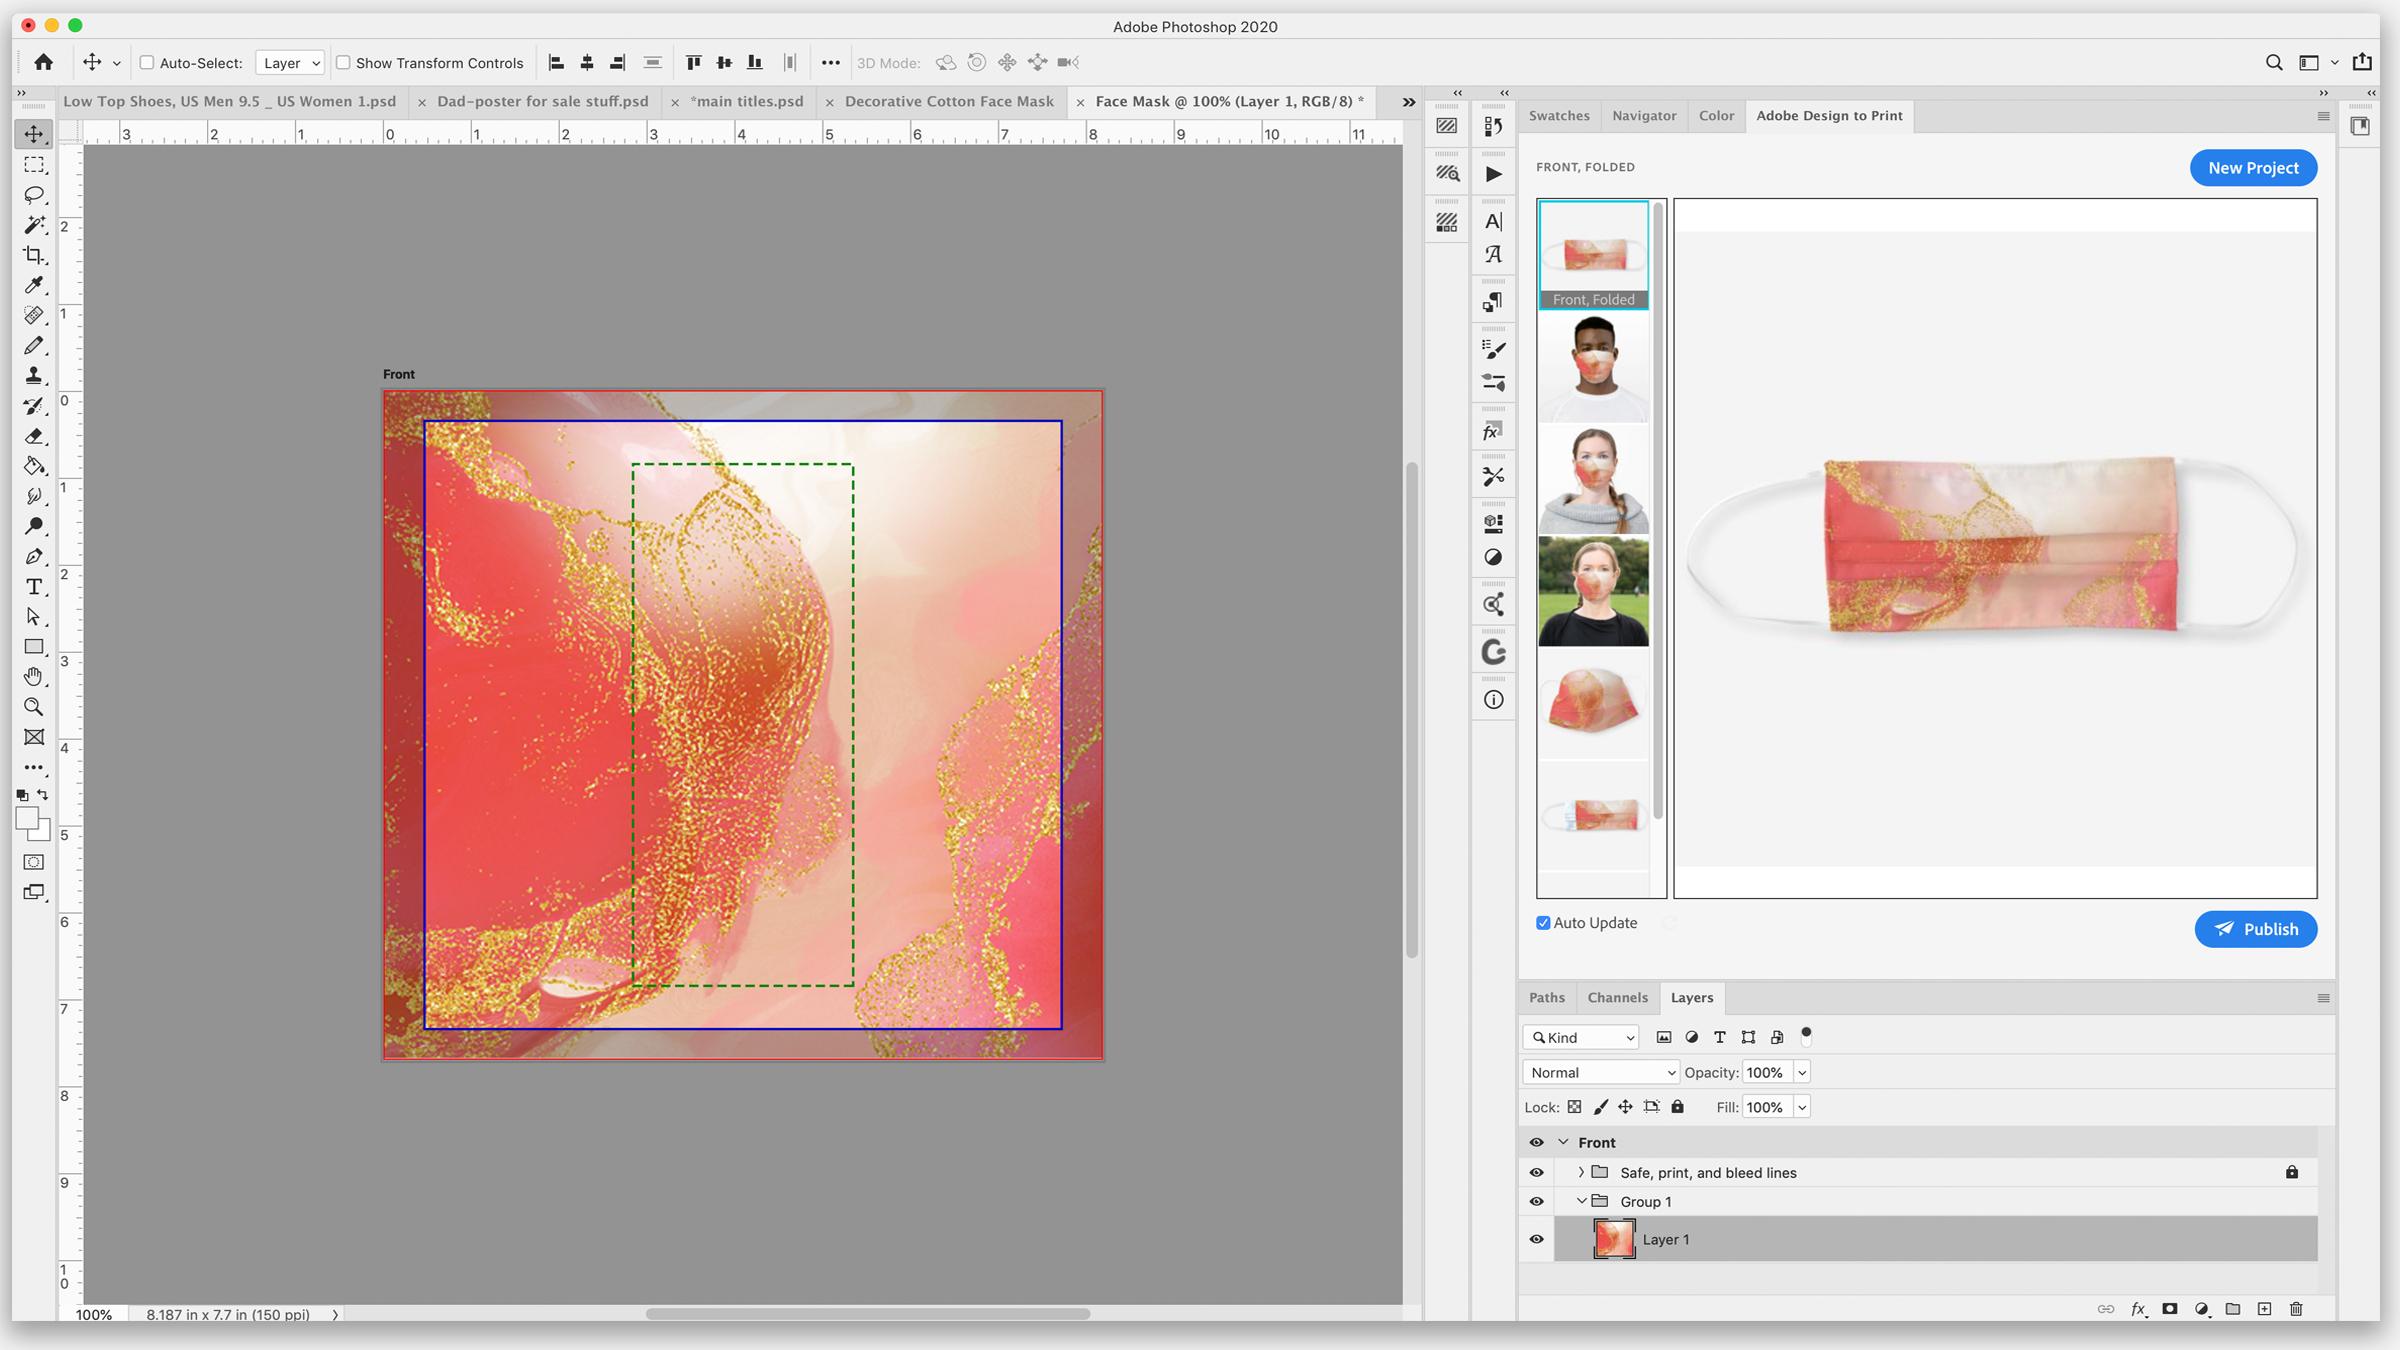
2. Lesson 1 ADTP, Your First Template and Publishing: Guys, welcome to less than one. So let's start with the mask. In this lesson, I'm going to show you how to use the Adobe designed to print templates to get your first setup done. Let's get started. And so for the first project here, we're going to produce this mass. And I've got a few things I want to explain to you first. Generally what I do when I'm setting up files use in Adobe designed to print software. I've explained it in a couple of other classes, but I want to just kinda review here. I tried to make the biggest possible file sizes. So I set up using three of the largest templates available that give me the proportion that I like. So I worked with usually the large, the shower curtain template, the extra large tapestry template, and the scarf template. The reason for that is I get then vertical Sort of a portrait, kind of a layout. I get a long and skinny layout for the scarves or anything in that proportion. And I get the more or less landscape or square kind of a template. What I do with those files is I saved them into a folder that I've designated here for eCommerce and POD artwork in that file, I've got the three folders, the one for the scarves, the one for the shower curtain, and the one for the tapestries. Then when I'm saving an artwork, I save it with my artwork number and therefore with the numbers on it, they will stay sorted for me in each of the folders, as you can see, I'm on artwork number 874 here. So you can just imagine how many different art file sizes and artworks that I have if I didn't actually number them, there'd be no way that I could keep them clear in my head. So I save each of the layout into the folders with their number. Okay. I forgot to put the number on the shower curtain, so I'm just going to go back in here. If you go into your folder and right-click on the document, you can rename it. And here I'm just going to add the correct number. I usually take out some of these extra little bits in here like the underscores. Keep my titles a bit shorter, click OK. And then you can see that I've got these three folders with the proper artworks and they all have corrected numbers. So I think we're going to work with the shower curtain document. I think that's going to be the proper proportions that I'm gonna need for my mask. So here I'm going to hit new project so that I can get these ASL interface. And here in this acyl interface, I can type in the product name. Now it works for the word mask. So you can see here it brings up all the mass. I will explain a little bit later on for some reason it doesn't work with scars. They just have some kind of a glitch here and their software, and you can't search out the word scars, but I'll show you exactly where it is. So here I'm scrolling down and we'll choose trim color that I think is appropriate for my design. You can pick different sizes here. Don't scroll through, maybe take a look at some of these different options. There are more mask designs available on the Zazi website and I will explain that when we are in their interface. But for now I'm just going to click this large Laos because I'm making this one for myself and I have a large hedge, apparently. I don't want the mass to be too tight and pulling on my ears. So I'm choosing large. So let me think, you know what I'm thinking that maybe this shower curtain, Leo, we'll be okay, we'll be the perfect one. Now, I sometimes grabbed my original layered file to use. My file sizes, Once I have flattened them for the art licensing are about 48 by 32 inches. So that works out great. For the most part. The size and pixels per inch is a high enough quality, high enough resolution that I can enlarge them slightly if necessary. And the reason it works is because the shower curtains here are at a 150 pixels per inch and my original document was at 300. So that allows for the small amount of enlargement here without losing the quality. Because remember, we're going to be reducing this down considerably when we put it on something like the mask. Okay, so I'm just going to fit this. And like I said, I have the original files so necessary for me to move some of the elements of the design around. I can go back to that original layered file. And what I really love here with this designed to print interface is that I have this preview here. So I used that kind of like a thumbnail and you can definitely enlarge the area on your screen that you have available for that particular palette, you can end up with a really nice big preview to look at. I find that's really useful, especially with the design of the masks because you can see the actual face and so you can see the effect. So what I'm gonna do here is grab this whole folder, which is the entire layer document, and paste it into my shower curtain layout just to let you see how I go about working with it. So now that I've got here, I could easily adjust the positioning of some of the elements and that might work out great for the mask. I probably won't make any adjustments for this particular class. But if I wanted to take this completely layered file and put it into this document, I would put them side-by-side like this, drag that entire folder from the original document. And you can see here that it is really, really enlarged. So it's so big that you can see all of these detailed gets from the glitter layer. Looks like I can probably go down to like a tenth of the size. So I'm going to use my transform commands here. Sometimes they find with these templates you can't grab those corner handles. So I'm just going to type in 10% here, just a guess, but it looks like that's going to be pretty good. I can now see the transform handles so I can make my adjustments. I think I'm going to put over a little bit like this so that I can get some of that glitter on both sides. So that looks pretty good. And I can look at my preview here, looks pretty good on all of these different versions. Whichever one of these that you click on, this is the one that will show up when we go into the XML interface. So if this was going to be something you're going to list in your XML store. Click on this Publish button here. Now here, if you were in my other classes, you'll know that there are these two different settings. You can publish a layered file, which is okay and quite useful actually if you're doing customization of things like cards or because Mr. ornaments or something, I don't need that for this particular project, so I'm just going to hit the flattened image upload and hit OK. And you can see here that when I hit the Publish button, that it's going through the process and it'll open us right up into the Southall websites. So that's so convenient, so cool, so easy. Okay, so I guess I was wrong about the preview. I assumed that it would show in this preview since that's what we chose in Photoshop. But does it matter? I guess if you were going to be just ordering this for yourself right now, then you would just add it to the cart and you'd be able to just purchase it. Now if you are wanting to add this to your store, then you would have had to go through the whole process of creating that store, which I do review in the other classes. But then you would hit this cell it button here, obviously login to your store. Then you would get to this page where you can post your product for sale, typing your description, put in all this other information, tags and so forth, decide on what your emission would be, your royalty for that particular product and hit posted and it will be added to your store. Okay, so it's a simple as vat and that's if you have your original designed here in Photoshop, then you can just go through that process and you're done. Now if you don't have Photoshop, if that something that you don't own, then of course, you can go straight into the website, type in the product. You can create your own so you could edit the design, you could add to a design that's already existing. This is less expensive than the one that I had chosen. So if you wanted to go to Create, you could start a new design and you could upload your own art. Their interface here, I actually go through this with a little bit more detail in my other classes, you would search the templates. You go to this products page here, and then it gives you basically the same options as you had in Photoshop. So you would just locate the item and you could go straight into producing your custom piece and why it doesn't show up. Let's just see Hafiz mask. There we go. Okay. So it's the exact same as you can see, the all overprint face mask is couple of choices here. This must be the one that's was that we just saw there for 1295 because it's pleaded. Yep. 1295. Let's see what the cost of this one is, 1595. Here's the price, and then the allover, which was for 1795. This one does look like you print. You're gonna be able to print all over just for the fun of it. Let's import the artwork. Go to background, actually go to my files here and it looks like it automatically uploaded my artwork and yeah, you can enlarge it. So pretty much the exact same as what I did in Photoshop. You can see down here the preview hit by. If you're going to post this to your story, you still hit this buy button and then here you would be able to sell it. And I actually really like these pleaded ones on myself. So that's probably the one that I would go ahead and order. And yeah, there you've created your own products, so congratulations. So in the next lesson we're gonna take a look at a couple of other proportions. So in a couple of other templates, we're gonna take a look at a scarf and I don't know, I'll surprise yet. Let's, let's see what happens to the next lesson. I'll meet you there.
3. Lesson 2 Working with Alternate Shaped Templates: Hi guys, welcome to lesson two. In this lesson, we're going to take a look at a couple more products from dazzle. And I'm gonna show you how to work with some of these alternate shapes that you need to work with. Let's get started. So for this one, I want to show you how to work with a really long pattern like this. So this could be for the scarf. So that's what I've got here and that's the biggest scarf, the 16 inch by 72 inch scarf. And that's usually what I use as the main template that I would use for things like this, which they've got it labeled as a scarf, but it's actually kind of a headband. I'll walk you through that. I'm going to show you this particular one in a second, but yes, about SIT right there. But let's work on this layout for the time being. So if you were to look at this one on Zazen, it's the one that is labeled as 16 by 72 inch long scarf. If got it labeled here as horizontal, yearly is vertical in the image that you're looking at here. But it doesn't matter. We can set it up either. Wait, so because I do pattern design, I have a repeating pattern here that I have just used to fill the space. You may not have this. I've created patterns myself and I've got them saved so that I can read a new pattern layer, fill it with whatever pattern I've designated here. These are a couple of the ones I've got just already installed here. I've got a hundreds of patterns that I could put in here. I chose this one for showing you real quick, but this one we've worked equally as well. I could Rasterize the layer and it would be perfectly usable for my final scar. All I would need to do at this point is hit the Publish button. Let's go back to this colored one. Let this update quickly in the preview that I hit the Publish button and then you'll see it will do the flattened image upload. And this will take us right into the thousands sites. Come on. And then you would just proceed as you did with the first product you could edit or HIPAA Selleck button here and add that to your store. So the same thing would go if you were to select all and copy here that we were working with that other scarf. I could paste that repeats in there or I could do a new pattern fill layer, hit the Publish button. Okay, and it'll open up right to the product page, the Southall site and same process. If you want to sell it, sell it button here, fill in all the information in that will be added to your store. Okay. Now for those of you who don't have Photoshop did demonstrate here in Photoshop first, if I had a pattern like the one that I was using in the first lesson, and I wanted to repeat that on a scarf. I would duplicate the layer, so I would just hit command J and that would give me a duplicate of the layer. You can see it here in the Layers palette. Then I would hit Command T to transform it, and I would change this minus 100, will flip it for us. And then I could move that over, enlarge really async big, and then just move that in. Seamless joined. So once you've got that, you could flatten those two together. So Furman II to flatten them and then duplicate it command J, and then just simply drag it across until you haven't lined up exactly. So again, you can enlarge to make sure that you've gone it's perfectly aligned. You know, if you're going to do a 100 of these with different patterns, you could have a standardized size so that you could type the location of each using the transform palette you see you could click on the corner or the edge and have it line up at exactly. That's the beauty of being able to do it in Photoshop. So if you didn't have that and you want it to do that kind of construction. You can do it right here on the Southall site. And this is kind of funny. Right here. It's advertising the design to print software for the first time. I've never seen this on the Zenzele site before. So let's go in here and try that out. We'll use the Shaphan scarf. We'll edit design. What I'm gonna do is delete this one and let's go back into my uploaded files here and we'll just grab that same file I just used in Photoshop. I would rotate this 90 degrees, enlarge it to fit and then use the tools right here on this alza website, duplicate and enlarge and flip it over. So I'm going to just copy and paste. So Command C, Command V, that gives me my duplicates that I could resize or flip. Or basically what I'm doing here is the flip on this side. So what I did is this one. Now I am getting my arrow keys and you can see that it's jumping a huge distance. If you want to go just a few pixels at a time, use your option Key to move it. And it looks like in this case we're going to be able to just have three repeating here. I'm just pasting. And because that was the last thing on the clipboard and paste it in the exact copy of that first piece. So there you go. You have repeated your pattern. If you wanted it to be exactly in thirds, then I would create an original file that was, I think this is a 72 inch length. So to divide it by three, you would have to do 24 inch pieces. So your original file, the one that I have here that I imported, would need to be resized to be 24 inches wide. So I would do that by going into image and changing it here. If you don't have Photoshop, resize it in whatever software you're using before you upload it here to the thousands site. So if you had gone straight into the nozzle interface and you didn't have anything previously uploaded than you would hit the upload button here that will take you to your files and would have gone into my assets or wherever I've got the original art. And again, it would have to be saved in either a JPEG or compatible format that think P&G is also accepted. And then I would just imported here and do my construction for my project. Once done, I would hit done. And then taking back to this page where I could then hit the solid button. Now in this case, there are some kinds of issues, so let's check it out. So because I enlarged slightly because the original that I had uploaded was just low-resolution image. I'm getting this message. So what you would have to have done is create your file to be a high resolution. And I know that I could do that easily because my image, my actual image here, it's 48 inches by 32 at 300 pixels per inch. It's extremely high resolution, so I would keep it as a TIF. So I want to resize that to be 12 inches. I'm gonna do 12 by 18. I think I can get away with a 150 pixels per inch. Now this is going to change the proportion slightly. But now this image file I can upload, I'm going to actually save it as a jpeg. Go back into this interface, edit to design, upload, go to that asset that I created, choose. And now I'm going to eliminate all of these are double-click on it and work with it. Now that I've resized it to these correct proportions, I can copy and paste. And you can see that my proportion is better for this particular design. I'm going to paste again so that got the duplicate. And you notice that when I am doing any kind of positioning, if I click on the image and I go to move it, you can see that there are all kinds of different guidelines that come up showing me the center point, both horizontally and vertically. I'm going to select all three of these enlarged slightly and hit Done. No, I don't get that message because the resolution is okay. So I can hit sell it and add it to my store or add it as he as to my cart. And I've actually ordered these scars before edges gave one to my mom, actually made her cell phone case and a scarf to match so she could be really stylish. And yeah, it's a gorgeous scarf. It's ship on so the patterns shows through transparently to the other side, just like any other Shaphan scarf that you would buy. Absolutely beautiful colors came out superintendents and matches her smartphone case. Now for her first smart phone ever removing grandma, I should call her great grandma says I'm Grandma, we have moved great grammar into the 21st century. He, so that is the one long and skinny design. And I want to show you something like the sock design and what we would do there. So I think I'll save that tilde next lesson. I'll see you there.
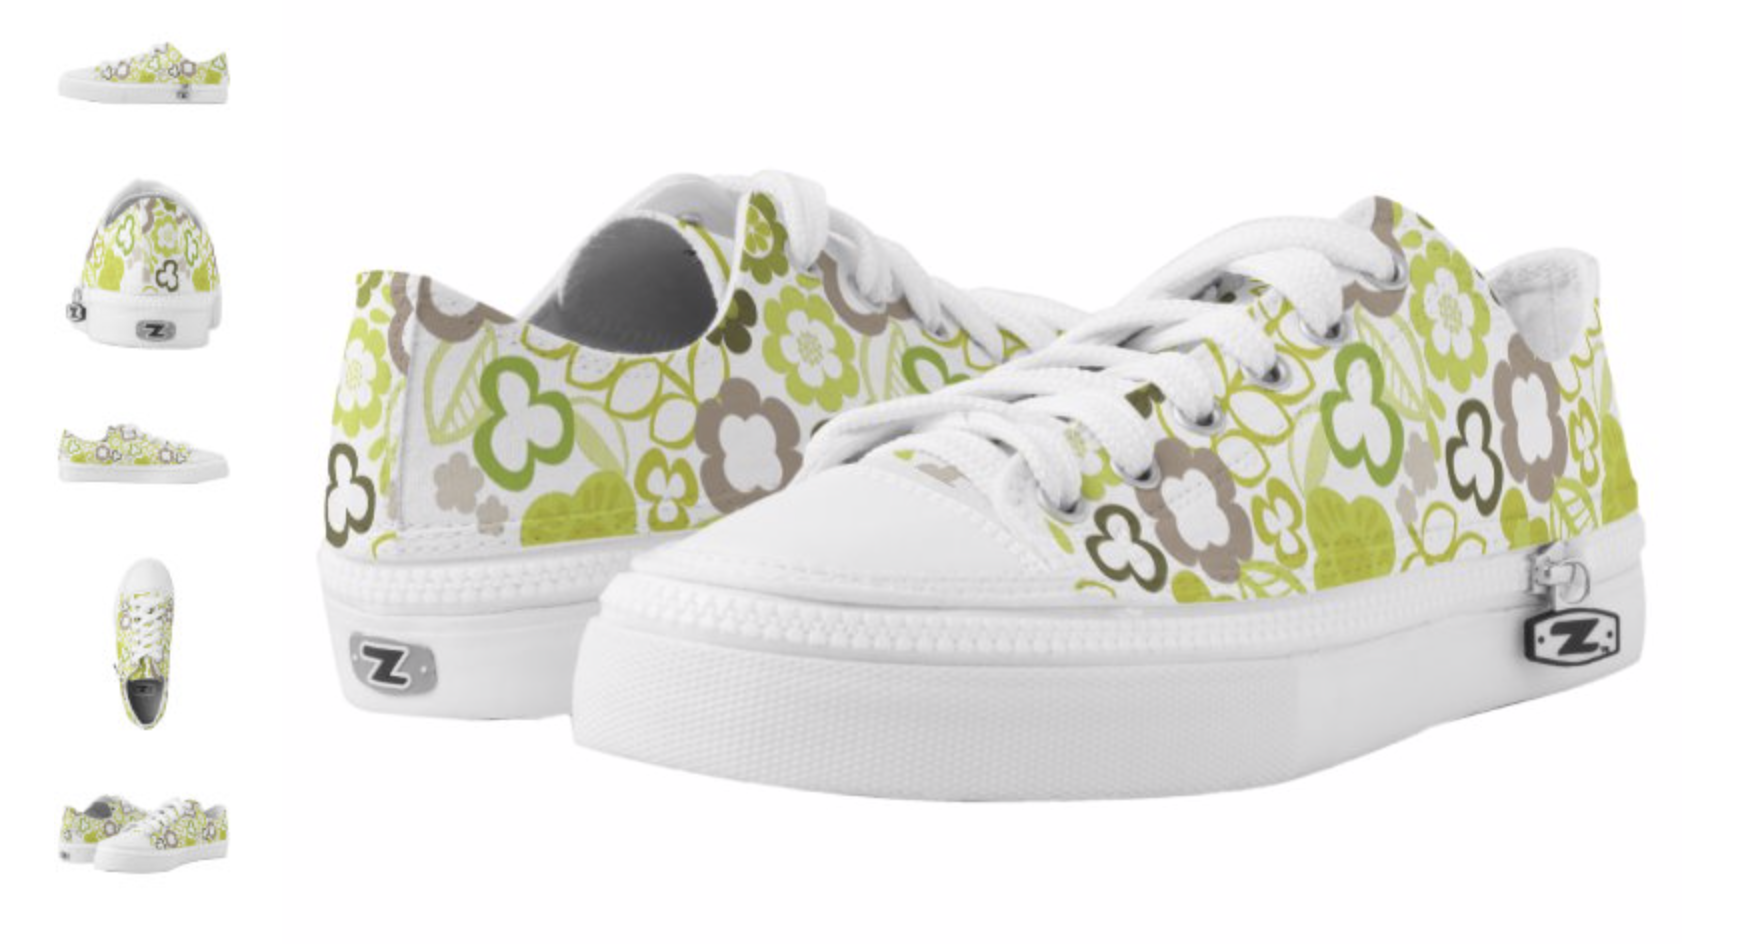
4. Lesson 3 Creating Bags and Shoes: Hi guys, welcome to lesson three. So your fashion ensemble would not be complete without some kind of a bag or tote that's looked at a couple of these that are available in the design to print software. I'm also going to be showing you the setup of a pair of sneakers, will do that at the end of the lesson. So what I chose today to show you bag wise is this all overprint cross body bag? Now when I originally opened it and started to work with it, I was having an issue where the preview wasn't showing the entire pattern going from edge to edge who was stopping even if I had this area filled. So that's a glitch just to be aware of once I had hit the Publish button and then gone into the Zazen site, it did appear right from edge to edge. I hadn't even gone into edit design and it was showing it correctly. So that could happen to you. You could be working on this and have that problem then for something like this, because it's just a big square, it's pretty straightforward. We would just copy this other one over and then decide whether we want to flip it. And if that was the case, then just type in minus 100 here and you've got the exact mirror image. I would adjust it based on the red line after my conversation with them on the phone yesterday. And of course, go back and check it. Once you hit publish, check to see that the update is happening here. So it is a little bit slow as you'd work with bigger documents just to let you know. Now, that could very well be because of my intranet or some other factor. I just thought I would warn you about that sort of screened glitch that happens here. And you can see here it says, please wait, publishing me. I don't know whatever the end of that sentence is. But here we have the bag front and back. Of course, you can still go in and edit. You could add anything else you want either when you're in this interface where back in Photoshop, I thought I'd explain both methods just because some of you may not have Photoshop. So not to worry, you can do this without even having the software. Okay, so that was a pretty straightforward accessory to design. And I thought that I would work with something a little bit more complex the next projects, so I'm going to close this. I'm not going to save it. And I thought, why not work with a shoe this time? Just to give us a bit of a challenge, I want to see how the pieces work together and whether or not everything goes from edge to edge. So it doesn't have any white borders or anything on it. I'm going to use this pattern that I created in my retro plurals class. And I think it'll work well because I've got it in a repeating, kind of a nice long strip and it looks like for the most part, I need kind of long strips. The artwork created for the scarf might even work, but I'm going to grab this one soul. Take note this piece top to bottom here, and I'm just going to select all and copy it. And then let's start with the inside, right? So I'm going to highlight this layer over here in the Layers palette. I'm going to paste as pixels. And let's work with it and see how this looks. For me. The funnest part is this part where we hit OK and we wait for the preview to update. Oh, there you go. You see that first piece of artwork and I love it. That's so cute. That is something I would wear. So then I would go through and make some decisions about the placement of the pattern bore artwork that I've got there. So I think I would duplicate this for the inside left. You can command J two duplicated, or you could drag it. If you hold down your command and Option key, you're gonna make a duplicate. But let's just take a look here. I want to get that out of that folder. What I think I wanted to do here is to flip it horizontally because you can see here from the artwork, let's go a little bit bigger here. I don't want this to be on this side of the shoe and then this to be on the back. So it'll be on the front here and on the back. What I want for both of them to be the same. So that's totally your own call. I am going to hit transforms of command t for transform. And again, that's one where you put the minus here in front and of course, work with your positioning. And remember what I said about the red line B, where the repeat would happen or where the reflection would happen. Okay, so we now have two parts of the shoe. So let's take a look here. Inside, left, inside right. Okay. So that's a two different shoes, left and right shoe. I was assuming this meant the same chuh. But that doesn't matter because what we can do now is I'm just going to actually do one at a time. Want the right to go into the right of that other shoe and the left to go into the left. Okay. So now we've got the whole shoes side to side-by-side. And you can see here that there is something a little Hickey going on with the repeats. I mean, it really isn't like it's wrong. It's totally up to you to decide how you want that repeat to happen. So if I wanted that same flower to be on the same part of the issue on the front part of each of the shoes, then you'd have to go back in and flip what I had done there, so I would take a peek. It's this one. I'll go back and do that and see sometimes that updating takes a little bit wrong shoe when we're doing here. Let's do this one too. And you notice that when I clicked on their half my move tool, so when I click Command click, it selects the layer that I want to be on. And I can see that because of this smart guide. So I'm going to flip that one as well. And so just visually you can see that this brown flower is on the back on all of them except for this one. So this one, I will also flattened see if that satisfies me, like I said, each to his own judgment call on your Part, just decide how it is that you want your shoe and the pattern on it to look. So that's kind of cute, you'd see it here. Now it is fully reflected, which is kind of what I had in mind. So then for the other bits here, like these back bits, you can decide whether you want to take the whole pattern or you want to take a section of it, I think I'm just going to try the a section of it. Copying it to V on my keyboard gives me my move tool again. Then I can click over here. I know I'm in the right spot, man v. We'll paste it. No question where it's gone. But if you do Command T, you can drag across from one part to the other. It does that weird glitchy thing when you do that kind of pops up and down on your screen. That looks like it's worked. So now we can do the same thing here on the back, right? So we could copy that. One of you can drag that you can Option Shift and drag across from one part to the other. It's a little bit weird when you do that because you get this strange glitching might just be easier to cut it and then select the one that you want to work on and paste. And then here I would flip it, sold back to that minus 100 here. So these two have to be aligned. You can see that they didn't quite land on the same spot. Now I'm going to get back on my MOOC tool, click on the tongue. And then I think I would do the same thing for this. I would paste, enlarge electrical and copy and paste on this one. And this one, I'm also going to transform Command T and minus 100 here. So now I've got my entire shoe, all the surfaces covers. So you can see here it's updating the preview, but you can flip through just to be sure that you've got every surface the way you want it. It might even be fun to do solid colors on some of the parts, like you can have the shoe back this part here be a solid color. It's totally up to you. You're the designer. So let's save this document now because that was a fair bit of work. I have that e-commerce folder, make a new folder called shoes. And I'm going to save this one. And I'm going to hit Publish here. And we're going to check it out on the Southall site. So those are two really cute accessories that you could make to coordinate with your mouse and your scarf. The last one we're going to work on in the next lesson is the socks, because they have a few challenges as well. Taking its sweet time, sometimes you have to press that button twice. This isn't the first time that this has happened where I've had to hit it again. It could be my intranet because it's currently storming here. And B here, some popping in the background. That's because I've got a fire going. It's so cool in the house. Here we go. So again, here you can go in and you could edit if you wanted to in this interface here, it's pretty much exactly what you see in Photoshop. So if you prefer to deal with a nice big artwork like this, then by all means, work directly in the thousands site. I personally find that for the first part, I like having the control that photoshop gives me if I'm composing and moving things around at an a y. But just this kind of a visual tells me more sometimes than this, but it's totally up to you. There are pluses and minuses on both. I kinda like to use them in tandem one way or the other. I think we've created a couple of really great products and I would totally where that shoe. So I'll meet you in the next lesson where we're going to take a look at the socks. I will see you there.
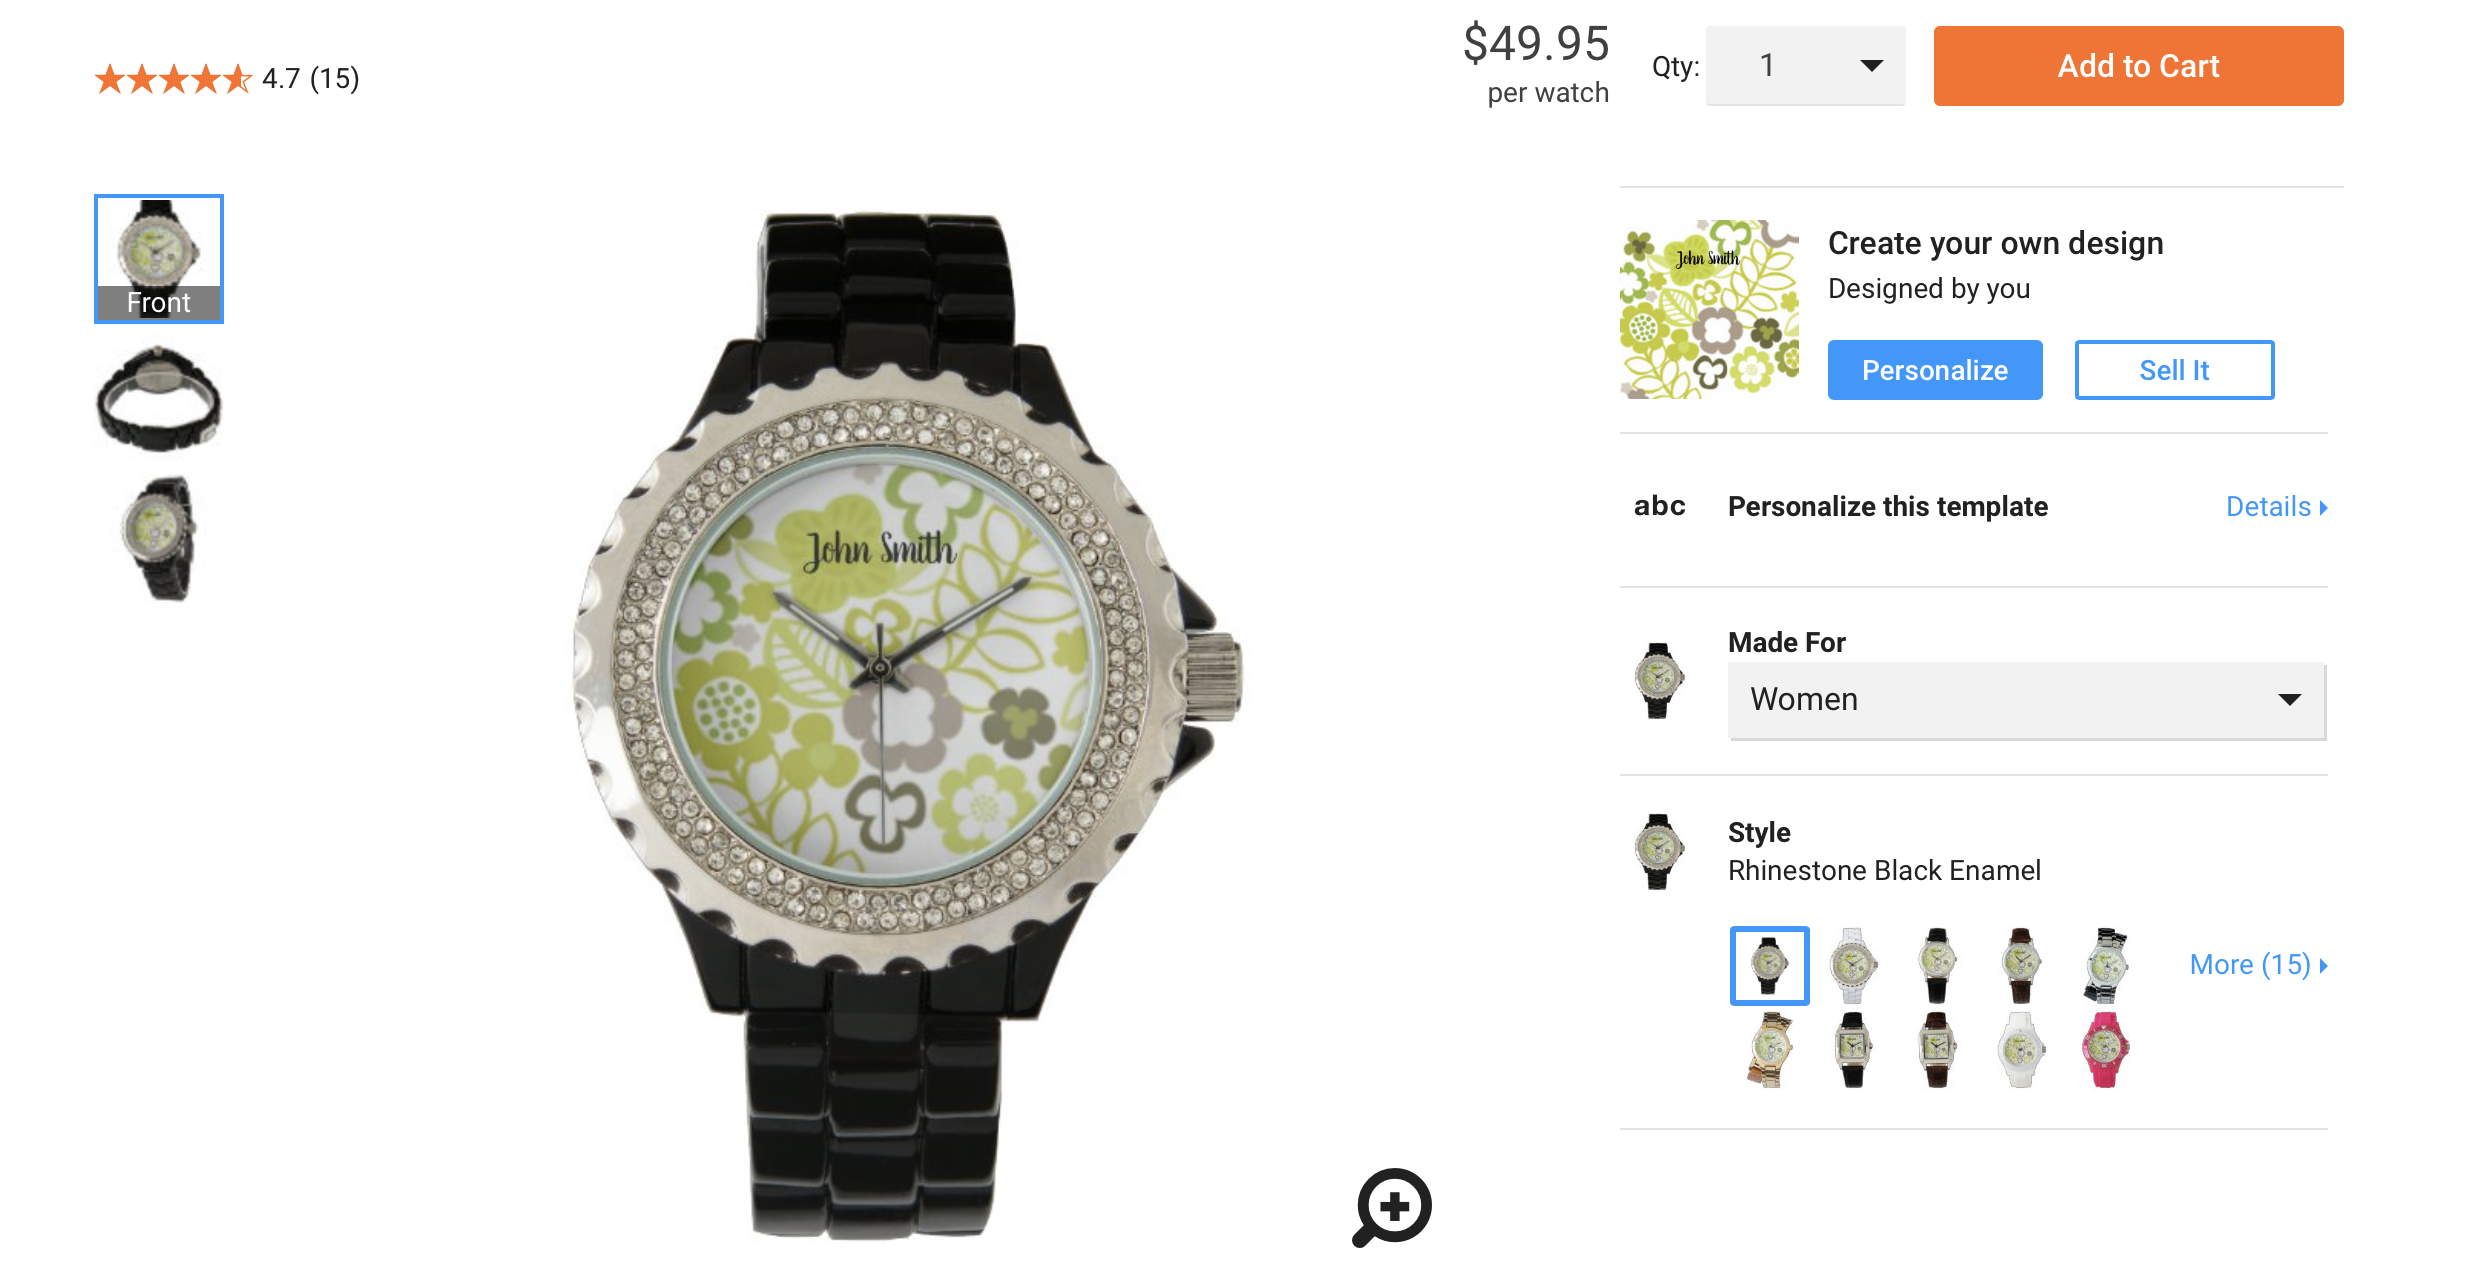
5. Lesson 4 Sock and Watchface Considerations: Hi guys, welcome to lesson four. So what else can we make now that we've got these new found skills? So here are a couple of really fun accessories that you can create. I'm going to explain some design considerations for you when designing something like a watch face or a pair of socks. Let's get started. So I have opened up the all overprint socks and there are definitely some considerations here that we need to review. I actually made a phone call to fall to just confirm a few things that were confusing to me. And the main one that I think you should be aware of is that even though they call it an all overprint sock, because of its shape, obviously, they are printing one side at a time and therefore, you have to take into account this seam here in the front. It's not actually a seam, but gets a hold or whatever you want to call that on the front of the sock. And what I found them to clarify was whether or not the print could go straight across as if you were looking at the flat front surface of the Salk and it doesn't. So what has to happen is that the artwork is perfectly reflected so that the artwork itself lines up along the line which becomes the center. Okay. I know that sounds a bit confusing, but I'll explain it in two different ways. So if we have this artwork and we need to have it reflects, what we would do is duplicate it. And I'm going to open up all these folders here so that I can drag them in. We're gonna do Command J to duplicate the layer and drag that into each, so Comanche each time. And we've got the exact copy of the same artwork on each of the layers, then what we'd have to do is select every second one. So depending on where you want your seam of your artwork to be, I've decided I want it to be on this side, so it would be the front of this rate sock if you want to select the layer individually, Remember that if you're on the move tool, you can just click on the layer and that will be the one that you have selected. Okay, you can see by my smart guides and that it has switched here in the layers. So whenever I click on one of the other ones, you see it being selected. But anyways, I want to show you this the rights inside. That's the one that I'm going to keep it stationary. So the right side, I need to flip. So I'm gonna do Command T. And then up at the top here, I'm going to do minus 100 and you see that flips it very accurately there. I would also do that with this one here. So Command T to add a minus sign there, minus 100. And we would have that perfectly lined up on the socks. So you can take a look at your previous here. They don't really show much. I wish there was at least one view that had the front, so you can see exactly what that looks like when it's printed onto the saw would be great to have a view of it. Like. This where you could see the front and see what your join will look like. So you can see, I don't know where these socks or from their probably woven and therefore the pattern could be knitted without that kind of a join in the middle that dazzle has. I just wanted to point that out so you're not thinking about you can have a design going right across the front of the sock. So I also experimental little bit with a piece of art that I had where I could demonstrate one of the things you could do to minimize the look of the seam. So if you look here, I've got two parts. And when you look at join, it does look kinda funny and spots, you know, you get these little hand-drawn things. I'm not even sure what they were, but that is just the straight repeat of a pattern tile that I have. I would probably also have to duplicate and reflect this horizontally. Make a copy of it. Oops, because I could've done right down here. I'd probably have to do something like this because I would need to have, if you look at the layout here, I mean, it's actually rectangular and quite tall. So I would need a pretty tall piece of art to put there. So I have reflected it both vertically and horizontally. And so I could end up with sort of flaws like what I'm seeing here, which I mean, you might not notice at all on a pair of socks, but I'm a bit of a perfectionist when it comes to that. And I don't know if I'd want these weird-looking overlapped flowers. So what I did with my pattern, so I've got the pattern, I'm going to delete all this stuff over here. I've got the pattern. And what I've done is I've created a single flower that when it shows up on both sides, isn't going to look weird. So it's not going to look like there's little bits cutoff or anything like that. I can repeat this whole thing was a pattern that I had created for a previous class. My retro coordinates class may have seen and so repeats here, there isn't some kind of a weird reflection. And then the same thing goes if I selected all here and I reflect, I'm going to use my Reflect tool, which is o on the keyboard. And the reason I want to do that is because I want to bisect that flower or at least as close as I can get because I want to show you what it would look like if I was to use this on socks now because I've got these that will reflect nicely. So I'm gonna select all, I'm going to go approximately in the center of this one. And it's going to be a vertical, That's going to be a copy. And you can see, because I didn't perfectly hit that. Oops. If I use half of that artwork and I could still put a couple more things in here, perhaps one of the little flowers, but you can see that that single half would actually reflect quite nicely down the middle here and across this way. So I'm going to fix that up, add that little flour in there, and then we're going to import this artwork into Photoshop and set up a song. If this was something I was going to be selling, I'd probably fuss with it a lot more. I'll end up just saving 1.5 a bit. But I'll explain as I go along and I'm just gonna time-lapse this part so that you don't have to spend too much time watching as I make these additional little changes to it. This is my reflection right here, my reflection zone. So I'm only going to be using the artwork that appears on one house. So what I'm gonna do is I'm going to divide anything that I put here in half. And for me the fastest way to do that is to draw a shape over top. But that would be useful to divide it in house like both, go into pathfinder and divide, and that will allow me to remove that half later on. I'm not worried about the stuff on this side, so I'm going to be deleting it. This one's already divided. I've got some nice stuff going on on my reflection zone there. So I'm going to actually eliminate everything on this side at this point. I'm going to make absolutely sure these are aligned. And so you've got two here. So I am Option Shift dragging over the items that I want to align here. And so I want those to align perfectly. So I'm going to hit this. I can clear my guides. And I saw that this one was doubled, got rid of the duplicate. And now this artwork is ready to go into Photoshop to feed my new artwork. So I'm just going to copy it here because I can save this as pixels, and that will be a decent enough quality for this particular project. So I'm going to paste it here, one to see how much I would need to add in Illustrator there to do this little foot protrusion there. So I'm going to when am I trying to do right outside? Yes. So you can see that this is what I want to have perfectly reflected is this artwork here. And when I was on the phone with them, they suggested that I line up to this red line. So you can see I would need some additional Art down at the bottom here. Now, I know that I'm going to need to fill in this space, but I know that that will reflect perfectly. So what I'm gonna do is duplicate that. So I'm duplicated in place. So Command J. So I've got one exactly positioned over top. You command t. And then what I'll do is I'll poll the artwork. We know that that is perfectly matched up there and you can pull it to whatever size you want. You could watch up in the control bar. This is where you'd have it, not a 100 if you want to be sure that it's a perfect reflection, what I would have to do is click here to be sure that the reflection is happening right along the line that we want to preserve. So I was going to hit OK. Now it's perfectly aligned. I would flatten the two together and then I would select all copy and use that on each of my different required template pieces. So I'm going to actually get rid of this one was an extra that I had pasted. Now Command V, we'll just paste, actually let me click on the rate combined. I don't noise doing that, even though I've selected, selected on the template, it's going a little crazy. So I guess what I'll do is I will make three copies and drag them into each of the folders here. You could also Option Shift to drag to duplicate instead of doing the command j. But now you can see I've got all of my surfaces covered hill located here. And when you see the flip side, actually I noticed here it is non perfect reflection. Let me double check that I've got everything lined up to the red lines, so I'm gonna go through and just make sure of that. So thank goodness for the preview because that definitely shows you whether or not you've got them lined up correctly, that would make us super adorable hair of socks. So I hope that explains that whole process adequately. And then the other one that I wanted to just show you a little bit about is the watch face. Okay, so I'm gonna save and close this document. And let's hit this new project button over here on the design to print extension. And we'll take a look here at think it would be in the jewelry. Yeah. So lets just grab a no. It doesn't really matter who grabbed this big. I'll just stick with the black and white ones for kids. Actually, I want to womans seed, maybe I'll grab this silver glitter one. And I think here I can change it to women create. So I think really, I mean, it's actually pretty obvious here that what you would have to do is work around this interior portion where the clock hands and the secondhand joint. You're gonna have a little area here that is blocked off, which isn't really critical for most of the artwork that we've been working with. So few took something like the alcohol ink artwork that I have here or even the patterns, one from Illustrator, probably a nice small portion of it here would be more than adequate whole group. So this would be perfectly fine. There's no worries. Nothing is going to be blocked in the middle here. And same with this one. And I'm sure this is going to be enormous and where to even go. Here we go. And you can see how absolutely adorable that's going to look at a watch face. So the only thing I would caution you here is if you are going to be using something that has a little bit of typography to at, at you would completely avoid that central area. I'm going to do. So. You can see here that if the type was too low, you would definitely have a conflict. You could also consider doing things like having the tight way down below are some of the type below, such as small artwork. Stuff is just jumping so much. And because this is appearing to me to be so low resolution, I guess, because I've got it enlarge to four hundred seven hundred percent almost me. You definitely would have to look at it at a 100% to get a really good idea of the quality, I would hit the zoom tool here and then a 100%. And there you could see your artwork, which looks a lot sharper in this case. Obviously, this is not something that I would do. I would definitely have to play around with the layout and the design in order for it to work for a watch face if I was going to have type on it. And I mean, personally for myself, I would not have type on it. Now, one of the things also consider in a case like this would be that when you go to publish, remember that this is in layers. You can hit Publish here when you get into the spousal website, it's gonna pop us into that in a second here. When you get into the thousands site, you can still edit your design so you could still enlarge it or whatever you want it to do. And you could add your text here. So maybe that's what I would recommend in a case like this, because you could probably get just give it personal, personalization there you can see that the quality seems to be a lot better. Now I don't know why a guy named John would want a floral bet. Haidt, who knows? And then hit Done. Oh, I forgot one thing. I would definitely make sure that you go to more options here and you make this object's editable. So you would need to make this a template object. And i would put something in like this because that's what's going to come up. When a person chooses to buy the watch, then you hit done. And you can see here and the details that a person could click on this, a change. So I think that's super adorable and I would definitely consider doing something like this with artwork that coordinates with my fancy mask and scarf so that I have the full ensemble. Anyways, just a couple of considerations for you, and I will meet you in the next lesson where we're going to wrap up.
6. Outro and Conclusion: Well, we've reached the end. You guys waited. Go. Now you've got some wonderful new products and I bet you're excited to see those come in. I went through an ordered a bunch of these products for myself. Once I get them, I'll be sure to publish some pics of me wearing them. The other thing that I'm going to do is add a bunch of these to my web site so that I can be selling them directly to customers. I would love to see some of your products listed here and make sure you share your length. Checkout my stores on Zazi.com and of course my website at shop dot Dolores art dossier. I'd also love to invite you to visit my to Pinterest sites. One is called the Loris art Dolores Nas Grant and the F01 is called teacher Delors nascar. And there I share tons of artists resources. If you're just starting to get the hang of print on demand, please check out my other classes. I've got several that offer all kinds of insights into the print on-demand industry. Thanks guys. I can't wait to see you in my other classes. Bye for now.
 Delores Naskrent, Creative Explorer