Transcripts
1. INTRODUCTION: This class, I will
show you how to sew your very own bunny plush, a project that's cute, fun, and full of personality. It's the perfect handmade gift, a sweet keepsake, or a delightful surprise for a
baby shower or kids party. You will get the full
bonny body pattern with five different
face options, plus an outfit pattern for
overalls and a bennie. Step by step, I will guide
you through sewing, stuffing, and finishing your bunny
so it truly comes to life. By the end of this class, you will have a beautiful
handmade bunny and plenty of inspiration to sew more
outfits to grow its wardrobe. So grab your fabric and thread, and let's get started.
2. BUNNY BODY - PART 1: Hein, welcome to my
bunny sewing tutorial. In this class, we will create the adorable little
bunny body step by step. It makes a perfect
handmade gift for a child, a baby shower or simply
as a sweet keepsake. Here are two versions
of this bunny. The left one was
completely hand sewn. The right one, I used
to sewing machine. So if you don't have
a sewing machine, you can still do this
bunny easily on a weekend. And now let's get started. So the first thing
I would quickly like to talk to you
about are fabrics. So there are different kinds of fabrics that
you can purchase. What I actually like
to do is to go to flea markets because they have very nice vintage
fabrics that are most likely 100% cotton or
some kind of vintage linen. So I really like those
old vintage materials. As you can see
here, for instance, I'm actually not sure
how old this is, but looking at the fabric, it does look very vintage. And I'm pretty sure
that this one is yeah, 100% cotton, which is nice. It will hold up the shape. And you also want to make sure that your fabric
is not too thin. You can see a bit through
here, but that's okay. As you can see here, I have used this fabric for this bunny. This bunny is hand sewn. Actually, I haven't used
sewing machine for this, and it works well. I mean, you can see
the stitches here, obviously, because
it's hand sewn. But yeah, this fabric really hold
up the shape very nicely. And for example, this one, is something I purchased, yeah, on the cheaper end. So I think that it
can still work. But definitely, this
is not 100% cotton. It is a bit more sturdier. I'm actually curious
to see how this fabric will turn out. But, yeah. So if you can go to some flea markets and
get those big blankets or some vintage peas with
100% cotton, if possible. So your bunny feels
smooth and, you know, also more healthy for the
environment around kids. So that's probably my
suggestion for you. So after printing out the template and cutting out
the shapes using scissors, you are going to end up with paper pieces,
templates like this, and you are going to use these templates to
lay it over fabric. And use preferably, like
those heat disappearing pens. If you can get a hand on those, I currently don't have them. So I just used a simple pencil to basically go around
the shape on the fabric, which I'm going to show
you in just a second. And, yeah, you have one
piece that are going to be needed for the body,
the back, basically. That is for the back side. And then you are going
to need two pieces for the side of the body that's going to
be attached here. Basically, you're going to
sew together those pieces. So it's going to be two pieces on the side and one in the back, and you're going to have a
center sew in the center here. And then, obviously,
you have yeah, two pieces for the legs. Basically, they are four layers. So if you double the fabric, you're going to end up
with two double pieces. It's gonna be for the legs
and the same for the arms. So yeah. And lastly, we also are going
to have two pieces, double layered of the
ears for the ears. So for the body, we only need one piece. So you would lay your template
on one layer of fabric, and you would want to use the back side of the fabric
to draw on two. Okay? So that means the nice side of the fabric should
be on the bottom. And then you just use a pen
and just go around the shape. And here you can see that
I left some opening. So I want you to make sure to just mark those areas later on, so you know that this
is not a sewing line, so it means you would have
to sew around this edge, and wherever there is an
opening like here or here, you are going to
leave that one out. Okay? I'm going to show
you the finished piece. This is where I have already
hope you can see it. This is where I have already I actually forgot to line to mark the opening,
which is important. So I'm just going to mark
it like this and like this. So I'm going to see
clearly where I have to leave the opening. Then for the pieces that
are going to be doubled, means like the legs and
the arms and the ears, you would want to lay your
fabric on top of each other. So basically layered. And
you would want to have the nice side obviously
inside of this. So if you have maybe a
fabric that you're going to use that has a front
face and a back face, you would want to
have the nice side inside here because we're
going to see this line, and then we are
flipping it around. Okay. So I did the same
here, layered over, traced over the template, and marked my openings
for the legs. And you can clearly just
make one piece for the legs, and then later you can
just continue swing on it. I'm going to show you how.
But you don't have to have one piece per leg or
something like that. So it's up to you how you are able to handle the swing better. Okay, then we have the arms. So I marked the
opening here as well. Then the ears. I have one. Those I have done separately because they
are little bigger pieces. So I did the same here, traced it over, two pieces. And then lastly, we
have the other side of the body on the sides. And there's a small little
thing that needs to be lined or marked is that
all the way at the top, you want to draw you want to extend the
line a little bit, because we are going to sew
all the way until here. It's gonna be needed later on. Okay. The next thing I would like
you to do is actually iron the double pieces or any fabric
that you already cut out. Because as you can
see here, yeah, this is not nice,
so just iron it, and then we can start sewing. Alright, so this is
just an example. I actually didn't
iron this piece yet. I just want to show
you real quick. If you're going to hand
sew the entire bunny, then, yeah, you should fixate your fabric
after ironing it. You should fixate your fabric, just so it doesn't move
when you hand sew. I'm just going to use some
simple pin needles like this. Maybe you can more.
This should be okay. And I'm going to use a
red thread just for you to be able to see
the stitches better. So I'm just going to tie the
end to a small little knot. And then you want to start somewhere where you have
the end of an opening. So maybe we can start here. And then what you
want to do is you want to always go as
small as possible. So I'm really using a
very thin, small needle. The smaller the better
because the wider you go, I'm going to show
you with this funny. And the wider you go, the more the stitches will be
visible in the end. So I'm just going to go
very tight like this. Sorry. Cooked a little. Okay. And then what you want to do is you want to go back again. So this is called a back stitch
and then go on the front. Hope you can see it. Like this. This is actually a little
white, so you can see. So if possible, really
go as close as you can. So maybe the next one I'm
going to do a little closer. Maybe somewhere. Like
this. They go closer. I mean, obviously,
the closer you go, the more you're going
to need to stitch, but in the end, it's worth it. Because the tighter you go, the more closer your
stitches will get, and it's just for the
durability of the bunny. And then continue back
and forth and so on. It's totally possible
to do this project. Hand swing if you don't have a sewing machine, you
can totally do it. It's going to take you
a while, but, I mean, if you have a weekend where you feel like getting
your mind off something, you can just start this little cute project and hand so this. Okay, I'm not going
to continue because I actually already
have hand sued one. So I think you can
just follow along. So no matter if you hands or you will continue on
the sewing machine, I'm going to show you
in the next steps on how to combine everything. Okay, so the first thing
I want to show you is how to quickly thread
in from the top. So I place my yarn
here on the top, and then here is a little hook. So I'm going right behind here. And then next, I go in here, number two, and then all the way behind this little wheel. And then up and then
slide like this. And it should grab
the thread inside. And then I go down.
Change the camera. Okay. Then for the next step, I want to make sure that
the needle is all the way up and you can
lower the thing. Then you place it behind
that little hook. Like this, and then you
can thread the needle. I do have this automatic
threader, but I'm just going. Okay. Then you can this thing and then for
this little scroll, why? You want to make sure that it actually goes in this direction. And you place the in here. Is this little hook there. Close it in. It's like that. Close this. I'm gonna
turn on my machine. D. Just gonna go all the way down. And then it should automatically
threat the bottom. You can see. That's
what we want. We want this wrap to come from the top and from the bottom. All right. Now we can
talk about the settings. So this sewing machine
actually comes with, I don't know, 39 stitches. So I'm pretty new to swing
machines in general, and this is a pretty upgrade. So I want to for this one, I want to make sure
to have the well, not a slim as possible, but I'm going to actually
use setting number one. You can see it. Okay. And
then here, which is nice. You can just change the
settings on the number. So this is going
to be number one. And this sewing
machine actually has the possibility to change the thread width and
the thread length. So in that case,
we want to change the thread or the
stitching length, right? So now it's 2.5. I'm just going to
adjust it to one. I have tried it previously, and one works for me. Alright, so this is to
adjust the strength of the, yeah, how basically
the thread will go. I will leave it for
now on number four. I will strongly suggest that you try the fabric and how it behaves on a test piece to see if you need to
adjust this wheel. And yeah, let's get started. I already placed my needle
down to my starting point. Going to lower it, and let's se straight ahead
on this line here. Also going to use the reverse
function to basically close the start and
the end points. Okay. And here's
the finished line. Again, I'm no expert, but I think it did
a pretty good job. It did very, very, very small, thin stitches and the back looks like this. You
can barely see them. And then when you
are going to see the other side,
looks perfect. Okay. Let me actually open
this side because I had it closed off. You can see this better now. How this back side looks
looks pretty good to me. So if you have a sewing machine, it's definitely worth you see? Just as a comparison. I mean, this is hand
stitched. You can see it. But again, if it's, you know, a gift or something, I don't think that they are
going to mine either way. I think this gives a
bit more character, and this is more on the
professionals side. Okay, what we want to
do now is actually, we actually want to
cut out this shape. So here where the
bottom is the opening, you can just cut this
part straight ah, right at the edge. Like this. But for the rest, you basically, if you have a scissor that is zigzac,
you can use that one. You don't have you can
just use a normal scissor, and you want to leave just a
bit of don't cut too close. So maybe about what is
it half a centimeter, bit more than half a centimeter. Yeah, you want to cut around
here all the way around. And then you do the
same for the sides. You can also cut off
the bottom part. Okay. These are the two pieces. Now, we are going to use
some small pin needles, and I'm going to place
the back body like this, and I'm going to
open up our side, the body or basically the
front side of the body. And then you're going to
align it with the bottom. So make sure to
stretch it like this. Like this you want to use some needles to attach it
so it doesn't move anymore. And then for the top, you would want to open
later when you see it. You would want to
open it like this and basically through just
over it and here. Okay, but I'm going to show
you again once we get there. Now, and this is the finished
body piece, basically. And what we now want to do is, I'm just going to forgot to
cut the top part of this one. And we have some
fabric left over here, which I'm just going to cut So for the top part, you
can just cut it now. Okay. What we then want to do is if you have
used Zixxis that's fine. If you don't, what I usually
do is just cut small pieces. I just cut in a bit. This will help for the shape.
3. BUNNY BODY - PART 2: I'm going to finish
the four pieces, and I will come back to you. Like I said four pieces. We actually had six
pieces to finish. So these are the finished ears. So I did leave the opening here, and then we have the legs. And wherever there was a curve, I just did cut a bit inside of the edges for it to be
smoother in the end. And these are the arms, also with the hole here. And the main body. So when flipping, this
should be relatively easy. You can just use back of a pencil or something
that is not too sharp to flip the fabric. Now, if you do work with heat resistant or heat
disappearing, sorry, heat disappearing pan,
you shouldn't end up with having lines like
this after you apply heat. But since this is a pencil, I'm sure that I can
just get rid of those lines with my rubber. Okay. Make sure to go all
the way into the edges. And then the front. So this is already the bunny's
head, you can see. This is how it should look like. Now for the legs, for instance, there's a little
trick that I like to use. I just use a little
bit of pipe that is a bit wider than,
let's say, pencil. This, for instance, is one
of those little vases, plastic vases that you
use for single flowers. I'm pretty sure you
know what I mean. But maybe you can find
a pipe or something that is about a finger thick. And then you can place
this inside of the leg. And then you go around on this side and basically push
this through like this. Tara. This is the simplest way I found to really flip
those thin legs. As otherwise, it's a little
more tricky, it's doable. Just takes a bit
more time. I did pretty similar I think. Okay. Let me show you again.
Basically insert the tube in this direction first and then push it through. And then on this side. Alright, now that I have
finished flipping all my pieces, it's time to start stuffing. Actually, I'm sure they are high quality stuffing material. I'm actually just using some material that I
have from an old pillow. I mean, whatever
you have at home you can use or if you want to go and buy order something more high
end, feel free to do so. But basically, I'm starting
to feel the head first. And you really don't
want to unstuff the head because
this is the most important to have the
head stuffed very well. Can also use a pen to make sure that you really
go and stuffen the corners because
it pretty much will hold the shape or keep the
shape as you have stuffed it. So make sure to stuff it well
and also stuff the corners, the edges very nicely. Now, this is after
stuffing the heat. So as mentioned, you want to make sure that
the heat is stuffed pretty tight because there's nothing else you can
do afterwards, right? So, make sure you
like the shape. So then for the legs, I actually like to
use the pipe again, 'cause it's gonna
help you to stuff. It's a little trick. You also want to make
sure to not stuff the feet too much. Now, like here, instance, they're still softer
than they had. The head is very hard, as well, well, the body is, like, medium, and then I would say the legs are
a little softer. You know, give this
more of a cuddly feel. You don't want them to
basically be like that. So I think that you can
just feel that they are a bit smooth a bit smoother in the stuffing to make them
look a little better. You also don't want to
stuff them all the way to the end because more or less, this is how until
you stuff them. So you have about I would say, a chick maybe 2 centimeters
that you don't stuff. Then we are going to attach
the feet to the body. So you are going to basically flip this fabric inside
a bit like this, and then you want to also align your feet maybe the
direction that you wanted. So maybe a bit like this. Then you insert the
feet, sorry, the legs. Let's see, more or
less like this. And then you can just use
the pin needles to fixate. So I'm always like to leave a tiny bit of fabric
here on the left side. So more like this. And since we go to sew here, there's still enough
fabric for you to attach it and here. So like this. And the second. Now it's time to
see. I'm actually going to use the setting number 00 where my needle
is gonna be on the left side. Like this. Okay. This is how it turned out. If you're afraid to actually use the sewing machine
for this part, you can, for sure, also
hand sew this area. I have done it
here, so it works. Now on the side of the body, you should actually
have a little opening still remaining to continue stuffing the
inside of the body. Now, for this to finish this, we're actually going to
use a ladder stitch. So a ladder stitch basically
goes from this side, and then you switch
over to this side, and then you switch
over to this side, and then this side and this. So let me show you. So just make sure that the
fabric goes in a bit and then you
basically pull it. Okay. And then you start from the edge and you go through once. Right? Then you turn it around. And then you go the side, like this. Then you flip over and go
like this right next to it, and move over again this side. And Now, there are different ways
to attach the arms. If you don't need
them to be movable, you can simply stuff
them at this point, close them with a
later stitch and then attach them by sewing along
the top edge onto the body. This is the method I used in the hand soon
version of my bunny. The only difference
is that the template now has a rounded
shape at the top. I also want to quickly show
you an alternative creating a small buttonhole if you are
familiar on how to do this. For sure, there are plenty of tutorials that you can find, and I highly recommend
practicing first on a scrap piece of fabric if it's your first time
making buttonholes. When placing the buttonhole, position it slightly
higher than in my example. So it sits a little better. Once you have made
the button holes, stuff the arms and
close them with a letter stitch again,
just shown before. Essentially, the buttonhole step just comes before stuffing if you decide to
go for this route. After that, you can
attach the buttons to the body and secure
the arm in place. Both versions work
perfectly fine, even if you choose
the simpler method. The main advantage of using buttons is that the
arms remain movable. Plus, if you later
decide to make clothing that's more on the tighter
or trickier to put on, having removable
and retachable arms can make the process
much easier. So for the ears, you can
decide whether to leave them unstuffed or add a
little bit of filling. I chose to stuff them just at the very bottom and with just
a small amount of filling. This way, they still
hang down nicely, but have a bit of a shape. In this version, you will
notice that the top part of the ear was actually folded before being
attached to the head. The process is simple. Just fold the ear and sew
at the bottom part first, and then secure the folded
top part at the end. This creates a neat thin
folded line in the ears. Alternatively, you
can also attach the ears flat without folding. That look is also quite
cute, don't you think? Folded ears tend
to give the bonny a more alert or weak expression while flat hanging ears create
a softer, slippier look. So it's really up to you choose whichever style you prefer and go ahead and
attach the ears. A Now, let's bring this bunny to
life by deciding on its face. Print out the
provided templates, cut out the face, and place one of it, for example, on the left
side of the body's head. Use this as your visual
guide to mirror the features onto the right side by lightly drawing
them with a pencil. Way you can sketch the eyes, nose, and the mouth in the
correct mirrored position. I would recommend to always
use a very thin pencil line, so you can easily erase it or adjust it later if you're not
happy with the placement. A Once you're satisfied with your pencil drawing, it's time to start stitching
using some black thread. I usually begin with
the bottom of the nose. There's no strict
right or wrong here, but I like to work my
way from the bottom to the top using a
simple backstitch. If the shape doesn't
look quite right, you can always adjust as you go. Next, I continue with the mouth. Also stitching back and
forth, as shown here. Lastly, I finish off
with the ice simply stitching in a star like
pattern moving clockwise. Alright, guys, and that's it. Congratulations.
You have finished your cute handmade bunny. Of course, it still
needs some clothes, which we will tackle
and other videos. I hope you enjoyed this course
and that you're excited to create even more of these
adorable bunnies. See you soon.
4. OVERALL & BEANIE - PART 1: Height, welcome to
this tutorial where we will be making this cute
animal doll outfit. For this project, you will
need some stretchy fabric for the beanie and a nice cotton
fabric for the overall. Now, let's get started. The first step is to
print out the template on a four or US letter from
where you're watching, and then you would want to cut out the shapes using
some scissors. And now that I have already printed out
my paper templates, we will begin with
the overall design. Place your cotton fabric in a double layer with
the right side, basically the good side facing
each other on the inside. Start with the front piece of the pens and trace
around the shape. Using preferably a heat erasable
pen or simply a pencil. Then you can use
some pin needles to simply keep the fabric in shape so it doesn't
move while cutting and just cut out the shape
using some scissors. And Meanwhile, I have already done
the same thing for my backside of the pens. So both of them are done. Then it was time for the pocket. Just know that my
pocket template looks a bit different now. It is already longer, so you can just use
the template as is. So you should have a longer
rectangle shaped pocket. Then you would want
to have some fabric, maybe some white fabric, something simpler that is
going to be used internally. This is just to hold the
top part and shape and basically to create a nice edge. I also marked which piece is for the front and which piece is for the backside to
not get confused. You would only need to
have one single layer, so no need to double that one. Okay, now that we have finished
all of the five pieces, it's time to set up
the sewing machine. I'm going to use a very
slim sewing length of one and use the setting. Number one on my sewing machine. This gives me very
slim stitch lines. For sure, you can
also hand sew this. We're going to use
the front side first, and we will stitch along
the line I just showed you. Alright, so this is how
it should look like. Then you are going to
flip over the nice side. I mean, you open up
the shape and place the inlining, also facing, the front side, basically, because we are going to
see along the top lines, and then we flip it again. But basically, yeah,
you are going to see this line and you have the
nice side facing towards you, you can see. Okay. Then you should end up with a fabric line soon on the top, and now we're going to do the same for the backside
of the fabric. Remember in the first step, we had to sew along that line Then we are basically
opening it up, turning it or flipping it over, and placing the lining on
top of the right side. It helps to use some pin needles to secure
the fabric in place. Also make sure that
it is aligned well And then so again on
that line in the top. I have already done it. Now we can just turn
over the fabric. Actually, you can cut inside of these if you didn't use
any zig zag scissors, and you can also cut the corners a little bit to help
to have a nicer shape. And then you can just use
a pencil to basically, yeah, get the shape nicely. And then you also
will do the same for the backside of the overall. There is a little
hole, you can see. If that happens, you can just fix it by sewing along
that edge again. Now you can see that I have gone over the same edge
a little bit lower. This way I don't have
any holes anymore, and this is exactly
what I wanted. Now, we are going to
sew along the top line again just to give
this a nicer finish. This step is optional. You don't have to do that, but I feel like it just gives a bit more
of a custom feel. I did this for both of the front and the back
side of my overall, and now it's time
to do the pocket. You can use this rectangle and fold it in half and we are going to sew along the sides. I have already done it, so
it should look like this. Then to turn it, I'm using a small pipe, basically something
that I can use to go through using some
pencil or some chopsticks. And then we are
just going to fold the top part a little bit. And then it's up to you. You can actually
do one sewing line or even two sewing lines. I did decide to just go for one, and then we are going to sew it on the top side
of our overall. You can hand sew this or use
the sewing machine as well. So again, we're going
to sew along this line, the bottom line, and the sides. And this is how it's done. Now we can place the
front side facing each other internally
on top of each other. Let's make sure they align
very nicely and we are going to sew along the
sides of the overall And at this point, you can
also use a zigzag stitch to basically prevent
the edges from fraying, especially if you
are planning to fold them to make this
into some shorts. Okay, now that is done, we can flip over or turn over the fabric and place the
overall on its side like this. And then we will just clean
up the bottom edges by simply flipping them one time
or folding them one time. And then it helps to use an
iron so it stays in place, and we just sew along
the bottom edge. I have already done
it for one side. Let me just finish off
the other side as well. Okay, this is how it's
done. Looks clean. Now we can again flip the
overall on its other side. And this time, we are going
to sue the in SEM, basically. That's what's left to do. So we're going to sue long
this line and this line. Actually, it's
easier to start from the bottom to the top and then
be careful in the center. Make sure you grab everything. And it's done, well, at least for the most part.
5. OVERALL & BEANIE - PART 2: Now that we have
finished the seam, you can one last time
flip the overall, and in the next step, we will create the
straps For that, I actually like to put
the overall onto my doll. This way I know how long
the straps will need to be. You can use some rubber
band that you have at home or simply use some of your leftover fabric or you
can use other colored fabric. That's totally up to
you. And I simply fold the fabric twice to
create a thin line. This should be about no more than a centimeter,
probably 0.8 ". I just a very small thin line. Then I'm actually using some patterned sewing
line as you can see. If you have a sewing machine, you can use that one or just
the one that you prefer. Again, you don't
have to do this. You can also use really anything anything that you think will look
great as a strap, maybe even a hairband. So the possibilities
are endless there. But here I'm just cutting the little straps kind of like this cute
design on top of it. And I start with the front side. And this part I'm actually hand sewing just to give me a
bit more of a control. And I also make sure to
not sew through the front. So I'm trying to just grab the inside of the
lining when sewing. Also, you want to go in the
left direction not straight. This way, the lining, sorry this strap will go
along the shoulders better. Now that we finished one side, we are going to attach the side, the strap to the backside. And for that, I'm folding
it, as you can see, like this, just to have both sides because one side is a little nicer
than the other. And then I attach
it to the backside. You can see how I folded it, and I'm also using the same
seams that I already have. This way, the seam
is not visible. And lastly, we just
attach it to the front. And we are done. And
congratulations. You have finished your overall. The next step we will create
the Bini, so stay tuned. So for my Bini, I'm going to use an old scarf that I have. Still, I like the color.
That's why I chose this one. And what I also
like is that it has this typical stretchy material, which makes it easier to put on later and to stay in place. So if you choose something
some fabric for your Bini, I would recommend to
use a stretched fabric and probably one that yeah, of course, you don't use
anymore, like an old scarf. Or actually old beanie, maybe you have an old Bini laying around that you
don't use anymore, so you don't have to purchase
the entire big piece. Yeah, so let's get started. Okay, so you would want to place your fabric layered doubled. And if you have any
nice facing side, you would want to have that
facing each other inside. Be we're going to flip
the fabric later Bini. Okay, so I'm just going
to use a heat resistant. I keep saying heat resistant. Heat disappearing pen. Okay? So these kind of pens
are very, very helpful. Basically, if you iron over the fabric, they
simply disappear. So they are very
nice to work with. Okay, I'm just
going to go around. So if you actually
see it that well, maybe the white one
would have been nicer, but it's okay. It works. You can still see. Maybe you don't see them
that well on the video. But as long as I see them
to cut, that's okay. You can actually see
the lines a bit. Okay, so then I will
just hold them in place just so they don't
move when I start cutting. H Okay. Now, this is the final shape. And the first sou line that we will be making
is around here. And then another on here. Okay, now that we
have soon the edges, it's time to flip this inside
out so you grab it from the bottom and just flip it over the other
let's call them ears. So like this and like this. So they perfectly align and
are on top of each other. And then what you then want to do is basically flip
it over like this. And then those four layers, you can actually, it's fine. Yeah, basically just flip them, press them together like
this and make sure that they align very nicely because we need to sew around this edge. So you would really want to
sew through all of them, as otherwise you will end
up with a hole the top. So I'm going to use
some needles to actually keep them
nicely in shape. I like this. Then the
other side as well. This looks good. And
then the last thing that we need to do is sew from here all the way
around the top part. Once I'm done, I will
come back to you. Okay, this is how it should look like and remove my needles. Then you can also cut a bit the edge I have to
say that actually, I have used a quite
thick scarf material. T wasn't that easy. It was doable, but if you have a thinner material,
that might work better. Alright. Now we just
need to flip it on the other side and hope that we don't have any holes. Okay. Looks good. No holes. Everything soon through. Yeah, looks good. Okay. Actually, there's
a small little hole I ended up having. That's okay. We can just fix it by simply sewing around
the edge a bit more. Let me do that
quickly. All right. As you can see here, I basically had to go
again, which is okay. You can just fix this problem by just going a little lower. Now
we can flip it. Now you see the hole has gone. And then we just adjust
the shape a little bit. We get nice and round. And then we just flip it
the bottom side like this. And we have our
first shape done. Congratulations. You have
finished this outfit. I hope you enjoyed
this tutorial, and I'll see you
in the next one.
6. THANK YOU - OUTRO: Congratulations. You have
finished your bunny plush. I hope you had a fun
sewing along with me, and you're proud of the handmade
friend you have created. Don't forget to share your
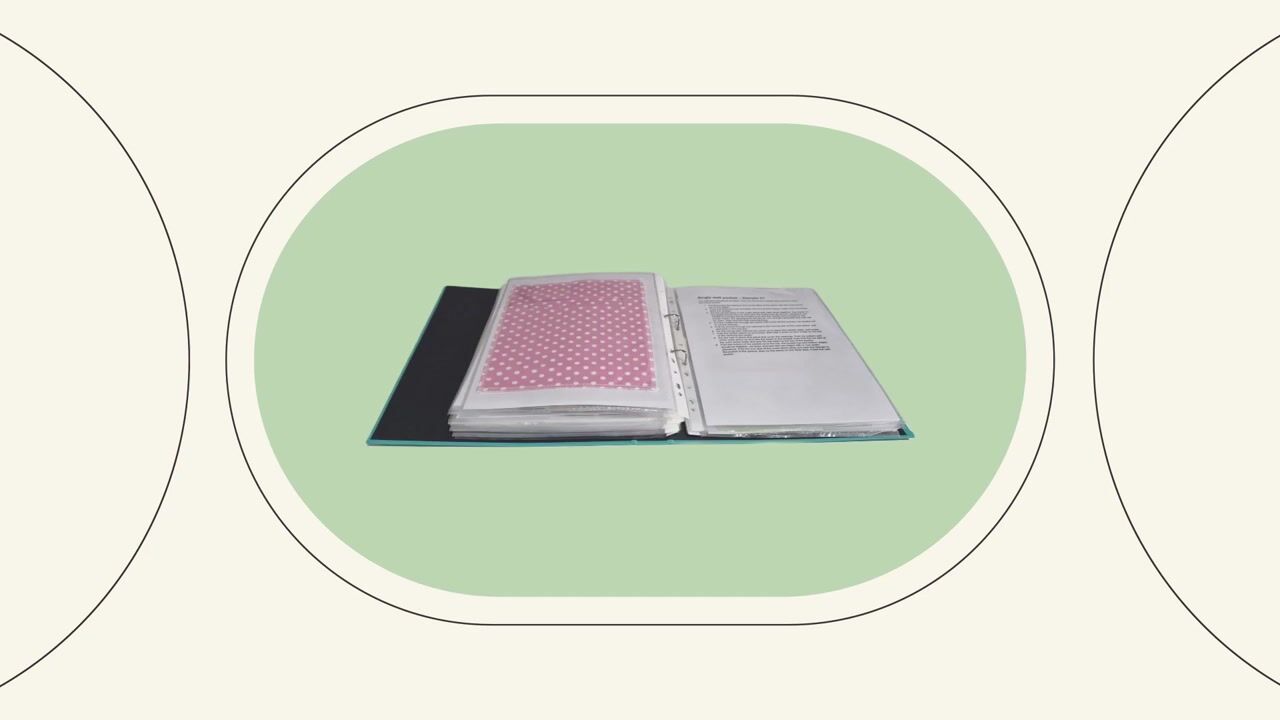
bunny in the project gallery. I would love to see the fabrics, colors, and outfits you chose. It's always so inspiring to see how unique each bunny turns out. You like to keep sewing, you can find additional
bunny closing templates in my Skillshare digital projects to inspire your bunny wardrobe. Thank you so much for
joining me in this class. If you enjoyed it,
please leave a review. It helps other students
discover the class. Until next time, have a sewing and enjoy
your new bunny friend.
7. EXTRA - PYJAMA OUTFIT - PART 1: Hi, welcome to this
tutorial where we will be making this cute
animal doll outfit. Now, let's get started. Okay, guys, thank
you for joining. Let me quickly walk you through on how to
create this pyjama. Now, after printing
out the template, you should cut them out
using some scissors. And yeah, we have
the sleeve template. We have the pyjama
back template, and we have the
pajama top templates, and then a template
for the pans. Alright, so I'm actually going to use two kinds of fabrics. This fabric will be
my outside fabric, my face face side, basically. It is quite thin, which is okay because I'm going
to use a second one, which is going to be
plain white cotton. So this is an old sheet
which I'm going to cut, and then I'm going to use
this and this together. Okay. And then you're
going to also hit either some rubber band or the pens, but
you don't have to. You can also just use a
shoe lace or a piece of thread that you can later
just bind together. Okay? So this is not necessary. But yeah, if you want to use a rubber band, you can do that. Otherwise, a thread works
just fine. All right. Now, let's get started. Actually going to start
with the pajama top. So I'm going to lay
my outside fabric and then the fabric that I
use for the inside of my pyjama basically on top. Yeah, like this. But the material
that is thicker, I would actually use
it on the bottom. This way, when you cut, it
doesn't change much the shape. Okay. So then I lay my first, my backside template, and
I'm just going to go around. These are heat
disappearing pens. Basically, if you sew and then use an iron,
they disappear. Actually going to
use a pink one. I tried white before. Does work. Let's try pink. Pink is a little better
for me to see. Okay. And again, once I iron over
this pen, it will disappear. Then you can just
cut out the shape, and I'm going to
also do the same with the front side for the left and the front
side for the right side. Basically, this
double double layer. And I also didn't mention
that you want to have the front facing side inside. So basically the right side is facing each other in the inside. Okay, now that we have
cut out the pyjama, we need to sorry,
the pyjama tops. We are going to use the
template for the sleeves. But for the sleeves, we will actually only
use the thin fabric. We're not going to use the
internal white fabric. So here, you can just simply
double it I mean fold it. So you have two layers because we need two
single sleeves. I seem to like this or somewhere where I don't
use up too much fabric. Like this. Okay, so now let me show you
where we will start sewing. We will basically go
along the bottom. Then for the left
and right top side, then you place them basically facing each
other like this, and we are going to sew along this line and along
the neck for here, the same along the neck. Then on the inside, of the pyjama top and
then along the bottom. And then for the backside, just along the neck.
And the bottom. Know that I'm not going to
show you how I sew this. I basically am using a
sewing machine with a very, very slim stitch line
of setting number one and the stitch length of
one, just to let you know. Okay, so I'm going to
use a white thread, so you will be able to
see this afterwards. So if you want to
see how to sew this, you can just continue
watching the next part, and then you can start
doing your sewing lines. Okay. So now you can see again this wing line all the
way from here and here. This material is a little thin, so you can see it kind of
moves a bit, but it's okay. And then the same for here. And for the backside, only
the neck and the bottom. Now we can flip this
to the other side. And press it. Down. If you have a bit of
a sturdier fabric, I actually recommend
to use some scissors. Where you have cures, you just cut a bit
inside. Just be careful. This will help with
the shape. Okay? And then for the edges, you can carefully use a pen. Okay. Then it actually helps
to iron this down because we are going to
sew along the edges. So this way they are
already aligned. So I'd recommend
to at this point, sew this fabric,
iron this fabric. Pieces. Okay. So I'm going to go and iron this quickly just to give it a better shape. I will
come back to you. Okay, now this looks
better already. You can just recheck
if everything is align or fitting well by just placing
them as they would look. This looks okay. Not
perfect, but it works. Okay, so now we are going to use the front facing side and place the other front
facing in the inside. So they are facing each other
like this and like this. Just make sure that the
top is aligned well. Because we are now
going to sew along this line as well as here. Let me do that quickly. Okay, and if you have
or know how to do this, I would recommend to a quick
zigzag stretch zigzag stitch in here just so it doesn't fray. Okay. Then we are going to
make a slim border. I'm not going to mark it here, but we're going to
go around this line, then all the way here and
here around the neck, going back down here and there, as well as the bottom. Okay? This will give
it a cleaner look. Let me do that and
come back to you. Okay. This is how I meant it just to have a bit
of a cleaner edge. You don't have to do that, but I think it looks a bit
better this way. Okay, then comes the most
difficult part, actually. Is to sew the sleeves. If you have never
done this before, I highly recommend
to try it out first, maybe on some piece of cloth or maybe you basically cut these pieces again
and just try it. Then before you do it
on your final piece. So you are going to if you have a front or
back facing side, you are going to
use the front side, the right side on top
of the right side. And basically, you have to start at the end, so like this. And then you are going
to start sewing. Then you have to stop
and basically align the fabric again and
then continue sewing, stop, align the fabric again, basically pushing
it down like this. So this whole sleeve will
end up going around. Okay? I'm going to try to catch it with my sewing machine. I hope you will see it. So by the center, I reached almost the center. The center of this should align with the center of the jacket. Then here you start
again with the curve. Basically, I'm moving
this fabric along. I always have the edge
on top of the edge. Okay. So you should at the end, basically, it should align
pretty much with the rest. Okay. Let me show you
the final result. Okay, so here's the sleeve. Let show you from
the other side. This is basically how
it should look like. So Okay. I'm just quickly going
to do the same on the other side and come back
to you. Just a quick note. If on the other side, you end up with a
bit of more fabric. Basically, on the
end, that's okay. It's better to have a little bit more fabric
there than not enough fabric. So you can just cut this
little piece at the end. Okay. Good. Now that we have
finished the leaves, we can basically finish
the bottom part here. So I'm just going to I'm just going to fold this
over a little bit, and I will finish swing just a quick line here and
for the other sleeve as well. All right. And now in this
last step, almost last step, we are going to place
the front facing on top, and we are aligning the pajama top like this
as well as the sleeves. If you need, you can just use some pin needles to
keep this in place. I'm fine with just
holding it and sewing this part with
the sewing machine. So we will sew
along this line and then as well here
going down this way. And we do the same
for this side. So here and
8. EXTRA - PYJAMA OUTFIT - PART 2: Okay. And if you have
some fabric on the sides, feel free to just
cut it straight and use a zigzag stitch
to avoid frying. This is after I've used some etching there just to
stop it from fraying, and then you can flip it. Okay. I actually like to fold. These leaves a little bit. Looks a little cuter.
You don't have to. But I think this just
looks a little better. And then for the jacket, it's very nice that you have this other color for the inside kind of gives
a bit of a contrast. So for here, you
can do is you can use a button for the
bottom part like here, or you can use show you. I've actually done it here. So I have sewed the top part a little bit down, so it stays. If you like this kind of design, then you can just simply do the same suit
down to the back. And I have attached one of those little buttons to
keep it closed like this. Okay? So that is up to you. If you want to use a button, you can also just leave it open or just to this down just
to keep it a little cuter. Alright. Okay, now
let's create the pens. So for the pens, I have
already cut out my fabric. I have only this thin material that I will be using twice. Okay? So this template is for
creating those two pieces. And then it depends on where you are going to want to have you
want to have, for example, a little bow in the
front of the pens, then you would want to
close down the back side. This is the backside
of the pens. You can see that this
part is a little longer, and this side is
a little shorter. So if you want your bow
to be in the front, you can close off this line. If you don't want
to see any bows, if you are using, for instance, a rubber band and just
closing it off completely, you can start with
sewing the front first. So your opening will
be on the back. Okay, so I'm going to actually
do the bow in the front. So I will be closing this line. And sewing along the
back side of my pants. Let me do that.
Come back to you. Okay. Now, you can
use a rubber bend. You can also use a
thread or a shoe lace, whatever you have at home, and I'm just going
to open up the pens, and you have this
this sewing line. Try to flatten the
top part a bit. So you are going to be placing the thread or the
rubber in the top area. And I like to keep it in when I sew or
close off this line. But you can also do that later and basically thread
it through at the end. So when you keep it in, just make sure that
you don't see over it. Okay? So I'm just going to be careful when sewing and just
slowly see along this line. Alright. Okay, I hope you
can still hear me. Fortunately, my microphone
died on me at the moment. Um, so I have placed
my pants like this, and depending on
your leg length, because I'm not sure how far you have sewn your
bonny to the inside, I made sure to leave enough
space at the bottom. So you want to align
your pants that this wing is basically
aligned here. This way, you can
see how much you can cut or also fold over. So if you, for instance, like your pants to be folded in the bottom just in the
same way we did here, you could, for instance, maybe cut it just a
tiny bit, let's say, the same length as your feet, And then this way, I
can sew this one time, so I could potentially
leave them long. But then again, if I wanted to, I can just fold
them another time. You can also leave
them very long. If you leave them long,
fold them over like this, you could then fold
them twice. Okay? So I'm going to show
you how it looks when I cut them to the
length of the feet. Okay, so now we will finish the lags by again
folding and sewing. Okay, now that we have
finished the bottom as well, we can just lay the
pens this first. So this is going to
be the front side. Okay, so we are going to now sew along this line from here
and then until here. Okay, so just make sure to have this a little crest
we use a rubber band. Okay. And then we can place
the pans like this. And the last thing
we need to sew here is the leg insides. Sew basically along this line, and then until here. This is how I finished
them on the edges. Now we can flip them bread. You can just tie it
together with a bow. So like this, using other side like this. And, you know, because
it's a rubber, it's not going to look as nice. But if you use a thin thread or something, it's
going to look great. In that case, you can because
I used a rubber band. You can also simply close it off like this by using some hand stitches
and close it there. Okay? Yeah, that's it. Now you have your pens. I initially decided to just close them on this side
and just cut the rest. I can also if I use a rubber band and still
want to cute little bow, I can just create one
and place it there. This is how my pans
are when long. And as mentioned,
I wanted to fold them so I can just fold them one time and another time. Like this. And like this. Hey, so I have attached
those little buttons just for it to stay
in place. All right. Okay, something else
I wanted to quickly show you this is
totally optional. So if you want, you could add one or even two small pockets here because the template also
has a small little pocket. So for one pocket, you are
going to need two layers. So I'm just using the
same fabric like this. You could also do a white
background like you did here, so that's totally optional. So the first sewing
line we will basically do is around the edges here. And then in the bottom and here. So it's like a U shape,
a sewing pattern. Okay, so let me do that quickly, and I will come back to you. Now to flip this, you can use a small pipe and the
backside of a pencil. And then just flip it like this. All right. And then
for the next step, you are going to flip
the top just behind, and then you can
define the size of your pocket. Probably like this. And then you can just
hands along this line. Okay. And then you can just cut the leftover
fabric behind. And then you can continue
sewing along this line. You can also use
your sewing machine, but since this is
quite thick already, it's going to be
like four layers. I actually prefer to
just hand sew this part. Okay, so in the template, I also provide a cute
little sleeping mask. So I'm just going to use
some of my old fabrics. I'm going to use the white
one as well as the blue one. So the right facing sides
are inside each other. Just go to create my outlines. And you also want to
make sure to mark the areas where we are going to leave the opening for
potential stuffing our mask. I'm just going to cut my shape out and then I'll
come back to you. Okay. So the next sewing
line will be basically around the internal mask. You just want to
mark it to make it easier for you to see the lines. And then this part you're
going to leave open. Okay? So we're going to sew
just along the edge here. Okay, so I should
look like this. And then again, I'm
using my pipe to make this easier to
be able to flip. Okay. So I'm just placing
my pipe in one end. My pencil. Here's my pencil. Anyway, use a pen. Like this. See, I already works. Okay. I'm just going to use a bit
of cotton or in that case, I have some fabric stuffing and just fill the
mask a little bit. Give this a better shape. Not to fall, just a bit. And a bit more in the center. Then I'm going to use a letter stitch just to close this off. If you have never done
a letter stitch before, just quickly going
to walk you through. I basically start from one edge, go along the bottom. And then I flip it like this, make sure that
everything is inside. And then you are going along
the edge in here like this. And then you're going to flip over and go along
the other across edge And then again across the other edge. And across and so forth. To make this look a
bit more complete, I'm actually going to zoo
along this line once again. This is how it looks afterwards. Just a little line around. And then I'm going to
use some rubber band. You can also use a hair tie, and then I'll see how
much space we will need. I actually like to just
keep it on the top, can also close it. But basically, it's just
for decoration purposes. And then let's see if it
fits, it should work. So I'm going to attach this to the back like this. Trying to only grab the white layer Okay. And then you can just I'm just gonna place
it here for now. I would say, actually, I'm
going to use the upper head. I can see how much I need.
Yeah, this should work. Then just to touch it here. Congratulations. You have
finished this outfit. I hope you enjoyed
this tutorial, and I'll see you
in the next one. Mm.
 Anna Rangel, Instructor & Interior Designer