Transcripts
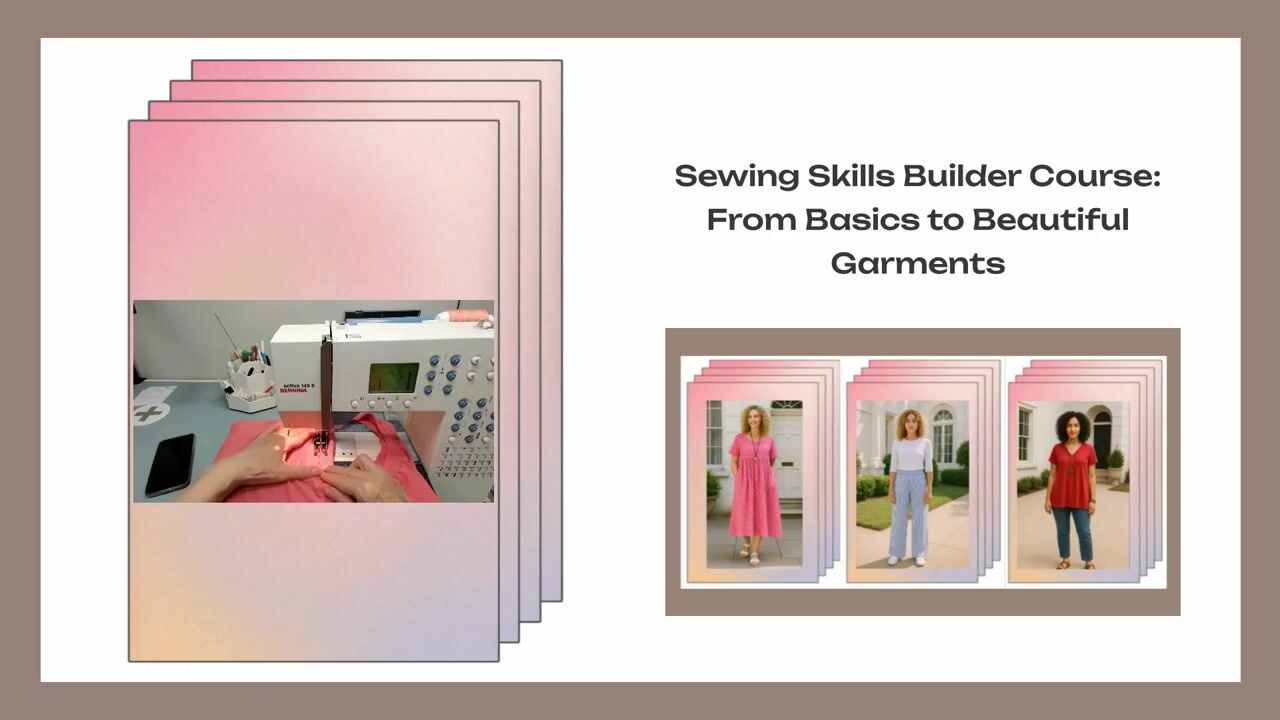
1. Introduction: Hi. Welcome to the Basic to Advanced sewing course
of Is Sew Academy. My name is Loraine, and I will be your teacher
in this course. You don't need any
experience in sewing, as I share my knowledge of over 35 years of
professional sewing with you so that you can sew garments and other projects
by the end of this course. Will sew samples of different
sewing skills to keep in a file together with your
notes for future reference. There will be downloadable
PDF templates for you to print out to use as patterns
for most of your samples. You are welcome to ask if
you have any questions, I will answer as
soon as possible. Enjoy your journey of
learning sewing skills.
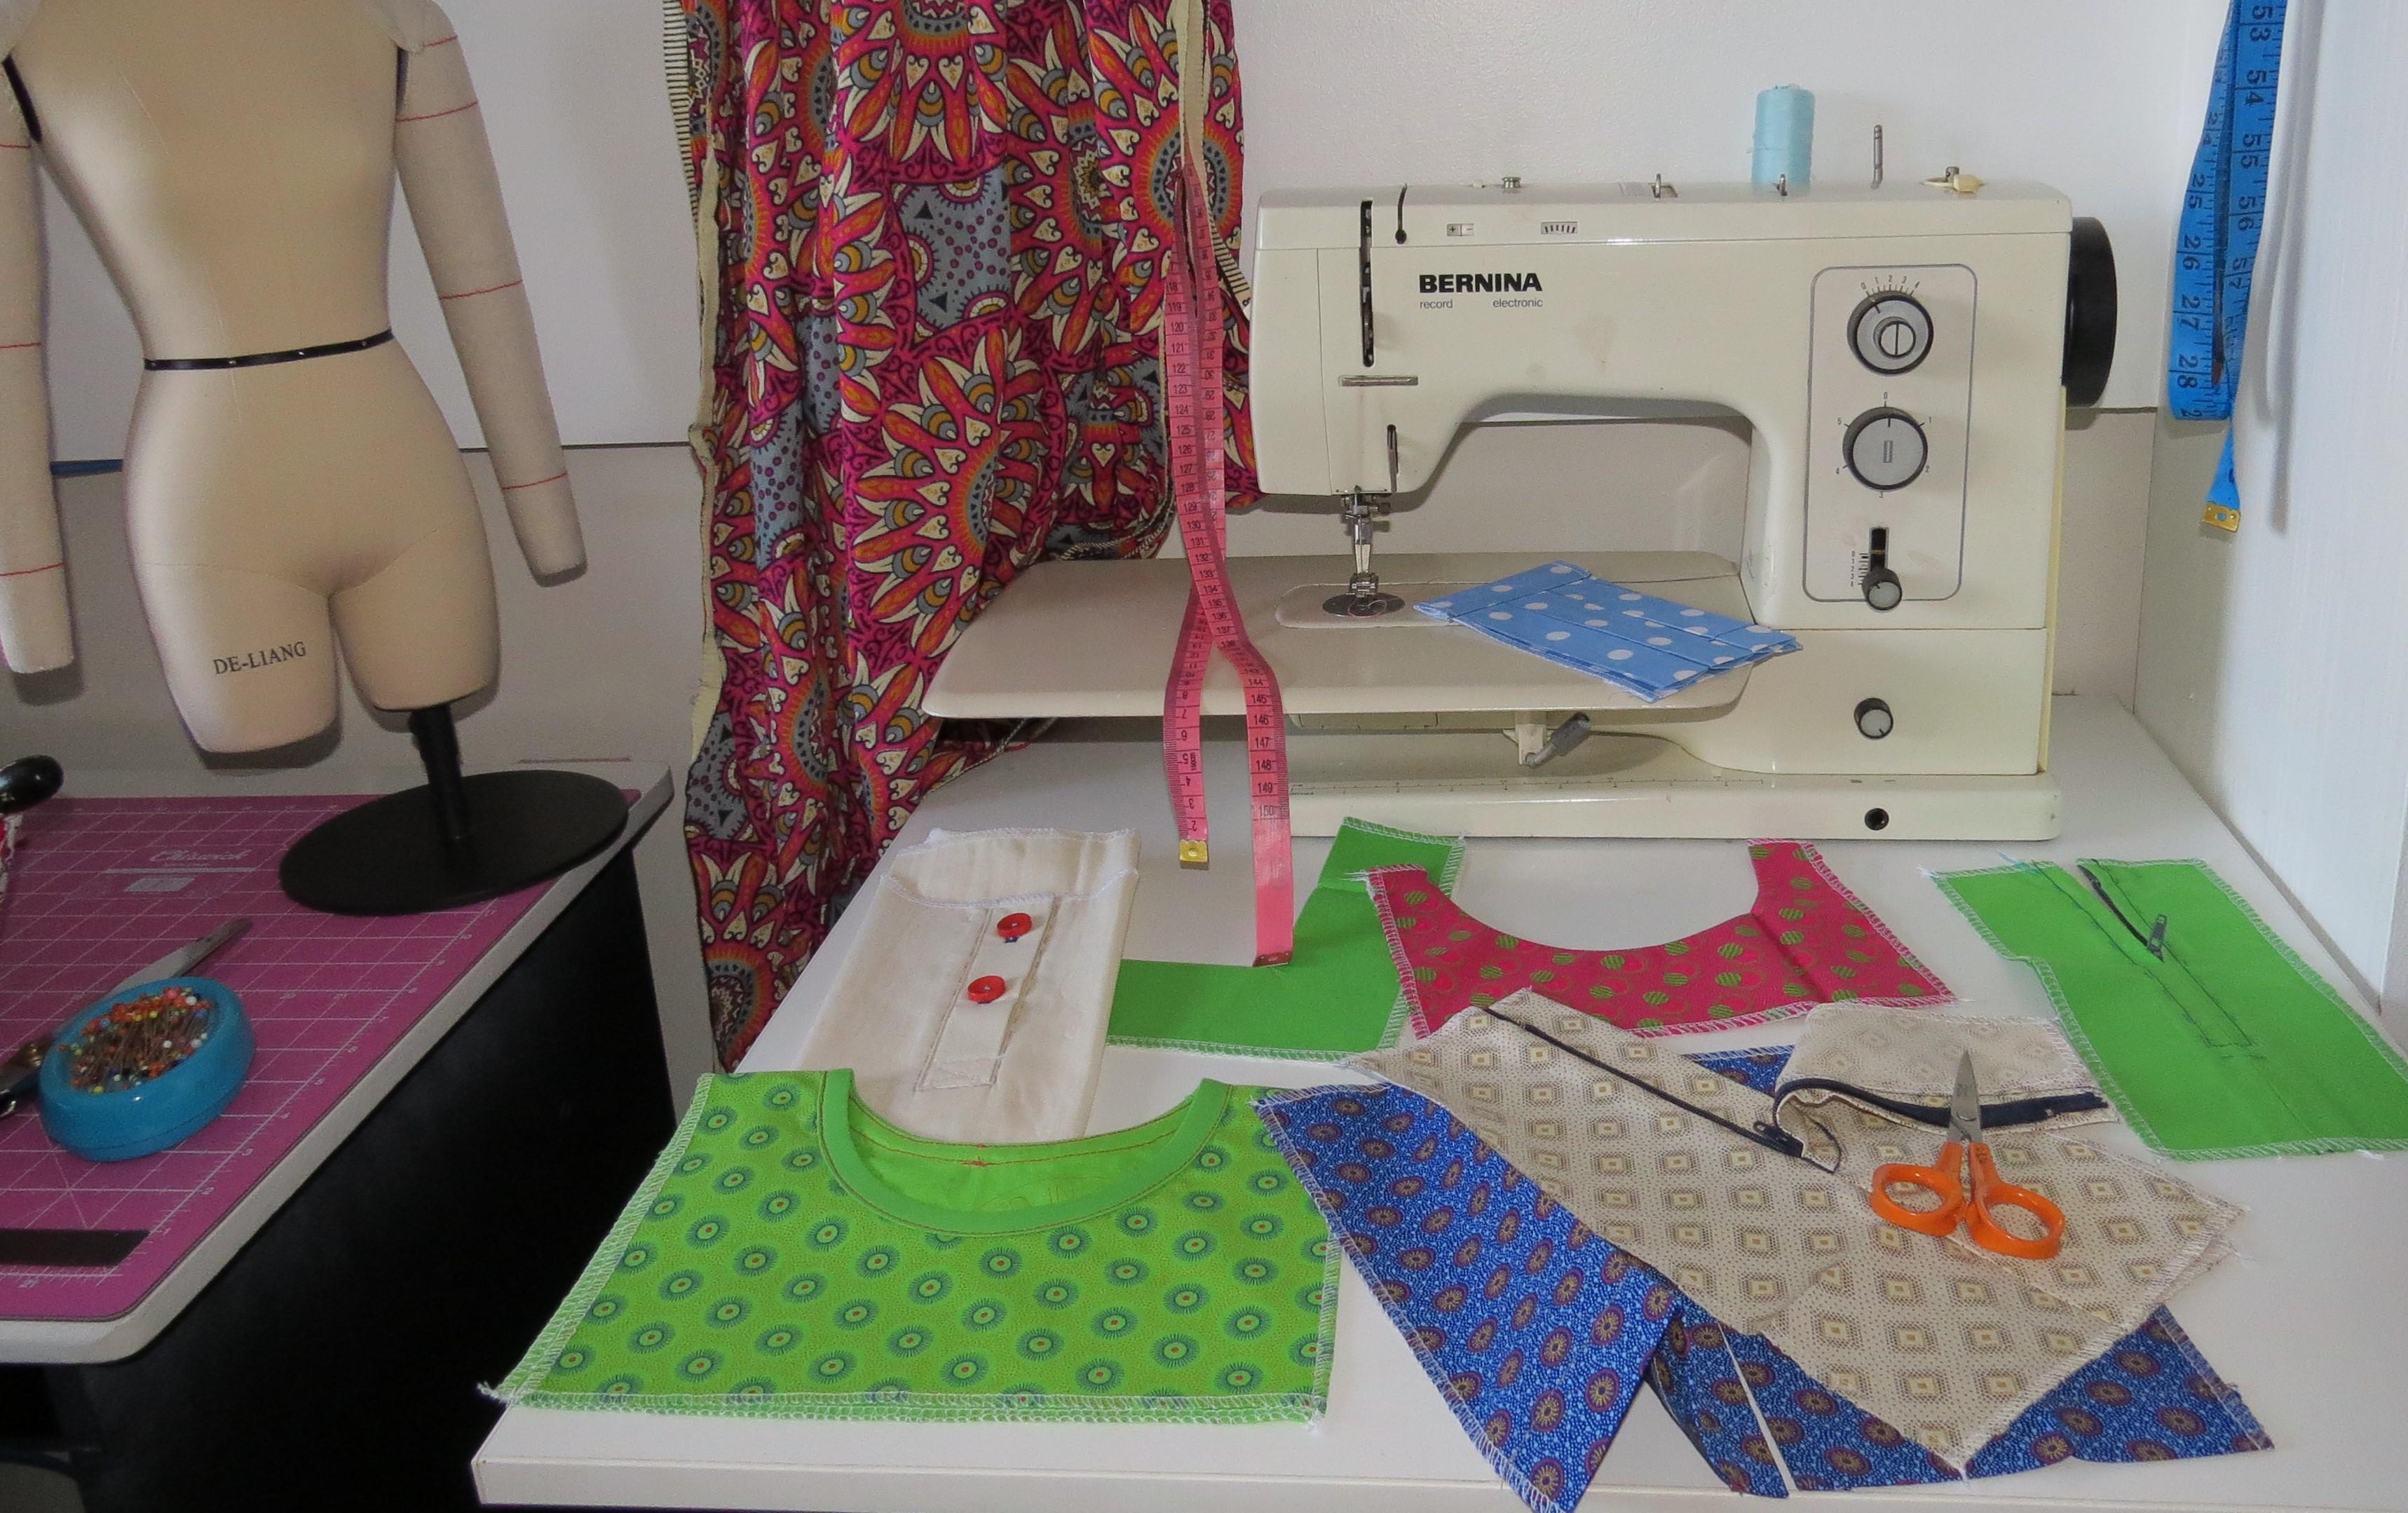
2. Supplies needed: The supplies that you
need for this course, a sewing machine, one of
these quilting rulers, a two B pencil, fabric scissors, paper scissors, thread scissors,
sewing gauge ruler, tape measure, a point turner, seam ripper, also called unpicker universal sewing
machine needles, size 80 12, good quality pins, two
medium size buttons, a pin and notebook, one invisible zip of
20 centimeters long. One metal zip of 15
centimeters long, for the exposed zip sample, one Nylon zip of 18
centimeters long, for the normal zip sample, and one Nylon zip of 15 centimeters long for the
pants zip with the fly, 1.5 meter woven cotton
fabric of a light color, preferably unprinted so that you will see the pencil marks, half meter calico or contrasting
color, cotton fabric, medium size universal
hand needle and thread of a contrasting
color, half meter, lightweight or medium
weight interfacing, a file with plastic
sleeves to keep your notes and samples
for future reference. You are welcome to ask if you have any questions or need help. I will answer your questions
as soon as possible.
3. What sewing machine to buy: A beginner, you most probably still need to buy
a sewing machine. When you buy a sewing
machine at an agency, they normally give you
free lessons so that you can get to know the
functions of your machine. I would recommend that you go to different agencies to test their different machines
that fits your budget. This way, you will get to learn what machine you like the most. Look for a machine with
different needle positions. If you like buttons and buttons, rather buy a machine that can make automatic button holes, it will save you a lot of time. If the agents tell you
that the machine can sew on six layers
of denim fabric, et cetera, ask them to
demonstrate it to you. Never take someone's
word without testing it before you
buy a sewing machine. In my videos, I use my
old paninaRcord machine. The reason for this is because these old machines are very heavy and steady bolt and
they sew on almost anything. I bought this machine in 1981, and for most of my life, I used to sew on this machine five to seven days per week. It never had any
tension problems. It is now 42 years later, and it is still
working perfectly. I mostly use my
banana activa machine for the automatic buttons. If you buy a used
sewing machine, test the machine to make sure that it is still in a
good working condition. People are usually
impressed by the amount of decorative stitches that
some machines have. These stitches add interest
and texture to fabric. As a beginner, you do not
need the decorative stitches, but if you do not have
an overloger machine, you will need an overlog stitch on your normal
sewing machine. If you only want to sew clothing for yourself
and your family, then the lightweight
machine will do. By the best sewing machine
that you can afford, look well after it and it
should last a long time.
4. Understand your sewing machine: Understand your sewing machine. The sewing machine
has feed dogs, which are metal teeth
like reaches that emerge from a hole in the needle plate of
the sewing machine. The feed dogs move as you sew gripping the bottom fabric
to help it pass through the sewing machine and produce a high quality stitch on the needle plate of
your sewing machine. There are vertical
lines on most machines. These lines are marked. Measurement of the markings start from the
middle of the foot. If the measurements are
not marked on these lines, set the needle in
the middle and use your sewing guy ruler to measure from the needle
towards the lines. To see what line you have to use for the width of your seam. You can put a piece of type in a straight line to
help as a guide. And then keep the
edge of the fabric on the side of the
type while you, so it is important to control
the foot pedal correctly. As a control pedal plays an important role in the
neatness of your work. The heel of your foot should be on the lower part of the pedal, and your fore foot on the
higher part of the pedal. This way you will have good
control over the petal. When you sew and you see your
stitching is going skew, lift your foot off the pedal, then your machine will stop. If the floor is slippery, get a rubber mat to avoid that, the control foot slide. While you sew as sewing
machines differ, sit in front of your machine
with your machine manual. Go through the manual and
make sure that you know what the function of every
button is on your machine. Wind the bobbin and thread your machine according
to the manual. To wind the bobbin
on this machine, I have to hold the fly wheel
with my left hand and loosen the wheel release with my right hand by turning
it slightly anticlockwise. The reason for this is to stop the needle function while
threading the bobbin. Draw thread from
the spool clockwise around the tension disc. Make sure that the thread is tightly in around
the tension disc. Put the thread through a hole in the bobbin from the inside. And put the bobbin in place. Hold the thread with
your left hand upwards. Move the button
towards the bobbin. Put your foot on the
pedal and slowly wind the thread a few times
around the bobbin. Then take your foot
off the pedal, but hold the end of the thread upwards until the machine stops. Otherwise, the winding
thread will catch it. Cut the piece of thread
that you were holding, and then wind the bobbin
until the function stops. Cut the thread and
remove the bobbin. Remember to tighten the
hand wheel releaser, the bobbin thread must
unwind clockwise. Put the bobbin in the case, draw the thread
through the slot, and then under the
tension spring to put the bobbin case
back in the machine. Open the hinged latch and hold it again with your
thumb and forefinger. The metal finger of the bob
and case should face upwards. Put the case in the machine, it will make a click sound
when it is incorrectly. Before you threat your machine, make sure that the
foot is lifted up to release the tension disks. To threat this machine, there is a hook at the back of the machine where
the thread goes through and then on top of the machine through
the tension disks. Then it goes down
around the hook and then around the take
up lever down again. Then hook it in just
above the needle. And then from the front through the needle to pull the
bottom thread to the top. Hold the top thread
with your left fingers, turn the hand wheel towards you. The needle should
go down to catch the bottom thread
and pull it upwards. Clean your machine. After
every project that you so remember to unpluck your machine at the wall
before you start cleaning. Although machines differ, the cleaning is more
or less the same. Remove the thread, open
the bobbin compartment, remove the bob and bob and remove the sewing
foot and the needle. My machine also have this cover plate that
I need to remove. Push the locking
lever to the left and fold down the hook cover. Remove the hook, brush
all the dust out. Clean the hook. Rise
with a cloth or brush. Never use a sharp instrument. Squeeze two to three drops
of oil into the hook. Rise to replace the hook. The driver of the hook
should be on the left side. The hook will fit in
on the right side. Turn the hand wheel
if necessary so that the hook driver
is on the left. Close the hook race cover and secure with
the locking lever. Insert the Popen and Popen kis. Then clean your machine
with a damp cloth. Run the machine for a short time to prevent oil
soiling your work.
5. Different Sewing Feet and The Seam Ripper: I would like to show you a
few different sewing feet that will make the
sewing easier for you. The universal Sewing
Foot normally has an open groove in
the middle of the foot. Most of them measure 7 millimeters from
the open groove to the side of the foot. When you sew a seven
millimeter seam, keep the side of the foot
on the edge of the fabric, and the needle should be
in the middle position. The standard zip foot normally comes with
the sewing machine. It has two notches, one on each side. You received the zip
foot on the screen. It is most likely that
your machine doesn't have the needle adjustment
to the left or the right. You will have to
clip the foot on the left side or you have to clip it on on the right side. Depending on which side of
the zip you want to sew. This zip foot can only
clip on in the center. You will have to move the needle to the left or to the right. The invisible zip foot has two grooves underneath
the foot to accommodate the zip coils and to keep them in
place while you stitch. In the video, I use the plastic foot
because the grooves are deeper in it keeps the coil
better in place while sewing. When you use the invisible foot, the needle setting must be
in the middle position. Keep the coil away with
your finger as you sew. Then the needle will sew exactly
at the back of the coil. The overlock foot
allows thread to wrap around the edge of the fabric
to prevent unraveling. It has a pin in the
middle of the foot, which keeps the fabric from pulling in while
you overlock it. As the machine doesn't
have a blade to trim off the fraight
edges of the fabric. This will not have a
professional look, but is good enough for
your own sewing at home. The edge ditch foot, also known as the stitch
in the ditch foot, help you to sew a
straight stitch on the edge of the fabric. The marking on the side of the foot is normally
for quoting, when you sew in the ditch
in the front of the foot, there is a metal plate. Keep this plate all the
way against the fabric. The sewing guide foot is
incrementally marked and you can line the edge of the fabric to any of
the red markings, keep a consistent seem. It has a plastic guide that
you can move to the mark. You need to guide the width of a seam or width of
different stitch lines. Keep the edge of the fabric against the plastic guide to sew a straight seam or keep the plastic guide on a line
to sew another straight line. It also have red marks
at the front and sides of the foot to
guide where your needle should start and finish the ruler foot has a guide
with grooves on the side. You can color every
second groove with nail polish
and a toothpick, then keep the edge of the
fabric at the specific groove when you sew a seam or keep
it on the previous line. When you sew different lines, the roller foot has
two sets of rollers. The bigger one at the front and two smaller ones at
the back of the foot. This foot is very
useful to sew on leather, stretch fabric, vinyl, plastic, or any kind
of fabric that stick, stretch, slip, or slide
under a normal sewing foot. The walking foot
has its own feet, dogs that evenly feed layers of fabric and patting
through the machine while quilting the
foot grips onto the top layer of fabric and
move it under the needle. At the same price as
the machines feed, dogs are moving the
bottom layer of fabric. The walking foot
is also a micing. When you saw stretch fabric
to prevent skipped stitches. For stretch fabric,
put the stitch lengths on three and use a
ballpoint needle. A very important tool in sewing is your seam ripper,
also called unpick. I'm going to show you how
to safely unpick a seam. The blade of the seam ripper
is between the two points. When you pull thread
from the fabric, use the side of
the longer point, otherwise it's going
to cut the thread, hold the seam ripper on its
side against the fabric. Then cut through
the back stitching on both ends of the stitch line. Then cut about
every third stitch on the one side of the seam, pull the thread on the
other side of the seam, then the seam will be undone.
6. Fabric and Sewing machine needles: About fabric and sewing
machine needles. The salvage on
fabric is the side of the fabric that
prevents it from fraying. You will find it on both
ends of a fabric roll. The crane of the fabric
runs with the salvage. On a pattern piece, you
will find an arrow. This indicates the
direction that the pattern piece should be placed on the crane
of the fabric. When you pull the fabric, you will see the
difference with the, the fabric pulls strong
against the grain. The fabric stretches a bit. Natural fabric versus
synthetic fabric. Go to your fabric store and ask them to show you different
types of fabric. You need to feel the
difference between natural fabric and
synthetic fabric. Natural fabrics such as wool,
cotton, linen, cashmere, visco ion, and silk are made from fibers produced
by animals and plants. Synthetic fabrics, such
as polyester, nylon, and acrylic are man made fibers
created in laboratories. Natural fibers usually have a smaller environmental
impact than synthetic fibers because
natural fibers do not use as many chemicals
during the production process. Some natural fibers are
less environmentally friendly than others because some plants require more water. Cellulosic fibers, which is plant based materials
such as cotton, viscose, and linen, will catch fire easily and the flames
will spread quickly. If the fabric is not impregnated
with a flame retardant, synthetic fiber fabrics
absorb very little moisture. They become sticky
when the body sweats, making them uncomfortable
to wear in hot weather. Most materials made from synthetic fibers
catch fire easily. They burn, melt, and
shrink in flame. For this reason,
synthetic fibers must be ironed carefully. Because they melt easily. You sew on satin or silk fabric, use a walking foot, de flon foot, or a roller
foot on your sewing machine. If you do not have one
of these sewing feet, put a piece of magic type
under the normal sewing foot. This will prevent puckering and your stitches will be even. You can use the sewing feet on stretch fabric to prevent
skipped stitches, but on stretch fabric you must
use a bigger stitch length 3-3 0.5 millimeter
about stretch fabric. Two way stretch is horizontal, running across the fabric
from salvage to salvage. Four way stretch is both
horizontal and vertical, running across the fabric
and up and down the fabric. If your garment is made of stretch fabric and
it needs a lining, then you must use
a stretch lining with the same amount of
stretch as the fabric. Or without a means that you cut all the pattern
pieces in the same direction, like velvet caudoy or prints that need to
face in one direction. Without nap means that
you can cut regardless of the direction the fabric looks the same in
both directions. Don't forget to follow
the grain line. When you buy fabric with a
print that forms a pattern, you have to buy at least one
printed pattern piece extra. The reason for this is
that the fabric is not always cut at the beginning
of the printed pattern. You must measure and buy
enough fabric to be able to use the full printed pattern on all your project pieces. Use a micro Tex
needle size 60 or 70 for fine woven
fabric like satin. On other fabrics of
light to medium weight. Use a universal size 80 needle
for heavy weight fabric, use a universal size 90 needle. You can use jeans needles or universal needles on num fabric. On stretch fabric. Use the stretch needle
on knitted fabric. Use the ballpoint or Jersey
needle for upholstery fabric. Use universal size
90 or 100 needle or jens size 9,000 needle
lightweight fabric. Use the smaller size needle, medium weight size T.
The heavier the fabric, the bigger the size needle. We only use cotton fabric
in our courses as it is easy to manage and it does
not melt when you press it. Always pre wash your
fabric to allow shrinking. And iron decreases out before
you start your project. If you take good
care of your fabric, it will last a long time. Machine wash cotton,
linen, viscos, and Ron type of fabrics on
a gentle or normal cycle, in cold water, like put them in the dryer
on a low heat setting. Hand wash silk in cold water and cool tumble
dry or air dry it, Hand wash wool in cold
water and air dry it. Interfacing is used to
reinforce areas that are subject to stress and helps a
garment maintain its shape. Interfacing is also required for many home decorating items. To add support and shape, I do recommend the iron
on woven interfacing. The paper interfacing
does not last long. In the washing, you get
different weights of interfacing for
lightweight fabric use the light
weight interfacing. The heavier your fabric, the heavier the
interfacing that you buy. You also get a stretch interfacing that is used
with stretch fabric.
7. Thread tension on the sewing machine: If the tension on your
sewing machine is not right, it can waste a lot of your
time while sewing a project. Always test on a piece of fabric before you start
with a new project. When you test the
tension on your machine, use a different color at
the top than at the bob, so that you can easily see
which one is pulling through the top and bottom stitches interlinked in the
middle of the fabric. If the tension is not right, the one will pull tighter
than the other one. The looser thread will pull through to the other
side of the fabric. Make sure the presser foot is down before you start to sew. Otherwise, there is no tension between the tension
disks on the thread. The thread will just run
loose through the machine. Re thread the machine. Make sure that the
thread is correctly through the tension
discs of the machine. Also through the take up lever. The threat on the bobbin
should be in clockwise. Make sure that the
thread is through the tension plate
of the bobbin case. If your machine is
threaded correctly, but the problem is not solved, look at the tension dial. The normal tension
on a machine is 3-5 Put the tension
dial on three, then sew a few centimeters. Check the stitches and move
the dial a little bit up. Then sew and move a little bit until your
stitches look right. If you have the drop in bobbin, you shouldn't have any problems with tension at the bobbin. But if you have the
front load bobbin that has a separate case, it is likely that the screw
could be loosened over time. Then you have to turn
the screw a tiny little bit to test
the bobbin tension. Remove the bob and case
from your machine. Hold the end of the thread, then pull up on the thread. The thread should
unwind and the bobbin should drop three
to 5 centimeters. If the bobbin drops
all the way down, then the tension is too loose. If it doesn't drop at all, the tension is too tight
to tighten the screw. Turn the screw a tiny bit
clockwise to loosen the screw. Turn a tiny bit anticlockwise, I'm going to say
with the tension on 3.5 the links are not
visible from the outside. 6-7 the stitches at the
top are a bit loose, the links are slightly
visible at the bottom. I'm going to put the tension on nine to show you what it
does on a higher number. You can see the tension
at the top is too loose, the links are visible
at the bottom. The lower the number, the loser, the tension. When you get to
the higher number, you get a tighter tension. If your thread jump
off the Tcp lever, the thread will get
stuck in the machine. You have to take
out the Bob and Is and pull out the
thread that got stuck. If you can see the top
thread underneath, it means that the top
thread is too loose, then increase the tension
to a higher number. Or if it doesn't help loosen
the bobbin screw a tiny bit. If you can see the bottom
thread at the top, then it means that
the top thread is too tight then decrease the
tension to a lower number. Or if it doesn't help
tighten the bobbin screw.
8. Practise to sew: Now that you know the
working of the machine, you're going to start sewing, download, and print
the practice sheets. Then start with the one
with the straight lines. The needle must be in
the middle position and the middle mark or groove on the universal sewing foot
must be on the line. Remember to put your finger on the top thread to keep
it from pulling in. When you start to sew, to sew on the sewing machine
is like driving a car. You have to keep your
eye on the road. Keep your eye on the
middle mark of the foot. Your steering wheel will be, your hand on the paper. Just keep your fingers
away from the needle. When you drive too fast, you may lose control. Go slow on the foot pedal. Move the hand wheel
towards you to make sure that the
needle is on the line. Let your foot slow down
on the control pedal. Keep your eye on the
middle of the foot and steer the paper to be
able to sew on the line. When you must move your hand, let the needle stay in the
paper and then move your hand. Otherwise, the paper may move, then your stitching will
not be in a straight line. When you get to the
end of the line, lift the needle up, then lift the presser foot up. Take the paper out, then you sew the next row. Carry on to sew
these straight lines until your stitches are
perfectly on the straight line. Then you can start to
practice backstitching. The reason for
backstitching is to secure your stitch line at the
beginning and at the end, Make sure that you know where the reverse button
is on your machine. Three stitches, then
three stitches backwards. Then sew the line until
you get to the end. Leave the needle in on the
paper at the end of the line. And back stitch three stitches. Then sew three stitches forward. Practice the lines with the backstitching until it
becomes easy for you to do it. Then you can start to practice
sewing on the circles. Do not back stitch on a circle. Your last stitch should
cover the first stitch. In other words, the two stitches will be exactly onto each other. Just go slow around the circles to be able to keep the
needle on the line. Carry on to practice the circles until you can sew
a full circle on the line. When you get to the
end of the circle before you sew onto
the first stitch, instead of using
the foot control, lift your foot up and use the hand wheel to
finish the last stitch. Cut the thread long
enough to tie a knot. Then pull the top threads to the wrong side and tie the
knot against the paper. Then you will have a smooth
finish on the right side.
9. Samples 1-6 Different seams and top stitching : Different seams. And
top stitching draw two straight lines
on the edge of the fabric to form
a 90 degree corner. To draw the lines, you can use a thin piece of
old soap or use your pencil. Draw three rectangles
of 20 centimeter with the grain by 15 centimeters
against the grain. Then divide each of them in half to assume you need
two pieces of fabric. This is why we divide
each of the rectangles in half so that you have two
pieces for each of the samples. Then fold your fabric
double for the samples. We need six rectangles, but we only draw three of them. Because we fold the fabric double and we're going
to cut them double. Put your pins on the inside, against the outer lines. Put enough pins,
otherwise the layers of fabric will move away from
each other while cutting. Do this all around
the outer lines. For the inside lines only
pin one side of each line. When all the lines are pinned, you can start to cut out cut long strokes
with your scissors. As short strokes will
give uneven lines. Cut the outer lines all around and then cut
the inner lines. The only way to get a professional look
on your sewing is to unpick where your seams are not straight or the
stitches are not right. Sample one is the open seam. Overlook the one side of
each of the two pieces. Place the fabric against the
blade of your overlooker. Do not cut into your fabric. The blade should only
cut the raffles, test your thread tension on
a piece of scrap fabric. Before you start to
overlook your samples, do not hold onto your fabric but keep it straight against
the metal plate. Do not cut the thread
against the fabric, but leave a piece of thread
in case the fabric pulls in. If your fabric pulls a little bit in with
your overlocking, then you have to smooth it to overlook on
your sewing machine. Your settings of your
machine should be on the overlock stitch
or if you don't have an overlock setting the West six X stitch
stitch length on two, taste your stitches
on a piece of scrap fabric before you
overlook your sample. Here you can see the
difference between the overlooker machine and
the domestic sewing machine. The right side of your
overlock stitching is a side where you see the straight lines of the needle stitchings
on the wrong side. It looks more like a zig zag. Always keep the right side of your fabric up while
overlocking as your seams will fold into the inside and then it
will look professional. If all the seams look the same, put the two pieces with the
right sides onto each other. The overlook sides
should line up. This will be your seam, then pin it on both ends, and then in between. The reason why we do this
is because the tension of your sewing machine
is not always the same at the top
as at the bottom. The one will pull in a little bit more
than the other one. Then when you get to the end, you will see that the one piece will be longer than
the other one. Your seam will look flat
on one side and pull in on the other side your seam, one al centimeter wide. You can draw a line of
one alf centimeter from the edge and then keep the middle of the
foot on the line. Or you can keep the
side of the foot on the inner edge of your over locking stitches with the
needle to the far left side. Put the stitch length
one for your samples. This will make it easier
if you have to unpick, but when you sew garments, put the stitch length
on 2.5 for your seams. Remember to hold the thread, then you can start
sewing your seam. Leave the needle in when you
take out your first pin, then sew to the next pin, leave the needle in
and take the pin out. And keep on sewing like that
until your seam is done. Then your fabric will not
move away while sewing. Now, press your steam open. Make sure that you have
enough water in your iron, and then press it with steam. Overlook your sample
on the edges, all around with the right
side of your fabric facing up long enough pieces of
your overlooking thread at the corners so
that you can make a knot tightly against your fabric that it
doesn't go loose. In the washing practice this with all your
samples so that you can get in the habit of doing this when you do
alterations on clothing. Then cut off all the Xs
thread at the corners, fold the piece over at the
top to the wrong side, and press so that you can
see in your file what your sample looks like on the outside and
also on the inside. Sample two is the closed seam. The closed seam is used on
medium and lightweight fabric. Use the closed seam
in side themes, princes seams, and also horizontal seams
in dresses and tops. This same can also be used
in many other projects. Put the two pieces of fabric
with right sides together, put it the same way that
you did with sample one. So your seam with the one on a two centimeter seam allowance, keep the edge of the fabric on the one on a two
centimeter mark. Overlook the seam. Fold your
seam over to the one side. The right side of your overlok
stitching should face up. Then turn your fabric and press the seam on the right
side of your fabric. Start pressing from
the flat side and move your iron over the seam so
that you can smooth the seam. Now you can overlok the
edges of your sample, Then fold the piece over and put it in your
file with your notes. Make another four samples
of the closed seam, but for the one sample, cut a piece of calico for the one side and use the outer
fabric for the other side. Overlook the edges all
around and press the seams, but do not fold the fabric in as you're going
to do top stitching. Sample three is the edge stitch. The edge stitch is done on the seam 1 millimeter from
the fault of the seam. Put the stitch length
on 3 millimeters. The edge stitch to reinforce
seams like on ins, at the hip area. The edge stitch is visible on the outside like
a top stitching. Put the stitch length on three sample three. B is
the unders stitching. Unders stitching is a
technique used to stop facings from picking out
from the inside of garments. If you attach a facing to a neck line or attach
a lining to a trace, you can stitch the
same allowances to the lining about 1 millimeter
from the same line. This will help keep its stay on the inside where it belongs. The unders stitching is done exactly like
the edge stitch, with the difference that the unders stitching
is only done on the lining or facing and is not visible
on the outer fabric. Here you can see that the outer fabric is
visible from the inside, but the lining is not
visible on the outside. Fold the sample under
seam, line, and press. Then fold the piece over and press sample four
is the foot stitch. The foot stitch is
also done on the seam, but seven to ten millimeter
from the seam line, move the needle to
the far left side and keep the side of the
foot on the seam line. The foot stitch is done
as a top stitching, but it also reinforces the
seam at the same time. Sample five is the twin stitch. To sew the twin stitch, you need to do the itch stitch and the foot stitch on one seam. Together they form
a twin stitch. The twin stitch is a top
stitching that we do, for example on jeans
jackets or bags. Top stitching should always be a bigger stitch length the, the fabric, the bigger
the stitch length. Sample six is the French seam. Use the French seam
on transparent fabric like Phon George and Gus cut two pieces of fabric
of 20 centimeter with the crane by nine
centimeter wide for your sample. Put the two pieces of fabric with the wrong
sides together. The right side of the fabric
will face to the outside. Pin them together. So a five millimeter seam, five millimeter is with
the side of the foot on the side of the fabric and
your needle to the far right. If your needle cannot
go to the far right, you can leave your needle in the middle and sew a
seven millimeter seam. Then trim 2 millimeters away, press the seam to the one side, then fold it over on the seam
line and press it again. The wrong side will face up now, and so one centimetre
seam allowance, press the seam to the one side and overlook the
sample all around. Then fold the piece
over and press
10. Sample 7 The inner corner: Sample number seven
is the inner corner. An example for the inner
corner is the V neck line. You need to cut one
fabric and one lining. The reason why we use Calico
fabric for the lining is because it is also
100% cotton fabric. For the corner seam, use the sample 11 template
of the corner panel seam. Make sure that the grin of
both pieces of fabric are in the same direction and also that the arrow on your
template is on the crime. Put your template on the fabric, all around on the edges. And then cut it out like the pens out. Put the two pieces with
the right sides together. Then draw a line, 1 centimeter from the edge on both sides of
the inner corner. Then mark the corner. Pin them together on
the inner corner lines with the needle in
the middle position, so under 1 centimeter line until you get to
the corner mark. If it looks like
your needle will go over the corner mark
with the next stitch, lift the foot up and put
your needle into the mark. Lift the foot up and turn and see that your needle lines up
with the next line. Then let the foot down and
sew further to the end. This is what's going to
happen if you turn it inside out without
cutting your corner. To get a nice and smooth corner, cut the corner to
the stitch line. But be careful not to cut
your stitches just next to your stitch, please. The same to the lining. And then sow your unders
stitching until you get to the corner at the corner. Left the needle in
and lift the foot up. Make sure that nothing
falls in under the foot. Your fabric should be
smooth under the foot, then you can serve further. Sample Should look like this on the outside and like
this on the inside. Overlook the raw
edges of your sample. Fold the piece over and
press and mark your lining.
11. Sample 8 The outer corner: Sample eight is
the outer corner. An example of the outer corner
is a lined patch pocket. For the outer corner, we use
the template of sample 11. B, cut one of your
fabric and one lining. Put the two pieces with
right sides together. You're going to saw one
corner on the sample. Draw a line on both sides of the corner of 1 centimeter wide. Make your corner mark. This is where your needle
will stay in when you turn. Put your pins in so the lines, when you get to the corner mark, turn and then sow
the other side. Remember to backstitch
at the ends. We will not cut into the corner, but we're going to
cut the corner away. Throw a line at the corner
and then on the line, this line should be just
above the corner stitch. Cut the corner above
this stitching line. This will help that
your seams will fit in better on the inside. When you turn it inside out so that your corners
are not too bulky, turn it inside out, then use the point turner
to turn the corner out. Mark your lining
on the right side. Fold the same to the lining
and do your understitching. Start at the one side, you will not be able to do the understitching
in the corner. You're going to stitch until you get as near as possible
to the corner. And then back stitch. Then do the same
on the other side. Smooth your fabric with both hands when you
do this stitching. And then do your unders
stitching until you see that you can't smooth the fabric anymore as near as
possible to the corner. Then do your back stitching and do the same on
the other side, the series on the left side now. So you have to move your needle
a little bit to the left. I'll lock the row
edges all around. Mark the lining.
Press your sample and fold a piece
over at the corner.
12. Sample 9 The outer curve: Sample nine is the outer curve. An example for the outer
curve is a lined curve. Patch pocket or anything that
has a curve with a lining. Use the template for
the curve panel seam. Then cut one fabric
and one lining. Put the outer piece and the
lining onto each other. The right side should
face each other. Start to pin at both ends and
then pin around the curve. As you're only going
to sew the curve line, sew a 1 centimeter
seam around the curve. The straight edge
will stay open. Put your needle to the left and the side of the foot on
the edge of the fabric. When you sew a curve, just slow. With your foot on the pedal, check your stitching to see
if the curve is smooth. If it's not smooth all around, pick and do it again. When you are happy
with your stitch line, mark the lining, fold
the seam to the lining. Then sew the unders
stitching from the one point to the
other point of the curve. Smooth the fabric
all the way to make sure that the seam doesn't
fold over at the bottom. While sewing the seam of the outer curve is bigger than the inside
where it needs to fit in. You will find that the sacks
when you turn it right side out to make the sea cut
half of the sea away, the unders stitching will secure the seam and keep it from your seam should lie
flat When you press it now overlook the raw edges, the sample should still be
open so that you can see what it looks like on the
inside the sample. Fold a piece over
and press again.
13. Sample 10 The inner curve: Sample ten is the inner curve. An example for the inner curve
is the curved neck line. Use the template for sample
12 a for the curve seam. Cut one outer fabric
and one lining. The lining will be the calico
fabric mark the lining. You are only going
to sew the curve, put pins on both ends of the curve and then
pin in between. So the inner curve seem exactly the same
as the outer curve with the needle to
the left and the side of the foot on the
edge of the fabric fold the same to the lining
and to unders stitching. When you turn the
sample inside out, you will find that the
seam pulls up because the seam allowance of the inner curve makes
the curve smaller. This means that
the seam will not fit in below the stitch line, cut the way half of the seam, and overlock the raw outer
edges of the sample. Press the seam and fold the
piece over and press again.
14. Sample 11 The Corner Panel Seam: Sample 11 is the
panel seam print. Your templates, the
panel to the fab. Make sure that the grind
line of the pattern is in the direction of
the grind line of the F. Note on the pattern pieces that you only cut
one of each panel. The part, the outer corner panel is bigger than the inner corner
where it needs to fit in. Because the seam allowance of the outer corner makes
the outer corner bigger, the seam allowance of the inner corner makes
the inner corner smaller. But the stitch line will be exactly the same
measurement on both panels. When you saw the corner panel, you have to mark the stitch
line corners on both panels. Put your ruler on the right
side of the fabric with the 1 centimeter lines on both
sides of the inner corner. Then mark the corner. If you do not have a
ruler like this one, measure 1 centimeter
in from the edges, make a few marks on both sides, then draw the stitch lines so that you can find the corner. To make sure that
you're going to measure the correct corner, put the outer corner panel
on the inner corner panel. The right sides should
face each other. Make a tiny mark on the corner. Then draw the stitch lines
on both sides of the corner. 1 centimeter from the edge. Make the corner mark
where the two lines meet. Cut the inner corner
panel in the corner until about two millimeter from the corner mark to pin
the panels together. Place the outer corner
panel with the right side facing down to the right side
of the inner corner panel. Put a pin on the edge of the fabric to keep
them in place. Then put a pin through
the corner marks of both panels and put a pin next to the corner marks to keep
the panels in place. On this side, take the pin at the corner marks out and
pin the rest of the line so the stitch line from the edge until you get
to the corner mark. Leave the needle in
the corner, mark and lift the foot up. Then the second line of the top piece to the second
line of the bottom piece. Make sure that nothing
falls in at the bottom. Pen the edges onto each other. Let the foot down
and sew the line to take the fold
out at the corner. Cut the extra two millimeter
to the corner stitch, but be careful not to
cut in your stitch. Overlook the seams,
then overlook the raw edges of your
sample and press.
15. Sample 12 The Curved Panel Seam: Ample 12 is the
curved panel seam. Put the template of
ample 12 on your fabric. Make sure that the grind line is on the grind of the fabric. Pen. Cut the straight lines
of the sides and the bottom. Leave some of the pens in, then trace the top line
together with the curve, with your pencil on your fabric, cut the panel out. The curve should be the
same as the pattern piece, otherwise the two
panels will not fit into each other
at the curve line. Then trace the outer curve
pattern and cut it out. Make sure that the curve is
the same as the pattern. The panels double and cut. The center marks about two
millimeter in on the fabric. The sam, allowance of the outer curve makes
the outer curve bigger. And the seam allowance of the inner curve makes
the inner curve smaller. But the same lines will
be the same measurement. You will have to stretch the inner curve to
fit the outer curve in fold the inner curve piece double and make a few cuts
around the curved edge. Three to four millimeter
in on the fabric. This will make the
stretching a bit easier. I have four cuts on each side of the curve and the small cut on the center front with the
right sides together, the center marks
onto each other. Now you're going to pin
the one side of the curve. The straight lines at the top should be exactly
onto each other. Put them with right
sides together. And put a pen to
keep it in place. To pin the rest of this side. Start at the center mark, stretch the inner curve
as much as you can, hold it in place with your
fingers and put a pin in. And then keep on, ping, ping, until the outer curve
fits in on that side. Then do exactly the
same on the other side. As the outer curve
panel is flat, you have to keep the
inner curve panel to the top so that you
can see the folds. When you saw the, keep
the side of the foot on the edge of the fabric to keep the panels in
place to each other. Do not take any pins out until the needle
gets to the pin. When you get to a fault, left the needle in the
before it catches the fault. Then lift the foot up and smooth the fabric
under the foot. Let the foot down, and sew further until you get to the next fault and do the same. I'm going to teach you
two different options to finish the curved panel seam. On the one half of the seam, cut triangles until
about two millimeter from the stitch line on the other half,
fold the seam towards the inner curve panel and do
a top stitching on the seam. One to two millimeter
from the seam line, cut the y half of the seam on the side where the
top stitching is. And overlook the other half of the sea where the triangles are. Impress the Sam and overlook the outer
Tes of your sample.
16. Sample 13 The Single Ended Dart: Sample 13 is the
single ended dart. The single ended
dart is marked on your pattern as a triangle
with two angled sides. You will mostly find this
kind of dart in the side, seems at the bust or in the waist line for
pants or a skirt. Put your template on the
wrong side of the fabric, then pen it and cut it out. Put the pin through
the dart point. Mark the notches on the
edge of the fabric. And then mark the pin at the
art point on your connect the marks with the ruler and draw the middle
line of the art. This will be the fold line. Fold the fabric on
the middle line of the art. Put pins in, make sure that the mark for the dart point will be visible. When you sew, start to sew on the edge
of the fabric, do backstitching, then sew on the line until you
get to the dart point. Do backstitch at the dart point, but leave a piece of thread about 8
centimeters long so that you can tie a knot against the fabric to secure
a smooth finishing. Make sure that you tie the
knot against the fabric. Then cut the thread about 1
centimeter from the knot. Press the dart to the side and overlook the raw
edges of your sample. When you saw this dart
in the side seam, you press it down. When you saw it in
the waist line, you press it to the side.
17. Sample 14 Double Ended Dart: Sample 14 is the
double ended dot. Print the template, pin it to the wrong side of the
fabric and cut it out. Then put pins through all
the dots of the pattern. Make marks on the fabric
where the pens are. Connect the marks
with your ruler. We don't want the middle of
the dart to form a corner. Slightly curve the corner
with your free hand. Fold the fabric in the middle of the dart with the
wrong side out. Then both points of the dart. Put the pen through each of the notches to make sure
that they're lined up at the bottom on the double. In the art, you're not
going to do backstitching. Leave a piece of
thread so that you can tie a knot on both
ends of the art. Start to sew exactly
on the mark. And then sew the line until
you get to the other point. The stitches are exactly from the one mark to the other mark. They mica, not
against your fabric. Now do the same on this side. On the outside, the dot
points are nice and smooth with the right side of
your fabric facing up on the one side and then on the other side so that
you have a nice flat team. The double in the art is
mostly used for shaping the waist area overlok the
raw edges of your sample.
18. Sample 15 The Box Pleats: Sample 15 is the box plets. Box plets are made up of two knife plets facing
away from each other. In other words, they
are formed when two pieces of fabric or folded
away from each other, giving a white vertical pleat. They are often used as a
standalone pleat at the back of a shirt or as a series of
plets on skirts and dresses. Cut your templates out and pin it on the right
side of the fabric. Then mark the lines at
the top and also at the bottom row the outer lines of the template. When you make a
skirt or a dress, always use a pin of
pencil that will wash out so tasted on a
piece of scrap fabric. Pack out the pins and then draw the lines
between the marks. Cut your skirt panel
out on the outer lines. Cut the waistband piece, one fabric and one fusing. Then on the fusing to the
wrong side of the overlook, the two pieces all around at
the one edge of the skirt, which will be the
bottom of the skirt. Fold the hem 2.5 centimeter
to the wrong side and pin it. The first half of
the hem should be pinned in the direction
of the grind line. Then on the second
half of the hymn, put your pens against
the grind line. On this one half you're
going to do the hand. On the other half
you're going to sew the hymn with the machine. I'm going to use
a darker color of thread so that you
can see what I do. But normally you will use the same color as the
background of your fabric. Put your thread through
the eye of the needle and make a knot with the
two points at the end. If this was a skirt, this will be the side seam. Put the needle
between the layers of fabric through the inner edge
of the overlock stitching. Then in line with
your overlock stitch, catch one thread on the
fabric with your needle, and then put the needle
a little further on. On the inner edge of
the overlok stitching. Again, don't pull the thread too tight as your fabric
still needs to be smooth. Check that your stitches
doesn't show on the outside. Otherwise you have to unpick
and start over again. Carry on like this until you finish the first
half of the hymn. Normally when you put a hymn in, will start at one of the seams and then end at the
same seam again. When you get to the end, put the needle through the
same spot where you start it. But for the sample, it will be where the thread
is in at the last stitch. Put the thread three
times around the needle, then keep your finger
on the thread, against the fabric
when you pull it through so that it makes a
knot against your fabric. Then put the needle
between the two layers of fabric and pull it
through the hem. So this is what it looks
like on the outside. Now you're going to do the
rest of the hem by machine. Sew it in the middle of
the overlok stitching. Put the stitch length on three, press the hymn on
the wrong side. Then mark the center
piece with a pin. Fold the one line
of the centerpiece. Then put it exactly on
the next line away from the center piece and pin it. Make sure that the bottom
of the hem and also the stitch line stay in line
with the rest of the skirt. Follow the next line to the
previous line, then pen. The next line will fold in
the opposite direction. Now do the same on the
other side of the skirt. Make sure that the bottom and the top edges are
in straight lines. Press the plates with steam. Then take out the pins
and press it more. Put pins at the plates at the
top where you're going to sew the waist band to
keep the pleats in place. Put the waist band on the top of the skirt with right
sides facing each other. The edges should line up at the top and also at the sides. If it doesn't line
up at the sides, it means that your pleats
are not folded in correctly. So the same with the one saying to meet the
same allowance, press the waist band to the top, fold the waistband 3.2 C
to the wrong side. And it, the front of the waist band should measure 2.5 centimeter. Make sure that it is the
same measurement all over. Then sew it in the ditch. In other words, exactly on the stitch line
of the waistband. Stitch length 2-2 and three, smooth your waistband
at the seam while sewing so that
you will be able to sew in the ditch and we don't want the stitching to be
visible on the skirt. Always use of the same color as the background
of your fabric. For box, you always need three times the amount of fabric plus the same allowances. Knife pleads, you need the
same amount of fabric, but all the faults should
face the same direction.
19. Sample 16 The Normal Zip: Sample 16, the normal sip, the type of the zip is the soft fabric pieces on
each side of the coil. There is a slight line on the Zeper type close
to the separate teeth. This is the perfect position for sewing your Ip
in a straight line. The teeth of the Ip are the little bits
that lock together to close the P that can be
made from plastic or metal. On the normal P, you will find the teeth on the right
side of the zip. The stopper is the piece
at the end of the zip that in regular Eps stop the
bottom end of coming apart. In open ended zips like
on coats and jackets, the chunky bit at
the bottom must click together before
you can close the zip. It can sometimes be plastic
or sometimes metal. You can also create
your own stopper when you shorten a zip by sewing several hand stitches
or six at stitches with your machine onto each
other around the teeth, Then cut the excess
piece off at the bottom. If you can't find
the correct length of a zip that you need, you can buy the longer one and then make it
shorter this way. Remember when you cut your zip, use your paper scissors
and your fabric scissors. The pull or tab, also called zipper, is what you use to open
and close the zip. You will also find
two little stoppers at the top of the
zip to lock the tab. When you sip it up, cut a piece of fabric
25 centimeters with the grain by 16
centimeters wide. Then divide the 16 centimeters in half so that you
have two pieces. Overlock the fabric and put the two pieces right
sides together. Pin them on the one side mark five millimetres above the metal stop at the
bottom of your zip. Then measure your from the top of the zip
down to this mark. This will be your
length measurement. Your seam will be
1.5 centimeter wide. Draw your seam line and then mark the
measured length of your zip on this line. Start serving at the bottom
of your seam stitch length on three and do a back stitching then until you get to your mark, the needle should stay in the mark and then do a
back stitching again. Now adjust your stitch length to the biggest stitch
on your machine. Then do a tacking
stitch on the rest of the seam Without back stitching, Cut the first stacking
stitch next to the back stitching on
both sides of the seam. And cut one stitch in the
middle on both sides. Press your seam open, make sure that the closed
part of your seam is on the right and the stacking
stitches are on the left. Take your zip, put it down on the stacking stitch
part on the left, on your seam with the right
side down with the coil lining up on the same line pin the top of the zip on
the edge of your fabric. See that your zip lies
flat on your seam. And then put the coil on the same line at the
bottom and pin it. Take the top pen out. See that your coil lines up with your seam and then keep it
there with your finger. Put pen in and do this all the way until you've
finished penning your Ap. Put your Er with a 1 centimeter
mark on the middle of your and see which line will
measure to 1 centimeter. Then hand tack your
zip on that line, all around on this side
as well At the bottom. Your tacking stitch
should be just below the last stitch
of the closed seam. Pull your seam to both sides so that you can see
where it opens. And then put the pin just below where your seam is closed. Take a hand needle, put your thread through, and then make a
knot at the bottom. Now start on the one
side of your Ip and do the hand tacking until you get to the
bottom of your Ip. Make your tacking stitches
about 1 centimeter long. Then mark the 1 centimeter line on the other side of your zip. Put your needle through
the marked line and then finish your taking
stitches on that side at the end. Do a
double tacking stitch before you cut your threat. Tack the pens out on the
wrong side of your up. Unpick the top half of
your tacking stitch, then open the Ip and put your normal Sip put
in your machine, so next to your taking
stitch on the inside. When you get to the zipper,
left the needle in, left the foot up
and close your zip, then let the foot
down and sew further. Then stop sewing when your
needle is just below the pin. Now you can turn and
sew over the Ip coil. When you get to the coil, you may want to turn the
wheel by hand just to get over the coil so that you do not bend or
break your needle. Then turn. And so
the other side, when you get near the upper, leave the needle in, left the
foot up and open your up. Then let the foot down again
and finish your stitching. Prese your sample and leave
the taking stitches in.
20. Sample 17 The Invisible Zip: Sample 17, the invisible zip. The invisible zip is
hidden in a seam. You don't do a top stitching
on this kind of zip. The teeth or coil of
the zip is visible at the back or wrong
side of the zip, always by your invisible
zip 2 centimeters longer than the opening
where it needs to fit in. Because you need extra
space at the bottom of the zip for the sewing machine
presser foot to fit in. When you sew it, cut a piece of fabric 25 centimeters with the grain by 16 centimeter wide. Then divide the 16 centimetre in half so that you
have two pieces. Overlook the fabric and put the two pieces right
sides together. Pin them on the one side. Measure your zip, but
keep in mind that the zip should be 2 centimeters
longer than the opening. Then prepare the seam and so the Sam the
same as the normal Sm, please. The same. Open back out. The tacking stitches. Lay the fabric flat with
the right side facing up. And fold away the one
side of your fabric. Open the Ip. Turn it
over so that the coil or the teeth that is on the wrong side point
upwards pin the zip, the coil on the seam line
fault that has been pressed in opens must be horizontal in to keep the coil
away from the up sew the zip behind the coil down to where
your seam is closed. If you have a
invisible zip foot, you can use it for this sample. But I'm going to
teach you how to sew it with a universal swing foot. Other words, your
normal sewing foot. Be careful not to sew the
coil but right behind it. If your stitches are
away from the coil, the zip will be visible on
the right side of the sample until you get to the point
where the seam is closed, but don't stitch
into the seam line. Close the zip to
the top to taste. Now zip it halfway and
fold the other side over. Smooth the seam to be
flat on both sides. And pin through the
zip at the bottom of the unstitched side against
the fold of the seam. Turn the fabric over and pin on the wrong
side through the zip and the seam only right next to the pin
that you inserted. Take out the outer pin, open the zip to the very bottom, and put the rest of the sip on that side with the coil
on the same line fold now, so this side
behind the oil, down the way the seam is closed. Pull the zip up, place your sample. Your zip and stitches
should not be visible on the outside
if it is visible. And do it again, Only
the P should be visible.
21. Sample 18 The exposed zip: Sample 18 is the exposed Ip. The exposed zip sits right
on top of your garment. For a deconstructed look, it can add an element of interest to an otherwise
plain garment. Cut the piece of
fabric, 22 centimeter, with the grain by
17 centimeter wide. Measure the zip tape from the top edge to the bottom edge. Then cut one piece of fusing
with this measurement by 4.5 centimeter wide on the fusing to the wrong
side of the fabric. Then overlok the
fabric all around. Measure from the top edge of the zip tape down to just below the zip stop at the bottom of the zip on the right
side of the fabric. Mark the middle of your fabric. Then draw a line with
this length mark. Seven millimeter to both
sides of this line. Then draw lines to
connect these marks. It should be the same
length as the center line. Then draw a line to meet the 27 millimeter marks at
the bottom of these lines. Mark 1 centimeter up from
the zip length line. Draw corner lines from this mark down to the
seven millimeter marks. Cut the center line above
the 1 centimeter mark. Then cut to the corners. Fold the seven millimeter lines to the wrong side
and press them. Then fold the triangle at the
bottom to the wrong side. And press pin and hand
tack the zip in place. The zip stop at the bottom
should be above the fold of the triangle and the zip should be centered in the
middle of the opening. Sew an edge stitch all
around the zip and do a foot stitch to cover
the raw edges at the back.
22. Sample 19 Zip with a fly: Sample 19 is the
zip with the fly. The zip with the fly is
the zip that you find in the front of pants
and sometimes in skirts. Keep the printed side of
your templates facing upwards and the right side
of your fabric facing up. When you pin the
pieces on your fabric, you have the left
side of your pants, the right side of your
pants and the fly shield. Pin the pieces all around
then cut them out. Pattern notches
are small marks on your pattern that
you must mark onto your fabric to ensure
that the two pieces of fabric will fit
correctly onto each other. When you sew it, you
can cut them into the fabric about 2 millimeters
with your scissors. Do this before you
unpin the pattern. Then put pins on the top, stitching lines on the
left side of the pins. And mark them with
your pencil on the right side of your
fabric against the pins. When you make pens and you
do the top stitching marks, make sure that you use a
pencil that will wash out. Then draw the top stitching line on the right side panel. Mark the notches on
the wrong side of your fabric so that
your marks are visible. While you do your stitching, Cut a piece of
lightweight woven fusing and iron it onto the wrong
side of the fly shield. Shiny side of the fusing
is the glue side. It's important that you
make sure that the side of the glue face down onto the
wrong side of your fabric. Put a piece of paper on
top of the fusing so that the glue will not attach to
your iron when it melts. Use a hot iron.
When you do this, note that you do not use steam
when you on the fusing on. Otherwise it will
not attach properly. Hold the iron at one place. Just long enough to melt the
glue and then move it on. Do this until your fusing
is attached all over. Mark the notches of
the fly shield with your pencil on the right
side of the fabric, overlok the left
and right panels, all around with the right
side of the fabric facing up. Be careful when you get to the curves that you do
not cut into your fabric. Your overlocker, just turn the fabric so that it
forms a straight line, but do not stretch it out. Overlock the fly panel
until you get to the point at the bottom of the fly curve, then fold it in. Don't worry about the fold
that forms in the fabric because the overlock stitching will not keep it as a fold. Fold the fly shield double
with the right side facing up. Then press it overlock. The raw edges together. Pin the two panels with
the right sides together. Start at the bottom
to sew the seam, do back stitching, then sew
until you get to the mark. Back stitch again. Sew the rest of the seam on
the longest stitch length. But do not back stitch as
this is attacking stitch. Press the seam open and tack
out the tacking stitches, fold the panel
with the fly away. Your fabric should
lie flat at the seam. Place your zip with
the right side down at the top. It should
line up on the edge. The coil of the zip should
be on the fold of your seam. Put a few pins on the
edge to keep it in place. Open the zip and put
your pins horizontal. Put the fly shield on the right side of your overlok
stitch should face up. Your fly shield
should line up at the top and at the
edge of the seam, then pin the fly shield. Your will now lie between the
fly shield and your panel, fold the other piece
of the down to the bottom and put a pen
in to keep it there. While you sew your put your normal sip foot
in the machine, start to sew at the
bottom of your seam and sew it right next
to the coil of your Ip. Take out the pen, close the up, and fold the other panel over. Then put puns in to keep
it close at the seam. Pin it with the wrong side up. Fold the panel
where the fly will be away towards the other panel. Then fold the fly shield over so that you can pin
this up to the facing. Then take out the pins in the front and open the zip hand. Take your zip to the
fly facing or put pins horizontal in before
you take the other pens out. Shows up on the outer edge. Do another stitching. Next to the coil of your P. You will have two rows
of stitches on the P, Close up, then fold
the fly shield away, put pens in to keep it out of the way while you do
your top stitching. The top stitching should attach the flyficing at the back. Put your normal sewing foot in. Put pens through the fly
ficing to keep it in place. Then put a pen through the
stitch line to make sure that your stitch line will attach
the fly fing at the back. Otherwise, you must do your stitching a little bit
more to the inside. So the top stitching
on stitch, link three, back stitch. When you
get to the same line, take the pens out at the back and fold the
fly shield over the, put the pen through
the bottom edge of the fly shield to
keep it in place. Now you must do the back. Back is a very small
zigzag stitch. The stitches should lie
against each other, but not on top of each other. As sewing machines differ, take a piece of scrap
fabric and test your machine to see which
setting will be the best. The bottom stitching looks good. The settings on
my machine stitch length 0.5 and the width 1.5 The bar taking on the seam line at
the bottom of the fly, from the opening of the seam down to the top
stitching of the fly. The stitching should touch
both sides of the same line. This is what a bar
tacking looks like. Then do a bar tacking on
the top stitching where the curve starts to attach
the fly shield at the bottom. This barking should be
about 7 millimeters long. The stitches should lie on both sides of the top stitching. Praise your sample. This is what it looks like at the front and at the back.
23. Sample 20 The seam with a slit: Sample 20. The seam with a
slit cut two pieces of fabric of 25 centimeter by 18 centimeter
and overlock the edges. A seam of 12 centimeter long by 1.5 centimeter wide
and back stitch. Set your stitch length on four. Then do a tacking stitch
on the rest of the seam. Press the seam open and take
the tacking stitches out, fold the seam to the outside of the same line, and put pins in, mark the 2.5 centimeter of the hem width on both
sides of the seam, the edge of the seam on the overlock stitching
and turn when you get to the mark then so on the horizontal
marked lines, take out the pins and
turn the corners out. The seam will fold
to the wrong side. Again, pin the hem
2.2 centimeters to the wrong side and press
on the inside of the seam. Hem should lie
against the fold of the seam so that
everything can line up, put pins in the corners
to keep them in place. Then measure the seam 1.5
centimeter and pin it on both sides so the edge of the seam until you get in line with where the
seam is closed. And so to the seam line until 1 centimeter
above the opening. Then turn again and make
a mark on the edge of the other side of the seam in line with where you
turned the first time. Do this mark. Turn again and so on the edge
down to the bottom. Then sow the hem on the
middle of the overlok stitch. Start at the stitch
line of the seam on the one side and then end at the stitch line of the
seam on the other side. The stitch lines
at the bottom of the hem should line
up with each other.
24. Sample 21 The welt pocket: Sample 21 is the Welt pocket. These pockets are mostly
used in jackets and pants, but I also make them in bags. For the sample template, I is the jacket piece. Cut one fabric and one fusing. Place the fusing
with the glue side to the wrong side of your
fabric and iron it on. Draw the placement marks. On the right side of the fabric template
is the pocket piece. Cut one piece of fabric, fold the fabric, double
on the grain line. Place the template
with the place on fold edge on the
fold of your fabric. Then open it and cut it out. For template C, you
must cut one fusing. Only place the fusing to the top edge on the wrong
side of the pocket piece. Throw the placement marks and then draw the lines exactly as indicated
on the template. In order not to sit in
front of the camera, I turn my fabric upside
down to draw the lines. The top line should
be 2 centimeters from the top edge and 2.5 centimeter from the
side edges of the. The side lines should be two centimetres down
from the top line, then join the side
lines at this line should be 2 centimeters from the bottom
edge of the fusing. The middle line is
1 centimeter from the top and bottom lines and 1 centimeter shorter
on each side. Then draw the corner lines, which forms the triangles with right sides together. Put the pocket piece
onto the jacket piece. The placement marks should
be in line with each other. Put them together as
seen on the video. Start to sow in the
middle of the outer line. Remember to do back stitching. When you get to the corner, your needle should stay
exactly into the corner, then turn and so
straight down to the next corner, then carry on. And so all around
the outer lines, it is important that these
lines are straight and that the needle is exactly
in the corner when you turn. Otherwise, the
weld will be skew. Fold the fabric double. See that the edges
line up with each other and then cut
the medal line. When you get to the triangles cut to the corners where
your corner stitch is, be careful not to
cut your stitch, but just next to the stitch, push the pocket through the
opening to the wrong side. If the fabric pulls
at the corners, it means that the
corners are not cut near enough to
the corner stitch, pull the corners to
see if it smooths out. On the right side of the press, the seams to the pocket piece at all four sides of the opening. An inch stitch all around
on the pocket piece. Stitch length on three. Place the sample, fold
the pocket to the top, then fold it down against
the top edge of the opening. Bend the fold just below the top corners of
the weld opening. Then see that the fold
is in a straight line. Put a pen in the
middle below the fold, press the fold, Turn the sample over with
the right side facing. Then fold the jacket
piece away on the sides, so the triangles through the pocket piece next to
the first stitch line. Be careful not to sew
into the jacket piece. This stitching will
secure the sides of the weld and should not be
visible from the outside. Hold the pocket, double
the overloked edges should line up all around. Then put pins in so it with a seven
millimetre seam allowance, press your sample and
put it in your file, together with your notes.
25. Sample 22 Bias binding the curved neckline: Sample 22 is the bis binding on the curved neck line type. The two pieces of the
bis binding pattern together on the dashed lines. Make sure that you're layer it out on the bias of your fabric. In other words, the arrow on the pattern should be on
the grind of your fabric. The reason why we cut the
binding on the bias is because it have to stretch a little bit to fit
in where you sew it. If you cut it on the grin line, then it will not be
able to stretch. Cut the front and back panels
on the fault of the fabric. Place the front and back panels with right sides
facing each other. The shoulder edges
should line up pin the shelder lines so it with the one seeing to
meet the seam allowance, overlook the seams. Then follow them to
the back and fold the B binding double with the wrong sides
facing each other. And press open the
binding on the one end. Draw a line 1 centimeter
from the edge. Fold the top over with
the right sides together, and mark the center back on the wrong side of the panel. The marked line of the
e binding on the center back mark and the binding
all around the neck line. Be careful not to
stretch your fabric. When you get to the end, fold the back panel on
the center back mark, and put the two ends of
the Bis binding together. Then cut off the extra
piece of binding. Bend the edges of the binding with the
right sides together so the one sent
met the mart line. Place the seam open, then fold the binding
double at the seam. Pin the seam on the
center back mark. Start at the center back and sew a 7 millimeters seem all
around the neck line. Fold the same towards the panel and then do
your unders stitching before you fold the binding
over to the right side. Trim the edges of your seam. Fold the binding
over to the outside. Make sure that it's the same with all the way around
when you pin it, start at center back and then the binding all
around on the edge. Stitch length on three. As this is a top stitching, your neck line should
be very neatly done. The stitching should be straight
on the edge all around. If not, unpick and sour it
again until you get it right, press the neck line and overlock the raw
edges of your sample.
26. Sample 23 Bias binding the V neckline: Sample 23, the vice binding
on the V neck line. When you sew this neck
line on the garment, you're going to do the
full neck line as you did in sample 22 with the
curved neck line. But for this sample, you only sew the V
on the front panel, fold the vice binding double with the
wrong sides together and press the seam allowance
will be 1 centimeter. Draw a line on both sides
of the V. 1 centimeter from the edge to find the mark where the lines
meet at the corner. Cut the order in until about
2 millimeters from the mark. When the By is binding to the
right side of the fabric, the binding should overlap a little bit at
the shoulder line, start at the one shoulder line, and sew it with a 1
centimeter seam allowance. When you get to the corner, lift the needle in the
fabric on the corner, move the stitched seam, the back and the wrist of
the binding to the front. The binding should
form a straight line. The wrist of the seam and sided to the
other shoulder line. Cut the binding straight with the shoulder line overlok the seam. And then cut the extra
two millimeter in at the corner fo the same down. And press the install a top stitching with
stitch lengths on three. Your needle should be exactly on the
corner. When you turn fold the panel on
the center front with right sides together. See that the edges line up and then put pens
in on the binding. Put your ruler on the centerfold line and
draw a line on the binding. This line should not touch the seam but be just
above the seam stitching, So the line on the binding at the back of the V fold the corner piece
flat on both sides. You don't want it to be bulky on one side and flat
on the other side. Then it, this is what
it looks like at the back and at the
front on my sample. At the center front, you will see that the dots did
not line up in the middle. When you use printed
fabric for the binding, you have to do planning. Before you saw the
binding on the V. Cut your printed binding longer and fold the binding in half pin a V at the fault
to see the results, keep folding it bit by bit, further on until you are happy. Then mark the fold on the
binding pin the fold, mark on the V point and
then pin it upwards.
27. The Shirt Placket: Sample 24 is the shirt placket, print your pattern
on actual size, and cut the pattern pieces out, cut two of pattern B on fabric and two of C on
lightweight fusing. I should be placed on
the fold of the fabric. And Put a pin through the bottom
of the stitch line. The center front line
is on the fault. The next line on the pattern
is the placement line, and then you have
the stitch line. The lines are 7
millimeters apart. At the neck line, mark
the placement lines. Mark the pin on both
sides of the front. Mark the bottom of
the placement lines. Mark the placement lines
with your pencil where the cutting lines of the
scissors on the neckline. Then draw the placement
lines between the marks for
demonstration purposes, I'm drawing the
stitch lines as well, but you don't need to
draw the stitch lines on your front pattern as you're going to draw it on
the placard piece. Connect the bottom marks
of the stitch lines. This will be the length line. On center front, mark 2 centimeters up from
the length line. Then from this mark, draw diagonal lines to
the stitch line marks. This will form a
triangle at the bottom. Here you can see the triangle. The bottom points are
at the stitch lines. Place the fusing
on the one side of the placed pieces with the glue facing the wrong
side of the fabric. Cover the fusing with paper and on the
fusing to the fabric. Remember, no steam fold the unfused sides, seven millimeter to the
wrong side and press. To fold the line evenly, you can draw a seven millimeter
line on the right side of the fabric and fold it on
the line to the wrong side. Then press it. Remember to use fabric markers when you mark on the right
side of your fabric. Mark the fused sides
seven millimeter and throw the stitch
lines between the marks. Fold them double. The folded
edge should just cover the stitch line. Then press. Put the placed pieces
right side down. The first edges should be
on the placement lines. Pin them. Mark the length line on the stitch line of the placed pieces
so that you can see where your needle needs to stay in when you do your
back stitching. Check the marks at the
length line to make sure that you have your marks correctly before
you start sewing, your last stitch of
your sewing lines should be in the mark when
you start to backstitch. Make sure that your stitching ins on the mold
of the link line. If you went over the marks
with your stitching, unpick and sew it again. Cut the placement lines until you get to
the diagonal line. Then cut to your last stitch. Be careful not to cut
into your stitch. Fold the centerpiece
to the back. Press the seam
towards the placed. Fold the placed panels
over to the wrong side. The folded edge should
be on the seam line. Pin them in position. Place the placket
pieces onto each other. For women's clothing, it
will be the right over left. For men's clothing, it
will be left over right. Pull the placed pieces at the
bottom until it lines up. The fold at the bottom of the placed should be in
a straight line. Press the fold at the bottom. Turn the bottom
piece of the fabric over and put a pin in
to keep it in place. See that the fold
at the bottom of the placket is still
in a straight line. Then sew it in the
groove of the fold. Be careful not to sew
on the top piece. Cut the extra piece off. And I will lock the edge. With right side facing upwards, so a top stitching
on the edge of your placed from the neck down, stitch length on three. When you get to the
corner at the bottom, leave the needle in the fabric, lift the foot up and turn. The placed pieces should
line up at the sides, then sew the bottom on the
placed to the next corner. Left the needle in
the corner, turn, fold the fist to the back, then sew the other
side to the neckline. Pin the placket pieces onto
each other on the sides. To secure the placket
at the bottom, sew another line 1 centimeter above the first stitch line. Iron your sample and overlook
the sample all around. In the next lesson, you will use this sample
to sew your buttonhole.
28. Buttons and buttonholes: Button Ole and buttons. Look in your sewing
machine manual for the buttonole settings. As machines differ and
have different settings, make sure that you have
the correct buttonole foot for your sewing machine. When making button Oles, always iron facing
on the wrong side of the fabric that your buttonholes come out firm and neatly. Practice on a piece of scrap fabric before you
sew your buttonhole, and do the same before you
sew buttonholes on camonds. The automatic buttonole,
most buttonhole feet have measuring marks on the side of the foot to sew
button noles on cord. There is a pin in the middle of the foot with grooves
on both sides. There is also a pin at the back, put the cort under the foot
from the front to the back. Over the pin at
the back and then at the other side
to the front again, if the diameter of the button is 1.2 centimeter at the
depth of the button. If it is three millimeter
the length of the button, Ole should be 1.5 centimeter. Measure on the side of the foot, at which mark you need to stop for the length of
the button Ole. Then move the plastic marker
on the foot to that marking. Make your marks where your
button Oles need to start. This will be in the center
of the button Ole stand. The needle should be
above the mark on the fabric and the
foot should be in a straight line up to the mark. Then you must press the
backstitch button so that the needle reverse automatically and finish the button Ole. This machine will keep the
memory for the size of the button Ole to make all the other button
Oles the same. To cut the button Ole, put a pin through the top
stitching of the button Ol and put your und picker
above the bottom stitching. Then cut through the
fabric to the top. The pin will prevent cutting
into the top stitching. The one step button Ole. Slide the buttonole foot open to the back and
put the button in. Then slide it to the front so the button fits
snugly in the gap. Then pull the button lever of the machine down as
far as it can go, it should butt up to the left edge of the
button Ole foot. Then select the button Ole
setting on your machine. To sew more than
one button Kole, you will need to
turn the dial to reset after each button
Kole that you sew. Once you reach the end
of the button Ole, be careful not to continue
sewing beyond this point, the four step buttonw, when you saw the four
step button Ole, turn the button for
each of the four steps. This is the four
step buttonole foot. The red marks that you see on the side are the
measuring marks, mark the length of the button. On these marks, on
the inner part of the foot are two red marks that are across the
machine needle. Keep these markings in line with your marks
on the side of the foot where you have to
start and end your buttonole. The bobbin case of this machine has a little
hole in the finger. If your machine
has one like this, put the thread through the hole from the inside to the outside. It puts a little
bit more tension on the thread of your Bob. Do this when sewing
button holes, satin stitching and
free motion stitching. Take it out again after you've
finished your button Oles. This is what the button Ole foot for my old machine looks like. It has grooves at the bottom and also the pin at the back
for corded button Oles. Mark the full button Ole
measurement on your fabric. Test your machine to see if it starts at the front
or at the back. Your needle should be above the mark where you
will start to sew. Turn the dial to number one. Test your stitch
length between 0.3 and 0.5 The stitches should
lie against each other, not onto each other. The middle mark of
the foot should be on the length mark
of the button Ole. Slowly until you reach the mark at the end
of the button Ole, lift the needle and turn the
dial to number 23 stitches. Lift the needle and turn
the dial to number three. Then continue to sow
to the next mark. Lift the needle and set
the dial to number four, then so three stitches. Number five will make a knot at the end
of the button Ole, if your machine doesn't
have the setting, leave enough thread so you can pull it to the back
and make a knot by hand the buttons. So two button Oles on the placard sample to mark
the button placement. Make sure that the panels
line up with each other. Then make a mark
in the middle of every button Ole onto
the bottom fabric. Take a long piece of
thread and fold a double. Put the fold of the thread
through the eye of the needle. Now you will have
four strings of thread hanging from your needle. Make sure they are
all the same length. Before you make a knot, the piece between the
two holes must be on the mark that you
made on the fabric. The needle should go
in from the back, next to the mark to the front. Pull the thread all the
way through until the knot snucks against the underside of the fabric from the bottom. Put the needle through
one of the holes of the button and
pull it through. Then put the needle through the other hole and on the
other side of the mark, through the fabric,
Pull the thread tight. Do it once more. Put the needle
through the stitches. Then turn the thread three
times around the needle. Pull the needle through. Keep your fingernail
on the thread so that the knot forms
against the fabric. Then put the needle between the two layers of F
and pull it through, cut your thread
against the fabric. Do the same with
the other button.
29. Shirring: Sample 26 is shearing. The supplies that you
need for the shearing is 20 centimeter by 15 centimeter,
lightweight fabric, one spool of thin
elastic thread, a 20 centimeter piece of six
to eight quarter elastic, a botkin and normal
sewing thread. Cut a piece of fabric,
20 centimeter wide, B 15 centimeter with the grain
and overlok it all around. Thread the machine
with normal thread at the top bobbin for
the elastic casing. Measure your elastic width and thickness and add four
millimeter for E. The six quarter elastic
in the video measures six millimeter wide plus 1
millimeter thickness. So in total, we need 11
millimeters for the casing. Fold the overlog stitching
to the wrong side and press. Then fold it 11 millimeters
to the wrong side and press. So the casing on the
edge of the bottom fold. Wind the elastic thread onto
the bob and buy machine. Holding the thread
between your fingers, not through the disk, be careful not to hold it too tight as we don't want
it to stretch out, but also not to loose. The other option is to
thread the bob and by hand. Now you need normal
thread at the top of your machine and the bobbin with the elastic in
the bobbin case. For both front loading
and top loading bobbins, thread the bobbin case just like you would
with regular thread. Your machine settings
should be on straight stitch and
stitch length on 3.5. The right side of your
fabric should face upwards. Place the fabric with
the right edge of the sewing foot on the stitch line and the
needle to the far left. Keep the foot on the stitch
line all the way and do backstitching at the beginning and end of the sewing line. Leave a piece of thread about 2 centimeters
long at both ends. So four more lines, keeping the fabric
smooth while sewing. Let the needle down in
the fabric when you stop. For the sample, we do the 1 centimeter measurement
between the stitch rows. But when you make a
dress or a skirt, you can do a 1.5 centimeter
measurement between the rows. Then you will draw the lines on your fabric with
a fabric marker. Use a Btkun or safety pin and pull the
elastic through the casing. Replace the bobbing with
normal sewing thread. Sew the elastic on the
one side to the casing. Pull the elastic. The left side should still
be in a straight line. When you are satisfied
with the strength, put it on the other side. Then sew it to the casing. The fabric measured
20 centimeter wide, but after it has been sewn, it now measures ten centimeter. Always do a test first as different fabrics will give
different measurements. When you sew a dress
or skirt with sharing, do a fitting before
you attach the elastic to the
casing on the side, pull the elastic and pin it when you are satisfied
with the strength, then attach it to the casing on both ends and cut off
the excess elastic. To work out how much fabric
you need for a project, so a sample of ten centimeter
long by 20 centimeter wide with five to six rows on a scrap piece
of project fabric. Measure the stitch piece from
side to side. An example. The sample fabric is
20 centimeter wide. The stitched sample measures
ten centimeter wide. Finished skirt should measure 50 centimeter from side to side. Then you take the 50 centimeter
of the finished skirt, divided by ten, which is the
stitched sample measurement. Then it gives you five. Multiply the five by 20, which is the sample
fabric width. This will give you
100 centimeter plus you need two
centimeter seam allowance, 1 centimeter on each side. So the measurement for
each of the front and the back pattern will then
be 102 centimeter wide. Different types of fabric
give different measurements. So always test on a piece of the project fabric
before you cut the pattern to work out how
much elastic thread you need. Normally, you get
five to six rows of 140 centimeter long
out of one bobbin. It takes more than one spool of sharing elastic for
an adult bodice. For a dress with
a sharing bodice without straps or a skirt, make the elastic
casing as you did in the sample at the top to keep the garment
from pulling down.
30. The Slash Pocket: Sample 27 is the slash pocket. The slash pocket
is commonly used in jackets, trousers and skirts. The pocket opening
is cut at an angle, making it easier to
access items quickly. That can be deeper and more secure than other pocket styles because the angled opening makes it easier to keep items
from falling out. These pockets are
commonly found on the sides of pants,
skirts and jackets. In jackets, they
might be integrated into the seam or part of a flap. Bucket panel A forms the
sideline of your pans. Bucket panel B with the diagonal line forms
the lining of the pocket. Then you have the one
front panel for the pans. Place pocket piece
B on the side of the front panel with the right
sides facing each other. Ben the diagonal line. And sew it with 1
centimeter seam allowance. Olock the seam, press it to the pocket and
saw an understitching. I Place pocket piece A on piece B with right
sides facing each other. Then pin the inner side edges
and bottom edges together. Them with a seven
millimeter seam allowance. A Olock the seam. Brace the diagonal seam. Ben the top and side of the
pocket to the front panel. And so it on the edge with
the front facing upwards. Overlook the edges of your
sample at the inner curve, move your fabric
so that it forms a straight line
when you overlook.
 Loraine Vd Berg