Transcripts
1. INTRODUCTION: Hi guys, I'm thrilled to welcome you to this
clay Earring making tutorial where we will embark on a creative
adventure together. I'm Anna, your
instructor throughout this fascinating
journey on how to create beautiful earrings
made from polymer clay. If you're an absolute beginner, this class is for you. Throughout this
tutorial, I will walk you through the essential
tools, materials, and techniques from conditioning
your clay to cutting, baking, sealing, and
assembling your earrings. This versatile material
allows us to shape, mold, and craft beautiful
earrings that reflect our unique style
and personalities. You have the freedom
to experiment, get creative, and infuse your personality into
each piece you make. Join me now and watch
a growing number of earring tutorials
to get inspired. Just be careful. It's
addictive. Are you excited? I know I am. Let's get started.
2. Tools & Materials: Hi guys and welcome. In this video, we will be
talking about the tools and materials that you need
in order to get started. Don't worry, you don't
have to write them down. As I have created a
PDF with all tools and materials that you can
find in the download section. What I want to say right away, not all tools and materials that you will see are mandatory, therefore, some are
marked as optional. Obviously, you can get super creative with your
earring design journey. I would recommend you start with the essential tools and add onto your
collection with time. Also, feel free to
explore substitutes from items you may
already have at home. Okay, now let's get started. Polymer clay is the heart
of your earring creations. It's a versatile
oven baked material that comes in a spectrum
of colors and brands. These are the common colors
I bought when I started, and I haven't purchased
more actually. As you can mix your own
colors using recipes, don't get scared once you order, let's say, one of
those small bags, It looks tiny, but
you can really make a lot of earrings
from this small bag, especially if you
start mixing it with white to get
a lighter color. My main colors are any white, any translucent brand black. If you want to mix your own
colors, get those four. Then you can also have
clay with effects. I don't really use those
that much, they're optional. I would definitely recommend to get liquid polymer clay in white which is the bacon bond from scalp and the
translucion version, I'm actually using them a lot
to combine small pieces of clay or glue baked pieces together within the
baking process. Next up to the essential
tools are gloves, acrylic roller, which I consider essential.
They're not expensive. Then I would recommend
a glossy surface, which can be a glass
or a ceramic tile, which you can get for free in many stores that sell tiles. A tissue blade ideal for
precise cuts and detailing. Actually a knife might work, but I wecommend to get
those tissue blades. I would recommend to get
the small version of it, not the big one that
you can see here. As the small one will
apply more pressure to your clay then if you can't invest in
a pasta machine yet, you can use those step
guides or something similar. Maybe even two
pieces of wood and a similar size to even out your clay when using
an acrylic roller. If you can afford
a pasta machine, I would recommend the
Mercado Atlas for beginners. It's great. And I
actually found mine for 20 years in the
classified ads. And it was brand new
as the name stated. It's an actual pasta
machine and it's perfect for getting a consistent
thickness for your clay. I have just wrote down the
pasta machine settings along with their
respective thicknesses, allowing you to
double check them. Then obviously, you need
something where you can bake your clay earrings to some
people, just use their oven. Well, that was not for me. While baking, there
are a lot of fumes, so preferably get
yourself a mini oven that you can place somewhere
in the ventilated area. I found mine for ten aros and
the classified ads as well, and it was brand
new then something you already have at home
baking or printing paper. I do not recommend to bake
on your glossy tiles. You will get a shiny surface
on your earrings at the end, please use baking paper
or printing paper. Then we have a baking tray, which usually comes
with a mini oven, aluminium foil, to ensure a steady temperature and prevents your earrings
to change colors, especially for white clay. Please get yourself
an oven tamer meter. They're not expensive,
and believe me, all ovens are different, and this way you can control your temperature while
baking to prevent mistakes. Next up are some optional tools. I have actually bought
some of those textures. Texture rollers or
the cheaper versions are those embossing folders. They are to create a certain
texture onto your designs. I'm sure you can use
many things at home. Maybe a vase, a toothpaste, or anything that you can find that has an
interesting texture to it. Then of course, you
most likely want to purchase some clay cutters,
you don't have to. You can also cut your own
shapes from paper and use them to cut up shapes from the
polymer, but it takes longer. I would strongly
recommend to get some cornstarch if
you're going to purchase some clay cutters so your clay won't
stick to your cutters. Next up, we have materials that we need after
baking your pieces. Some sending tool, this can be a Dremel tool which comes with
a drill and sending bits. You can also use a toothpick
to create holes and simply use sending paper you found in your garage.
But that's your choice. If you want to make
that investment, I do consider it essential
if you're planning on creating many earrings or starting a small
business from that, please always wear
protective gear at all times to protect your eyes and
lungs from small particles lying around The
nail polish acetone is to clean your
pieces after baking. It can easily remove small
dust from your earrings. Then we also need two pliers to later assemble
our earring pieces. We'll talk about those jumpings
and findings later on. The next materials and
tools are mostly optional. I still haven't
actually used all of them to be honest,
but I'm planning to, if you want to try
out Sal screens, get yourself an old credit
card or something to be able to apply the
paint to your surface. Have a dedicated video for that. Then optional are
some gold markers. Some crafters like to apply that to the edges
of their earrings. Then you have some
basic brushes. Yes, you can actually
paint on top of your raw clay
and then bake it. It will turn out just
like a painting. I'm actually planning
on adding a video for a creative acrylic
painting technique at some point in the future. Speaking of acrylic, if you
want to draw into your clay, most likely you will also
need some basic plate, or mixing palette from your kids that can help
in mixing acrylic colors. Then we have a rotary tool for
the very creative designs. If you wish to
start making canes. I think I have used
mine once or twice yet. Then I also have some
sculpting and cutting tools. Really, those are optional. Someone actually
gave me a tip to ask my dentist if he
had some old tools. Apparently, every dentist has
this drawer of old tools. I'm sure they can give
them to you for free. Then a needle tool is
very helpful though. You can also use a
toothpick to grab something tiny or improve small
imperfections with it. Then of course, glitter magic. I love to use gold
leaves or flakes or some nail art accessories for my designs, But
that's up to you. Maybe you have something
at home already. As I mentioned
earlier, acrylic paint is optional to draw
into your raw clay. You want to create
a certain color. I don't recommend to use acrylic paint to
mix your clay with, rather use liquid ink or
alcohol ink to do that. Even mica powders can be used to create a certain color when
mixing it with polymer clay. The next tools materials
are also optional. If you do want to create a glossy finish
for your earrings, I recommend to get this UV sin. I'm sure you will find
this specific brand on Amazon. It's widely used. I also use a cheap UV
lamp to cure my pieces, but you can also
use the sunlight. If you live in a sunny country, just make sure to
cover your pieces with a glass bowl or something to
prevent dust sticking to it. I actually use rubbing
alcohol for cleaning my tools and also before
applying the UVasin, it helps to prevent your reason to move to the inside
of your pieces. Then I also got myself a
small precision bottle to be able to apply my UVasin
with more precision. Lastly, let's jump
into Jef findings, jumpings, posts and starts. No one would tell you which size you need when you start
watching tutorials. Well, I will I recommend three sizes as seen here
for your jump rings. Those are more or
less the sizes you need to combine
different designs. I never use different
sizes then. Personally, I like to use earring pins and
those flat posts. And four or 6 millimeters, mostly I use the six millimeter as the 4 millimeters
is really small. Lastly, you can get some other earring findings
that you can decide yourself. I like to buy the
gold plated versions, but just because I
have sensitive ears, you can certainly find
cheaper versions made from alloy or some other
material available. Yeah, with those, you
should be pretty much covered and start creating
many earrings from that, especially if you get those flat posts and the earring pens. All right everyone. Now that we have gone through the
tools of materials, let's dive into the basics
of working with clay. And the upcoming videos, By the end of this course, you will discover optional inspirational earring tutorials. Feel free to watch them for
inspiration and perhaps kick, start your journey in creating
your very unique designs. I'm excited for you to
share your creations with me as well see
in the next classes.
3. How to condition Polymer Clay: To ensure optimal results with your polymer clay projects is essential to understand the
process of conditioning. Contrary to common
misconceptions, conditioning polymer clay has nothing to do with the trend. Instead, it's all about making
the clay more workable. Let's dive into the reasons why conditioning clay is vital, how to do it, and some myth
associated with the process. Polymeric clay can be quite firm when using it straight
out of the package. Different brands can feel different when
conditioning the clay. While Fimo tends to be
super hard to work with, which I personally find kern, it can feel super smooth and
even sometimes too smooth. Polymeric clay has
been very popular and has been even sold out in
many countries for some time, where in some countries may
have not been too popular. Meaning the product laid on
the shelves for some time, which made them a
little brittle. Let's call it old clay. Clay needs some oil component
in order to stay workable. There are some tips when
it comes to conditioning your clay and getting the
right consistency of it. While I could explain the whole Chemkan components
and reasons of problems, just let's stick to the
basics and keep it simple. First, let's have a look at clay which has a
good consistency. Even though this bag has obviously been open
for some time, it's not like it's been two
years old. It's still firm. But also when I press down
on it, it slightly bends. That's how you want
your clay to be. Before we start
conditioning our clay, we make sure we have a clean
surface and clean tools. The last thing
that we want is to transfer any dust and ins. Let's now cut out a piece and start kneading
it with our fingers. We can also use
our acrylic roller to roll it out a
couple of times. How do you know your
clay is conditioned? Well, if the clay
sticks to itself, if it can be blended
without seams, and if you bend it, it doesn't have cracks. It is conditioned well enough. Some brands may need
less conditioning, while others may
need a cable runs of knitting or running it
through the pasta machine. Can you keep your clay laying on the surface
for some time? Yes, you can keep
your clay open. It won't air dry, but what will happen
if you keep it open for too long is that it will get unconditioned and depending on the
surface you keep it on, it may lose its oils
and will get harder. What I like to do is I
like to keep my clay in a plastic container even though
it is not 100% necessary. I still sure to keep as
much moist as possible. If you have some older bars of clay that have been
sitting on your shelf for some time and it got too
hard, try the following. You can add some liquid clay. Adding some liquid clay can
help soften your old clay. Just don't use too much. Start little by little and bear in mind to use the liquid, translucent translucent clay
and the solid solid clays. Adding specific clay softeners, there's some specific
clay softeners available for purchase as well. You can use those
to make sure to also use little
drops of them heat. Applying gentle heat to the
clay can also help soften it. You can warm the clay with your hands by needing it
for an extended period. Alternatively, you can place
the clay in a warm spot, like near the heater. Just be careful to
not overheat the clay as excessive heat can
lead to premature curing. Conditioning. Sometimes
all the clay need is proper conditioning, net and manipulate the clay thoroughly by hand or
with a pasta machine. This will help redistribute the plasticizer and make
the clay softer and more pliable plastic
wrap or bag method, wrap the crumbly clay in a plastic or place it inside
a sealed plastic bag, leave it overnight,
or for a few days. The plastic will trap
moisture and help soften the clay. Baby oil. Baby oil is a common
household item that can be used as a
clay softener as well. Simply apply a tiny
drop of it and start conditioning your clay until it gets easier
to work with. What about if I feel that my clay is too
soft or too fresh? Some brands, such as Kerned, tend to feel very soft. If you feel your
clay is too soft, when working, you
can try to leach it. Leaching clay, get some plain unprinted
copy or printed paper. Roll your piece of clay
out into a thin sheet. Lay the sheet of clay
between two sheets of paper. Place a book on top and wait for a few minutes open to see if some of the oil has
been released into the paper. If not, try a few more minutes
or use more paper on top. Start kneading your
clay if necessary, if it feels still too
sticky. Repeat the process. Let's talk about
some misconceptions regarding polymer
clay conditioning. Number one, unconditioned
polymerclay is weak when troubleshooting a broken polymericlay project
after baking. There is a common
misconception that insufficient conditioning
might be the cause, however, is essential
to debunk this myth. The strength of polymerclay is not determined by
its conditioning. If you directly slice a block of polymer clay straight from its plastic and start baking it, it will still remain strong even though you have not
conditioned the clay at all. Conditioning is primarily
focused on making the clay more workable and easier to handle rather than affecting
its final strength. After baking, you could perfectly baked the
unconditioned clay. It will turn out the exact
same as unconditioned clay. Second, conditioning
polymer clay for a long time always improves its quality over
conditioning clay can make it too soft and
difficult to work with. Conditioning should be done
until the clay is smooth, pliable, and free of lumps. But excessive conditioning is not necessary and certainly
won't improve the quality. Third myth. Only
a paster machine can effectively
condition polymerclay. While the paster machine
is a useful tool for conditioning is
not the only option. Hand kneading and rolling
with an acrylic roller can also effectively
condition polymerclayth. All brands and types
of polymerclay require the same amount of
conditioning. That's not true. Different brands and formulations
of polymeric clay have varying degrees of firmness and require different
amounts of conditioning. Some clays may need more work to reach the
right consistency, while others require
minimal conditioning. You have to try out the brand
you're working with and see how much conditioning
you will need to be able to work with your
clay comfortably. Now that you know how
to condition your clay, how to fix crumbly
or too soft clay, it's time to move on to the
next video. See you there.
4. How to use Depth Guides: Let's talk about earring
thickness and how you can use app guides instead of a pasta machine to achieve
a certain clay thickness. The thickness of
polymer clay earrings depend on the design and
style you want to achieve. There is no one size
fits all answer. Usually I provide you with my pastor settings
in my tutorials, but feel free to adjust the thickness to your
personal preference. Lightweight earrings
range between 1.5 millimeters to
2.5 millimeters, which equals 116 to
one tenth of an inch. Standard earrings could be around 3 millimeters or
one eighth of an inch. Here I have some depth
guides in 3 millimeters. You will find multiple
variations of those guides. They might be sold in one, a 2 millimeters, 3
millimeters, or even five. To use them, simply place
the guides on top of your work surface like a tile
and your clay in between. Roll out your conditioned
clay with an acrylic roller. The gap in between will make sure to roll out your
clay consistently into 3 millimeters if you prefer not to
invest in depth guides. You can also use thick pieces of wood or even inexpensive
plywood from a hardware store. While using deb
guides are helpful, I highly recommend
getting a pasta machine. If you can, it will save you
a lot of time and effort. You can often find
affordable options. Once you have one, you
won't regret the purchase. Instead of purchasing several different sizes of de, guides. The pasta machine can serve multiple purposes in your
polymer clay projects. Speaking of pasta machines, let's talk about those
in the next video.
5. How to use a Pasta Machine: Using a poster machine for
polymer clay earrings can be a game changer as
it allows you to condition and roll out the
clay evenly and consistently. As I have mentioned within my tools and materials section, there are many poster
machine brands. My favorite is and stays
so far, the Meat 150. It's absolutely cute and
doesn't take away much space. Here's a step by step
guide on how to use a paster machine for your
polymer clay earring projects. First, prepare your work space. Make sure your work area is clean and free from any Apris. It's best to work
on a smooth surface like a ceramic tile. I prefer to work on a mat tile, but some like to work
on glossy tiles. You would have to
try which one you prefer before using
a paster machine. Condition your polymericlay by hand and an acrylic roller. First set up your pasta machine on your work surface. Most pester machines have
adjustable thickness settings, typically ranging 9-0 Start
with the thickest setting, that is usually
marked as a zero, and gradually work your way
to the desired thickness. Start placing your clay into the pasta machine
and use the handle. While grabbing the
clay from the bottom. Fold your clay in half to avoid trapping
bubbles into your clay, it's best to place the
closed side to the bottom. This way the air
can be kept out. When we start to get
our clay through, repeat the process until
you reach a desired shape. Another tip to
avoid old clay that has been stuck inside the
machine or unproper cleaning. It helps to lay your clay in between a sheet of baking paper. Make sure to place
your clay somewhere in the middle so you can actually grab your
paper from the bottom. Look how nicely and
smooth my surface is. I don't have any lines that
may have been caused by the pasta machines or some dried dirt that got
stuck inside the machine. Takes a little longer
to always place it inside the baking paper, but it's worth it as you get
clean and smooth results. Okay, that's it for now, see in the next video.
6. How to use texture Rollers, Mats or Embossing Folders: Using texture rollers, or
mats in polymeric clay. Earring making is
a great way to add interesting pattern and
designs to your creations. Here's a step by step
guide on how to use them. After conditioning your clay, you have to choose a
suitable thickness. I have used the setting number one on my polymer clay machine, which is roughly
3.7 millimeters. Don't go too thin here. As with pressing down your
texture roller or texture mat, it will decrease slightly
in its thickness. Let's try out the
texture roller first. Make sure that your tools are
clean and completely dry. If you sink rubbing alcohol, this should evaporate
within a few seconds. It helps to apply
some corn starch on your roller and dust it off with a basic
brush before using. This way, the clay won't
stick to my roller. Then I simply apply light pressure to it and
start rolling it up. It helps to do this
a couple of times on some test clay to see how it feels and how much pressure
you need to apply. You can always just remix
your piece and try it again until you feel comfortable
using those rollers. Let's try another texture
like this, sandpaper. It looks beautiful,
don't you think? I love this texture? Now let's move on to
the texture mats. If you live in the
US, lucky you. Cool tools have really
beautiful texture mats. I think they do ship
international as far as I know. But you may need to pay some shipping fees and maybe some taxes if you
live outside the US. I got mine from a store
in the Netherlands. They might have already imported them directly from the US. There are also plenty of
texture mats on Etsy. I'm pretty sure you'll
find something nice. Let's clean my mat
before using it, then I just lay it
on top of my clay. Then I can use my acrylic roller to go over the texture mad. A couple of times, you can
practice this as well. In some videos you will
also see that I have used another thin layer of clay on the back
sides of my earrings. This will add some more
interest to the back side if you're planning on starting your own polymer clay
business for sure, your clients will appreciate
this little tea tall. When placing a thin layer on my clay behind my
baked earrings, I can just press my piece on top of my texture mat and Tedda, I have added a beautiful
texture to it. Another tool I like to use
are embossing folders. They're usually used
to emboss paper, but they work for
our purpose just fine compared to texture
mats or rollers. They can be very affordable. You can use them by
just pressing them down on your clay,
like texture mats. Only that you don't have
your acrylic ruler. Just use your hands to
press it down slightly. You can be very creative. Just have a look
around your house and see what you could use to create textures.
See in the next video.
7. How to use silk screens: Using silk screens
with acrylic paint on polymericley earrings is
a fun and creative way to add some interest
to the surface. Let me quickly show
you how to use them. There are different kinds
of silk screens available. There might be some that are just a fine fabric
mesh like this. There might be some
others that look like stickers where you have a
sticky back by the way, you can wash both
after using them. Then we need an old credit card or a similar tool like this. I got this tool
laying around from an ipad screen protector
I ordered some time ago. It works great to apply
some paint with it, but certainly you can also use an old credit card of yours. Let's see now how we
use silk screens. I already have some
condition clay here. This color is number 92
and is called Sandstorm. It's from my master
clay recipe collection. Now I lay my silk screen
down on my clay and use my acrylic roller to roll over the surface
a couple of times. Let's use some acrylic
paint and start moving the paint down with
my tool or credit card, we switch directions to apply
the acrylic paint evenly. You could only fill a small area or cover the whole match, depending on how much space you need to use for
your clay cutters. Then we can start slowly pulling our screen up and see
our final result. I usually place my sill
screen immediately into warm water and wash the paint off so I can use
it another time. When it comes to my
polymer clay surface, I'll have to wait
until the top is completely dry in order
to use my clay cutters. You could also cover your
piece so no dust sits on it. Just leave a small gap on
the sides for ventilation. Now it's your turn to experiment
with different colors, patterns, and combinations to achieve the desired
look for your earrings. Have fun and enjoy this
creative technique.
8. How to use clay cutters: Using clay cutters is a simple yet effective way to create uniform shapes and designs in polymeric
clay earring. Making these small tools come in various
shapes and sizes, allowing you to easily cut out consistent pieces
for your earrings. Here's how to use clay cutters and some tips to get
the best results. I already place condition
clay on my tile. I added some texture
to my clay using a texture roller I used setting number one
on my pasta machine, which is about 3.7
millimeters or 0.15 ". Choose the clay cutter that matches the shape you
want for your earrings. Ensure the cutter is clean and free from any prius residue. Use some corn starch to cover
your cutter or tilativey. Use an invisible layer
directly onto your clay. Place the clay
cutter firmly onto the clay sheet into the location where you
want to create the shape. Make sure the cutter is
centered and aligned correctly. You think even pressure press the clay cutter
down into the clay sheet. You can rock the cutter
slightly to ensure a clean cut. Carefully lift the
cutter and you will have a perfectly
shaped piece of clay. If your clay tends to
stick to your cutter, your clay could be too fresh, you could try
leaching it as sin. And the video on how to
condition your clay. You can also try using a
soft brush to press it out of this as long as it
won't damage the surface. You can also try changing
the surface you're working on or add some more
costas to your cutter. Now gently lift the excess clay, surrending the cut out shape, and set it aside for future use. We call those scraps. You can do many
earrings from those. Okay, now it's your turn
to try out clay cutters. See you in the next video.
9. How to use printed shapes instead of clay cutters: While clay cutters will save you a lot of time cutting
out your earrings, you may not have the
budget for those or simply want to
create your own shape. Whenever I could,
I have included PDF printable cutter shapes for you under the
earring tutorials. If you can't find
the clay cutter, which is similar to the one I use in the earring tutorials, you can use my printable PDF to print out the shape
using your home printer. Let's now see how we use them. First, let's cut out the
shape using scissors. After you have cut
out the shape, you can then press
them lightly on your conditioned clay and use a hand knife cutter to
go around the shape. I have to admit,
this might take a little longer and might
require a calm hand, but certainly is a super cheap
alternative if you don't have the budget or simply can't find the
shape you're looking for. If by any chance you
have a canva pro count, there are plenty of shapes
you can get created with. Simply place them on an four
document in the size you would like and print them out and use them in
the exact same way. I hope you like this
little trick and I will appreciate all the shapes I have included for you
in the tutorials. Simply print them
out and get started. See in the next video.
10. How to lift Polymer Clay from your Work Surface: Learning to work
with polymer clay can be frustrating at times, especially when we rely on short videos or social media
comments for guidance. One crucial skill is
the ability to lift polymer clay from a work
surface without distortion. That's why I made
this video for you. Here's how you do it. The
first important thing is to choose a glossy
or a light mat tile. Working on a smooth
surface like glass or Glas ceramic tile helps the clay stick to the surface
rather than the tools, making it easier to lift it up. Use the tissue blade to release the clay from
the work surface. Don't use your fingers
to lift it up. Use the tissue blade instead. Hold down the blade with
two fingers on each side. Slide the blade behind
the clay and hold it in a 45 degree angle with one
movement slide underneath it. Finding the right angle
takes some practice. Try that a couple of times and check if your back
looks great as well. Does your back look cut? Then your angle of the
blade was too close to the tile Cutting pieces of
the clay while sliding. Does your back look
distorted or your general piece then your
angle was too wide, you pushed your clay forward. Instead, finding the
right clay consistency is essential as well. Clay that's too crumbly
won't stick together, while overly soft clay is challenging to handle without
distorting its shape. Aim for a consistency that allows to cut pieces that
hold their shape when lifted. If you don't have the
right consistency, try conditioning all
the clay longer or add some tiny drops of softener
to make it more workable. If on the other
hand, you feel that your clay is too soft,
try leaching it. As soon as in the video on how to condition clay by
lifting up your clay properly, you will enhance
your polymeric clay crafting experience and create nature more
professional looking pieces. Happy practicing.
11. How to mix a Polymer Clay Color using Clay Recipes: When aiming for a
specific clay color, understanding color
mixing is crucial. Clay offers the
advantage of requiring only a few primary colors
to achieve various shades. To get started, consider
obtaining clay color recipes. If you have no idea
on how to mix colors, I have created a
master collection of 102 beautiful color recipes, all utilizing just
five ingredients. Sculp, premium cardium yellow, cadmium red, fuxia,
cobalt blue, and white. If you're interested,
you can purchase the master collection PDF through the link
provided in this video. Let's take a closer look at
the color serene seaweed. Using my recipe for
this clay color, you need a round cutter. The size will determine
the amount of clay you will get out of it
from one round of mixing. Choose a consistent thickness on your clay machine
like number one. Now condition the colors
needed for your recipe, which includes blue,
yellow, and Foxia. Use a round cutter to cut
out two circles of blue, 1.5 circles of yellow
and one fourth of Fuxia. Lay them together. Recheck
if anything is missing, you can mix the color by hand
or use the pasta machine. There you have it, our
beautiful, serene seaweed. These recipes work every time. No matter the size
of your circle, that's the best part of it. If you want more clay, you can use a bigger circle. If you want less clay, you can use a smaller circle. Just make sure to have a consistent thickness during each round of mixing
for all colors. I hope you enjoyed this
quick video. Happy creating.
12. How to Bake Polymer Clay Part 1 – Polymer Clay Oven: Choosing the right
polymericleoven depends on a few factors. Here are some considerations to help you make
the best choice. Any oven that can maintain the correct temperature is suitable for baking
polymer clay. While it may be safe
to use your home oven, you need to know that polymer
clay is not food graded. I recommend getting
a small mini oven. But if you do want to use your home oven, you
can do that too. Just make sure to give it a quick rinse before
baking any food in there. The disadvantages that mini
ovens may have is that some may not bake at a
consistent temperature and start getting
too hot with time. But if you apply some tips, they can work just fine. Me personally, I'm
only using mini oven. For me, it works fine. I
don't have any problems. Please don't try to use your microwave and try
to bake your clay. Now, what is essential to get, in my opinion, is an
oven thermometer. Believe me, many ovens
don't actually have the temperature that's
stated under control. Getting to know your oven
and which setting to use to achieve the right
temperature is essential. I recommend making some tests on your oven to get a better understanding
of its performance. For my testers, I used all
the cutters I have and cut them out and test
bake them later. You can use those blanks to design the shape and
combinations of your earrings. This way you can see which colors to use
for your next project. It also helps to determine
the proportions and overlook. Returning to the baking process, place your raw clay
pieces on printing paper, baking paper, or even cardboard. I do not recommend placing your clay right onto your tile, as this will result in
shiny sides on the back, preheat your oven until you have reached the
correct temperature. And place the baking tray
into the middle of the oven. Cover it with a hood made from aluminum to protect your
clay from turning brown, and it helps to keep a more
consistent temperature. Let's now have a look at setting the right temperature
and getting to know how long you have
to bake your clay. See in the next video.
13. How to Bake Polymer Clay Part 2 – Times & Temperatures: Polymylay manufacture
provide clear instructions on recommended baking
times for their products. I do find some a
little too short. The reason I think is that
these guides were set up this way is because they need to
cater various oven types. As many ovens have inaccurate
temperature settings, manufacturers strike a
balance between achieving proper curing and preventing potential burnings in
ovens that run too hot. However, experienced
polymer clay artists who frequently bake clay know that longer baking times than recommended often
yield stronger results. What is the best temperature
and baking time? I can't really give you
100% general rule on that. That will apply to
all clay brands as every brand is slightly different or behaves different. Also the thickness of your clay plays a
part as thin layers, big faster than thicker ones. What I can do is I can give
you my experience in baking using Sculpi, Primu,
and Cernetclays. I might do some more
tests in the future for other brands and upload
those tests for you. For scalpion,
kerned, I recommend opting for a temperature
of around 130, 240 degrees Celsius or
265 to 285 Fahrenheit. I don't feel a big
difference if it was baked 130 or at 140 degrees. Everything in between
works good, in my opinion. Let's talk about
baking times now. These are some mixed colors
from my master recipes. I baked three pieces
at different times. The thickness was number
one on the claim machine, around 3.7 millimeters
or 1.15 ". I baked this piece
for 50 minutes. Only after cooling, I tried to bend it and
it broke in half. The same happened for
the 20 minute piece. Only the 30 minute piece didn't break because it's
a small surface. Let's have a look at this piece, which was also baked
at 30 minutes. But because this piece
has an embossed design, I tried to bend it
and it broke as well. 30 minutes might
always be enough. If it's a small piece,
it could work though. Then I did the
even crazier test. Baking a piece for 45 minutes, 60 minutes, and 90 minutes. All those pieces look
absolutely fine to me, as I have not gone over the hundred 40
degree while baking. While you could bake your
clay for 60 to 90 minutes, I usually go for 45 minutes. This will make sure
the clay is hard enough but also won't
start getting dark. As the longer you
bake your piece, the colors might turn darker. It's hard to imagine
that some brands suggest baking only
for 15 minutes. I don't think that
this is long enough. Clay does need a
certain temperature and also baking length, The components melt together. If your clay breaks, it's not because you baked
it for too long, it's the opposite,
you under baked it. As long as you keep the
maximum temperature, your clay won't burn. And I'm sure you could even
bake it for several hours. In summary, while manufacturers instruction ensure a decent
outcome for most users, baking polymer clay
for longer than recommended can yield stronger
and more durable results. I recommend baking
some test pieces using the brand of your choice. And see for yourself how
your results came out. Please watch the next
video on some more tips before diving into baking some test pieces. See you there.
14. How to Bake Polymer Clay Part 3 – Tips: Let me share a couple more
tips when it comes to baking. And especially if you're
using mini ovens like me. The position in the oven to
ensure even heating position, your polymeric clay
tray in the center of the oven as far away from any heating
elements as possible. Good air circulation around the pieces is essential
for a uniform curing, protecting your
work from the heat. Heating elements in the
oven can get extremely hot and may cause scorching if
your clay is too close. To shield your creations, I use a folded aluminum hood. An aluminum cake
tray works as well. The cover not only protects
your work from the heat, but also helps maintain
a steady temperature, resulting in more reliable cure. Maintaining a
constant temperature. If you feel your mini oven
gets too hot, like mine, I'm using the lowest
setting and halfway of baking I see it
sometimes jumps up to 150. I just open my door for a few minutes until I
get back to like 130. Placing a ceramic tile
inside or on top of your oven helps also to distribute and retain
the heat more evenly. I would recommend
keeping your oven out of drafts as well
materials to bake on. To avoid shiny spots on
your polymeric clay, simply use printing paper, cardboard, or baking
paper as a barrier between the clay and the glazed ceramic
tile while baking. Watch for leaching
before baking. Avoid leaving your art pieces on paper for an extended
period before baking. As liquid plasticizer
might leach out of the clay and create
holy spots on the paper. Meaning, don't keep them
too long on the paper, as it can result in
unintended leaching. If you want to
continue to work on a project the next
day, you can do so. But make sure to
place your clays on a ceramic tile and cover it
so no dust will set on it. Experimenting with time and temperature when dealing with browning issues
and polymer clay, adjusting the baking time and temperature can be a
potential solution. However, it's crucial
to be cautious as higher temperatures and longer baked times
can lead to browning. The key is to find a healthy
balance between reducing browning and ensuring
your projects are fully cured and strong. I recommend conducting
careful experiments. Start with the recommended
baking time and temperature, and monitor your
temperature while baking. If you experience browning
on top of your clay, reduce the temperature
the next time you bake. As long as you stay within
my suggested range, you should not
experience this issue if only you may
experience cracking, but that would
only mean that you have to bake them
longer the next time. Preventing plaques and cracks. Plaques are whitish
areas that can appear in the middle of a polymer clay
piece after curing. While they may
resemble air bubbles, they often occu without any obvious trapped air in
the rock clay before baking. This issue is more noticeable in translucent and
light colored clay. Some believe that
plaques may be caused by water vapor or air collecting
in the clay during curing, especially when there are sharp temperatures contrasts
during baking or cooling. To reduce plaques, avoid
baking too close to the heating element
and try avoiding any usage of water when
handling your row clay. Can you bake polymericlay
more than once? Absolutely, you can bake polymericlay as many
times as needed. It's a common practice to
bake complex pieces and separate parts and then assemble and attach
them after baking. Additionally, you
can safely attach raw clay to already baked
clay and bake them together. This technique is
often used to achieve specific effects that may not be possible within
a single baking. Don't hesitate to bake your polymericlay creations in multiple times if necessary, as it won't cause any harm as long as you stick to the
advised temperature. By following these tips, you can improve your
polymeric clay baking process and create beautiful, well cured pieces for
your artistic projects. Remember that experimenting
and finding what works best for you may lead
to even better results. Now it's your time to get to
know your oven performance and test bake some pieces using
the brand of your choice.
15. How to make a baking bending test: After the recommended
baking time has elapsed, carefully remove one of
your test pieces from the oven for better accuracy. It's advisable to create two to three additional pieces along with your finished
earring pieces. Allow the test piece to cool down to room temperature
before proceeding. Now let's perform what I
call a baking bending test. Gently try to bend
the clay piece. If you notice that the clay is breaking in half or into pieces, it indicates that your oven temperature was not sufficient during baking or the baking
duration was inadequate. Keep in mind that
different clay brands can yield different outcomes. Testing a few paces is essential to understand
your vin's behavior. Ideally, clay should
be somewhat bendable. Thinner pieces will naturally bend more than thicker ones. If your clay doesn't
bend at all, it means either your oven
temperature wasn't high enough or you didn't bake it for a sufficient
duration as well. First check if your
oven temperature was within the
recommended range. If it was, then adjust your
baking time accordingly. You can continue baking your clay in additional
15 minutes periods. This is why I create two or
three extra test pieces. As I may need to recheck
the baking process. As mentioned earlier,
you can't over bake clay if you maintain
the correct temperature. Over baking only
occurs when you see bubbles or browning
on the clay surfaces, indicating that the
temperature was too high. If bubbles appear, your temperature
definitely was too high. That's why using a
thermometer is crucial. If your clay bends without breaking,
let's bake correctly. All right, see you
in the next video.
16. How to drill holes into your earring pieces : Once your earrings
are baked and cool, it's time to drill some
holes for your jump rings. This way you can assemble
your earrings later on. There's some tools that you
can use to create holes. Some crafters even like to make the holes before baking
using mini hole cutters. I like to create
mine afterwards. What can help though
is to just mark the area with a
needle tool to help your Dremel tool
to stay in place later if you want to make
your holes afterwards. Like me, you can get one
of those hand drills. They are very affordable
or an electric drama. They come as cable free
and with cable versions, the ones with cables are a bit
more precise and stronger. If you bake a lot of earrings, they can be useful if
you're just starting out. Just get the cheap or option
that will work just fine. The whole size need to be around one millimeters or 0.04 ". If my jump rings
have a gag of about 0.7 millimeters or 0.027 ", If your jump rings are
thicker than that, consider a slightly
bigger hole as well, so your earrings move comfortably and won't be
stuck in one position. When drilling your holes, consider the jumpering
size you got. It would be frustrating
if you drilled your holes and your
jumping won't reach your drilled holes
and you have a gap between for my six or seven
millimeter jump rings, I can drill my holes just a few millimeters
from the edge. You can mark this area also afterwards by pressing
down with a needle tool. Then you start drilling your
holes with slight pressure. Try to not get distracted
while doing this. A couple of times I noticed that I started
drilling holes and then my design was upside down when I actually wanted these lines
to go with my bottom design. Yeah, this can easily happen. Make sure to be focused when deciding where to
drill your holes. There's no way back from that. The next video, we
will talk about sending down arrow pieces there.
17. How to sand down your baked earring pieces : Once you have completed
drilling your holes, you might notice small
imperfections or rough edges on the surface To achieve a smooth
and professional finish. Standing is an essential step
in the ear making process. Sending will not only
improve the appearance, but also ensure the earrings
are comfortable to wear. In this tutorial, I
will guide you through the simple and effective process of sending down your freshly
baked earring piece. Let's prepare our workstation, Ensure you have a
well lit workspace. Lay down a soft cloth,
a flat container, or a silicon match
like I have to protect your surface and
collect debris and dust. Let's choose a rougher grid. When using basic sandpaper, choose the first grid
of around 120 to 220. This will remove
larger imperfections and smooth out rough edges. If you work with
the Dramml tool, just choose the one that has
the biggest grain optics. Let's start sending hold your earring piece
firmly but gently, and begin sending the edges in one direction using
even pressure. Avoid using circular motions as they can create
uneven surfaces. Continue sending until you chose achieve a
smoother texture. Usually, I don't send the top surface only if
there are some bombs. But since I make sure to keep the surface clean
even before baking, I don't have much
to send down there. Let's increase the grid
switch to a medium to soft sand paper around 320
to 400 or even smoother. Then start smoothing it down
for a couple of rounds. Repeat the process as before, sending in one direction
with a consistent pressure. This step will further refine the surface and remove any
remaining course of scratches. If you don't have
many imperfections in your clay from
the beginning on, it may be enough to start with a fine grid right away
and skip the rougher one. What I like about using a drama tool is that
you can send down areas which are more difficult
to access using sandpaper. As Dramml tools come with
many different sized bits, Let's clean and dry. Once you're satisfied with the smoothness of
your earring pieces, wipe off any sanding
dust with a wet cloth, or just give them a
quick rinse with water. Let the pieces dry completely before proceeding
to the next steps. Sending down your freshly baked
polymericle earring piece is a crucial step in achieving polished and professional look. With the right grit sandpaper
or a good drama tool, you can easily smooth
out imperfections and create a comfortable
finish for your wearable art. If you have baked some of
the blanks I suggested, you could now start and try to send them down to
practice this technique. Happy sending, and see
you in the next video.
18. How to design the shape of your earrings using blanks: Designing the shape of your
polymer clay earrings. Using blanks is a fun
and creative process. Whenever I buy new clay cutters, I always bake some
blanks from them. These blanks I can use
later to design my shapes. Usually you either have
earrings that are made of metal earring finding that will then be combined
with a piece of polymer clay. Or you have studs which use those flat earring pins where you can attach one or
more polymer clay pieces underneath those
blanks really come in handy as they help me determine which combinations of
cutters I could use. This way I can
exchange and try out different combinations before I start cutting into my clay. Okay, I hope you enjoyed
this quick video. Feel free to start baking some blanks if you
haven't done that yet. See you in another
tutorial video.
19. How to glaze your earrings using UV Resin: Glazing your polymer clay. Using UV raisin is a straightforward process
that gives you creations, a beautiful, shiny,
durable finish. You don't have to glaze
your earrings using UV sin. You could just leave
them unfinished, or you can try
other alternatives. Like I explained
in the next video, I like to use UV sin as it
gives a beautiful shine. It's fairly easy to apply if
you have the right tools. Okay, let's get started. Prepare your polymer
clay creations. After you've finished baking
your polymer clay pieces, remove all the imperfections. You can use a fabric cloth to wipe it off with
rubbing alcohol. Why using rubbing alcohol? Well, sin tends to
move to the center in some occasions and leave the outside of your earring
a little more empty. Even though you may have applied it straight
to the edges, it still seems to run
more to the center. Rubbing alcohol can help
to keep your sin in place. Set up your workspace. Lay down a glossy
tile to protect your work surface from
any spills or drips. Also, glossy tiles can be easier cleaned in case of spilling
some of the UV raisin. Wear protective gear. Please always wear
protective glasses, a mask and gloves. When handling UV raisin, it may not be considered toxic. But some people can get
allergic like reactions or slight eye burn When experimenting coming
in touch with UVasin, make sure to work in a
ventilated area as well. Fill up your UV raisin in small precision bottles to
help applying UV raisin. I like to use those
mini precision bottles as they have a smaller neck. Just refill it carefully
with UV raisin. After each use, I just clean the neck so it doesn't dry
up and close the bottle. Now let's apply the Uerasin. Using a toothpick
or a needle tool, you can press down your
clay earring piece. Another trick is to
just use some raw clay underneath your piece that will hold down your
piece in place. Carefully apply a thin
and even layer of uerasin around the edges and then move on to the center of your
polymeric clay creations. You can also cover the outside
edges, remove air bubbles. If you notice any air bubbles on the raisin coated surface, you can use a long
neck lighter and apply the flame for
just a few seconds. This will make the bubbles pop. Be careful to not leave the
flame on the surface for too long as it can make the
rasin more yellow or brown. Let's cure the raisin. Once your piece is coated
with the UV basin, it's time to cure it. The best and fastest
way is to place your creation under
a UV light lamp for three to four rounds. It usually takes a few minutes to cure the raisin completely. That's why I like to make three to four rounds after
the recommended curing time. Check your creations with
a toothpick on the edges to ensure that the raisin got
fully cured and hardened. If you notice still some
sticky or tachy areas, just place it back under the UV lamp and let it
on for a little longer. If you don't have a UV lamp, you can also leave your pieces
out in strong sunlight, but this technique will
take longer to cure and you run at risk to collecting
dust on top of your pieces. Those UV lamps are usually not expensive and you don't have
to get the ultra fancy one. I like to use
specifically this shape as it allows me to place my pieces with
comfort underneath. If by accident you closed
down your hole with your sin, you can always drill it again. Please be informed that once you use sin on top
of your pieces, please do not bake
your earrings again. If you're planning on baking your earrings for another step, apply the sin at
the very last end. Okay, let's discuss in another video alternatives
that you could use as well.
20. What other materials can be used for sealing or glazing : A general questions
I get asked all the time is if you actually have
to glaze or seal your clay. No, it is not
necessary to do that. Many crafters also
leave their creations unfinished with result
in a more natural look. If you don't want to use sin or any other kinds of
seal or glaciers, you could just leave it natural. If you do want to Gal and
don't want to use UV sin. Let's talk about some
other options that you have by showing the
actual products. I do not do any
advertising and I do not get any financial benefits from showing you those products. I simply want to showcase alternative ceiling or glacy
materials that you can use. Polyurethane varnish. Polyurethane varnish is
a popular alternative to sin it rise to a glossy finish and provides a durable protective
coating on polymer clay. Make sure to use the
water based version as oil based may react
with the clay over time. Liquid polymer clay. Liquid polymer clay
can be used as a glaze or achieve a
slightly glossy semi finish. It is specifically
designed to be compatible with
solid polymer clay and can be baked together. Some crafters even cure the thin layer of clay
using a heat gun. Acrylic medium. Acrylic gloss medium is the thick water based
acrylic product that dries to a glossy finish. It can be brushed on the polymerclear surface and baked to achieve a shiny look. Epoxyasin. Epoxyasin
is another option. If you're open to other
types of raisins, It is considered to be nontoxic and provides a clear
high gloss finish. When applied correctly, it may take a day
to be fully cured, so don't expect the same
cure time as you would with UVasin Hel Maar Crystal Cot Met. This spray varnish
works well with polymer clay and dries to an
almost invisible Met finish. It can give your pieces a supple shine
without being sticky. Rust, oleum, crystal
clear enamel. While this is not specifically
designed for polymer clay, some crafters have had success using it to seal
their clay projects. It dries to a clear and
glossy finish as well. Before applying any of
these alternatives, it's essential to do a small test on a
baked test piece of polymer clay to ensure
compatibility and decide results. Different brands and
types of materials can behaved differently
with polymer clay. Testing beforehand
will help you avoid any unwanted surprises
on your finished pieces. Uv son is and stays my
personal preference, but you don't have to
feel obligated to use it. Feel free to investigate about those alternative
materials and use other coatings and the projects if that works better for you.
21. How to add flat earring pins to your studs: Hey there. In this
video tutorial, I'm going to walk you
through two quick methods for attaching flat earring
pins to your studs. We will cover the EC one and then move on to
something a bit fancier. Before we dive in, make sure your earrings have
been baked already. Let's kick it off
with the easy way. Grab the upper part of the
earrings, you know the stud. If your design has a
particular direction, keep that in mind as well. Now get your hands on a Dremel
tool or some sandpaper, and give the spot
where you're attaching the flat pins a
roughened up surface. This helps the glue and
the metal stick together. Decide where you want your
earring holder to sit. The center works if
it's just a stud, but if you're planning to add more big pieces underneath
by drilling holes later, aim for the upper part
to leave enough space. Place a little of instant glue
on your flat earring pin. Press it onto the baked stud. And use a teeth pick or a needle tool to hold it
in place until it dries. Some crafters stop here, but over time the
stud could get loose. To avoid this, I suggest using some BV Asin on the back and
curing it under UV lamp. Now into the more
advanced technique to hide those rounded pins, grab some conditioned
translucent clay. I use number seven on
the clay machine or the pasta machine to make
it as thin as paper. Use the same size cutter
you use for the studs. And cut out thin pieces, create small holes
where the pin will go. This helps the piece
slide down smoothly. So now let's take one piece, slide it into the pin, and gently press to position it. Now for some extra texture, I take my piece and press it to the edge of
my texture mad. Now, this back won't look
so boring any longer. Time to trim the edges that popped out while
pressing it down Me getting in the effort now means less sending
later, which is a win. I make sure to create clean
pieces before baking. You don't have to
add another layer to the back of your earrings. But if you're thinking of turning this into
a small business, this extra touch could totally
impress your customers. Once your pieces are all set, bake them for another 30 minutes and they are ready
for the next steps. I hope you enjoyed this quick trick for
attaching your earring posts, catch in the next torial.
22. How to assemble your earrings using findings & jump rings: We have journeyed through
the creative process and now the time has come to bring our earrings to life
by assembling them. This point you should
have already chosen your preferred
findings or possibly have attached flat
posts to your earrings. If you have applied a protective
glaze such as UV sin, ensure that this step
is also accomplished. Let's gather our
tools and prepare the jump erings and findings that will bring our
earrings to life. As I mentioned in the tool
and material section, the choice of jumpering depends on the distance
of your drilled holes. Should you find that a six
millimeter jumping doesn't span the distance up for the seven
millimeter alternative, In scenarios where
your earring findings boost a sideway sloop, the petit four millimeter
jumping comes into play. Since these earrings
are a little thicker, I have chosen to utilize the
seven millimeter jumping. I'm using my sharp plier in my left hand and the
bended plier in my right. What is up to you,
how you hold them? Then we simply open
our jumping and slide our earring pieces
through it and close the loop. Let's do the same for the
earrings with the findings which have the four millimeter
jumpering attached. Here we have our beautiful
finished earring pieces. At this point, you should be ready to start creating
your first earrings. Feel free to re watch any
video you have seen so far. Happy crafting and enjoy the wide range of
earring tutorials.
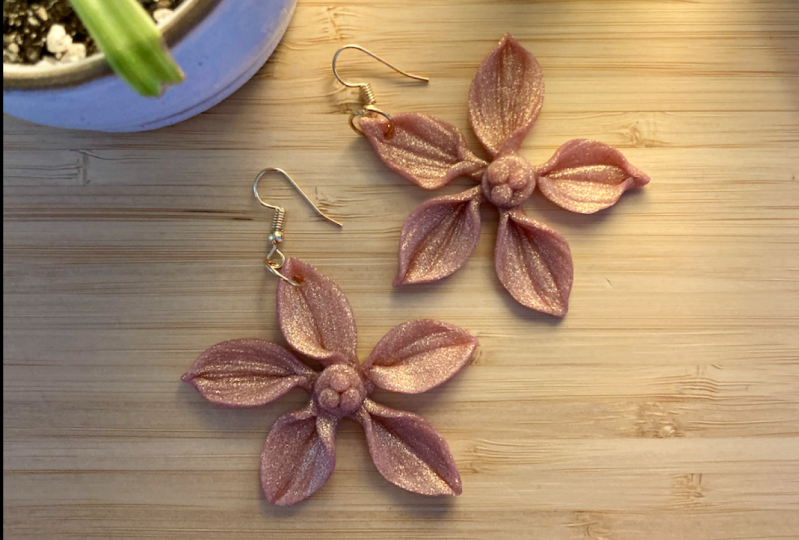
23. EARRING TUTORIAL - ALANA: Hi guys. In this video we
will make the Alana earrings. The first thing is to cut a
wide piece of polymer clay. You can always add more if you feel that you don't have enough. Then we condition the clay using a acrylic roller
or a pasta machine I used in the thickness number
two on my pasta machine, you can cut the rectangle of about six by seven sandi meters, or 2.4 by 2.8 ". Doesn't have to be exact. Just a example. I'm going to cut the corners
to create a clean rectangle. Then I start dividing
my clay piece in four. Now I'm using the
translucent polymer clay and basically do
the same condition. First with my acrylic roller and later with my pasta machine. Here I used the thickness
number six or seven, which is way thinner. Then I adjust the size so
it matches actually with my other rectangle and create
four equal pieces again. Now comes the stack. I stack the translucent
clay on top of the white. Okay, now that we have a
stacked little rectangle, we can cut it in half
and stack it again. Then I slightly
press on each side. Just don't apply
too much pressure. Just a bit. Can also use
your acrylic roller. Now on a clean surface, I need to condition
more translucent clay. This translucent clay
will serve as my base. I used the pasta machine setting six or
seven here as well. Now you can use just
some baking paper for a smoother surface
and cut the corners. And now comes the fun part. Carefully cut slices
from the cube Terra. Doesn't this look beautiful? Now comes the fun part. Place the little rectangles on top of your conditioned clay and make sure you actually align them with the correct size. You will notice later here I did a little mistake as I have aligned basically the top
on top of the top there. You see it a little
bit. It's okay. It happens, yeah. Make sure that that
doesn't happen to you. Then I can use my guides or use a pasta
machine number zero. Those guys are 3 millimeters. Then we can remove the scraps. Don't forget to save them,
you can reuse those. Now we apply some corn
starch to our cutters, and a little bit on
top of our clay, and we start cutting
out our shapes. Here you can see I have
created small pieces for the top and bigger
pieces for the bottom. Don't forget to
save those scraps. You can always create
further designs using them. Now my fingers and
rubbing alcohol optional, but to smoothen the edges
so you have less work. Later you prepare your pieces, the less sending will
be required afterwards. Now we need to bake
those for 45 minutes. Here are the baked pieces. We immediately move them onto a cool tile to prevent
any deformation. Here are our baked pieces. You can't keep them like that or add another textured
layer behind. Okay guys, I hope you
enjoyed this quick video. Happy crafting.
24. EARRING TUTORIAL - MAHINA: Welcome. In this tutorial we will create our
machina earrings. I have provided
you with a recipe. Please proceed accordingly
and mix some clay. I have used the pasta machine
thickness number four. Now let's use an oval cutter or cut the oval shape yourself
as provided in my PDF. This oval cutter has a height
of two on a 2 centimeters, which is approximately
1 " for each earring. We need five leaves, so ten oval pieces per
earring, per P, sorry, and two small circles. Now we remove the scrapes and we condition this again if we
want to make more pieces. Now you can use
any texture mat or even real leaves to press on two to create some leaf texture. Just don't press too hard. What I like to do is I
like to press the middle slightly and a little bit
under sides a little stronger, just so it looks
like a leaf shape. Now we slightly push
together the lower part, and at the same time we pull the top part to make
it a little sharper, cute leaf, isn't it? Then I place the leaf sideways
and push down slightly. Okay, four more to go. As you can see, I start
to aligning them in one direction and slightly
press into the middle. Just not too strong. Just a bit. Now comes the fun part. We take one of the
circle and place it behind and start
shaping our flower. I make a tiny little ball, press down and use some bacon
bond liquid, polymer clay. Place a tiny drop in
there and carefully lift my small piece and place it into the middle later. Once we start baking, it's going to be fixated
with a bacon bond. You could keep it like that if you prefer a more natural look. Since I'm a huge fan of gold, I'm going to add those
three millimeter tiny gold plated beads for that. I'm using liquid scalpy. It's up to you how many
you would like to place. You can do three or four. I think three works fine. Isn't this cute? I love it. Now let's bake them
for 45 minutes. And here we have
our baked pieces. Now we can drill some holes
to attach our jump rings. After drilling our holes, we can start assembling. I'm using a six
millimeter jump ring and an earring pin
which is 5 millimeters. And here we have one of
our earrings assembled. Doesn't this look beautiful? I just love this design. I hope you enjoyed this
video. Happy crafting.
25. EARRING TUTORIAL - KALEA: Hi and welcome. In this tutorial we will create our
Kalia earrings. We start by chopping
white polymer clay. Then we start chopping
translucent polymer clay. So as you can see, we need
more translucent than white. Then we combine and chop again. Now it's time to form a bar. Now we slice into little squares and start stacking them on
top of each other. Yeah, this should work. Now we can use an acrylic
roller and slightly press down the next step. I'm using a paster machine
number one and also condition more white clay and also use the paster
machine number one. Then I have this nice color
that I'm going to use. But you can surely just use a knife and cut
thin lines instead. Obviously this way
they are equal, but the tissue blade
should work just fine. But removing the scraps, this looks clean. And now do the same
for the white. Okay, now it's time
to start stacking translucent and white interns. Almost done here. Okay, those a leftover. Then I use my acrylic
roller and obviously rotated and start
cutting stripes again. But this time, be careful. You have to align them. Shift it with one cube. You get the checkered press down, so they combine. Okay, now I can just put the leftover
pieces to the other side. Can I use my acrylic roller
again? Just be careful. Don't press too hard. And now we use cornstarch
and cut our pieces. I love this design, has a nice texture to it and some small pieces. Since I have some space left, I'm just going to
create some studs. And now be careful,
remove the scraps. And here we have the
pieces that we can then smoothen and place
onto our baking sheet. Let's bake those for 40 minutes. Here we have our baked pieces. Do you see how the
translucent now is more visible after baking? I love it. Okay guys. Now what's left
to do is to assemble them. But you already know
how to do that. I hope you like this
tutorial. Happy Crafting.
26. EARRING TUTORIAL - MOANA: Let's start off
with conditioning some white anti
black polymer clay. I used pester machine
setting four and created some small rectangles
which are similar in size. We can now divide
our rectangle into eight equal stripes and start stacking them
on top of each other. We need another piece of black clay and form
it into a snake. Let's cut our rectangle in half and cut the
snake in half to combine. Now we start
placing two pieces in the middle and start pressing our rectangles
into a rounder shape. Let's condition some more
white clay for our base. I use thickness number
five on the pasta machine. Now it's time to cut
small slabs and start placing them overlapping
and randomly onto our base. We finalize with
our acrylic roller and use guides or
the pasta machine. Setting number zero. Let's save the scraps as usual. Next, we start cutting
small studs from our slab. Carefully remove the scraps it's baking time, make
these for 40 minutes. Meanwhile, I have already
conditioned more white clay and used the texture
to nice texture. Then I used those half round
cutters to cut out my shape. Carefully use some white
liquid clay and press down your baked peace
onto the white raw piece. Bake again for 40 minutes. Here we have our baked pieces. What's left to do is to attach our blanks using superglue
or for better results. You could even place some on top and use your UV lamp to fix. Okay guys, let's now it's
your turn. Happy crafting.
27. EARRING TUTORIAL - AROHA: Hi guys. For these earrings, you can use any scraps
that you have left from previous clay crafting and
add some translucent clay, which I'm already chopping
into small pieces. Yeah, pick the colors you prefer and start
shopping them as well. At the end, add some
liquid polymer clay. This will help the
pieces stick together. Now we can form a small cube, and here comes the fun part. We start cutting
small slabs from our cube and we start placing them overlapping
on top of each other. You can then use
your acrylic roller to achieve your
desired thickness. I like to place some paper on top and roll over a couple of times for a smoother surface. Now it's time to cut
out our circles. And don't forget to repurpose your scraps for more earrings or save them for
another project. Finally, we can cut
our inner circles out, which you could use to
create additional studs and bake them for 45 minutes. Add some flat earring
pins and cover your earrings with era
for a smooth finish. Okay guys, I hope you enjoy this tutorial.
Happy crafting.
28. EARRING TUTORIAL - PAHOA: Hi guys. In today's class, we will create those
layered palm two earrings. First step is to condition
some white clay. I use the setting zero
on my pasta machine. Then we can predefine our
shape using a cutter or a printed shape just to mark the area where our
design will be placed. I don't press all
the way down yet. Then I have already prepared
some beach polymercletnes. You can mix them yourself or use my master color
recipe for those. Basically, I have
a darker beach, one that is more yellowish
and a neutral beach tone. Next, I use a round cutter to
cut out my mountain shapes. You can of course, just use your cutter knife and create
a shape of your choice. Then I start placing
the neutral beach first and the darker
beach on top. Then I use a small tiny
round cutter for the moon. Now we need to make
some small snakes from black polymer clay and start creating the trunk
for our palm trees. Before we continue
with our leaves, I would recommend to
not press too strong. Just lay it slightly
on top so you can still move your shape
around to correct it. Using my needle tool, I can now finally create some texture before
we cut out our shape. Now I'm using the
neutral beach tone and form another snake. I actually pressed it
through the pasta machine on setting five and placed
it around my shape. The last step is to use your fingers and
soften the edges. Before we start baking, I actually cut out small studs from the
neutral beach as well. Now it's time to assemble and place some flat
earring pins behind. I always seal my pins with UV Son afterwards so
they don't come off, which can happen sometimes. But you can certainly use
translucent polymer clay and make them again for 15 to
20 minutes. Happy crafting.
29. EARRING TUTORIAL WAIMEA: Hi guys. In today's class, we will create those
abstract earrings. I'm using a tiny
beige toned ball from my master color
recipe collection, but you can also
mix that yourself. Then I need some
white polymer clay as well to mix them together. The plan is to create
some sort of white. It's not so extremely wide. I roll it out with a standard
pasta setting, zero. I'm actually using
some canvas paper to create some texture, but you can certainly
use whatever you can find at home or some texture mat to create some texture on top or just leave it smooth. Now let's redefine
the shape by gently pressing down with our
cutter or printed template, marking the areas
for our design. Take some black
polymerclay and shape thin snakes to create abstract
plant and flower designs. Use a needle tool to
refine your shapes. Taking inspiration
from abstract shapes on Pinterest can fuel
your creativity. I personally like incorporating small loops for the leaves
to bring some balance. Apologies for the
reflective light as it was already dark when
I continued this shape. When taking a break, I would suggest to
cover your design with a small glass ball to prevent
dust and lint from setting. Don't worry, it won't dry out. As you have noticed,
I decided to create a different design
for the second earring. It still has the same style, but they kind of still match
together, don't you think? Finally we can cut
out our shape. The next step is to create a thin snake that you can
then place around your shape. I feel this kind of frames the whole design into
small piece of art. I'm also cutting out some
small studs in black. And together we bake
them for 45 minutes. After baking, we
finalize with the steps, creating holes, assembling
and mating with UV rays. And tunes loosen polymer clay on the back so the pins
don't fall off. I hope you enjoy this
tutorial and feel inspired to recreate or design your own
version. Happy crafting.
30. EARRING TUTORIAL OAHU: Hi everyone. Today let's craft some beautiful
Hawaiian inspired earrings. I have prepared and conditioned three colors using my
master color recipe. But feel free to
mix your own cut out one circle each from
the red and purple clay, then blend them together. I have added a white circle
to enhance the vibrancy. Keeping in mind that baking
colors tend to darken, I start by conditioning the tone with the
pasta setting five, making them quite thin. The same process applies
to the green color. And I'm using a
piece of paper that can help avoid strong lines
from the pasta machine. Moving on, conditioning black clay pasta
setting number two, this will serve as our base. I have also incorporated an olive tone from the
master color recipe, forming a snake and
creating branches. Randomly, lay down pieces to form branches where you
can place your flowers using a small stud
cutter, cut out circles, press them through
their rubber texture and shape them into
small flowers. Now let's repeat the process
with even smaller circles creating a mix of bigger and
smaller flowers for our. Time to craft some leaves. I'm using a small
leaf shaped cutter, but you can certainly
just cut a leaf shape yourself as the rubber texture will alter the shape anyway, for added detail, create a small white clay
snake cut small pieces, press them down, and
use the rubber texture again to form even
smaller white flowers. I have actually forgot to create some texture
on my branches. You could certainly do this
step right after placing the, the olive clay for the branches. Finally, we can cut our shapes. I suggest you use
a round cutter. Not like me, I used an
organic shape and it didn't turn out as I wanted
just use a round cutter. Instead, it's easier
for you to later rotate the shape and see where you can
actually drill your host. Before baking, I decided to add a little flower nectary to make it look
even more tropical. As you can see, I have also
cut some small studs as well. If you feel like this is too much texture and
flowers for you, you can certainly just create
small black studs instead. Now we bake for 45
minutes and finalize with the steps we already
know. Happy crafting.
 Anna Rangel, Instructor & Interior Designer