Transcripts
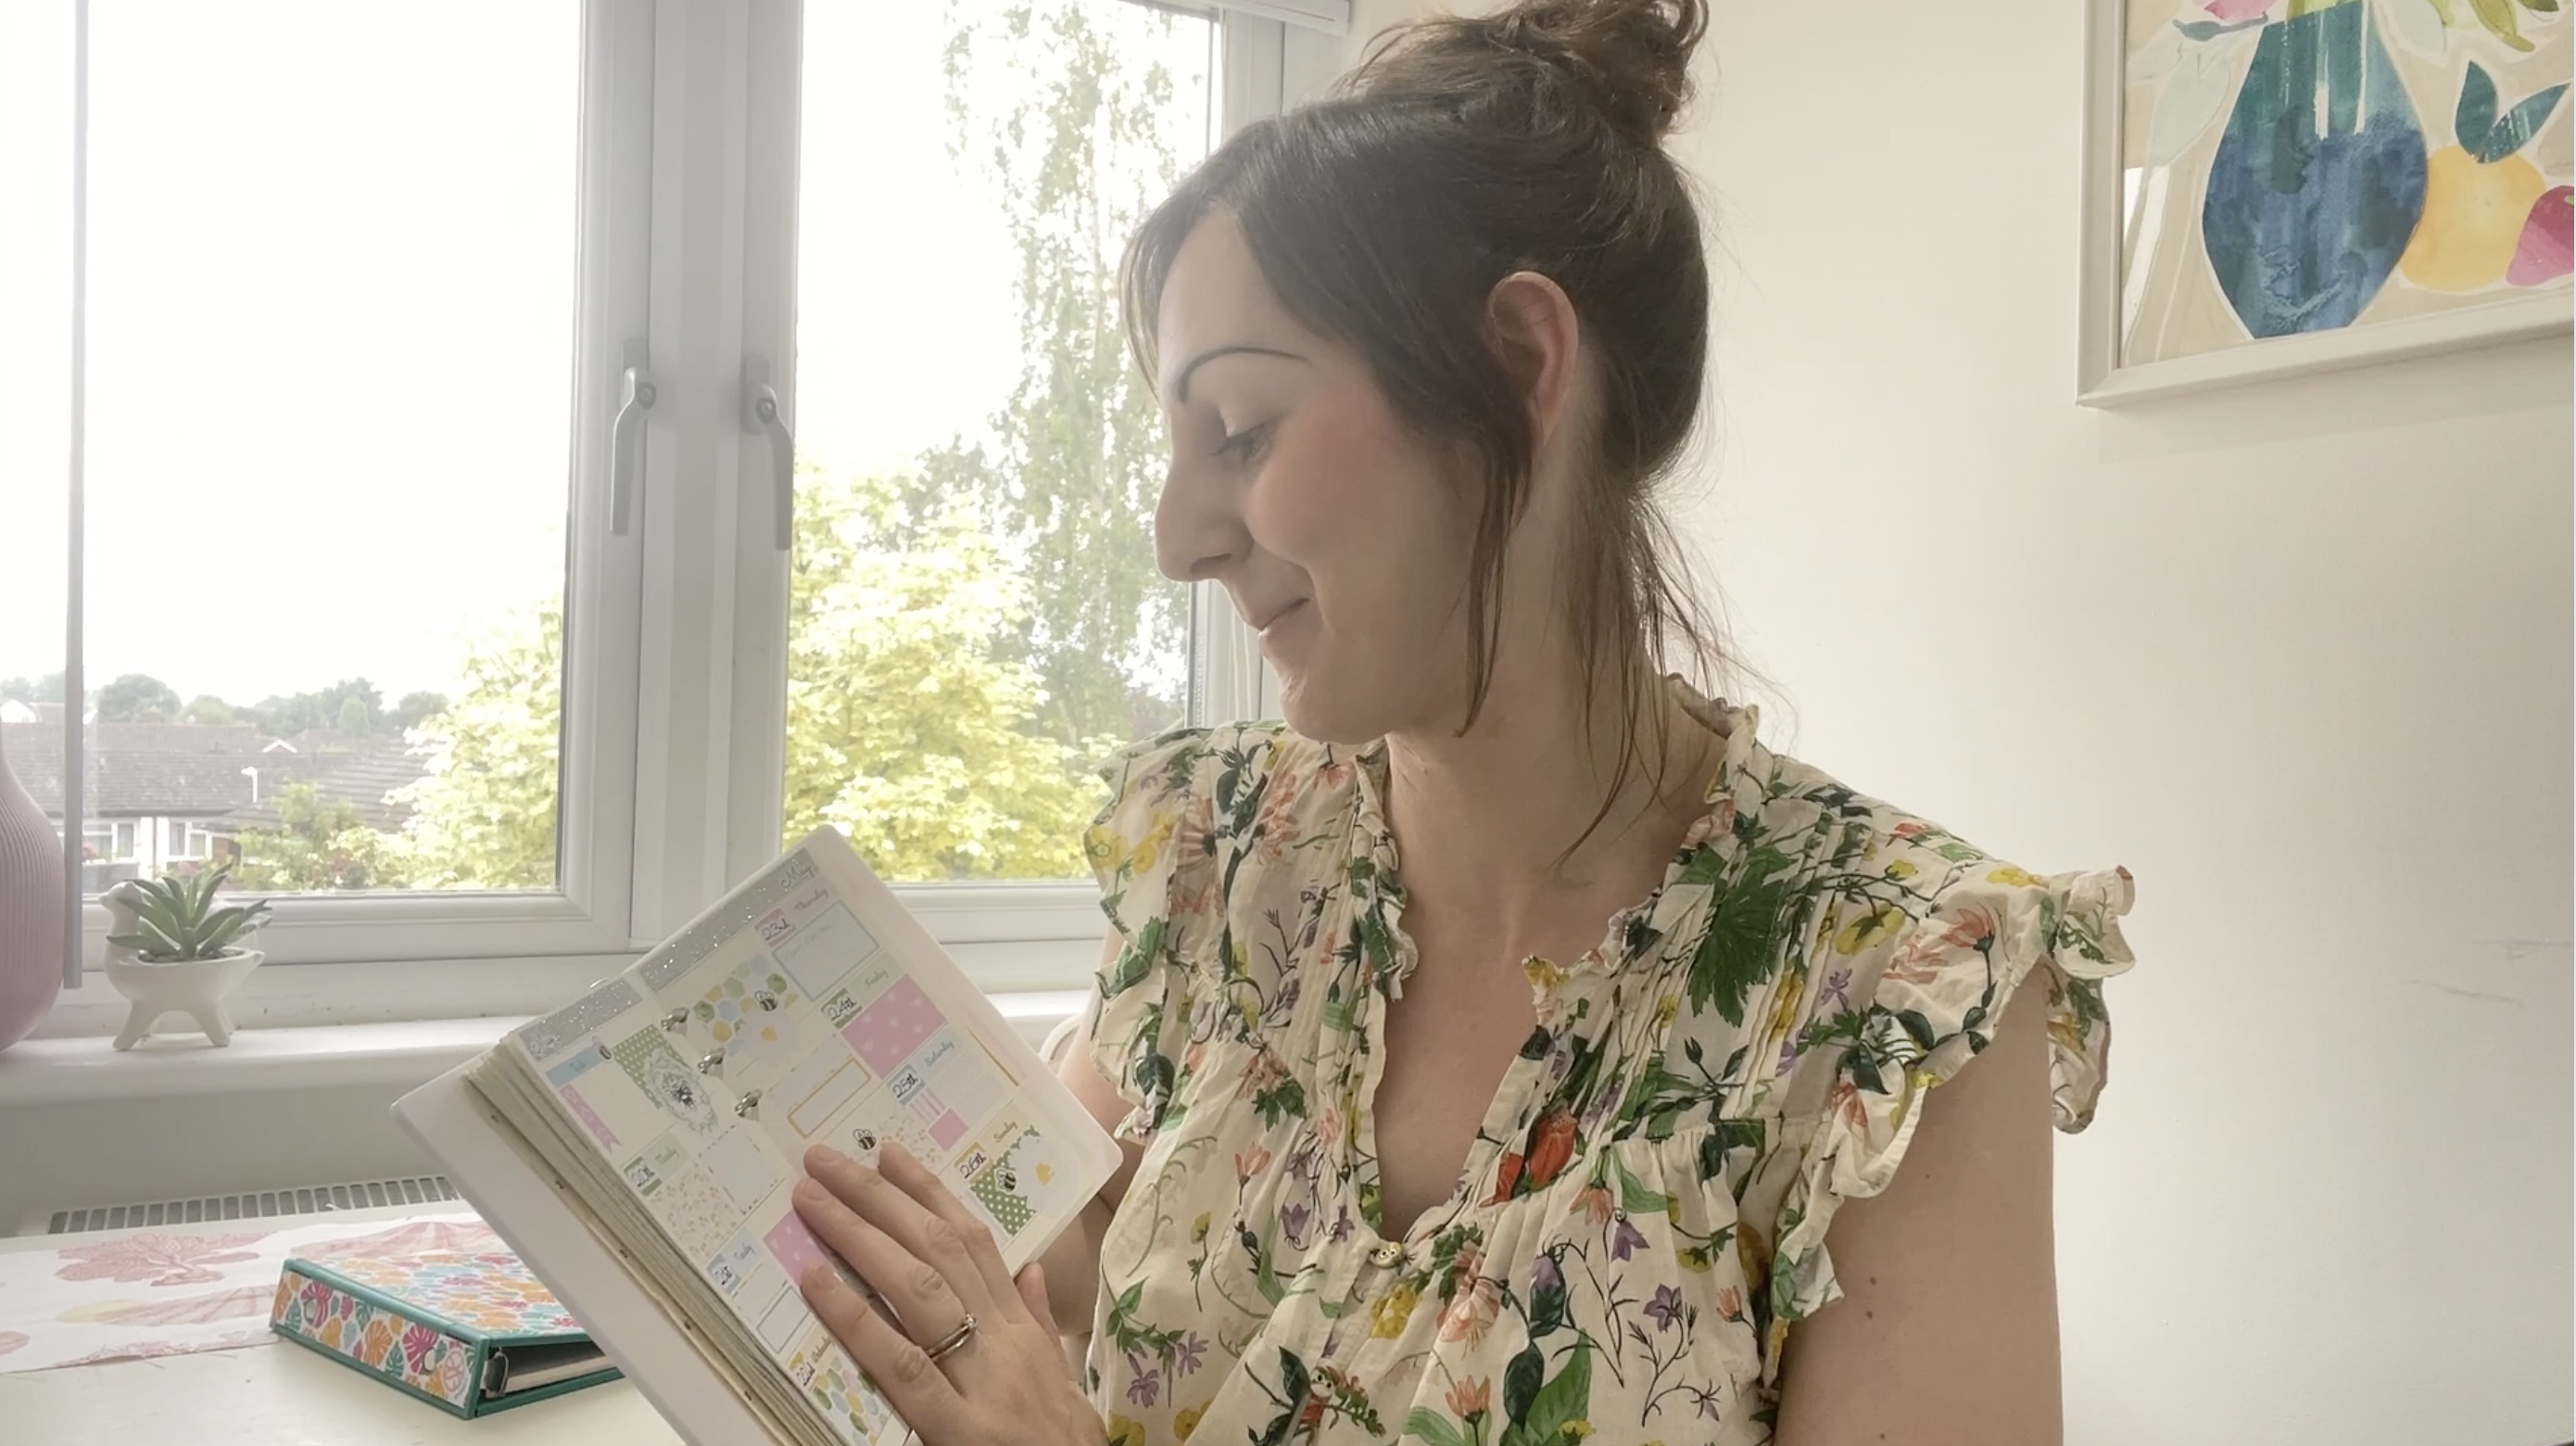
1. Introduction: Hi, I'm Sarah Douglas, designer, crafter, and
small business owner. I love paper craft
and plant supplies, especially creating my own
pages in my dot grid journal. In this class, I'm going to
show you how to get started going from blank page to beautiful page with lots
of fun along the way. I'll show you how to create three different pages
suitable for beginners, a plant page with stickers, a journal page, with papers and ephemraa And a book tracker
page with pens and doodles. Don't worry about having exactly
the same supplies as me. Just grab whatever
you have to hand, and let's have fun experimenting and creating our own designs. Your planer or journal is
an expression of yourself. Your plans, your
memories, your creations. It's a place for you to have fun doing something
that you love. It can be daunting,
starting with a blank page. But in this class,
we'll begin with some warm up exercises,
switching our materials, doing lots of doodling, and then we'll
dive into creating our three designs
of planer pages. I'll show you step by step
how to create each one. By the end of the
class, you'll feel a lot more confident diving into using your
plant or journal, whether that's in
an A six planer, like the one I'm using or in a bullet journal or another
notebook style journal. If you love all things
stationary in stickers, then this is the class for
you. Let's get started.
2. Class and Project Overview: I'm so glad you
decided to join me to venture into the world of
planners and journaling. This class is structured
in three parts, so we'll have a lesson for each of the plant pages
that we're making, the journal page,
the planer spread, and the book tracker page. But to begin with, we'll have two preliminary lessons where
we do some practice pages. Firstly, swatching
our materials, and then secondly,
creating lots of doodles. Your class project
will be to pick one of the plant pages that
I'll show you or to do all three and find
out which is your favorite and upload a picture
to the project gallery. I'd love to see all your
different creative styles, and we can find lots of inspiration from each
other along the way.
3. Materials Overview: As I mentioned in
the introduction, you don't need to have
a lot of supplies. Just adapt whatever you have to have to follow along with me. If you like, you
can follow along with just a blank
notebook and a pen. But as I suspect, you might be a fellow stationary
lover and you'll have lots of gorgeous supplies
you want to test out. I'm using an A six
size do grid planner. This particular one
is my own design, three D printed and
handmade by me. It is available on my website, stick at UK, otherwise, you can buy these inserts. They are a standard size
and they fit easily into any as size planner
such as a pile fax person. This is a pile fax personnel which fits the
same size inserts. Or you might have a
bullet journal like this. This is also dot grid paper. This is a five size. If you're following
along with me, I'll be using a six sze but don't worry for
any measurements, we'll just be counting
along the dots, so you can easily adapt that to fit this larger format if
that's what you're using. For pens, I have fine
liners, black and gray, and also pastel colors, and also these tombobrush
pens in pastel colors. You'll also need some stickers. I'm using this mini weekly
plan of sticker kit with a beautiful pastor theme and Bs You can find this
on my website as well. If you're into stickers, which I really am, there's a whole beautiful
array of plant stickers available on NC two from small businesses
all over the world. It's a really fun and
vibrant community to parts of I personally find I'm in my zone of ballis sticking down a beautiful
page of stickers. I also have some lovely
sparkly washi tape that I'll be using along
the top here, too. For the journal page, You'll need some patented paper and some ephemra
or paper pieces. These again in my own design. If you have any paper
craft supplies, dig those out and choose your favorite pieces in
coordinates and colors, or if not, you can try this
page with any collage types, scraps you can pull
from magazines. You can also find lots of beautiful stickers
for journaling or Nets if that's
your preference. Now then, let's get started
testing our supplies.
4. Swatching: Oh. The blank page. Scary. Nothing kills creativity like being confronted with
this intimidating page. At least I find that
to be the case. If the blank page fills
you with inspiration, that's awesome and you're
ready to crack on. One good way I find of getting started with
any blank page, whether that's in a plan or in my art sketchbook is
just a swatch materials. It's a low pressure
way to play around, relax into creativity
and find out which combinations and
materials you like the best. I'm starting with my
favor Castel fine liners. I'm going to test out the
colors because I think we all know that the colors
you see on the caps aren't necessarily how
they come out on the page. Okay. So let's see
how they look as a line and then filled in. Which I wouldn't really
do with fine liners, but you can do whatever
doodles you like. Then the great thing
about this swatch page is that I can just
refer to it any time. Anytime I want to make a
new plant or journal page. I can just come back here, pull out my favorite colors, pull out my favorite
combinations or see if one particular
material looks better than another for one
particular type of project. That's the fine liners. Now I've got some paint
pens to try as well. These Posca paint pens
use acrylic paint. They try really flat and
mat with bright colors. Let's just write
down what I'm using first Posca paint pens. I'm not using them
for our pages today, but it's useful to have them swatch to have any
materials that you have swatched in one place so that you can see how they suit you and how
they work for you. Also one important thing to check is whether they
bleed through the page. Okay. So depending on how
you're doing your pages, that might be important for you or it might not
matter too much. Instagram is a great
place to look for inspiration on plan of pages, and I've seen some
really nice layouts done with Posca paint pens. One example that sticks in
my mind with a lady who did some Christmas baubles
with layers of paint pens as a border around her month introduction page and it looked really beautiful. Here we go. Those paint pens
are the thick nib ones. You can get thinner nibs. Those
are the ones that I have. One set of pens that I did want to show
you briefly as well. I've got a couple
of alcohol markers. Now these I wouldn't recommend because they bleed
through the page, I just wanted to show you that. Let me just write down. So if you look when
you turn the page, those bleed through
really strongly. The paint pens do a little bit, but those come
through completely. I wouldn't recommend
alcohol markers for the projects
that we're doing. The next one is I
want to swatch one. Okay. Let's fit you in
here. The next ones I want to swatch are
my Tombow brush pens. I'm going to use these for the book tracker page
that we'll be doing. Let's write down. Let's
write with the thin nib. I'm doing this swatching
quite quickly. You can do this more
slowly and neatly. If you want it to look like
a really beautiful page. The nice thing about these
is that you can have a thin or thick stroke depending on the pressure that you
put on the brush tip. This is also a good way to get started with any new
materials that you buy, just swatch them out and see
how they are to work with. The reason I'm doing
these extra ones at the end is because I want
to see how they layer up. Once I've swatched these out, I'll go through and see what
I can draw on top with. That will be useful
to know because for some of our designs, we want to use color in the background and
fine liner on top. This will let us know which materials layer up
well and which don't. Then down here, I'm going to swatch these lovely washi tapes. But before we get to that, let's go over these and
see what layers up. So when I'm writing, I like to use a black
or gray fine liner. Any brand is fine. These ones came from Amazon, art and fly is the make. So black fine liner will go
on top of anything really. That's what I like about paint
pens to alcohol markers. It will go on top and brush
pens works really well. It doesn't matter
what you do, doodles, stars, hearts. Then a gray. You can see the gray
doesn't show up so well, you know that for future. It does if you want
something very subtle. Then these pastoral
ones I probably wouldn't use with any of these. I think they're too pale to
show up. But there we go. Now, let's swatch
our washy tapes. I've just a selection here. I've got more washy
tape than this. I'm not going to
swatch everything, but what I do want to
find out is how do the different sizes
fit on my grid paper. This is the thickest
one that I have. I just want to
line those up with the dots and just see how
much space it takes up. Then I can use that
with my measurements. This is pretty much
a standard width. Most of the washy
tapes that I have seem to be this width. The other thing that I'm
checking for when I'm swatching these when I'm sticking them down is how
transparent are they. Do I like their
appearance on the page? Do I want something
where I can see the background underneath or
do I want something opaque? This one is a little
bit thinner again, this I place that on
the two dots high. Each dot is half a centimeter
apart from the last, this is a centimeter high. If you like swatching
your washy tapes, you can spend a lot
longer doing this. You can fill up pages
with beautiful tape. See how they look, see which
colors go together nicely. See which combos match up. Quite like this
holographic one too. L put a little piece
of that on there. This one's just about
half centimeter wide. There we go. Swatching
is complete.
5. Doodles: Okay. Let's practice
some doodles. This is a great way to get
started when you want to test out some ideas and designs or just warm up
and have a play around. I'm going to test
out some elements that I think I'm
going to be using in my journal pages and
my book tracker page. One of the things I
like to do is borders. I don't have a
particularly steady hand, and I'm going to roll with that. I like to do wobbly
borders like this. Go over twice. Let's
go over this side. The nice thing about the
grid paper is that gives you a grid a grid to follow. So we're going to
start with some stars. Let's do blue stars. If I use yellow, I'm not sure
how well that will show up. Stars. A nice way
to do stars is to go from top to opposite
diagonal with a curve. You can always use the top and bottom ones
as a measurement as well, so that all your stars are
consistently the same size. Or you can use the dot as a central point and go
around it like that. You've got a slightly
smaller size of star. It looks nice to add
small circles, too. So play around with the
different styles that you like. Let's also try some flowers. I'm going to do the
centers in green. Again, I've used the dot as the central point and then I'll just do my petals
coming out from there. You can leave them as
just the flower heads or you can add stems. You can do five, six
petals, just four petals. Have a play around with the style of flower
that you like. You can do a big center
and some flat petals. We can also practice
just some leaves. Again, using the diagonal
to do some small leaves. We can also do
some tiny flowers. So petals coming out
from the central dot. This can look nice
as part of a border. So for example, if you've done your page border like
this for a journal page, you could go in and add some small flowers
around it or along it. You can cluster them together
or spread them out evenly. This is just your page to experiment with
different doodles. See what you like. See what comes out well and what doesn't. I find that this helps
just to take the pressure off the final pages a little bit because then
you're not thinking, if I try that, will
it work? How will it? The other thing we'll test
out is some cute plants. These will be useful
when we come to do our book tracker page. We're going to draw some
plants on the shelf. So we can practice plant parts. Again, I'm going
from here diagonally to this one here along. It doesn't have to be
perfect, of course. This is hand drawn. Then
we can have a spiky plant. Maybe we can add a pattern. Maybe we want to do
and tray of plants. Like succulence. Maybe
we'd have one coming down. And then we can try
some mini plants too. So we can just use one square here to do a very
small plant pot. Again, these can be useful as little accents on
your journal pages. You can do a tiny cactus, maybe. You can also practice
some of the lines or boxes you might like to
include in your journal page. So one idea you can use
is to fill in a border. Using a brush pen. You might want it
bigger than that. But this is just a practice. Do your lines
inside to add text? And then you can add details. So one design that
looks nice is to do a line to join the dots and then add a
couple of dots between. So you're doing a line. And then inside, you
can also go from dot to dot to create a
scalloped border. Again, you might like
to take your time and do it more neatly
than I've done here. But for a practice,
this will do. Give us some ideas
of what we like. We might also want to
separate out sections of our journal by highlighting
some rows here. Alternate rows you can do. Then you could
leave it like that or you could underline again. We can see what it
looks like if we underline in yellow to match. If we do it with the fine line, it's a slightly different shade of yellow and it will stand out. And then you can practice a
little bit of texts as well. See how that looks on top. You might find that there's
things that you like and things that you
definitely don't like. I did a lot of practice
pages using this idea, and I found that in
the end I preferred to keep my journal
page simple and not have any areas that I marked out or lined
for myself to follow. But this class is
all about finding your own creative style when
it comes to journaling. Do test out these ideas
and see what you like. You'll have different
materials to me and a different
style of using them. It could be that you hit upon something that is perfect for
your style of doing things. I've tried dashes here, I've tried dots here. We could have a solid line. Okay. You could try it with
different colors. You could try it with the gray, you could try it with
the past or fine liners. But just have a play around, see what you like and see what is most satisfying for you. One other idea you could try is just simple lines to write
on in pastor colors. There we go. When you finish testing out all your ideas
and all your doodles, then it's time to start
on the journal page.
6. Journal Page: In this lesson, we're
going to be creating a journal page using
patented paper, ephemrara pieces, and
our fine line of pens. I did quite a few test versions of this page to try and
find out what I liked best. That was why our doodle
page was useful. I tried a border to begin with, but I didn't like
how this started. I tried lots of different lines here and I tried sketching out where my elements would go, but I didn't like that
way of beginning. I tried out mixing
different lines, some black, some yellow, using a posca paint pen, adding a border, using the brush pens and
stenciling some stars, but I didn't like the mixed
up look of this page. I tried again testing out how
I wanted to write my dates. Did I want to do it
large with a brush pen? Did I want to try a
calligraphy style? I tested out more boxes. Did I like a box
shape, a bubble shape? Do I like dotted lines? Do I like squiggles, I didn't settle on any of those. I tried out more titles in the end after yet
another test page, which I also wasn't happy with, I settled on this design, and what I decided I would
change on here is that I wouldn't do these line
sections or headings. I would have it just text in
between my paper elements. I tried all the
different styles of things that I love
doodling, but in the end, I preferred the clean
and simple look, so that's what I'll be doing. But of course, please
do incorporate any of the elements that you loved from your doodle practice
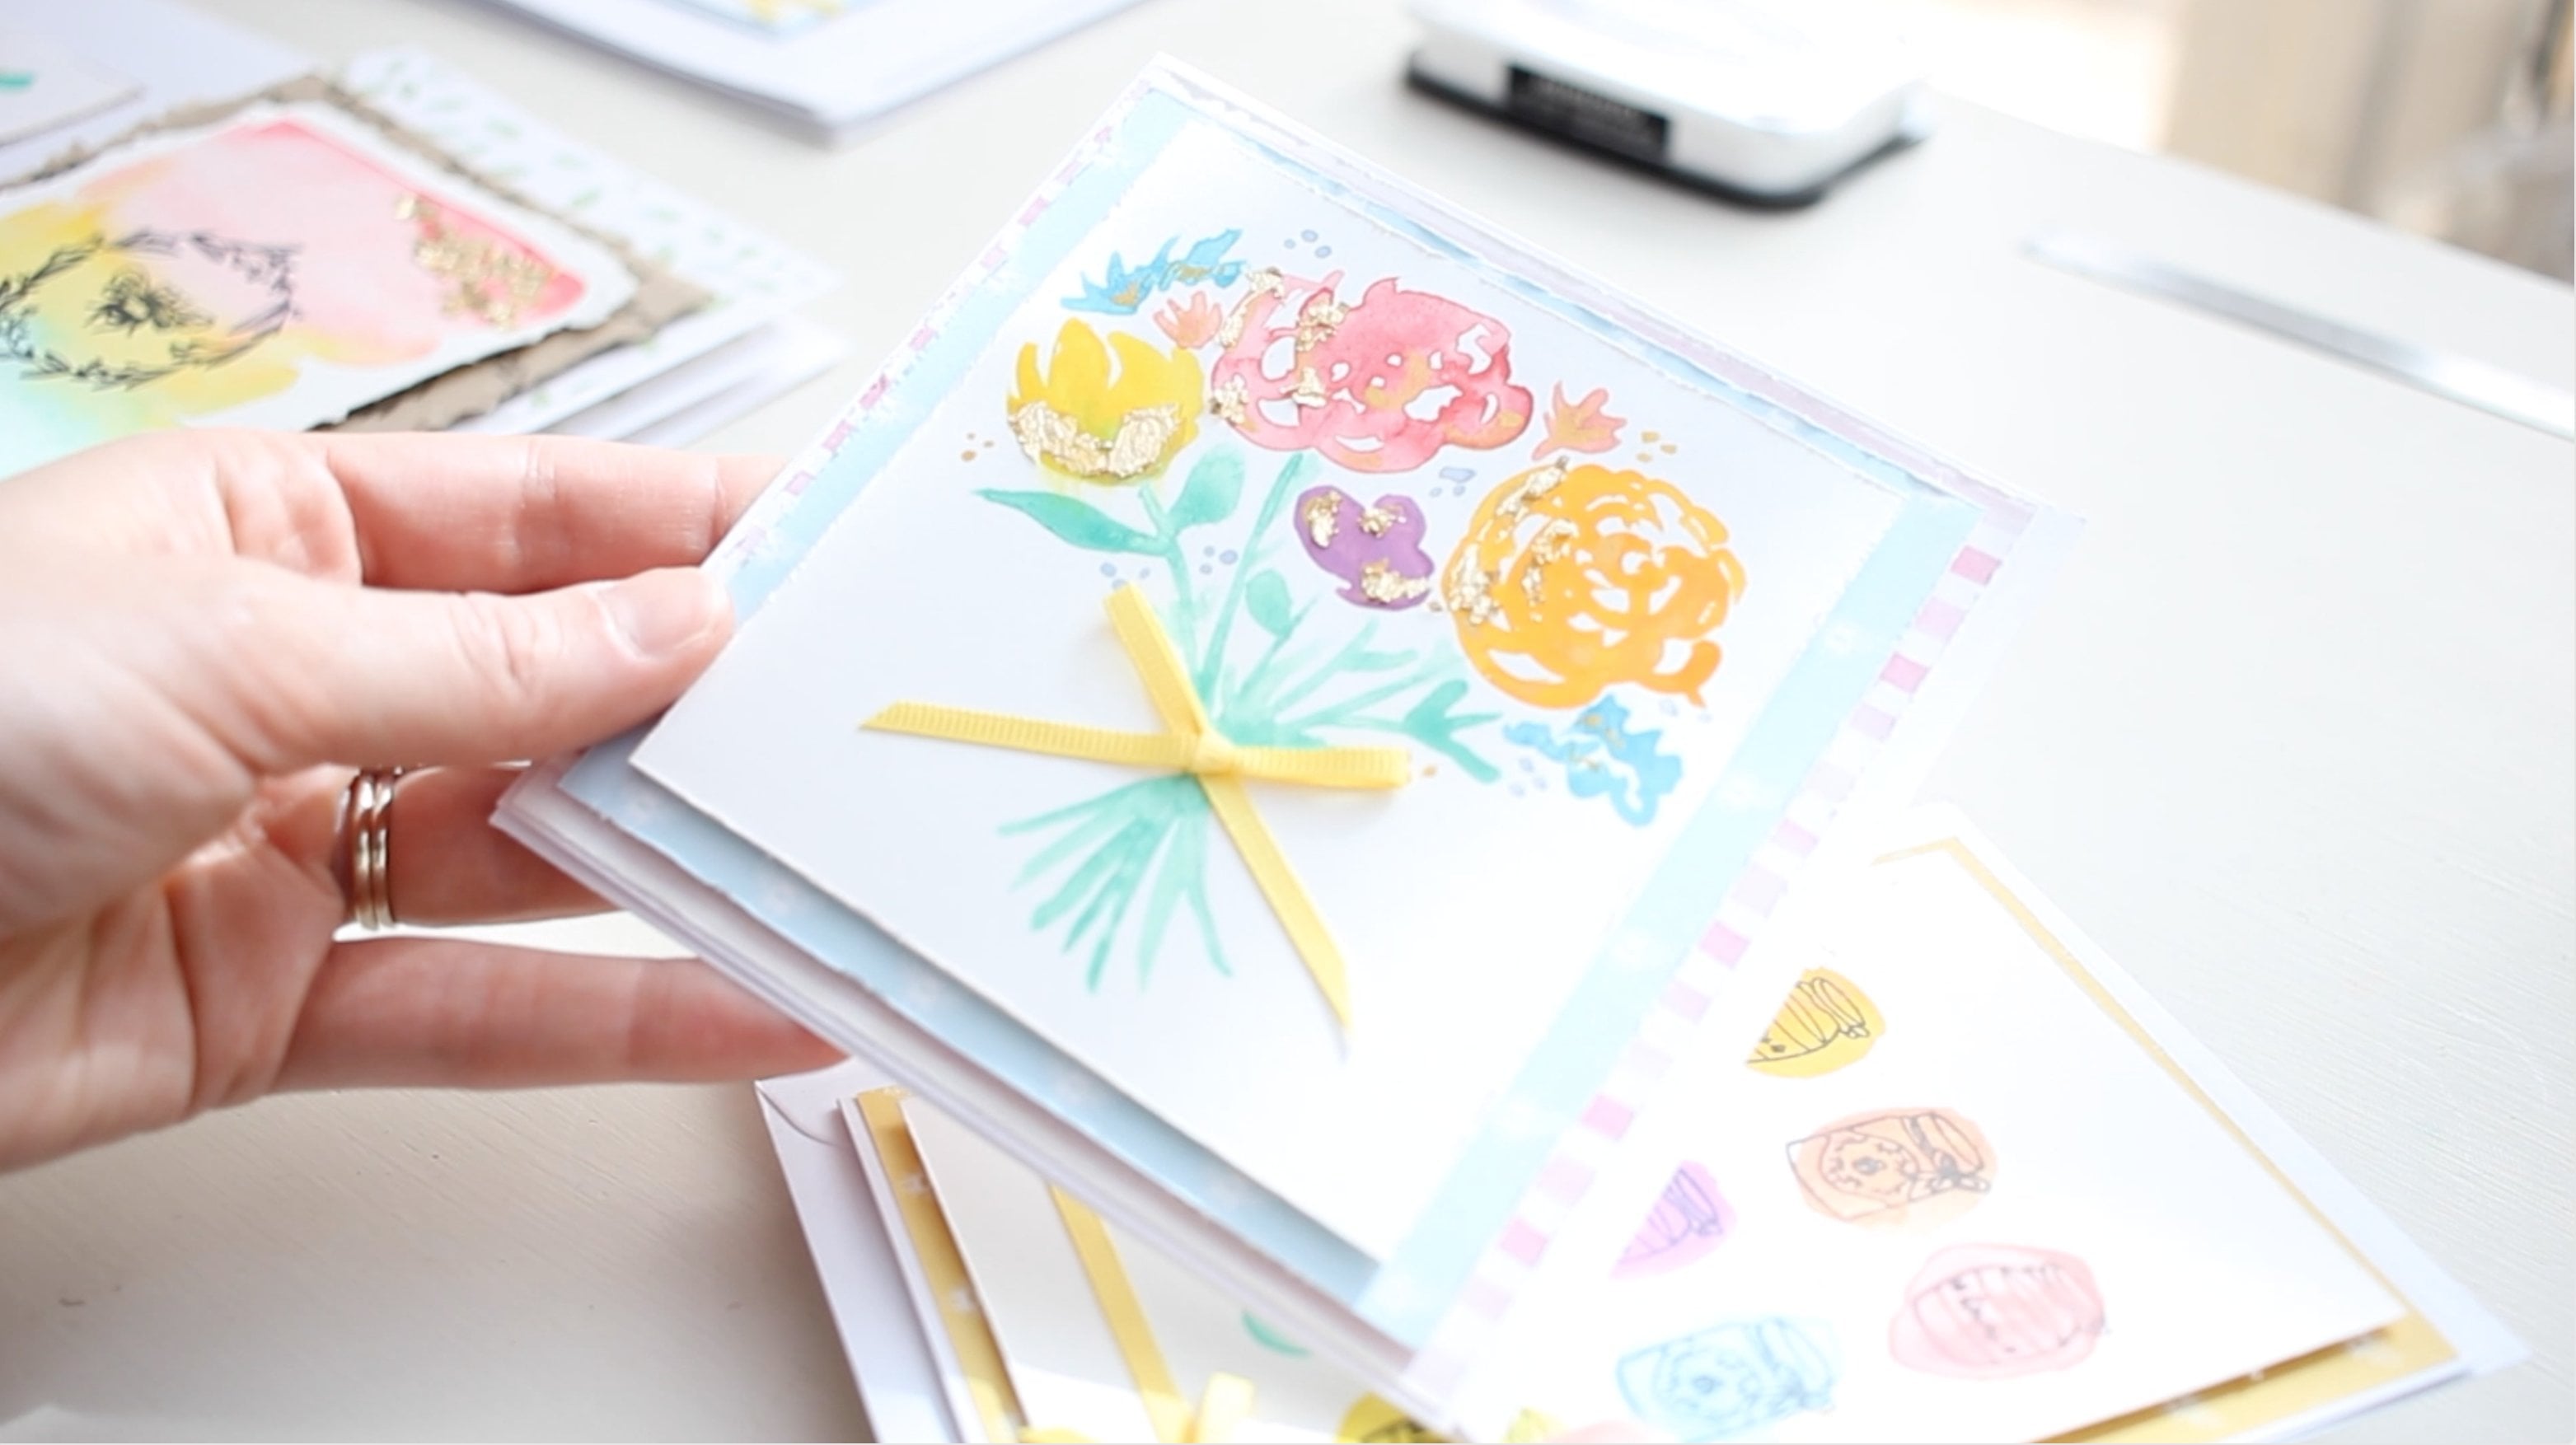
into this section. So for this journal page, I'm using patent paper and
ephemera, paper toppers. So the designs that
I liked when I was experimenting
with this page was this leaf paper and also the craft paper
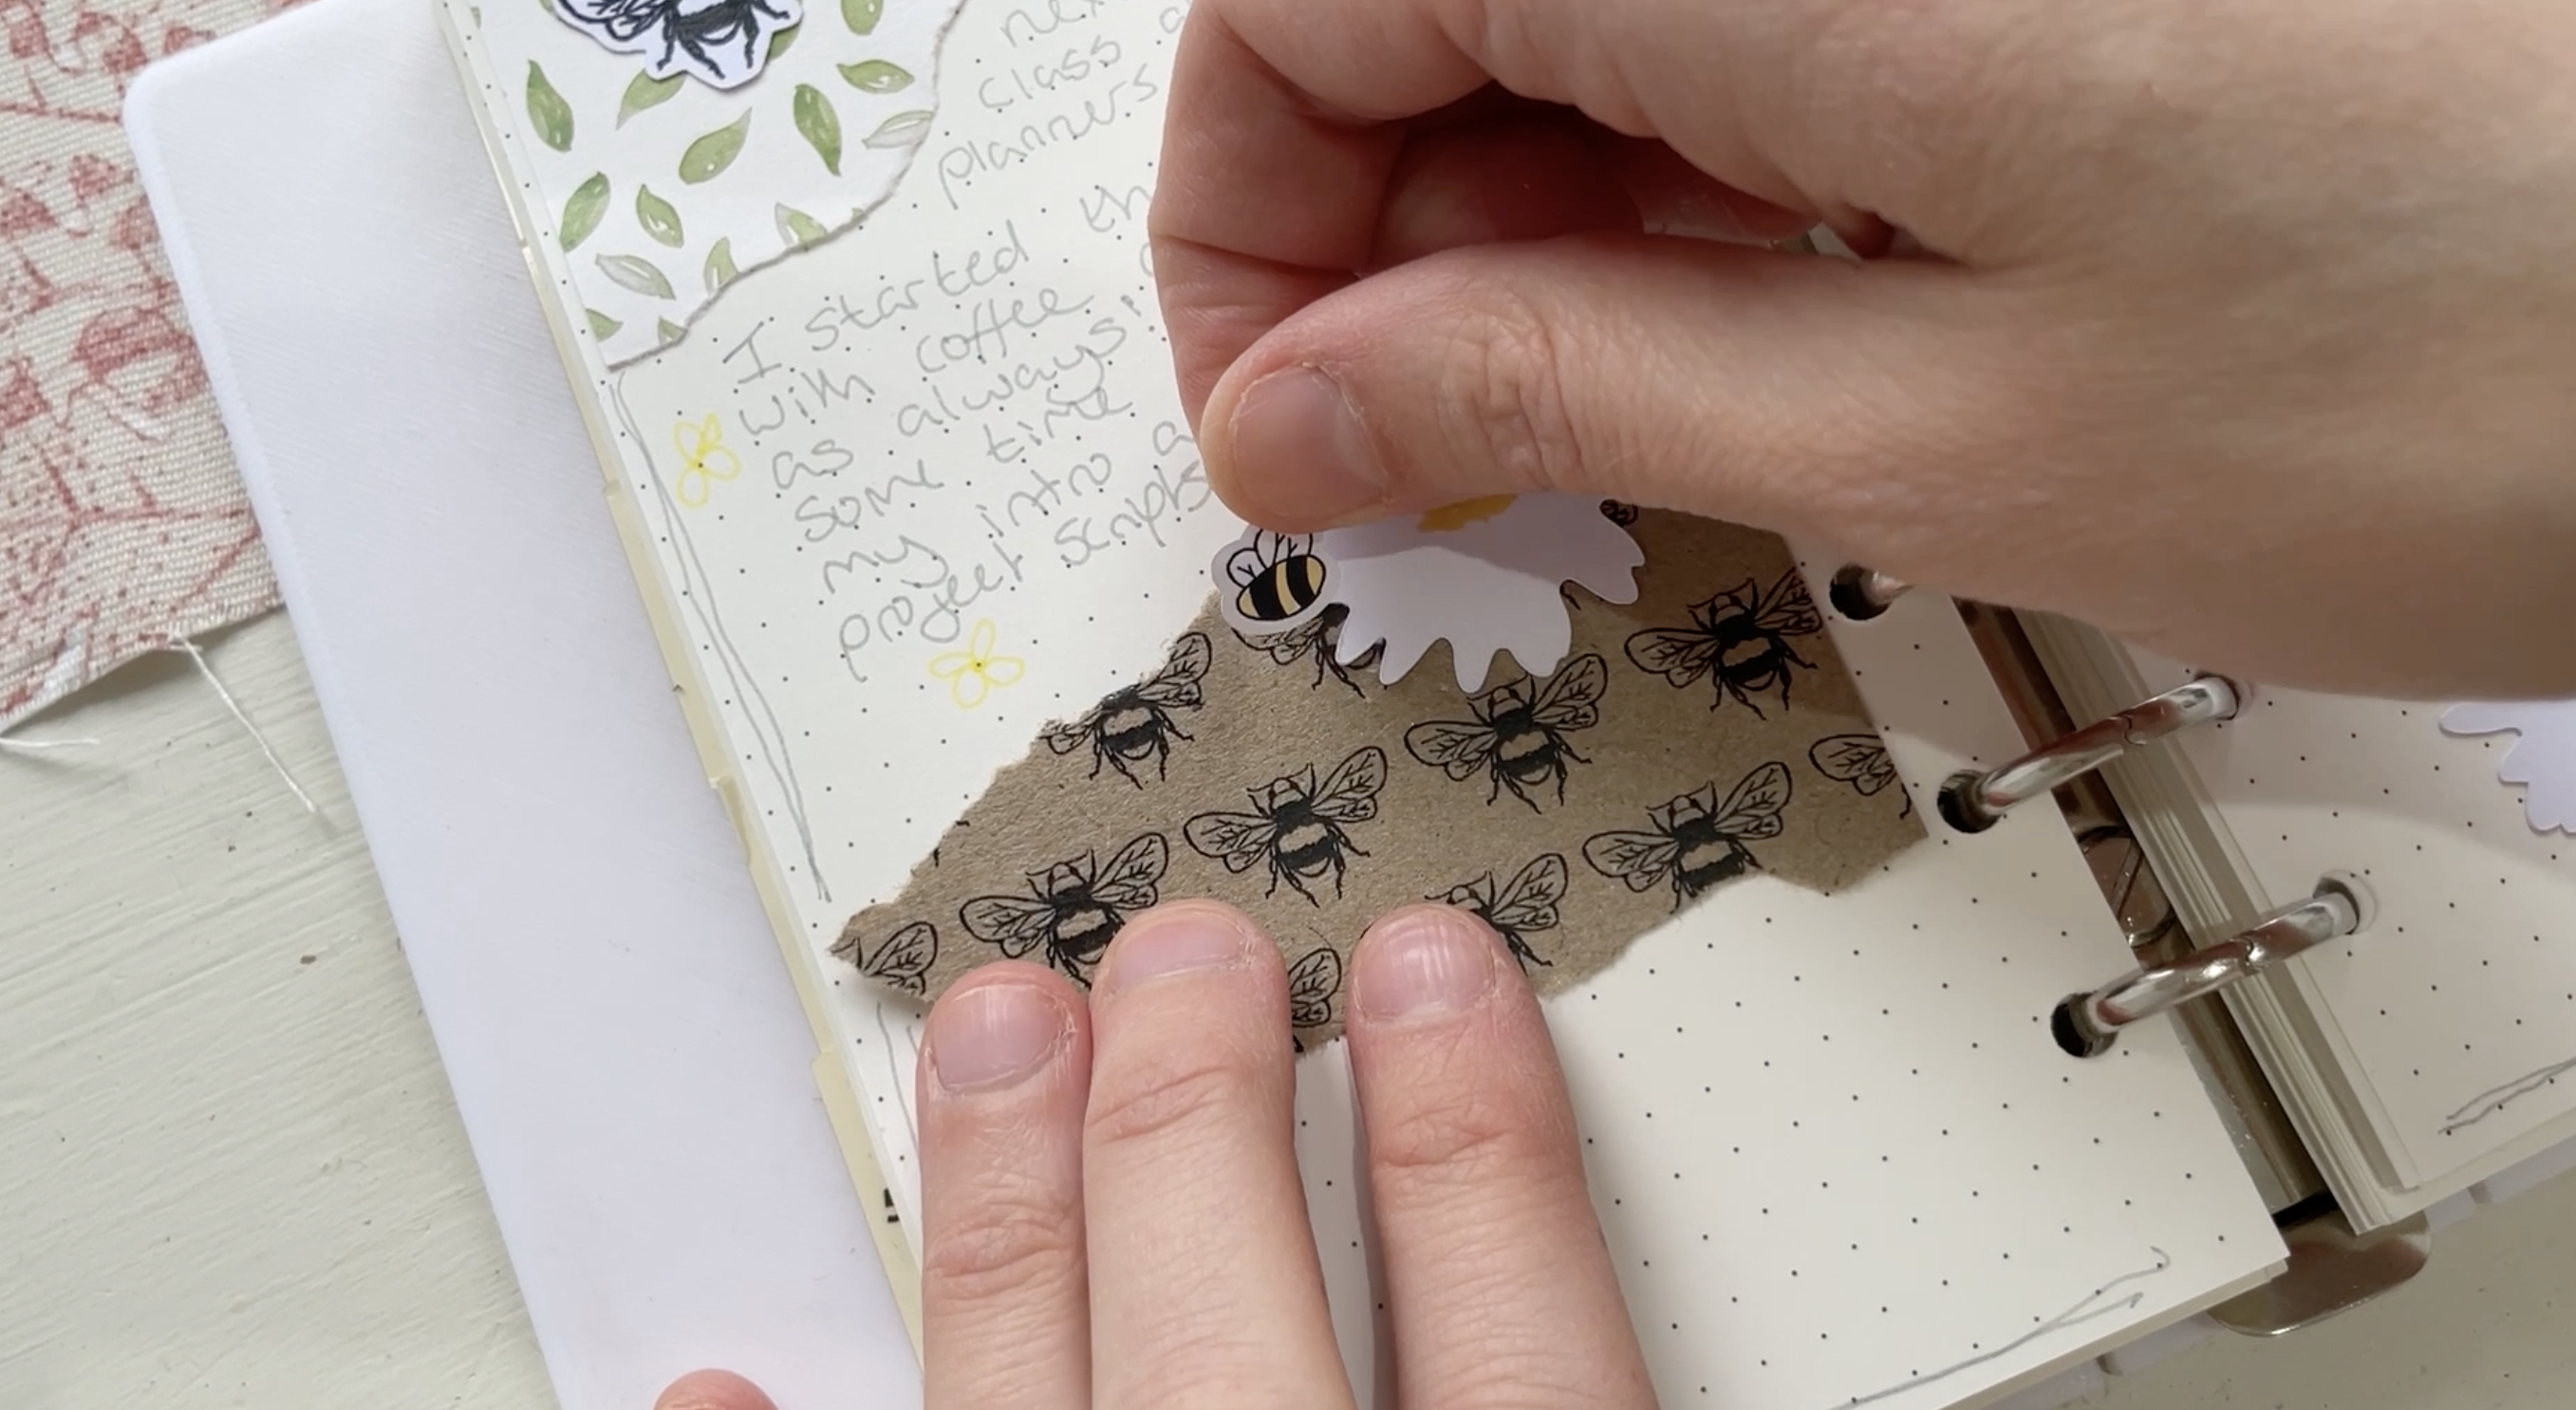
with these on it. Okay. And then for the ephemera, I liked how the large daisies
looked in the corner. So I had one that
was a bigger size, one that was smaller. I had a flower with
a stem on the side, which I'll have to dig
out at some point. What else did I have?
A B in a honey jar. To be a honey jar. And I also had
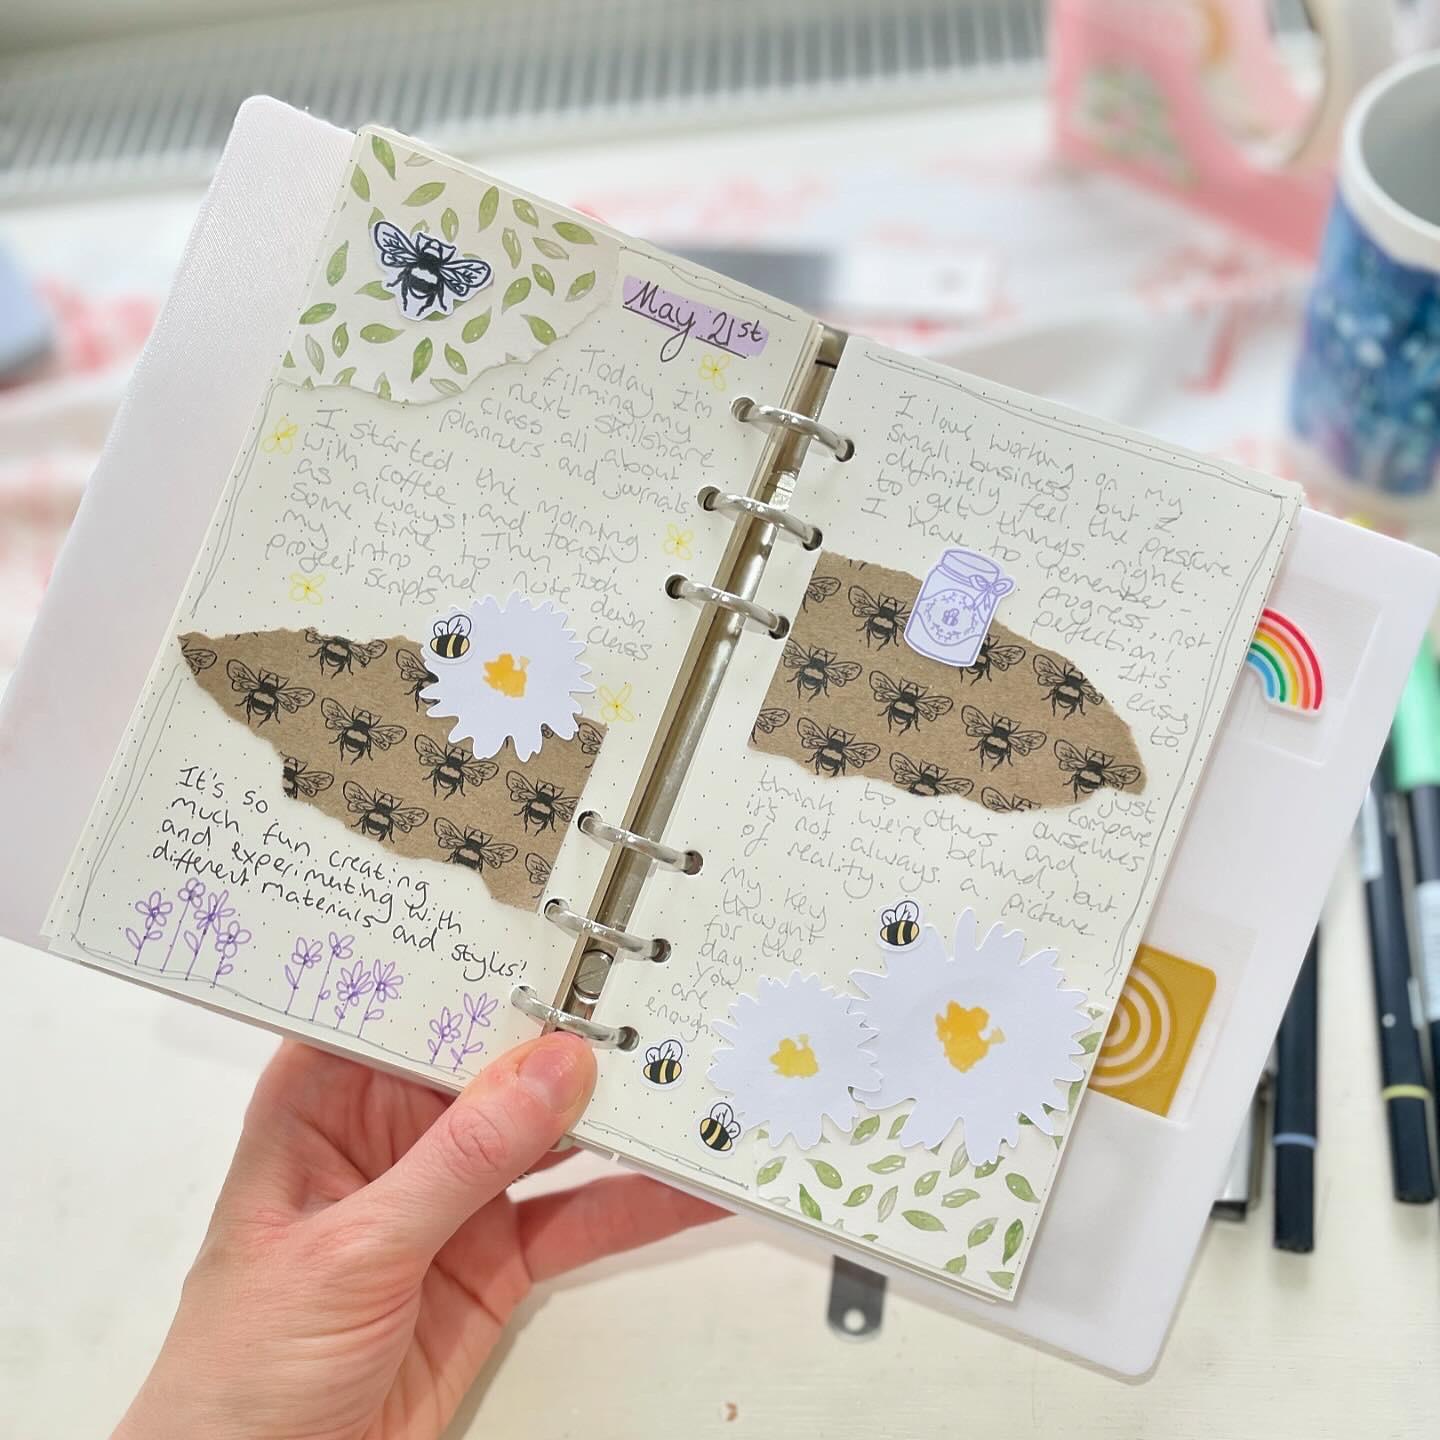
some bee stickers. So to begin with, I tore the pieces to give
them a ragged look. I want one in the corner here and one in the
corner up here. And to glue those down, I'm using a tacky glue, which is just a strong PVA. This is the part of
journeying that I find most enjoyable to pull out my favorite patterns
and designs and create something that feels like a reflection of the time
and the space that I'm in. So it's May right now and everything is
feeling quite spring. These papers, the bees, the leaves, the flowers. And also, I'm feeling quite
spring like and optimistic. But on days why I'm not, then maybe I'd choose like
a really dark paper pack, like a space theme, some deep dark purples,
some rich colors. Something to reflect my mood the day that I'm
journaling about. When it comes to the
journaling itself, you're writing, your
memory keeping, it's completely up to you. You can do one day on a spread. You could write about your
whole week across the spread, or you could just write about one particular
memory or day out. There's no rules
when it comes to journaling, there's
no guidelines. There's nothing to say that you must do it
like this or that. Before I stick
these pieces down, I just want to play with
the placement a little bit. I'm thinking about
where I want to write. I want to have some space above to write up here,
some space below, and then the same on this side, space above and below
to fit my text in. I think that looks good. If you don't want
to use tacky glue, you can also use a tape
roller or double sided tape. Okay. I'm also going to add
a border to this page, but I'm going to use a gray
pen to do it so that it doesn't the eye too from
the rest of the designs. You don't have to use a
border, but if you do, you can choose to
do it free hand and wobbly like me or you can use a ruler
and do a straight border. You can doodle on your border like we did in the
tractor session. I like it because it brings the spread together
a bit as one piece. I'm going to stick
on my B over here, my flowers are going
to go down here. If you don't have any
paper craft supplies suitable to use for journaling. You can of course use any
stickers that you have. You can use any bits of
ephemera from trips out, for example, if you're writing about a day trip or a concert, somewhere you've been an event, you can use ticket stubs, things like that stick in
any photos that you want, you could add, you could use
a piece of background paper. If you've got a
little insta photo, you could frame it and then
stick that on as well. Or you could cut
pieces from magazines. If you like that collage, you can pull out
different shades or particular images
that you cut out to use. Now that I've stuck
down my pieces, I need to think about what
title I want to have. From all my experiments
with titles, I never quite decided on my
preferred way of writing it, but I think what
seemed to be simplest was to do the background piece
and then just text on top. I'm going to use this
purple color Okay. Another point to
note is that if you prefer not to have the rings in the way,
you can, of course, take your pieces out and do your pages outside the binder and then put them back
in when you're done. But I quite like working with the steadiness of the binder
holding the pages in place. Then I think I'll add
a little underline. The rest is up to you. You can add some lines to mark out different areas that
you want to write about. You can add some highlighting, or you can just go straight
in and add your text, writing in between the do grids. Sometimes if you want to write, but you're not sure
what to journal about, you can find some
prompts online. But whatever you choose to do, just have fun and
make it your own.
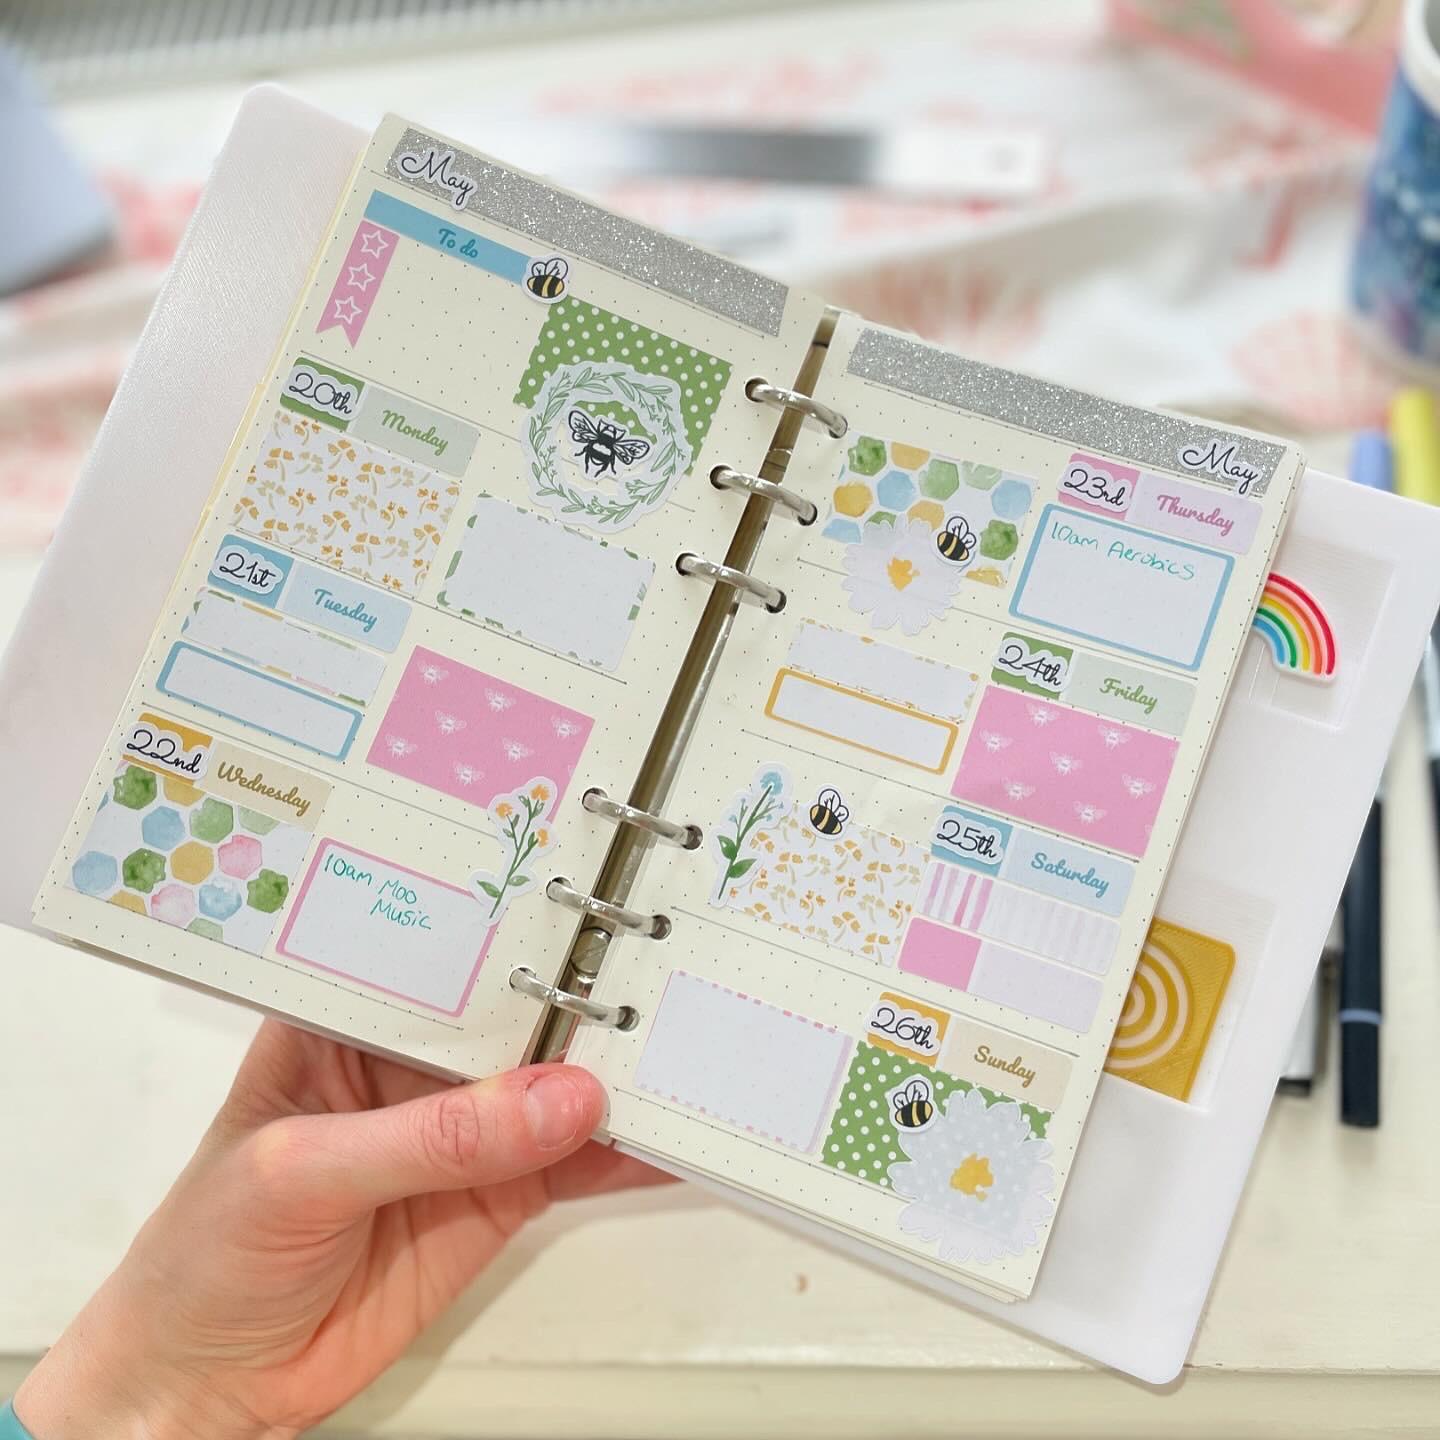
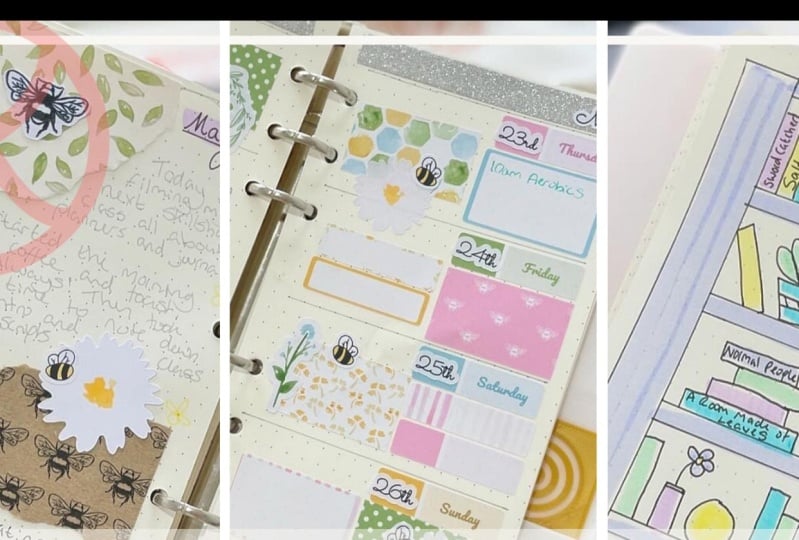
7. Planner Page: Let's get started on our
next page, a plan a page. The previous page that we did a journal page was more
for memory keeping. Was a plan a page is to
plan your week ahead. I love using stickers for this. They are just about my
favorite thing in the world. I'm going to show
you how to turn your blank dot grid pages into
a weekly layout like this. I'd like to start by marking off a space at the top to
write in the month. I'm going to put a strip
of washing along the top, and I know that it's going
to take up this much space. I want to do my line on this
third row of dots here. So I'm going to divide
up the page first. You can take your pages out of the binder to
make this easier, but I am stubbornly keeping my e. So that's where I'll have the month at the
top and the wash tape. Okay. Now we want to split each side
into four even boxes. I like to have a note section
here and then Monday, Tuesday, Wednesday,
then Thursday, Friday, Saturday,
Sunday on this side. You need to find the
halfway point of your page between this line, and then I like to leave a
border at the bottom as well. So let's put that in first. I'll leave a smaller border
than I do at the top. You can leave a bigger border and put washi tape at
the bottom as well. If you like that look, I'll
just leave mine plane. So if you count the number of
dots between here and here, you'll know where your
halfway point is. I have 30 dots between my lines, so I'll mark my middle
line at 15 dots down. And the same on the other side. Then we need to mark
our dividing lines here at 7.5 halfway
between the 15. And the same down here. Next, I want to add my
washy tape at the top. I love this glittery washy tape. It's so sparkly and pretty. I have a sticker sheet that
I use to add the months in, so I'll put one at
the top of each. Sometimes I put them in
the center, but recently, I've been preferring to
have them on the far side. I'm going to do it like
that for this one. Then as I mentioned before, we'll have this section
as a notes bit. This is a sticker kit that I'm using to fill in the pages. You can, of course, if
you prefer just write out your day and dates and add in whatever doodles you
like and whatever stickers. But I really like
using these kits. This one is my own design. But if you and search
for planer sticker kit, you'll find loads and loads of gorgeous designs on there from lots of different
designers and sellers. These are designed to
fit in a large planner. For this smaller
do grid planner, I'm going to be cutting
these large boxes down to put in each side, and then using these
half boxes and quarter boxes to to write
in my plans for the week. Then on this sheet, we also have some
stickers for decoration, some checklists,
and then the days. Let's start with the days. And then for this section, I'll add in a title over here to do I'm using the dots to
roughly align things. I'm not being too
precious about it. As long as I have this
split out layout, it looks neat enough
for what I like. It doesn't have to be
absolutely perfect. Then we'll add in a
checklist so I can write down my top three
priorities for the week. I'm going to you can
write the dates in here, but I'm going to
use stickers to add my dates just because I think it looks neter than my handwriting. And now, you can decide how you want to do the rest
of your layout. So I like to cut these in half
and then alternate them on each side and then alternate
the half boxes to write in. You can do this more precisely, but I'm just going
to do it by e y. I don't mind if they're
slightly one key. Often, what I like
to do is to do a few weeks or even
a month's worth of layout pages in one go. And then I'm not
having to rush to set up my pages for the week when I want
to put in my plans. If I've got things in advance, I'll write the in in pencil before I've
done all the stickers. And then I'll write the in in pen once I've done
all the stickers. If plans change, I actually have an erasable gal
pen that I love using, and that means that I don't have to scribble things
out across them out. These stickers are
slightly repositionable. So if you stick them
in the wrong place, as long as you haven't jammed
them on the page too hard, you can take them off
again and reposition them. But just check the type of paper of the stickers
that you're buying. So, I would say, repositionable, but some aren't. Okay. Okay. So now that
I've got my patterns down, next, I'll add space to write
in my plans for the week. So sometimes I use
the bigger boxes. Sometimes I use a couple
of the quarter boxes. Sometimes I have a plan in
mind. Sometimes I don't. So for example, on a Tuesday, which is one of my working
days on the business, then I might put in my priority for the morning here
and my priority for the afternoon here
or on a Wednesday, I take my daughter
to music class, which is like music and games
and that sort of thing. I just put that in as one entry, and then we always have the
afternoon free to hang out. That might be too much pink
so I'll put these down here. I'll try and vary the
colors a bit on each day. We can have a blue up
there. And yellow hair. This kit is called a mini
weekly kit because if you were using it in a
large vertical planner, it would do you a week. But because I'm using it
in a smaller planner, it will a lot more than a week. You only get one set of dates. But what I do after that is
just use day stickers to add in the other entries
for subsequent weeks. Then I'll just do different
designs of layout. Once I've used all the
boxes and all of these, then I might do some which have just these checklists
alternating or just decorative
stickers around. You can really vary what you do doesn't have to be the
same layout each time. That's part of what I find
so enjoyable, I suppose, so relax about doing my
own plan of page spreads, it's simple but creative, and I think it looks
so frety at the end. The final step that I'm going
to do for this one is just to add the decorative
stickers on top. I'm going to pure with a
little b in the middle. Going to have a flower here. And then I want
to these daisies. I'm going to add this
big daisy down here. I like that you can see
the poker through it. Then one up here where
we've got some space. And then I'll add a few of
these little bees as well. Many be up here. So this is now ready
just to write in my appointments and events
plans for the week. This is the pen that
I'm currently using. It's the F ink pen, and I've got turquoise
ink in it at the middle. I feel like I should
have some weekend plans already, but I don't. I'll have to make
some. Okay, that's our plan of page finished. Doesn't it look beautiful? I would love to see
your pages too, so remember to
post your projects into the project
gallery section.
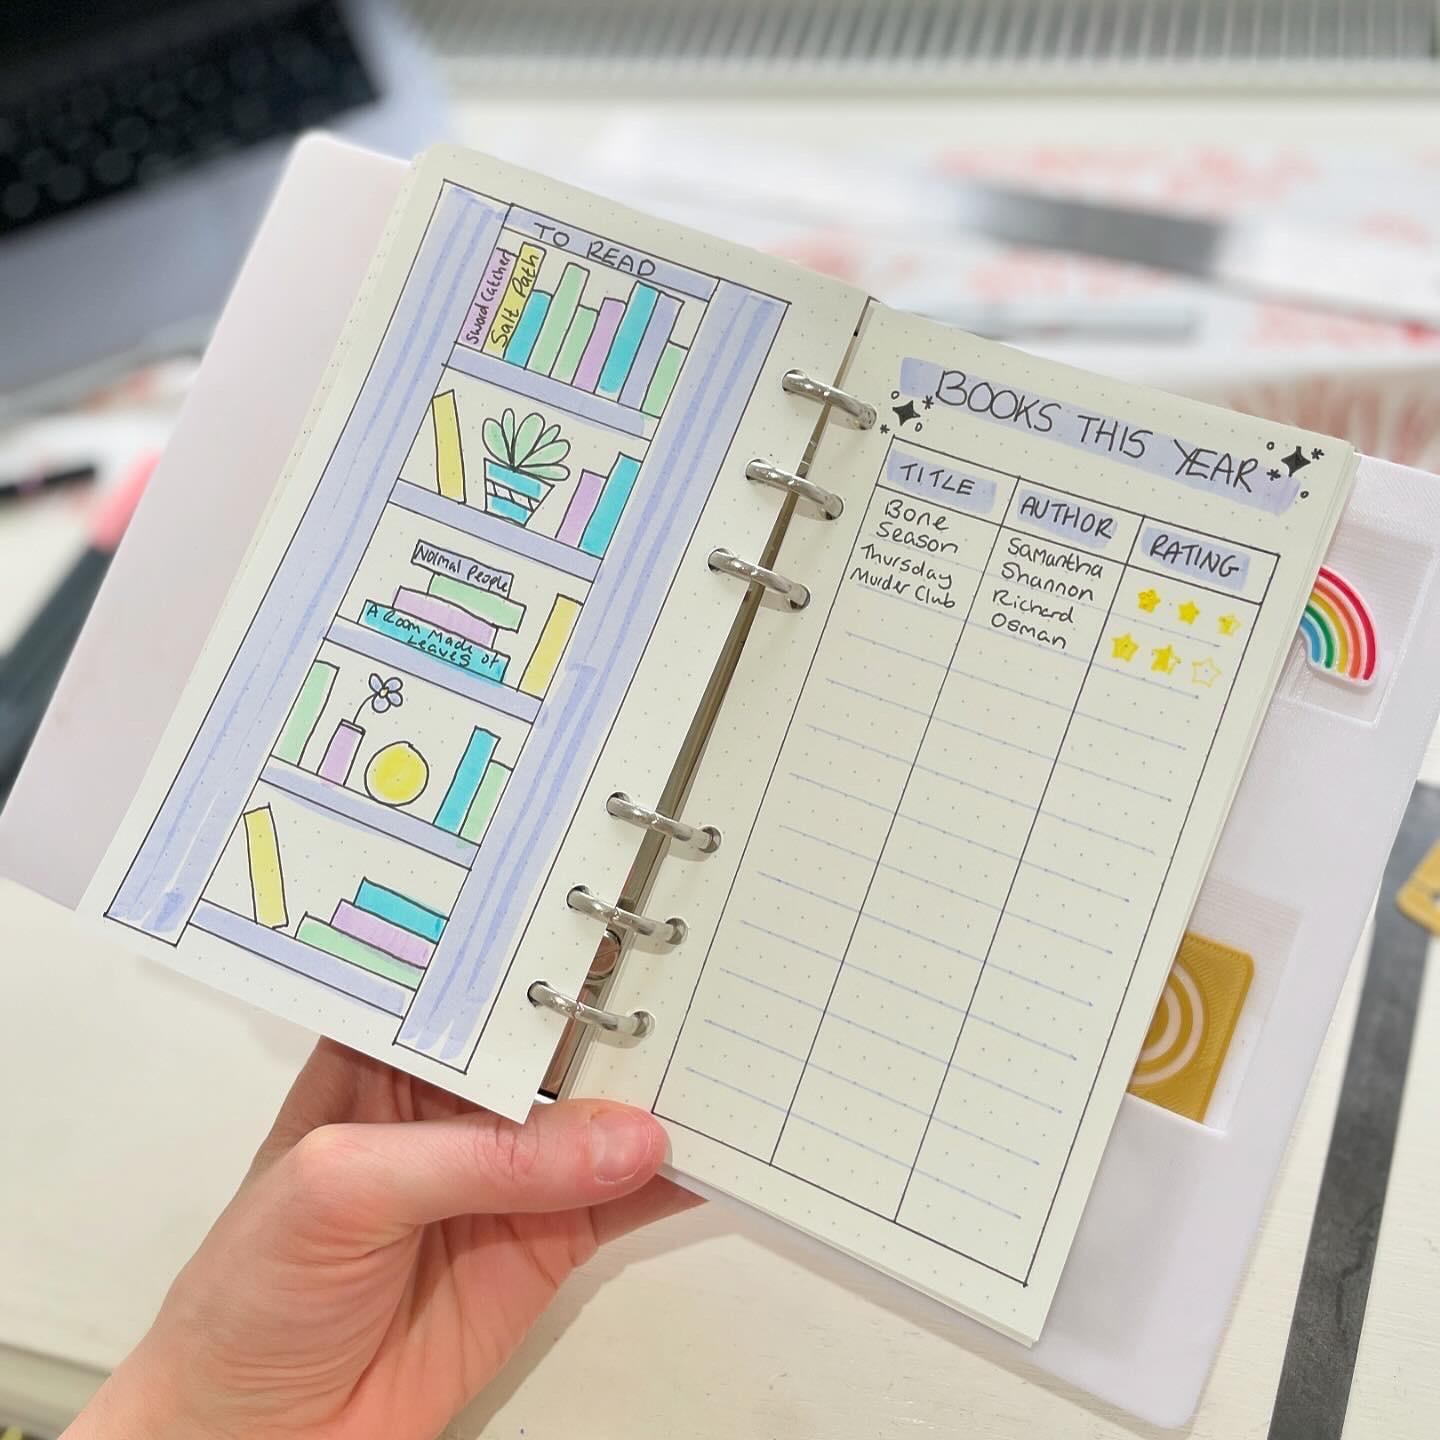
8. Book Tracker Page: For our final page, we are going to do
a reading tracker. We'll create this bookshelf
doodle over here and write the names of our books
to read on the spine. Then this will do
a bit differently. I'm not really happy
with how this came out, but we just basically want the
title and then a table for the name of the book author and the rating that we can fill in once we've read the
books on our list. Let's get started. For this one, I decided to take the
pages out to make it a bit easier to
draw the bookcase. I'm going to do the bookcase on this side and then my
table on this side. If you just roughly picture why you want
your lines to be. Luckily, I have this
helpful small ruler. I think I'm just
going to do my lines on each side of the bookcase, the width of the ruler, which is a centimeter. I'm going to start it
from the bottom here. I'll make it wide quite far to the edges so that
we've got plenty of space for the books
on the shelf. Okay. I'm doing mine straight
with fine liner, but you might prefer to do it in pencil first if that
feels more comfortable. Now, a reading track it is something that
I would probably do for the whole year rather
than a month at a time, unless you're a particularly
voracious reader, you might be. I would keep this
maybe in the front of my planner and then when I
bought a knee book to read, I'd add it to the
shelf, and then when I finish reading one,
fill in the table. Then at the end of
the year, you'll have this very visually
appealing reading. I'll draw on the
top piece first, and then the bottom piece. I'll do one up. So it looks like the
bookcase has legs. And then I'll need to work out the distance apart
for the shelves. I think when I did
my original one, how far apart are they? One, two, three, four, five. But then I thought, well, if
I want some taller books, they won't fit, so I
could do fewer shelves. But then I think
this looks quite nicely balanced and maybe
we'll do it the same. So from this one,
I did five one, two, three, four, five,
and then did a shelf. My shelves will come out
evenly, which is nice, but if yours aren't then
don't worry too much. If you particularly want to
measure them first, then do. But if you're not too brother, you can just have
one smaller shelf, which can be just for
plants on very small books. I don't really particularly love getting everything perfectly
measured and precise. Rough is good enough for me, but this has turned out
quite well, so that's nice. What I want to do next is just add the color to the shelf. For this, I'm using
the Tombo brush pens. I found that when I went over the brush pen over with
the brush pen a few times, it makes it quite streaky. I want to try and do
just single lines. I don't mind if it comes out of the lines a bit or looks
a bit uneven because I like the hand drawn look that it gave it when I
did that style. That's another
reason that we did the swatching at the start
as well because if you find out at this point that your fine liner bleeds and isn't resistant when
you go over it with pen, then it might be a
problem at this point. Now my title at the
top of B to read. Now we can have some fun
doodling our different designs for books and plants and knick knacks that you might
find on your shelf. My top broke can all be books, and then the next row, we'll
have a plant in the middle. Just like we did in our
doodles, do a plant pot, and then we'll
have a cute plant, some leaves coming out. Let's think about how
big I want to do this. Maybe here and here, have we go down like that. Maybe have a little
design on there. It's a slightly wonky
plant, but never mind. I think my plants are
wonky in real life anyway. So it's perhaps more realistic. We'll have a couple
of books there. I'm going to have one here over. Let's on the diagonal like that. Then it's leaning on a side. And then maybe on this shelf, we've got some
stacked differently. They can be in a tower,
an uneven tower. And one on the side. And then this shelf here can
have some knickknacks. So I'm going to add a
flower in a vase like that. And we'll have a
flower coming out. So you know I'm using
my fine line of this time rather than the gray one because I want
this to be quite bold. Then we'll have an b here. Who knows what that is. And a couple more books. And then down on the bottom, I'll have one leaning again. And then stacked. There we go. Now we can have some
fun adding color to the books and the accessories. Let's start with my book
case is this color. I want to do the books
with the other colors. Maybe include that one
as well, we'll see. Let's start with
this other purple. Again, I'm trying to
do them in one stroke. So that I get just one
flat layer of color. That's why I like the
brush pens because you can get a thick line when you
use them on the side. Now, if I remember, this
is quite a bright pink, so I don't know if I want
to use that on here. Let's just do
another test again. I think that might
be too bright. So let's put that one
to one side for now. Then what should we do
for the plant plant pot? We'll have it bright
blue, shall we? There. Now you can use your fine
liner again to write on the names of the books that
are on your to read shelf. I tested out gray, but
it didn't show up well, so I'm going to stick
with black for this. If you find that you haven't got enough space for the titles, I've been shortening them if I've got a particularly
long title, or you could do it over
a couple of books or if that puts you off. Then you could have
a key, I suppose. Couldn't give it a code, give it an acronym. You could just write tiny. Or we can pick books
for titles. And so on. Until you fill up your bookcase with the ones on
your to read list. Now, let's work on the grid. First, I want to add a title. When I did my
previous designer did my title too big and
I didn't love it, so I think I want to leave
more space for a grid this time in a smaller space
for a title at the top. I'll do it in the
same style using the Black fine liner,
so they match. I'm going to keep
it quite simple. I just want to write down
the title of the book, the author and the star
rating that I give it. You might want to leave
lots of space for notes if you particularly want to record what you
thought of each book. You can do that as well. But
in the interest of space, I think I'm just going to record those three things in my table. So I want space for
the title at the top. I think that will be
enough. We'll come across here with our table. We'll go to the edge. Down to the bottom here. Remember not to come too far over
into the punched holes. Okay. So that will be for
the column headers. And then we want to
divide this into three. So how many dots have we got? We've got 15 across, so each column is
going to be five wide. In the same style as I did this, I'm going to add background
color with the brush pen. And I'm going to use capitals because I think
it looks slightly needs. I don't love my handwriting. If you do, it can do
something really beautiful and script and calligraphy like. But I'm just going to
keep it simple for now. And I'll add some
doodle stars too. You can leave this open if the length of your titles vary and you want them to take up different
amounts of space. But I quite want mine to
fit neatly into boxes. So I'm going to add in
the dividing lines too. Might do them in
a lighter color. Maybe I'll use this. Okay. Well, we are ready to go. And then, as you read your
books, just fill them in. I tried a few different options when I was doing my test ones, and I decided that
I preferred just using again so that the whole
spreaded quite unified. Okay. And then for
the star rating, you could use a stencil or
you could draw the stars. I do have a mini stencil that I was using
to do the stars, which look quite cute.
I'll do that again. I'll use the nib of the brush pen so that it matches the yellow on
the books over here. Only three stars will fit
in my box, but that's okay. I can do half stars. This nib is a bit too
big for the stencil. So I can try the fine
liner for the next one. Okay. You might want to capture the date that you finish reading
your books as well. But I think for this
particular layout, you can only fully
fit in three columns. You could lose the
author column if you wanted to replace
that with date instead. You can if you prefer go through and do your
stars all the way down, and then fill them in
once you finish reading, or you can just stencil
the stars as you go. There we go. Just 1.5
for you, I'm afraid. Okay. Ah. Look page is done. Let's put it back in here.
9. Final Thoughts: Thank you so much for
taking this class. I hope you had fun
creating your plan of pages and you learned
lots along the way. Don't forget to upload
your pictures to the project gallery here
on Skillshare so we can all have a look at everyone's different
creative styles and give each other some love. Please also leave a
review on the class. Not only does it help
me know what you liked about the class
and what you think could be improved the next time, but it also helps
your fellow students to know if this
class is for them. You can also hit
the follow button next to my name to follow me as a teacher on
Skillshare and receive notifications when
I post new classes. If you'd like to find out more about the products that
I design and make, then pop over to my website
tikkit dot dot k. Thank you again for taking
this class and I can't wait to see you in
another one soon. Bye.
 Sarah Douglas, Papercraft designer & illustrator