Transcripts
1. Introduction: Hello everybody.
It's the class and welcome to this
curls planner, 5D. Credit to our design,
interior design, and also out the design
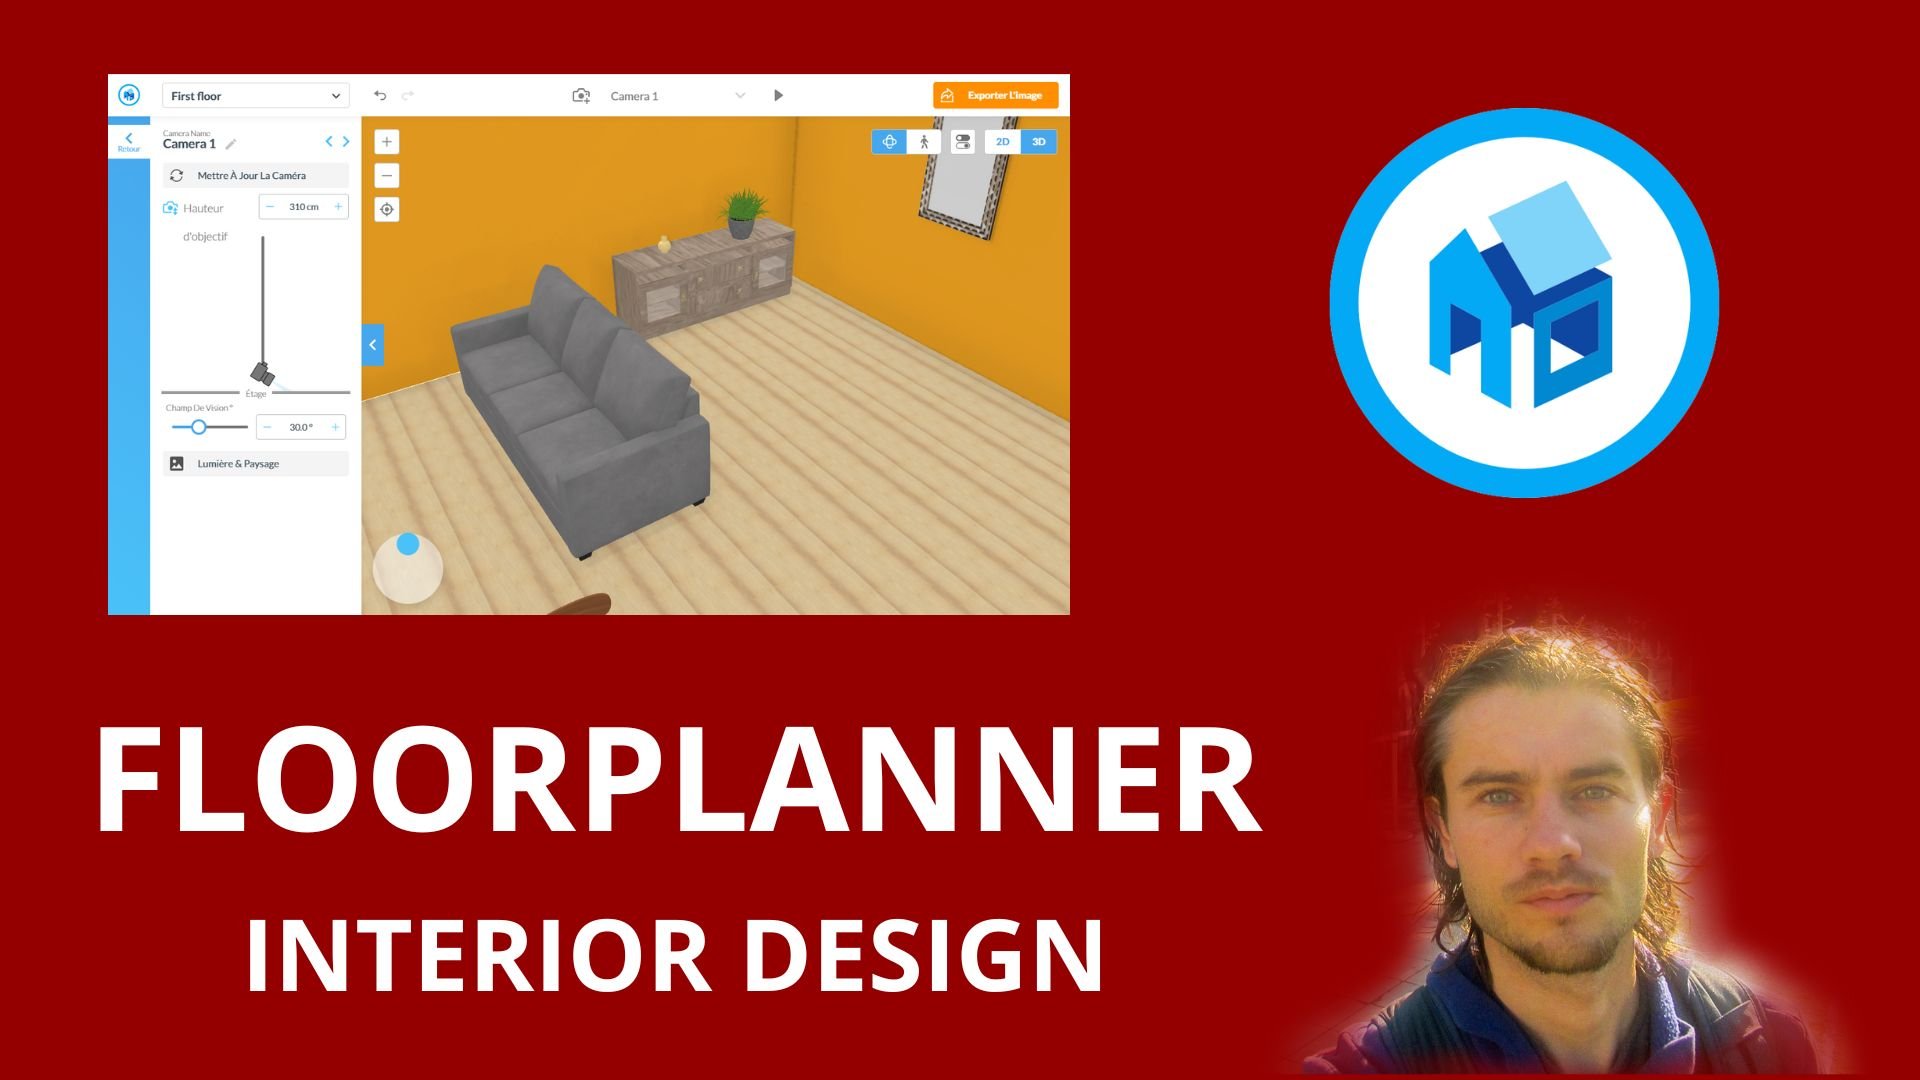
planner 5D. What is this? It is a software that
allow you to create a 2D plane and obtain a
real-time 3D rendering. This software is specialized
for interior design, but it is also
possible to expand on exterior design software or loss to optimize our
interior design things to the click and drop
system and preset size. Indeed, it is quick and
convenient to a doors, windows, or even furnitures, thanks to the vast library of furnitures. So change to the 3D view
is very poor food with a real-time view of the
plane, rendering does. We can move around the
room to see its layout. It is then possible
to export your views. Planner 5D as a free
version and a paid version. The free version gives
access to all features but only allows you to have fewer rendering and not
all the image library. And with the paid
version, you will have access to every sink. Who is this software for? This software is for any person individually want to create a rendering of their
future apartment. Always are simply designer
room entrepreneur who practice for
interior design. This ergonomic tools
make it possible to make presentation and rendering
for any clearance, both in 2D and 3D views. It is also possible to
use this software For real estate agency with
this ergonomic tools. So now what you will learn
in this training curves, in this training curves with a concrete project of
ours designed interior, all rooms and also to
expand to the exterior. You will learn how to use
Planner. Step-by-step. You will be able to see how
you can create two outwards. Craft words, create, draws, how you can add different
furniture in rooms. You will see how to set the different parameters and how to add colors, Oregon materials. Also, you will see also across
this project to see how to export your work
different type of views and to create
a real renders. This complete project with
our discretion is perfect to master perfect Lisa software
and also to your design. So planner 5D, complete. Curious. I was project.
2. Start with software: Let's start with Planner 5D. The first things to do, it's to create a new content, to create a new
country needs to go on their website
planner 5D dot com. You will have just to go on to write and you can see nerve. You just need to enter
your email address and after you will have
directly no count created. So first let's introduce planner faculty with
this grid tool, you will be able to create
great interior design. So it means you
can create a room, you can create an apartment, you can crowdsource
design of hours, but you can also
extend on to erase. You can also extend on garden, even if it won't be the best
for garden design clearly, it is very great for interior design and greet
to introduce your work. You can also extend a
little bit on the garden. If I just continue here. So layer would end design. You can work in 2D mode. You can create multiple
floor if you need. And after you can switch to, switch the mode to
explore and aided design, you have a huge quality of furnitures and Phoenician idiot, then you can edit color, patterns and material to
create your furniture. And you can then
visualize and show. So it means you can create
a render of your design. You can select different views. And after you can
create your render, it is an online tool. So craft anywhere, anytime
you just need to have a Wi-Fi connection and HD
visualisation to this 3D mode, 5,000 items catalog,
easy user interface, item editing, and community. You have a free version. With the free version, it is possible to use almost
all the features for free. One of the program with
a free version is you want to export in HD or to have the possibility to
have a few HD image possibles. And the second sings is that you won't have access to
all the item catalogs. It is very limited. With the free version, e.g. you select just categorized
like bed categorized like. So flag categorize. You will have only
access maybe to the swift 456 elements. So if you have access really to the five toes and catalog, or you need to have
a paid version. Perversion. What is this? It is around $20 per month if you just add an
engagement of one months. So it means if you want
to stop after one month, you can it's $20. But you can pay for for one year and just for
one year, it is $60. So if you just pay
one year, 12 months, it just onetime
payment 60, run $60. And so after you have also
the possibility to get ideas. So it means on this website, you can find the
design on the other professional or just or the
amateurs here for a room. So it is an interesting, you can also your
abs 0 possibly to upload a plane if you
want to use a plane, z software can create, can find x2 with
different worlds, can find the different
furniture and try to recreate,
recreate your plane. You also design school use case. You ever assume our features
and then you just go unseen up and we can continue
with the main dashboard.
3. Start with dashboard: I've taught to
create your account, you can arrive to
this dashboard and now you will be able to have
access to your project. If you need to
change the language, you can change the language
on the right and share. You can find my project. If you need to edit
your settings, you can edit your
settings on this area. So first I can edit my project
from this main dashboard. You will absolute
possibility to have a summary of all
your project here. I clean my different projects
just to crowdsource, curiosity is definitely better. And on the left you
have different folders with all project or renders
all texture and achieves. So first, if you want
to manage your project, let's just create a few
projects, something fast. I can click on New and just create a
project from scratch. So start from scratch first. After to do this work, I'm just going to, I
have a room by default. It's okay. So at any moment you
can come back on planner Friday on
the main interface, or you can come back directly on your project, clicking here. Let's create another
project, new project. Start. Oops, it is a smart without. Let's not a problem. I'm
going to use a smart wisdom. I will show you after
what is this I just used next step and acidic two-bedroom industry I
bedrooms and complete. So after I can come back
to my project like this. So now I have this
second project. We will have x2 visualization
just in few moments. New project again. Start from scratch. Let's leave this one. You can also use
directly my project here, snapshot texture profile. You can also come back directly to the main
dashboard on this area. And here you can find it
again, project renders, texture and shade,
just just the trash. If you want to remove projects, They will be, they will
arrive on actually. Let's create a new
project again. Maybe I can select again
the smart with Al. And I can select another type
of models like this one. Next step, Next step. Let's select her living room in this tree L
again and complete. So it's okay for that. So if you click on
Plan or Friday, you come back directly, directly on the main
page like that. And after you can come
back to your project, clicking here my project. So now I have four
different project. If I want to create a folder
icon on the left or project, you click here and you have the possibility to add folders. E.g. it can be like
rooms, like this. I can create another folder. I can click here, add folders. And it can be e.g. house, like that. Each time when you click
on this we print you can add folder again,
rename and remove. I can click on Rename
and e.g. at this one. At any moment, if you
drag and move a folder, it's not possible, but you
can add a folder again. Here I don't have
anything inside this folder and anything
inside this folder. If I click on our project, I can find my four
different project. And this project for
us that can rename, I can click here, rename and phrase on
palate can be room. One. Validate. Here, I can rename. It can be e.g. house one. Here. I can rename. It can be room number two. She I can click on the
sweet print, rename. And house number
two, just like that. So each time when you
have your project, you click on this trip print. You can open the project, you can rename your project. You can also send to a
gallery you can duplicate, move to achieve e.g. I. Duplicate. Now I have room one copy if I click
on this one, duplicate. And now I have also how to copy. If I want to remove, I can click on achieve. Yes. And if I click on room one copy I can click
here and achieve, Yes, know how to position an
element inside the folder. If I click on one, I can click on this sweet
print and I have moved to, and I can select
where I want to move. This project is going to be
in Zoom folder and validate. If I just continue,
this is my room. Yes, if if now I click on rooms, you can find a womb one. If I come back on all project, I still have my room number one because it is
in all project, but it's also classify enormous. If I select my room number two, move to I can click
on room again. Yes. If you drag and move, you use I was number
one and you click on the top right corner of the
element and left-click, you can also drag and
move where you want. It can be also achieved, but you can also drag and
move inside the folder. Here this one will
be inside a house, and I can click on number two and drag and move
inside this folder. So now as you can see,
I have all project. I have my two house
and my two rooms. And if I click on
one of these folder, I can find the
classification when 112. And if I click on the house
one and house number two, at any moment, you can create a new project directly
inside a folder. And you can also add any
moment delete a folder. If you delete a folder
like remove this one, you don't delete your project, you just delete folder. And if I click on Grooms, I can go and remove
just like that. But I have still my project. If I just go on the main
categorize all project, I have house to house one, room to room once. If I just continually
totally bit on this dashboard, all renderers, you can find all the
different renderers that you apply here.
It was different. It was another creation. And this is the front render. When you click on this one, you can download your render. You can also make draft, make HD, move to. So it means you
change the quality, may drive it is lower-quality, make HG it is better quality. And you can also use achieved. You can also create just
folder only for your renders. And if e.g. I. Click on this one, preview, I can, I can see my
preview just like this. If I click on this one, I can have the preview
and then I can download by preview. My image. Here it is all texture. I don't have a right now. It just that you can upload
texture and then you reuse this texture when you want to add
something on the wall, something on the floor, you can use a texture and you
can directly upload here, but you can upload after
when you add digit texture. So it's possible here, but it's possible after here. It's actually just
also models that you can craft ends at,
you can remove. So as you can see, I
have room one house too. And I just remove this element. I'm just going to remove these
elements to as a cookie. Now, before to create
a new document, I can come back to all project and just apply
achiever, all this one. So it means it's like to remove, but you can recuperate
in the trash bin. And I can click here. Also. And I can click here, achieve. If you want to edit
to an element, you just click on zoom
element and double-click, or you just go one-click. You can edit your project. And at any moment if
you've gone to write, you can come back
directly to your project, but also directly e.g. to the snapshot texture or
anything that you want. So she, I can come back
directly to all renders, e.g. let's use our project
and click on this one. Achieve.
4. Create project: First, let's see how to
create a new project. So to create a new project
when you're on the Magi burn, you just need to click here, but you have multiple options. So the first things that you can do it start from scratch, but you have also all
these different options. Let's first start from scratch. You just pretty simple. You just start a project
with absolutely no sink. Just propose you
at the beginning, a room like this. And this room as five
meter by five meter. Five meter here, 5 m here. If you don't want this, you just click the room
and you can delete, and you can start with
the different tools. And I'm going to come back to
my dashboard, mine project. So this is the
first possibility. The second possibility
is to create a new project and to
use a smart without. I will just show you in detail little after smell
to resolve that. What is this? You can directly
enter your dimension. You can select the style
and automatically. As a tool, we'll credit
for user interior. So I can select
to choose a room, whom shapes, so I can
select what I want first. If I stay on something bicycle, I can just click here. You have also a window
I can drag and moves a window where you
want e.g. here. I can also drag and move
the door where I want. And after you can also create
some rotation if you need. And you can flip horizontal,
flip vertical you. So your acidic what
you want first. And I've taught to do this
step you can use next step. You will have different
type of dimension shared simple because it
is just two rectangles. So I dressed staff
two-dimension, I can make some adjustment
with my two-dimension. Let's create
something like this. Maybe I can increase
little bit more. And after I can
click on Next step, I need to select what type
of whom it will be first, because if it is a bedroom, I will have a bed, but if I select her living room, I won't have a bed. I will have a sofa, different type of things.
So I can say e.g. living room after
acidic or styles or Taiwan's can be Scandinavian
country minimalist. You have also Japanese, not too much style,
but few style. And after you have
the render for Abby, you have to wait a little bit because it can be
a little bit long. I can select Scandinavian
living room, Scandinavian NP complete. After Ivan, if you
use this one or you can just edit it at your
convenience, the room. So it sees the rooms that I have with a Scandinavian style, sees a 2D view. Now. 3d view will appear soon and you can make
some adjustments. So it means if you have some things that you
don't really like, you can edit this. So e.g. if I don't want this
one or if I want to change the position to rotation, it is totally possible. If I want to add more furniture, I go on my furniture panels and I can add what I
want just like this. I want to remove e.g. this plant I can remove
after to do this work. So it's okay for that. I can just come
back to my project, create a new project again. And you can also
upload the plane. So you can click here,
upload the plane. You need to select on your computers with
planes that you have. It can be a plane in
JPEG and PNG finer. And after automatically, if the furniture is not
recognized properly, choose an object from the rich plan off 5D
collection to replace it. So I have this, I
have just this image. I'm going to select this one. And after you need to
wait a few minutes. And computer will recognize different things,
likes of furnitures. It will recognize also walls, doors, windows, any
things like this. And after he will
create for you plane. So this is our cognition has
started. You need to wait. And I can just
click on Continue. After all, let's create
two new project again. And one of the last possibility
is to create a template. If you said it might project, you just come back
on your project. You can eat, eat one of your project and judge
details specificities or you're a designer, I'm going to click on Template. You can select the template, can be empty room, bedroom, bathroom,
what you want. I can select e.g. bedroom directly. I have a model of bedrooms
with different size. And at the same time inside I have elements just like that. Sometimes it is useful because directly you have
a window directly, you have a dog directly, you can have a bed,
different things, and you can make adjustment
at your convenience. E.g. I. Can go inside if I
don't want this one, I can click here. I can remove. If I want to change some
position of element, it's possible I can use this one and drag and
move on this direction. If I want to change a
material on something, it will be also possible
I can click e.g. on this furniture and I
can indeed some materials. My convenience, if I need. As you can see, again, he did that but you can eat it. Most things. I can come
back to my 2D view. I can make some
adjustment also if I want to pull walled city
is also possible, I can increase the
size of my room. I just need to be careful
because maybe I will have to edit the different elements
of change of position. So this is a different
options that you can add when you
start to project. So most of the time
I will show you with new project to use the different tools and
show after minutes, you will have, you will
have a plane of your, of your sketch or of your image.
5. Master dashboard: Let's explain the
dashboard in edit mode. So this is the
dashboard of aged mode and how you can work with these first things
to do in the center, you can find a bedrooms. And every time when you
add different things, you will have your
design in a 2D view. First, if I just
click on this area, I can select room. So I can click on this
one and automatically I have an element
created on this space. Something extremity
and proton is, you can mix 2D
view and the view. So this is a 2D view by default. At any moment you just need
to click on 3D and you can enter in the 3D
view just like this. You have exactly the same tool. So it means you can
do the same thing on the 2D view and on the 3D view. But be careful because
sometime it's not extremely convenient
in the 3D view to position the element. And sometime it's not extremely convenient to make the
design only in 3D. So I can advice to
relate to use 2D and 3D at the same time and
to mix for the best. Totally on the top you can
find the icon planner 5D. You can just come back
to the main dashboard, to the main page
here, my project. You can come back to the
dashboard with your project. And on this area you can
find the number of rows. Here we just work
with one floor first, so we just have one flow, but it's possible to
add new flow from this. Charities undo redo actions. So you can use historic panels and you can undo redo actions. Totally on the right, you have different
element like e.g. you will be able to see things and we'll explain
that just after. You can also add the rulers. If you want to
duplicate your project is possible in
totally on the right, you have your own parameter, your project snapshot
texture profile, and you can come back
to the dashboard with one of these categories. If you go on the left, you can find your
different design tools. So we have tools to
create e.g. who, whom? We have tools to add main
construction element. We have tools to add
different furniture. We have tools to add
audio type of furniture. But for exterior,
here it is interior. Exterior. You can also add
the last news furniture's. Here it is a raison
furnitures and on this area. And just below your
favorite furniture. So each time you
can add furniture, you can change the furniture
in February it and you will find this furniture
just on this area. Sometime it can be useful. So these are different
design tool are located just here on this REITs possible
to recenter on your cameras. So e.g. if my home is here, I can just re-center clicking
on this, on this element. I can also change
full screen or not. And here you can zoom
in and zoom out. So now let's talk about
navigation in 2D and 3D view. Into 2D view, if you
just go left-click, you can drag and move like this. Left-click, you
can drag and move. If you go right-click, you can also drag and move. Nothing will change. And if you use
your scroll wheel, it is possible to zoom
in and zoom out so you can zoom with this element. But again, advise you to
just use a scroll wheel. And in this case, it is very simple
and you can zoom in, zoom out, and with left-click, right-click, you can move. Now let's talk
about the 3D view. I'm going to apply 3D view. And this is Sam Singh fossa Zoom first, you can re-center. You can click on plus, and you can click meters. If you want to turn around, you can go left-click and
you can turn it around. You can turn and you can change all sorts of view like this. If you just go right-click, you can also have the possibility to right-click
in the 3D view is little different because it is like if you was working in your design. So e.g. I. Use left-click first and I can position my view
around like this. And after with a right-click, I can advance exactly
like if I was working and I can
go see and we'll see how it goes here
inside my room. And now when I'm inside, if I come back left-click, I can drag and move like this. So this is a type
of things that you can do with left-click. You can move down the road. And with right-click, you can exactly like if you was
working in your design. And after to zoom-in, zoom-out root, it is
the scroll wheel. At any moment you
can come back to D. So 3D, 2D, 3D, 2D.
6. Edit settings: Let's see how to edit settings. So to edit settings, you can find on this
area different options. The first option that you can do each to change
the backgrounds. I can click here. And this is project
dimension and subnets. When I click on project, I have the possibility to
change the background. So I can go here, select a waste by grooms
blue backgrounds. You can also select some sink
like Grace, just like that. I'm going to show
you an example. Let's come back with grid
and just create some seeing I can teach here and just
crapped to an element. This element I can drag and
move on this direction. Drag and move on this direction. Also. I can change my grid by
grooms silicone wise, blue. It can be this color also. This is a grid and you can have something with infinite grace. Infinite grace. I can click on this one also. So it just depends
of what you want. If I said x is Grace, I can also work with my 3D view. And you can find
some environment. It's not done means a 2D view, it is also false or 3D
view what you prefer. So after all it just come back. I'm going to select this grid. After. If I come back to
my 2D view by default, your snap to grid one,
I think it's nice, but if you want to
increase some time, you can increase the value. Here it is. Luck words.
What does it mean? It means if I click
on this Wars, I can needed this one. If I lock walls, and now I click here, it's not possible to have
the options to edit xo. Worse, it's not
possible to AD to. Now, here I added the room, but if I click on my wall, I can do any sink. If I change look walls, now, I click on this one and
I have multiple options. You can change your project
name just on this area. So if I just want to have
something like this, I can change for project. Here object. If you
turn off this option, you will not be able
to see windows, doors, etcetera on your plan. So the most of the time
we'll keep object, but sometime you can just
activate this one if you don't want to see different
elements on your design. Here it is a dimension. I will walk in midterm and centimeter if you want to
change, you can change. Personally, I used to work in metric unit meter centimeter. Here you can activate
the dimension, you can see the dimension
or you can do is activate you have also
external dimension, or you can work with internal dimension depending
of what you prefer. The extension line
also, this one. I think it's nice,
but sometime you can remove extension lines. Why not? Also? This is a line color. So at any moment if you want
to change the line color, you can also notice little different you
can create to render, to use it to turn in your project and in
the public gallery. Here It's not about
aged parameters.
7. Create walls: Let's explain how to draw words. So to draw words, we can use this tool just here. Directly. This is
the first features. I can click on this one you
need to go or left-click. And the things that you
need to understand, you need to create two rooms. So it means you need
to close the path. I can create my first brain just like this and you
can see a distance. I can zoom a little bit, e.g. if I want to create
sodium seeing with 10 m, I can stop at tense
just like that. Now I can continue. If e.g. you press escape, you will have this
message because it is not possible to stop whether you can sell
and you do again, whether you can continue. Let's do this again
and create some sync with 10-meter dress sizes. If I just press Escape to stop, you need to continue,
just exists. And I can go in this direction. Let's make some sync
with like six meter. You need to zoom even if
after it is possible to make some adjustment and I can
come back on this direction. Let's work with six meter. Also. I can zoom little. I would go in this direction. And I can work with two meter, and I can go in this
direction with four meter. Now, I'm exactly on this area. I can come back, come back, come back and left-click
on this sprint. And automatically
I have a new room. So this is my main rooms. You can find this one
and you can indeed these parameters at any moment, if you click on this, on this one, you can edit the type of
rooms that you want. And when you click on this one, you can find also ate, the sickness of the different
hello worse. So e.g. here you have a 270 centimeter thickness
world, ten centimeter. If I want to
increase everything, I can increase and put
something like 20 centimeter. It is totally possible. If I wanted to add wall inside, I can click on these
tools and I need to click on one of this wall. And I can drag and move
on this direction, e.g. and drag and move
on this direction. If you press Escape, sometimes he will be able to create two new
room sometime not. And it's going to be a problem because if you
don't have a room, It's not possible to
separate here to change e.g. some material on your
room when it's like this, you need to take one
of these points. And you need to drag
and move little bit. And you take one
of these brands, you drag and move little bit and automatically he will recognize a room and after you make your adjustments at your
convenience, just like that. So things that I'm going to do, It's to click here. Now we have two separate room. To separate room. If you want to delete,
you just press delete and I can remove
this one and this one. Let's do this again. I can create a first print. Let's work on this direction. Walk again with ten meter. I can come back on
this direction. This direction, and
this direction. I can press Escape if you
want to adjust a wall. Because here I didn't
define anything. You can take this point and you can drag and move
on this direction. Take this sprint and drag
and move on this direction. You can also take the wall and you can extend at
your convenience, and you can just follow so
distance that you have. Let's come back just
on the indoor words. I can click here.
Let's do this again. I want to create
to a room inside. Left-click. Add a print
here, add a point here. If I press escape automatically, I have a new room created, but sometime not if
it's not the case, just use the process that
I showed you just before. You can also try and move the position of the
element like this. Let's continue. I would like to have, I would like to have a
new room on this area. Can go left-click crowd to print and crowd to know
dark fringes here. And if I press Escape, I have a new room
located on this area. And I can continue, e.g. left-click here, left-click,
and just left-click. I can process Kip and I
have a new room or so here. So at any moment you can make some adjustment at
your convenience. When you click on the wall, I will show you after, but you have different options. One of the first options
is you can either world, maybe you can think
it's totally unuseful. I will show you that
when you add stairs, it can be useful. And you can left-click again. And you can show your,
your world again. Are the options that you can do. It is to add
multiple point, e.g. I. Have this words. If I click on this one, I can add corners. I can click and automatically I have a columnar in the Maidan. Why it is useful, because
now I can drag and move these print on this
direction or this direction. And sometime it is useful, but because I can
add Mach point, now I have this
wall and this wall, so two separate worlds. And I can separate again
with another print. Now I have this wall, this wall, and this wall. And it is useful because e.g. I. Can drag and move on this direction and make
something a little different. Just here. I can add another point and drag and move on
to this direction. And I can create a
new space like this, but still on the same room. So this is why you can make
some adjustments like that. I'm going to show you
again, click here. At e.g. a. Point here. I don't know the upwind
click here, adeno dot print. And now I can e.g.
try to drag and move. And I can make some
address men dressed like this, just like this. But if I make some adjustment
here you have now is this wall and it's not
extremely convenient. And I don't have possibility. I can just add,
but I want to have the possibility to
remove this one here. In this, in this case, it is not extremely convenient
to do this type of work. You need to plan before. And you can remove a
column there also, if I click on this corner, I can remove this one. Click on this call. Now, I can remove this
one each time you can remove Cornell,
just like that. Last things that I
wanted to show you is, oops, let's come back. I think I'm going to come back. Yes, just exactly when
you click on the wall, you have the options. So internal dimension and you can find it so the sickness of your world, as is explained. So you can change
if you want to meet different size outdoor walls
and more indoor worlds, you can change the thickness.
8. Create rooms: Create rooms. Let's explain how
to create rooms. So for this, we can use this feature as well
as different options. So I explained firms that it
is possible to draw words. So you just need to click here. But you can also
create directly rooms. So first possibility
is this one. It just a basic square rooms. So you have five
meter by five meter. When you create a new document, you can also add this one. And after, if you need to make some transformation,
it is simple. You just click on
one of these wall and you can drag and move
at your convenience. You can also take one of these corner and you
can also drag and move. At your convenience. Just exert to change the type of change
the words just here. And you can also add new things. If you need, you
click on the words and you can add new corner. I can click on this,
Add new corner, and I can make some adjustment. I can click here, add a new kernel again, and e.g. make an adjustment
just like this. Well, the type of things
that you can do it just to click on this element
is exactly the same, but directly, you have a
room with a rectangle size, five meter by three meter. If I click on this one, it is another rectangle, five meter by three meter, but on a different direction. And interests come back here. If you click on this one, you can find an element with
the shapes and whatnot time. You can make some adjustment. You have multiple option. It can be this one or
it can be this one. Or you have also this
one just like that. So you select what you want. And after you can make
adjustment again. So it means I can
take this call now. I can extend depending
on the dimension. I can take this one and make
some advertisement. Also. Just here. Hates
little specific. You can just add a cube. It's not extremly useful, but it is a possibility. So after you have two type of possibilities
to create your interior, whether you can
use create worlds, whether you can add
multiple rooms like this. I'm going to show you, I can remove this one. I can e.g. create
my living room. My living room will be this one. And I can position this
element on this area. And this will be my living room. I can extend a little
bit on this direction, extend a little bit
on this direction. On this area. I'm going
to add a new point here. Add a new point here. And thanks to that, I can
go in this direction. Crowd like a kroner
dressed like this. And that's it. So this will be e.g.
in my living room. Now, I would like to add
another element on this area I like best whom I can click on this one and create
two new room. And I can make some
adjustment position. This one e.g. here
I can just snap. And after I can put this corner
directly on this corner. And I can create a new
room just like this. And just laces. And after I can continue, I would like to
create a bedrooms. I can click on this one again, or maybe I can change
this to show you. I can select this rectangle and I can snap
directly on this area. Move this corner, like this. Move this corner. And I can extend
little bit my wall on this direction. I can continue. I'm going to click
on this one again. And e.g. position from this
corner to this corner. And I can drag and move
on this direction. Drag and move this
print just here. And now I just need to follow this line to be just in front. And it's okay. This small area, it will
be like it will be like, Where do I can just grab
the URL here I ever saw. So possibility may
be to drag and move these print on this
direction, e.g. just here. And I can take this point and
I can drag and move here. But if I drag, drag the sprint, it's not going to be extremely
convenient. If I click here and
add a new point, I can drag and move this
one just like this. And now it is better. If I click, you can
find this room. You can see this room. Perfect. You can see this room perfect. And you can see this
perfect, just like that. So you don't have just one way to create your interior on base. You can use these tools, but you can just
create room after room and you just need to add a different room.
Just be careful. You need to have an overview
of your design before, because sometime it can
be a little difficult to change the position
of the different Carmel.
9. Edit room type: Let's explain how to
edit the room type. So it means when you
create a room by default, you will have just
some sink like room. And you can change
that and you can apply Arun type of
each new rooms. So first things to
do, Let's click here and just use this element. And thanks to that,
I can create worlds. Let's create two first-world
with a value of 12. I can create a second
worlds with a value of six. I can come back
on this direction with a value like eight. I can go here and
apply a value of four and come back on this
direction with fall again. And I can go here, I created this elements. So by default I have
a room know sigma. And when I click on this one, you can change the type, but I think it's better
to change the type after. So let's continue.
I'm going to click and draw something more. So let's click on this one. Oops, first I need to resend them because
it's not truly good. Yes. I'm going to re-center my
views and zoom little out. So now it's better. I can use my tools and creative
first room directly here. I can press Escape and I can drag and
move on z direction, Dragon, we went this direction. And now if I move it, I can find this new
room. Let's continue. I can add awards for his own PR from this
sprint to sprint. Just like this. And
I can press Escape. I can add a new room, e.g. here to here, and I
can press Escape. It is also possible to add
pressure to the gardens. I will expand more
in details after, but I can use one of
these tools here. And I can select Pass and laws. And I can use one
of these block, e.g. is this one. And I can see this is print
snap to this crowd now, sit exist, print
snap to this kroner. And cities is print
snap to this coronal. And cities is print snap to
seize colonial interests. Exact. If I want to
introduce Arun type. Let's denote downwards. I think I forgot to words. Let's click on this one and craton or downwards
and z direction. And as you can see, I don't have a new room, so you just need to take this
and drag and move literals. Hits not working. Let's drag and move liters. Yes, now it's okay and I
need to make my adjustment. I said exists one. I can change the type of
dress down this area, e.g. it will be so living room. And after you can drag and
move the position of the text, Let's click on this
room and just change. This will be the kitchen. I can click on this room. Sometime you need to
double-click it's better and change the type. This will be the bathroom. Let's click on this
room. That transit time. It will be e.g. the room. And let's click on this one. Let's change. And maybe this can
be a guest room, bedrooms, just like that. Now, you can find also the
dimension meter squared. We have this living room
around sati 9 m squared. We have a child room, we have a bedrooms. We have this bathroom. And whereas this
kitchen in here, it will be a nonreal
for the garden. If you go on the right, don't
forget, you have dimension. And you can apply the dimension and also the text for the different types,
just like this.
10. Add doors: Add doors. Let's explain how to add doors. So first things to do, Let's create a base. And I'm going to use credit card and credit
first-world on this direction, I can zoom a little bit, make some sink like
around ten meter. After I can go in
this direction, Let's just make some
singles smaller. Whoops, I can put
six meter and I can come back with ten
meter. Then I can close. This is my first room. I can continue
creating odour room. E.g. I. Can go here to first
room on this direction. Again, press Escape and I need to drag and
move a little bit. Yes, Now it's okay,
I have my room. Let's extend on this direction. Let's create a signal in the
room I can cry to world e.g. starting from this
point to this point. Again, press Escape. I have another room. Just maybe I can
drag a little bit on this direction and select
again these tools. And I can snap here to this corner and come
back on this direction. And I can press escape. It's moved a little
bit towards the room. It's not working. Let's drag and move this
one. Now it's okay. I've taught to do this work. If I want to add doors. First things to do,
you sit exists panels. Then you search doors. You can find room doors, entry doors, Glassdoor
one more time. If you just have a free version, you won't have the possibility
to have a lot of options. So it means you will
have just suite for frostbite first door. And that's all. Let's just come back and
let's select to entry dogs. We have these different options, not a lot for entry doors. Again, why not sit
exists one or this one? This one or let's see, it exists one and left-click
drag and you just need to drag and move and
automatically it will be positioned on the water. After when you add your doors, you have different option. So it means you can change. So opening, I can invert to go inside and I can click here. I can also invert on
this direction again. And I can also invert. So opening left or
right in this example, let's open on the right. After to do this work, you have a possibility
here to center. So the extreme Newsweek, just false view.
You can re-center. You can duplicate your door and you can eat it a parameter. Let's applies a 3D view. And take a glance. Now we have our first door. This though I can
also in the 3D view, drag and move and change
the position on my words. Now, if I want to
add interior door, Let's come back on the 2D view. And I can select room dose. You have different options. Let's see, digs a basic
dough like this one. And I have different color. Here. I'm going to show you
with the first bicycle. Let's put this one on this area. If I want to duplicate
this door, I can. I'm going to show you different
models first, I can e.g. sit exists one and I
ever so more options I can why not select
this one just exists. And I can change the opening. If I go into the 3D view, you can find different models of dose with different
type of size. Just exits. If you click on one
of these though, you will have the
materials options. And if you need to, e.g. if I click on this
one, materials, if I want to change some sink
like a woman might tell, yes, it's possible.
Just like this. Let's come back to the 2D view. So most of the time you
will reuse the same dose. So I'm going to
click on this one, remove this one, remove
and duplicate this one. First, I position this one on the right direction
and the right opening. Then I duplicate, so I click on copy and I can
position on this part. Let's invert Z direction. And I'm going to
click here copy and position this one on this area. And I can invert the
direction. Also. Just like this. And it's not more
difficult that that this process you just
need to click on doors, your syllabus or
dose that you want, and you can position your dog. You have also glaze though
it is just this modellers. If you want to, I did
Metallica one more time. It's the best thing
is to go into the 3D view because you can
eat it the material here, but you won't see
where the surrender. So acidic or 3D view. You can also change the size. If I click on this though, you have wider eight
and levitation. If I would like my door. Finally, I have 220 centimeter. I can tap 220 centimeter
integral blends to door as not the same size. Now, let us come back with something bicycle
204 centimeter. Let's assume a digital
material that can Zoom. Most difficult things when you want to edit the
material is just to see what are the
correspondents. I'm going to explain that. I can click on the
door materials. And so why is color here will be the main material
of my dough. And this one is
probably for this area, and this one is
probably for ender. So if I click here, e.g. let's make some sink in. Y's can apply wise,
just like this. And it's even not, not this one. It is something little
different about this. Why scholar? If I select this one and
I'll just change for wise, Yes, Take your glands
now it is this area, this area and this area. Strange e.g. about this one. If I change for black color, I don't really see any element. Can unclick. Maybe, yes, maybe I have
this small element here. And this is the black color. Let's click again materials. And if I put y's, yes, it was this element. And you found to change
the color of my door. Each time you change the view, you need to de-select
your selection. And if I come back to
this door just like that, you will realize, so first
I'm going to change again. So position. You will realize that it's also possible to close the door
and open the door. You have open or close. If I click here, I
can close the door. And if I want to reopen, just click here and
you can reopen. I want to have my door with
a different main color. If I want some sink like Brian, I can search on my color picker, so brown color and I can
validate just laziness. I'm going to come
back to the 2D view, removes this one,
click on this one, duplicate, and position again.
11. Add windows: Let's explain how to add
a Windows, ten Windows. Let's reuse this base. We apply different doors, and now we are going
to apply Windows. Click here, ciliate this
panel first, search windows. And you have these
different options. So you have different models. But I'm going to show you
is that you don't have really a big, big windows. So one of the basic models
can be this one, e.g. I. Can put this
model stress here. Dell bicycle models can be, is this one but it is
a sliding windows. And I can position this big
sliding windows on this area. And after you have done models, this is the same, but it
just different colors. You have also more
specific windows like e.g. this one, I can put
this one dress here. Andrew principle is the same. You just need to go left-click and you just need to
drag and move on. So well, in the
rooms that you want, you can just drag and
move just like this. You can also have window
just with one door. Here. I've talked to
position your Windows. If you click on one of these, you can find a wide
eight levitation. So if you need to
change, it is possible. Let's activate as a 3D view. First. If I zoom in it aloud, you can find the appearance
of the different window. Why it can be useful
to change e.g. is a size or against
the levitation. Let's take this Windows. I think this Windows is supposition is not
extremely good for me. So I can click here. First, I have two options. I can click on this arrow
all then drag up done. So I can move up done like this. Well, I can just
enter what they want. Fossil invitation. If I want to leave
edition of 100, I can tap 100. If I want to change the
size of this window, I want to have 100 by 100. It is also proceed, but just like SAT
if phi acidic e.g. this window, I want to change the position that can
change levitation. Or I can drag and
move on my wall. And I can change.
Also. A white ends are eight if I need it. You can edit all the windows. If I sit exists one, and now I want to edit the materiality is super
simple. You click here. You have two colors. If I click on this one, Let's apply some
seeing more in brown. And this color is more for
the collapse of the glaze. And I'm going to click here and select Yes,
Moses brown color. You can also drag and
move your window. If I just come back color, I'm going to come
back with a glaze. In ways they just
change the frame color. Here's, this is a big
window as you can see. It means if the size of your
words is just like that, It's not extremely convenient. You need to reduce this
window or you need to increase the
size of your words. But I can change. I
have white eight. If I want just 21048, I can take 200, 1,024
white. I can change it. So we have a small
limitation on this area. So now what's happened
if I have this type of window and I want to
change for $1 Windows, it is possible you can just
click on this one first, I can come back with
a wise materials. The second thing is to click on the window
change wide and eight. I'm going to change
my aid for e.g. 210. Just like this. And now I need to change
the position like that. And why not to put a
little levitation? Levitation if I apply e.g. a value of zero. And I click here,
take your glands. It's not extremely good for
the position of the window. So this is why I need to
apply your little levitation. I can change that
just to apply for. And if I apply for centimeter, it is perfect for the
position of the window. So be careful you
don't have to put zero because you
will have offset. So it is better to check that and change this
example. I need to put e.g. four centimeter and I convert this one to
a door or window. Maybe I can make something
little higher with 220 exits. And it is same for this one. I can, indeed this
one, let's apply 220. I can change the rotation. If I apply zero, it
won't be extremely good. So I can apply e.g. for and I can take outside. And let's shake. And yes, it looks nice.
12. Add elements: Add more elements. We have seen that it is
possible to add doors. We have seen how we
can add windows. And it is also possible
to add more sing. So it means you can select these panels and
you can add stairs. You cannot colognes, or you cannot do roofs,
you cannot erases. Let's first create two bays. Again, I can click here
dressed credit to room. Drag and move this room
and this direction it just external little
bit here. And here. If I just go on this area, and I said exists 11 of the things that you
can do it to add like e.g. oxygen's decorative elements. So you can put one
of these inside. I can drag and move and
put a notch where I want. It can be, they can
put this on the wall, but if you put
this on the world, it won't be the best. If I select my 3D view. You can see so out here. And I can drag and
move this one. And you can also put this
on the wall just like that. I'm seeing and theorists thing
is you can open directly. If you put this one on
the wall, you can open. It is convenient when you create some single
separation e.g. I. Ever leaving room. And I want
to credit to separation. I can add awards, e.g. I. Can click here,
dressed like this, and I can press Escape. Let's drag and move little
bit to have a new room. And I can take this element
credit to rotation first. And position this
one on this area. It is not possible to,
to create a rotation, but I can position
this one on this area. And if I activate my 3D view, we can obtain this type
of render, just exact. If I click on this one, you can find your
wide and eight. We can also click here
if we want to close. But definitely it's, maybe
it's not extremely convenient. So anyway, you have also the Odell models
that you can use. I'm just going to come back
and click on this one. Delete. Let's make
an adjustment. Now, inspector, if I come back to all these
different things you have also e.g. partition, it can be good if you want to
create a separation, you can drag and move in. Put the separation
where you want. After e phi just continue. You can also add
stare will explain after how you can
create two new levels. And in this case you will have the possibility
to add this tail. You have also some columns the corrective colons face elite to declarative
colognes may be at, can trust to try this one
inside and put this one here. After you have also more models, Let's try another one. If I just come back to stares, you will have multiple options of stair will show
you later laughter. You have also a garage door. If you create a garage, you can add a garage
door, fences, AND gate. So something interesting
or so if you want to extend onto a gander and
I can click on this one. First. I can use pass and law,
create an element. And I can drag and move this
first point on this corner, and drag and move this
point on this call. Now, let's make an
adjustment here, and let's make an
adjustment just here. So I created this first. These are little garden just
in front of their house. If I just come
back, I can select fainting gate and you have different type of options, e.g. a, yellow wood panels
or element like this. I can just go left-click,
drag and move. You can change the wide so
deep at your convenience. So if I want to increase, I can maybe work with 400 legs that can
increase maybe 440. And I can duplicate my element
if I need a duplicate. And I can position
this element here. And I can create two
rotation 90 degrees. And if I zoom a little bit, I can put this one on this area. If I select my 3D view, you can find an overall view. This fence here you can find this element also. If I just come back, you can also add a roofs
and you have also erases. Sometime it is useful because if I come
back to my 2D view, I can select an
element like this one. First position, this one here. I can select an element
like this one and put this one directly
along my house, can create a
rotation 90 degrees. Put this one around this area. If I want to change. So wide NGDP, it's
possible, let's put 450. Maybe I can change
this one or so, 620, just like that. So each time you can
edit the materials. If I click on this element, Material Options and I
can eat it, this one. Whoops, I didn't selected
the right to demand. Yes, against it exists one. Then I can select style. This is a wood materials. If I want to have
a different type of wood material like this one, it is possible if phi
silicon, my fence, here, it is the same. I can have the state Options. And here we have would
institute CO can change e.g. this one selected different
can be this color. I can also find different
type of categorized. So why not to apply
some bricks? Also? I have word here
and I can change. And if I click on this one, materials, wood, these are same. I can search the same
element if I need, I can try to change. When you have
something like this, you have a lot of materials. So be careful if I just
click here you have pass facing colloquial of
texts, teal color. Just like that. It's probably better
if I have a wall with a different size
here, it's too small. This element is to write. The last thing that I
wanted to show you. If e.g. you want to add something
like a roof, it is possible. Just come back to these panels. Hoof. You have multiple options. Window, you can use
specific proof, but if you use a type
of force like this, take your glands, you will
have to change the world. We'd have to change the
world, changes style. Or you will have to add
another element like e.g. this one to create your roof. Let's come back to the 2D view. Let's sell exist panels, roof. You ever saw models
directly made. So it means so e.g. I. Can use directly this models. Left-click and just position my models can go
in this direction. Rotation 90 degrees and put
them roof on this area. And I can change the
size of my roof. I just need to check
my words here. I think that can tip 620. But the deeper Let's work with When Tucson it
depends on the size here. I didn't put specific size on my house and I can position
my roof just on this area. City exists 3D view. And you can find the render. Things are positioned. It's not extremely nice, but I can make some
adjustments if I need.
13. Add furnitures part 1: Add furniture. Let's explain how
to add furnitures. First things to do.
Let's create a room. Here. Creditor room. Let's
position this room on this area a little bit. So size. Let's make some sink or wrong
sati, meter square. And let's see how to add
the first furnitures. You need to grow this panel. You can click here and you
have multiple categorize. First things to do.
Let's take interest to furniture's here with all
these different options. One more time you need to
have the paid version. If you want to have access
to all library of furniture, or you will add just
two first possibilities when you want to
add from each us. If I want to create a base, e.g. for just maybe for a small apartment,
something like that. I can start with credit with
a bed so I can click on bed. I have different
options and I can select full queen and king beds. So as you can see, if you have the pro version you will have, you will have choice. If you don't have
support version, just the free version, you
won't have really choice. I can e.g. select this one, left-click and I
can drag and move inside my room. And
I can come back. If I want e.g. a. Sofa, I can just click here
select armchair so far. So this one. If phi acidic just so far you have straight
corner multiple options. Let's apply straight. I'm going to click
one of these models. Why not at the beginning
these models and left-click and put
this one on this area. Maybe I can add a window and door for us before to continue. Click here. Select adult first. Let's position a door yes, on this area and invert. So opening and I can
position or so one window and drag and move
this window on this area. I've taught to do this work. I can come back to my furniture. So I put us so far. If you want more, it is you can come back on
this type of furniture. You have also different type
of shares that you can use. Or I can select another
type of armchair. You have a so-called now I'm
chair or this possibility. Let's go left-click,
drag and move this one. Let's create two
rotation 90 degrees. And why not to position
this one on this call? Now, I've taught
to do this work. I would like for my apartment, I would like to table and
I would like to share. So I can click on the
category table chair and I can select dinning table. You have these
different options. Let's acidic something simpler. Click on this one and I can position my table
around this area. Or maybe I can position. Yes, we were on this
area. It's nice, but I would like more I would like to share so
I can come back. You can see Lex tours,
chair bookshelves tools. Let's see the x shares. And I can e.g. click on this one to
have would share. I can duplicate at
the same time and position and odor on
zero del direction. Each time when you click
on your furniture, you have multiple option. You can duplicate,
you can invert, you can crop
rotation. It's okay. Maybe I can take this
sofa Crato rotation and put my so far just on
this direction and turn. This one still exists chair credit to rotation
also 90 degrees. And so it exists chair and
create a rotation 90 degrees. Let's continue with my
different categorize. I would like something like storage because it
is small apartment. I'm going to put this one on the same room so I
can click on storage. And why not too silly? Like a dresser or
a wife and Rob, and let's select 21 drop first. It's not extremity
and protons, e.g. you don't like so materials, you can change the
materials after. So I can select this one. And I think it's little big, but definitely it's
not a problem. You can click on this one. And you have different
options, wide, deep 81, knockdown,
angle and levitation. So it means I don't want
something like this. I can change for 140 and the Deepak can
change maybe for 50. And so eta can change for 200. Now, let's create
two small rotation, 90 degrees and position this
element along the words. I can continue. If I want to have something like a shoe storage
at the beginning, I can select this one. And I can drag and move y naught this element and position
my shoe storage. On this part. I want to have a TV stand so I
can select TV stand. Select a model like this, simple models and put
this one on this area. Just like this. So
after each time when you add these
different element, you have the possibility
to AD2 element. I'm going to go in
my 3D view first. To take a glance about
surrender and zoom inside sometime you need to wait
and take your glands. Definitely, it's very great. We can have very grid design with grid materials if I was on, but I want to change
the materials of this TV stand and just
click on this one. Don't forget some time. It's not extremely
convenient, acidic, so Wald's need to press Escape. Sometime it is difficult
to select an element, just change the view. You need to change the
view. Now it's okay. I can click on this one. I can change one more time X2 position all and drag a dog. Or in this example, and I want to change the style. So let's tie would. If I wanted to make
some seeing in black, dark wood materiality
is possible. If I want to change for
this one, it is possible. Just like that. Let's why not see leak? Let's see this one just here. And if I sit in my table,
I want to have the same. I can click on the table first. It did the style would e.g. if I want, I can still exist. Same. Just like that. I can click on Share also. And materials, wood. And I can see the same. I can reuse one of the last
color that I use here. You can find your less
colors that you use. And sometime it
is pretty simple. In this example, it didn't apply my element, its little strange. So I need to apply
again on this one. And that's it. So
if you want to have exactly the same material
for all your furniture, it is possible if I want
to edit my bed also, we have a lot of pillows. Whatever execution,
wherever base I can click on my bed first. It's a little complicated
to ceilings of furniture here with
this type of view. Yes. Now it's better and I can change what Susan materials
have multiple option e.g. you have this one. And I
can change the text here. You can find different
categories of materials here. Stay. And I can put e.g. this one. And I could continue if I need IFRS on
policies type of pillow. And let's put this pillow in red and I could continue if I need a base for
to add furniture. So this is first base.
14. Add furnitures part 2: Let's continue with furniture. So we have seen how we can drag different furnitures to create
a redesign of this form. I can continue e.g.
with another room. So the things that I'm going to do is to first click here, add another room so I
can click on this one. Drag and move. And I can position my
first corner on this area. In position my second
corner on this area. I would like just
to cry to bathroom. Not too big bathrooms
I'm seeing quiet small. And let's add the doors
at the same times. Doors, room doors. And left-click position
of doors, e.g. just on this area
can invert effect. Let's move little
bit this dose or so. So I've talked to do this work. I need to change the category
so I come back furnitures, and this time I can
select the bus home from each year's first things to do. It's why not to select
bus and show us. Let's select a model of
sugars like it can be, maybe it can be this one and
put this one on this area. Just like that. I've taught you have
multiple option. If you want to add the bus, you have all these
possibilities. After I would like
a washing machine. So I can see gouache by sin. We have doubled seeing
suspending freestanding sinks. We can find with
furnitures also. And let's see leaked.
Let's take e.g. this one. And I can put this one just may be on this direction. Rotation 90 degrees. At the same time I want
to call it so I can click toilets and click on
one of these, e.g. this one and drag and move here. If I want in a bus home, if I want to add for nutrients, it can meet cabinet
and shavings. I can click on this
categorize shelves. And let's apply phrase nonpolar small furniture like this one. I can apply this one
here. The effect. If I continue, maybe apply
this one on this direction. And I could continue with more. I have multiple
options. Just here. Let's select the 3D view and take a glance
in, in the bathroom. Just like that. So after it is exactly same, if you select one of these, you will be able to edit
the parameters. So e.g. I. Can click on Show
warehouse and I can indeed the materials here
you have a lot of different type of coulombs because we have a
lot of elements. If I just sit exist furniture, it's more simple
addressed in the style. One would materials.
One more time. If I need, I can eat
eat these materials. If I want to add some
sinful kitchen, e.g. you have little space because
it is a small apartment. Maybe I can add a small
kitchen on this area. Let's come back to my 2D
view furnitures first. They ever saw the
kitchen categorize. You have kitchen cabinet but you can thanking Chin cabinets, but you have also kitchen sets. I click on this one. You can directly have a set sometime it is
extremely useful. Slipped along to
find so reserved. Let's come back on kitchen sets. I need to wait. Yes. So now it is. Okay. And you have all these different
type of kitchen sets? Sometime it's not too big. Sometime it can be big. Maybe I can position this one. But you have all these
different options. If you want credit
to a rotation, it's little big, but I
think it will be perfect. I can position in my corner. I can redo it a little
bit just so far. So why it is very large, I can just change for 160 centimetre small
so far dragon move also this from micelles. And yes, it's perfect. After I will show you
that it's possible to add to add elements here. So e.g. we have
electrical appliance. And if we want to add fridge, any things like this, we will be able to find on this area. Here. We have put main things. Let's come back to the 3D view and take a glance
these nice render. You can also click on this one. And if I select texture, I will add a lot of texture. E.g. you have this element. If I want to change, I wanted
something more in wood. I can change civic food. Acidic than Odell one. Maybe I can have exactly
the same type of foods that are using for these
different furnitures. But if I want, I can try
something different also.
15. Add decorations: Add decoration. It is possible to add a
declaration for this. When we go on to furnitures. As you can see, you
have the possibility to add decoration and
you can continue. You have all these
different options. Let's start with decor. If I want to add a mirror or
I can use this option mural. I have multiple models. Let's e.g. CDX, this one, these models, and I
can drag and move e.g. my models around this area. If I want some sinful
lifestyles sometime it is useful if you want to make
something like decoration. You can use these
different options. Again, why not use this type of book and put the
book directly here, cranial rotation
on this direction. But I will zoom option if you
just want to add a pillow, you can add a pillow, e.g. on, so bad you have this type
of pillows is type of view. I think I'm going
to remove this one because it won't
be extremely good. In my example, if I want to add some sing
for the bathroom, I can, why not celiac this one and drag and
move into the bathroom. So each time, if you want to add more sings, it is possible. I can assume little bit. I have also vars and flowers. If I want to add some sync
directly on my table, I can add flowers
just on this area. If I need to add something
like decoration. Like a plant, it can be useful. Maybe I can drag
and move a plant. Here, it's more planned, so maybe I can put this
one around this area, but it's possible also
to add more sings. You have also Kendall's
figurines and D cross. C is also different options
you have also this one. You can add a crisis. If I continue, why not
to put also this one? And maybe I can drag and
move on a specific area. I can just put this one here at this moment and then just
check on the 3D view. Something very important is
position of zero element. So if I select this table, you can find the zoo eight. And here we have eight. I'm going to turn a
little bit so I can click here 870 centimeter. It means if I select this
element with flowers, so best things to do each to
apply the same levitation. So again, just step 70. Sweet. If I swipe, put this one here, you can see this element
directly on the floor. Here. Again, find this
furniture for TV. And I have eight
of 43 centimeter. So it means if I select
this small plant, I need to position also
at the same level. So here you have 43 centimeter. If I click on this plane
and need to change the levitation for
43 centimeter. Now, as you can see, it is definitely better. If I go little bit on the world, you can find directly this
element, this is a mural. I can click on this one. And if I, if I want to
change the position on the wall up and
down, it is possible. When you click on early melt, exactly like a furniture, you have different option
if you want to duplicate, you can duplicate this element. As you can see. If you want to remove,
you can remove. When I click on this one, I can also create some type of rotation if really I want here, it's not extremely useful. But if I want, I can crop rotation and I can
change the material. If I click on this
one, you can find the frame into glaze. So it means if I click here
and I apply some red color, I can change the
frame for red color. And if I click on this element, this small plant, and
I go and see options. Just click here, materials. As you can see, I can change things are maybe a
duplicated this one, so it's not extremely good. I'm going to click on this
one again and take a glance. You can change the
color of a bot, e.g. I. Can use blue color. I can change the
color of the groomer. Here you have multiple options. By default, we have
grown materials, but if I want to have
something different entities, placebo, if I just continue, I can see leak y naught can
be something like this, something lazy sway of different
options when more times. If I just come back,
this is a cool off the leaves and I can change
the color of the leaves. Also far more this
type of green color. It's not exactly so leave it just the base of the plant, e.g. the leaves, It's not
possible to AD2 color. Sometime you won't be
able to edit every sink. If I just take your glands. So about flowers truss here, I can just turn a
little bit, zoom here. And if I take this element, it is exactly same. Attention. I can change the materials
here you have some cooler. If I just change this color in this
example, I can change. So top of the flowers
it's possible, but sometimes it's
not visible here. I can change also
this green color. And I can change the
color of the vase. If I want to have some seen
more like pink, I can change. Also. If I just turn here
you can find the book, so position is not good. So I need to check
this furniture, this furniture of eight
or 50 centimeter. I can click on the book and Chancellor levitation
for 50 centimeter. Just like this. So it's
extremely convenient you can do. You can make a lot of things. I can click here and TSM, I can go and materials and
can find texting materials. And we have this
putting materials. If I want to change for wood, it's possible or I can change
with also multiple options. If I just come back to my 2D view and select
one of these element. So one more time I can click
on furnitures, continue. And we have also moccasins
here to adjust the crop. But you can do a
lot of more things. If you want to add contents, you can click on curtains. And I will have
different type of options so I can drag
and move curtains, e.g. on this area, I can
create some rotation. If I want to change the size with the white aid,
it's possible e.g. I. Can change the way
and just put 220. And here we have curtains. If I just continue, you can also have
element for kitchen. It can be just like a cap. Eta can use e.g. this one and drag and
move on this direction. Change. So wide,
Let's apply 120, 150 and put the carpet just
on in front of the kitchen. I think something is
wrong and need to move. Again, this element, I
think I move by mistake. Now it's better if I
just continue your will. So kitchen and different
kitchen element from declaration. So each time if
you have a table, something like this, you can
have element of decoration. You can have also
multiple plants. It's plans that you
can use for theorists, but also some time for insights. We can use this one e.g. for inside it is a possibility. And I can also use a
mount for the TRA, so I can use this one. Why not to position on
erase this one also. If I just continue, you have also element like can put element,
early days element. So fireplaces, a lot of options. At the end of the world, some things that you can do
each to other people, e.g. you can add a guy and if
you want to add a woman, you can drag and move a woman. You can also add
pets if you need. So you have pets, human to dog or cat, anything that you want. I can put the dog in the
garden just like this. Anyway, not to put the
cat inside on this area. I can take your glands
about my 3D view. And you can find these people. And you can find these people
also as a man and a woman. If you click, you
can change the eight of wide and deep sea foods we want to change later the
ratio of the character. Here we have the cat
same, we can change. And if I just go
outside, I absolute dog. Even if when you have something
like this, you can click. And if I go on materials, I can change also the
color of the dog. If I if I want to have a
dog with different color, It's just like these
shades of black color. I can change color. It's small for the eyes, not for everything, but you can change your cool
off a few things. And semi acidic this element. Here I can duplicate. And I can also
click on this area. In this example, I can only edit to the material
of the stone. So as you can see, we
have lots of options to add more elements
to increase. So design at the end, she also reputation
is not really good. But I'm just going
to remove this one.
16. Add appliances: The API and Cs. So we can add a, p and c is
also this extremly useful. It is more elements that you
can use for your design. So click on furnitures again. You can find
electrical appliances. One of the first things
if I want something like a fridge, you can find e.g. kitchen appliance and you have stove, refrigerator,
microwaves. Let's apply a refrigerator and select one of these
with maybe a white color. I can take this one, but
this is a black color. But if I want to change the
color after it is possible, I can just tell you have
a little space here, it will be perfect. If I click on this one, materials, you have all
these different options. So if I want to put
this one in y's, I can put, if I want to
put this one in wise, it is also possible. Just like that. If I just continue
one more time, I can see the kitchen opinions. So if you want to starve, you have what you want. If you want to add
a ***** waves, it is also possible. Take a glance if I'm
selected my 3D view, I can zoom Italy bit
here, e.g. this space. So if I drag and move and
microwaves just on this area. Yes, I can see the
exam microwaves. Take a glance. I need to
make some adjustment. First. Sometime it's not
extremely convenient. I'm going to come back
to my 2D view first. Syllogism microwaves
crowd to rotation here, and I can drag and move. I have little space and
here it will be perfect. I just need to change
liters of position. When you click on this one, you have alleviation of 78. If I select my 3D view,
it's not perfect. So I need to change that. Sometime it's the tone in
trouble to select element. I can change the limitation. So now it's okay
and I can drag and move and put this on the top. Just like that. 87, you can click on this one and you can
edit the materials. You have different options
at your convenience. So it is just to have an
idea about what you can do. Let's come back to the 2D
view and click on this one. Electrical appliance. It is also possible to add e.g. a. Computer to add equipment. If I click on computer, I can put one of these. I didn't add an element here. So you have different
models of computer. I can see it exists one, drag and move directly on
the table. Let us come back. You can see leaked also. If you want to add socket,
it's also possible. Sometimes it can be interesting. Who's all appliance? If you want a washing machine, you can add a washing
machine on the place. If you need to add
video and TV, e.g. I want a TV, I can drag
and move this one and positions at TV on my furniture. The other so different
types of equipment, but sometime it can be
further down then you can add something for the
gander and if you need. So you can complete
e.g. on this area. I can credit to small
partial and click here percent loan can drag and move this point
on this direction. Dragon moves the sprint
on this direction. Drag and move this print, and drag and move this printer so I can create a small
patch show on this area. And if I want to add some
sink in my furniture feels like like an
equipment can be e.g. this element can, if you want, add this element
also, as you can see. The last important things is
if you want to add light, you can find electric
LPNs lightings and you have different type
of lights that you can add. E.g. if I just won't, table lone pair can
click on this one. And I can put a table lamp
on the array. It can be e.g. just here to rotation. If I want to add a
different type of lighting, like a chandelier, you can
have different type of models. You just need to be
careful about the size. I can add e.g. this one here. And you can also add
just selling light. And you have modern
selling line options. Why not to apply some sink
like I think it can be this one for bathroom
in the living room. Why not to put an
order like e.g. this one just on this area. You have or this
type of auctions. Just be careful
when you position this element about limitation. Because if I go on my 3D view, maybe it's a computer of the table won't be
directly on this area. Here. It looks nice, but
sometimes it won't be Perfect. So if I select my 2D view, I can click on this
furnitures and I can find x2 eight is 43 centimeter. So it means if I select my TV, I need to have levitation
at 40, 40 sweep. Just like this. To have exactly
the right correspondents. It is same. If I click on
this table, I have 873. So it means I can
click on the computer. It's a little strange here. Yes, 73. So I can click on the computer
and leave you Titian 70. Sweet. I think I made a mistake. Just on this area. Yes, it was live
edition or it's okay. If I click on this lamp, I can change the
limitation for 73. Also. You can find directly. So alleviation of this slide. Something important. You can reduce e.g. the eight phi one to put just 40 I can put for t.
But if you change, Here's the AT, It's not
extremely convenient because you will lose the ratio. You will lose the ratio. And I think it's not
extremely convenient. So the best thing is to keep, so right size are to
choose a different light. You can find these slides
also in this area, and you can edit it directly. So cola one more time.
17. Add favorites: Let's see how to add
furniture in February. So we have the possibility
and this area, we can add furniture
in February. So the first things to do, I can select one
of these element, just cry to room on this area. And I think I can keep this
dimension or if I want to just extend a little bit, I can. And just let's add
few furnitures. I can click here and
select e.g. just. I can also just add the
doors, first room doors. And let's apply a
dose on this area, can invert the position. Let's directly window. I can click on
Window, select e.g. this one, and drag
and move here. And I can add furnitures or so. I can add to bed, like e.g. this one and just
put this one here. Let's add e.g. a. Storage. I would like to add what robes. And just click on this one and
put zero right drops here. And I could continue. I met convenient to have more things. It can be also tables, chairs, Dean in table. Just like this one, just position this one here. It can be a lot of element. Any things that you want, you can put this in February. It can be also just
to just to opinions. You have different options. You can also put
this in February. Let's work with another
type of storage. Like a stand. I can see leak, maybe this one put
this one here, create a rotation
just like that. So to add in February it again just click on
one of the furnitures. And you can just apply this
clicking on this icon. I can click on this one. Maybe I can click on this icon. And you can repeat
the same for door sometime it is useful
also for door, or it can be useful for Windows. So you can click on this one and perfect after to do this work. If e.g. I'm on a
different project because you will find
this on a new project. If you create a new project, you will have this again
here in this example. If I just create another room, I would say that can teach here. And credit to another room, e.g. just on this area. If I click now and my favorite, you can find the element. You create a new document, it is same, you will
keep your favorite. And after it is interesting
because it is faster, you can ask for some
elements in February and you can reuse just with a
click and drag system. And I can click on
this one again, Just like that, or click on
this one again, dress here. So nothing more for this. If you just click on an
element in February. Now you can see you have
this icon selected. You can to at any
moment these activate. And if I just click
here, just come back. Now, as you can see, I don't have this
element anymore. If I click on this one
I can do is activate. Click on this one. I'll just click on the
element is activate. Click on the element,
There's activates. So now if I just come back here, here at this activity, it also favorite items. After up to you if you want, if you have elements
that you will reuse a lot of time
in different design, you can just put
this in February.
18. Add floors: Let's explain how to add flows. So to add flows,
at the beginning, you can have, you
have your first floor here and you can add a new flow. So first on this first floor, I can create some
things so I can zoom out and I can try to base just
create one element, laces. The first things to understand. If I click on this
element and add e.g. just room door, and I just add
a window at the same time. Window and drag and
move this window. So this is our first floor. As you can see, if you just
have one woman like this, you want to add a new flow. You select your 2D view. And when you go here, you select add new flow. Now I created a new flow
with exactly the same size, that is the order flow
and you can eat it. So this is a first flow and
my new flow I can click here and I can tap second
floor just like that. And after our floor, it's possible to duplicate. If you duplicate,
you can create two nodal flock cookie laces. It's possible, and
you can delete. You can also remove a
flock clicking here. If I sitting my 3D view, as you can see now, we have a second floor. And on the second floor, if I want to add
element like e.g. a. Window again, can drag
and move this window. So it's not extremely complicated
to add to add a floor. I'm after I can put my window. Yes, I need to put the windows
here and now it's better. Yeah. So now what's happening if
you have different rooms? So I can click on my signal
flow and removes this. And now I just have my first
flow and I can delete, can delete this one. And I can delete
this one. If e.g. I. Have multiple rooms that just click on rooms,
credit frost room. And these are
really, I can extend the turbid crowd to
Saigon room on this area. And just walk like this. Create another room again. And credit to another room. And I can duplicate this room. Oops. Let's make
some adjustment. Yes, just like that. So if e.g. you have some signal
exists, I can extend it. There'll be this room. After we cannot do is we can
have a lot of seeing. I'm just going to make two
rows at the beginning here. And invert. Let's add just a few windows. It just for style, just to not add on nasal worlds. And I can click here and select window and drag and
move a window here. Then I can duplicate, maybe I can drag and move on
this area for this example. Now, what's happen? If I credit directly the new flow when I have
something like that. Again, click here, add new flow. And one of the problem
is, as you can see, we just add an element on last, on the last room selected. E.g. is a restaurant
and y's here. And if we add a
new flow directly, we are on this one. I'm going to remove this flow. So this is our first row, e.g. I. Click on this one,
I go on, add new flow. So new flower will be
on the last element. But you can make
some adjustments. So it means you can e.g. extend and just have exactly
the same base that you have. Just pillow. So you can just
create your base. You can extend this one here. I can add print. So I can add a new point here. And I can add a new doc print, and I can add
another print again. And thanks to that, I can
drag and move this print. Dragon moves these printers here and drag and
move this point here. So normally now we have
exactly the same base. If I select my switch, the view, it's okay, we have to send base, so you need to make some adjustment to
have the same thing. And after to do this work, I can create my element in size. So I can use these tools, rooms. And if I want to create doors, autocrat trusted him, meant I can just click here, escape. And just sketch here and escape. And it can make some
adjustment, e.g. like CS1. And maybe
this one thing, It's not extremely convenient. First, I need to
change the position of this one and change the
position of this one. But as you can see,
I don't have room credited here even if
when I'm moving this way. So now it's okay. Sometime definitely
it's not convenient. And that's it. If I want, I can create
a nodal worlds separate in two-part dress here. I can press Escape. I don't have a neuron credit, so I need to make
some adjustments. Maybe here, maybe here,
and now it's better. I can walk again horizontally. And if I need, I can add e.g. Windows again. Just like that. I'm not going to
enter too much in details with the furniture. So m is just to show you how it works for the step,
and that's it. So now we have our second
floor just like this. And you can repeat this process
as long as that you want. So we can add a
new flower again. But if you add a new flow, you will have to make some
adjustment for your base. So if I create, add
new flow again, now I have this one
and as you can see, I need to repeat the
process one more time. Just like this.
19. Add stairs: Let's explain how to add stairs. At stairs, it is
sometime difficult. It is not extremely
convenient in this software. And I will show you
why and how you can add a stairs between two flows. So the first thing is to do, Let's create some symbolic code. I can click here and
just create two room. Not with this, I'm just going
to create a room with this. I can go left-click and drag and move this
room and this area. It just extend a little
bit on this direction. Maybe I can make something like 40 meter square and
extend little bit here. So it's okay for that. If I need, I can just add
the doors at just one dos to have a better
view of surrender. And I can just add a window to have also a better
view of the render. Just exits. The first thing that
I need to do each to craft a new flow. So again, quite a
new flow like this. And as, as explained
before here it is simple because I just have 11. I just have one room. We have exactly the
same thing on the top. Just like that. I'm going to add the stairs. You can find this in
constriction stairs. And let's take e.g.
with a basic steps. So it means this one, you have all these
different option of stairs. You will try to adjust this
depending of what you choose. Let's take this basic example. I have this term and I would
like to put these e.g. who runs a miter on
my leftwards effect. And I can zoom a little bit. So now after two
positions is element. One of the problems that I
have is in this software, if I select my new flow first, I can rename for signal flow. And in this second floor, if I select my 3D view, one of the problem is I put these answers on the south
floor. It's not good. I'm going to redo again. I can press Delete, select my first floor and put this one on
the first floor first. Yes, just like that. So if I come back
to my second flow, 3D, take a glance,
we have this render. It's not extremely convenient because automatically
we don't have an opening sometime in
some software online tool, we can have an
opening in planet 5D. No. It's not
extremely convenient. So what is the process to
respect some things that you can do it to select first in 2D. So first floor. And in the Fraass flow, you can click on Zoom
room and you have the possibility to ICT
cells or ite flow. Let's apply either
sells for first floor. Now change for second floor. And on the second floor we
do the opposite process. We need to click on Zoom room and we need to add
the floor. The floor. So thanks to that, we can
have this type of openings. And if I select my 3D
view just like this, you can find now we have
this type of friends. Just like that. If we want to see everything, we can just either flow after, I'd say just for this view, but you can wake
period selling after, maybe it's possible, but at this time it's better
to hide a re-sync. Now, in my second floor, if I come back to my 2D view, I can reuse this element and
try to position in the same, in the same location after I will have to make
some adjustment. And m is to create two rooms. Click here, create two rooms and drag and move your rooms
in this corona and extent, you need to position
where you want this sprint and when you want
this print, just like this. So I've taught to do this work. You can either
worlds because if I click on my 3D view and
you have this window, but if I first things to do, I can click on
this stair I don't need on the second
floor like that. And if I click on this words, I'm not sure I can
click here efficiently. Yes, if I click on this one, I can either water,
just like that. And now it is opening, but it's not perfect. I just need to have
a small part here, extend this part to be
able to go in this room. So now I've taught two. Either you can just
click on this war, other corners like that. And thanks to that, you can pull just here. I need to add more corner
or second click here. I don't know, they're
just like that. And I can drag and move
in this direction. And click here adeno dark corner and drag and
move in this direction. Now is there M is just to
make adjustment depending on the location of the flow. So if I click here,
it's not really good. Click on this for some time. It's difficult to click
on this wall and either. And now, as you can see,
it's almost perfect. But you just need to
make little adjustments depending on the
position of the stair. So it means maybe
in your 2D view, you can drag and
move little bit, make some adjustment
with this position. Now, if I select my 3D view, now I can obtain this render. But here normally we have a wall and this wall we can
recuperate this word. I can see my 2D view. Click on this wall. Rich period. So view, perfect and
sharing this example. So perfect things
will be to have an element like that
and an opening here. And we can reuse this word, take your glands just like this. We can also just use this world until this
path and create two door. If I just want to have
some single opening like this, it is good also. Truss here. So this is an example about how
you can add the stairs. Definitely. Yes, I confess, it's not extremely convenient. It's not extremely
economic to add stairs between two flows
in plaintiff failed, but there is not
a big possibility because you don't have the
opening automatically, because you don't have Zoom
running automatically, it's not extremely convenient. So you need to try
to arrange yourself. And sometime it's
not extremely good.
20. Edit materials part 1: Let's see how to
add the materials, how you can materials. And for this we're going
to just create an element. So I can teach here first. And I can select Tools. And let's create two
first, first whom? I can zoom liter. And we can create something with ten meter. I can go in this direction. And I can type something
with six meter trust Lexus. I can come back on
this direction, ten meter and here, six meter. I've taught to do this work. I can continue
with this tool and just add a new
point on this area. And credit to print
home here to here. And I can press Escape
after I can continue. Don't you print or Sue and I
can take C Sprint, sprint. And I can press Escape. And now as you can see, we have our first element
on the left and we have to first form is here and two different
rooms on this area. So know how to edit
material. First. If you walk to floor, walls and after I will
explain with furniture. So if you want to edit the
materials of the floor, you need to click
on one of the room. And directly you
have this option. C is a style options. And after to click
here, inside the room, you can find floor, my Italian cell material, indoor material,
outdoor material. So most of the time we won't, won't change cell materials or you can select
a different color, would cease to tell
you in Weisberg to most of the time we won't
change really to send material. But from our material,
It's extremly useful. If I click onto for materials, you can select what you want. So you have different options
here, as you can see. And if I want to have
some sink like e.g. arena layer, I can click on this one and I just
need to go left-click. And so element will appears
directly inside my room. Hey, you have different options. If I want to have
something like a bracket, I can click on this 11 more time or you have different options, something in protons, if I
select one of these, e.g. acetic, this one, oh, I just come back with
something simple. I select this one. You can eat, eat and
scale materials, which means you can click on texture scales and you
can increase the size. You can decrease the size
sometime it is also useful because you can create a rotation if you
don't want to have, so wouldn't brought
on this direction, you can apply your
texture rotation. Lexis, and I can craft
something like 90 degrees if I want to change the zoo
position of the wooden block. I've taught produces
twice is just an example. You can select what you want. If I would like something
more like the kids see league e.g. tiling. You have also different
option after. It depends about what you want. After if I still exists room, I can also do the
same thing flow and why not to
change, put this one. And if I sit exists room, I can change also flow and select what I want
you to ever so carpet, I can click on carpet and
I have different options. Let's e.g. maybe I
can see it exists y. So let's use the first things
to do when you want to edit material directly
on the element. It works also from outside. So it means if you
create something outside, you select e.g. this 1% loss, you can create an element outside
to crowds with garden. And I can draw this print area, Rosie splint on this area. And reduce little bit this
sprint and the sprint. I've taught to do this work. If you click on this element, you have multiple
options directly, you will be in the category
group because it is outside. And you can select
what you want. You have different
grace material, but you can select
something forward pass. And you can create different
type of rectangle of different types of elements
with different materials. If you create a roof level, so different roof materials, as you can see, that you
will be able to add. So let's just come back here. Solexa grace material. Now, if I select the 3D view. Sometime it is interesting
because you can have also the real render, e.g. if I said exists room,
possibility to integrate. And for this I can select
indoor or outdoor worlds. So I sitting room. As you can see, you
can do this one also. You can find a different
world selected. After I would like to work
with the indoor worlds, I can click on this one. First things to do if you just
want to apply your color, you just select and color. Click here. And if I want something like this
type of red color, I can just apply. This exists. And if I select my 3D view, now I have this red color. If I show you on the
different rooms, I can click on this room's edit. If e.g. it is a bathroom, I can select Indoor
and change e.g. you have multiple options. Like I can see lead to things
like metallics like this. I can seek some
sink like tiling. Now you have multiple
options, e.g. found bathroom, you can
use something like this. By way of materials
is very interesting. You have a lot of options. A normally you will be
able to find what you want with all these library. And same thing here. If I click on this one, I can select these options. If you want to
select a wallpaper, I can click on
wallpaper and they have different options one more time. It is also possible
to scales, e.g. I. Can select this
one and I can use my texture scale to
increase or to decrease. Most of the time we
will keep 100 per cent. But sometime it will be useful to change the
different parameters. When you walk
outside is the same. If you want e.g. to
change the world outside, you will have to
select also worlds. You acidic ones. And you can just click
here style, outdoor. And you can change with
different options. If I come back to my 3D view. As you can see, I
can still exists one kitsch here, outdoor. And I can select a different, a different breed by default. We can select any
things that you want. You can also create two wooden, wooden house if you need
these different options. As you can see, e.g. I. Can click on
this one and create a rotation like 90 degrees. But if you just want
to have a white color, you just click here tan
color, you silicic wise. And that's it. And you can come back with a white color or you
just select nothing, and you can come back
with this gray color. This is the first
thing that you need to know to materials.
21. Edit materials part 2: Let's continue with materials. So I've talked to see these
different possibility. Who are going to see how
you can add the materials. But now on furnitures, it works literally like Sam, but it just that you can have different type of materials. So first let's select
this room and just add few furniture so I can go and
so left and select frogs. E.g. I. Can select table, chair,
select dinning table. We have different options. Let e.g. let just select this
one and position this here. We just come back,
add few things. I can see leaked like a
kitchen element, kitchen sets. And let's see Lead, e.g. this type of kitchen sense, gradual rotation.
Kansas example. I don't want to make some seen anything
special about the design. It just to show you
some materials. Again, just come
back, Let's see, leaked a bed like full
queen and king beds. And I can delete this one. Left-click. Positions are bad here. Let's select also like some
sink, like a bathroom. And you have the best
whom baths and showers. And let's select a
show our models. Just put the show on models e.g. around this area to rotation. And put zero element here. And I can continue or
you have more things, Let's add maybe Storage. I can add a dresser. Let's see. Let's see, let's
select this one. Put this dresser here. Shelves, floor. Let's add like e.g. this one and credit
or a t-shirt. You want to edit on materials on the furniture. How to do this? You just need to click on the furniture and it works same. So it means you
have these options. Style I've taught
you click on style, You go on furniture here it
is a wood materials ****. It's pretty simple on this
example of table because you just need to change
only one material, but sometime you have a lot. And this is why
when you ever lot, you need to go on the 3D view to see what different correspondence
I'm going to show you. Let's work with a 3D view. Let's zoom a little bit. So here it is, our table. I can click on this one. And I can see links to materials and change silicic
what they want, shared his wood material. But if I want
something different, different, it is possible. I can use e.g. metallics and I can
create a table, metallic table using
e.g. this one. After, if I select e.g. z's, if I sit exist furniture. And according to this options
here we have two materials. So first materials
is the main pile, the second materials are so dear directly differ
on true worlds. I can click here if
I want to change, put something more
in black again. And you have a signal
and materials color. And I can put this more in gray. As you can see. If I
select e.g. my kitchen. We love a lot of materials, so I can click here and I
have all these possibilities. So sometime when you have
something like this, it can be difficult to see what are the different
correspondence. So e.g. here, I know that it is a top of the kitchen so
I can click on stone. If I want to change that
for wood materials, I can then activate word and select one
of these, like e.g. this one, e.g. this one. But sometimes it's not pretty easy if I click on this one, I'm not sure, but if it
is this part, this part. So I can click here. Let's make something
more in gray value debt. And I just realized that it was this part, but
sometimes it's not a, it's extremely easy to find
what tells of correspondence. You have a lot of black color. So when you have a lot, maybe it's not really good
to edit everything because it's little difficult to see the different
correspondence. But at the same time it is a
kitchen with a lot of scene. When you just have one element, it is very simple, like e.g. this one. You can click here. And it is easy, you just have one materials and you can
eat it only these materials. So after if I select e.g. the bed one more time or you have different
type of materials, fabric materials, I can
click on these options. And you also wouldn't
material as a base, probably for the feed. So I can click here if I
want to change this one. Yes, it is for the feet. If I dress comeback e.g. We have a sheet
here on this area. Can select my Text
tool materials. And let's apply
something different. But if you want to change, shape this fabric, so
normally it is the best, but if I want to have
something in laser, I can click on laser
and silly, e.g. this 11 more time you can scale. So I can use my texture scale
as you can see to change. So definitely it is convenient, Convenient, wherever
convenient tools. If I click on so bad again, options and select
just this text here. Here, it is a cemetery. So texting material
for the structure. If I wanted to change this
one for wooden materials, I can click on wood. And e.g. I. Can change even if it's not the best because we have
this element of things, this element it's better
with fabric materials. So I can come back silk fabrics. You have different
type of options. Entity same if I want
to change the color. Here, we have linen
and I can change also. So each time the most
difficult things is when you click on an element, it's two different
correspondents. What is your element
for which Carlos, this is only problem. Sometimes it's not very
easy to find these. At the same time if you had any sink like
decoration element. So it means you can use dicker, it will be, it will walk same. I can add anything that
is that they want. It can be e.g. vase and flowers. And I can add to y
naught this vase. Click here. I'm going to remove this one. Yes. So I have this space. If I want to add some sink, like if I want to
add a plant, e.g. I. Can click here, plant. Select the first one, and drag and move this
plant on this area. When you have all these
small intimate sometime not everything is
possible to be editable, lot of thing, but
not everything. If I click on this one, options, as you can see, I can
change that things will cool off of surveys. So I can click on this area. If I put something
while in red, yes, I can change the color of the face and we have
a second color. And I don't know
what t is tumor to correspondents of
this second color? Acidic, something
more like proper? Yes. It is just for this
part of the flow works, but it's not possible e.g. to rigid so leaves or to a
digit top of the flowers. If I select this plant, can click on this one. Options. And here the only possibility
is to aged flow work. But so I can click here and
I want to change this color. And they want to have something
picker achieve in red. I can click on this one. So it depends of really
object is that you choose.
22. Create garden part 1: Let's explain how to
create a Gardens. So we have the possibility
to create your garden. And for this, we need
to go on these options. And one of them
has things to do. It's to create
different elements. So first let's
create a structure. I can click here
and just grabbed a structure like a stricture of hours so I can
create two room, then extend on,
this is direction. I can extend on this direction. Maybe I can make
some seeing around 80 m square like this. So this will be my base. Just far as our example, let's add a dual. I can click on doors, just add any doors on the front. Just like this. I've
taught to do this work. Let's add Windows. So I can add any windows. Dress click here. Cd exists basic window and
drag and move on this area. I can drag and move here. And duplicate also,
just like this. Maybe I can duplicate to get another one on
this direction. And I can duplicate
again on this direction. So it's okay for that
where I've created, this will be the base. So first father gathered, you need to create
rooms or house. For this, you need to
select Pass and loss. So you click here by cellulose and you have
different elements. So you can imagine will be
just a square like that. And you can position
your square. But you have also other
elements like this one. You have also the
island meant like e.g. this one, after aim
will be to drag. It moves a different print. So you can drag and
move these points and you can also add new point. So when you are on e.g. relying, you click here and
you can add colony of print. And thanks to that, you can
drag and move like this. I can click here and I
can add colony of print, click on this line at Karnak print and I can
make some adjustment. And when you click
on an element, you can also change
the materials. So let's remove this one. Click here, remove, click
here, removed first, I would like to create like the theorists on this
area how to process. I need to click on personal
and civic, just two square. And after to select this square, I can go left click, and I can drag and move this first sprint
until this corner. You can snap and this
sprint until this corner. And after I can move this
sprint on this direction. And I can move this sprint on this direction to work
horizontally and vertically. If I want to change
the material, can click here and style. Now you have different options. So by default, you
can use green, you can use something different, but I think is the
best for a garden. And I can select different
type of options. And you have to share
on type of grades. Is that you can use,
but not only grazed, so it means you can select
e.g. something like that. Let's take something like
that for these theories. If it's difficult for you
to see the dimension, because we don't
have the dimension. You have the options to add
something here at all else. And thanks to that, you can positions
where you want. And after you can sit
eggs with dementia, rhizome, public and
civic to run four meter. And after I can drag and
move my point following the ruler to check if my
dimension looks correct. This is why it is
useful to add ruler. You can reuse this
for the Galvin because directly you'd
want absolute dimension. So you can drag and
move different print and definitely it is useful. Let's remove this
ruler in this program. After, if I want
to create a pass, here, it is possible. So I can select
again by sin loss, I can select e.g. a. Rectangle and position this
rectangle around this area. And if I want to make adjustment
that can reduce here, I can redo it here. And I can read you
the sprint just like that. Yes, perfect. And after I can change one
more time, I can eat it. So materials, NCLEX,
some things that I want. Why not? Why not to select this one? So if I want to credit surroundings with
different garden elements, you have different options. The first options is to click on percent loss and to just select
a rectangle or a square, and to add multiple rectangles to create the surroundings. But you can also just add different corner point
and make adjustments. I'm going to show you
the two possibility. So first possibility,
you can e.g. position the rectangle
around this area. And you can drag it
and so print Lexis. And you can position another
rectangle on this area. And you can pull this
sprint just here. And you can drag and
move just like that. So this is so first possibility. But we have a
second possibility. It is to remove this
one and Fridays off, but you can select this part. And when you click on this line, you cannot do, cannot print. You can add a new.com or
print and tackle glands. You can snap this
corner point here. You can pull this gone up, print on z direction. And you can just stay
with the same element. After I can click here
and adduction of print. And I can pull this cannot print on this direction,
just like that. If I want to continue on this
direction, I can use this. I can do the same thing. So it means I can click
here and do counterpoint. Click here, I do
chroma point again. And I can start e.g.
on this direction. Position. My first
Cornell dress here. If I click on this one again, at the colony operates. Just like that. I can add another truss here, add acromial print, and I can
extend on this direction. And I'm still on
the same element. But it is useful because you can add different
counterpoint legacies. But one of the
options you can e.g. select one of these. It can be maybe this one or this one is not
extremely good. I need to find the
right element. To element will be this one. And you can also position
directly this one here. And you can drag and move to a different corner print at your convenience and
work with two part. But if you just want
to work with one part, you can continue with
the same process. So it means you can add a
point here at Cornell point. You click here at
Karnak point again and again positions
with first here. Drag and move. This one on this direction. And I can add a new
doc on your print. So click here, endocrine
of print again. And I can pull on
this direction. And I can repeat the
process last time. So just click Share icon or print Sukarno point is
now located on this area. Click here at the
corner of print, and you can drag and
move in this direction. And you can click here at
the corner of print and dry and move on this direction
and take your glands. We have only one element here. We just have one element. And it means if I
click on this one, I think I move little bit of an immense are mainly meant I
need to come back. Yes, perfect. So it means if I click on
this one, it is a style. I can make that Taiwan because
I just have one element. But you can also add different rectangular and have exactly
the same type of result. After up to you. It depends about
what you prefer. It depends how you
want to process. But definitely I think this
is a good process to use. And you have multiple
options like that. They just come back
with a basic grace. Colic. If you assume too much out, you won't see your elements. I think I can make adjustments. I'm not horizontally
perfectly. Yes.
23. Create garden part 2: Let's continue with the garden. I've taught to do this work
to position your main part. So it means the group
positions or base. You can add different elements. When you click here you
have categorized and e.g. if I want to add furniture and might
erase, it is possible. By furniture's here.
Let's select e.g. first, you can have
different sets of these different options. I think it's interesting. Let's select one of
these, like e.g. it can just be this one and left-click and positions
is set on this area. After exactly like a furniture, you can do exactly
what you want. If I just come back, you
have also chair and benches. E.g. if I want to add the bench, maybe on this area, I can select one of these. It can be this one. And I can pull a
bench y notice here. If I just continue, you have also chess launch. And I have different options. Let's select one of
these, like this one. And I can position this area, I can grow to a rotation may be positioned just once here. So this is a different
furniture that you can use for your gardens. I've taught you
have most things. You can just have a table
or your small table. It means I can still
exists one in. Why not put this one just here? And you can have
also more elements, but it is more outside. You can have shed e.g. if you want to add once you can, at once, as you can
see, just here. And you can change the color. Each time when you
have your furniture. Exactly like any
interior furniture, you can edit the style. So click here, it is a style. And if I want something like subtexts deal with
the different colors, maybe I can change solid green, acidic, something
different, just like that. Oh, maybe this one.
Because this one. If I click on this small table, I can needed also the color. If I just come back here, you have more elements. So after, after partial
furniture or if you want to add any trees and the
plants, it is possible. And you will have
different type of models of trees and
modal of plants. You won't be able to make
a lot of advanced things, but you have interesting
possibility. So first, if you
want to decorate, you can have flowerpot life, e.g. famously too long. Like e.g. this
type of flow work. But I can put this
on the terrorists or this one just like this, but you can also
work with trees. So e.g. you have this type of trees I
can position once here. You can also decorate
with something like that directly on
the garden. So e.g. I. Can select this one, I can mix with this one. And I can see it exists
one just like this. So if I want to create
different something with different
flower on the front, I can try to mix just here. Just like that. And I could continue
if I if I want, hey, I'm not upshots. Trees and plants can have also something
decoration like this. If you want to add big
trees, it's also possible. So I can continue. I have this type of big
trees and terrorists thing. If I want to put big trees here, I can go left-click and
position once on this area. Maybe I can position. This one is very big. You can change the size
Solexa tree. Here. If I want to redo it, I can put 400. Let's put 408. Let's put like a ton tree. I can duplicate this one, which is shown in this
area gently towards a size 4300300 and maybe 600. You can also add things
like decoration. If you want to create two edge, it is possible you can
click on this one. This one, yes, it
can be interesting if you want to make
a delimitation. I'm going to show you again. You can click on this one. And I can position this one here and go in this direction. And position this
one on this area. We can take a glance
on the 3D view. You can also drag
and move element directly. In the 3D view. It's a little, it's a little long here
with the connection, I need to wait a little bit
towards the real render. If I just come back
here at the same time, you can add a different
type of garage. You will be able to add pool. I need to wait a little bit. Yes. You will be
able to add pool, outdoor lighting,
outdoor activities. So e.g. I. Can select this one. If I want something like this, I can drag and move another pair roller decoration element, I know to drag and move
this one. Just here. If I just continue,
if you need to add something like a swimming pool, you can click on poor. You have different options
where you have outdoor pools. Now you can also add a
complete pool like this six, this one, you can create
two rotation, e.g. 90 degrees, and you
can edit the style. You have different options. So if Iran, I don't want
this one, I can click here. If I wanted to have something like like I can click on wood. I think this style
or I need to wait little bit or maybe
it is a style. I think it's Sam. Yes,
if I just click here, I can change e.g. Alexis. It's not
perfect, but maybe, maybe we would be able to find something differently
just as an example, after you can select
materials that you want. So just an example of a
bad you're swimming pool. I'm going to remove this one and just come
back to my 2D view. So after you can,
The most things you have also elements is if you
want to add a phone ten e.g. you have multiple
type of Fontan. If I just come back
to trees and plants, you can find also flow well bed. So it means this one
is a flower bed. I can go left-click. Position may be here. Whoops. Yes, I can position
this one may be here. Cranial rotation. And I can change the size. Maybe I can put 400, 258, maybe I can put just 20. So you have all these
different options. You have also this type of element for flow where I can
click on this one again. Let's put 200, 150
decoration element. So you have a lot of things. If I just click on my 3D
view and I just go in this area. So this is an edge. You can click on the edge. If you want, you can change. We have eight wide for his own productions or wait for one to Santa will
obtain this render. But maybe it's not the best. Maybe you can just type
something like photos. And after, maybe it is better to duplicate
from surrender. So it means you can position
the first element here, and then you can
duplicate and position another trust on this area. You can work with 2D view. I think it's better. You
can click here, duplicate. You can craft your
edge dress laces. So as you can see, different
options to create a gallon. So aim is not to have something
perfect fossil gallon. It's more about interior design, but it's very useful if you
want to create two theorists. It's very useful if you
want to create two partial. It can be also extremely
useful if you want to just extend lethal
to the garden, even if it won't be
perfect for the garden. Definitely, definitely. You can make interesting scenes. As you can see, just like that.
24. Create renders: Create renders. Let's explain how
to create renders. So first things to do
after to finish your work, it is to change the bike routes. Here by default,
we have this grid. You can change, just
have to go into parameters and you
have some options. Here you can see this one, you can select this one. So blue color, you have
also this type of collapse. Here it is again, so grid
and you can also extend with unlimited garden,
just like this. So different types of cream. Those are most of the time we
will use a white scroll up, but sometimes it is useful
if you want to change, you have multiple options. You can also work
with a 3D view. And if I just go here, you can also change
bedrooms in the 3D view. To see surrenders. I've taught to do this work. You need to click here and
your abs are realistic render. So you can select the
view that you want. You can click first here, sets the best angular
view for snapshot. I can select this
view first to have a general review of
my project exists. And after to anger, you just have to click on save and you have
different options. Regular screenshot
when the referenda. If you just use a production, you will be able to use
regular screenshot. And so I quality render, you will have to pay credit, so you need to buy credit. And I've talked to
have this credit. You can create real render, but you can create just
a regular screenshot. And I start from this
regular screenshot, you can buy credit after to convert to HD,
which is possible. So sharing my example,
I'm just going to use regular screenshot. This is the size
than non treated by 675 in screen credit T.
And I can click on Save. Snapshot will appear after a
while in a snapshot section. So then after to do this work, you will be able to go here, select snapshot and you
will see surrender. But first, let's
select different view. I can e.g. continually
tall outside, select like a view
of the theorists. Think I can select like maybe this one and repeat the
process as long as you want. So it means if you want
to have 1020 view, you just need to
repeat this process. I'm going to click on a
regular screenshot and save. Know what's happening if we
go inside, Let's go inside. And we will see the
settings. So e.g. if I go here I can see the selling and I can
take different views. So first let's select
to view of living room. And I can click here
realistic render save. You ever saw a possibility too, enable use of automatic saline
lighting white rendering, or use a night mode. But definitely sometime
it's not, it's not perfect. But you can use or to this one. Let us come back on Save. If you use the night
mode, if it gets better, only for HD, Render won't be really good if
you just use regular. And I can continue. I
can select a view e.g. of the bathroom. Zoom inside. Just like this
regular screenshot. Let's sell it to a view
of the first rule. I can go inside this room. Perfect. And I can continue. I have a single room here. I can go inside also. And I can add one more time. A realistic render, regular
screenshot and save. So this is how you can create a render nursing
extremely difficult. You just need to select
a view that you want. So mostly in proton is two
masters and education. And after you can just click
here and realistic render, After you will go on your snapshot on the
top right corner, you will see all the
different renderers on this area, also
different renderers. So let's take again.
So by this render, you can find appraisal. It's already not bad. Just with regular not
in HD screen quality. It's already not bad.
If I just click here. You can also render like this. If I click here, I
can have my render. If I want to render off my
terrorists can have also. After, if you want to convert, you can click on
this sweet print. And first you can
just download on your computer because
it is METs regard. So you can download
on your computer, you can use, you can
convert to make Drive. So it means low quality or
make HD very high-quality. But for Mac HD, you need to buy credit. You can also move to
a different part. If I just continue, I'm going
to show you what it was. If you are exporting
high-quality e.g. it was a bathroom
in high-quality. And definitely you can
see the difference. It's very great to buds are
materials that texture, quality of the furniture's. Here. I didn't change. So bank runs and you
can see the grid, so we have to change
the backgrounds. And definitely piece Surrender is very, can be very great. Here it is another render in
high-quality. Very great. If you add light, you can find the
different things. And if you activate
a nightmare DT is great in HD
dressed like that. But to have this quality, you will have to take credit.
25. Add rulers: Let's explain how to add rulers. Use a ruler for this. You can find rulers
on this area. And thanks to that, you can add rulers
first things to do if I just create two base, I can just click here. And e.g. dressed crowd to room. I can extend it'll
beat credit to base for 4 h. It will be more convenient if you want to have a distance
for element outside. If I just add the
duals room doors, and I can position just
two doors on this area. And invariance of position. At the same time, I can add a window. So I can click here, window, select Basic window
like this one. And I can drag and move here, maybe duplicate, and I
could continue if I want. The fact is when e.g. you use one of these
element pass and lows. I can click on this one,
left-click and drag. Notice element. One of the problems
that I have if I want to erase on this area, is I don't have to dimension, I don't have the dimension
of this element. If you just check on the different parameters
dimension here, you have external dimension, you have just dimension, but you don't have moccasins. And it is not extremely
convenient because you want possibility to directly
observe dimension outside. So this is why you can use e.g. the ruler. And I can click
on this one, just redo it. Just click here, validate, click on this sprint and
rage It's also share e.g. I. Want to change materials. You can select a
different materials. Let's put e.g. this one. I don't know the
dimension for this. I can use the ruler. I can add a ruler, position my ruler on this area and extends
a ruler. If e.g. I. Want to have a terrorist for
meter on this direction, I can enter from it, from this corner point. And after I can drag and move, oops, not the ruler up,
position this here. And after I can drag and move my print until form
it just like that. And this is why it's difficult to have a lot of precision in the garden because you don't
have directly so dimension. If I want to create
something on this area, I can also add rulers.
Click on this one. And I can position
my first point, e.g. here, and my Sigma
and print e.g. here. If I want to have something on the
frontline from it, again, I need to
position a ruler. And maybe I can put
a ruler on trust on this corner print like that. After I can take out this print
and extend to four meter. And if now I click on my tools and I add passing
laws like this one, I can drag and move this
point on this corner. And I need to follow my rulers. And if I zoom, I can position, oops, I move the ruler again. It's not extremely convenient. Yes, Now it's better. If I move this point. I can try to position
just in front of the ruler to have four meter. And after for some pair I can drag and move this point here. And I can drag and
move this point here. So definitely the ruler is more convenient for this type of sin, even if you can just apply
distance between e.g. you have two furnitures, you can apply your
specific distance between two furniture
sometime it can be useful. You have a table, you
have some similar exam.
26. Project create walls: In this project, we
are going to credit the interior of a complete
interior off I was an actor. We will extend with outdoor. It is extremely useful because we will see a
different features. So how to create e.g. towards how we can add rooms, how it's possible
to add directly, directly, doors, windows,
how we can positions a different element at
furnitures and credit to render. So it is definitely a
very interesting project for interior design and then to extend on outdoor
design and create render. So first things to do
is to create worlds. So I'm going to zoom out and groans or
left directly here. And I can select one of
these tool, this tool here. And thanks to that, I
can create two words. If I zoom a little bit, I can e.g. start here. And we will have two crowds. The first mall with
ten meter, ten meter. After I can go in this direction
and we need to continue. I can apply six meter
after I can continue on this direction with a
value of six meter, also, just 6 m. When I
arrive at six, I can stop, I can zoom little out and I can apply here on
just two meter. Like that. I can go on the left. I need to apply for meter, stay horizontally and I can come back verticality
and just snap here. So now we have a
different dimension. So as you can see, we
have ten meter interests that we have the
thickness of the wall. Here. We have six meter, four meter, two meter, four meter, and eight meter on this area with the
thickness of the world. Second things to do is to continue with the word creation. So continue with this tool. We can create the first room around this area,
just like this. And I can drag and
move just here. I can press escape and
automatically I have a new room. I'm going to extend little bit. I can stay with a value of
five meter on this part. Here, if I drag and move, I'm going to drag and
move in the middle. So it means to put sweet meter, to put just swimming. I think I can zoom little bit. And when I arrived here, I can have more precision. And just to play sweet meter, need to keep my words
on the right direction. Yes, just like that. Perfect. And after to do this work, I can create a noodle words. Click here, start
from this cone of print and not on
this corner point. Let's just click here. Start to run this area
and crowd to wall. Just we can walk vertically, trust exact, and I
can press Escape. I don't have any
new room created. So the possibilities to
drag and move this one. And thanks to that, we
have a new room and then I can make some adjustment. But the disposition, I'm
going to move little bit. If I move here we
have five meter. I need to let little space. I can move this
sprint and others. Alright, Suite
around 380, midterm. You can make 282. It
is not a problem. Just make something like this. After to do this. Well, let's continue. I would like to create
two best whom I can create two best
woman this area. Create two new will. Start from this print and go
a little bit on the left. We can let 220 meter, two meter, 20, left-click. And I can continue on this direction and
I can press escape. As you can see, I don't have new room created
is not very good. So you need to drag and
move it towards this wall. First, you need to drag and move literal this wall maybe
on this direction. And now I have a
new room created. And you can just
come back sometime. It's a little problems that
we can have with Planner 5D. So it's okay for that. We have our own
different element. I can click on this
room and I can change this area and just
select it will be living room. I can click here
and I can change. And it will be the bathroom. I can click here and change, and it will be a room. And I can click and change. It will be also not the
type of form like this. And it's okay, we have our base. We can just check
with a 3D view. So you can change with
a 3D view and perfect. So this will be the living room, first room, second room. And here it will be so vesicle, it just a small house. I can come back with my 2D view.
27. Project add doors: After that we can add doors. So to add those, we need to click here. And we have different
type of options. We can select doors. And let's first apply the entry doors
so I can click on entry draws or you have
these different options, I'm going to sit exists one. And the left-click
drag and move. We will position
directly on the world. It's pretty easy
because we can snap on the wards and I just
need to change the opening. Opening outside. It's
not what I want. I can just click here. Chances opening on this area. Perfect. After to do this work, I'm just going to
change for the 3D view. Just check my doors. And I think it's
okay, perfect. Zone. Nice things is you need
to try to put the door in the middle of this world so
you can move little bit, you can use your grid
and I can position in the nadir after I need to add those doors so I can
see lick room doors. Here we have this type of doors. And I just want
basic doors in Y, so we see the reason
for which I can select the first left-click, drag and move on this area, legend x2 opening
a can just click here and stay on this direction, but in verge opening
near the wall. And I can drag and move a
little bit on this area. I need to position
the same dose here. So click on this one. You have the options to
duplicate, duplicate, and I can go left-click
and positions is new doors on this area. I can now click here, invert. So opening one more times. Just like that. I think maybe I can
invert on this direction. And this direction. Yes, perfect. And position in the center
are on this small world. Let's duplicate again. I can click here
and duplicate and position around this area. One more time. I can change opening. With this one. We need to let a space on this area because it
is a small bathroom. So to Haryana a little
space when to put the put this dog more near this
world and this dorm or needs is also perfect. We have now our own
different silicosis 3D view. Just like this. As, as explained before, if you want to edit the color
of the different elements, you click on the doors
and you just need to go on style and you have the
multiple possibility. So first color in
this example will be the main color of dollars. So why is color? If
you want to change for anything that you
want, it's possible. This is the color of this
element and this element, and this is a color of
the endodermis here. So if you want to
change, you can change. When I click on my doors, I can find also the wide
and I can find also eight. If I click on my entrance door as a wide ends AT this is Ferran because it is
a interests though. And as you can see, so eight is bigger.
So eight is bigger. Oops. I'm just going to come back with the position of this door. Just like that. Yes. It's okay for us that I
can come back to my 2D view. I think a little bit on this, alright, was not really good. Let's come back onto 3D
view. And now it's okay.
28. Project add windows: The next step is to add windows. So let's add Windows
on a different rooms. The first thing that
I'm going to do is to click on the left. And here you have the
options to add windows. I'm going to select one
of these basic Windows. So it means this one, but I will resize after
because I would like to have I would like to
have windows, doors. So first I can click here, drag and move on this area. They need to change
the dimension. Here. This is a wide and eight, I'm going to change. So eight of these windows, if I select my first my
first entrance door, you can find 230. I'm going to do the
same thing and change. So 84200 cr t, just like this. And at the same time limitation, I need to change this one first, I'm going to enter zero. And after to do this work, if I select my 3D view, I need to make some adjustment. Because if I zoom a little bit, as you can see, it's
not really good. Here. Let's click on the Windows again and change the
levitation and need to increase the value of four
will be perfect to perfectly positioned this windows on
this area, just like that. So after two doses work, I can come back and
duplicate this element, silicon or 2D view. First, click on this
one and duplicate. So due to duplicate, you click on the Windows copy and you can just drag and move. And we're going to position a second windows
around this area. Let's duplicate this one again. Click on the window,
duplicate and position this one
around this area. And the next step is also to click on this window again
and position in order here. So best things to do, it's to create two nodal. Click here on doors, Not Dos, just click
here, windows. And let's select
the same Windows. Left-click, drag and move
on. On this direction. I just need to add
X2, right size. So if I click on this one, I ever live edition of 85
and I ever saw eight of 140. So it means I have
exactly 200, 225. I want to arrive at 270. So this is why I'm
going to change liters levitation and apply
your limitation of 90. And thanks to that,
if I add 140.90, I will have exactly 230 and it will be the size of
the top of this window. So perfect. If I sit in my 3D view, just, you just need
to take a glance. We have exactly in the
same lever on the top of this window and the
top of this interval, the top of this window. Now it's okay, everything
will arrive at 230. So it's okay. I can
come back to the view. You can position
this window around. Here. You can take a
glance about a grid. And let's position the
fin here, it's perfect. Let's duplicate this one. Click on Zoom window, duplicate and position the same window. Not on this area
but on the right. And positions and window
run some made-up. Also, you can just
take your glands to the grid to try to
have the right position. After to do this work, Let's add the same
window on the bathroom. Click on this one,
duplicate again, and position the same
window on bathroom. One more time. I can zoom and try to position in the remainder of
this, of this world. Also, just like that. Perfect. We have exactly six windows. So sweet. Same windows on the living
room and on the first form, the second room
and the bathroom, where the exactly
the same Windows. Let's click on the 3D view. So we'll obtain
this result here. It's great because after we will add a T erase on this area. And we can find this
window on this phase, this phase, and this phase. If I come back to my 2D view, maybe I can just drag and
move little bit on this area, this window, thinking
surrender will be returned better 3D.
Yes, just like that.
29. Project add furnitures living room: Let's add furniture
in the living room. So we have the living
room located here. I need to add furnitures. So first things to do, Let's select this element from each yours and you
have different categories. First things to do, I would
like to add sofas so I can click directly on
this type of furniture. You can find sofa. And let's just use a stretch. So far you have different option like this one will be perfect. And I can go left-click here, crowd to rotation on my sofa. Let's go to rotation. Just like this. I think
it's still fairly big. I can change the
size of my sofa. I can go in this area wide. It is, yes, it is a big sofa. I'm going to re-do it with 160. It will be enough for
the size of my womb. After I would like to add table. So I can just come back and I can see
league table, chair. I have different dinning
table dressed like that. So about the table,
let's just continue. I would like to have table
with chairs directly. Anticoagulants can
have this one, this one, maybe this one, but it's little BFA. I'm going to try this one
and I can go left-click. I'm going to try to
stay with this type of color and positions
is a tremendous here. I can move little bit my sofa. Trust to run this area and
move little bit my table. Here. I've taught
to do this work. Let's just come back again. I can select to have office
furniture of beds, storage. Office furniture is
not what I want here. I can say extra rich first and add the TV standard,
seductive is ten. I have multiple options. And let's use some
simple like e.g. this one or this one. And let's say it
exists one left-click. I can position and
rotation first. And I can put my element
just along the wall. Maybe I can read
you a little bit. It is wide 176, I can reduce for 160 and position my
element just in front of. So, so far, 160. Maybe, maybe it's little
bigger again. Let's make 140. So perfect. I want to add an element or so so I can come
back outside of TV stands, or let's use a young girl
dresser, show storage, shelves. Maybe I can use sheriffs
first floor. One more time. I have these different options. I can why not sit exists
one and left-click maybe it's a little big but I have more option.
Yes, definitely. I think it's little big. I'm going to delete this one and maybe just sit exists one. Just like that. I can create two rotation. I don't like to merge
the column. No problem. I can change. Click here style and net change
or wood materials. And let's choose a dark
wood materials like e.g. this one or this one. I'm going to use this one. Perfect. I'm going to
click on my table also. And if I go on materials, so you have this wood materials, I think I can stay like this. If I click on this furniture materials
and if I click on this one, I can recuperate
my last materials. Just exit. I'm going to check. Click here, click here, and I can acidic directly the materials on
this area. Yes, perfect. And I can click on
this one and see lead to this material also. You have the same materials. I can continue
with my furniture, storage, shelves, flow, and let's select an adult
models from another area. I can click on this one. Yeah, Just let's apply
some sing quiet small. Maybe this one
also can be great. You ever saw something
very bicycle. I can see it exists
one also just here. I think it's nice. And
just change the materials. So style, color. Here, It's not possible, I can only change the
column, but it's okay. I'm going to put this
one not to tell you why. I prefer with material, so maybe I can change furniture. Furniture is again storage. And yes, yes, This
one will be perfect. I can position this here. And it did the materials style would select again, this one. After I want to walk
on the kitchen. To work on the kitchen, we can just change
your categorize and we have teacher
and categorize. Best things to do is to
sleep, to kitchen set, even if we can add
elements one by one. But I want to select the
kitchen set here, e.g. maybe this one can be great. Yeah, We'll, so this one this one can be
also interesting. I think I'm going to
stay on my first ID. So it means this one perfect, but the color will stay
in the same style and position this element
just on this area. Directly, I want to
add a fridge so I can come back outside,
just click here. And to have a fridge, as, as explained before, you need to find this in
electrical appliance, and you can find kitchen
appliance refrigerators. Let's apply this one. Left-click and put this
element just on this area. I'm not going to add
too much furniture. So m is just to show you how
you can add few elements. If I want. I can also have like a small kitchen appliance. But it's more about declaration. Let's just come back on
kitchen and wherever. So Kitchen Cabinet, maybe I
can put ones on this area. That phrase on paired we
have something like this. Yes, I think it will be perfect. I can click on this one. And it is a style. And I'm going to reuse my
same type of whom material, but I can also click here, but it's the texture colloid
is not exactly the material, so I prefer to click
on the Materials. And if I click on this area, we have also the top. And I need to replace stone. Select again, would, and
select again. This one. Perfect. Maybe I can make
some adjustment. Put this one here. Put the fridge on this area. I finished possibility
maybe I can reduce liters. This one, I have a y 250, maybe I can put 220
and a of fridge. Gradual rotation puts the
fridge in the corner. Just like this and
sit exists one I can put this one here or
against the wall. Just like that. I
feel it will be great. Let's click on this. Furnitures. Just
change little bits of white AT will be enough. And put this one in the corner. So it's okay for that
follows this area. I can just check
my 3D view first. And it's definitely a, but this time we will keep
the same type of style. I think it's nice. We can just check. So Kitchen also. Yes, perfect.
30. Project add furnitures first room: Let's add a furniture
in the first room. So we'll work with this
room first, biggest room. And I would like
to add furnitures. So let's go into left,
just click here, and you have different,
different possibilities. And let's first select beds. I can use full queens
and kings beds. And now we have
different option, I think for the style. The first maybe would be great. I ever saw this one. This one also you have
is this one, this one. I said I have
multiple possibility. I think I'm going to
click on the first, maybe this one just like this. And just pulls the
element on this area. Just like that. I'm after. If I just continually
totally beat, I go just before. I can select
something different, I would like to add
first office furnitures. Click on this, categorize
office furnitures. Let just select a desk. You have these
different options. Let's select a simple desk. I think I can drag and
move this one perfect. And credit to rotation
90 degrees positions with desk just along the world's I can move liters the bed around this area. And then at the chair, let just come back,
select office chair. These different options create, let's just see, lead to
simple official or e.g. this one and creditor rotation and put this chair
just on the front. Now forecloses, I need
to add also elements. So let us come back inside. Main categorize intaglio. And I can see Lake Storage. You have tracers, NIF stains. It just click on stance
first. Not understand that. I will see that after one Rob
first, closest one drops. Let's see leaked or
what Rob? Not too big. Maybe I can see leak. Some scene like this
one or this one. Again, just sit exist
simple wet robe. It will be perfect for
what I want to do. I can change the way, let's just apply 100. And at the same
time I can change the IP address to play. 50. And neutrons are color
style silicon food. And let's apply, you know, DOCTYPE of like e.g. this column, not exactly, it's a dark color, but same type of Cologne is, exists one and perfect. So after to do this work, let's continue. Click here. Storage again, Chris
cells would like to apply your dresser,
but small dresser. Maybe I can find one
of these. This one. Maybe this one. Maybe this one will be greater. I will choose this one. Maybe I can drag
and move this one. Crop rotation. One of the problem is
maybe the size of my bed. I can find a depth of 226. Maybe I can just redo it with 221st and put this
one just here. And about this element
I have a deep of 50. It's too much. Can try with dress frothy and put this element
trust on this area. Maybe I can change the deep. 200, but yes, 200, it will be too small. Let's keep 220. Think it's okay. We can work just in front
of the bed or I can just redo the Jeep little
bit of this element, soft T5 and put this one here. So perfect. Let us continue. I have also small stains. It can be useful on
the right of the bed. I can see it exists one and
just change the material. So first I can put
this one here. Just change too deep. It just to play 40. Just change the why'd
they just apply 70? And a bunch of eight? I think it's okay. I can change the materials, style, mood. And silicon order. I can see the exact
same suite means this one and drag and
move along so worse. So it's okay for this part after we'll add few decoration. So first thing is to do
check with the 3D view. Yes, perfect. Yeah, it's okay. Maybe
I need to check. So size of this one because
it looks very, very high. If I click here, I have eight of 261 is definitely too much. I'm going to reduce
to Android is totally enough for this element. So sometime you need to check, maybe you will find something
that you don't like. So don't forget to
check the parameters.
31. Project add furnitures second room: Let's continue.
We're going to add furnitures on this home. So it means a second room, as this form is smaller, so we need to be careful of
genes or different furniture. So first I can click on
my furniture as option, add a bed again, full queen and king beds. But I don't have
a lot of option. Maybe I can drag
and move some sink. Definitely something
smaller for this room. E.g. I. Can put this one. I think it will be great, but maybe it's later, maybe it's little big. I ever saw this one. Why not? If I continue, I have more simple bed like e.g. this one also, this one. Maybe I can stick this one. It is not very
big, it's perfect. And if I click on this tile, I can change the wood materials. And let's select again, literally the same
style with this one. I've taught to do this work. I would like to add
odor furniture also, click here and select
Storage again. Let's apply first one Rob again. But something small nodes, very, not very big, not
very lounge. If e.g. this model's just little like my first models,
maybe I can change. I ever choose a small
different models with just one door. And this is a basic models. So these models, these models. So a few, I'm going to
select something simple, like the first, just click on this one, position this here. Put little beads on
the right, the bed. And let's change the
weight of this one. I can just apply 60. Maybe 60 is little small. I can apply 70. After to apply 70,
I have the deep. I can reduce with 40. And I have 8190. I can put 200, just like this. And I can put this element
trust on this area, change materials style
and said exists cola. Cola materials. I don't like to merge
this type of kilometers, so maybe I can sell
it to another. Let's come back here storage. And let's take something
with mood materials. It will be a bit of
what I want to do. Maybe I can select this one. And it needs a parameter again, frost, I can check
those studies. So studies, okay. I can change this
with materials, with just this one. Come back and change
the dimension. So the white will be
70, deep will be. Maybe I can change for
50.50 is little too much, can just apply for t. And
let's apply to injury the Faso eight and position this element
just on this area. After ledgers come back
again one more time. Click on my furnitures. Sleek storage
again, dress cells. Oh yes. Let's take this
type of dressers perfect. Can create two rotation. Put this one on this
area, just change little. This side we have a deep
50 address step for t, it will be enough. And false arrest, I can
keep this parameter, I can keep white, I can keep 28. And Gibbs, these materials
had just come back. Click on stand. Let's add a small stand. Can see league. I can see it exists
one, perfect. So after I can
click on this one, just drag and move crowd
to rotation 90 degrees. I don't have a lot of space. But if I move a little bit my bed and change
little bit this size, I have a white frothy. I think I can just
put a wide of sati. I can change the deep. So t will be enough also. And they have eight electrons, eight front just for t. And put this
element on this area. If I just change
for weight is 40, I think I need to check
on my 3D view first. And so things will position
is not extremely good. I need to create a rotation. And position is yes,
dressed like that. Come back to my 2D view. Just click here or debt again and just change
a wide ledgers, come back with certainty
on this direction. But deep for t, It's
a little stranger, but there is the ratio
of this furniture. Let's come back out. Click on this one. Materials would an address
to play you gain this. Would materials Perfect? The last thing that
I'm going to add is just two little shelf. So I can come back
with furnitures. Just select two storage. And why not shelves, floor, and just put
a little models. E.g. this type of models, these type of models. Maybe I can just put
this one on this call. Now, I can click here
cranial rotation 90 degrees. This one on the corner. And change directories or
materials wood and sit exist, same type of materials. 3d view. Just check
that everything is okay on this room. Can zoom. And after to be inside, turn around with the camera. And yes, I think
everything is okay.
32. Project add furnitures bathroom: Let's add furniture
on the bathroom. So I have the best Chrome here, I need to add furnitures. Also, I can click on categorize, just select and
bathroom categorize. We have different options. So first things to do, Let's just apply religious
to play bass and show worse. I want to add a show where US, you have one more time, much better option I
think can be this one. This one can be interesting. And I ever saw these options, but yes, Let's
just add this one. Left-click. And I need to create to rotation because
it's not extremely, extremely good like this. My element is on this area. Just scratch a rotation on this direction and put
the element just here. After to do this work, I would like to have
also a wash basin, so acidic this categorize and you have directly
freestanding sync. You have also doubled since, let's see, the
freestanding sink. And you have at the
same time furniture. It is not just on your sink. I can continue. And some things that
I would like to add. Maybe this one can be great
for what I want to do, but I ever saw the options. So yes, let's just add this one, left-click and I can
turn crowd to rotation 90 degrees and position
this one along this one. I can continue. Select toilets and dress. Click e.g. on this one,
left-click position rotation. And we can put this
one along the walls are so after we have replaced, we can add a furnitures. Let just come back, select cabinet and
shavings, shelves. And we have different
options one more time. I can see why not
this one or this one. If you want, you have shared, but he ever so close
S wardrobe and cabinet can be extremely useful. And address continue. Yes, I can just see it
exists one left-click, craft to rotation 90 degrees in robust whom we will
work with different color, not the color into the bathroom. And I can put this one here. Come back shelves. And on shelves I can see why not this one and Crato
rotation 90 degrees. So now let's take our blends
first about the 3D view. If I just go into the bathroom. So this will be surrender. So we have the show well
dressed on this area. We will have this one perfect. Maybe I can just
change little columns, these materials and
these materials. Let's take your glands
also about this element. This element is not
extremely convenient. I'm going to remove
this one and change. Maybe I can select this one. Yes. Thanks to that, I can stay in the same style and put this one on this area. Perfect. So I've dealt to do this. Well, let's come
back on shelves. 2d view first and click here. I can change the materials. I have this wood
materials I think I'm going to change for
the best school, maybe I can apply this one. And I can come back
to my 3D view. Dressed like this. Yes, perfect. Maybe there was an opening here. It's not extremely convenient. I can change that, select my show well, and just change on
this direction. I think it will be better
on this direction. Yes.
33. Project add decorations: I've tells that we
can add a decoration, decoration element
to increase X2, to increase the render, and add more elements. So the things that I'm
going to do first is to go on the left furnitures. And we can change
with categorize. And I'm just going to
select one of these. We can continue and
we have decoration. The first things to do, Let's add small element e.g. I. Have the plants here. If character and
spleen decoration, I'm going to come
decoration and adult neuro. I have these different options. Just let's add the mural dragon. Move inside the bathroom. Maybe I can move
little bit this one, move little bit this one. And position two
mirror in my data. I can create a rotation 90 degrees and position
Miami Rogers here. If I want to change the size, it is also possible. After to do this, I would like to add the painting so I can click on paintings. You have different options. And let's select two models. E.g. I. Can just select this models and left-click position these
models just on this area. And I could continue, I have more models if I want, I can maybe take one of these. I can take this one. It is a very small element, but maybe it's a
little too small. I have marked things
that you have this one, this one, this one. Anyway after if you need, you can eat it. So element inside I
can put this one also credit to rotation and
position this here. If I click on Israeli Mental, you have just eight, Y 22. Maybe I can increase. Let's try to work with 40. And about eight maybe
I can change with 60. Just like that. And positions is element
just on this area. I've taught we lose this
work, let us come back. I have also vase and flowers. I'm just going to put
a vase or for worse, trust here, I can just
check the position. So if I click on my table, I have eight of 102. It means if I click on the vase, change the limitation for
100 to also just like that, let us come back also. If I just go outside
and I continue, I have all these
different options. Let's walk with plants. So I can select the
interior plants. When multimode you
have multiple options. Let's try, let's try. Thing I can try this one. Left-click and position
this plane on this corner. Perfect. Maybe I can try another plant. And let's try this one. And maybe I can position here. It is quiet, big. We need to change the
ate 140 and wide. Maybe I can just put 100. And the Jeep, maybe
I can just put a T. And now I have something smaller and I can position this element
in this corner. Perfect. I would like also, maybe we can add more
things is we need, we have like we can add rugs. Maybe I can add the regs on this area are just some things may be in the best whom it will be better like a small rocks so that we can apply
in your bedroom and I can create a rotation
90 degrees, perfect. If I just continue. Also have different types
of kitchenware like this. And maybe I can
just put this once it exists one and
just put this on the table one more time as
a table of a tough 1.32. So if I click on this one, I need to change the eight. Not so it's really
petition for 102. And I can just validate. Perfect. And I would like just
maybe to add curtains. So two terms we
need to go and mix. Curtains, blend acidic to nearly months that we will
repeat different times. So e.g. I. Can select
I think I'm going to select this one or
this one wherever. So I think this
one will be great. I can just go left-click first. And just position this
element on this area. I think it's not
working properly. Let us comeback and Dragons. Yes, just here. So
after if I click on this one, let's first change. It tells a white to 100. Maybe I can walk with 270, It will be better,
maybe just 220. So now I need to make adjustment or bad zoo
position, I think so. I need to turn it in. It's more like this. There is because
I have this small element and this millennium men. So it's more like this. And I need to select
my 3D view first. Is a 3D view just
turtlenecks that, yes, about the direction. You just need to have
this element on the war. And now I can check
if it's okay, I think it's not
perfect. Yeah, okay. I can select this one and
change the different parameter. Have alleviation of zero
directly on the ground. I don't like to merge. Let's let a little
space can be maybe ten. I think ten will be great. About the A2, we
have this one thing. It's too much. I can
tap 200, maybe 30. Yes. Levitation. A 230 so
deep. I think it's okay. I can know Duplicate. Let's come back to the 3D view. Click on this one. Duplicate and position
this one on this area. Credit to rotation 90 degrees. Just keep right direction
and position this one here. And duplicate again. Click here. Duplicate. And
position this one yes, directly on this area. Also. Let's do this again
because sometime it's moving onto rung position. Is trust legs out. Maybe I can, oops. As you can see,
it's not possible because they have this element. Maybe I can drag and
move Nick term my window in the middle
between the two furnitures, and normally I have a space
to position my element. Yes. Translates that. I need to position
captain also on my three older Windows so
I can take this one. Let's keep exactly the same. You just need to duplicate. Position your element
just like this here. But it's not the
same type of window. So I need to come
back to my 3D view. And it did so parameters. So let's go here. And I can click on my curtains. The first things that I can
do to change so levitation. So levitation, Let's
start with 80. I figured t will be great. I think it's little, too much. Maybe 70. Just like that. After I need to
change x2, eight. Let's turn little bit,
click on this one. We have a 200. And I need to reduce. Let's walk with 160. It's not enough
when injury the 70. I feel like this is great. If I compare with this
area, yes, it's great. And that's it. So it's perfect. And I need to repeat
this cartons. They just use it to the view. Click on this curve,
turns, duplicate again. And position this
one on this area. Rotation 90 degrees. And just snap on the war. Just like this. One more time. I don't have too much space, so maybe I can drag and
move little bit and normally I need to position
yes Exactly In the remainder. Trust legs out. And duplicate again. Click on this one,
duplicate again. And position on this area
CRA to rotation, 90 degrees. Maybe it's little too big for the bathroom or yes,
it's little too big. But I can change the Y
that can entail e.g. just felt boss who met something with a
different size like 200. And I can position
this any mantras here. I don't have too much place. Maybe I can move liters
is different entity. Men first. And positions or
curtain is just on this area. I can extend a little
bit. I have 200. I think 210 will be OK.
Don't it's too much. Let's stay with 200.
It will be okay. And after to do this work, Let's check every
sink with a 3D view. So if we take again so bad
Jakarta and it's nice, we have curtains here. We have this character and
so on, this area, wherever. So this captains on this area, perfect. We can find. So we have two elements on. We have two elements
here directly. Maybe I can change the
position of this one, and I can change it tells
a position of this one. You have my first plane, I have my second
plane on this corner. Maybe I can move little bit. Here we have this
element of decoration, this frame and finish nice. Ends as heat. So after we can do more, you just an example, but what you can do, but you
want to add more element. It is possible, I think
I'm interning trouble with position of this element. If I click on this table, 102, if I click on this
one, I have 102. Is sitter strange? Because if I select my table, he has a problem is 1.2. So eight of the table, the eight of the chair. So I think about the table, it's a little different. And which ends or limitation? Affinity 75. I need to check. Yes, it is 75. Let's click here. Levitation. 75. So
same time we need to make adjustment because
of different reason.
34. Project add appliances: Let's continue. We're
going to add appliance. So first things to do, Let's select the right category. We can click here and we can
find electrical appliance. The first things is, as you can see, you can go in this area, you have cremate. And if we want to add
some sink like eating, we have different options. Let's try example
celiacs, this one first. And this is an element
in C is perfect. I'm going to try and position. Maybe I can put this one
directly on the kitchen. If I click, I every wide
and then drip, sweet, maybe it's a little big, but it's going to be okay
for what I want to do. And then duplicate. Let's position another one. I think I can position
and Adele one. Let's click here first. Rotation. Position in order one, just in the position
of the frame, and I will age it just after. After. Let's position another
one in this room. Td Grace, go and this area. And I can duplicate
or track and move again. Here we have a frame. I can use this eating just
below the frame on this area. And about the bus room. I think I can slip
to know Dell type of models have different
models like this one, this one, this one
I think will be better for what I want to do. Maybe I can still exist
one perfect credit to rotation and position this
one just after the window. Perfect. So it's okay
for this trust element, Let's activate the 3D view. And let's just check we
have this element here, whoever nodal element on
this area, as you can see, so position is, a
position is nice. I don't need to change. I have my frame on
this area, perfect. Here we can check whether
this one, we have, this one. Maybe I can click
on the frame on this area and drag and move
little bit more on the top. And if I go directly onto
best whom I can find also, this type of models
here, perfect. So the next step is to add
lights so I can come back in a different categorize
electric LPNs lighting. The first thing that
I'm going to do is to add a floor lamp of table lamp. Maybe I can put the two
sittings a 2D view. Let's zoom little bit and let's
see two floor lamp first. Not a Flowline light,
night light first. Let's try your small models, not something very big. It can be, can be e.g. this one, this one or this one. Let's try with this one. And position two element. We're stressed on this area. If it's too big, I can change. I have wider 40. I can change for 30.40
and I can change for Satya and position
this slide, this area. Let's set a set time, add a table lamps. Table lamps exists. And you have these
different models. This is my desk for neutrinos. And I can activate two models. Can be, why not this one, this one, this one. Let's try with this one. And just position
on this area can create a rotation truss here. Now, I want to add
spot lighting again. And we have different
models of silly lines. If I want to keep
a modern style, just add different type of spot. First things robust, whom
I'm going to select. This one is the best room. Here. After fossil room, frozen room, let's select something like Let's take something like this. And I can go left-click
position once here. Duplicate position in
order on this area. And let's do the same thing. I can duplicate
position once here and duplicate position an
order on this area here. I'm not going to
develop too much about Xu light after it
depends of many things, just to add little light. And if I go into living room, why not time I can find
different options. Let's work with this one
directly under kitchen. Let's work with
this one just here. And let's work with
another type of models. Man, maybe you can
be this one just on this area, just like that. So 3D film models of lights. After, as I explained before, we have more options. But this electrical appliance, if you want to add any
sinks like microwaves, you want to add to a computer, ODU, any equipment you
have a sumo equipment. It is possible to find, hear me, I can position the computer and click on this one just here. Rotation 90 degrees. And maybe I can position
or to a TV like e.g. this one and position this here. Maybe it's a TV is little big. Wide. Maybe I can change 120 centimeter and keeps
you there are parameters. So I can check on the 3D view. So first things to
do in the 3D view, I need to check e.g. to compute here on the desk, we have 875 centimeter. So if I click on my computer, I have levitation
75, so it's okay. If I click directly
on cease lamp, I have 75 unduly irritation. So it's nice. If I
click now on this lamp. Levitation is not good because on this furnitures
or you have 858. So here I need to change the
limitation for 58 avatar. We can find a spot here, can find another spot. So here it is inside. If I go, this area will
be able to see e.g. I. Can go here. I can go inside the
room and we can find a spot on the sending. Let's come back little outside. I need to check my I need
to check my TV first. This is a TV. If
I click first on the furniture has
860 centimeter. If I click on the TV, levy Titian 45,
so it's not good. I need to change for 60
and now it's better. If I turn, can find
this spot here. We can find the spot. I think for the rest it's okay, maybe maybe it's not perfect. If I click on this one. I have levitation 257. Maybe we can drag
and move little bit. Yes, I think it's better now. And normally here it's okay. Don't need to move. Yeah. So let's come back to the
2D view and it's okay, well, I'm going to stop
here for the furnitures. So I wanted to show
you step-by-step sometime it's little long, but how you can process
to add furnitures in the different rooms
and add more elements. We can develop more. We have again more options. We can add more decoration, but after it will belong, it depends of your project.
35. Project edit materials ground: Let's add the
materials on groomed. We have different
materials onto grown on each living rooms,
on each rooms. So by default we have the
same, as you can see, where exactly the
same wooden materials and I would like to change. So first thing is to do just select each room independently. I can click on this one, and I still exist
room, as you can see. Now, if I go into
these options, style, I can change materials
for the flowers are cell. So indoor and outdoor words, let's select floor first. After that, I can see the
different categories, dialing, different options. If I continue a little bit, I have different
different models. Share. It's not extremely good. Sometime it's smoke
false for awards. If I just come back
at the beginning, I just think this
one will be good. It's little wisely tell great. Size will be enough. I can click on this one. Yes, perfect. After
if I want to change, can I have the options? You have the texture
scale. Just like that. If we want to
increase or decrease. In my example, I think
definitely 100 per cent will be great if we need
to create rotation. It's also possible. She, I'm going to stay at zero. So after let's click
on the bathroom. So click on Syllabus whom first. And let's reuse exactly
the same materials. Style fraud. Let's activate 1
mol times tiling. And I can drag and
move this one again. Just click here. And it's okay. After Let's work
with the two rooms, I would like to add
a wooden materials, not exactly the same,
just too different. So select this room. Go on these options. Floor. And I can see lead
to one of these. It is packet, I think
definitely will be great, but you can also change
sometime you have lemonade. Can be great Also. Yes, I will stay with
packet, just change. Maybe I can select this one. But you have a lot of
options, definitely. Yes. So this is the timings
to do it to sit exists 11 more time if you want to change the text to a scale so you can
increase the size. You can decrease the size. 100 per cent is very good. So in this example, and sometime you can
make a rotation not to, not to rotation like 45 degrees, but you can make a rotation
at 90 degrees if you want to change the direction
horizontally or vertically. This example, let's keep zero
or 100 per cent in zero. Let's repeat the
process on this room. Click on the room style floor. Let's select this one
again and just validate. It's okay. I think the best seems to do
it just to select each room. And after you select materials, activates the 3D view. As you can see as
the render is nice. And even when you
go on this room, you have a joint. It's perfect. For us
the size of the tiles. I think definitely it's great to have something different around
just for the room. And it's good. You don't have
anything more to do. Take your grant
so bad. So doe we have so perfectly meet here. We have the perfectly
meeting reminder. So definitely it's very great when you have this
type of software.
36. Project edit materials walls: Let's add the
materials on wards. So to add material on wards, so things that we have to do
is to select first the room. And after two sittings
a room we can go on and we can select
indoor and outdoor. First. Let just work with indoor
for all the different rooms. Beds are living room. Let's click indoor. And maybe engineering room. I can position something
like a wallpaper. So I can go into
these categories. Have different options. You can see this one, this one. You have urges,
different possibility. The things that I'm going to
select is just to continue. Maybe some sink like
this type of color, or maybe it can be this one. Dress here. And I can just validate if
I select my 3D view, they could glance, yes, we have this small element. Often it will be
great for so many. Afterall it's
ceilings or bathroom. So click on the bathroom
style, activate indoor. And in this example,
let's apply timing. But tightening on
new fossil world, I think I can sneak
one of these, something like that,
e.g. don't hesitate. You can also use your 3D view. So thanks to that, when you add materials
on the world's directly, you can find the render. So I can come back, click directly on the
bathroom options indoor. And I can try different
options things. This one can be
key for this area. Maybe I can try another
one. I have this one. This one. This one also is good. Yes, So we have a
lot of options. Let's work with this
blue color effect. Now I can continue and
click on this room. So click on the floor first. Materials, select Indoor. And we will just
work with the color. If we just want to
walk with a color, it is like a painting color. Just select ten color. We can go on this small
rectangle and we have options. Let's swap something
neater in red, not too much, maybe
something like that. And I can validate. If it's lethal to merge, I can reduce with
this type of cola, but a finger can hear
if I do this one, if it is definitely too much, but I think I can work
with run this codon. Now, let's work with this rumor. So click on the floor first,
options style indoor. And let's set it to
Colgate tint color. Let's work with some seeing
in screen like this one. I can try first. So now it's too much. I can just rigids little
bit the transparency. And me as I think definitely
here, it's better. It's okay for that. So
that was the next step is to change the color of
all the world's outside. So if I just focus
on Per Click here, I sit in their worlds. And if I go and style, I have indoor and outdoor. And just on the outdoor, worse, let just apply a white color. So I can go on tan color or
you can just click No sink. And thanks to that
is pretty simple. You just need to select all the world's outdoor
words, one after, once, and change the style
each time you select, not indoor, outdoor and you
can replace for no cola. Here I need to select
also, know Carlos. Each time you select
the world's style, outdoor and you
apply new nucleolar. Need to click here. No color. It's not possible to edit
all the outdoors in one. All you need to do this
the first time when you create just the
base of your house. And you don't have created
any new room inside. It is possible to change in just one time, also
outdoor words. But if you do this after, you need to repeat this process. So perfect. We have
changed the materials inside and we have removed
all sorts of material, yes, I would say on
the outside worlds to have some scene in wise, I think definitely it's
better that should be break. It's not very thick,
it's not very, very good to use by
default, these materials.
37. Project render interior: We have finished the
interior so we can craft a interior render. So extremely useful. I show you step-by-step
how you can create two interior using this software
and how it step-by-step, you can make some
design materials, adds a different furnitures
or more elements, and we can create a render. So first things to do,
you're going to see options. And if you go and see things, you can change the backgrounds. This is a grid. If you want to change the background, e.g. I. Can use wise, but I ever assume our options. It can be this one, this one, this one, this one, this one, this one. So let's just apply the
Weisberg ruined first. And after I can click
on realistic render. When you are on realistic
render like this, m is two sittings of
views that you want, just six reviews that you want. So e.g. I. Can just
select the first view, like on the top, just like this thing, I can zoom out a little offset and yes crowds
this type of view. First. After you need
to click on save. And you can apply your regular screenshot
rendered referenda. If it isn't, why
quality you will have to use credit. So e.g. if I click on this one, I will have to have credit. When you have the paid version, you can just make sweet
for first photos. And after you will have to
add other elements to phrase on Xbox your work
in high quality and you can select the number
of friends that you want. Here we have just going to
explode in normal quality. Click on realistic
render, save and share. This is irregular screenshot. Let's click on this one. Snapshot will appear
after a while, you know, snapshots section. So after we'll be able to
see the different snapshots, after to have this type of view, maybe I can just create
another type of hue like e.g. this one and create
a realistic render. Save week. Your last question again. After let's create one script, Sean Penn room, even if
we can do a lot of small, but it just an example
so I can zoom inside and credit maybe a first
screenshot in my living room. I can position myself
yes, around this area. Things is view can be interesting
and realistic render. Save, regular screenshot. It's okay, I can navigate
inside and creditors, so a view of the best rumor, I can go inside
just like this turn around depending of what I want. Maybe maybe I can take this one. I can also go in this area
and just turn around. And maybe I can try
something like this. So it's okay, I can
repeat the process. Let's end on the first room. Let's go on the left. This is my first rule. Let's go in this corona
and turn around. And the thing is, is you can
be great with your laptop. And let's turn a little bit. Yes translates that
realistic render. Save regular screenshot. And you can repeat this
process as long as possible. So it means you want
to make 20 screenshot. You can make 20 screenshot. If you want to make
100 screenshot, you can make 100 screenshot. Let's go on Z
signal in the room. Maybe I can go here
first, turn around. And this form is small. Maybe I can try this one. You have also the
option enabled. You can enable use of automatic ceiling
lighting while rendering. In hibernate mode, rendering. It is possible you are
just going to create two regular screenshot here, but you can work with
a dark environment. So it means I can e.g. say you need to, again CDK to use here
realistic render save. And maybe I can use NA values. And you have also a night mode
rendering that can apply. So it's okay after that you can change all your
different screenshots. So to check your
different screenshot, just go on these panels and
you can find snapshots. All renderers here. So this is not the best
quality as, as explained, if you want to have a 3D render, you just need to use the render and you
need to buy credit. So it sees a view like this. E.g. will have
this type of view. So even if here, if I take this example, I apply like a light mode, but definitely it's
not extremely, it's not extremely efficient because I didn't change
the environment. It's not extremely efficient. It exists one, this one. And each time you can download in image file, your
render download. But if I show you maybe
something with a real render, I use a 3D render on a
different project. And e.g. this one, if I
click on this one, it was a real render with
a different project. And you can see
the difference and definitely take
your glands so bad. Some materials on the World
Cities, very great tagline. So bad the materials
of the furniture, so level of details and share was working during
the night and in the HUD, you can really see
the difference. Here. It was also HD Render. And you can see the difference
with a different effect. Another HD Render,
just like this. It's definitely a
really great about bad, so lied to by the shadows. We can make amazing things. And here it was not a
high-quality render on, but twist the top, you
just follow the curves. Just for this example, we stay in this type of quality. But if it's your projects,
your own project, you can take credit
and then you will be able to export to
obtain the best result.
38. Project create garden: After that, we can work on the garden to welcome to the gardens with first
thing that we're going to do, each to create the base. So we would create
different paths and we'll create the GRU. And also first before to add a different element,
crowds your grace. I need to position my
different paths and pass, and I need also to
position my terrorists. Let's crunch the
terrorists first, click directly on this area
and you have pass and loss. Let's click on this one and select the first
element just here. And this element I can send, click on this one, drag and
move and position this here. I've done, I can
go left-click and drag and move this point here, left-click, drag and move this print and snap
on this corner. And I can take this
sprint and move on this direction and also
move in this direction. Let's take a gland
so badges size, it's not possible
directly to exercise. You can use these
tools are the rulers. And thanks to that,
I can position the beginning of my rulers here. And I can extend. If I knew nothing, I can
make it theorists maybe. Yes, I think around
sweep, sweep, sweep, sweep 0.5 can be great
so I can position my ruler. And if I zoom little bit, drag and move my ruler here. And I can just extend
little bit might pass just on this area. So this will be my terrorists. But I need to click on my erase
and change the materials. I can remove the ruler first. Click on just erase
materials. Let's stay on. Grindr enables this
type of options. As you can see. I think
I will select this one, but you can try Yoda
one if you want. So yes, it's okay, I'm
going to select this one. I've taught to do this work. Let's continue. Click again on passing laws. Exterior click on
this one again, and drag and move
in this direction. Froze the best things to do, it's to use these points, snap to this corona. Take this point. You can
just snap to this corona, or maybe you can snap for us to this kroner and after we'll
make some Transformation, whoops, yes, just like this. So snap to this coronal. After we can move on this area, maybe if I zoom
need to beat out. I think it's nice here. I can take this
one and add print. So now what we're going to do, goings to do first we
change the material. Let's click here chains
of material six or seven and add multiple point. If I just click here, I can add a print. And let's add a second print. Click here at the
second print, acidic. So first, let's zoom little bit. Yes, I have a point here
and a need to position this brand just in
front of this corona. And now I have a
second print and I can drag and move
on this direction. And I can use this
world in the ligament. And after I can take this point and I can
move on this direction. Perfect. So now let's continue
pass and loss again. Click on passing laws, click on this one again. And we can make something
just directly for a cow. I need to have at least
minimum dimension that can create two rules. Positional rules around
z is around this area. And maybe I can put
at least five meter. I think it will be great. Yeah, it's just five meter. After I can take this one and I can position the first element. You can see we can stay in this ligament like that effect. And I can drag and
move my element. Just stay on this semi
ligament here and just hear things or ligament
is not really good. Yes, no, it's bitter. So I've taught to do this work. Let's change the
material routes. So first click on
the rule, remove, click here materials
and activates the same. And now I just need
to complete with grass, grass element outside. So how to do this process? When you zoom too much Sherwood, you don't see anything. I need to zoom at
least, yes, legs out. Let's click on this
1% loss again. And I need to add
multiple point. I can add multiple elements. So first let's add something on. So back here. And drag and
move on this direction. And I can take this print
and drag and move on. This direction may be exists. Okay? So after either the explainer, if we want, we can
add multiple 0.0. We have also Xu options to
add multiple rectangle. We can make CO2, so e.g. I. Can add another
rectangle like this one. This rectangle position
in this coronal. And then I can pull my
different points, e.g. I. Can pull a point here. Sometime it is also fast. I can take this print
on this direction. Move little bit here
and take this print and teal or ligament. I need to now take
this print and drag and move until this corner. And take this point, drag and move until this corner. Perfect. Let's create another element. One of the best things
to do, maybe it's too. Yes, I will be able to
add Mach point. So e.g. you can click on this
line at the print, can click on this slide. Other point also.
And thanks to that, I can pull now with this print. Just like that. I can pull now is this
sprint chest here. And I can pull this sprint. Trust on this chromium. Can take a little long time, but this is only processed
to do you're not have or doorways
or the operas CBT. It's okay. We have
our element here. It's not a problem because
if you sit in your 3D view, you will have just
so feelings of impression to have only one
type of rectangular exists. So it's great. So we have the terrace we have surpassed in front of your house and here it will be an element fossil cap. I forgot something. I need to come back
to my 2D view. I can add your
rectangle on the right. Click again on this one. Pass and loss. And credit to small rectangle. Not extremely large. Just snap here and just
make something like that. Perfect.
39. Project create terrace: I've tells us we can add
furniture on the terrace. So to add furnitures
on the terrace, just go on these panels and
you have partial furniture, patio furniture, netflix clicks, let's click on this one. First, I can zoom
little bit on my erase. And I would like
just to add a table, but you have also sets. I think set is the best. Webs is different options. Maybe I can add this type of element two will be
perfect. Dress here. After if I continue
a little bit, you have more sets,
but it will be enough for what I want to do. I can add shells and bench
chairs, loons, Bench, chair. Let's add a change lunch
and civic two models. Why not see leaked or it can be this one and create
a small rotation. Like e.g. here, I can see
leaked sig bond models. It can be maybe CS1. And I can create a rotation and position this one
just on this area. After I can continue. And you have also chairs, but they have enough things. I think this type of an element, if we want to add umbrella, things that I want
to do first is to go out and select
outdoors activities. And maybe we can complete with an adult type
of element like e.g. this one. This one also, I feel I'm going to sneak this
one correct to a rotation. Let's work on this direction. Perfect. So I would like to add plants, declarative planes
on this tea rice. I have this categorized
trees and plants, things that I can select
it and maybe this one, put this one here and then duplicate and put this one
also on zero, the r direction. I can select a seagull models. Let's select this one will be
perfect decorative flowers. And I can duplicate them and position this one also
in zero dose side. If I just come back little bit, we can add more things like lighting, just
outside lighting. You have different type of spot. First I can sleep, e.g. this one and drag
and move on to words to have outside light. Put this on the wall just
to round my daughter. And maybe I can add a spot. I have this one. Oh, maybe I
can add something like this. This one maybe on this coronal. And I can duplicate again. And position this one. Yes. Trust on this corner. At the same time, at
the Assembly votes, maybe I can just put
little plants on this area and maybe also
this type of decoration. So maybe I can put ones
just here and duplicate. And put to know the
trust in front exists. After to do this work, Let's just come back
not on lighting but trees and plant one more times. So take your greens. We have e.g. this one, I think it's little big
but I can reduce the wide. Maybe I can tape 100. So deep may be I can tap
100 also ends with eta, can just take 200 and put
this one around this area. You can add rocks are, so if you need this element, this element can
be anterior Stein. Yes, I can put this element
just once on the left, just here of the door. And duplicate again. Click here. Duplicate and position
this one on this area. So perfect. Let's take your glands
on the 3D view. So m is just to add
little furnitures. I think if I check so
different element, we need to make some
adjustment. So e.g. what type of adjustment
I can do first, maybe I can change the
position more in this corner. After one of the problems that I have is here the
limitation is not good. So I need to click
on this plant. Chancellor limitation. It wasn't 75 by default, so I can use zero. For the rest. It looks nice. I need to repeat this
process, this one, levitation and zero or so. Let general social
position of the light. I think it's not very high. So let's try and move
little bit better. Each time it is Sam,
you can edit on this. I would cite from each
year's materials so I can click on this one
and option style. And you can have all
these different options to a digital materials. If I want to edit
this furnitures, I can click on the Options
and you have color, you can detect your convenience. We have the set table also, even just a plan, but if you go into your option, you can change the
color of supplant, but it's also so same same problems here. So I need to click on
this one change to the petition with
a value of zero. And I need to click
on this one and change lives station
with a value of zero. And validate.
40. Project add trees: After that, then we can add more elements are in the gardens and we can add trees first. So let's add ornamental trees. Click here acidic
trees and plants. And we have different,
different options. The first thing that
I'm going to do, each to add big trees. We have all these
different models. I can e.g. see exists
models and move here, but it's definitely
very, very big. Legends. Legends are wide like e.g. for orange-red, nothing more. Chances are deep
like 408, like 600. And drag and move position
one big tree on this area. Let's select an
ADL models can be this 11 more time I can try and move in this direction and
just change the white. Let's activate foreign trade. Let's activate like 308, Let's activate like 500. Just like this. And put tone audiometry maybe on this area. Let's try type of models. It can be maybe this one. And I can drag and
move on this corner. I can change one not time
this size of this tree, Let's walk with a wide 350, gets work with 350. And maybe a TA can work with
500 again, just like this. Even 500, maybe it's too much. I can work with foreign trade. We can add ornamental trees. After you have also specific, you can add this type of
tree so I can go left-click, put this one just here. You can mean more
option. Maybe I'm not going to try this one. Maybe try this one. This one I can I can change for 200 and I can change
from maybe 208, 260 at the entrance to have two very
declarative tree. And why not to select this one? It will be perfect. I can zoom a little bit and duplicate this one
on this direction. I need to invert. So I can invert. Yes, Perfect. Maybe I can invert in z
direction, exists an exists. You ever so much since
it can be flower bed. So I can click on this one. And why not add Bedouins
this area one more time. You can change if
it's too small, I can make something
like 400.258. You have one but I
can reduce like 20. Just like that. You can also add
roadshow efforts. So this small
elements at directly, you can put e.g. I. Can put this one here. And I can duplicate
multiple time to craft a small flower beds. Let's duplicate it again. And let's duplicate again. If I just check Z
are the options, maybe, maybe I can add another one
just on this array. I can change something
little bigger, square and read DPT 250.850. Just like this. So Fontaine or you can just dressed as this
type of flower bed. You have butterfly or so maybe I can put
position this one here or something
little different. It can be like this,
the correct filament. And I can click on this one, just change for 120.120,
just like that. You have also these
big trees with flower. Let's reduce 150, 258, 250. And position once on this area. And duplicate and
position once here. Scrap to rotation. And it's ok. So this is a type of
things that you can do. I'm not going to enter
much more in details. In planner 5D. It's more about interior design. You can also walk on to erase
it all elements outside. But if you really want to make
a perfect a garden design, it won't be so best M to create. So garden is just to extend your interior design
or out on the outside, we surpassed show, we surpass. That. Aim is not to make
perfect garden rendering. If you need to add to pool, also you can add pools. You can click here and you
have different type of models. So Fontan, if you need
the correct form ten, maybe I can add a
decorative font and maybe this one
just on this area. Let's check the 3D view first to have a
view of the trees. Yeah, it's great because
you have you have a house and we'd square to introduce
or who's in a garden, even if you can't do
the perfect garden, definitely nucleate scratch
can add the theorists. You can add, pass,
let z some flowers. And you can make
interesting things to introduce your work. Last thing that I'm going to do, just be fourth-grade surrender. It's to add character. So I can come back on Tuesday, just see leak furnitures. And here we can find people. So interior people. Let's click on this one. Inside. Let's click on the woman may be on erase
working on to terrorists. I can add also maybe to animals. Let's come back here. Pets and select dog. It's added dog may
be on to erase. And let's e.g. Act cat, maybe. Maybe you're lonely
cat on this area. I can put these dressed and maybe on this
area just like that.
41. Project render exterior: I've tells that we
can create a render. So this time it is render
with outside belt. So it means we can create a
render of the terrorists and different angles from
outside in the garden. Let's directly, I can change backgrounds
who are not times, so we can eat it too parameter. Try type of bedrooms. Be careful because if you select this lawn
background should be absolute FIDIC to have
an infinite or garden. It is not the case
where I can advise you to not use the same
letters work with wise, it will be perfect. After to do this work, I can use realistic render. Need to select
different type of user. First thing that I can do
it to select a top view. So I can position
my element around the center, zoom little bit. And maybe I can
create a snapshot up with this type of view first. Click on Save. So as, as explained before, if you want a real render, it is possible but you
will have to add a credit. So by default, if you have if
you have to pay the option, you cannot fall renders
foreign dose for free. But after you will
have to pay a credit. And let's come back
realistic render, save, regular screenshot, and
I can click and validate. So let's set a different view. I can first try to have a
good view of the terrorists. And I can select e.g. this type of view try to have some thing because one of
the problem is that you have so trees and the
different decoration element. But I think I can try
to make something here. It will be perfect
and realistic render, save your screenshot
and validate. Plaintiff 5D is definitely
a very great tool, very great tool to criterial
interior design, to crack, also to extend on outside
design ever need outside this. And it's not too
much in details. But it's great when you want
to create, to pass show. You want to create a
theorists like this. It can be amazing Also. Let's select a different view. It can be this type of
view at the entrance. We absolutely entrance. Maybe. Maybe I can walk
like this first. Yes. Perfect. And
realistic render. Save. Let's see, lead to less view after are not going to repeat
too much the proceeds. I think you understand
how to work. Maybe I can take
a view just from this area and realistic
render one more time. So it's okay, We can
zoom Nutella root and we're finished
with this project. It was definitely a great
project to show you how to use Planner
5D, step-by-step. So we have seen
everything step-by-step. So it means how to crack
the base of the house, then how to draw walls, how you can add doors, how to add Windows
after step-by-step, how you can decorate
the different rooms. Who is furnitures,
adding furniture years. We have seen how to add
materials on the floor first and second on
the different worlds. Credit interior
render, then extend to the garden with tere's pass
and also outside garden, different trees and create
a render of outside. So step-by-step, this
is a process to use if you are working
with plenty of ID. And after Sam, you can
go here, snapshot. And you will be able to find your different element each time when you click
on the sweet print, you can download in image file. You can also make HD. So it means you can convert this image to ISD using credit. And you can also
classify in further.
 Nicolas Forgue, Welcome awesome students !