Transcripts
1. Introduction: Hello everybody. It's
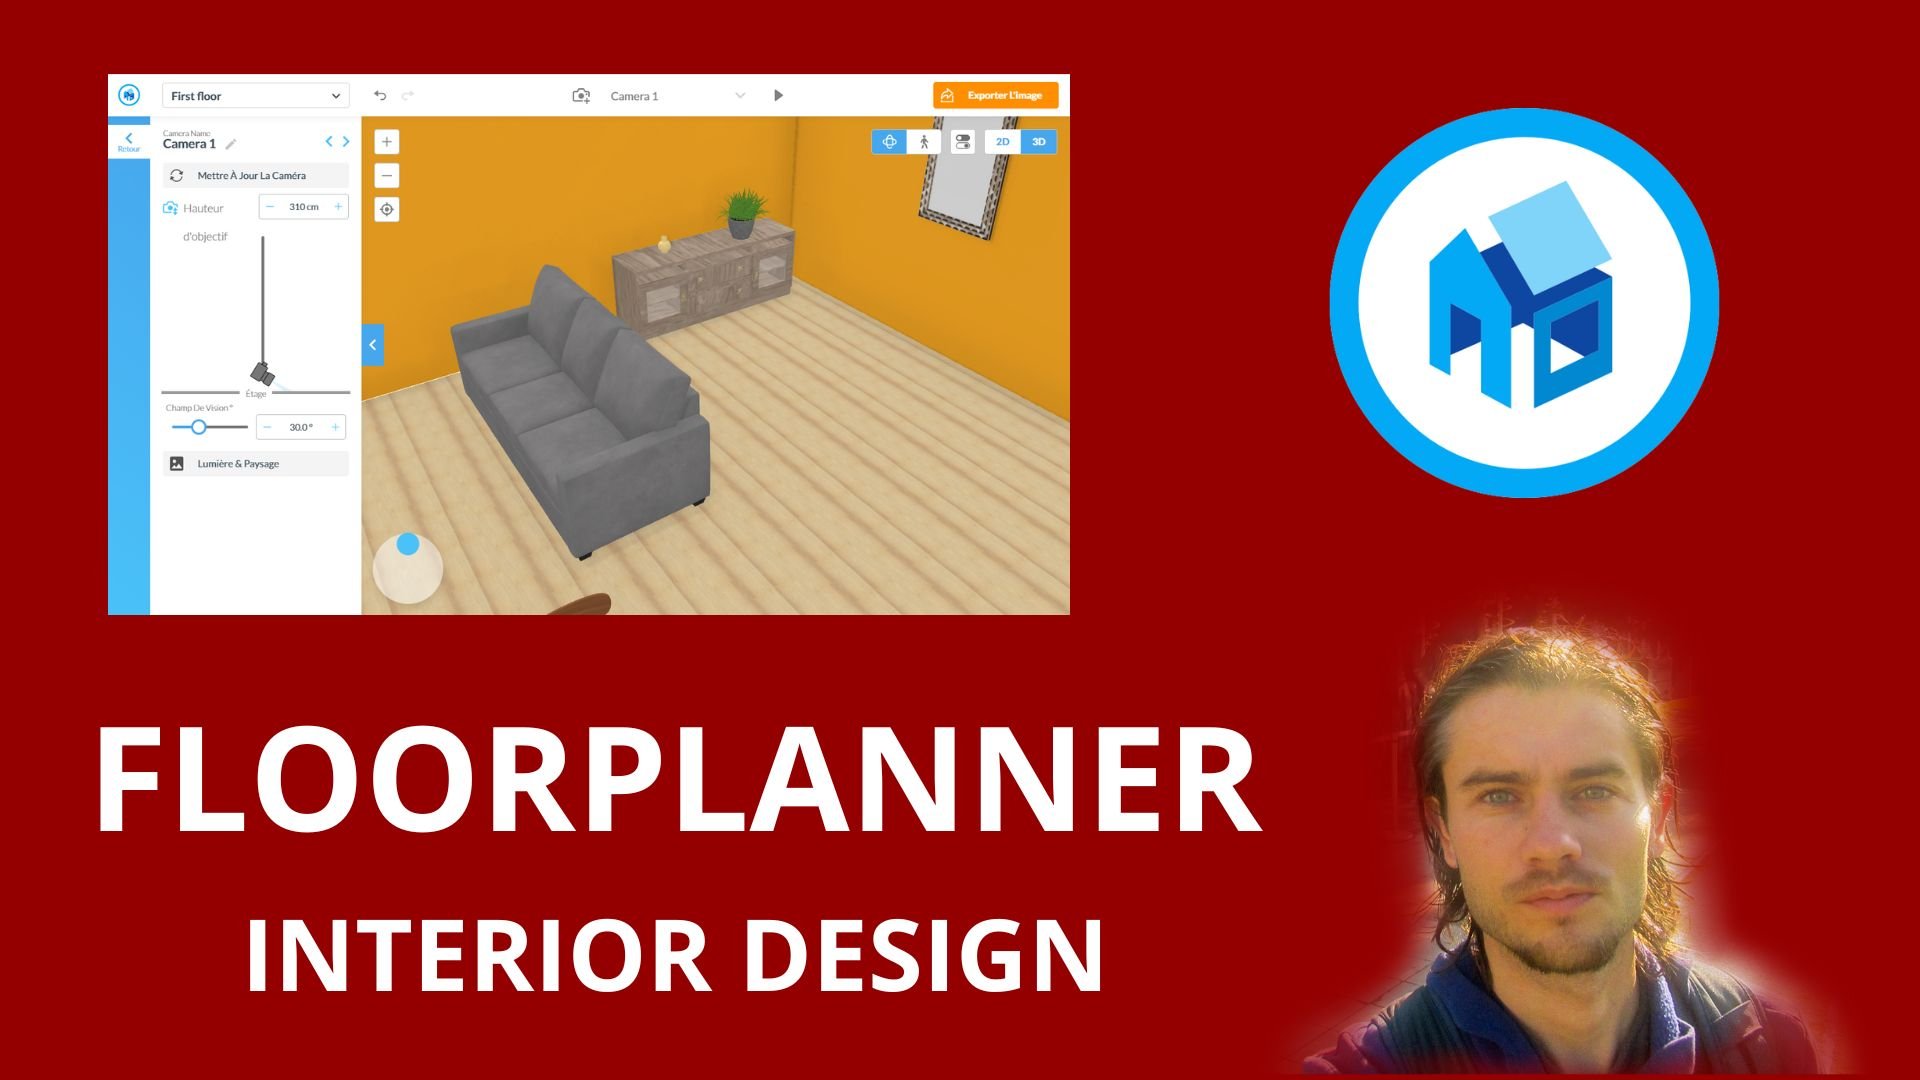
Nicholas and welcome to this curse on by me. Interior design with
a project creation of a house on by me. What is this? It is a software, it is an online tools that allow you to create a 2D plane. N2, obtain a 3D
rendering in real-time. The software, especially
for interior design, but it is also
possible to expand on exterior design with
different features. The software's allow us to optimize our interior
designs sense to a click and drop system
and different preset size. Indeed, it is economic to our doors to add windows
or even furniture. Sang Twist, vast library on by me offers very advanced
library of furniture, decoration or API and
sees the change of the 3D view is
very powerful with real time view of
the plane rendering. It is also possible
to work inside different rooms and to have a very amazing,
amazing rendering. On by me is free for the main
features, all the features. But just if you want to
have unlimited number of projects or if you want
to export your work in HD, you will have to
take the proportion. Who is this software for
this online tool for individuals who want to create a rendering of the
effort your apartment, or simply designer room. For any entrepreneur who want to work for interior design. This economic tools makes it possible to make
presentation and renderings for Cleon's in 2D
and 3D views for real estate agency who want
an economic tools to give ideas to clients and create
rendering of project. Now what you will learn in this online course,
in this training, you will learn how
to use on by me online tool with the creation
of our step-by-step, I will show you the
process to respect and see different features. So we will start to crowdsource base with a different
amount worlds after we will create a different room in side and
we will start to adores, will start to add windows and to furnish a different
room step by step. I will show you also how to add different types of decoration. I will show you then how
to AD two materials on the floors and aged
materials on words. We will create renders, different types of renderers
of the entire project. Then we will extend on so Gander and to create a basic garden, but extend on the garden. And then we will also
export your work in a real rendering and with
the different features. And thanks to that, at
the end of the course, you will be able to
use unbind me and to create your own project
for interior design, but also to extend
for outdoor design.
2. Start with software: Let's start with and by me, first things to do,
Let's see the website. So you need to go on and
buy me this address. And after you can
add the website, you need to understand
that it is an online tool. It is not directly your
software on desktop. It is a non-line tune to them. So if you need to
change the language normally by default
it is in English. But if you need to
change the language, you can dress go on the
bottom right corner, and you can change the
language on this area. First thing is to
understand what you can do with this stuff
where you can work with interior design efficiently because you have a very interesting
tools to create world, to create room, you can import furnitures with a
drag-and-drop system, so it's extremely,
extremely convenient. You can after export your
work and create real render. It is for e.g. just or people who want to
design their future, e.g. but it can be also for
interior designer. If you want a convenient
tools, grid tools, not expensive to work
with interior design, it is extremely great. Tool is free for
conception, proud. But if you want to export human to export with
real-world data, you will have to buy credit. So you can take your glands
are but the solution here. And this is a
features I've taught. You can also use a
pro pro version, but definitely are already
with the free version. You can do a lot of scenes. And easiest Sui De plan
her craft and drove. It is a very nice SI, system. You have endless
possibilities of design. Can furnish and decorate
with a lot of items. So I'm saying on
terrorists thing you have also, moreover, you can have an
interesting feature to credit directly,
you furnitures. And this is a DEI furnitures. It is a little
different interface and we introduced through
how you can use this one. And it is great because
if you want to create your own table using
different materials, using different
element, you can use. What we saw made by me. And it is a DEI, for DEI furniture
that you can use. If you take a gland just
on the pro solution here. Save time or creating
new project fast, faster start from scratch or improper direct
you to the plane. And here when they say
that it just directly, you can, you can
directly expert, you have a pro version
in better rendering, but you can just
start for free and only only use an only used e.g. here you have the price on this area and included
premiums or startup plants. So it's a startup plan. You have all the basic conception
tool it is okay. And add. In addition, it is just
unlimited projects, unlimited
high-definition images, unlimited standard definition. So it just that if you
take this one, e.g. one month or you
can pay annually. The aim is to have
unlimited project and unlimited I Definition images when you export your
work, this is interest. But for the conception
tool it is same. So if it's for a walk propose, I think it's interesting to
take this premium version. But if it just like
this, just sometime, you can just use the free
version startup plane and just buy credit only to export in re-render or just
to expert in basic render. And in this case, you don't
need to do any things here. If you take the
unlimited proofs, you have everything unlimited. Unlimited for K images, you have a packers pack. Also false when read
60 degrees images. But it's more for really,
really professional use. After you just need
to go and sign up for free when you address e-mail. And after we can continue the
curious with the interface.
3. Manage projects: I've talked to
subscribe and you will arrive to your dashboard. So this is the main dashboard. And from this you can
create a project. If you're going to top
right corner here, you will be able to edit
your account and to edit your profile
from this area. Here you can create a project. And I've told you
will be able to manage this one
with my projects. So if I just click on my
project just like this, I have nothing because they arise also project
for the curves. First five projects are free
to express your creativity. So if you want to mock project, you need to have a subscription, but for free you
have five project. I then click on New,
just like this. And automatically I can
enter to this new interface. Before to see this interface, just click on Next. Make any things that you want, you can just apply project. And I can create a new
constriction house like this. And no. And just click on Draw walls. And you can just click here
just to create anything. And just to understand
the principle of work, I can just go on this area. I do room and ceilings
of first element. You can change the shore face. Let's work with just 40 m gram. Select a room type like e.g. it can be just two living room
and just click on correct. So this is one project I have
just seen my first project. And after to do this work, don't forget that it's not safe automatically in lots of online tool itself
automatically not here. So you need to click
on this area and save regularly if you don't
want to lose your project. When you create
something like this, you will have some
options on your project, on this area with
information areas. But something I'm protons. If you just come back
to your dashboard, you can come back here. And now I can go on my
project and take a glance. We have now is this
new project just here? So every time when you will have a project on
this dashboard, it will appear on my project. After you will be able to
have a preview, Not directly, you need to wake little time and you have different options. You can just click first. If you just click here, Edit Project
automatically, you come back directly on your
project, just laces. It sees my 3D view. I can come back to the 2D view. Let's pick here. If you click on this area, you can copays or project. So you can duplicate, e.g. you can change the name. And now I have this
project duplicated. At any moment, I can just
come back with my project. So as you can see now
I have to project. So first one and
duplicate it project. You will have a lot of
information inside your project. So e.g. if I just click here, it needs a project. And we will see all those things in details
after. So it's not a problem. At the beginning, you don't understand a lot of seeing you just click here on the left. And yes, it's okay. I can just click
here on your left. Add for exons per room, crowd to new room with maybe 20 meter square
cynics Arun time. It can be a bedroom craft. And I can position
this one just here. After. If I want to add
element that we'll be able to go and build and e.g. select. It can be interior
door for loading dose. Just see leaked y naught, this one add to the project
may be on this area. I can add e.g. furniture
so I can go here, furnish. I can have different
type of categorize. I can dress gone so
far, an armchair. Select sofa. And let's just apply
this one to project. Let's continue. Just click here for niche. I can come back here. I want to add just
like your bed. So I can click
directly on bedrooms, beds, double beds, and just select this
one or two project. And maybe I can put
this one just on this area, just like this. So I just make this elephant. I can just add a window also. Add window. So I can click here, Build. And I can come back
to this area window, double window, and click on, Continue, click on this one. To project. Maybe I can
position ones here, duplicate and position in order. Just here, duplicate and
position in order maybe share. So I've taught to do this work. Let's just save their work. So don't forget to save
or I can just click here. And if you click
on your project, not here, not here. Just the image like this. You will have information about the number of flow,
number of firms. So we have one floor, two rooms, but total of 60 m square, one bedroom, and we
didn't put any bathroom. It just beginning to show you. If you continue,
you can enter tags. So if I want, I
can put like e.g. arrows. And it is just for me, I can put light e.g. arrows, design, medallions, project and
it seems like this. So you can put your tags. You will have description. If you want to add
a description, you just click on
this area and you can raise your description here. You can change what
you want house, it is a new construction dream, or they'll just
informative things. You can find a color
palette croon flop. So by default, we have this color palette on the
living room bedrooms. So when you will change, it will have a
summary on this area. And we have all this
your faces ground floor floss your phrase
words your face, ground floor, bedrooms floss
your face. What's your face? So each time it will
be a summary of all your project when you will include a different project. So project will
appears on this area. And thanks to that, if
you click on this one, you can have description, more information and sometime
you can also visit to stop. If e.g. for projects, someone wants to buy
exactly the project. You can visit the
store and I've axes, e.g. to the price. So this is how you can start and how you can
manage your project. This is an overview. You can click on your rooms with living rooms and bedrooms. And you will see a list of your different projects with
only positioned to project. If I have 100 projects or 100 projects will
appear on this area. On your project here you
have the options to e.g. duplicate again. You can set the parameter
of your projects. So if you want to
change the name again, it's possible and you
can delete your project. So these things that
I'm going to do, It's now to delete twice. Just to show you as an example, I can click on my project
and click on this one also, and delete to start
from scratch. So now if I come back my
project, I just definitely sink.
4. Create project: Let's explain how to
create a new project. So to create a new project, when you are on your dashboard, your main dashboard,
you can create a project directly from here. You have also the possibility
to click on my project. And in this case, you can also create
a new project here. So I've taught to do this work. First, you will have a
video, it just introduction. I can click on Next directly. You can rename your project. And just that project, you can enter what you want. I'll tell you what kind of
project do you want to stop? It's not going to
change any things. You can put that you want. It just for you, it just for your categorize, just for your information. It's not going to change
anything when you start, if you click on renovation,
you constriction, dream project or odor
it just for you. It just for you as
information what you, what will be the project? So if it is or innovation, you can put renovation if
it is a new construction. So most of the time you can
click on new construction, our dream project or order. What is your type of cuisine? So as far as onboard new, new construction, it is
cent, interest for you. Is it a parliament? Is it ours? Is it order up to you to
choose what you need? I can click on ours, e.g. and next, you have an existing 2D floor
plan to use as a models. Here I'm just going
to click on No, after we show you with a plane, how do you want to
start your plane? And you have two options, whether you can start with whom, barroom, easiest,
or dream worlds. So if I select group by womb, it's not more easier. I think it's not as
your thing, it is same. You just need to select two
room shape just to start. It can be this one, this one, this one or this one. Let's start with these elements is where you select the
short phase that you want. E.g. I. Just want to start
with basic living room. I can apply here and
type living room. And until value may
be 5 m squared. I can just click on
Create and I will have a first room like this. But if you need after you
can just click on this one, you can drag and move. And we can make some adjustment. And it's not a problem after if you want to compete with Wall, you can compete with wall. You can add odor room. It just to start. It is definitely just to start. So if I start with world e.g. I'm just going to click here and not save any
sink new project. Next. Let's step again project. How's new construction
next node. And this time we're
going to use draw worse. And directly you can draw words. You have the word sickness
on the top left corner. And you can create some sink, can then turn dimension
depending of what you want. And you will be able to start
with this automatically. You will create your first room. You can continue if
you want directly, you can craft more elements and you will have to validate. But after I finish, if you need at any moment, you can put a wall again. And as you can see,
it's pretty convenient. It's pretty convenient.
Let's just click here. You can also start with
an image as backgrounds. So let's create a new project. And let's start with first, next project again, new
construction heroes next. But this time you
can do you have an existing plan you
can keep click on yes. So you can just click on yes, in Portugal flow,
just like this. And I can select this image. And something
interesting you, first, you need to define
the dimension. So you need to select
two points, e.g. you can decide that. You can go in this corner. So m is to zoom. You can use your scroll wheel. You can zoom in position e.g. your first print on this area. And you can select the
second print, e.g. you can put here,
but it depends. You can also just use an object. If you have a dimension, e.g. of a sofa, you have a
dimension of a window. You can use this one. And after, from this
point to this point, you need to define here, just put an image with
one-dimension. But if e.g. on this area, we
have maybe eight, 8 m, maybe we have midterm. Let's say at meters I'm going to tap like this centimeter, 80 or 800 centimeter
to have eight meter. And after to do this work, you can also work here with the transparency of your image. If you need to rotation, you can create rotation. Let's just come back to 0.1. It's not, it's Romney convenient to receipt when
you are like this. Take your glands. It's not extremely convenient. You arrive and when you start to turn, not extremely great. I'm going to click on
delete and do this again. You can click on Upload. Let's sit exist imagery again. I'm going to put my print
again on this area. So let's sit exist
print just here. You have some problem with
the snapping options. And yes, put this point on this area and this
one just here. So I can apply 8,800 centimeter. And I can just validate after I will have my
image on Zoom backgrounds. And if I just go on this
area at any moment, you will be able to
take a realistic image. Sometimes there is tin is. When you click here, you will have the option
changed by growing image. And thanks to that,
if you want to remove the background
image, you can. And just to check that you
have the right dimension, you can just click here. And if you just sleep, e.g. this point to this
sprint, as you can see, we have 8800 centimetre
just laziness. So this is another way
to start with a project.
5. Start with dashboard: Let's start with the dashboard, the dashboard of conception. So when you start after
to create your document, you can arrive to this
interface, to this dashboard, how to process the first thing that you need to understand, you don't have a lot of tools. Here. It will be the
parameter of your project. So it means each time
when you use a demand, you will have a summary
on project here. I've turned this area. It is on what flow
you are working. So by default it is a
current flow and you can find your selling
a 250 centimeter. He wanted to change the setting eight or you want
to add overflow. You will be able to do
these from these panels. You can also add a basement. After to do this work
totally on the right, you have undo redo actions. So it is a history panels
here you can find option. It's not saved automatically, so don't forget to save
your work clicking here regularly and at
the end of your project. And here it is a different
tools of conceptions. Daddy, on the
bottom left corner, you can zoom in, zoom out as you can see under
my groin we have this grid. It is totally not a problem. We'll be able to select
different type of view. We have a 2D view, we have
a 3D view with a character. And we have also reviewed directly from the
character just like this. So if I just come
back to the project, if I go here and e.g. addressed at the room, I can click on this area. I'm just going to add words. It's going to be faster. And just create some
scene like this. I can go here, zoom little out, and just go in the direction
and this direction, and this direction, I can add an element here,
element here, e.g. and maybe you're not
already a man dressed like that and validate. So after each time when you go on this area top-left corner, you can click on the project. You will have
different information. If you want to change
the project name, you can in the main dashboard, but you can also do this here. Project name, you
can change type of our zinc here apartment. You can change and
type of projects. So by default, I put
new construction, but you can change also after, and you will have the
number of floors, rooms and the total
of meters squared. Here, e.g. you
have one floor for rooms 66.4 meter square, and you will ever saw
summary on the description with areas and the
different room to room. And each time you can find the floor area in
the worst area. So it's a great summary with the different things that you can have on your project here, I've thought about the
different categories of tools here. It just tools to
create your base. So create war room, room
separation, exterior. Here you will have the
different tools to import directly from
nutrients and other things, furnitures, declaration, all these type of scene
you will be able to do from this categorize. And also you will
be able to create your own furnitures when
you go to My Content. After here, it is the panels
to create realistic render. So you have already
sticky match, so hundred 60 image. But you can also just grab
basic screenshot with the same qualities that on your computer and
it's totally free. And I will show you
also how to walk. Here on this area, you can just see
different images when you render will have
realistic images. Here you can add
complimentary element. So it means if you
want to add arrow, if you want to add
rectangle, ellipse, and text inside, it is possible you want to add
an image runs or backward. You have inserted image and share just to have measurement. One more time on this area, you can zoom in, zoom out. And if I just check, I will show you just that
tells the navigation. And you can move from 2D view, 3D view, and the view from
the character directly. But I will show
you just have to, How to Master is an aggregation. And don't forget to save. And when you want to relieve, you just click on this area.
6. Master navigation: Let's explain the navigation. So how you can navigate in 2D
space and in your 3D space. First things to do,
just go on this area. Click, Add a room. You can sit exists one maybe you can
increase literally be the size of the room
with a value of 20. Select Arun type,
you can put what you want that supply
bedrooms and craft. So after to do this work when
you are in your 2D space, if you want to zoom in, zoom out, you can just here. And you can zoom
in and zoom out. If you want to. If you use a mouse
with a scroll wheel, it is great because
you can zoom in, zoom out directly using
the scroll wheel. And definitely it is better. Now, if you want to
change the position, you go left-click and
you can move like this. So you're with your scroll
wheel, you can zoom in, zoom out, and with a left-click, you can just move like this. You can also use click on your scroll wheel
or right-click. It works also in the 2D view. It is exactly same. Now what's happened if
you are in the 3D view, if you're in the 3D
view, just like this. So as you can see by default, you have a character, you have a character
here, you have a men. It is extremely useful because the packaging of your position, you will be able, e.g. to add materials
on all the words. And if I just come back to
my 2D view, Let's click, I don't know the room, this 110 meter square
maybe bathroom. And I can put this one
just on this area. I can come back to my 3D view. So by default, when you zoom in, zoom out, your reference will be your character,
your character. So if I want e.g. zoom in, zoom out and go
more on this area. And I go just left-click. As you can see, it's not
possible, it's not possible. So this is why if I want to resume on this area
and move here, I need to put the
character and you can drag and move the
character just here. And now your view
will be adjusted. And thanks to that, now I can zoom in or zoom
out directly on this area. If I want to have an
outside view, e.g. here, I take my character, I'm dragging move on this area. And now automatically I can have this type of view
and I can zoom in, zoom out, but every time with the character
as a reference. So if I want to see this world
and my character is here, it's not possible I can turn, but it's not
possible to do more. And if I just go right-click, they could lend some here. So if I want to see this, well, just on this area, I take the character dragon
moves of character e.g. here and now I can turn exits. So this is how you can
work with the navigation. So extremity and
proton to drag and move your character after. If you click here,
it is interesting. It just like Works who view? When you click on this area, it is a view from
your character. So you just need to change
the eight of the a's, e.g. at your convenience, by
default it is 1 m 70. And when you are like this, you can go left-click
and you can turn Xist left-click and
you can turn exists. If I just click on this
wall because you have a small rectangle directly, you can send those
of you on this area. When you will have a door, you will be able to open, enter inside an
order, another room. It's possible. Also. I'm going to come back
and just click on builder interior doors
for loading dose. Just apply this one
at two project and position a dough just
maybe on this area. If I just come back
to my 3D view, just laziness, I
come back just here. And I go left-click
taglines, I have the door. If I click on this
one automatically, I can change the room and
directly go on my odor. Boom, just like that. If you want to move, you can also use your arrow
keys on the keyboard. You click on the arrow
keys multiple times and you can move like this
using your arrow keys. When I arrived here, I can go left click, oops, maybe I'm outside, I need to come back
with my arrow keys. I can go left-click
just terms here. And if I use my arrow
key on this direction, I can work just on the
direction of the door. And if I go left click here, I can open the door and
just go in this room. So this is a sweet option,
extremely convenient. You can change to the 3D view. And you ever saw
works work mode. So it is just perfect.
7. Add wall: Let's see how to draw walls. So to draw walls, we can just click here and
you can find ad words. I've taught to do this work first things to understand you can change the world
sickness on this area. So by default, we have ten centimeter sometime
you can change also for outdoor
and indoor words. So M is you can zoom in, zoom out when you scroll
wheel and you can position the first element. If you don't want to
finish the world e.g. like crap, just
something like this. And you just click on validate. You just have
created when words. And you can activate
the 3D view. Can you can see the first-world just laces at the beginning. So m is normally too close to have a complete
room or to have e.g. the base of the house. So let's just come back
on the Today View. Click on this words and you
have different options. Delete. Just like this. So let's click on
Add Waltz again. I would like to create
a base for her house. I position my first point and you have specific dimension. So you can zoom in to
add more procedure and zoom in and move on your space. If I want to have ten meter, it is one tos and centimeter. I can continue when I
arrive at one tos n, I can go left-click after
I can come back here. And I would like
some sink like e.g. 8,000 centimeter. So when you arrive at 800
centimeter, I can stop. Don't hesitate to zoom in here. Keep disease e.g. vertically, 800. Now I can go in this
direction if I want to again, ten meter, I can click
one tos and centimeter. When I arrived on this area, you can see a line. It is a yellow line like what
you are just in front of zero dot world and
left-click and just close. This is my first, this is the base of my hours. After if I just
click on validate, you can find this one. If I want to add indoor. Worse. She's exactly
the same principle. If you just click on
the tools and you can just snap to one
of this one, e.g. I. Can snap here. You have a dimension on the left
and on the right, e.g. I want to start with 400
centimeter from the right. I can start my words here. I would like e.g. suite
and read centimeter. So I can zoom, swing dread. And I can come back on this
direction automatically. You will have a
new room created. If I want to know their
room on this area, I can go left-click IN terms
of values that I want. Like fries on per 300, maybe 50. And I can come back here. If I want another rooms here, I can create a new ones. Each time. Automatically you have
a new room credited. Don't forget to validate. So after if you want
to make adjustment, it is possible. I
have this words. If I want to move this war, I can drag and move in this direction or
on this direction. Each time you have information
about the dimension. If I select this word, I can move also here or here. And I have information, you can change the
position of your words. So I'm seeing interesting Also when you click on one of these, you have different options
like split, add a deed. So e.g. if I click on this area, I can just click on Add
and automatically here you can add something directly at
these levels on the words. It will be like e.g. a. Window. If you click on Split, like e.g. spit here, I created an
adult print sometime it is useful because you can open and make some adjustment. So e.g. I. Can open and I can
continue with AdWords. And now I can go here. I can go see, I can go here. And I made the adjustment
because I split these words. If I feed it, I can click on this one. Split again. And now I have this element. If I drag and move this part, take your glands, you
can move like this also. Whether you can open clicking on the element or you can just e.g. dragon move on this direction. When you click on a wall. You ever so-so options Edit. And thanks to that,
we can edit to sickness directly on this area. You can also change. So room eight, if you need. If you click on Control, you can select multiple
worlds at the same time. Take your glands, this wall, this wall, this
one, and this one. But it's not possible to edit multiple worlds
at the same time, which can delete multiple
worlds at the same time exists. So if I change the thickness
just on this world, just to show you, but it's better to do this
at the beginning. Just e.g. I. Can go and eat it.
But just to play, dress to see the
difference validate. As you can see, we have a value, we have a word with a
totally different sickness. So now I can go and edit again. Let's just come back
with a value of ten. If I dress go, why would
we have e.g. this base? I can see it, my 3D view. And you can, as you can
see, it's very fast, very convenient to crab
just a base of anything, just to base off anything. If you want to do
this with basics, classical Sui De
modelling software, it can be extremely long to do this type of
work sometimes. And I've talked to lose the
openings to create a Windows. It can be extremely long here. You don't have to do all this
work because it's a tool, it's perfectly made to work with interior design and also
extend on outdoor design.
8. Add room: Let's explain how
to create rooms. So to create rooms, you can go here and
you have other room. So from this, we can add
multiple rooms if you want. Each time you add one room, you can undo not there. And it is the order
process to create a base. You can just create
worlds or you can create e.g. directly rooms. If I want to start with a model. So you have multiple
models like this one, this one, this one. You select what
you want. If e.g. you want something bicycle the base of hours, you can e.g. siliceous your face like 100 or you can select
a rectangle also. Like, let's say it's a
square first 100 m squared. Maybe it's too much. I'm just going to start with
something ten to 20 m square and just select or living room and click on
credit, just like that. So after you have
element, if I want, I can extend and directly it's pretty fast as you can see, but you can compete
with words after. So it means you can work
with rooms and worlds. I do same time after
you can use AdWords. And if I want to add
an element here, I want to add an element here
I can eat is pretty fast. So up to you to define
if you prefer to work with worst of all rooms, or you can just mix. So two possibilities. Each time you can
click on each rooms independently because
you can edit the rooms. Let's press Delete, delete, and delete on the keyboard. If I just come back, you
have different types of shapes or forms, like e.g. this one, I can put 30. Select a room type like to kitchen may
be living room again, and click on Create. And after you can
make an adjustment at your convenience, just laces. Add rooms. Can now e.g. this one, It's that 20. Let's add a bedrooms and click on Create
dressed like that. So after you can mix multiple
room at the same time. So first I'm going to
click on Add rooms. Cranial base, credit
to first width, e.g. might leaving room
for t meter squared. I would like to add, Yes, just living room and
click on Create. And I can position
this one just here. After I can continue. Add rooms and select a
rectangle, just like this. Shocked face may be 16 and
it will be a bedrooms. So I can click on
bedrooms credit. And I can position my bedrooms. So we need to click on the bed
and you can drag and move. Whoops. Yes, I can move this one. I can move e.g. this one and credit to firms
bedrooms like on this area. So now I want to create
an order on bedrooms. I can click here add rooms. This time with this
type of shapes. I can apply maybe 12th type and all the bedrooms
and click on crapped. Now I can just snap to
areas like this area. And I can click on this one. And here you can also
drag and move this print. And you can, oops,
let's do this. I think, yes, I need to make adjustments and drag
and move this sprint. The sprint and move
in this direction. Yes, perfect. It's not perfect. I
need to snap here. No, it's okay. And I can continue. So I can click here,
select Add rooms. I want to add the
bathroom inside. I can click on this one. Just 10 m squared, just silly bathrooms
and cracked. And I want to add a
small bus forms here. I can move this words
just like this. External little bit and perfect. So we can definitely
walk like this also, you have two possibility, just cracked words
or create rooms. If I just come back on, Add rooms and select
two rectangles. With maybe 20. You can select room type, but you have also mock
disability can be a garage. You can have you
can have basement, you can have also library. You have multiple options. Let's click on Get Rich credit. And I can position my
garage to tell you on the left, just like this. And after I can make
some adjustment with this one and also with this one. And just adding different rooms we have created also this base. I can click on my 3D view. Just like this. You can drag and move the character
outside if you want to have an overall view of
outside with the selling. And each time you
can just come back inside, just like this.
9. Add room separation: Let's explain how to
add a room separation. So to add warm separation, you can find out this
area at room separation, why it is interesting
because of materials e.g. you can separate two rumor. And thanks to that, you can
put different materials. So first let's click on AdWords and let's create two
base, just lazy. So I can create a
base like this one, this one, this
one, and this one. After I can create two
room on this area, maybe just Lexis and credit
to know dorm room dress here. So let's just validate. So now one of the things is e.g. if phi one to it did
materials on C. So room e.g. I. Can just click on my 3D view. And with my 3D view, I can put the character here. And if I click on this
area can go and edit. And you can change the style of the ceiling
and of the fluorine. If I click on fluorine, I can edit my materials. This is outward, but you
have a lot of options. E.g. I. Can try another one. I can still eat. Why not? Why not
silly exists one. Just like this. If I said exists, well, I can also edit the Natalia. So I can click on this Edit. And you have the style covering. And you can select a pain, but you can also select
different materials. I can use. Why not a wallpapers. And if I click here, I can position, maybe, yes, I can try with this one. It's okay for that. So now if I want to separate this part in two different
material or this world, so it is possible if you
add a room separator. So let's come back to the
2D view just like this. Click here and add a room separation,
other room separation. And thanks to that, I can phrase on per
click on this area, on this part and just
go on the direction. And I created a room separation. And inside this element, I have rooms we end room
for. It's not TOEFL. He just to separation. And now if I just validate and I come back to my
3D view, take a glance. We have only, we
don't have words, but we separate this area. And it means I can select
something different. I can go and edit fluorine, lead, just change
for like carpet e.g. and just click on this one here. E.g. I. Have this wood materials and I have this
copied materials. And then you hover to
separation from the world. So it means I can
click on this one. And I can apply
something different like I can apply just to color, setting paint it supplies
is green color and silica, one like this one. And I felt I can click on re-use and position also on this area, and maybe also on this
area or this area. But inside the same room. You can separate like this. When you use this one. Add room separation, you
can separate like this. So this is why it is
interesting to add to room separator because
at the beginning we not understand what
these theorists to add the room supervision. Just legs up. And if I just come back
outside to the view, here you have the
possibility to add the exterior. So e.g. I. Can select gardens like this credit and just put
ones on this direction, once, on this direction,
just like this. And on this area, if you click here at
room separation, e.g. you go from this
part to this part. As you can see, you don't
separate with one N1. If I just click on Validate, I click here and just
select my 3D view. Just like this
when you work for, but outside, it's not
going to work properly. I can go and edit and I just add one element because
I don't have worlds. We see something in
proton to understand. If you want to walk outside, you want absolute possibility
to add separate room. But it works every
time when you have word slices in this main rooms. Whereas on Pell I want
to do the same thing. And other room separation, e.g. to this part. To this part. I don't separate with a wall, but I just separate this
area. In this area. If I just click on
validate, sweetie. Now if I want to change
one of these materials, I can, I can click
on this area aided. Go on. So right. Fluorine. And I would like to separate
with maybe a mosaic tile. And I can click on this one. I think it's not the best let supply wall and floor tiles. And yes, I can still exists one just like this and
you can separate. It is same for awards you have received parish
and here and here, these two different path now.
10. Add exterior: Add exteriors. Let's explain how
to add exteriors. So for this, you can find
these features here. So first be fraught to do this, let's add the word
credit to base of house. And I'm not going to
enter specific dimension. Just create something like this. And just come back
on the direction, this direction, this direction, and just go here. I can validate and I can continue with
ad words if I want, I can create something here and maybe correct
something here, create a separation or so. Or this area. I can just validate. Maybe I can use builder and I can add to front
doors just for the example, let's select the first Add to Project and positions is
from dose on this area. Let's continue.
Click here, build. And we can come back
to this categorize. Let's select Window. And we have pasture doors, e.g. double windows. Let's
see the pasture doors. And I can continue. Can now have more options
because you can have the y's basic ways
bash path shadow, I want this one and I can
position next ones here. Duplicate and position e.g. an order I can zoom on my area. Maybe I can position in order here just on this direction. And I couldn't position
more if I need to duplicate and position in
order just on this area. Perfect. So now I've taught
to do this work. If I take a glance
to my 3D view, I can obtain this render. I can put the character outside. So you click on the character
here, you are inside, here outside, and you can
find it tells a render. Let's come back to the 2D view. If I want to add a garden, you got multiple options. Add exterior, garden,
path shoe, drive away. So I'm seeing on
theorists thing, if you click on Calendar, credit, you can position
e.g. your gardens here. And after you can make
adjustment, just like that. But something interesting. It will follow the directly. If you extend some time, it will follow perfectly the world I'm going to
show you just after. So let's remove this one first. Click on the exterior. You can also add the Paschal. Let's click on
pressure, 10 m squared. And I want to add a
theorist to tell you on the left of my house
so I can fit here. Extent with dementia
and you can put the dimensions that you
want just like this. And if you click on the element, you can find edit. And on the right you can change the name of your
elements if you want. If you want to have to
erase, you can erase. If you just want to have
any things that you want, you can tap and click on
style, edit materials. You have the king
and the king tiles. So you have multiple option, but if you want to change something different like
wall and floor tiles, you can also put flooded tiles
on this area if you need. Just like that. I've taught to do this
work. Let's continue. Add exterior and
sit exists time, drive away, and click on Create. And I can position
may be once around this area and extend
on this direction, maybe just legs out. Let's continue adding
stereo bus show again. Maybe I can use this one and it's not possible
to duplicate. I need to use addict stereo,
partial gain credit. And maybe I can add
a new doc pressure may be on this area. Just like that. I can click here or I
can click share reuse. And thanks to that, I can
select these materials. And I can put these
materials just here. Just like that. So let's validate. Come back to the 2D few. No. If I want to make the surroundings add
my garden with Grace, I can add exterior. Gardens create and position e.g. on the left, just like this. And we can stop.
Something interesting. You can add multiple rectangle
and repeat the process, but it is convenient
because if e.g. I. Extend here, I can find a guide like what I'm
in front of this area. And if I just click on
this area, take a glance. He find a daily meditation from this point to this sprint. And thanks to that, I can pull
and I don t need to create another rectangle
automatically is going to define a delimitation, but you need to have the
right address with the world. So it means I can click here perfectly observe
right adjustment here. And if I go on this
REITs perfect, he defined just as this space. And I can just pull this
element so it is perfect because you can just crowds with grace with only one element. Here it is the same.
I can extend on z-direction and I can
drag and move dress here. And T. Yes, maybe until this area here I
can drag and move. And I need to oops, thing, It's not
extremely convenient. Yes. Sometime you can have something a little
strange like this. Let us come back. Yes. When you have something
strange like this, you need to try to
observe right adjustment. So it means I can
come back here and left-click and
snap on this area, but here he's not going to
define the right limits. I need to zoom. I just want this area
and take your glands. It's not really good
about the limitation. Maybe I can split. When you split, you can add a new data point,
as you can see. So if he's not able to define
directly the right point, you can position your own
points so you click on Split. You dragon moves up print
after it's going to be better. Just like that. And I can go on this area here, I can go in on this area. I'm going to turn in
trouble here when I want to close a pass. Little strange, they
have something wrong. If really you are in trouble when some time It's like this, you can just create a rectangle. So it means you can add an exterior gallon
done again credit. And you can try to
create some sync smaller. Just like this. And you can make
adjustments with no doc, but it is also totally possible. She on this area can extend. It's nice. And I can extend on
this area. Just lazy. Sometimes it's possible
to do with just one step, some time it's
little difficulty. If I click here, I
can delete again. If I click here, I can delete. And now if I extend
this one, yes, perfect. But sometimes it's
a little difficult so you need to make
some adjustment. But now I ever exterior. If I click on Delete and
I click on this one, yes, thicker, denser, you have this small element,
its little strange. Yes, it's little strange. So it means in this case I
need to add another element. So click here, add the exterior gardens and position my gardens
on this area. Just like this. Yes, something was lethal wrong. So this is why I want
to do this again. And I'm going to come back with my story panels because something was wrong when
I extended my element. Yeah, I know what's happens
and I need to come back here. Let's come back just with the spatial and just
extend a little bit. Shy. You have a garden,
it's not really good. I need to delete. Add exterior again. Pass shoe. Let's position this one on
this area. Just like this. And click here, add exterior gardens positions
or gardens on the left. Let's extend literally beaten this direction here,
on this direction. Here on this direction.
Let's continue. And as you can see, she it's not
extremely convenient if you arrive on this area. Yes. Perfect. And I can continue. Perfect. And I can
continue here. So now it is okay. I think beginning
to as not okay. Sometime you need
to try a few times because depending of
just few imperfection, you will be in trouble. But after for the rest, you can just grab one
element like this.
11. Add doors: Add the doors and let's
explain how to add doors. And for this we can use directly build and the
possibility to add dose. Let's first add the words and just create a base of hours. Thanks to that, every
time you can repeat this process and after it
will be extremly convenience. So I can just create a
base of smaller hose. And maybe I can
position one room on z direction and position
another room just here, and maybe another room
just on this area. I can validate. Peak on this world. Let's change liters of position. Perfect. So if first I want
to add a main door, so it means entrance doors. You can click on Build. And after we can find
exterior draws from Doris, pasture doors, garage, true? If I select from duels, you have different models, something on the left,
it's different filters. If you want to do rows
with a black color wise, cold gray, I want
something in y's, I can apply wise. I want so I'm singing black. I can apply directly black
color, susan, materials style. So if I want e.g. a. Wise door with a modern style, I can click on wise,
activate motor neurons. And thanks to that, I have directly some
Doris selected. But if you don't want, you can just deselect. And I've axes to also dogs. Let's select the
first it is this one. When you want to add an element, you just need to click
on Add to Project. And I can position
my main doors, entrance doors on this area. After you just need to snap to the world and automatically
is you have the right side. You don't have a
lot of math to do. You can just go left-click and you can move your
shoulders, just laces. I've taught to do this work. You have other type of options. If I click on builder, you can come back
on exterior doors. So some pasture doors, partial dose is
just like window. It's almost only window. So it means you can
find exactly the same when you go on
Window pasture doors. It is exactly the same. After you can find
also garage doors. And you have this type
of Doris sometime it can be useful if you've
just created a garage. If you want to add
interior doors, you can click on this one, interior doors and
you are forging dogs. And you can find
also sliding doors. Just like this. Let's just come back with folding
doors one more time. You can apply filters. I would like inside if you want something with endurance,
you have this one. She want wise door,
you have this one. Let's select wise and select a basic interior
doors like this one. Add to Project. I can position
once on this area, you can find the
direction of the opening. So it means if you go
left-click and I go little on the left directions
openings on the left. I go liter on the right's
opening is on the right. But you have also the direction
to a digital direction. Go on, edit here, and you have multiple groups. Let's do this again. You click on this one, edit and you have
different options. You can change the
dimension if you need, but be careful because if
you change the dimension, the frame won't change. So the most of the time
I can advise you to keep the standard
dimension sets you up. And you can change the
position with eight from for something and I'm protons
is changed world site. So I can click here and change while opening
on this direction. Here I would like to absorb
printing on this direction. You have a stylus
that you can change. I will show you dressed after. If you want to
repeat the process, click on duplicate and
position in a doubt though, like on this area. And I can check on the
left and on the right, put in Zomato and
duplicate again. Just like this, I can change the direction of opening, edit. Quiz change while opening. Something important. Also, if you want to
replace wizard to delete, you can delete but
just replaced with to-delete to keep the
precision you go and replace. And you can select
an ADL models. If you want, just like this. And let's click on Replace
and select the same models. Maybe, maybe, maybe I'm
going to remove this one, it's better and just click
here, duplicate again. And edit Lexis. If you want to change
the style you can, but it's better on the 3D view. You won't see anything. So click on the 3D
view like this. After to do this work, this is a main doors. As you can see, if you
click on this one, you can just I go on Edit and you can change
the materials are not an, it depends on the element e.g. and this element,
it's not possible. But if I'm using an indoor
entourage like e.g. this one, first I can move
it tells a character, yes, it's better, and I
can click on this one. You have different options, the most difficult things
it just to see what is the correspondence of
a different element. Everyone's means, so it
means it is this one. And I can change this, come back again, do
exterior of phase. So here I can put
something inward like this one door interior face. I can put this one again. This frame exterior of phase. I can silica frame
with word also. And framing theory of phase, Let's sit exist
would element also. You have different categories. So each time you sitting
with categorize that you want and you can edit disease. And this is the Enders. If I click on this one, I wanted to end all in black. I can change for
black. Just like this. I'm like I just come back here. It's strange because
it's an endl. Don't change, just invert
but not to tell you. If I just come back. And you want to open when
you are in the 3D view, you have a little bit more
option like animate and you can click here and you can just open the door
as you can see. After to do this work, if I click on this one, again, click Animate open. If I click on this one
and he made to open, I can even do this
in my main doors. Click on this one. And not this mean does this mean though
it's not possible, sometimes possible,
sometimes it's not possible. To. I did materiality
depends of your element. Sometime it's possible,
sometimes it's not possible. So let's come back to
the 3D view first. And because I edited
this materials, I can go ahead and delete
and click on this one. Duplicate and drag
and move along. Go inside. It's okay.
12. Add windows: And Windows, let's explain
how to add windows. So phronesis, when
you go in this area, you can see they build
while going to keep the same strictures that froze the doors and just add Windows. Click here, build. And we went on with
these different doors. I can come back on build. Now I can select Windows. You have different type
of models one more time. If you just want a
very simple window, click on simple window,
just like this. It is just a very, very small window
that you can use. You can select,
Show more reserved. And don't forget,
if you go on left, you can add you can
add directly filters. I don't want to a small window, I want something like at
least two double windows. Let's click on double windows. And we have more
black frame here, or wooden frame like this. If you want directly
something in y's, I can apply the filter wise. And I would like
this basic window by Zig double window in
Wise Add to Project. I've taught to do
this work exactly like exactly like the doors. You can position the window
at your convenience. Here you have dimension
on left and right. I can try to center. And the opening will be depending of where you
position the mouse. And I can go in this
direction and left-click. It's okay. If I want to have the same window on this
area can duplicate. And I can drag and move
this window on this area. And I can check my dimension. And yes, I can do
something like this. After you have different
models up to you to see the different
models, I can come back on. If I go here, you have also some
sliding windows that you can use like this. If you ever saw roof
windows like this. And if you just want to
have big door window, you have pasture doors here. The name is special doors and things to that you have
these different options. If I want to stay
in the same style, I can go on to left Carlos
and select wise again. If I just continue, I have
exactly the same models. Sad, my first but
with a pressure dose. So it means this one. And I can click on
Add to Project. And I can position once here. If I want to have another on
this area, I can duplicate. Maybe I can position or an order chest and
your back like this. And you have more big window. Build like all these big
windows that you can use with foldable sliding bay. If I click on this one,
something really big. As you can see. Maybe I can select another
one. Just click here. Build. Let's try this
type of sliding window. And it is a big window. I can position this
one on this area. So after to position each time
you click on Zoom window, you have different options. When no time you can
replace by another one. And if you've got an edit, your abs away 288
from flow and you can change while side exists
and change while opening. But yeah, it's not going
to change anything. And just style. If I select
my 3D view, Let's check. As you can see, I can go inside. We can find this small
double window and the special girls can drag
and move on this direction. Zoom little bit. You can edit the
materials one more time. Here for Windows and most of the time you will
keep the material. But if I want it to change one more time,
I can animate it. So it's convenient, aged. And it is say my
candidate to materiality. If I want to change, I can put all suggest a color like a paint Matte settings. If I wanted something in black, I can put these
elements in black. You have the outside face glaze. So this is just to glaze. So I can change for, I want something
different for the glaze. Can change. You have also inside face glaze. I can change the categorized
for glaze and civic. Why not this one?
Just like this. It's totally different. Let's see if this one. After you have Woodside
faves window in Windows, I can change maybe I can
put my paint and black. Just laziness. And outside
face window. Might paint. Click here. Black,
just like that. So you can change at
your convenience. So difference, a demand. You have also the Enders who
have here for the end-all, you just have one
style, not my style. So you can edit each time. So materials just like this
that just come back outside. Select 2D. When it's not possible to animate when
you are in the 2D view, it's only in the
3D view. Delete. Let's click on this one. Duplicate. And position this
one on this area. Again.
13. Add furnitures part 1: Let's explain how
to add furnitures. To add furnitures, we need to go directly here and
we can find furnish. So firms would be fraught
to use for niche. Let's just add the
room so I can click here and I can just
create your room. Let's select this first element, change the route type, and just select something
like living room. And I can change for 40 m square and just
click on Create. So now I have this element. And if I want to
finish just first, let's go and build. Let's activate interior doors. With affording doors,
I'm going to select my basic folding
doors, this one. Let's position this
one for a sample here. And then select Build again. Builder. Let's select
Windows, double windows. And just, let's
click on last one, end position just here. If I want to furnish inside. Click Here, you go
on this categorize. And you can find
different categorize to add furnitures like
living room, bedroom, kitchen, bus, home,
genie, Chrome, office, if you want to add
elements so you silly to main categorize. And then you can go inside. If I want to add a sofa, e.g. I. Can click living room sofa. And I have different options
directly on the left. You can apply filters. So first you have
insider categorize. I can click on sofa. And after you can
select a brand corner, you can see the two materials. You can see the
two color. If e.g. I want to swap
something with fabric, I can apply fabrics. If I want to have some
sync with a color, I would like some sin in gray. I can apply gray and
each time you can add multiple filters here. So e.g. after to
apply my filters, I want to add once. Maybe I can use this
one or to project. And you just need to position your furniture
where you want. I've dealt to position
your furniture. You have multiple options so
you can drag and move again. You can move just on this direction or just
on this direction. And you can create a
rotation like this. Let's e.g. put this one
maybe on this area. And after I will show
you that you can eat, eat your furniture's,
let's continue. I can go on furnish again. And I would like to add a bed
or so so I can change it. First. I'm going to stay in living room so you have more options. If I wanted to have a TV, TV furniture, I can just click on this area
one more time. On the left, I have
multiple, multiple things. If I want to add
something in gray again, I can apply gray. And I can see little. Stein may be something
contemporary, and I will have this
different type of options. But I can change the color, maybe I can silly
contemporary black colors. And now I have these
different options exist. Let's far as unpaired still
exists one or two project. I can go left click
here to rotation. And just position this one on
this area. Let's continue. I can go and furnished so
after if you want to change, so categorize, you
can come back live in Zen, furnish here. And if I want to add to bed, I need to change to
categorize four bedrooms. I can select a bad
one more time. You have multiple options. And you can see the
firstborn bed, double bed. Eat both simple bet. Let's select a double
bed. One more time. You can apply some
filters on the left, or you can just select what
you want on this area. Let's see, lead to I naught, I can just continue. And maybe I can select, I can select, may be z. So let's delete this one. Maybe this one. Let's focus on birds. It exists one or two project and put the bed around this area. Perfect. I would like to add more things so I can
come back on furnish. When you are inside e.g. bedroom categorize, you
can find a wanderer up, chest of drawers, nightstand. Let's add just one row. I can click here one more time. I can add filters on the left. I can also take your glands on two different options here. And let's select two
models like this, one at two project and put
this one on this area. So each time you just need
to go and furnish sedate. So right, categorize
and you can put different elements
if I want by six, also furniture or bookcase. And it seems like this, you can come back on the living room and you
have living room storage. One not time, you have
multiple options on the right. You can, after you have the possibility to edit some furniture and
some furniture, as it is not possible to edit. It depends on what you choose. So this is why I'm going to
select Basic furnitures. Let just continue, or I
have this big bookcase. I can add to project
like this one. And credit to rotation
on this direction. And put this one just here. If you need a table, any things like this, when you go and finish, you come back living room and just you
have this category, dinning room, table,
chairs, benches, storage. You can see the
phrase on per table. And you have these
different options. One more time you can
apply why not to color? If I want to have
some singing Brown, I can apply brown. And if I want to
have a modern style, I can click on moderns. And why not to select this one and position this
one around this area. And the same for just share. You can go here, you select for niche. And if I just come back, I can apply chairs. And I have different models
of chairs one more times. Let's see league.
Let us continue. First. If I click one of my first,
share something bicycle, maybe this one, this
one, this one or so. Let just select this one
and put the chapters here. Here, it's not very
important to budget closet. I use it just to show you
the principle about how you can import something and
how you can eat something. When you click on your element, you have the possibility
to duplicate. You can duplicate, go
in this direction and just turtlenecks that you can repeat this process
for lots of things. If e.g. I. Wanted to add two bedrooms on the
right, I can click here. First. Are the room. Click on this one. Yes, ten meter square. Activate bathroom,
craft and position. The best woman this area. Maybe I can read you turn this direction and extend
on this direction. Click on this door. Duplicate. And positions is though just maybe on this area. Let's invert on this direction. If I wanted to have some
simple for the bathroom, I can come back on furnished
again, furnished categorize. And after I can select bathroom and you have multiple
options one more time. If I want to have
something like a sink, I can click on this one. You have first set, just the first set only. And you can find also the sink. Like this. One more time you can apply filters or you can select some things
that you want. You have, you have a lot of
choice. Might one more time. You can also select
something directly with different materials
like maybe this one, this one, Let's say e.g. this one directly
with furniture. Maybe this one at two
Project glitch here. Let's create a rotation and
position this one just here. If I select my 3D view, you can take a glance
about surrender or so. Something very
interesting is definitely even just with the screen view. Quality is very good about some material to a
different element.
14. Add furnitures part 2: Let's continue with
the furniture sales. So now I show you how you can add
different from micelles. If you need to edit the
furnitures, it is possible. And depending on the
furniture that you have, you can edit mode or you
can just edit a few things. First things to
understand when you click on the furniture
so you can duplicate, so you have multiple options. You can have information about your furniture's
sociality is information. And thanks to that, if you
want to visit the store, you can and you can find also
a list of related project. You have also the
possibility to duplicate. So you can duplicate
your element and you can have another
element just like this. You can delete, so you
just click on Delete. You have also the
possibility to replace. If you just click on Replace, you can select
another furniture or directly in the same categorize. So if I select this one, now, I will add this one. It's a place of The last one. You cannot. So after the
features, nice yours, interesting to
have some measures between two different element. Click on measles. And you can find that absolute distance from the sofa to the
beds with distance from the sofa to TV furnitures from this
chair and from this one. So you can have
different type of dimension each time on
the different sides. If I click on this table, I can select Meet
zeros and I can find the dimension and comparison
of the two chairs. The words on the left
and on the right. If I click here, I can find this
type of dementia. And also I can see that I'm totally in
front of the world, but you can move at the same time if you want
to create some adjustment. So this is something
important to note. After depending of
what you choose, you can edit your
furniture on that. If you sit at your
3D view. Like this. You can also move your element
directly on this view. So we can click on this one. And you have exactly
the same thing. You can find some easier, you can replace duplicate at
your convenience or delete. Can also drag and move into
3D view at your convenience. Let these activate me zeros. Here, It's not possible to
edit anything on this so far. It is just a furniture from a brand and you don't
have multiple options. If I click here, it is possible to edit
on this TV furnitures. If I go in this options, you can find the dimension
and you can find this time. So it depends really
on the frontier. You have some furnitures,
it is adjustable. So it means you can
make some adjustment, modification and you, I'm
solving for nutrients, this fixed value will
be able to edit it. In this example. In this example of this
furnitures, just like this. If you go on the right, you have the white
here, so eight. And if I want to have
something smaller, just 140, I can tap
140 here on the 8th. If I wanted to have trust 50, I can take 50 and
I can change it. If I want to have just
Satya can put sati. If I change the deep, I can drag and move
after Alonzo words. And I can change also the style. Let's first move liters the
character interests here. So thanks to that, I can
change the terms of u. Let's move little
bit on the left, show you a different
type of style for leg. So it means this
element, probably, sometime it's little
difficult to know exactly what we're announcing. Element at the beginning. I can select metals. And if I click on
this one, yes, it is. For this element is a fit. You can change. I can change
to do so you have this one? This one. Normally I can keep food and I would like to
change the color. Maybe this one so
I can see leaked. Oh, maybe I can change for this first one, just like this. And same for indels. Indels. So I can put
the same address here. I can put something a little
different about the world. Maybe this one. And I have also structure. For this structure,
I can select the same and I can create
something like this. But I just have once again, black color and it's not
possible to edit HTML. So it depends on
what you choose. If I select this one, e.g. this bookcase, as you can see, it's not possible to
a disease bookcase. Let's move little bit. If I select this bed, it is not possible to
edit this bed also, but definitely depends
on what you choose. I can click on this bed, replace and similar procedure, but often it will be
exactly the same. Maybe I can try this
one just like this. And if I click on this one, it's not possible to a DTL. So if I click on this one, not possible, not
possible, not possible. So it depends definitely
about what to choose. If I go in my bathroom, I can select this one and just zoom in a little
bit on this element. Here it is possible to edit. And I can change the Y, that thing, it small. I can increase 120 and I can change the tip
to have something better, but the ratio like 60 and
move little bit about eight. Let's walk with 100. Here you have this white
color sink. So e.g. if I click on this one
that we looked in, different type of phrase, you'd like this,
but it is a sin. So definetly to us, I think a grid materials. Maybe it was probably not paint with white school
or something like this. We have also the first set. And the first set I
can change if I want, but it is a metals and then
you have different types of metals materials here. And we are so strict. Sure. If I want to have my
furniture stricture in water, I can select wood materials and select one of these
elements, as you can see. So it is a type of
things that you can do. If I just come back
and select my 2D view, something I'm protons
in some furnitures. If I just select for
niche bedroom beds. Double beds, have
multiple options. Let's just continue. I'm just going to try e.g. this one at two project and just put two
element like this. Because it is possible
to edit this bed. And I want to show you
some time you have a bed. You can indeed, I can
select my 3D view. Just like this. Put the
character on this area. Yes. And as you can see, when I click on this
bed aged, I can change. I have different options. So here's options that I have. A mattress sickness. Generally 25 can be great, but it can be just 20. The pillow size
blanket position. So you can change the
blanket position as you can see, pillow pooled. So you can change these
general features. I can also change the
state of the bed. Here it was a wood materials
so I can change if I need I have also from
Pillow pillow set, blanket set, I have
different type of things. If I select my pillows sets, I can select different options. Take your glands, we
can add more pillows. You can see like this
one or this one, you can just hit the pillow
set with a lot yogurt, so the blanket set and you
have different options. So I just want to show you that depending of the furniture
that you choose, you can have different option. In some bed, It's not
possible to edit anything. This one is not possible. This one it is possible, but it's difficult
to know before. It depends really
of what you choose. If I click on Edit again, I can also see lead
to the front pillow. And you can change the
style of the front pillow. You have multiple style. So you can change the set, but you can change the style of font pillow, again, real pillow. And you have a list of different pillows
that you can use. Some pair I can put
something in red. Oh, just shown type
of color like this.
15. Add decorations part 1: Add the declaration. Let's explain how
to add decoration. So forces first thing
that I'm going to do it, just to add a room. We can crack the
first room room type. And this room will
be a living room. And I can add my element. I can extend a little
bit on this direction. And this direction. After all, Let's
add another room, e.g. is this one. And let's change
that you apply e.g. here it is living room. I can add like a
bathroom just on this area and make some
seeing not too big. It's enough. After let just click
on Build first. And civic two front doors, but not the exterior doors. So Builder interiors
door, folding doors. And let's click on
this one and position the first door on these alveoli. So thanks to that,
we can see again how to add basic furnitures. I can click on Build again. Here, slick windows,
double windows. To project. Maybe this one and
position this one here. Solexa doors duplicate. And positions is those
directly on this area? I can go and edit and change
opening dressed like this. So this is our base. I've taught to do this work. I continue builder and change
for furnished categorize. Let's select living room
with horizontal arm, chair. So far, so far, I'm chair. Let's apply. Maybe I can click on
this one, the first one. And Crato rotation make
something like this. Let just come back
on build again. From each directly. If I go and bedrooms,
I can select one bed. Double bed. Silica may be this one. And positions of bed
dressed on this area. This one here. Furnish again. And I can silica kitchen like a pre-built sets,
different options. Let's select a small one. Like maybe. Maybe I can select this
small one at two project. And going this direction, credit to rotation
and put this here. That effect I could continue
if I need with furnish. Here we have 0 fees. I would like to add the desk. And let just see leak some sink like this one and
position a desk here. Dragon moves her bed on this direction
position or desk here. So we're not going to go frozen. Aim is just to show you how
you can add some decoration. To continue. If you click on furnish, first thing that you
need to understand in some different categorize. You can add more elements. So it means you can have e.g. fitness equipment if you
need any things like this. E.g. if I wanted this one, I can put this one and you can add also these type of element. If I just come back on furnish. Here, when you select
some categorize, you can have more elements, e.g. in your kitchen, you can
find a p.sit and sees. If I click on API and see if I can find a fridge so I can grant xu left refrigerators
and I can sit at once. Let's click on this
once and you can put a Phrygian directly
on your project, can create a rotation, drag and move this here and put my fridge just on this area. It's silly eggs or
3D view. Just cases. If you want to add TV, if you want to add laptop, any things like
these, electronic, It's also possible
to click on Finish. I can come back outside. E.g. you have TV and
media furnitures. If you go on official
electronics and entertainment. I can continue. I can find some like models
of laptops. This one. And I can add directly to the project something
important to know. If I just click here Solexa
2D view and do this again. Furnish syllabus.
This laptop is, even if I go here, the laptop won't be positioned
directly on the table. Sometimes it's possible,
but most of the time, no. So if I click on my 3D view, you will have to
make adjustments. So it means click
on Zoom element. And you can select
this arrow and you can move to put your
laptop directly on. Moves your laptop, e.g. on the table. Like this. You ever saw decoration element to add decoration in a man, you need to change and you
can find decorate, decorate. This is another big categorize. He had just spent n wallpaper. So if we want to
edit the world's, you can find this here, but we can work differently. Thailand stone flooring and
you have decoration and accessories sometime
we forget this area. And thanks to that, I can have different
type of a lot of on the curve, e.g. I. Can click here a cryoEM
turns declaration accessory. I want to add the Miro. Let's click on mirrors. They have these
different options. Lectures too, slick ones. Like this one at two project. And I'm going to put my
mirror or maybe yes, on this area. Just like this. If I come back decorate. So he says e.g. Miro. Let's select and decoration. Yes. Let's click here. If you want
any decorative accessories, you can add pillows if you need. You can have vase. You have a lot of element. E.g. I. Have this vase or to project. And why not to put a vase
directly on this area? You have more scenes. If I select now my 3D view, each time you can
make some adjustment. Sometime you can eat, eat more, sometime, No. If I click on this element, it's not possible
to edit the size. But I can just change the
position and this direction and just change the position and the direction alongs or worse. If I turn a little bit, I can move with my
character. Yes, dress here. So you can find this element. If I click on this
one is not possible to edit the size
or the materials. If I click on the
laptop aged here, you have some options so I can change the dimension
of Z laptop. So definitely depends
of zero element.
16. Add decorations part 2: Let's continue with decoration. So when we go on decorate as, as explain diseases,
decorative accessories. And we can have a most things
if this is on the cross. And you have all
these possibility, you can add also curtains, e.g. and you are also
words decoration. You want to add any painting
like I would like this one. I can just click here and position abating
along the words. I can sit in my 3D view
and take a glance. Now I have this
painting on this area. I can click on this one and I can move the absolute
possibility still. So to edit in this example, e.g. the style of the frames. So why to eight? If I want something bigger, I can tap 120. A type can take 70, but I need to be
careful because maybe the drawings will be deterred interference if I don't
keep the same ratio. And you have more options. You have also some
options with glaze. This one, and again this one. As you can see, I've
taught to do this work. Let's just come back
on the 2D view first. Let's make one more time. Decorate. Charges come
back on Monday Crow, this is where you
will be able to add curtains, curtains and blends. I have different options. One more time you can
apply your filters if you want a specific colors
or any things like this. You have this type of character and this type of characters. Let's see lakes, some simple
models like this one. I can add to project. Position my element
just on this area. And if you want to edit, I can advise you to select
your 3D view or you will be in trouble to see in
real-time surrender. So I need to edit
this one first. I can click on my
curtains aged and I have options to change like so wide, can put maybe 220 after eight. And as you can see, oops, let's do this again. I'm located here. Are the things that I would like to do
is to change the eight. Maybe I can try 141st. And after change of position, just on this direction.
Just like this. I feel like this,
It's nice. It's two. To lambda can change 200. We'd be probably better. And I can position my
curtains. Eight is too much. I can change 120 and drag
and move on this direction. You can change the
style of the curtains. So it means I have
wood element here, but it's trying to,
because they put words but you can
change the curtains. If I select fabrics that
can use maybe this one. And I can change the color. We can also work with
the curtain rod, so it means this area. And you can change. Let's
come back to the 2D view, something malls that you can do. When you want to decorate. Declaration. You will be able also to add trees or to add a plant, trees. It's this far outside. I will show you later after you can add plants and flowers. For indoors, you have
these different options. Like I wanted, just
something like this. First I can add two project. I can zoom and position may be on my desk and I can move here. Here's different types
of glands as this automatically is
put on the desk. So it's great, but
sometimes it's not. It depends of element. If you want to add the
dress to indoor plant, the correct again, I can
continue with trauma results. And I have this one, but it is fake plan Maybe I can select this one, Add to Project. I can put ones on this area. If I just put this one, I can change the size. You have the options to
edit and I can change, like Phaedrus want wide 70. 70, it is possible, and I can drag and move here. Let's select the 3D view. So as you can see on the desk, we have this element. If I go on a date, I can change one a deep, but not the materials. Here it says my plans. So render is really great. Aged. If you want to change
here from this panel, it is possible for
onto renewed 60. 60.120. I can do this. You can change the color of the flower pot and I can
see leak like metals. And why not? Blue metals are
metals and things like this. The last thing is
the arrestin things is we'll be able to
add light. Also. The declaration. Decorate. You have
lighting option. You can also add peoples. If you need, you will have all these
possibilities, animals. If I just come back
on decoration, accessories, lighting from this, you can add different lights. So you have just a
simple light like this type of flights
that you can put e.g. on the table here, you
don't have to taper. I'm just going to put on the
ground and decorate again. You have ceiling light. You can work with a table
lamp, suspended lump. All these type of things. E.g. I. Have this one or two project. I can put ones here. And the correct again, lighting. You can put also selling light. You have these
different options. Sometime you have scenes like spot at two project I can put maybe dress but to
run this area just to show you the correct, again, sometimes you
can have this type of sin can be great tif
to create to bathroom. So each time when
you add two light, you have the possibility
to switch on, switch off. But when you manage
your own variant men for realistic and
render realistic image, you can set the parameter if you want to
work in the night, and in this case, automatically also light will be switched on. If I go on a date, I can just change. So bulb e.g. if I click on this element, it can change the ate. It depends of what you have. Let's select the 3D view. Here it is, this slide. Can we did here we
have this element. So be careful because
when you have this type of petechial glands, it's not on ground. So if I zoom, it'll be two
element is not located here. We don't know why.
It's a little strange. So you need to go left-click and you need
to put this on the wall. And when you see yes, just here, you can find that its political
snapping area and boom, your element not yes, your element is totally on
the wall, just like that. And if I just work
inside the bathroom, you can find this elemental. So switch on, switch off. So this is how you can
add a declaration. So don't forget when
you go in this area you have decorate the material, but we can eat into
material directly. But on the right variant,
proton decoration, accessories.
17. Create collections: Let's explain the collection. So it is possible to
create collection and add furniture
in this collection. Let's first just
create two rooms. So click on Add room
and select this one. We can change the runtime
like trust bedrooms, credit. And I can just extend little bit this room,
just like this. So after to create a collection, when you go directly
on this area, you can find collections.
If you click e.g. first on Bill, you
can just move on to the right and you have
collections here. You can create a new collection. What is interesting to use
collection if you have furniture that you want to
repeat on different projects, it can be useful to create
collection. If you are e.g. furniture in a bedrooms that you want to have
in different project. You can add the furniture
in the collection. If you want to reuse the same windows are
in different project. It can be useful also. You can earn time, creditor
collection, truce. Zone M can be like e.g. bed. And I can click on Create. I can click Prusa again, crowd to new collection. It can be like maybe doors. I can click on credit lazy. So each time you can create
your own collection, I could continue to collection
like window exists. And I can continue. I can create a collection. It can be just bedrooms or it can be just a
specific product. See, I can change. I can be living room, anything that you want. I can also create two
collection for gander. Let's click Create Calendar. If I click on one of these
collection like bed, as you can see inside, I don't have any things to do. If you click on Explore
Catalog directly, you arrive in front niche. So e.g. if I start
with directly adores, I can mark on builder ciliate, interior doors, folding doors. And I'm going to
select this one or two project and position
my doors on this area. So this door, if I just
come back With built here, you have the possibility
when you are on the doors to
Add to collection. So I can add to collection and you sit eggs or
corrections that you want. You can also create
two new collection directly from these panels. It's also a possibility. If I click again
on Add collection, I would like to apply on
doors just like this. If I want to add an entrance
doors at that, we'll reuse. I can click on Build,
select from doors. And if I want to reuse this
a lot of time I can click on Add collection
directly, doors. So this is a type of
things that you can. If I want to reuse e.g. beta, I can click on furnish and I can select bedrooms, beds. Let's apply double beds. And I'm going to click on
this one or two collections. Solexa, right? Collection. So it means bed collection. And just after. Let's continue. If I want to use
or a tough time, maybe maybe this type of bed, I can click on Add
To Collection also. And I can select, bet. You can repeat this process
as long as you want. I can use maybe this one, Add To Collection bed. I can extend it with more
reserved and see leaked like maybe this one
or two collections and just apply again in bed. That's it. So now if I just
come back on build, I'll just click outside. So each time I can add another rooms clicks here, add rooms. It can be another
type of bedrooms. Credit. And position this
one just on this area. Oops, let's do this again. Just like this. So e.g. we have
the first bedrooms and I can have a second
bedrooms on this area. And I want to reuse
elements that are yet that can
just click here. And instead to search
against the element, you can directly go
on your collections. I've told you silly
eggs are collections that you want. So e.g. it can be in bed and I can
find these different project. So it means if I want
to reuse this one, I just need to add two
project and I can put this one here for this bedrooms, letters come back,
corrections, bed collections. If I want to reuse this
one or two project and put this one directly share. So you can Hearn little
time is wrong to reuse in different projects
regularly the same element. You can add in collections. And you can enter the
collections that you want. When you are inside
of the collections, you have the name here. If you click on the name, you can just change again. So you can tap what you
want. As you can see. You can find the
number of project. If you click on one
of the project, you can remove from collection. If I don't want
this one anymore, I can remove from collection. If I don't want this,
this one element anymore, remove from collection. And the last thing
that you need to know, if you want to delete
your collection, you just click on Delete here. And I just same time you will delete Zope Project Insight. So let's delete to
collection twice just e.g. if you want to use.
18. Brand corner: Let's see how to use
a brown corners. We can find just here
at Brown counter, what is this m is to reuse the furniture's
from the same brand. So sometimes it is useful
if someone wants to buy the furniture or the
same brand or to have exactly the same time
style of the same brown. It is possible with
a brand corners. Let's first add the rooms. Click here. I can
select a runtime. Let's apply our living rooms. Just change the phase first 430 and click on craft and position my living
room on this area. After, Let's create
another room. So select direct key, add rooms. And I can click here
10 m square room type. Let's select the bathroom and positions robust
room on this area. Now, if I want to add sings
directly from the same brand, I can click on the left. Brand Cornell's
brand, Cornell's. And directly you silly
eggs are brands that you want for your elements. Sometime you have brand
with a lot of things. Sometime we you have pronged
with just a few things. Can continue. I can continue. So depending of what you choose, you can have more
or less choice. Something very
interesting is that it is a real element and
regularly it is open. Regularly. Regularly.
It is of debt. I can continue this one, this one, this one. After, depending on
what you choose, you can sell it directly. Depending of what you choose, you can see lead to
directly something. So if I just come back
and click once, e.g. I still exist one and I go
into left round corners. You can see like what
type of whom it can be. It can be a bathroom, it can be a bedroom, e.g. here on bedroom, we
just have this one. But if I select bathroom e.g. you have different type of
options. As you can see. If I just come back later, before and see leaked,
maybe this one. Here we will have a
lot of mock choice. And if I go on the left, I can select the
rooms that they want. E.g. I. Can click on bedrooms first. And if I go on bedrooms, I can walk with one models of bed and position
my models of bed. I can continue front corners and I come back to this element. So now I have directly
into bedrooms, this one. Maybe I can deselect here
and see directly with type. If you continue, you can
find a type I would like, like maybe a sofa directly. I can select so far and add
to project like this one. And just create a
rotation like this. Let's continue brown corners. Let this active at so far. Let's continue with rooms. And I want to walk out. So maybe with Office I can see
Leto fees via Canada desk. I have this one and I can put
a desk maybe on this area. Click on this one,
drag and move. Brian Cornell. So again, let's go into filters. Again, continue with
just two bedrooms. Add another type of furniture, or maybe this one or
this one just here. It's thanks to that
you will have just also element of the same brand. After again, have more trend. You can see the stylus. So if you want, if I just go here, I can find also elements. Sometimes it is useful if you don't really
know what to do. You can see different things and when you like something,
you can just add. I can continue if e.g. I. Like this one, I can put this one,
put this here. And Crato rotation 90 degrees. I like this one. Or to project. Click on this area. And creditor rotation
for this wondrous here. So it depends on the brand
Cornell that you choose. It just come back here. In this example for
I don't have a lot of things from restroom,
it just decoration. So if I wanted to
work with a boss whom I won't choose this brand, I will have to choose
a different brands. So it's okay for that. Not many more things
to know about this. I can click here. Just
silly as a 3D view. And these different elements are just from the same branch. We can click on one of these and you can
have information. And you can find
that as a brand. And if I want to have a related
projects that can final. So if I click on z sofa information and
I have already project, project with Odell
type of so far, e.g. I. Click on this one. I can also find information
and put to another.
19. Community content: Let's explain the
community content. You can find community
content just on this area. You have the possibility. We will see that after, just after to create
your own from neutrinos. And when you create
your own furniture, you have also the
possibility to share with the community
content and you can just recuperate different
types of furniture years from. So community. First
things to do. Just add the room so I
can click on Add rooms. Set exists one and just enter a name and let's
select bedrooms, credit. And let just extend
the little bits of words on z direction
and on z direction. If I wanted to add furniture
from the community content, you just go on this area. You said IT community content. And thanks to that,
as you can see, you have credit your furniture, your own furniture
with, made by me. See is how you can
create furnitures. And you can also share with the community
content if you want. Not too much, too much project, but sometime you can
take a glance and you can complete with all the
projects that you have. Also busy projects
that you have. It is exactly the same thing. You can go unsold left, you have different categorize. And if I select phrase
on purchased a chair, I have different
models just like that. If I'm satisfied with this one, I can click on Add to Project. And that's it. I have an element from
the community content. Let's select another example so I can come back
community content. And you have different
type one more time. If I wanted table, I can click on table and you
have this type of table, you can see not many Chen, many choices is
why I'm not going to spend too much time here, but it just to show
you the principle, you can recuperate a
demand from the community. Let's click here
community content again. If I wanted some sink like
the corrective accessories. Let's continue. You have this one, this one. You have some
decoration element. I have one more time. Just to share. And if I click here
again, community content. Let's activate to decorative
accessories again. Yes, Not too many scenes have
some decoration like this. Here. Let's take a glance on
the 3D view. So it is same. If you click on
the elements here, you won't have the
possibility to edit. I can select just my 3D view. And that's it. So this is a type of
elements that we can have with the
community contacts. And after it works exactly cent is dressed with furniture, so it means can
change with position. At your convenience,
you can craft rotation, duplicate your element,
delete if you need them.
20. Create furnitures part 1: Credit furnitures,
it is possible to create your furniture. And for this we have features,
very interesting features. And when you click
directly on this area, you can find my content. So I can click here. And in my content
here, as you can see, I don't have any sinks
and I can create e.g. my first furniture,
fixtures is made by me. So you can create
your own furniture. It is really something
specific to buy me. You have also these features and you click on plus
and directly you can change the interface and you are going to enter
in your new space. Yes, just like this. And phi just continue. You can just click here, try now, or you can just login. You click on Login on
the top right corner. And after you can enter
in this area is a semi. We'll be able to
see your project, but this is make by me. It is a different dashboard,
different interface. You have a new window, and you can craft your
first project on this area. Let's just tap furniture. We're going to create a little table just to show
you and just validate. Things are truly is
very interesting. One of the only problem is maybe it's not
extremely ergonomic. And maybe it's when you want
to move with your camera. Sometime it can
be a little long. So first, you have
the structure, you have materials, and you have retails projects here
on the top-left. So you need to select the
strictures that you want. If you want to start with a box, you can start with
a box of frame, a pallets per credit. It depends what you want. If e.g. you want to make
very fast furniture, you click on bus
structure like this, and you have different options. As you can see, I
can select e.g. this one. And it's very fast. You can just create
a basic furniture. Those basic like a bookcase. Cities are aids that
you want just here. It is in millimeters, so be careful about to
dimension this area. E.g. if I want 150 cm, I'm going to tap 11500
millimeter wide. And this is the land.
Think it's nice. I can just click
on Add to Project. And that's it. Now, I
have my first element. As you can see, we have the possibility to drag
and move on the direction. Here are some interesting
is we can make some change. So e.g. I. Have this element. And if I want to duplicate
this element that can duplicate with this options,
you have duplicate. And you can drag and move the element at your convenience. So first I can
deselect everything. I can click on this one. Duplicate anticoagulants
or you have another element just here. Can drag and move on this view. Sometimes it's a little
difficult or by the selection, if you want to add e.g. more elements, you
can click on outside, you click on this one, duplicate, and you can add
more elements like that. Can also make some
transformations. So it means you
can drag and move Z's dragon moves this one, this one, and this one. Let's see a second example. I'm going to click on Cancel, know, and just create
a new project. It's come back with
furnitures, validate. So now we're going to
start with the materials. So retest project, but
start with the materials. And let's use a lambda. After you have different type of numbers that you can use
construction you have sushi, the world's shapes on this area. You can even create a
stone bronze if you need. And keystone broad is very
great because you can stick the materials
that you want. So e.g. I. Can see pine, yes, it's nice. And I've taught to
seek the materials you can entail the
dimension we sickness 66 and dimension just like this. So I can walk. Let's redo it. So I'm going to
create something with 40 millimeter and
just 40 millimeter. Let's work with the
length, about xw length. It will be my first foot. And I would like to work with I think sixth century.
Just like that. And I can just click
on Add to Project. So this is my first element. I've talked to
have this element. Let's create two rotation
on z-direction 90 degrees. Like this. I want to
duplicate this element. I can click on duplicate and petition in order. Dress here. Like that. I don't have
all the right dimension. At any moment. You can come back on
shops and you can have access again to your inImage
can also come back here. You have predefined element. As you can see, you can
select predefined element. So e.g. it is 15 millimeter
by 40 millimeter. And you can add more choice. If you click on View hours, you have all this
possibility of element. But because I started
with custom shape, Let's continue with custom. Let's select again for t
and select frothy again. And it will be
white off my table. Let's send 1,200. Likes this. And add to project. Something little difficult is to position each element in
comparison of zero del. So e.g. shall you need
to select your element. And generally you can
snap the element. So I can click here. And you have also
the free moves. And you can try
to snap directly. Maybe I can snap
directly on this area. I think I made some mistake. It's not exactly
what I want to do. Let's click on Edit. You can eat it raw material, but it's not what I want to do. I'm going to delete
and do this again. Shops, materials, metals, Chris tumbles. Let's step again, 40. Step again for t. But here, Yes, I didn't want
all this address. Want to have maybe 46. Perfect. And yes. Oops, not 46, 40. Maybe as this one, I think it's not enough. It's work with 5,000. Yes, now it's a bit tough. So I can drag and
move this element. It can create a
rotation 90 degrees. Then I can use this element to have the free move and
position this one here. After I can click, Don't, don't forget if you want to deselect everything,
click outside. If you press Shift, you can select multiple
elements at the same time. And if you want to deselect,
you click outside. Against it exists one Dragon
move on this direction, like just here and perfect, I can snap NIF this base. Now I need to duplicate
these three elements. Click on this one, click on this one, and
click on this one. And we can just use duplicate. And we observe
duplication on the left. It's not possible to
duplicate where you want. So click outside this select. City exists one, shift, this one, and this one, and start to drag and move on this direction, just like that. So those are things that I'm going to do it to come back and shop and create two bonds. So I can select **** here. You have plywood, OSB, let's select plywood, and
let's choose one materials. Let's stay with spinal. About the sickness. I can praise, it's not too loud. Let's work with 25. And about a bad zoo length, it will be 500, like this. Maybe 500 times or wide. It will be bitter. About zero ln 21,200.500. Yes, Perfect. Let's click
on Add to Project Settings. This one drag and move. With the free tools. When you click here
in the middle, you can snap directly
to this area first. And I've taught to
snap to this R-value can take, click outside first, select this element shift, this element, shift
this element. And you can move and snap here. Just like that. So e.g. we can walk like this. But after I'm going
to show you that you can cut your element.
21. Create furnitures part 2: Let's continue with the
creation of your furniture. So now if you want to tell
him and it's possible, I want to read you this one. And I want to read
you this one or so. So I can sit exists to an immense and just
drag and move here. So now it's the things
that I want you to do. It's to create, to cut. Maybe I can crunch a kid before. So let's just come back here. Click outside. And when
I click on this one, shift, click on this one. You have the options
on this area. It's not extremely convenient. Sometimes you need to
select just one element. Click on kit. I've
taught to click on Kurt your position where
you want to have your card. So it means I can
just snap along this area and I can
click on validate. And thanks to that, I have
just one small element here. And I can drag and move on this direction and I can delete. So it is interesting features. This cut, you can click
on this one again and position this element along
this area as you can see. And that's it. You can just click on Okay
and validate and kitsch here. Just delete. Let's repeat this
process on this area. Click on this, on this element. Chet, first, you need to snap
on the side that you want. Alonzo phase. And after I have a
new element here, cut can drag and
move and delete. Let's do this another times. Chat. I need to snap to
this face value date. And let's click on this one
and move on to write delete. So perfect. So now
that I have this, I can still exists
element, this element. So I can see the Xist
element at the same time. And I can just move
and snap here. Perfect. I can click on this one, shift, click on this one, and I can
duplicate this two element. One of the problem is
when you duplicate, It's not extremely
convenient because it's duplicated on
our radar like that, so it's not extremely good. So let's sit exists to element Movietone
on this direction. Perfect. And I need to move on this
area and positions is here. Let's select again. And maybe I can move. Yes, perfect. Whoops. Yes. It's okay for that.
I can sit exists boron and moves abroad. After to duplicate. The same when you
duplicate some time, It's not exactly where you want. So now I can click again and drag and move this
ball on this area. One of the programs that I
have is the size is not good, so I need to create a
character again. Click here. You need to create a carrot or a need to create a rotation
shear, it's not good. You can create a
rotation on your cut. Yes, perfect. And I need to snap
directly on this side. Crowd to carrots. Perfect. So now you will realize that
you have one more element. I think it was not
working properly. So now it looks nice. Validate. Now it's okay. And
I can click on this one and take a glance. Now, we cut this element. And let's click on delete. Let's repeat the process. So it means I can
select this one. And credit to catch again, I need to first
rotate the tours, Crato rotation 90 degrees and drag and move this
element along this phase. And after crack two curves. So perfect, I have again this element and I
can drag and move, undress, delete, and that's it. We have created
this small table. As you can see. I
think it's a tool, it's, it's very interesting
or budget process. But I think that seems to
improve because it's not extremely sometime
convenience that extremity sometimes ergonomic to move
to a different element. If you select one element, e.g. or you can press Shift
select to Elementor. So you have the options
to click on aged. And when you click on Edit, you can Solexa pins
that you want. So it means if I wanted
something more in black, I can apply a black
color just here. If I wanted something
more in gray, I can see Cray this one and
just validate. It is same. I can click on all these
different element with shift. So Solexa different paths. This one, this one, this one, and this one. Paint gray. And I can select the same
just like this, e.g. but if you click on this arrow, you can change all
sorts of settings. You can just add the
materials to your elements. But if you want, you can just
keep the wind materials. Says how you can work
each time when you select an element so you can delete or duplicate
your element. You have also silly
drained automatically. You will have different drain, but sometime it can
be a possibility. And after you can find
planes and planes options, you have the different step, just like this, different
steps of creation. And you can just keep
these different steps. You can find some
materials automatically. She will define your
differ on them, both materials and what types of hardware or you can need
to create this furnitures. After what type of tools
you can need to create this furnitures and what
tells you different cuts, why it is interesting, e.g. you go into a shop and you want to craft exactly this furniture. You have all the catalyst. I need one bundled
with this dimension, one board with this
dimension material pine. I need one. Wouldn't post with
this material. So now that we then pass with these materials, and that's it. So this is a type of
things that you can do just like this. Each time if you
come back on shops, you can add more elements. And after you just
need to click on save. So when you click on
Save, as you can see, we have the first
furnitures like this. We can find a summary
when most times we step materials, tools, and catalyst. If you want to add
a description, you can add a
description and you can edit your project again, just on this area. So this is just an
introduction about Meg by me about the basic, what you will be able to do. And after one more
time, you can delete, duplicate, or edit your
element at any moment. So now from this, if you just come
back on and by me, and you come back to any project or you
start a new project, you just click on this area and you can find
my content again. And now as you can see, we have this form nitrous. So if you cracked
different furnitures by yourself using made by me, when you will come back
in on by me directly, you will have your element. And if I need, I can add
to project just like this. So I don't have any room,
but take your lens, I can sit in my 3D view and I have my smoke
table on this area. Maybe I can add a room to put this inside sitting my 3D view. And we have this smoke tobacco. If I click on my table, I can create rotation change. I can also duplicate or delete, but it's not possible
to aged materials.
22. Edit materials part 1: Aged materials, we are going
to see how to AD2 material. So first things to do, Let's create a base
using AdWords. And just great to base off. Let's make something simple. You can craft something
like z is going this direction and this
direction combat here. After we can create two separation around
some idle on this area. Just like this, I can cry to note on this area and maybe
you'll know duck part. Dressed on this area. Let's make some adjustment
validate first, let's drag and move liters
this fall on this direction, this one on this direction. And yes, it's perfect. So now I would like to
edit the materials. You can indeed some
materials on the Fraass, you can indeed some
materials on the ceiling, you can indeed the materials
on the walls also, sometimes not every time, but sometime it can eat into the materials on
the furniture's. If I just gone through
a realistic 3D view, you can edit the material
directly clicking on the room. So if I click Share Edit, I have these different options. But for the frost it is also
possible on the 2D view. This is my room number one. I can click here, it is
selected by default. We have this wooden materials. If I click on edit, I have options
selling and fluorine. Let's first start
with a ceiling. Here. If I want to change, you have different options. Most of the time it will be just paying for ceilings.
If I apply e.g. this red color, click here, and I select my 3D view and go inside the room and
take your glands. Now we have the ceiling
with this color. I can come back here. You can click also on the wall, on Zoom ceiling, and directly
you have the covering. And let us come back
with the white color. Just like this. By default, you have
little gray color. It is not to tell you why Scala. So acidic that 2D view. Let's change the color
of all the ceiling. First, click on this one. Selling. An exchange for total. Why Scala? Click on this room aged selling. And let's click on this one
and click on this room, aged selling, and
click on this one. Perfect. Now if I want to change
the flow of materials, this is exactly the
same principle. You click on the room, aged and this time
you select fluorine. You have a lot of type of
categorize that you can use. Ad would if you want
something like carpet, you have all these different
options. As you can see. If you want some sink
like here for outside, you will be able to put grace. But it will be for outside. If you need just wall
and floor tiles, you have different models of
flood tides like this one, maybe this one, this one, all these different
types of models. Let's e.g. select
this one just here. And when you go and
edit materials, you have the options to create a rotation here
because it is this. It is a tie like this. It won't change
anything after you can create horizontal and
vertical position. So it means you can
change the start, e.g. and you can also just
click here and you can also change the
position vertically. If I just come back. And you can repeat this process on all
the different rooms. So I can click on this room. And when I go in this area, which is exactly the same, I can click on fluorine first. I select what I want. Let's click again on while
in frog floor tiles. And I have different
options again. Maybe I can try different ones. Like this one. Some say on terrorists team is you
can reuse the material. So if you have a
lot of room e.g. and you want to put this
same time materials. You click on this one, reuse. And directly you
go in your 3D view and you can activate
this element. You can reuse what you want. It's not extremely good because
it is this one selected. I'm going to click here, click on this area reuse. And now you can see
this tile selected, this floor tiles selected. And if I put this on
this area, this area, this area, I can repeat this
materials where I want. And also on the wall I
will show you just after. If you go left-click again, you can delete the materials to come back to
the old materials. So it is something
extremely useful to know. It is if you want to
do this after fossil, I'm going to change. Let's click on this one. And let's work with
wooden materials. Click on style, change. And here you can find out would have different
models like this one, this one, this one. Definitely a lot of
options that you can use. This one, this one
thing, It's not very, extremely convenient for fluid, but if I come back
at the beginning, maybe I can select this one. And if I zoom in, it'll
be this is the same. When I click on fluorine, edit materials can create a
rotation, as you can see, 90 degrees depending on the
direction that you want, can also change the
position horizontally, and you can change the
position vertically. Just like that. Let's click on the last one. Fluorine. That
change for outward. And let's set it to another one. Now, I can see it
exists one or maybe I can change for yeah, let's delete this one. So now as you can see, we
changed the material flows. We have four
different materials. Then after I will explain
it for the worse.
23. Edit materials part 2: Let's continue with
the materials. We're going to work with
the materials on the words. You need to work on the 3D view. Because if you just
select the 2D view, you click here or you just
click on the wall like this. And you select aged. As you can see, it's not
possible to edit the materials. You have to go directly
on the 3D view. So let's click on
the 3D view first. Let's position,
very important to position your character in here. So center on Zoom room
and I will explain why. So first thing is if I want
to add the material on the face of this world,
left-click edits. Now you can find the style covering each time you work
on the phase that you want. So in indoor or outdoor phase, you can have multiple option. It is exactly the
same type of options. If I just want to have
some sink like a paint, I can select a matte
setting paint. Let's say the exact team. We have different options. Let's work with
some thing in blue. And you have all these type
of blues that you can choose. Let's walk with maybe this one. And now I have this blue
materials on this words. Something I'm protons. You can repeat this process
but it's not the best. So it means I'm not going to
on each wall on this room, if I use exactly the same
materials, click here. Aged, silly covering, setting, paint, blue, and select
again the same element. It's, it can be big rocks, It's not extremely interesting. So the best things to
do, It's too here. And just go on re-use. And thanks to that, you
can reuse this element. And directly you can put this on the phase that
you want, just like that. I'm seeing I'm proton to know if your character is not
on the room, e.g. the character is maybe on
this area. Take your glands. I will have one wall that
it won't be possible to put the materials in this example, it
will be this one. So take your glands. So
character is not here. I want to put on this wall, but it's not possible. If I click here, it will be on this world and it's
not what I want to do. Let's click Show Again. So it means I tried to have with your camera
to put on this world, but every time
it's not possible. So put the character inside the room for
the materials all, every time you will
have one wall where it won't be possible to
put your materials. So put the character
first in reminder. So now I can go left click here, and I can go left-click here. And as you can see, it's
extremely convenient. If I want to work on this area, Let's say maybe it
can be a bathroom. And thanks to that, I can
try something different. First, put the character
inside like this. We can zoom and you don't forget to
validate last sections. Click on one of the
wall on the room. Aged. Change the style. This
time I can work with e.g. you have war and float age. You have also worked tides. And you have all these different
options. As you can see. This. You have these
different options. You can also select one directly on a
different categorize, wall and floor tiles. And generally you have more
options. Just be careful. Sometimes you have
something better for fossil group and sometime it is better
for the world, e.g. this one can be great
for the world like this, that you have more options. So let's see. Maybe I
can select this one. Great. And I want to repeat the process
or maybe an adult. Well, let's see. Let's see it exists one. Something in brutalizes
after click on reuse and put on the
different worlds. Such one, this one, this one, and this one. So if I want to work
with this area, I take my character and
drag and move on the left. Click on one of the world. Don't forget to validate
click on one of the world. Exist style. This time I
would like a wallpaper. So change for change
for what papers? You have different models. I can you can take your glands by yourself about three
different options. So let's put these models. Reuse, click here,
here, and click here. And drag and move the
character in last area. Just like this. Validate first, select
one of the room. Click on this tile. And I can see lead to no
dove type of wallpapers. Let's work with this one. Reuse and apply on the
different words and validate. So it's okay for that. I show you the process
to add materials. If you want to add materials, I would say it is a same. You put the character
outside. Like here. You see the words that you
want and you can go and edit. Also. You still existed if e.g. it is something for outside, you have also natural
stone that you can use. You can also see leak. You have different
themes of metals. So we can have a lot of options, concrete and bricks. All right.
24. Add floors: Add flows. Let's explain how
you can add flows. So before to add flows, let just create a base. So by default, you
can click here, you'll work on Zukunft floor. And from these panels
you can add a new flow, and you can also add a basement. Let's first create two new flow. Click here. And I
will work with, well, it is fast. And let's create our base. Just like this. Let's take the same
type of example. I can just create
two separation on this area with two rooms. And maybe I can try
to know their rooms. Trust on this area. Validate, click here. And just gradually
till extension. To do this fast, I can
just click on Build first, create a Fondo or just from Doris dressed on
this area. Perfect. And I can continue build interior doors, folding Doris, Let's select
my basic doors, this one. And position once here. Can just change
direction like that and duplicate and position and
adult one on this area. Maybe I can I can take this
war and drag and move here. Yes, it's better. Or maybe I can move little
bit on this area, this area and this area. Quetta position,
this element exists. He did last sprint it just to come back on
builder select Window. Let's just add our shoulders. And I can select my
wife, special Doris. I can go on my results. So it means this one
and just put e.g. once on this area
and frozen example, just one on this area. Normal. I don't need to do
more just to if you want, you can put in order room, but it's not extremely and
protons are m is to work with. So if I select my 3D view, so we have this render. If I go outside and
this is frost flow. If I want to add another flaw, you can click on the 2D view. Like this. You go on the Options and you just
need to click on other flow. And now we're on
the first floor. Each time you can navigate first floor and you can
change for current flow. It is selected when you have
a yellow point just here. So now I'm going
to current flow. If I click here, I'm
on the first floor. When you are on
the second floor, I can see my 3D view
to show you here. Now we have we are
on the second floor. As you as you can see, second floor automatically
keeps the base of the first, keeps the base of the
first, just like that. Now if I need to make
adjustments and need to e.g. we move the words but be careful
to be on the first word. I can click here, and I can press Delete or
I can click here, remove, remove, and
remove. Now it's okay. And I can walk with my second
floor at my convenience so I can use my tools are the worlds and maybe
I will put e.g. stairs on this area
so I can just create, may be first room here, maybe signal in the room here, and maybe yourself room here. Just like that story space. When room to room, suite room. If I just validate, I can come back here, build just silicon
windows, double windows. And I'm going to
select this one. And e.g. just one ad
once on the front. And yes, maybe on this area. And duplicate and position
and O'Dell on this area. It's okay. So now this is our Oda flow. I can click on my 3D view
first and we have the second. I'm not going to put doors in size a second just to
show you the floors. You can repeat this process. Even when you are
in the 3D view, you click here and add a flow. And this is now my workflow. And I have cheap and I
have still the same base. So now if I need, I need to delete
this indoor words. You need to come
back to the 2D view and you repeat the process. So here you can delete, here you can delete and you
can continue like this. You can also add a basement. Click here and gloves either
basement on this area. Click on this area. So basement you can
also change the size. By default, I keep 250, but you can change. And now we welcome to
basement again one more time. Delete this one. Delete this one,
delete this one. Again. This one. Silicon my 3D view, and this is a basement
just like that. So if I come back to my 2D view and i means the second floor, I can click on second
floor 3D view. So now we are in this plot
so you can find basement. You can find first floor, second floor, third floor. Just like this. Now is
this thing that I'm going to do if you
want to remove one flow, you can see like e.g. the basement and you
just apply, delete. The only ovarian protons
seems to not fail it just to select the
right floor to be sure to not be in trouble. And you can lock a flaw if
really you want to stay here, you can look at Florida is possible and you want
to move any sink.
25. Add stairs: Add the stairs. Let's explain how to add stairs. So we have seen is that
we can work with floors. So it means here we
can come back with this example and we
have grown flow. We have the first flow and
we have the second floor. If I take a glance
on my 3D view, we can find the different floors on this area just like this. So now it's the things that
I would like to do is to add the stairs in omega in on by me. It's extremely convenient for the simple reason
that automatically you will create an
opening and you don't have a lot
of things to do. Just come back to the 2D view. And I want to understand
on the first floor. So I need to change
for the ground floor, I need to change for
ground flow like this. And you can go on
this area, build. After to do this work, you're going to categorize staircases and you have
different options. Straight staircases exists. You have any
careless staircases. You have cropped off
turn staircases. Just like this. You have doubled quarter
turn staircases. And last one categorize
platform stairs. Just lazy. Let's select e.g. is a straight step case. Let's select some basic
options like first, maybe not the first one. Maybe I can try with
this one, this one, or maybe I can try
with this one. This one. And I can click on
Add to Project. And you need to position
where you want. E.g. I. Can go in this
area and I can put this one around this area. I think adjustment
won't be really good. In comparison of
my second floor, I'm going to remove
this room because e.g. delete this one and
delete this one. And I can position my stairs so I can click here
directly on this. So now if I click on my 3D view, just here, you can find the
location on the stairs. So just stare is located here. I can drag and move my character
directly on this area. And something interesting
is if you change the flow, so I select e.g. second floor, I can change here. First floor. And directly we have openings, so it is perfect. You can find the opening
just on this area, but location is not
extremely good. So I need to come
back to my floor first and drag and move
little bit on this direction, the stairs to have little
space on this area. Now if I just come
back first floor here, you can find this element. And now we have placed to
move directly on this area. So this is how you
can add an element. Now let's see a second example. Just to show you the stairs, let's position and
adult one on this area. Let's click directly on build and select the
different categorize. Lead change for curvature
term staircases, quarter turn staircases. I can select fries on
PER, just this one. Add to project. And I can position this
one as you can see. It's, it, it's great, big, but maybe I can
position this one here. That just froze example
maybe on this corner here. If I change the flow
for second floor, you can find the opening directly automatically
on this area. Can be nice. Maybe I can put towards directly on this area. Antes definitely convenient. Few other words. Something very
interesting is you can find the position of
your stairs directly. So it means you can make
adjustments to your words. You don't have to check
and it's not difficult. You just need to put your
words, you validate. And now I can click
on the words and drag and move and go directly
along the stem. And maybe I can put this one. Yes, just like this. If I stick my sweetie view
now you can find directories, a wall along this area. So definitely it's very
convenient to add stairs here. It's extremely convenient
and this software. Let's come back to the 2D view. So you can find second flow. We have the position
of this one. If I select my first flow, so change phosphorus flow. I can see I can see directly X2 position of zero del one and x2 new
one, just like this. And in fact, just come
back to micron flow, I can find the position
of my first step.
26. Create garden part 1: Let's explain how
to create a garden. So even if the best is
definitely for interior design, it is possible to
extend on the garden. So the first thing
that I'm going to do, it's to build directly
just create worlds. And it's great to base of
something really fast. Just make some seeing
here on this direction, come back on this
direction, this direction, and just validate knows
the next step if I want, I can add worlds
also again inside. And I'm going like every time takes the same type of example. Credit may be a room
here, rooms here, and another element
on this area, another room in this
area. Like this. Let's just add doors outside and also Windows
or from a fall onto words. So let's see the build first. Exterior doors, front doors. Let's click on the first one
and position the first one. Here. Let's come back, build civic Windows,
pasture doors. If you just continue at the end, you can apply,
show more results. And I'm going to sit
disease models of partial DOS and apply once here and also to unselect because I would like to
create, to erase, duplicate. And let's drag and
move this one on this area and duplicate
again and positional. So this one on this area. So it's okay for that. Let's add windows may be here. So click on Build again. Windows, double windows. And to keep exactly
the same style, I can go ahead and sit exists one and position
once on this area. Here, we don't focus exactly on the position
of the element. We're going to focus
on the garden. So position just fast. These different part. Maybe once here, duplicate and maybe another
dressed on this area. So perfect. I've taught to do this work. Let's take a glance view. I need to put the
character outside first. So this is a view of this house. If I want to create
something outside. You can go on this area and
you can add, add exterior as, as explained before, garden
pea shoe, drive away. Best things to do. It's to start with spatial
and drive away and to add a garden path at the end is definitely
the best things to do. So I can create to pay show e.g. crowds. And I would
like to erase on the left so I can snap here. And you can just click
on one of these part, one of this edge, and you can drag and move and
the best things to do it, to follow the ligament
of outside walls, not the wall inside
the outside world. It is definitely the best. And you can snap. I can click
here, reduce or increase. Let's continue with
an exterior walls. Let's apply another
type of tissue, e.g. this one around this area. Just like this. Let's zoom a little bit. Yes, perfect. And I
can extend like that. Let's continue. Select directly, add exteriors. Let's take a drive away. Was it shown to drive away, dress here and
extensive drive away. We can be on the
semi ligament here. About the size? Yes, totally enough. So it's okay for that. Now, if you want
to add so Grace, Grace area also rest of the gardens are
best things to do. It's to put this at the end. So you've got an addict stereos, see Leganto and scrapped. Because if you do
this Onto beginning, you will be in trouble
when you would like to add a tissue or an
drive away after. So I can advise you to
position this element first. Don't forget that each
time when you apart, you can splits apart and you
can drag and move like this. You can click on the edge split. And each time you
have the options to make some adjustments. And don't forget that. Let's delete this element. Come back at exteriors, silly gardens and puts a
downturns dress here. First. Let's try to have the same
or ligament on this area. And reduce literally beats. To save on things is
to extend this part and you have the options
to a different rectangle. So it means you can add
an exterior wall, again, another part like
around this area. And you can add
multiple rectangle and try to do your
garden legacies. But definitely it's
possible to do in just one time We
just one element. I'm going to delete this
one. Why it's possible? Because automatically
he will define them. Zoo line from this
corner to this corner. And if I click here, I can just extend this area and this is
why it is interesting. Sometimes you can have
just very little burger, but generally it works properly. Let's click on this one again. Extend on z direction. And now it is, if I click
on this area here is going to define this point
to this point automatically. And if I pull it is perfect. And I can stop here
and snap on this area. Sam, if I click here, he's going to define this corner to this
corner automatically. And I can go left
click and move. But here e.g. it's not working. This is a perfect example about sometimes it's not
working and he's not able to find this corner
and maybe I made a mistake. No, it's not possible. As you can see, I move also
on the left, just like that. So here e.g. we are
literally in trouble. May be yes, we are in
trouble, definitely. If you are in trouble like
this, the best things to do, each to click on the element, activates split, and
you have a coronal. You can move this columnar
on this area, on the spot. And I need to click
on this column. And also just like this. Now, if I click here, I have this element. So this is why it
is useful to split. You can make grid correction
if you are in trouble. And I can continue
extend until this part. And I can take this one and take your glands that you have exactly the same programs. So if I move here, I move all these elements
so it's not truly good. So this is why you can split. You click on this
area split and you take this point and you move
until this coronal print. Whoops, yes, just like that. And now you can have just a small area and it's
not working again properly. Let's click on this one split. And let's drag and move this
element just on this area. And I meet her in trouble again. Can make some more adjustments, split and drag and move
an element just here. Again, sometime it's not
extremely convenient. So shear, it's not
working properly. What I want to do
if I click on Split each time and you
have the element coming back on this area. Maybe I can try to make
some little adjustments. And if I click on this area, yes, it's going
to work properly. But it's not perfect at the end. And I need to take this coronal. And normally yes, I can
make my address men. Sometimes it can be
little difficult. You need to try multiple times. And if I click on this
one, it's works perfect. And now I can click on this
one SEM automatically, he's going to define
a coronal plane, but sometime he's not able
to define a corner points. So you need to do
this by yourself. And I can extend until
this area. Just like that.
27. Create garden part 2: Let's continue with the gardens. To add element, to
add furnitures, to add decoration, to add trees with different types
of possibilities. If I go on to left first, you can click on Build. And when you go on
build you won't have any sync specific, you can click on Finish
and inside furnish. If you just go on this array, you can find outdoors. And for this you can find all the furniture
decoration in mole. So if I want outdoor furniture, I can click on this one. I've said you have tables. And you can select elements. E.g. I. Can select
this small table. Zoom a little bit on my
picture, just like that. And I can position this
element on this area. Let's continue. I can just click
on Finish again, and cities is models of chair. And I can put maybe one
share here and duplicate. Maybe you're no doubt
one on this area. Oops. Maybe I can duplicate
position and O'Dell 1 st, this area exists. And maybe duplicate and
position on the dial one. Just on this area. Just like this.
I've taught you can add more elements when
you go in for niche. It is a seat. You have
different type of seats. You can add a bench. You can have also this type of element. E.g. I. Can add this one and position this element just on this area. I feel I don't like to
merge the materials. I can change the materials
aided exteriors, and I have different
options here. Let's try with
something different. Maybe this one or this
one, or maybe this one. Let's work with this one. If I click here, re-used and you can put this
material dress, he also just like
that for any debt. And if I click on
these materials, aged exteriors, maybe I can try a different
ones, like this one. So now let's come
back to the 2D view. If I select again for niche. So this is a different
outdoor furniture. You have more options. Now going to enter
to merge in details. You have also different
outdoor decorations, like rocks if you want. Sometime you can put also this type of element
on the ground. And if I want, I
can put ones here. Duplicate. There are
shear, duplicate here. Duplicate Angela's
creative paths with multiple
elements like this. Let's come back at
furnish outdoors. If you need to add any pool Spangler and it's things like this, you want
to add the pools. You have different
models, not a lot, but you can find simple models. Can maybe puts ones here. If you click on the
pool's aided, e.g. you can change the
white if I want us to have some things smaller, I can have 400.400 here. And maybe 8160 will be
to tell you enough. And I have a smaller pool now. Furnish outdoors. If you need any
sink like a garage, you can find garish cows. If you need any things like
parabolas declaration. You can have elements also. He's on parallel. You have
this garden shelters. If I want to put
ones on the back, I can put words. So first things to do if
you want to add from it shows if you want to have input on just plant trees, you need to go into,
no doubt categorize. You need to go and decorate. Decorate here you can find
planting flowers and trees. Planted flowers is better
on just falsity race, but also further garden
you have, you have choice. So I can click on
show more results. So this is a type of plans
that you can use inside, but that is that you
can use outside also, I can click on this
one and put ones directly on the terrorists. Let's come back on decorate. Can also put maybe
decoration element. You have a wheelbarrow
declaration just like this. Take your glands. And if you come back on decorate this type of
elements that you can use, it will be perfect
directly frozen calendar, it is just shrubs. And I can click on more results. You have also different element one more times and
after it's going to be finish around this area. If I just come here
in your garden, you can try this
type of element like this one or two
project. Like this. I can use D, correct again, silly to
Nadal models like this one. And put this one's here. I can tell in my 3D view first. So take your glands
about supported planes. I've during the
project I will show you how we can finish the work. So we'll credit to
complete the race and we will complete
credit also gal done. But just to show you the basics, I have, this element is put
a plane that can go on edit. You can change the color
of the flower pot. If I select metals, I can activate read materials
on this flower pot. I can also change
the size wide eight. It's increased to
860 wide, 120.122. You can change the size
of the element like that. Here you have the
wheelbarrow aged, I can change also the size of this element was
just an example. I'm going to delete
your wheelbarrow now and take a gland. So by this shrub, by default
it's small but you can make something bigger each time
you absolutely did options. If I want to have
something bigger, I can put 168,200.160. Just lays out. And you can make something really
bad, really bigger. And you can move your element. It is a St. for this
one, can click here. And one more time you
can change the size. That makes something bigger. 100, 108, 120, just legs up, try to keep liters
the ratio to have something interesting
about the render. Render is very nice. And the last thing that you
can do for the gown, done it. If you want to add
the big trees. Let's come back on the 2D view. Let's zoom out. When you click on decorate. Decorate here, you
can find trees. And thanks to that, you
have bigger element. If I want to add a big trees, I have this different size. Let's see, leak like this one, lounge and put a large tree
on this area. One more time. You can go in Egypt, you have wide a deep
and you can change it, change the 84600. Just laziness. If I come back on,
decorate your will. So just shrubs, the
corrective element, you have this type of
shrubs that you can add. It's put this one
here and some idiot. And you can change. So
different barometer. Let's put 220 and that's it. Let's say it's a 3D view. So we can find the
render of this tree. You can also treat bottom if you need different styles and
you can find this trouble. So let's move the
character just like this. So the aim is to show
you that it's not with these online tools that you will be the perfect
garden design. Most inspired on this
interior design, but you can extend generally, it's very good to extend on the pasture or on a
t raise with pass. Sometime you can
make an theorist in C seems from the garden. So thanks to Zach, you can
add different big trees, you can add different shrubs, you can add furniture, and you can extend your interior design
to the outdoor design.
28. Create screenshots: Let's explain how to
take a screenshot. So to take screenshot tie, you have this project here. So I have interior design
and outdoor design also. And thanks to that, you can check on the 3D view and the things that
I would like to do. It's to create screenshot. What is Antares to
grad screenshot? First, it is totally free, so you can use the number, unlimited number of screenshots with the free version seconds. So quality is exactly
like on your screen. So it means take your glands, your quality is not bad, the
quality is already good. You can create a screenshot, but it's not possible to
a digital environment, to a digital environment around and not to be
on a white background, you will have to create
a realistic image. So first things
that you can do it can come back into 2D view. You can just create a
screenshot of this area. So click here screenshot and you can change the
title on this area. I can tap tighter, number one. And after you can zoom in, zoom out with your
scroll wheel and you can drag and move your
element inside, like it's not two page, but inside your friend. You can zoom in, zoom out, just clicking here. You have different options on the left so we can
set the parameters, display furniture on flow. So it means depending on
the flow that you want, you can display the furniture's only on the floors
or not. So e.g. if I click here, I won't see
Xue from materials like e.g. zeolites are captain, I want
C. And if you click on non, you won't see initial neutral. Sometimes it is
good just to have your floodplain
and nursing moms. So here I can just
put my floodplain. And at the same time you
have displays a wound name. So we can just create
something like this. I can put title number
one, take a screenshot. This is my first screenshot. After I can come back display furnitures, let's activate all. And you can also change the
world callosities in gray. You can put this in black, e.g. let's just come back in gray. You can position measurement. If you position mesial man, you can change the size
at your convenience. And after all, displays
a room named displays a womb array as you can
also have annotation here, don't have any annotation. I've taught to do this work and take a screenshot or so here. Let's put tighter number
two and take a screenshot. After you can work
also with the 3D view. So you can click here and I can activate my 3D view
just like this. I can move little bit. You need to move the
character to try to have something interesting
after it fits inside, I need to put the character e.g. inside, just like this. And maybe I can make a
general environment. And screenshot again. Select title, number, sweet. And maybe I can move little
bit on this direction. Yes, perfect. I can take a
screenshot of this area. After when you are inside. If I want to take screenshots inside and you don't
want the character. You can click here. And you can see it
exists type of view. Thanks to that, I can go inside. You can use your arrow will, your arrow keys on the keyboard. And you can walk inside and
you select to view, e.g. I. Would like to
select this view. And I can change here
also eight of the a's, it is 1 m 70. If I activate screenshot, I can directly save this one. I can take tighter. It was number four. Take a screenshot. If I
want an order or view, I can work inside. You can use your
arrow keys, can work, work, work, work well, or you can directly click. If you click on the
furniture directly, you observe view
from the furniture. You can go into furnitures. So I can turn just like this. And I can cry to
render from this area. Title number five. Yes. So title number five. And I can take a
screenshot, kitsch here. Take your screenshot. If I want, I can
click on this area. If I want to enter in this room, I have a bathroom when room
here, when a woman here, you can just click on
the door and you can enter inside. I've
done stays the same. I can select to view this view. And I can take a
screenshot just like this. Oops, I was on Title number
five is not a problem. I will arise after. And I can click here number six. And I can just go out. So this is how you
can take screenshots. You can take unlimited number of screenshots at
your convenience. And definitely is a quality, is good, it has, it is
exactly like this render. And this render is good already, but it's not possible to
a digital environment and it's not perfect,
realistic render. A difference with
already sticky match. I've told you will be
able to click here. You can see your images when you come back also on
your main dashboard, you can have access
to your images. If I go in this
area, my image is, you can find the numbers here. Realistic images, snapshot. Maybe I can cry out to note. I think it's okay. Maybe I can try to not
just forms a theorists, just to show you also. So I can click here
and directly go around this area and credit to another snapshot from the
terrorists screenshot. And I think it is saved serum. Take a screenshot closer. And if I just come
back on this area, realistic image, It's cringe. Just come back here. Image. You can find your
different already before I created few images. And when you have your image, you can download, you can
share and you can delete. So again, don't not
on your computer, just clicking on this area. Very convenient. I think I have two
times the same thing, maybe this one, this one. I think it's okay. Maybe
this one and this one. No, it's not exactly same. If I click on this area. So as you can see, it is a great render or already
was already sticky metric, but it is wise background, but just otherwise background
not on environment. Take your glands
realistic geometric n, Lexis realistic image.
At the same time. Sometimes you can
have this type of element and the realistic image, not realistic image,
a screenshot image, screenshots in marriage, screenshot image,
just like that. And just to show you, if I click on this area, is this one was already
sticky match HD image. If I click here so you
can see the difference. We can set the
environment outside. And yes, definitely it's better. But already we can make interesting things
with screenshot.
29. Create realistic images: Let's see how to create
a realistic image. So when we go on this, on these panels, you can
find realistic image. When you create screenshot. It is already good
with a free versions, but it's not possible to
a digital environment. When you create realistic image, to need to add the pair version, all you need to buy
credit to have e.g. unlimited ought to have a
number of realistic image. Something interesting with
already sticky match first, you have better quality, but you can set some very early. So this is the same principle. If I just click on realistic
image automatically, you need to be on the 3D view. And I can zoom in, zoom out sham,
outside for a sample. First things to do,
you go on the left and you can find this
camera. Click here. You can select, you want to have your AIR realistic
image inside. You can select the rooms
that you want, e.g. if I want a realistic
image on the living room, I can click here.
Go to this room. And directly automatically I go to my living room and
something interesting, you are predefined
camera automatically, he is going to create
different type of camera. You have a lot 48 view
from these things. You can also create
your own view, but honestly you have
already 48 view. But if you want, you
can add a new camera. You select Xenon. I can just keep my camera e.g. and you can sit eight
Lexis and you select e.g. this one, you can change
the focal length. And if I just click on
Save, take your grants. I have no my camera here. And if you want, you can rename or
you can delete. But definitely carryover
already 48 view. So it is a lot. I think we have totally enough. And each time you
select one camera so that you would like and you can create your
realistic render. I've talked to
select your camera. Something important here, if
you click on personal life, you can change the eight. And it is an
environment outside. If I click here,
you can see e.g. default, golden hours,
Nordic, and night. If you apply night automatically your abs a different light. So light will be
opened as you can see. If I just changed from default, I will come back during the day. You can also add a new mood, and it can be my mood. You can select if you
want day or night, and if you want artificial light with
light brightness, e.g. and you can change
all of our own. And you can select
a bank ruins image can be e.g. the moon tens. And you can just click on save. And I created e.g. my mood. And it is Sam
exactly like camera. You can click here
and you can rename all delete to remove
something I'm protons. You can personalize outside. If we click on this
area personalized, you can change the background
image and take your glands. We have different
type of environment. And let's select e.g. Sony middle out
soon if field, yes. And after to do this work, you need to click here. And you can choose the image
quality that you want. Standout definition,
definition for K definition. I use already my definition
and fork a credit. I'm going to show you the
render with another example, but just I have to
credit left here. I'm going to use
this one criterion, linearized geometric. Honestly, I can advise you to use at least I definitions down. Our definition is
not extremely good. And I can click here.
After you will have to wait just a few moments to
directly observe render. So it's okay for that. I created this realistic image. Just to show you if e.g. I. Use my 3D view and I'm
just outside like this. Just to show you something
about the environment. You come back with realistic
image and take your glands. This is our environments
that you can edit. So here we are in city, should go in this area. So first you can
change the mood. As you can see. Like this. If I come back to default
personalize backgrounds image, you can try all these
different ones. When you will create
a realistic image. It won't be exactly like this. It will be better just
to see what you want. You can also apply a
crude sky, cloudy sky. Residential leases. Um, can be buildings, also if village Let's
apply e.g. if village. Each time when I'm just going to come back when
you click on an element, you can directly observe view
on this element. So e.g. if I click on this tree, I can absolute view and take your cleanser render
is definitely great. If I click on this tree, I can arrive on this area and then I can turn just like this. Let's create another
realistic render. But just as standard
definition I have again, one credit left Creighton,
you're realistic image. And you can repeat this
process as long as you want. So after to do this work, you can see your realistic
image just on this area. So you can click on Image. And here's my two SD image. If I click on this one, take a glance,
it's little small. Size of the image
is little small. So this is where I can advise
you to use HD, HD image. Each time you can click, you can find surrender on
just to show you an HD image. This one was SD also exists. Here it was HD. And you can see the
difference definitely we have greater buds were
lied to by the shadows. So textures and
materials and render is definitely a really great. When you use this one, you can download shell
and delete one more time. The last thing that
you need to understand when you go out
of your projects. So it means I can just
save my project first. I can just click here. Close. You can find the option of your project on
directly you will e.g. on my project, I can
click on this area. And now I have this
note on this area. I'm going to come back. So this is a project and if
you click outside like this, you can find overview, you can find rooms, you can find products, and you can find
images just like this. So if I go and images, I can see I can have a summary. So I can put here, it is no doubt
realistic as the image, as the image one more times. I had also may already
sticky magic and click on. This one is HD. And yes, definitely We
have a very great quality. As you can see. You can select inside images
or media realistic image. You can see leaks when
read 60 degrees image, or you can select
just screenshot.
30. Create animations: Let's see how to create
an animation with the 360 degrees image. I have this example
here on this area, you can crowdsource
260 degrees image. You have these three
possibilities. When you want to
export your work, when you want to create
a different scenes, you have realistic
image screenshots and 360 degrees image. To use this one you will have to use to have a subscription. If I click here just to show
you the process of work. So hundred 60 degrees
image automatically, you will arrive in a 3D view. And I can just
click on Next here. I can click on Next here also. And the aim is to set the parameters on
the top left corner. So first things to do, you select B4 to
see the settings. You select the reference point where you would like
to turn around. So e.g. I. Can position myself, I
can move a little bit around some of these
living room like this. And maybe I can walk little bit on this
direction. After to do this. Well, you can see the settings and you can
change it by grunts image. So we have this
background image, it is with the snow, so it's not extremely good. In my example, you have
these different options. Let's take like this one. You can change it so
the sun position, you can find a certain
arrive here on this window. If you click on this area, you can definitely change
the certain position. And it means so exposition
on your project. So just click here and you
can change, so same position. You can also change
the sun inclination. We can drag and move. It will depends the
moment of the day. So you can put the sun more on the top if it is
a middle of the day. Or you can just put
the sun more like this if it is at
the end of the day, depending of what you want after you can
find natural light. So if it's drinks
a day like this, you can keep natural light
and you have new S1 read, 60 degrees image and gene because before you add
the different engine, I'm going to keep this 1.1 of the problem is when a change
here, take your glands. Now, we have more options for background images because
I changed natural light. So it means you can
select more options. Let's select e.g. this one. Don't forget that
you can change also the eight of the eyes. And after you will
have just to select Preview, just like this. So when you activate preview, you will turn around, but you will turn around
with a real render. So the aim is just
to really position. You can click on modify
if you want to edit. So depending of what you want, you can change position, but it can be also outside. So it means I can go just
outside like this, e.g. and I can take it again. So badge a preview. And I've taught to do this well, you will just generate. And whether you can
have a subscription or you can also buy
credit pack of one, pack of two, or
just pack of ten. And you will be able to make
this type of friend though. Just to create a view
rotation. Rotation. Like you are in
the center and you turn around 360 degrees. So it's perfect. We have seen these
different features. So each time when you
finish your work, rarely sticky match
for CB possibility. Screenshot possibility is 360 degrees symmetric
possibility screenshot, it's totally free. You can do everything with the free version
realistic image. You can use
subscription or credit. And 360 degrees C magic can use also subscriptions
or credit.
31. Add annotations: And annotation. On your project you
can add annotation. Annotation are located here. You have arrow
rectangle, ellipse. You can even insert the image. What is the anti-racist
of z, the anti-racist. It just one more element on
your project if you want. Because after we can make
for on Paris screenshot, when we make a screenshot, we can have more information. E.g. I. Can click here first
things that you can do it to create two arrow. And if you create a first print, automatically, you can drag and move around this direction. You can pull a row
and if you want, you can even click
on the middle point. And you can create
a rotation occur, you can create to share over. And you can positions or
a row where you want. But I can position my
hour here and move just on this direction and reduce hitter
bit on this area. If you just want a normal arrow. So it means we go to curves. I'm going to do this
again, left-click. And then I can
position my arrow. Maybe I can extend. You can put some
description e.g. if I just continue,
you have a rectangle. It's not on your rectangle. It is a frame rate tongue
girl where you can add text. Click on this one. And if I create a
rectangle on this area, I can edit inside. So pecan aged and you have more options
on the right first, you can just type something. I can put like to
erase exposition ways, modern furniture
items like this. And you can read it
at your convenience. So it means you can enlarge
your frame just like this. You can move your friends. So e.g. I. Can put this just in
front of the arrow. If I go on the left, I have multiple options. First, I can feel
generally it's better. You can delete a color to fill. Can be also blue and it's
things that you want. And you can also,
I can click here, maybe I can put this in blue
and change the text color, color, and change for wise. Just like this, I can also
change the font family. If I need n, then I can change the font size. So it just you can put more information if you
need some description. And it's things like this, can extend theorists exposition
with modern furniture. And so if I need more, I can teach here.
Duplicate this arrow. Chen, put this one on this area, this one maybe on this area. And I can take my frame duplicate to keep the
same type of structure. And drag and move this here. If I just double-click, I can put living room, kitchen, and trends. So I can just type
something like this. If I want to extend my, my friends, I can
extend my friend. You can repeat this process. It is interesting because you
can put some description, you can add more elements. And after I e.g. you
take a screenshot. When you take the screenshot, you can have more elements. You can select your
plane and you can just change a display name. You can remove this one. And here it is a notation. And you can make some
description lexis. After, depending
on what you want, you can make some silly
little smaller or bigger when you add
some description. So it's okay for that. After you can repeat
this process, you have also the
possibility to add ellipse. It is exactly the same thing. So it means you
can add an ellipse like this and some text inside description project,
anything like that. You can also put a
description of your project. So you create a frame
like a rectangle. You can put this on the right. You can create a big
rectangle like this. And inside you can make e.g. description. And I
can grow into line. Yes. So it just a description so
you can make what you want. You can make some
adjustment just like this. You can put this directly on the right and you can
add a lot of elements. So this is the aim of nutrition. It's really to add more
elements around your project. And you can insert
all these elements, then you can add
a notation also, if you need or show annotation. You can even insert an image. Here. Insert Image, image
that you want. Let's take anything
in this example like this image and uploading
the image when it's ready. So image is now available. You can just go left-click and you can create
a frame like this. And you can just drag
and move your image. But be careful because
you can just loves literature proportionality
on your image. And you can put an
image where you want. We don't use these
too much personally, but it's possible if
you've got an edit, you can change the
thickness here. And you can create a frame
and change the type of frame. Let's click on Delete.
And the last point after at the end
you will be able to hide a notation or show
annotation at your convenience. So this is an interest
to add an adaptation.
32. Add measures: Let's explain how to add zeros. So to add me zeros, we can find this feature here. This is a measurement. So thanks to that, you can
just select the first print. You can select the second point. And you can have a museum at sometime it is useful because on the outside part you won't
have also informations. I can click here Mozi almond. And directly you just
need to select to print to mesial, so
corresponding distance. So it means if I
assume little bit, you can zoom a little bit. I can select to print
like in this corner. And if I just go on the right, I can select to know dot
print like this corner. And I can realize that I have
one tos and ten centimeter because I have the
sickness of the world. By default it was one Towson, but I have the sickness of
the words and that's it. So I created this one. I ever mercy, oh man, from
this point to this sprint. If I want some measurement
from just the furniture, it is possible I can zoom. And here I can see leaked one
corner print like this one. Oops, I think it's
not extremely good. I'm going to do this
again, measurement. And I can select to
print on this area. I can drag and move
sedate per second print. And I can realize that they have this one for the furniture is not the best because there's things that you
need to understand. You won't have too
much precision. You can zoom, zoom, zoom. If really you want to have
more precision, you really do. You really need to
zoom at the maximum. So e.g. I. Can select this point and
I can try to calculate the distance to this
point just like that. Sometimes theorists
thing or if you want to check mysterious, I would say that when you
add something outside, like the Paschal or garden, you want absolute measurement. So it's not possible to have
direct resume as Yeoman. So further to erase, I can zoom first and I
can sit exist sprint. I can go into right? And if I zoom, I can sit at this
point are so exists. And directly of dimension 500 centimeter point to
it is exactly this I want you to create to erase with 400 centimeter on this
area, normally 800 cm. So I can position
my first point. I can go in this direction. And thanks to that one
more time or you have yes, 800 centimeter, 809 centimeter, at most 1,010 centimeter. Again, also use this
one if you want to. I have a view of the distance, so it means I can click here, I can arrive here. And I can see x2. I can see the distance
between the sprint, the sprint going
to do this again, Ms. yummy and click here. And yes, Now it's vector. I can find the distance here. So those thing, exceptional
with these tools. It's not something
that we use a lot, but sometime if you need any dimension, you
can click here.
33. Project create walls: We are going to
create a project. It is a very interesting
project to seize a different features
of buying knee. And in this project we're
going to create 2 h. So step-by-step, we
will draw words. We will create different homes. We'll add furnitures
who were aged, materials on the floor, materials on the walls, or resists, sings a step-by-step and we will
credit also render, we'll also extend to garden. So it is a perfect project to see the different
features of unbinding. The first things to do. It's to create two worlds. So it means the
base of the house. And I can click here AdWords, and I can create a first
print on this direction. I can zoom a little
bit and just create some sync with one
tos and centimeter, I can zoom again, 1 cm like this. Then I can come back on
this direction and we can apply 600 centimeter, 600, I can come
back on the left. And let's apply 600
centimeter or so. Then this direction,
200 centimeter. On this direction we can apply, we can zoom little bit out. And I think I'm not
perfectly on this area. I'm going to do this again
because it's not perfect. Going to one tos. And again, don't forget to zoom if you want to
increase the precision. So when Tucson and I can stop, I can go in this direction. 600. So just 600. Then on this direction, I can apply 600 again exists. Then 200 on this direction. I can go on the left foreign DRI the centimeter can
zoom little out. And yes, perfect. And now I can just close
with 800 centimetre. So after to do this work, I want to craft room inside. I'm going to create
a first room here. We can define them either. And I can define my girl at 300 and create a first-world
on this direction. I can position until 450, and I can go on this
direction. Just like this. I can create another
element here. You just need to let a space for a door so we can lead to wrong 120 centimeter on the
left. Just like this. And I can create two new
words on this direction. So we'd have a small room here. And I can create another
room on this direction. Let's apply like 250
centimeter, just like this. And I can come back
here. So perfect. So this will be a living room, first room, second
room, and the bathroom. I can just validate. I've taught to do this work, I need to define the different types of foods
so I can click here type. And this will be the living
room and the kitchen. At the same time. I can
click on this room. And on the top right corner, you can select the bedrooms. You can click on this room on the top right corner
and bedrooms again. And you can click here on the
top-right corner. Bedrooms. Not bedrooms, bathroom, just
to best from just like that. So living room, bedroom one, bedroom two, and bathroom. If you take a glance
on this area, you can click on
the project and you can have some
informations directly. So I have one floor, four rooms. And this is a totality
is just a small house. And you can find
the first bedrooms, a second bedroom.
Maybe I can extend. I would like to add
a second bedroom at least ten meter square. So maybe I can change
liters will position. So it means here I can extend a little bit with
480 centimeter. Here about the bathroom, I can extend little bit
weighs 200, maybe 220. Click on this area. Maybe a bit more, 220 or 230. Yes, just like that. And I can extend
it a little bit. This was not a lot. Can just extend 240. I think normally I have
moles at 10 m square. I can check on my project areas. Not yet. I need to move again. 250. If I click here, normally I have enough space. If I click on this
area, yes, it's okay. I just need to
read to space 480. And just on this area, yes, I have enough space. They just come back. Project informations areas. So now it's okay you have
ten meter square here. And let's check the 3D view. We can switch to the
3D view directly. And this will be the base
of this. Literalists.
34. Project add doors: Let's add doors. So we're going to add
doors on different parts. So first two entrance door
and then inside doors. We can use built here. And first things to do
select exterior doors. And you can find from dose, you have different
types of models. We can apply some filters. And I'm going to
select the first, this one at two project and positions is those directly
and snap to the wall. I can just put this
in the middle. I can take your glands
for t and t I ate. It will be great. I just need
to change the direction. And you have these options. And I can click here,
and I can click here. Just like that. After all
it's applied doors inside. I can go on this area. Build again. Just come back with
this categorize. And now we can find
interiors doors. Let's select folding dogs. And I have different
types of models. We will use something
moderns like this one, simple interior doors to
project and position. Once on this area, I need to change openings so
you can find on the right, so different options let change. So while opening to this, I in the direction of the words. And if I just go left-click,
I can drag and move. Maybe I can let Ron 20 centimetre
of space on this area. I want to duplicate
this element. So duplicate Bose is shown
this element just like this. And yes, 20 centimetre
can zoom little bit. Maybe I can let on
this direction. Yes. 15.14. 15.15.
Just like this. Perfect. If I go on a date, I don't need I don't have
anything more to do. I can duplicate again and I
can move in this direction. Let just let 15 centimeter or so on the right part, idiot. And let's click on
this area change. We're opening, click
here and it's okay. So now let's check that everything is okay
with a 3D view. Switch to 3D. And we can drag and move
the character to have a better view of if
I just go outside, I can find my main
doors as you can see. So it's perfect, Nice
model and mentors. And I can move the character
and dressed inside. And when I move inside I
can see my different doors. So we have this one, this one, this
one, and this one. As, as explained,
if you click here, you want to open the
doors for an emission. It is possible just like this. But if you click
on the main doors, it is not possible. And if you want to edit
materials you've gone aged. And on the right you
have different type of styles that you can change.
35. Project add windows: Let's continue with Windows. We need to add windows. And for this we can come
back to Builder here. And we need to select Window. So we have this different
type of categorize. First, I would like to
select pasture doors. I want to stay
with everything in wise for the doors
and for the windows. I'm going to continue because here's a frame is not wiser. So I can continue, continue, continue, show more results. And here you can
find a wise windows. And I would like to select this basic pressure dose up
to project and position my, my first window just on
this area I want to center. So I have dimension on the
left and on the right. Let's position. Yes, just like this. Perfect. You can take a gland so bad review of the
window with a 3D view. I can put the character
outside and it's perfect for to keep the same
style. 2d view. I want to position two window
like this on the left part. So click here and duplicate
the window position once. First on this area, maybe I can let as a space 100, maybe around 106 centimeter. And let's duplicate again. Drag and move. And I think I can let again 106, 60 centimeter just on this area. Maybe it's a little too much. I'm going to redraw it. I'm
going to read your roots. May be 120 will be,
I think enough. And here if I reduce 100, 120, just like that. So 120, 120. And thanks to that, we have a space here. It will be perfect to
put TV from Charles. And here we'll add a
sofa, TV furniture, and the kitchen furniture
will go on this space. So now I want to add also Windows on a two
bedroom and the bathroom, but not the pasture doors,
just normal Windows. I can click directly
on build again, select windows here, and
I have double windows. Let's continue. I want
to keep the same style. So if you continue,
the same style will be this one to project. And I can position my first
window just on this arena. And in my dollar you have 95.0
left and 95 on the right. Perfect. Let's
duplicate this window. Duplicate and drag and
move on this direction. You can call it inside. And I want to have a value of maybe might have to be 65
centimeter on each side. And even if the
bathroom is small, I'm going to keep this
same type of window. So duplicate again and position this one just on this area with things opening
needs to be inside. I have 35 on the left
and five on the right. So perfect. Thanks to that. In this small house, we will have three big
pasture doors and sweet, just normal Windows
just on this area. I can select my 3D
view like this. If I just go outside. Thanks to that, I
can see the view of this type of windows
if I want to. Since the Odell side, I move my character H time you need to
move your character. If you want to see
inside you move the character in the
rooms that you want. And thanks to that, after with your scroll wheel
or just using this, you can zoom in, zoom out. At your convenience. I can go inside. You can see the ceiling when
sometime use Zoom a lot. You can move the character, but you can also use your
arrow keys to go inside, to move inside, like to work. Let's come back to D. Don't forget to save your work because it's
not saved automatically. So regularly you can click on Save on the
top right corner.
36. Project add furnitures living room: Let's add furnitures,
unbelieving room. So we have the living room and I would like to add furnitures. So to add furnitures, we can click here and directly, we can go and fill a niche, but if we go and
build it is the same. You can change the
category for fuel niche. And I need to select to
categorize a Taiwan. So this is what living
room first things to do. I'm going to add a sofa so
I can click on this one. So far. And I would like
to keep a modern style. I'm going to use this one. The first will be
probably great. So I can click here to project. And after I can create rotation using this part and I
can position my sofa. Yes, Just on this area. Perfect. I've taught to do this
work. Let's continue. I can come back on for niche. After you have Rudolph
type of sofa if you want. But this one will be great. If I click here, I would like to add TV and media
for nutrients at the same times about the type of color I can select here
and different type. And the materials
also would like some sink more in black or gray, maybe something like this. I can use gray. I
can click on black. And I can have this one. Can have this one may be TV furniture, complete
TV furniture. Maybe this one can be great. But I can try
something more basic curl like price on this one. I have this one also. Let's try this one
at two project. And I can create
a rotation here, 90 degrees and position
just along the words, you can just snap and positions, uh, so far around this area. Let's come back on furnish
living room again. Whereas a problem I don't have I don't have
directly table here. I need to continue dealing room. And you have table here. I can see the tables. You have multiple options. One more time I can apply
your filters if I want. And about the rooms, you
can apply dinning room. Let's select e.g. I
think this one will be great for what I want to do. And I can add to project and position my element
around this area. Can create a rotation 90
degrees. Just like this. I've taught to do this work. I need chair for niche. Let's come back on dinning room. We can select chair. Let's stay on the same style. Wise or maybe wise on gray, maybe black,
something like this. And if I continue a little bit, I can see leak. Maybe this one. Let's continue a little bit. Just to seize a
different choice. We have multiple models. I'm going to stay on
one of my first things. So it means this
one at two project. And I can create a rotation
90 degrees on this direction. Maybe I can put this one
here, this one here. I can duplicate my chair. Duplicate is not too big, so I'm just going to keep
to chair it will be enough. And move on this direction, and move on this
direction, just like that. I've taught here versus a
solution to put the table here. And I will have a lot
of space on this area. But definitely we are
going to stay like this. I've taught to do this work. Let's come back
again on furnish. The general categorize. And you have different
type of things that you can use for living room, but also the dinning room. You can select some storage. If I have storage on
the dinning room. Can select prone and not brown, you can select gray
and maybe black. And not a lot of things. Going to come back on film, furnish and living room
storage, it's better. So you have this type of things, it will be perfect. Sometimes you can
change the color when you have basic furniture
feels like e.g. I. Can use this one to project. And if I just click on this one, replace me Serial
Node is this one. It's not possible to edit, so let's try another one. Let's try this one bookcase. If I just click on this one, this is a cemetery is extremly bigger and I don't
have the possibility, yes, I have the
possibility to edit and to change the
mesial, so it's perfect. Let's create a rotation first. I can click here or rotation and position this
element on this area. And when I go and edit it, I can change the material
and I can change wide eight chins, a wide 140. I can put on this
area, yes, perfect. Let's change to
eight, maybe 160. The deep, salty
sweet will be great. And if I want, I can
change the materials here. I have moved materials. Let's apply maybe
something little darker or like the choices one
or this one maybe. I think it's not too dark. Yes. More like this one. It's okay. I can come back again. Furnish. Let's continue. You have this basic element. You can also edit this
one I can add to project, and I can put ones. So in this area it
will be perfect. I can eat it too also when basic shelf it is
possible to edit, but when you have
specific things, it's not possible to edit. And about the wide Let's
work with AT or by 28100140. But the deep digital
dipped letters change for 30 and I can
change the materials. Let's work with the same
type of materials like e.g. this one. It's okay. I can put direct
your lungs or worse. I'm not going to add
a lot of singing just to show you the
principle of work. After you can add more
things if you want. Let us come back on furnish. N here can change for kitchen. And you are e.g. kitchen cabinet like this. But you have also
predefined element. So if I come back
pre-built sets like that, Let's select a small one, not too big. I have this one. I can try with this one. I think it will be great. And I think this
one will be great. I can add to project. Yes, perfect. I can
create a rotation 90 degrees and position this
elemental around this area. Let's continue. For Aneesh. Kitchen. Kitchen, you have
kitchen cabinet or so you can find furniture. Maybe I can complete
with some like e.g. I. Can complete with something
like this and add to project to rotation 90 degrees. And maybe I can put
CS1 and z direction. And I can put this
one just here. Perfect. So it's okay to add
some basic furnitures. We're not going to add a lot. We'll add decoration at the end, select 3D, and take your
glands. Just like that. You can drag and move
my character so you can see the small kitchens
here, perfect. You can find these two elements, this one and this one. You can see the table. You can see the sofa and the
furniture just in front. Perfect.
37. Project add furnitures first room: Let's continue. We can add phony
cheers on a bedroom. So here we have the bedroom. So for us bedrooms we can
add furniture's here. Let's click one more
time on furnish. And so here it was a different
element of the kitchen. And we can just come back. Let's just select bedrooms. So after two or three
bedroom categorize, you can see beds generally the first things
to position it is a bed. So I can click here and you
have different options. And let's try with, maybe I can try with this one. Maybe you can select more because here it is
been bent double bed. I can select double bed first. I think it is better. You can have all these
different options. Let's select why not this one. And positions or bed. Normally, I have just
littered space on this area. If I go on a date, I have the mattress
sickness, pillows size push. And we can edit the
material on this element. I think it's nice. I can
put this one just here. After. Let's come back with
furnish bedrooms. And you can find what
drops, chest of drawers. Let's select a Waldorf first. I can go on the left,
activate filters, like maybe a great filters
and a black filters exists. Don't have a lot of options. Maybe I can do is activate
this one. And this one. Yes, this type of wise
wardrobe add to project. If I click on this one, it's not possible to edit, but maybe I can keep more waste time on this
area in this bedrooms. So this is why I can
put this element here, because we have
already this one. And I can drag and move. If I just come back and
finish after you have this wardrobe and maybe I can
find something in blacks. But definitely I'm not sure. I can try in this, in this room to have
a specific Stein. I think it's literal. Maybe I can try something
a little darker. Let's try with this one. Yes, it will be better. I'm going to delete this
click here. And it's okay. Let's come back and build
are just furnish bedrooms. And I can apply chest
of drawers like this. Perfect. Let's continue like
this one, maybe this one. Let's try this one
or two project. And I think I won't have exactly the right
space on this area. As it definitely too big. I'm not going to apply once. Just come back on
furnish bedrooms. I would like a desk. Yes, desk. It is perfect. I able
to shaves on Office. Let's create a desk. So if I just come back, maybe I can find some
sync it 30 frontally. This one can be great. Well maybe I can put this one. It is a specific Stine. Yes, I'm going to add
this one and I can click here to rotation, put along this area just
dabs of space, it's perfect. And I can move here. Furnish again, or fees. You can find shares also. Let's add the basic
shares for desk. Can try maybe this one. Yes. Let's try this
one and credit to rotation, 90 degrees. Perfect. But I don't
like too much. Maybe I can sell
it a basic chairs. I can come back
directly on furnish, heat is CEFR or fees. But if you just come
back on dinning room, you can find basic chairs
like e.g. these ones. You can select some seeing
very against it make something very simple. Like e.g. this one. Let's create rotation. I just want to add
a small element on this area, Phoenicia again. And let's select leaving room. For a simple reason. I can have storage and
we have shelves, e.g. our bouquets, but
bookcase can be greater. So I'm living room
storage, bookcase. Yes, Like this one. As you can see, we
have a lot of web, definitely a lot of choice. Because we have a lot of choice. Sometimes it can
be long to choose. We have a lot of possibility
for the furniture's. If I continue show more results, I have all these
different options. This one, Let's come back with something bicycle
axis, it's perfect, like this one or two project, I can just crop rotation 90 degrees as I have
a small place here, it will be perfect. I can just change the materials. Let's come back with this
type of dark colors. Maybe I can try to
No.1 little different. And if I just come back here, I can find a wide eight. Maybe I can just change
the perfect lighting. 880.45 centimeter. The last thing that I'm going
to choose for this bedrooms is if I just come back on
furnish bedrooms, you are e.g. nightstand. And I can select ones like this one
may be this one. I have not too much space. So let's go left, left on this element, liter left for the bed. And she, I can
position on this area. So perfect. I can just
check on my 3D view, what is the renderer?
So select 3D. We can have directly
the location of the character inside
anticoagulants were very, very nice window. This is not a very big room, but it's totally enough
for what we want to do. You can also directly
click inside and you can move an element if you need. You can find your
cursor and you can also move in your 3D view
at your convenience, I can click on the table if I want it to move. It's possible.
38. Project add furnitures second room: Let's continue. We're going to add furnitures
on the second bedroom. So it means here,
first things to do, Let's position a bed. The room, a bedroom
is not very big, but we can position Few
element or on the bed. Click on Build, select
cell, niche, bedrooms, bad. Let's apply a double bed
again. One more time. I have this different option. Let's find some sing, not, not too big or
something more bicycle. E.g. we have this one. And web, something
simple like this also, as you can see, red
dress come back. Let's try this one out
to project. Perfect. I have a little space and positions or element
just on this area. Furnish the bedrooms. Let's work with one more
time and nightstand. And select just the
different models. Let's try to find smarter models like this one will be perfect. Position this here, move
littles a bed on the left, just let space for the
opening of a door. And perfect. So let's continue. I think I can position
and element here. Select furnish again, bedrooms. Let's work with
chest of drawers. And I need to find
some sing not too big. Like I think this
one can be great if I just add to
project. Yes, perfect. I can cry to rotation
90 degrees positions is dressed along these swirls. And I think, yes, I have little space again. And yes, I think it
will works like this. And I've told us things
that I can store. So it's maybe to position
this one on this area, choose another options
and pool table. But I think it depends
what we want to do things or to option
there are good. Maybe I can stay lazy. I'm just after that. Let's add just an element like
a bookcase furnish again, in the bedroom, I won't have too much seeing that things
are best things to do. It's to come back
on living room. Again, leaving room storage. I stayed bicycle or bad the
scenes after it depends of the interior designs
that you want to do. So let just use one
of these again, maybe this one or it can be
this one, this one or so. Maybe something like
this. You have this one. Why not? Yes. Let's try with this one. I feel I can change the color. It did, yes, it's possible
I can edit this one. First. I can go and Steinem. Let's select word
again and work with maybe this type of color
and creditor rotation. I need to check size. It's too too big. So wide, 100, maybe
20 will be enough. Eight, maybe 100 and deep. They're just 30 centimeter. Again, position my smartphone
yttrium rest on this area. So not too many things in
this, in this bedrooms. Let's sit as a 3D view. Automatically, the
character will be position where you are, where you're in the room. And we can zoom in. You can also click on
this one if you want to observe view from the
character and directly. And yes, I think it's okay.
39. Project add furnitures bathroom: Let's continue. We're going to add
furniture in the bathroom. So Zoom first in the bathroom. We don't have a lot of place, but it will be okay to position just so most important element. Click here on Build, so we can come back on furnish. On furnish, you can add directly-sold
bathroom categorize. First things to do.
Let's apply a pastor, Pastor Ben, show us. I would like to either
show arrows, show, whereas I'm sure, well, those are just bicycle sugars. Let's continue. I have this one, this one, this one, this one. Maybe I can select this one. I think it will be
great to project. And I can change the position and every
place on this corner, it will be perfect for my show where each time you need
to come back on for niche. Let's say like best from
bathroom again, this time, I would like a sink with a
furniture at the same time, I think it will be perfect. Maybe this one. The left you can see just sync. Let's apply single level. So some option like
this with furnitures. Let see it exists one to
project rotation 90 degrees. And I can position this
element just here. Perfect. After that, let us
come back again on builder from each bathroom and
select toilets. Choose something simple,
like this one or this one or two project. I can create a small rotation and puts a toilet
just on this area. So thanks to that, I have
little space here for the small furnitures
from Michigan. Bathroom. And you have no
option like storage. Let's click on storage. And you have some seem laziness. But here I think I can stay
with some singing in wise, it will be perfect on this area. I can just click on this one to project creator rotation and position just on this corner. So perfect. Let's
switch to the 3D view. Can change the position
on this element. So I think maybe I have
a problem with the show. Well, so location
is not really good. And I can create
a rotation, yes, it's definitely
better like this. To D and click on the show. Well, normally I have
just little space. Yes, it's perfect. So thanks to data, can move little this furnitures and
move it towards the toilets. I can also move this
element to have more space. If e.g. I. Click on the Show
where he lives, a possibility to
change the dimension. But you won't have the possibility
to change the material sometime it's possible sometimes
it's not receive barium.
40. Project add decorations: Let's continue. We are going to add decoration. To add the correlation, we can just click here and you can have
directly decorate. With decorate, you have
different options. And totally on the right, e.g. you have Declaration accessory. And I can select one of these. You have also painting wallpaper
or its little different. If I just click here, like just on Decker, I can find different things on this area and you
can have curtains. So I would like to add curtains. I can teach here. I have
different type of models. Let's see leak two
basic models like e.g. this one and add two project. So after I can zoom a
little bit and position my first curtains and these
areas along the walls. So I'm seeing theorists team, you can edit the size. So dimension wide eight, it's not enough, so I
need to increase a wide. Let's try with 200. I think 200 will be great. And I can position z is the center of my
window. Just like that. You can change, you have
dipped eight or finger, but the deep that can kill it
keeps this parameter eight. Maybe I will have to chain if you want to change the style, you have also the
different options. First, I need to
walk with a 3D view. And thanks to that, I can find the Render. I can click here, you can change little two position
with this element. And you can go more on the top. Or if you already did, you go on the right, you can find the 88 is two
merchant need to change, may be 220 liters a
position on this area. Perfect. It's okay for this
first element, I can keep this color. Come back to my 2D
view and duplicate. Click on the curtains, duplicate position
on Odell ones. Here. Let's create a rotation
and just go yes, on this area. Perfect. We can zoom like this. Let's duplicate
again, no dark times. And I can duplicate on this
other window. Perfect. And I would like to
add also cure turns on the basic window on
the suite of rooms. I have to change the size. So first duplicate again, position this one just here. And create a rotation exists. So one more time I need to
come back to the 3D view. Just zoom in this area. Click on the curtains. Aged eight, I need
to change maybe 140. And I can change the
position on this area. It's too much 120. And I feel like this, It's nice. Perfect. I can come back to my 2D
view and duplicate again. Click here, duplicate. And position this
one on this area. Rotation. And just snap to
the wall. Whoops. If I zoom, I can click
on this element. Maybe I can move little bit. Yes, trust legs up. Duplicate on other times. Rotate and snapper so long. So words on this area. So it's perfect. I
position my six curtains. Now I would like to add little bit more element so I can come back to
decorate the curl. And you can find me at all. I would like to add a mural
may be in the bathroom. And I have this one, this one. This one maybe I can select
this one, Add to Project. If I zoom, I don't have too much or I don't have too much
place on this area, maybe I can make an adjustment. So it means positions
in me over here. And move this element
on this area, and move this element
along z score. Like this. I can check
with my 3D view. So take your grants. We have this mirror. If I click on this one
thing, It's not bad. I don't like to match the color. Maybe I can try another
one to d. Decorate. If I come back at the
beginning, I have e.g. this one is big Miro. Let's select the 3D view. Has definitely, it is
a very big mirror. Can create a rotation, but I think it's little too big. Maybe I can try this
one. Yes, perfect. So this one will be nice. Nice about the colo and
I can put this one, yes, Just on this area. We can also work
directly on the 3D view. It is possible. So let's continue. Decorator again on the curve. And if I want to have something
like word decoration, you have different
element exists. Can be paintings. Let's see, maybe this one. I can put this one
directly on this room. Just like that. If I need to add e.g. or the type of
element like a plant. Again, come back on decorator
again, decorate here. And access to and decoration. We can have directly plant
and floors are trees. If you just click on trees,
It's smartphone outside. If you click on
plants and flowers, it's more for insight, but also far to erase. So again, continue. I have this plan, maybe
it's nice and I can put this one directly
along this area. If I go and eat data can change the white and eight,
it's perfect. It Chancellor White for 60. That change a deep for 60 also. And 8120. And I can position on this
call knows this element. Let us come back on
decorator again. I want to add maybe a vase with some flowers and put this one directly on the table. And it should just come back on decorate
declaration accessories. You can come back and
own the car again. And you have the
corrective accessories. Phrase on purely can have face. If I just gone xu left. No, I don't have to
merge more options. Here it is more pillows. You can also have
rugs if you need. And you can have more options. So I think we're
going to stop here. It's enough. I don't want
to add a lot of things. Just to see some
basics features. If I just go on my 3D
view type of glands here on with surveys it is okay. But sometime if it's not okay, you can just drag
and move the arrow to position on the right size. If I go and edit, you can change the
y to eight and the d dt of this element, but it's okay for that. If I see So plant. Just like this. Yes. Perfect.
41. Project add appliances: Let's add a p and sees. So to add a p and sees, the first thing that
I'm going to do is to click here furnish. And let's work with a kitchen appliances with this element that you
have different options and I want to add a fridge. So let's click on this one. I've taught to do this work, I have different options. Let's select one models, like a simple models. Maybe I can select
this one and position my fridge on this area. I have space on the left. I can turn and position
this here. Perfect. If I just to come back on
furnish, let's go outside. And we have TV and
media for neutrals. If I just continue liter, I just want to add maybe a TV. Yes. And you have
different type of models. So let's select our models. May be not too big. Finger can still exists one, Add to Project rotation 90 degrees and put this element
directly on this table. I need to check with my 3D
view if position is okay. As you can see, the
position is not good. So click on this one and drag
and move with the arrow. And we can just position
this on the top. If I go and edit, you have wide eight dp dt. Let's keep this parameter. And yes, just like that. Okay. Maybe I would like
to add a computer. Let's select furnish. Again. Let's come back on
this categorize. And you have office,
and in office, you have different options like electronics
and entertainment. I have this computer
and I don't have a lot of models of computer. I ever saw this one. Let's click on this
one. It is perfect. I can zoom on my desk, rotate and the computer is not on the desk,
I can see that. So let's come back
to the 3D view. Dried and moves the
character, the Zoom here. And you need to
click on the desk. And with this arrow you
can put on the top. Yes, just like that. Perfect. The last thing that
I would like to add eats it is lights. I would like to add
different types of lights. I can select 2D view again. To add the light, we need
to select and decorate. And in decoration,
decoration accessories, we can find lighting. You have different
options one more times. And if I go on the left, I would like maybe
selling light. But you have also table lamp were lumped suspending lamps. Next this Let's just apply lighting, ceiling light. Maybe I can add spot. It will be great for
my project to project. Again, that sweet spot
on this area with a rotation like this. Let's just come back
on decorate again. I have more options. Let's select, I will
select this one. It is just to spot. So maybe I can add
this one around here. And I can duplicate this one. Duplicate and position another
one just on this area. Decorate. Again. I have this type of spotlight may be first
for the bathroom, I can select fossil
bust through my cans. Sit exists one at two projects position
this one just here. If I come back to my lighting, I can just add different
spot in the room, like e.g. this type of spotlight. And let's put for
spotlights on each room. So once duplicate, you can have the option
switch on if you want, or switch off sometime it is interesting if
you want to create a render after it's
duplicate again, maybe you're not there or here and duplicate another here. Duplicate, I'm not going
to positioned perfectly. So m is just to have
four spots on each room. Duplicate maybe once here and
duplicate maybe once here. So it's okay for that. I can check on my 3D view
that everything is okay. And we're finished to
a different furniture. You can add more
things if you want. But after it can
take a lot of times, the aim was really to add, to show you the
process step-by-step. And we can, we are
almost ready to create, to render, but we need to
first a digital materials. We can drag and move
your character and you can go inside the room. A Zoom. And yes, as we can
see, it's convenient. We have a problems. E.g. this is a light and
the light is located here. It's a little strange and
webs are wide and deep. It's not possible to
directly until value. So you need to move
on this direction. Extremely convenient to
move the light, definitely. I need to use this view. And now if I just check, can click on the light
and fun, it's okay. But it's not
extremely convenient. I have the same problem here. Yes. Trust legs, this is little strange that this
spotlight on directly or discovers that get put with
the same size of the world. So it means 250 centimeter. This one, it's not
extremely convenient. And just place it so you can see your snap liter and you
can position your element. But the spot for the rest, yes. So spot of the right location.
42. Project edit materials floor: We are going to eat
flow of materials, so change the floor materials. So to do this, when you click on an element, as you can see, you have
the possibility to edit. And on the right, you can find information
and you have the style. You can change ceiling and
flowing by just sending. I'm just going to
change because it is not totally white color. So I'm going to click on
this y-squared off first. And about the fluorine
on this living room, I can change also. So let's click here and
edit the materials. You have different categories. So categorize that
I'm going to choose is you have wall
and flow of tides. So let's click on this one. On this one, you have
different type of options. As you can see, you can zoom. And I'm going to sit exist
one is just the flood tide. It is perfect for
what I want to do. The first thing is that I'm
going to do is to click on each room and
change the setting. Let's activate twice. I can click on this one, aided selling and
activate wiser. So I can click on this one, edit selling, and I can click on this one or you can work on the 3D view. Click on the 3D view
just like this. So we can find this
nice materials. First, I need to
move my character on this array so we can find
this materiality is nice. When you click on the floor, you can also edit or
change from this area. If I select my
fluorine like this, you can click on edit
materials and you have different option if you want to exchange horizontally
or Redskin. Here, it's not extremely
useful, but it's possible. Now I just want to reuse these materials
directly onto bathroom. So I can click on
the radius here. Now, this materials is okay. And if I just click
on this area, Let's move little
bit. On this area. You can click on the floor and you can apply
these materials. So each time you can take
your materials on the floor, but it will works
also on the door, on the wall and you can
reuse directly on an area. So it's okay for that. Just validate. I can click on this room. And on this floor, I can use edit, change. And I have different options this time I can select again. Yes, Would it will
be perfect but change for some similar or
different, as you can see. Maybe I can try this one. I think this one
will be perfect. I want to position the
same in zero the room. First I can move my
character exists. If I click on this flow radios. So thanks to that, you
can copy this element, these materials, and you click
where you want to reuse. And I can click on this area. Just like this. We will have this tan materials
on the living room and so bathroom and these
wooden materials on the tombs validate. And I can come back
to my 2D view.
43. Project edit materials walls: Let's add a materials
on the worlds. So to add materials
on the words, you need to work
with the 3D view. So let's change. For sweetie. I've taught to do this work
we can we need to position character
directly inside the room. If you don't please turn the
character inside the room, you will be in trouble. I'm going to explain why. So first things to
do, It's to click on one of these words,
e.g. this one. And you can go and edit. Now, you have to style. And on this face, I can change the materials. The things that I'm
going to do it just to apply a color paint color
on the living room. So you select my paint or setting paint that
apply setting. And I can use maybe
like a blue color, very clear blue color. Maybe I can try some sink
like maybe this one. And if I zoom little
bit or maybe this one, yes, you can find
this color here. I've taught to do this. Well, if you want to not
repeat this process, so it means I'm not
going to click on each wall to have exactly
the same materials. You just click on Zoom world with the
material that you want. And you can reuse,
click on re-use. So now you can find we have
this material here, save. And I can just click on the different phase to
apply the same materials. Just like this. You can click
here. I can click here. If you click again
a second time, you can just remove
the materials. Let's click here, click
here, and click here. As you can see, it's very fast, it's very convenient, but you
need to add the character. I would say, why, why insight? If you don't have the
character outside like this, if you have the character,
I would say like this. I want to, I will have a problem with one word. And here e.g. this phase, it's not
possible to see this face. So it's not possible to
apply your material on this phase because the
character is outside. So this is why each time you
need to have the character inside the room or you will
be in trouble for one word. Let's continue with
your bathroom so I can drag and move the
character just here. After to move my character. First, I can validate. I click on one of this one. This one is it. If I go and say, alright, let's select something
like I'm going to apply. You have a title can be great. I can continue, but I don't
have too much options. Maybe I can try with
something like this. I think for the
bathroom it can be nice to have something like this. But if you want, you
can have more options. You select. On sub-categorize. You can change for
wall and floor tiles. We have also mosaic tiles. Sometime it can be interesting. Like this. Let's see, thick wall and floor tiles. Continue little bit. Further bathroom you can have interesting things
like this one. Can be this one also. You have more options. So let's stick on this one. And I want to
repeat the process, so reuse and apply
just here, here. And here. Let's work
with directly this room. I can come back. If in this room you can
select one of these word. So I can click, oops. Now I'm going to
remove that validates. So you can click on
this world aged. And you can change this time. If you want e.g. some sink like a wallpaper, you have this categorize and
you have different options. Well, I don't want something with too much broader patterns. I prefer something
more classical. Yes, here. So maybe I can imply something
very spicy curl. Maybe this one. Maybe this one, if I zoom a little bit. But definitely I'm
going just to add the paint these different area. I'm just going to add the paint. Yeah. So let us come back. Select style, cover,
change, setting paint. Let's put something
literally in red. Just this one, perfect. And I can reuse here, here. And also here. Just like that. Validate dragon move my
character on this area. I think something
is wrong because I, yes, I have my element
here. It's okay. I can come back to my 3D view. Dragon moves the character
in the last tool, select this Edit
Style, Set in pain. Let's create something
more in green. I can apply green color
and may be still exists. One. Reuse, click on this word, this word, and this word. If you draw them,
move your character, I would cite first
validate dragon, move your character which side, and you select e.g. this word, you can also do
the same thing outside. I'm going to keep the y scholar, but if you want to edit
your world outside, you can do exactly
the same thing. E.g. I. Click here, I can apply a
blue color on this area. Let's come back with y's.
44. Project render interior: Renderers, we have finished
with the interior design, so it is great as you can see, we have great tools, very convenient tools for
interior, interior design. If I select my 3D view, we have finish, so
different rooms. And we can exploit
different views. We can use a screenshot to just add the same
quality of the screen. And we can use also
realistic image. So let's first start
with screenshot. Again, come back to my 2D view. I just want to create a
screenshot of this type of view. So I can click here and
activate screenshot. You can change the title. Let's select phrase on per view. I can just dab Utah. Just step e.g. view number one, it's going to be better. So let's just step number one. To tell you on the left, you have different options. Display from each year's, all on floor and none. So if you want to not
display furniture, you can click on None, e.g. you can just create a
screenshot of this. But means this case, let's keep with our
displays or materials also, let's keep some materials. But if you want to
change, you can change. You have the Arun
them like this. You have all sorts
of rooms, areas. It can be convenience, and you can display
also a notation. Let's remove this one,
removes this one, and just keep display materials. I can take a screenshot and we obtain directly this view I've
done just with screenshot. You can also create
view of, sweetie. What does it mean? It means you can just come back on this area and you can
change Frost 3D view. E.g. position my
character around this area and just
move like this. Crowd to isometric view like around this one and
create one more time. A screenshot. Here, screenshot. I can just view number two. Number two, and take your script a
screenshot of this one. And after, you can also just stay on the
screenshot, you can zoom. And I can go e.g. just
inside, just like this. And I can keep, keep my character and
credit to screenshot e.g. on, maybe this view. Take a screenshot. Whoops, I have still
the same view. Maybe I need to change
for you number three. And I can take a
screenshot and you can repeat this process
at your convenience. Something interesting
also is if I just go out and you change the
view mode for this one, you can work inside, Let's work inside this room. If you click on this door, You can directly go
inside the room. And I can just have
a view like this. When I will have this view, I select one more
time screenshot. And you can also take
a screenshot places. So definitely for free wizard to need any credit with the
totally free version, you can crack the numbers
that you want a screenshot. And I can select
View number four. And screenshot is totally free. You can make what you
want with the screenshot. It just the same qualities
that on your computer. And just take a screenshot. So this is a first things to understand after second
seeks to understand. You can also create, re-render. And here whether you need
to have a paid version, all you need just to buy credit. So acidic what you want, I can e.g. just go here. And when you go in this area, you can find realistic image. You have different options under realistic image when you
guns are left just here. You can change the camera. This is why, depending of
the rooms that you choose, generally you have a lot of camera options for Amazon Perla, you have 16 camera. So I can try one of
these light, e.g. maybe this one or
it can be this one. You select cameras
that you want. So view of the cameras
that you want. I can see it exists one. And after to do this work. You can also, if
you want to have personalized and
you can Shane e.g. eight, if you need, you can also change
the focal length, but definitely I
think it's great. And you have some
options on this area. So this is moods. So I'm Brian men. You can change the
default golden hours, Nordic style or night style. If you put the night
style automatically, you can find the spots
with zeolite on. If you come back to
default here, light off. If you click on Personalize, you can change the background, image and Zoom environment here, because you can
see on the Windows outside some variant met so
we can choose it is a CT, but if you want
just a countryside sometime it is
better or it can be a park in these things like these things are
part will be great. And I've taught
to do this wrong. You just click here.
And here I have again, one definition credits
that I took e.g. for the curves, I can try
one high-definition with this one tricyclic
and one credit left? Yes, if you click on Buy, you will see whether you
can use a paid versions. And thanks to that, you can have unlimited project and realistic, unlimited realistic images. Or if you don't use this, you can just buy credit. You can. Would you prefer
to buy your pack? And here you can just buy a pack just like this depending
of what you want. I'm going just to create
a new realistic image, dress ones, just to show you the difference with
a normal view. Okay? And you can also, let's work with another room. I can just click here, e.g. this is a bathroom. And maybe I can go in this area. I can use my arrow
keys to go outside. E.g. I. Would like
to use this view. Here you can find the spot. So this is the same. I can click here. Oops, here's the list of the
image from this project. Directly, I can see
leak realistic image. I can set my parameters
one more times. And I can just click here. And I think it's not
really good or bad review. So I need to try another one. They don't propose
something interesting. Maybe this one can be interesting and it can make
some little adjustments. Here. If I just
click on this area, I have sufficed credit
nephron standard definition. Let's click on a
standard definition and create a new
realistic image. It's okay After you can repeat this process as
long as that you want. So it means on each room
you can repeat the process. You can also add the
different views. And if you want 100
image of your project, you can create 100
image of your project. It is at your convenience. When you will go on my images, you will see a summary here. So take your glands. This is an example. If I just click
here, you can see on the top-right corner and downloads the image
on your computer. You can also remove the image. This is a realistic images
and this is a snapshot. If I just select a
snapshot like this one, it is exactly like
on your screen, but on the screen already
it is a good-quality. It is not bad quality
is good quality. So already you can walk
only with screenshot. It's already nice. After you can download, share and delete and
take your glands. So but a real render. So this one is HD. If I just click on this area, yes, it sees little better. But finally, already
it is very great. In ingest a screenshot. Here, we have improvement. We have more improvement
about the environment. So it means you can
find the shadow, you can find the lights. You can find the
environment outside, e.g. it is create a transparency
on Zoom windows and yes, definitely it is already render. You can also improve
because here it was just if I click on
realistic image. Now I'm outside, so it's
not extremely convenient. I need to go inside
just like this. And you just go on this area. This is a definition. You can also create two for k. For k definition,
it's also possible. But here you will have
credit or subscribe. So it's okay for that. We are going to we're finished
for the interior part. Step-by-step.
45. Project create garden: Let's continue. We
are going to crowd the garden, so forth together. And first things to do, I want to add a
different element. And I can click here, add exterior for things that
I would like to create. It is erase on these areas. So from this I can
use partial credit. And I can position this on
the left just like this. And I can drag and move on
the direction by just say, we can put to around
400 centimeter. And if I click on this one, it did, I can go on, right, and I can find
different type of materials. So material yards, I
can just click here, I have all these
different options. Maybe I would like to
add something different. So here we have the
king, the king tides. But I'm going to come back
on wall and floor tiles. And I have multiple options. I'm going to change with e.g. something like this. Or if I just continue, I have this one, this one. This one. I can zoom this one and I
will show this one. Yeah, Let's see it exists one. After to do this work. I can continue and just
select Add exteriority again. I can use one more
time, partial credit, and position once
on this direction, trust exists, and
I can click here, extend until this area. And just dragging one z
direction runs a nadir. I can go left-click and split. I can drag and move my point
just in front of this wall. And after I can
just take this one and let's I need to drag
and move or any mental e.g. I, if I click on Split, I have this one on this area. And now I can take this one
and I can drag and move. Let's move, let's move, let's move and until to arrive
for around 600 centimeter. Ketone to pay show.
You can click here, it can be faster
for things to do, just extend little bit, just at the level of this
world here it's okay. And if I click on
this one, reuse, and I can apply directly
on this area and validate. Let's come back to the 3D view. Let's click on the left. Add an extra Oreos, dr away and positional
driver way on. So right around this area, I can extend until
to arrive here. About the size, you can
put a round 400 or so. And we can be exactly in front of this
area, just like that. Not exactly in front. Let's extend just little bit and recuperate this materials. We can repeat this
process, click here, reuse and activate on this one. Now just validate and I can
come back to my 2D view. I've done that. I can click
and add exteriority again. We use gardens on this area, create and position the base of the golden
dressed here first. And I can move this
one, moves this one. Keep a wrong, may be
found written materials 400 centimeter and extend. So each time I can just move
like this, it's convenient. I don't need to craft
a lot of rectangles. Shi I can extend or so. She can come back on
this direction. Perfect. Can extend. On this area you have occurred. The effect that can also extend, but it's not really good, it's not working properly. First, I'm going to
work on this area. Let's try with this
one. Yes, Perfect. I need to zoom here. And as you can see, I don't have a separation. I don't have a separation. Maybe I need to make
some adjustment. Tried to go here. And yes, definitely it
start from this area. If really we have this problem. So aim is to split the world. So I can click on Split. And this one we can move until to arrive
dressed on this area. And it's not working
properly again. So I can split again. And yes, I can maybe
drag and move, not this brain, but here
you have now a new print. And I can drag on this direction and try to make an adjustment. Yes, perfect. So
this is a solution. If you are in trouble, you need to add a new point. You need to split here. Normally I can go on the
left and not any problems. So perfect. So as you can see, we
have also got done with just one element. Question number one,
question number two, and drive away. Number one. Check with the 3D view exists.
46. Project create terrace: Let's create the terrace. So we have this area and I would like to add
different type of furnitures. So the first thing
that I'm going to do, it's to go on. Here. I have different options. One of the problem
is you need to, you can go and fill niche. If you go on decorate, you will have some decoration
accessories on this area. If I just come back on furnish, you can go on
outdoors just here. And you have outdoor furniture, those activities,
decoration and other. Let's click on
outdoor furniture, those air e.g. seats table. Let's click on the table. And maybe I would like to add, maybe I can add like this one. And I can put my table just on this IVF After I
would like chair. So let's just come back. Build from each directly. We can change for
outdoor furniture and just select Seats. Have different type of models. Let's use e.g. you have this one or this one. Let's just take this
one or two project. I can apply once here. And duplicate position
another here. Duplicate again an order
on this direction. Let's turn like this. And you click it again. An order on this direction. So it's okay for that. Let's continue
with furnish dose. I've taught to
position this element. If I click on outdoors,
you have activities. Here. T is element like this. Maybe I can select one models of barbeque
area of this one, this one, this one
about Zoom models. Let's select this one
perfect or two project. Can position one
modals on this area may be about display, yes, position once here. For niche outdoors. Again. So this is
outdoors activities. If I just come back
on outdoor furniture, seats, because you
can also see benches, you have shared garden, lose some Loon gel. E.g. you have this one. And if I just come back, I can also have this one. So let's take e.g.
this models to project and apply once here. Let's duplicate position
in order on this area. Or maybe I can just
change the color. If I can just come back, maybe I can add this one
just to change the color. This one is bigger. And I can drag and
move this one, and drag and move this one. So perfect. Let's come back on to D view. Let's look one more
time for niche. If you've just gone
outdoors, you have mocked, seems like Pierre Boulez pools. You can add, so lighting. Sometime it can be useful. You have some outdoor lights, moderns are done lights. I can select this one. And maybe I can position. I can position may be once here. And duplicate and order
may be on this area. Duplicates may be once here. Another here I need to create
to rotation 90 degrees. Perfect. On furnish, I can change
for our declaration, accessories, plants and flowers. If you just continue, you
can have interesting models. For outside. We need to select more reserves. Phrase on Pella,
you have this one. So the things that
I'm going to select, this one with a declarative pot. And Phoenix little beak. If I go and edit, it can change a wide
and deep address change for 80, 88, 160. And I can put ones on
this area, may be, I can select and
move little beads. The table is perfect and I can duplicate
this element and position an order
on this direction. Let's continue with the correct
or you have more sings. I think I can select if I like this one, this one will be
perfect or so forth. Erase again position
once here. Whoops. Just come back and edit. You can change. I'm going to change
for 4,040.120. It will be perfect. And I can duplicate and just
position another this comma. If I come back on decorate, I have seen something
interesting or so. It is a bamboo tree. Let's add a bamboo tree just
on this area in this corner. Perfect. I can edit this
one for 100,100.180. Just like that. And I think it's enough
force to outside twice just to add a different
type of element. Let's select the 3D view and
check if everything is okay. So t is my bamboo tree. I can move here and just checks the terrorist
takes a character, you need to move outside
around this area. And thanks to data,
can re-center my view. And we have this
different element. Maybe I can move a little bit these elements here and move
little bit or socialite.
47. Project add trees: Let's add trees. So I would like to add
trees on the garden. And for this, just select. You can select Build, and after you can change, you have different options. If you gone outdoors, you can find this
different option, but definitely go on, decorate. And you can find plants, flowers, trees, trees,
it is big trees. But if you just want to
have the basic shrubs, you can find this on
planting flowers. First things to do,
Let's select trees to add big element first. And I would like to add a pattern like this
one or maybe this one. Yes, I'm here, I'm going to
select this one and add to project expositions, ones here. And I can edit the size about eight less
change for 500,250.350. So I can position
this tree panel That's just come
back on decorator, you have another one. This one can be
interesting out to project its position once here. And I can assume edit again. And let's change. So different value, I can put I think 200
wide to entry deep. And here, yes, when
Jared will be great. Perfect. Each time we need
to come back on decoration. I would like to
add a normal tree here we have different
size of tree. And let's e.g. select this one or two project. And I'm going to
position may be once on, maybe once around this area. And I can change with it. Why the 250 here deep to maybe 308 foreign
trade and positions. Once on this area. Let's continue. Click here. Decorate. Let's add another
type of tree paths. One more times. I can select, not this one. I can sit exists one or
two project resistance here. T is very big. That changes size. Why? Sweden DRI, the swim 38450. So perfect. I can add more element again. Decorate. If you continue, you can find this type of
shrubs and terroristic. Let's select this one. And I'm going to put
ones on the front. Let's duplicate, puts
another one here. Maybe, whoops, replace,
No, Let's duplicate. Be another ones here and
duplicate an older ones here. Each time I can click
on one's AD it. And if I need to change, I can change that. This one change for a 200,150.150 letters
changes one idiot. Like 200 also, An hundred, 60.160, I position e.g. my main tree meant sharps. If I just come back on decorate, you have more option. You can take a glance. You can also create edge
if you need some time, it can be interesting. You can click on this one and you can create a small edge. And whoops, just come back. Rotation on this direction
and position this here. After, again, a did
this one wide eight. So why it can be around 208, can be around 100 and
so deep can be just 60. Just like that tells that
I can click on this one, duplicate position
on zero dioxide. Let's add when entrance, once here and once here. After you can also directly into decoration,
decoration, accessories. You can find plants and flowers. And you have also
outdoor modals. See something interesting. If I just continue here, it's on the interior
of plants or plant. If I continue little bit more, you can find shrubs
like this one, all these different entities, flowers you can put
directly on the ground. Are you ever saw
some decoration? The average so grace
as you can see. So it's perfect for outside. So let's rephrase on just this one first and craft like an element on this area. Decorate. Let's select this one. Maybe put these ones here. Decorate. Let's select this one. Just on this area. Decorator. I can select this one. Here. The courage, I'm going
to add multiple elements first and after I will
re-size little bit. The great. Let's
click on this one. Decorator. Aim is not to spend too much
time on this, this area. Maybe this one, I will
delete and try another one. If you want to add grace, you have different
models also like this one with some flowers. I can put this one here. And the correct again, through this type of
models craze just here. So it's okay for that. After, let just
click on few element like this one each time
I can go and edit. The wider eight, it change
for '80s with deep and wide. Yes, I think it's nice. I can click on this one. Duplicate to in order to craft like specific
pace space here. Let's duplicate this one's
position in order here. And duplicate again, can
change the size of this one aged 81, entry 2,100. And I'm intrigued, perfect. I can go in this area and
duplicate, duplicate. This element. Grace aged eight is only ten. Maybe I can change
the white for 134, 100 and duplicate
shrunk ones here. I can see it exists one it did. Let's increase the size. 120 is a wide 60 and deep 60. Duplicate what is
shown once here. And we know del
one on this area. You have also this one? Yes. So it's okay for
that Jamie is not to spend too much time
on the garden. Is this software is perfect
for interior design. We can extend for
outdoor design. It's smoked too for a show
of these different things. After fossil garden, we
have just limited element, but it just interesting to extend and to have
a view of e.g. I. Was inside the garden. Let's click on the 3D view. And let's wait because
sometime we have plenty, can be a little bit
longer. But one more time. So the quality of the view
is very, is very great. Even when we are just, we on the screen. Just lazy. They could Glenn, so budget
trip arms, this one, this one we have
different type of grace. And it's definitely we can make interesting
things with Ugandan, not perfect, but we can
make interesting things. Some time about the
different distance you can make adjustment when you walk with your 3D view. Perfect.
48. Project render exterior: We can create a render of
the outside, I would do. And so far as is, as, as we did previously
for the entire part, we can do the same thing
for the outdoor part. So let's click here. And first with just basic screenshot. And after realistic image, I can cry just a
screenshot of all my, all my gardens with
also the interior part. Let's just change
display rename. I can remove this one materials. It's definitely so much better. So we're going to
keep the materials and just add gathering. One. I can take a screenshot exists. I've taught to do this swap,
we need to change the view. Click here, activates
the 3D view. And it's great to
isometric view first, like maybe this one can drag and move the character. I would decide. If I want to be more center, I need to position the
character on this area. Let's create a screenshot
when not time. Downturn number two. And just take a screenshot after I can create
different view, e.g. more ones from the terrorists. So I can click here, I can zoom. Just like this. We
can also change. So it means if I
just come back here, Chen for this type of view. Thanks to that, we don't
see the character. Let's come back with screenshot. And as you can
see, it's perfect. I can just move little bit. This can be a perfect view. I can go little on the
left with my arrow keys. And this can be a perfect
view of the terrorists. Let's create a screenshot. So first image, number or
sweet, take a screenshot. After I need to move
on a different part. So I can just click on the tree. And thanks to that directly, you can go on this area. If I click on this
tree directly, I can go on this area. If I click on this
tree directly, I can go in this area. If I click on this one, I can go in this area. Let's turn on the wrong. We can curate a view also here. Take a screenshot. It's imaged number
of sweet again, let's take image number four. You can repeat this process
as long as you want. Exactly. It is exactly
the same things that when you will use
for interior design. Let's create a 3D render also. So first I can go
around this area. Perfect. And I can click here. Now, I need to change
for realistic image. You can take this one, but you have multiple
camera options. And thanks to that, we can
change our environment. I can silica Taiwan first or
I can just keep this view. I can personalize
tight eight for cats. And here you can change
the environment. You can find a little
spot just here. Let's come back with default, personalize and bank
drones image I'm going to change for maybe
countrysides village. Let's walk with village. After I can just click here. I don't have anymore
I definitions. I'm going to come back
with my just stand down definitions and
click on this one, create two new realistic image. After I can repeat the process. It's cool, e.g. on this area. And just take your glands. So but front of my house. Yes. Just like this. Ready, sticky match. It just changed the environment. Personalize. And maybe in this case I can change for
just the park like this. Maybe this one.
Yes, it's better. And creatinine are
realistic image. Oops. Let's make some adjustments. Yes, perfect, realistic image,
one standard definition. So it's okay for that. We have finished this project. So it was a great project to see the different features of by me. So as I've explained, this
is the step-by-step process that I'm using if I want to
create something on by me, starting from the world after, add different doors and windows so you have
your structure. Then we can add different
furnitures on each rooms. It is best to her
own liter times. After you can add more things like decoration turns light. In each thing that
you want inside. You can edit the
materials on the flows. You can also edit the
materials on the walls. Perfect. And after you will have your interior design ready, you will be able to take a
screenshot or realistic image. And if you need,
you can extend on a ganglion depending of the
projects that you want. So this is why I wanted
to show you also how you can extend on the garden
crops like cutie erase, crowd to govern and also
our different trees. So perfect training
to discover on by me. If I just come back
here, my images. Now we can find
different options. Say it was the same, I think
so I can remove this one. Yes, perfect. So he
says screenshot view. This is whoops. Let's just come back. This is an older
screenshot view. Each time you need to click on comeback or it's
not really good. So you click here and back. Screenshot view. I've
already good quality. And it's not the best,
best definitions. But already you can take
your glands so buds are real render. Just like this.
49. Project edit informations: When you have
finished your work, you will have the
possibility to have a summary of everything that
you have in your project. So first possibility is
when directly you are. Here, you can click on Project. And thanks to that, you can have different
type of information. So first information,
project name, type of Zynga, and
type of projects. So when you create your project, this is the first
thing that you need to enter a project name, what type of bruising
and the type of project. So if I've told you
want to change, you can change the name, e.g. after you decide to put other
or any things like this, it's possible if after
you want to change, if new construction from dream project, It's
possibilities here. It just for you. After to do this work, you can find a summary
number of flows, number of rooms, and some
number of meters squared. In this project,
I have one floor, four rooms, 64.67 m squared. If I just click on this area, you can find each, each element. So every time when you
create a space in urea, so it means I have my
living room here, e.g. my garden space here. Here I have my
pressure number one. Each time you will
have a summary of size directly in
project. So peak here. And you will have also what projects you
are in this area. So I can click on area. So I have grown far e.g. your living room
with the size and the world's area
and four bedroom. Second bedrooms and robust form. Size for pressure 1
bar should do to drive way Galton one and wherever solitary element to
its exterior fight. But here I think it's some things that I
will have to remove. If I just continue
with my project. Yes, if I just continue
with my projects, Let's come back here. So after we can find with the
area zoo different project. So this is also projects
that I have in my project. You can find the number and you can find the
description just like this. Sometime you can
have a price also. If you want to see details. Also, you can just
come back first. Don't forget to
save your project. You can click here. And after you will add your
project at pairings here, if I go on my project, this is a project so you can edit again,
you can duplicate. If you click on this area, you will have also information. First you have the overview. And when you go see
and you can turn 260 degrees on your project, you can also just click here. And I have different
view about surrenders. We have one floor for
room 65 m square, two bedrooms, one
bus from rooms. One more time webs
the description here. If I click on projects, I can find the
different projects that I'm using just here. Depending of depending
of the room. So living room, grab this one. Bedrooms. We can have this one
bedrooms and bathrooms. Peter Strain because they have little bit more things and everything is not
appearing at this time. If I click on images, this is all the renders that
we have for this project. We have different
type of screenshots. So when you read
60 degrees image and Zen realistic image. So it's good after at the end you have your
project so perfect. If you want to edit you open, if you need to duplicate
this project, you can. If you want to set the
parameter with the name, the description, you can also, and you have everything that
you want after you work.
 Nicolas Forgue, Welcome awesome students !