Transcripts
1. Class Introduction: Know you need to show up on social media to promote
your brand or business. Everywhere you look,
the advice is the same. Be consistent, post regularly, stay active on social media. And you know it's true. Consistency is what
builds momentum. It helps you figure out what resonates with your
audience and give you the data to see
what's working so you can adjust what isn't
here's the problem. Every time you sit down to
create content, you freeze. You might have content ideas
written down somewhere, but turning them
into actual posts, that's where things fall apart. You're not sure
what to post first. You don't have a system. And even when you do post
something, it's random. There's no flow no
strategy, no plan. And instead of
growing your brand, you're stuck in this cycle
of stress and inconsistency. If that sounds familiar,
you're not alone. I've been there, too. In fact, many brands have
the same struggle as yours. Hey, there, I'm Kristine. If there's one thing I've
learned from managing multiple social media
accounts, it's this. The secret to consistent stress free posting isn't
working harder. It's working smarter. And that starts with having a solid content
planning process. When I first started creating content for my business
and my clients, I was all over the place. My content plan had no
direction and flow. And honestly, no strategy. But once I discovered the
power of batch planning and organizing everything in one
place, everything changed. I went from cramming daily
to having weeks of content ready to go and actually enjoying the creative
process again. Whether you're an aspiring
social media manager, a virtual assistant
supporting clients, a digital marketer
building campaigns, or a content creator
growing your own platform, this class is perfect for you. Here's what we'll
cover together. A step by step process
for planning and producing content in
bulk, the efficient way. How to organize everything using simple tools like No
Shon or Google Sheets. Real demos showing you exactly how I plan content
from start to finish. By the end of this class, you'll have a repeatable
system that saves you time, reduces stress, and helps you show up consistently
on social media. No more last minute scrambling, no more creative burnout. Just a clear organized
plant that actually works. Sounds good. Let's get into.
2. Class Project: Let's talk about your
class project because this is where everything we learn
actually comes together. For this project,
you're going to create your very own content calendar using either No Shon
or Google Sheets. And don't worry, I'll walk
you through both options with full demos later in the class. Here's
what you'll do. Step one, pick a brand or
account to plan content for. This could be your own personal brand client
you're working with. Or even a made up brand. Step number two,
choose your tool. Download the Notion
template or grab the Google Sheets template
from the resources section. Pick whichever one feels easier
or more exciting to you. There's no wrong choice here. Step number three, come prepared with a list of content ideas. Step four, follow along with the lessons and apply
each step as we go. You'll plot your ideas on a
calendar, create scripts, and design briefs,
write captions, and organize everything
in your content planner. Step number five,
upload a screenshot and share your calendar in
the class project gallery. I personally review
every single submission and leave feedback
to help you grow. Now, here's my advice. Don't wait until you've watched
all the videos to start. Work on this as you go. Pause the lessons,
open up your template, and actually do the work. That's how the process
really clicks. Your first content calendar
doesn't have to be perfect. In fact, it probably won't be
and that's completely okay. The goal is to build the habit and get
comfortable with a process. You can always refine how
you plan your content later. That's it. I'm so excited to
see your content calendar.
3. Review the Brand's Content Strategy: Before you start plotting out posts and designing graphics, there's one crucial step
you need to take first. Review the brand's
content strategy. If you're working on your
own brand and thinking, wait, I don't have a
content strategy yet. This is your chance
to create one, even if it's just a
simple one pager. Here's why it matters. Without a clear strategy, your content becomes random. You're just posting for
the sake of posting, and that leads to burnout inconsistency and
honestly not great results. To be able to guide
you through this step, make sure to download the brand content strategy workbook in the
resources section. So let's talk about what
you need to look at. First is the brand
voice and tone. How does this brand communicate? Is it professional and polished? Casual and fun? Inspirational and empowering.
You need to know this. So your content sounds
like the brand. Not like a random person
took over the account. Next is Target audience. Who are you talking to? What do they care about? What problems are they facing? The better you
understand the audience? The easier it is to create content that actually resonates. Next are content pillars. These are the main topics or themes the brand talks about. For example, if fitness brand might have content
pillars like workouts, nutrition, mindset, and
transformation stories. When you know your
content pillars, brainstorming becomes
so much simpler. Next up are goals. What is this content
supposed to achieve? Are we trying to
grow the audience, drive traffic to a website? Increase engagement, sell
a product or course. You content should tie back to at least one goal platform
and format preferences. Where is this content going? Is it on Instagram,
on TikTok, LinkedIn? What formats work best? Is it carousels, reels,
or static posts? Knowing this upfront saves you from creating the
wrong type of content. Now, if you're working
with a client, this information should
ideally come from them. Ask for a brand guideline,
a content brief, or even just a
quick conversation to align on expectation. If you're building
your own brand, take 30 minutes and
write this down. It doesn't have to be fancy, just clear enough that
you know what you stand for and who
you are talking to. Once you have this foundation, everything else becomes
so much easier. You're not guessing anymore. You are creating with intention.
4. Plotting Content Ideas: Now that you've reviewed the strategy and you've got
a list of content ideas, it's time to actually
plot them out. This is where your
content calendar starts to come to life. Here's how I approach this step. First, decide on your
posting frequency. How many times per
week are you posting? Is it three times five, seven be realistic here. It's better to commit to
three high quality posts a week than to burn out trying
to post every single day. Next, choose your content mix. You don't want every post to be the same type of
content. Mix it up. Maybe Mondays are
educational carusels. Wednesdays are behind
the scenes stories, and Fridays are engagement posts or user generated
content, if you have any. Variety keeps your
audience interested. Then map it out to a calendar. Now, open up your
Notion template or Google Sheets and start
plugging in your ideas. Assign each idea to
a specific date. This is where you'll
see your whole month or week laid out
in front of you. And trust me, it feels so
good to have that clarity. Next, align with
important dates. Are there holidays,
product launches, or industry events coming up? Make sure your content
reflects that, as well. You don't want to miss out on timely, relevant
content opportunities. Finally, leave room
for flexibility. Life happens and
even trends pop up. Don't pack your calendar so tightly that there's
no room to pivot. I always leave a few
flex spots where I can drop in spontaneous or
trending content if needed. Now, here's a protep. When you're plotting content
ideas, think in batches. Instead of planning
one post at a time, plan a whole week or
even a whole month. This helps you see
the bigger picture and makes sure your content
flows well together. Let's start adding content
ideas on our calendar. Then let's name this as
promote our pop up kiosk. Then the status is it's
for content Ida next. It will be published on
Instagram and Tik Tok. Then the content type
for this is a video since I'm planning to
make it as a reel. So I was inspired by this reel, and I want to get the link so that I can use this as a guide, copy and then let's add it
under content in spo there. Next, if you want to
add a different audio, just simply get the link. So let's go to Instagram again. I want to use this
specific audio. Let's get the link, copy, and let's base it here. Next, I want to use
this area right here to expound my idea for
this specific content, a video of our hope kiosk doing different cake
flavors available. Now, if you have any talking
heads for this video, you can add the video
script right here or even add a graphic
design brief right here. So this is how I
plot content ideas. So usually it's a mix of instructions and notes for
that specific content. So this is really
helpful for me, so that later, when
it's time to edit, I would be guided on what I was trying to go with that
specific content. So let's add more content ideas. I hope you enjoyed the demo. Remember, this is a draft. You can always move
things around, swap ideas, or adjust as you go. A goal right now is just to get everything
out of your head and into your content calendar so you can actually
see your plan. Once you've plotted
everything out, take a step back and look at it. Does it feel balanced? Does it align with
your strategy? If yes, you're ready to
move on to the next step.
5. Script & Design Brief: So you've got your content ideas plotted out on your
content calendar. Now it's time to bring
those ideas to life. And that starts with scripting and creating
design briefs. This step is all about clarity. You want to know exactly
what you're creating before you even open
Canva or start filming. Let's break this down. First, scripting. If your content includes
video or voiceover, like reels, Tik Tok, or YouTube shorts, you'll
want to script it out first. Now, this doesn't
mean you have to write word for word
what you'll say. Sometimes a bullet point
outline is enough. But having a script
keeps you on track and makes the actual recording
process so much faster. In your script,
include the hook, the first line that
grabs attention, the main points
you want to cover, and a clear call to
action at the end. Even for static
posts or carousels, I like to jot down the
key message or headline. Now let's move on to
the design brief. A design brief is basically
a quick note to yourself or to your designer about what the visual
should look like. You don't need to overcomplicate this enough details so that
there's no confusion later. Your design brief might
include the format. Is it a single image, a carousel, a real? The key visual elements. Do you need a specific
photo, an illustration? What texts should you
put in your design? Write them down. Brand colors and fonts. Stick to your brand
guidelines for this. Next up, dimensions. Make sure you're designing
for the right platform. And we have the mood or vibe. Should it feel bold
and energetic? Calm and minimal. Next up are links. Include links from
inspiration from other creators or other
posts if there are any. If you're working with a
team or outsourcing design, this brief is essential. It saves you from
endless revisions because everyone's on the
same page from the start. Here's what I do. I add sections for a script and design brief
in my content calendar. That way, everything
lives in one place. I can see the idea, the script, and the
design notes together. No jumping between different
apps or documents. This step might feel like
extra work at first, but it saves you so
much time later. You're not sitting
there doing editing, wondering, Wait, what was
I even trying to say here? You already know it's all written down in
your design brief. So take a few minutes
per post and map it out. Now, once that's ready, we can now move on
to the next step, which is editing media.
6. Editing Media: And now we're getting into the fun part editing your media. Whether it's photos,
graphics or video, this is where your
content starts to actually look and feel
like, Well, content. Before you dive in,
here's the key. Batch this step
whenever possible. Instead of editing
one post at a time, set aside a block of time and knock out all your
editing in one go. It's way more efficient. It keeps you in a creative flow instead of constantly
switching gears. Here are some editing tips
that may come in handy. When creating graphics on Canva, create a few templates
you can use. It makes designing new
posts so much faster. Number two, when editing videos, add text overlays or captions
because did you know that many people watch videos on mute and you don't want
them to miss your message. Number three, don't over edit. It's tempting to add
every transition, every sticker, every effect. But sometimes simple is better. Focus on making your content clear and engaging,
not just flashy. Number four, save
your edited files in an organized folder so you
can find them easily later. Trust me, when you're
scheduling posts, you don't want to be searching through a messy camera roll. Once your media is
edited and saved, you're ready to move on
to captions. Let's go.
7. Writing Captions: Alright, your visuals are ready. Now it's time to
write the captions. And let me tell you
a great caption can make or break your post. You could have the
most beautiful graphic or the most entertaining video, but if your caption doesn't hook people or tell them
what to do next, you're leaving engagement
and results on the table. So let's talk about how to write captions that
actually work. First, start with a strong hook. The first line of your
caption is everything. It's what shows up
in the feed preview, and it's what decides
whether someone keeps reading or
keeps scrolling. You can ask a question, make a bold statement, or call out your
audience directly. Here are some examples. You're not posting enough, and here's why that's okay. Hot tick you don't need
to post every single day. Ever feel like you're running
out of content ideas. Next, keep it conversational, right like you're
talking to a friend. Break grammar rules
if it sounds better. Your captions should feel
personal and approachable. Of course, align it to
your target audience. NextopPvide value. Whether you're educating,
inspiring or entertaining, make sure your audience gets something out of
reading your caption. You can answer a question, share a tip, tell a story. Next, include a call to action. What do you want people to
do after reading your post? Is it to comment, to share? Click a link, tell them. Don't assume they'll know. A simple drop an emoji if
this resonates or save this post for later can make a huge difference in engagement. Next, use formatting. Break up your captions
with line breaks, Emogis or bullet points. Big blocks of texts are hard
to read on a smartphone. Make it easy for people to
scan and absorb your message. Finally, write in batches,
just like editing, I recommend writing
all your captions in one sitting if you can. It keeps you in the
writing zone and ensures your tone stays consistent
across all posts. One last thing. Don't sleep on hash tags. They can still help
with discoverability. Do a little hash tag research. Find relevant hashtags for your niche and save a
list you can pull from. I usually add three
hash tags per post, just enough to be found, but not too spammy. Alright, captions are done. Now, let's keep moving.
8. Review and Publishing: We're in the home stretch now. You've donned,
scripted, designed, edited and written captions. But before you hit
that published button, there's one more
super important step. Review. This is where
you catch mistakes, make final tweaks and make sure everything is
polished and ready to go. Here's my review checklist. First, double check the visuals. Are there any typos
in your graphics? Is the image crop correctly? Does the video play smoothly? Sometimes things look perfect on your computer but
weird on mobile. So always preview next, read the caption out loud. I know it sounds silly. But reading your caption
out loud helps you catch awkward phrasing or anything that just
doesn't sound right. Next, check your links. If your caption or bio
includes a link, click it. Make sure it goes
to the right place. Broken links equals
missed opportunities. Next, verify the posting time. If you're scheduling your posts, make sure the date
and time are correct. Posting at 3:00 A.M. When your audience is
asleep, not ideal. Use your insights
to figure out when your audience is most active
and schedule accordingly. Cross check with your calendar. Make sure the post
matches what you plan. Sometimes ideas evolve as you work on them,
and that's fine. But you want to make
sure everything still aligns with your overall
content strategy. Once you've reviewed everything
and you're confident, it's good to go, it's time
to publish that post. Now, you can post manually or you can use a
scheduling tool. I highly recommend
scheduling posts if you're batch
creating content. Tools like Meta Business Sweet, Later or Instagram
app lets you schedule posts in advance so you're not glued to your phone
every single day. Now, here's the beauty
of this entire process. Once your content is scheduled, you can step away. You've already done
the hard work. Now, after posting, don't
just forget about it. Check in on the performance. What's getting engagement
and what's not? Use that data to improve
your future content. Social media is
all about testing, learning, and
adjusting. Alright. You've officially gone from
idea to published post. That's the full cycle. And the more you do this, the faster and smoother it gets.
9. Demo: Content Planning using Notion & Google Sheets: Now, I want to show you exactly how I use Notion to
plan my content. If you love visual
organization, databases, and having everything
in one place, you're going to love this demo. Notion is super flexible, and that's what
makes it powerful. You can customize it
however you want. But I'm going to
walk you through a simple beginner friendly setup that you can start using today. I'll also be sharing a link to this Notion content
calendar template in the resources section. Now, if Notion feels
too much or you just prefer something
simple and straightforward, Google Sheets is your friend. If you're ready, let's dive in. So I made this template
inside Notion, and I will be sharing
this with you for easy content
planning process. First, let's get to know each aspect of this
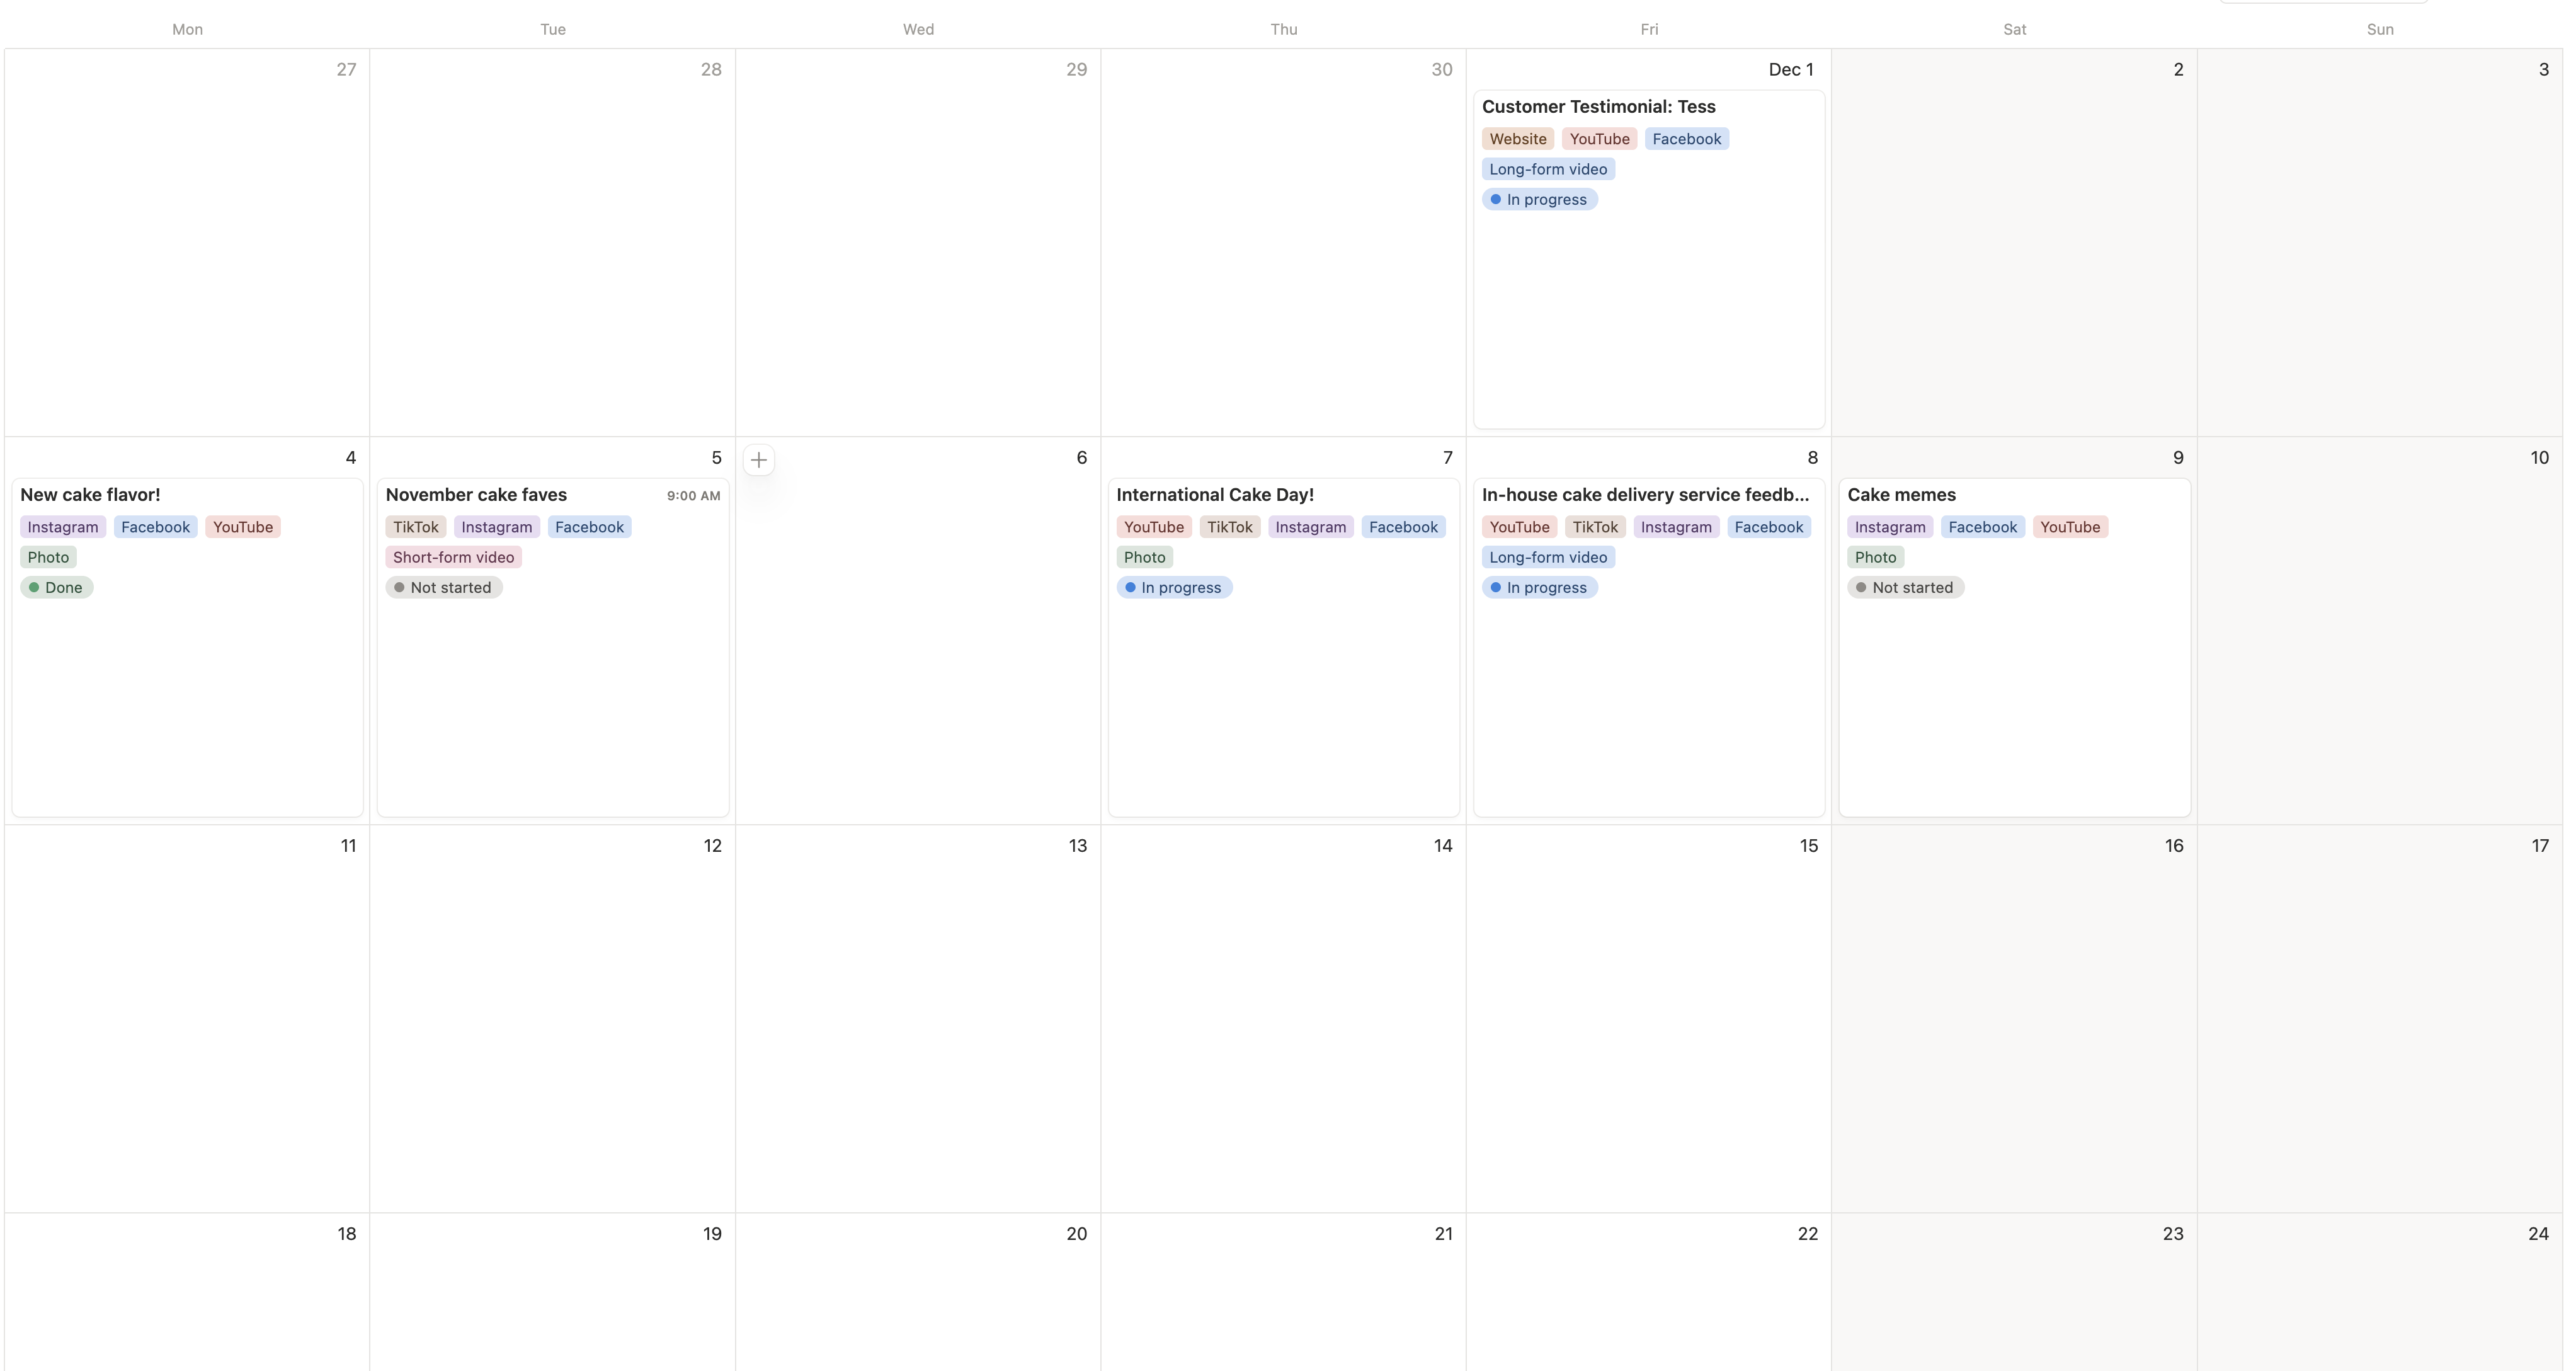
content corner. So once we scroll down, you can see the main
content center. So this is in calendar view. This is where all the content
planning will take place. Next, I have here
the content goes, we have here for Tik Tok,
Instagram and Facebook. You can totally tweak
this portion of the template depending on which platforms you want
to create content for. Now, let's scroll down. And we have here the
content idea dump. This is where I dump all my
ideas for content planning. So this is super
handy whenever I'm Audigo or just simply
browsing on my feed, and suddenly a
content idea pops up. I just simply jot down
all my ideas here, and then I categorize it if
it's for my personal brand, if it's about digital marketing, productivity, and all that. And then in here, I write all the details about that
specific content idea. And then finally, I have
here the idea status. Is it approved or is it not
related to what I'm creating? So I can either choose
approved or not approved. If you want to add
another entry, just simply press this
new button here and it creates a new entry
in the content da dum. Now, I understand that
in the category portion, it might be different
for your brand. So to edit this part, just simply hover
your mouse here, to open up the menu, go to properties, go to
category, and in here, you can rename and change the
options for this portion. So maybe you can change the personal brand
to entrepreneurship to just simply marketing to events depending on your brand or the type of business
that you have. So let's say you
have an idea that is approved and you want to add
it to your content calendar. Just simply hover
your mouse here and then click and drag it to
your content calendar. So there it will transfer
to your content calendar. This is an example of an item or an entry inside
your content calendar. Let's try to explore this there. So you can see that we have
different properties in here that is very important for your content
planning process. So we have here the
day, the status. In understatus, you have the
content idea, scripting, shoot video, for reviews and so on until it
gets published. Next, we have platforms
we have here, Instagram, Tik Tok, YouTube,
Facebook, and more. And this is actually a
multi select option. So for example, you are posting this specific content on
Facebook and also on Instagram. You can select this,
and it looks like this. Next, we have the content
type we have here, if it's a text, a video, a carousel, a single
image, and all that. In this portion, you
can add a link to the content inspo or content inspiration
or other references. In here, you can also
add a link to the audio. Then you can type in here
the caption, the hashtags. You can embed here or
attach the cover image. So in here, you also
have the link to media wherein you
can add links from your Google Drive or other
sources or where you stored that specific media
that you have created. And you can add here some notes. And since we move from the content da dum
to the calendar, you also have here the category
and also the idea status. So you can just simply
disregard this. So just simply focus
from the day to notes. Now, whenever you have
a new content idea, I want you to select this
but a new content idea. This is a template,
and once we click it, it will turn into this. We have added more
sections that would be helpful for your
content planning process. So we have your content
idea notes, video script, if you have a graphic
design brief, and also a draft caption. So usually I type in my
captions in this portion, and once it's finalized, I copy and paste it in here. Those are the properties
inside the content calendar. Now, whenever you have a new content idea and you want to add it directly
to the calendar, just simply hover the mouse
on that specific date and then press the plus button
that says add an item. So let's try, and it
will look like this. It's pretty much be right, but it has the
properties that we need. So the next step
would be clicking this new content idea so that we can add these
elements right here. So let's say, for example, new cake flavors or
something like that, and it will show up like this. Now, let's say this
specific content will be published on
TikTok and Instagram. And right now it
is for scripting. So going back to your calendar, you can see all the
tags that we have added for each content idea. So this content idea will be published on Tik
Tok and Instagram, and right now the status
is for scripting. So that is how you can use the Notion content
corner template. That will be provided to you. You are much more comfortable in using Google Sheets in
planning your content. I also created a content
calendar template for you, and it will be available
in the resources section. So be sure to download SquicklyEplore this content
calendar in Google Sheets. So first, you can add
here the month and also the week and you have here
Monday, Tuesday until Sunday. On this portion, you have
the content details. So you can add here
the date, the time, the content type,
the status, as well. So we have similar
statuses in here, and you can type in
here the platforms. Next, we have here
the content idea, and you can insert
a cover image in here and then type in here
the caption, the hashtags, add in here the link to media, and also add in here the content inspiration
or other references, and then you can add a
link to the audio and then type in here some notes that would be helpful
for your content. I have here the week one, two, three, and four. If you want to add a new
week in your calendar, I have here the weekly
calendar template, simply access that
specific tab or sheet and then press right click on your mouse and then
click Duplicate.
10. Final Thoughts: And that's a wrap. You made it through
the entire class, and I'm so proud of you for showing up and
doing the work. When you started this class, maybe planning content
felt overwhelming. Maybe you didn't even
know where to begin. But now you've got
a clear step by step process that you can
use over and over again, whether you're managing
your own brand or helping clients
grow on social media. And the best part here, you now have a repeatable
content planning process that works for any
social media platform. Let's do a quick recap of
everything we've covered. How to review the
brand's content strategy before you dive into planning. So your content has
direction and purpose. Plotting your ideas
onto a calendar so you can actually see your
plan and stay organized, creating video scripts and design briefs to guide your content creation
with clarity. Editing your media efficiently
by batching the work. Writing captions that hope, engage, and inspire action, reviewing and publishing
with confidence, so nothing falls
through the cracks. Plus full demos in both No
Shon and Google Sheets, so you can choose the tool
that works best for you. Truth is, content planning doesn't have to be complicated. It just needs to be intentional. And now you have the system
to make that happen. If you haven't completed
your class project yet, I really encourage you to do it. Create that content calendar. Apply what you've learned and upload it to the class
project gallery. I review every submission, and I'd love to see
what you come up with and give you feedback
to help you improve. Before you go, here are a few ways to keep
the momentum going. First, build a
content idea bank. Start a running list on your phone in Notion
or in a Google Doc. Whenever you see something
inspiring, write it down. If you need help with this step, check out my other class on finding endless content ideas. It's packed with
strategies to make sure you never run
out of content ideas. Next is batch your work. Set aside a few
hours once a week or even once a month to plan,
create, and schedule. It's a total game
changer and will save you so much
time and stress. Finally, analyze what works. After your content goes
live, check the analytics. What's getting engagement
and what's falling flat? Use that data to improve
your next batch of content. Remember, social media
is all about testing, learning, and adjusting
along the way. If this class help you feel more organized and confident
in planning your content, I'd be so grateful if you'd
leave a class review. It helps other students
find this class, and it gives me insight into what you'd
love to learn next. And don't forget to hit
that follow button. I've got more classes
coming up about marketing, productivity tools, and
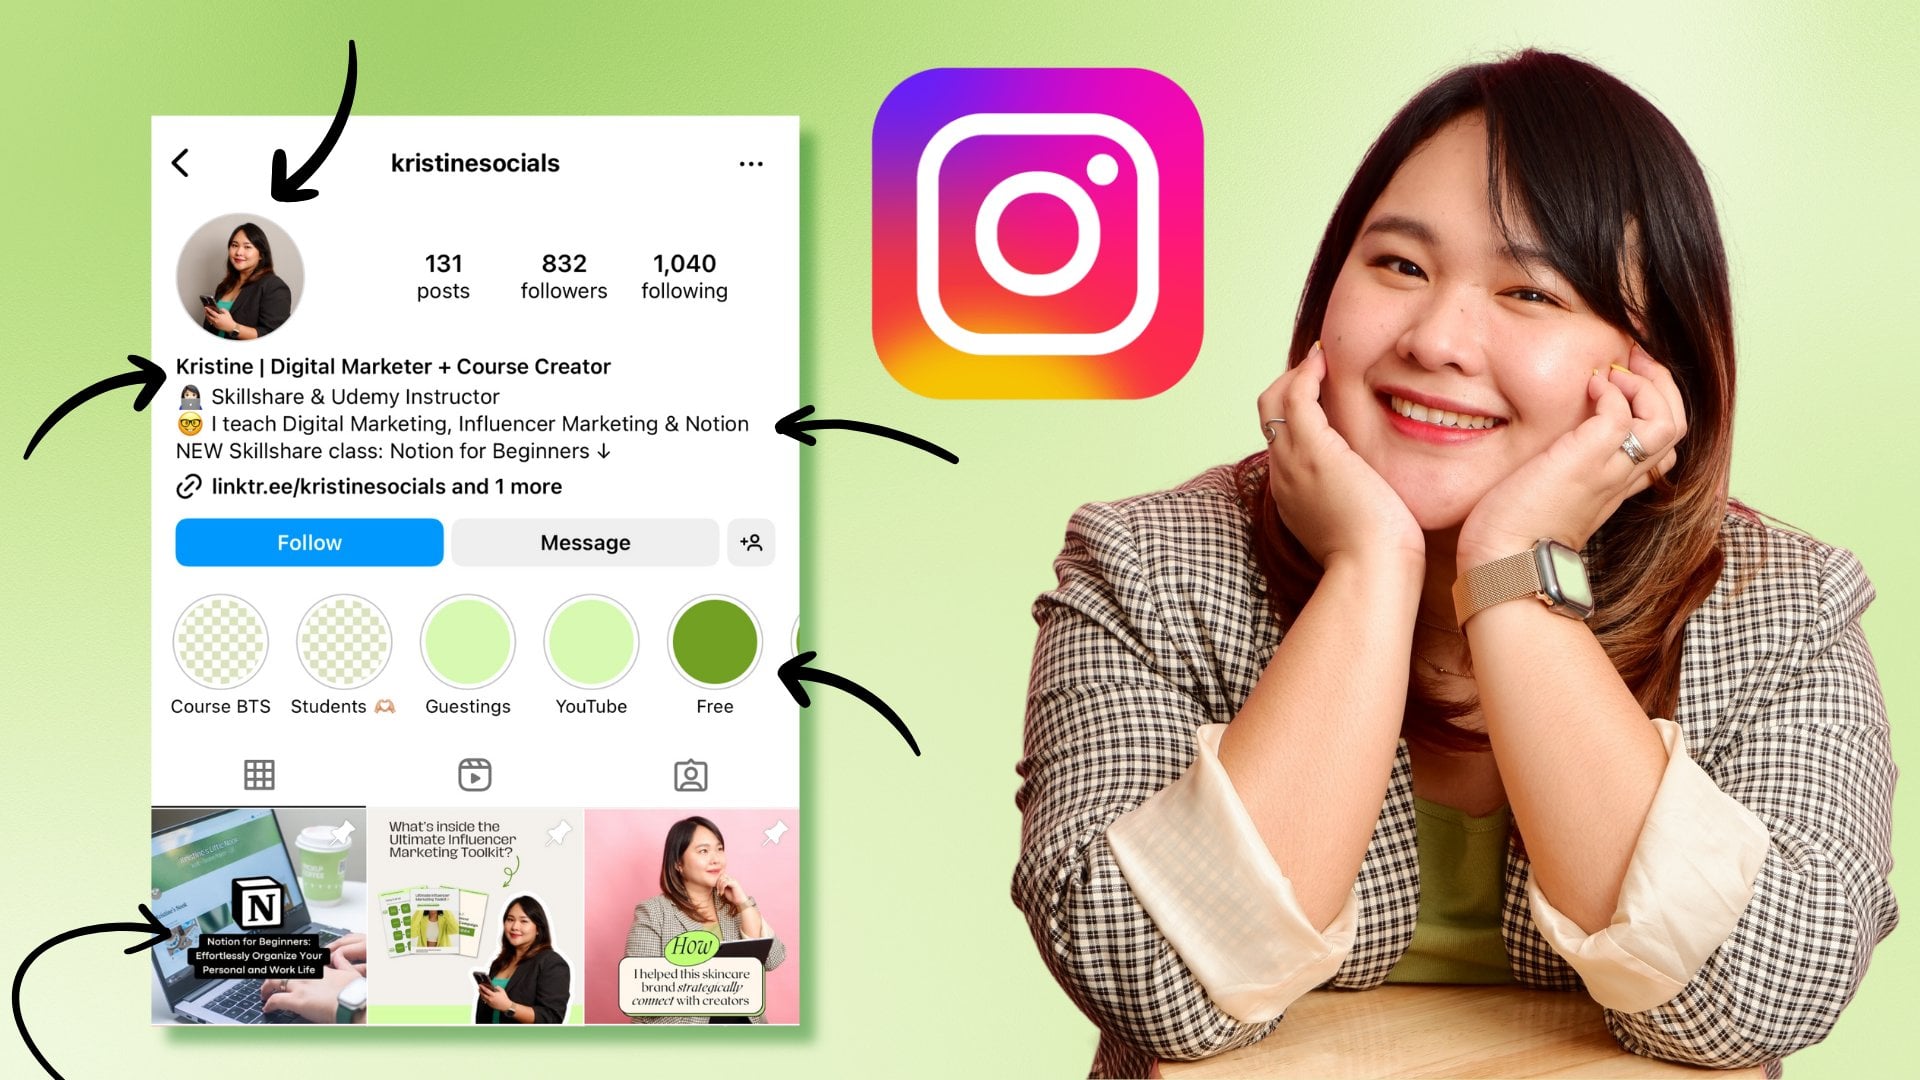
creative content creation. If you want to stay connected, you can find me on Instagram at Kristine Socials
and at Skillshare. Alright, friend, you've got
the tools and the process. Now go plan, create, and show up consistently
for your audience. Thanks for being here
until next time.
 Kristine Sacdalan, Digital Marketer & Course Creator