Transcripts
1. Welcome & Project Overview: Even if you're not
familiar with the work of the wonderful British designer
and poet William Morris, you may well have heard the most famous of his quotes, which is, Have nothing in your houses
that you do not know to be useful or believe
to be beautiful. This was one of his
core philosophers for intentional design, emphasizing that
useful, beautiful items created a refined life. His work often
addressing the need to have a deep respect
for natural beauty, which you can see reflected in his work that features fruits, flowers, birds, even vegetables. And this is where
we'll be taking the inspiration from for this
class where we're going to create something
very practical in the forms of journals
and notebooks, and we're also going to
make them quirky beautiful. Using nature's bounty
in the form of fruits and vegetables to
create printing blocks, which will then form the outer covers of the
journals and the notebooks. Hi, everyone. Dawn Cora here, artist, designer and
holistic health educator. And I warmly welcome you
to this class where you really are being given
permission to just play. Play it like you did
when you were a kid. Can you remember when you
were doing potato printing at school and how much fun
it was, how freeing it was? Well, that's what this class
is all about, as well. We're going to be making
something practical, and we're going to be
making it beautiful. So I'm sure William Morris would be giving us the
thumbs up for this. Lots of choice in
this class as to how you actually make your
journals and your notebooks, and I'll be taking you through three different methods
as to how you can make them depending on what
kind of materials and what kind of tools you've
got available to yourself. We'll look at ordinary fruits and vegetables that you can use as printing blocks for making the outer covers and, you know, how to actually cut
them up and use them and have a look at what
kind of paints to use, whether you're going to
mix your own colors, whether you're going to do
them straight from the tubes. As I say, there's
a lot of choice in this class and, you know, a lot of flexibility in it, depending on what materials
you've already got. Can also, if you wish, start your project
off by getting a little bit of inspiration
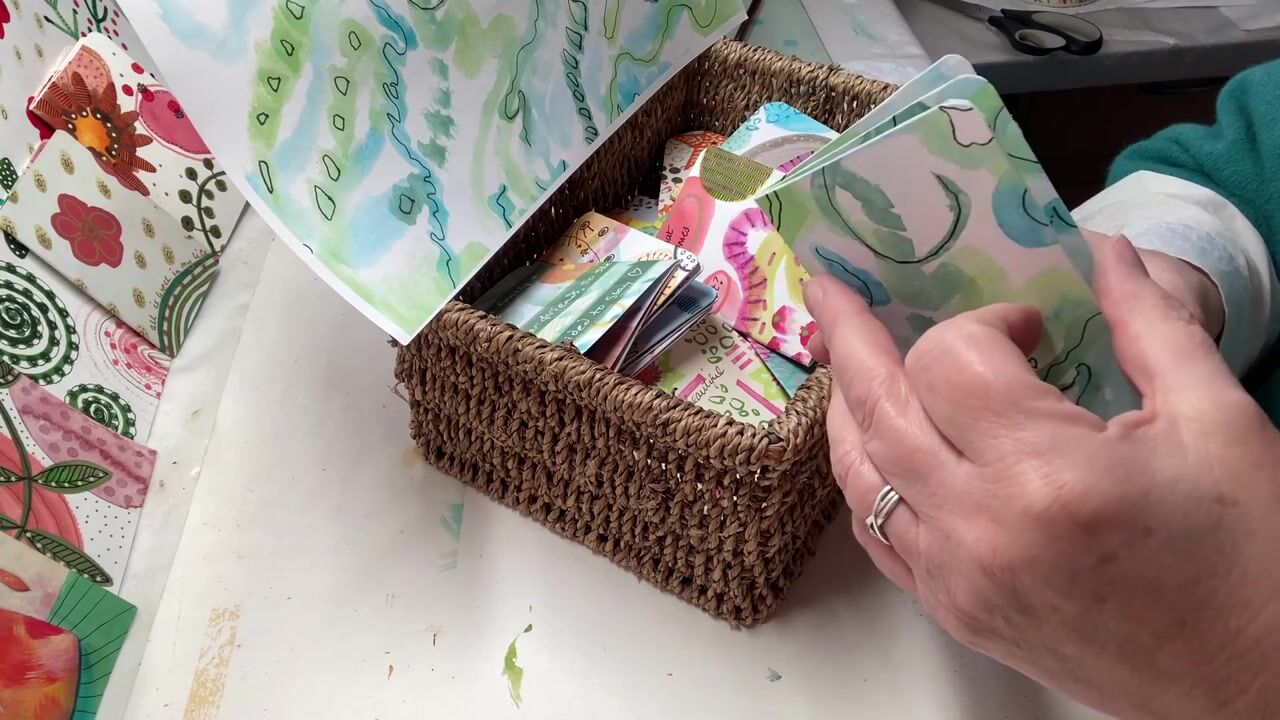
from the art prompts. These were prompts
that were done in the last class that we made. But I've included the
PDF resource sheet for you again here without
you having to go make the little cards themselves to give you some
ideas which might be an introduction into how you want to approach
your own design. You don't have to use
these, of course. Again, that's all
part of the choice. We'll have a lot of fun in this very simple
printing process here, which, you know,
for some of you, if you ever did this
as a child will hopefully bring back
some very fond memories. You'll be able to see
how easy it is to create some patterns on the outer
covers and, you know, add to them and see what
those shapes actually then suggest to you and how you can add a little bit of
extra detail on it, just by looking at the
shapes themselves, how they kind of
dictate in a way, any extra kind of marks that you want to
then put on them. And we'll obviously
have a look at the different ways in which you can put the books together
and then trim them. Once you get going, you'll realize how simple
a process it is, and you can make quite a lot of these in a very
short space of time. So it's ideal for doing over the weekend or if you find
that you've got, you know, a couple of hours free, and you want to do
something quite simple, but that's a lot of fun. So I do hope you'll
give yourself permission to play and
join me in this class, as we have a lot of fun making
these lovely notebooks, even sketchbooks,
little journals, by using that lovely
printing method that's been around for a long, long time that we
used to use as kids. Let's take a look at
what materials we need.
2. Suggested Materials: Well, the stars of this class are definitely the fruits
and the vegetables. So, if you've got a fruit bowl,
go and have a look at it. Have a rummage, see what
fruit you've got in there. See what shapes you
could have a play with. The apple's perfect for
you to either cut it that way horizontally or
to cut it vertically. And each of those will give
you a totally different look. Even the avocado, once
you've eaten the inside, the actual outer rim of the shell would be an
interesting shape to play with. As you can see here, the
pairs are, you know, looking a bit past their
edible date, really. So they're perfect
now at this stage, to be able to again, either
cut them horizontally. Or to even cut them vertically and see what
definitely shapes you get there. So I have a rummage with
the fruit that you've got. Or if you feel so inclined, go and buy some gorgeous fruit that you'd really like
to have a play with. Let's go and see what's
in my vegetable tray. Well, there's a
few things that I can use here straightaway. I can see the courgette, carrots, potatoes,
possibly the leeks. The broccoli would give me
an interesting texture. So I'm going to pull
some of them out and see what I'm
going to play with. There are three
different methods of making a journal and notebooks, and the simplest method
is using sellar tape, scissors, and a glue stick. The easier method is using
a long handled stapler. But I'm aware that, you know, you might not have one of these. In fact, you probably
won't have one of these. So I'm just including it as a method for you
to be able to see, you know, one way of
being able to do it. And another method, which
is slightly fiddler, but only slightly
fiddlier is to do a stitching method where we
stitch the pages together. So you'll need a darning needle. Some thread. I've got
embroidery thread here. That's what
I've been using. Some kind of sharp tool. This is a little bradle for
making holes into your paper, which is where
you'll then stitch with your thread and your
needle. You'll need a pencil. A ruler would be handy. Sorry, not a ruler, a rubber
would be handy as well. If you have a cutting mat and a sharp knife and
a measuring ruler, a ruler that you can cut with, then that might make
your process a little bit easier than just using
scissors, and it might not. And it depends on how comfortable
you are in using these. It's not necessary to have these because you can just use
scissors if you want to. Now, the other thing that
you're going to need for any of the methods that you use
is, of course, paper. And here you can see it's just printing paper that you
put through your printer. This one happens to
be 80 GMS, sorry, grams per square, but you
don't have to use that weight. You can use any weight at all, 70, 80, 120,
whatever you've got. The printing paper is for the inside of your journal
and your notebook. And what you're
going to need for the outer covers is some sort of mixed media paper that you
can then easily paint onto. Now, I've taken mine from a
mixed media art pad here. You can see the weight that
I've used there, 250 GSM. Doesn't have to be that heavy. It can be a bit, softer
than that, if you want. And I've used an A three pad, which I've ended up cutting
down into A four sheets. So if you've got a pad that's an A four size, that's
absolutely perfect. If you've got an A three
size, that's great, as well. You just cut it
down so that you've got two A four sizes
and work it from there. And, of course, the final thing
that you're going to need is paint, acrylic paint. You can use artist
quality, student quality. You can do like I do,
and just use, you know, what I call sort of or
craft quality, if you like. You can mix your own colors or you can take the colors
straight out of the tube. It's entirely your choice. Now, what I did as well
was I took some of my little art prompt
cards that I made in the last class and used those as a little bit of a
direction as to where I wanted how I wanted
to start the process. You don't have to have
made these prompt cards. I've included a PDF resource with all the art prompts on it, and you'll find that
in the projects and resources section. And I'm hoping
that I've included all the materials there that we need in
this little video, but I've also put a materials list in the project and resources
section as well. So just double check that if I look as if I've
missed something from here. I'm hoping I haven't. Okay. On with my penny. And my scruffy old sweatshirt. I think between the two of them, I probably got more paint on these than I have in
one of my palettes. I've got my cup of tea, which I always have
ready, of course. And the choice now is yours, whether or not you want to just watch the
whole thing through so that you know what
you're doing and gather all your materials ready so that you know what
options you're going for. Or after gathering
your materials, you want to just dive
straight in with me and do it alongside me. The choice is yours.
Whichever way you choose, grab your painting gear
and let's get started.
3. Choosing Colours: So here I've got my three
sizes that I'm working with, and I folded them, and now I'm going to just open them so that they're a bit more flat because I want to be able to print all the way across it. But at least that
gives me an idea of what the front and what
the back might be like. And the way to get
those three sizes that I've just
shown you there is to find the midway point
on your A four sheet. You can do this just by
folding it over and putting a little crease in the
top and the bottom, and then drawing a
line down the middle. So cut that one out first. Now, again, don't
worry if it's not exactly straight because
you will be trimming the edges. So don't
worry about that. Then with the little ones, again, you're just folding over, turning that into a
little book shape, finding the mid line and cutting that down
the middle as well. This is where it's quite useful
just to have a rubber or eraser on hand because you can just rub that
pencil line out. The thing with pencil
lines is that they don't always paint over. So if you can rub
it out, then do. And then, of course, you've got your little notebook size
here by just folding it out. Sorry, folding it
together like that. So that's your two notebooks. And then your journal. I'm calling them
notebooks and journal. As I said earlier, you can
use whatever you want. Use these books for
whatever you want. I'm going to use the bone folder to get that nice and sharp. Because this paper is a wee bit thicker for your outer edge, it doesn't fold just as easily as your
printing paper will. So it's good to use a bone
folder or the back of a spoon, as in you use this
bit here like that. That gives you a nice
sharp edge as well. And there you've got your
three sizes ready to go. So now I just need to decide what colors I'm going
to use from a printing. And I have taken some art prompts out of my little art prompt box here
just to give me some ideas, and I'm quite taken with the idea of using three colors next to each
other on the color wheel. Now, I'm usually drawn to
the blues and the greens, so I'm going to do the
opposite for a change, just to mix things up a bit. And I'm going to go
with the red orange through to the yellow orange with that orange in the middle. So that's, you know, they're just such cheery colors, and I've got flowers growing in the garden which have
these colors in them. So it feels kind of yeah, a nice nod to them, actually. And one of the other
things as well, I've pulled out begin
with one or two circles. Now, I notice for myself that I use circles a lot because it's such an easy shape to start a painting with to actually get you
into the painting. So that's what I'm going to do. Use those three colors, and we'll start with a circle. So I just need to get going.
4. Creating Shapes For Printing: Now, I've got a selection of
vegetables and fruit here, and this is where it really
gives you permission to play because it's
just like being back in primary school again. And, you know, you can't
go wrong with this at all. So I've got various veg here that once I've chopped into and with the pear itself, that's going to give
me a circular shape. So I think I'm going to
start off with the carrot. So let's just I mean, it doesn't really get any
better than that, does it? So let's just start
using that one, I think, and maybe actually
whoops. That's rolled off. We'll have a couple of potatoes as well just
to start us going. So that's how I'm
getting my circles. Now, obviously, you can use
any shape that you want to. You could cut that
pear going down that way and you could print
with a pear or an apple. You know, you can
just use vegetables and fruit in any way you want, any direction you want, I mean. But because I'm going
to choose the circles, I mean, that's not
quite a circle. It's an oval, but that's okay. In fact, in fact, in fact, I'm going to chop that one
into little semicircles. So that even gives me
another shape to work with. So all I need to do now
is to get my paint ready, and then we are ready to print.
5. Simple Printing Process: Now, I'm not going to bother
mixing paints for this. I'm just going to
go straight with paints that I've already got
straight out of the pot. I'm going to choose this lovely
red, this orange yellow, and this orange because they make up that section
of the color wheel. I say, this is not
written in stone. You know, be flexible with it. Give yourself
permission to play, which is what this
class is all about. So I'm just popping these colors directly onto my palette. And we'll start off
with the larger one. I'm keeping this
really, really simple. So I'm just literally going in, putting the edge of the potato, sorry, the whole of the potato. Just make sure it's covered. You can see that there, and I am really not
overthinking this. Let's just go for it. Now, you can go off
the edge if you like, because that brings
an extra bit of um Interest is the word I'm looking for when
it goes off like that. Don't worry about,
you know, these bits. This is playful printing. Really is playful printing. And I'm going to
print all the way across with that shape. So that I've got the front
and the back covered. God, this is fun.
This is really I can't tell you how much
this is making me smile. It's an absolute
joy just to allow yourself to be this
playful and free. So let's take one of these
little semicircles now. As you can see, I've, you know, not done a great
big plan about this. It's just going with the floor with it and
just, yeah, playing. Absolutely playing. Wow, look. Do a bit of overlapping
if you want to. Don't overthink it. In fact, they look a little bit like lemons,
don't they, those? Don't overthink this at
all. Keep it playful. It's probably useful
to have, you know, different vegetables for the different colours
rather than trying to use one vegetable to mix, you know, to get them all. Let's see what happens now. Oh, this is like a summer. I mean, how much fun is that? That is just just lovely. Turn it round a bit,
so you're not getting the same shape all
the way through. You know, you're not going in the same direction.
I mean, whoops. A voila. I love it.
I just love it. Let's give one more probably turn that
round, give that there. And that's it. That
is the first cover. Now, when that's
dry, knowing me, I'll go in and do a little bit more fiddling with
it and faffing with it and putting some
little extra pieces in little extra mark making, perhaps with my Posca pens. Oh, I just want
another one up there. L. Let's have a yellow. Let's have a yellow right there. But you don't have to. You know, that literally can be it.
It can be that simple. For this next one, I decided
that I would go with a pear. So I've chopped
the pear in half, and I'm going to go
in with the orange. Just making sure that
I've got paint on it all. If you find that you
can't pick the paint up, you can always, you know, use a little brush if you
need to to just paint on any bit that's not picked the paint up from your
directly from your palette. I'm going to put that
right in the middle there. That's just delightful. I love the little star
bit in the middle. See what different
results you can get with this. It's lovely. And of course, it has that
gorgeous printed feel to it, which you can only get
when you're printing. You know, you can't get
that with painting, you know, with a painting feel. Now, am I going to go in with, let's put some
little semicircular lemons in there as well. One the lock. Do that again, just see if I can get it a
bit sharper. There we go. A little bit coming off here. A little bit down
there. And a bit there. And that is the second
one done as well. Now, I will go into this with a little bit more detail,
just because I can. In fact, what I could even
do now before I do that is get I'm getting a
little cotton bud, and I'm just going to dip
that into that red paint. And create some dots
all the way around it. I mean, this is such a
quick, fun, easy process. You can do loads of
these in one go. You know, as long as
you've got your paint on your palette, you're
good to go, aren't you? So there's a second
one created now. So we'll put that with the
first one ready to dry. For the last one, what
I've done here is I've actually chopped this
carrot off at an angle, which is going to give me
that lovely oval shape. And I'm going to treat
this slightly differently. But I think we'll just go
into the red to start with. I'm probably going
to allow the colors to mix a little bit here. Now you can see there
that I can't just quite pick up that red paint there. So let's use my brush to get a bit more on it.
There lock, there we go. Oops. And I'm going
to sort of do a pattern going across
the middle there. Now, you can see there that as I've not dipped it
back in the paint, that's gone less saturated, which is absolutely fine
because what I want to do now is pick up this yellow, which, of course, will create
a slightly different look I've still got a little bit
of red on that carat there. And then I'm going
to do an overlap. Me a bit more on that one. And actually, I really like that color so I'm going
to turn that around and stick with that color
rather than, No, let's not. Let's just go with the orange. Otherwise, it gets a bit as if we're overthinking
this, doesn't it? Yeah, that's the
direction I went in. A bit more on there. Okay. I'm really, really liking that. So that would end up being
probably the front of the book there. But let's see. I'm not going to add any
more to that at all now. I think that's got enough
paint on it as it were. But I can, of course, go in with some extra detail
once that's dry. So there we've got the
three printed papers there, the different sizes. And obviously, I will put them to one side to let them dry now and then go back into them with a little
bit of finer detail. And
6. Adding Extra Marks: These are all nicely dry now, and I've decided which way
round I want them to go. So that one's going to
be opening that way, and that one will
be opened that way. Obviously, you can, you know, turn it over and decide
which you want to be the back and which you
want to be the front. So those are the choices
that I've made there. That one just had a wee bit
of a smudge round there as it was part of that print there. So I'm going to leave
that to the back, and that will become the front. Now, before we put
any of the pages in, that's when it's
at this stage here when I'm going to add
a wee bit more detail. But I just thought I'd show
you these as they look now, obviously, before we put
the middle pages in. Now, what might happen
with some of yours as well is that you might
get a little bit of paint around the edges. You know, once you've been
printing, you can see here. But there's a really
quick fix for that. You can just see very closely in there in one of
the other books I've made. You can just see it underneath. But I'll show you that quick fix once
we get to that stage. So let's just take a look
at different options for adding one or two
more marks onto them. So this book here, what I've done here
is I've created this with a grid by using a grid by using washy tape across the paper and then painting all
the way across it. But then what I've gone
in and done is I've gone and used these really
fine felt tip pens. These little stdler ones. I've got Sadler and Lyra pens. And I've just added these
lovely little lines here, you know, in what would
have been the white gaps. Then you can see here, I've also added gold
posca pen as well, just to add a few more marks. I've done the same with
this one here as well. With both of these, in fact, I've used a gold posca pen. Just around some of the edges here and around some
of the edges there. And then I've used a
black fine liner as well. So they were quite simple,
using pens with those. With this one here, I've
used the Posca pens again to add these white dots
and picking out, you know, different shapes and
another fine liner to emphasize some of
the leaf shapes there, and then a thicker pen just to add this kind of decoration
in here as well. So it doesn't take much just to elevate it a
little bit further. One has been a bit different
because what I did here was, again, working on
that grid work, you can see with the white
lines that are left. What I went in and
did then was I just used these neo colors, just choosing, you
know, a couple of different colors to go in and add extra details
on them as well. Now, the backgrounds
for this were a lot plainer than obviously the backgrounds that
we've done with printing. And these were all done. All of these were done with acrylic paints,
and a paint brush. So what I want to do
with these is to keep it really simple because I
like the freshness of them. So I don't want to really
add too much else to it. So all I'm going to use
is a white posca pen, and this is a three
size and a micron pen, a black fine liners,
and this is 0.5. I'm just going to do
some extra detail with these just to give it one
more layer of interest. Starting with this one here, I'm going to take the Posca pen, and I know it was a pear, but I quite like
the idea of just bringing in some sort
of segments to here. And what I'm doing is
I'm literally just following where that little
star was in the middle. And using that as a
little bit of a guide. Now, that needs a
wee bit more whoops, white coming through it there. I'll let those dry and then go over them again.
That's better. And it just brings
that extra layer of interest into your design. I'll go over that in a
minute when they've tried. So I'll do the same
with all of them. It just gives it all that
wee bit more detail. I could have left
it exactly as it was because I thought they
were quite sweet as they were. I think this just adds a
little extra something to it. So, in a way, I've been guided by how the printing
itself has turned out without any formal
preconceived plan of how I wanted it to be. But it was looking very summary and it sort of had a bit
of a fruit feel to it. So that's really what I'm just
emphasizing a little bit. So I'm going to do exactly
the same with this only with the black fine liner. Keeping that segment
feel repeated. So it's like a
repeating pattern. And really, that's about it. You know, you're just creating patterns with these
little printing blocks. And that's what they
are, of course. They are blocks to print with. They just happen
to be made out of natural materials rather than
rubber or silicon or wood. And then the final thing, I'm just going to put
little black dots into those red dots that are created with the
little cotton bud. We'll just put some
in those as well, L to give them a center. Okay. And that's as far as I
want to go with that one. So let's have a look at
the A five size now. I'll do something a
little bit different. I'm going to use the
black fine liner again. But this time, I'm just
going to emphasize the actual shape inside
the lines itself. And where it crosses
over another color, I'm going to give that
the dominant shape. So that it looks as if it's on top of the shape underneath it. So it's just another
way of adding some marks a little bit different to what I've
done on the last one, but creating a wee bit
more interest again, and it creates a
little bit of kind of depth because some of
the shapes look as if they're going behind
some of the other shapes. So it makes it a wee bit more
three D then rather than just that flat two D
design before you put anything on it. So simple. I like the word kiss. KISS, keep it super simple. That's a good one to remember. Keep it super simple. I think I'm going to do
a similar thing with the red shapes as well by just following the outline of those like I've done
with the semicircles. Again, because we've got
this overlapping going on, it suggests, one element
is behind another. So it's a very different
way to approach it than how I did the first one. Same colors. Similar shapes, but a slightly
different approach, and then therefore, a
slightly different effect. Equally as nice.
The important thing here really is to not
overthink it all, but to just, you know, allow yourself I know
I keep saying this, allow yourself to
be playful with it. You know, don't be too
attached to the outcome of it. Just see what's
going to come when you allow yourself to just, you know, sort of follow
the lines a little bit. And be playful. You know, when we're kids, we don't
overthink anything. We just get on with it. And
that's what I really invite you to do with this
lovely little process to just be a kid again. Be a kid again. Enjoy
playing with the colors, and more than anything, enjoy playing with the fruit
and the vegetable shapes. And that is as much as I want
to do with that as well. That's plenty. I don't need
to complicate that anymore. And then finally with this, I'm really enjoying, you know, there's a lot of light
and white space in this. So I don't want to
overfill this at all. So I'm going to literally
go in with just a few dots in the sort of interior
spaces of these here. Again, it just adds a
wee bit more interest, creating a little bit of
pattern with your mark making. Brings in a different
color and tone. I think that's rather
nice, actually. But because I'm keeping
the dots small, I'm not losing that freshness. Turn it that way, perhaps be able to do it a
bit easier that way. I'm not losing the freshness of the white showing through. That's still showing through and keeping it all pretty fresh. So that's just
something to be aware of when you're printing
yours as well, because you will
get these spaces probably where the paint didn't quite meet the paper. And this is one that you can add a bit of
interest without, you know, overwhelming it, if that makes sense. Again, dots are such a simple
way to do some mark making, particularly if you end
up with a big space like this where there was quite
a lot of white there. That's really emphasized
now that shape there, which could have got lost, you know, into this
white background here. Same here, look, it's kind of the white bleeding
into the white background. So I can just emphasize that lovely shape with the
marks there a bit more. Careful not to smudge
what you've done. You know, just be
mindful of where you're putting your fingers
to hold down the paper's edge as it were, to keep it flat enough
for you to work on. And as I said earlier, you know, you don't have to
do any of this. You can just leave it exactly as it was when you printed it. The choice is yours. It's just whatever your
preference is really. But being a pattern
girl that I am, I always like to add a little
bit of extra something. I'm just going to say
this one more time. The key to any of this is
to just not overthink it. Just go with the floor with it, have fun with it, as I
say, be a child again. And that's as far as I'm
going to take that one. So we need to look at the next stage now where we actually turn these lovely covers into books. I've turned out, you can see the correlation
between the colors and the white and the black, and yet they are quite
different results on there.
7. First Method (simplest): I'm going to show you three
different ways to attach your papers inside
these notebooks and your little journal here. And I'm going to start
off with this one. I'm just going to remind
you here about kiss. Keep it super simple. So you're going to
need for this size, you're going to need two sheets of AFO copy paper,
printing paper. And I've put them both
together like that. At this stage, we don't have to worry about being too accurate because it all gets
trimmed at the very end. So if your sheets are not
exactly the same size, it really doesn't matter. So I folded that in half. I'm going to cut up
the middle of it. You know, I could get very perfectionist about this and get my blade out and my cutting mat and everything
and do it perfectly, but I'd still have to
trim it at the end. So it seems a bit of a
waste of time, really. I'm folding that again. So I folded it once, I
folded it twice. I'm cutting that
again up the middle, just hanging on
to all the pieces at the same time
there, as you can see. So now I've ended up with four smaller pieces there and
four smaller pieces there. So eight in total. And then I'm going
to fold them in half again. Use my bone folder. Remember, you can use
the back of a spoon, the curved back of a spoon if you don't have a bone folder. And that now is the
inside of my book. Now, when I put
that inside there, you can see
straightaway that it's bigger than the
actual outer cover. So that's where we do
the trimming at the end. Because I've got some
paint on the edges here, some of that will
get trimmed off, but not all of it
will get trimmed off. So I'm going to
take a glue stick, and I'm going to take one
of these pieces of paper, and I'm going to glue
it to the inside. Just get some more paper on it. Put that under there.
That's better. I'm going to glue it all
around the edge in the middle. And I'm going to
stick. Make sure it's right at the
edges, actually. Otherwise, it'll peel away. I'm going to stick one
piece to there like that so that it
covers up most of that middle and then
just flatten it down. I like to get a tissue
just to wipe down the edges so that if there's
any excess glue there, most of it's come off. So that's my cover up so we can see a bit
of glue just there look. That's my outer cover. With those now put in place. Now, this really is the
very simplest way to do it, and that's with seller tape. So, as I've mentioned a
couple of times before, this isn't a course about, you know, proper bookbinding. It's about having some fun, doing some printing
with the fruit and vegetables and making
yourselves some very practical little notebooks. So I'm going to
tap, I sella tape. And I'm going to
literally just put that down the middle there so that it doesn't
go over the edges. Could have done with
that being a wee bit longer, that's okay. And that's just meeting
the edge there. And basically, that's what
you do with each piece. So you just put the next piece
into the middle like that. Make sure it's a
nice sharp crease. And then sell a tape
that one in as well. Now, you know, these
are little notebooks for you to just write your shopping listing or I don't know, whatever
you'd like, really. Jot down a few ideas. You know, you're not
putting these in an exhibition to be judged
or anything like that. So they really, really do
not have to be perfect. In fact, try your hardest
not to make them perfect. Try your hardest to let go
of the need for perfection. So here I am again. I've made those a wee bit
longer this time, and I'm just that's better. I'm trimming off the
edge there like that. I'm opening the fold again. And I'm putting in the next one. Putting the fold to the
middle of that fold. Just make that nice and sharp. So I know where it's sitting. That's good. Sell
the tape again. So you can see where I'm
going with this, can't you? Now, you can also see
their look that that's not the same size as the
one underneath it. And again, this is where
the trimming comes in. So, don't be worrying
if you think, Oh, I've done something wrong there because they're
not the right size. We'll all turn out in
the end, I promise. So then I'm opening
that up again. Like that. Sharpening that one, putting that in there. Like so. Trimming that off. But in that, I've got two more to go in here. I mean, basically, you can put as many pages in
as you like with this method here because you just keep elllotaping
all the time, so you can make it as thick
or as thin as you like. I like to paint furniture, and we have a wonderful resource here where I live in
the town that I live, where it's, you know, like, really good for
upcycling furniture. So I have a little notebook like this where I have
measurements of everything. When I go down and see what
they might have, you know, ready for upcycling, ready for giving a nice paint effect, then I usually have my
tape measure with me and a little notebook
so that I can take all the measurements in take
all the measurements down. So they're quite handy these
for all sorts of things. Now, that's the last piece
that's going in there. Just getting that silla
tip down the middle. Chopping off the edges. And, of course, what we need
to do now is to do the same. Well, you don't have to do it. You can either
leave that as it is because they're all
securely in or you can just give it a wee
bit more sellotape down each side. It's
entirely up to you. You don't need to because
they're actually fine. So we're sticking here
with this simple method. And what I'm going to do
here is I'm opening it at the middle now and just
flattening it a little bit again. And for those of you that
don't have a cutting mat and, you know, exact knife
or a craft knife, you can simply use scissors. Again, this is not going to
be an absolutely perfect, you know, bound book. It's going to be your
little fun expression that you've just had
a lot of fun making. So that's trimmed that
with a pair of scissors. So you'll notice there that
I'm doing the long edge first rather than I'm doing the top
and the bottom edges first. That's perhaps an
easier way to say it. And I'm just taking
my scissors and using the outer cover as a
guide for where to cut. Now, that's gone over. That's
just left a few there, so I'm going to go back in there and just cut that a bit better. So that's trimmed the top
and the bottom pretty well. Now, I'm going to trim these sides separately rather than all in one go
as it's folded. So again, I'm going
to use the edge of the outer cover there as my guide for doing
the trimming there. Now, when it closes, let's do that side first and then I'll be able to
explain it a bit better. You can see that when it
closes, the middle comes out. Can you see what
I'm saying there? So let's come a bit
closer to camera. So it looks there
along this edge here that it's all
trimmed very nicely. But when you start to close the book, the inside comes out. So keeping it partially
folded like that, I'm going to use
that edge again. As a guide to just trim
these inner pages. I hope this is all
making sense to you. And if it isn't, please do
message me to let me know. So I'm going to do the
same with that again, although I'd already
trimmed it once, it's coming out, a
little up there, so I'm going to
take those scissors and just give it a further
trim up there like that. And that is your
little notebook made. Now, again, I can still see that there's a little
bit of paper coming out, so let's give that a final trim. But again, don't get too, I might even have to go in there and just trim that as it is. I mean, if I was doing this with a knife
and a cutting mat, then obviously I'd get those a lot neater
and a lot sharper. But, you know, to say that that's been done with sellotape, glue and scissors, I think
that's really, really sweet. Now, I'll just show
you another one. I didn't print this obviously
with vegetables and fruits, but I just wanted to
show you as an example. This was a little project that I did with some elderly folks, and we were looking at
things that we loved. And it's exactly
the same principle. So it's just got sellotape. Obviously, it's a
different size. But each page is put in
with seller tape again. And this was just a
lovely little way of scrapbooking the things
that they loved. And this is obviously mine. I like to print and things. Sell a tape at each end. So you can see how effective
it can be, you know, for a really simple little
scrapbook or a notebook. So let's take a look now at the second method that
I'm going to show you.
8. Second Method (easiest): I'm going to show you
the method that I'm using for the other
little notebook size. So we'll need the same
amount of paper again, two sheets of A four
printing paper, and we're just going to do
exactly the same again, fold it in half and cut it. Like we did with the last one. I mean, obviously,
you can do it with your cutting mat and a
ruler if you wanted to. But as I said earlier, we're trimming the edges
at the end anyway, so it just saves you the faff of having
to get all that out and, you know, get it on your
workspace as it were. So then I've got
four sheets again, which I'm going to fold over. Make a crease, go to the
middle and cut that again. Just be careful
with your scissors when you get further
up near your fingers. Don't be nipping your
fingers with your scissors. So then I've got eight pieces. Going to fold them
over one more time. I get my bone folder
onto this one. So make it as sharp
a crease as I can. And here, put that in there. I've decided that
that's the front. You can see that the paper is larger than the
outer cover again. So what I'm going to do here
now is take a couple of paper clips and just making sure that that's all as
central as I can get that the folds of the inner papers are meeting up with the
fold of the outer cover, and I'm just going to Pop
paper clip on that side, turn it round and
pop a paper clip on that side just to keep them,
you know, all in place. Now, this is a fantastic method. It's a stapler, and it's
a really long stapler. So you can get, you know, quite large books into here, and this is by far the
easiest method to do it. And obviously, you know, you might not have
a long arm staple. In fact, chances
are you probably don't can't really do it
with a small stapler. They're not big
enough, but I wanted to show you this method anyway. Because if, like me, you end up falling in love
with making these notebooks, then it's actually worth
investing in one of these, and you can get them
from the big retailer that we all know
about wherever you are in the world, very easily. Now, the thing here, I say, I'm going to put two
staples in one here, one here. I'm not
going to measure it. I'm just going to use it by eye. If you feel that it's
better for you to actually measure it and put a little mark there, then please do so. Where that spine is, that's where you want
the staples to go. So I'm going to line that up making sure I'm going
to stand up for this, making sure that
this bit here is parallel to the edge of
your stapler and making sure that the bottom
of your stapler is in alignment with the actual
spine of your book. So once you're happy that you've got it all
in the right place, and it's straight, then it's a quick press
down. Turn it round. Do exactly the same
on the other side. Now, this takes a
little bit of practice, and sometimes what
you might notice is that you've actually stapled it just outside of
the spine itself. And so it doesn't when you go to the middle and you
start opening the pages, they don't actually open
just quite as well. But that just takes practice. So again, don't
worry about that. Now on this one here, I have got a little bit
of paint around the edge, but most of that's going
to get trimmed off, so I'm not going to do the method whereby we
stick the first and the last page to the covers because they're
clean enough in this case, so I'm just going to leave
them exactly as they are. I am going to trim
this with a knife onto my cutting mat with my big ruler here because
that will give me a really, really super neat finish. So what I'm going to
do here, and again, I find it easier to
do it standing up, is I'm going to take the
spine edge as my measurement. So I'm going to line
that up that spine, obviously with one of the lines here so that
I'm getting it all, as a really good rectangle. And you've got ten pieces, ten layers of paper
to get through there. So very carefully
and very patiently, I'm cutting from the spine
end down through each layer. Until I've got it all off. There we go. Now the
reason that we do it from the spine end is
because if you don't, you end up with
little tufty bits at the spine if you do
it the other way around. So rather than doing
it that way like that, what I'm going to do is turn it over and do it from the spine
again on the other side. So I've got a really nice
sharp edge, of course, here now, along here
and along there. So it's even easier
now for me to line up and make sure that I'm
getting it pretty straight. That's good enough for me. It takes a bit of patience, just getting through
all those layers, but it's worth being patient because the
result that you'll get will be a really nice
sharp edge, as you can see. Now, that's the
front of my book, so I'm going to do the
cutting from the front. And again, lining that up. You know, it is worth having these things if you're interested in doing
in making books, whether they be, you know, very high end proper bookbinding or whether you're doing it a
bit more for fun like I do. It's still worth investing in a couple of things
a cutting mat, a knife, a ruler edge, and a long arm stapler. But like I showed you
in the first one, if you don't have those things, you can still make
something that's really sweet with your scissors. And there we have it. Another little note book, you see how quick and
easy they are to make. So I'll show you now
the third method for making the larger one. We're actually going to be
using thread and a needle.
9. Third Method (slightly fiddly): Now, I have to apologize
for this bit here because I managed to turn my
microphone off by accident, so I'm just going
to do a voice over and talk you through here
what it is that I'm doing. So I'm getting to the spine here of This is the
larger notebook. And basically, what
I'm going to do is use my ruler to measure
out four spaces. So I'm going in from
each end at roughly 2.5 centimeters is and
making two little dots, 2.5 centimeters in
and then adding a couple more dots into
the center of that spine and marking it with a pencil because this is where
we're then going to be threading the
embroidery thread through with the darning needle. But before we do that,
we need, obviously, to make the inners again, and it's exactly
the same principle as with the smaller books. Only this time, we're
going to be using four sheets of A
four instead of two. So here we go and
fold it again in two, use the scissors to cut it. You know, making sure
that you really, really get your hands and your fingers out of the way when you get to that end of it. Once you've cut the first half, fold it because that then is actually the right
size for your journal. Fold the second bit that
you've just cut off, the second half And then join
those two halves together. You don't need to do any
more cutting, of course, because you've just now
folded it to the right size. It's worth, you know, using your bone folder or
your spoon at this point, just to make that fold
nice and deep and sharp. As before, you're going
to position that inside your outer cover and either using paper clips
or some little clamps, whatever you've got, then
just put a couple on to keep the outer cover in place
with your inner papers. It just helps them when you're
going to make the holes in them to make sure that your
papers all stay in one place. Now, for this, I'm going to use a bradle which is basically, you know, an
instrument like this with a very sharp point on it. If you were doing
proper bookbinding, you would have a much
slimmer version of this. And if you don't have a bradle, you can always use
the darning needle, or even a sharp nail
to make the holes. So where you've
marked it, basically, you can see I'm actually going through onto my
cutting mat there. If you don't have a cutting mat, just make sure that
you don't damage your tabletop or whatever your worktop is that
you're working on. And you want to make
sure that that breadh or your nail or your
darning needle is coming right through to the other side so that your holes are going
all the way through. I'm now taking a piece of embroidery thread,
and basically, I'm going to cut it
to the length of roughly twice as long as
the actual journal cover. Gonna thread that then
onto my darning needle. I'm not going to put a
knot in it because I want to be able to leave
it loose at both ends. So we start off by
turning it over so that we've got the inside
of the journal. And if we think of that as
being number one, two, three, and four holes, we're going to do the first one
through number two. We're going to put the darning
needle from the inside to the outside like this
through number two hole. Then we're going
to turn it over. And from the back, we're
going to go through what we've just described as
the number one hole. So basically, from the
back cover to the inside, you're pulling that up
from the number one hole. You've still got that loose
thread on the inside, but you've got a lovely
first thread on the outside. So now we're going
to take that thread, and we're going to
put it back down from the inside to the outside, down the number two hole. And pull that tightish then we're going to
go from the back down through the
number three hole, pull it up, or maybe we're not. Just get it on there again. We're going to go down through
the number three hole, pull it up on the inside, so that it comes up on
the number three hole, and then from the inside, down the number four hole so that it comes
out of the back. And then we're going
to push that one back through the
number three hole. So that means then that down
the spine on the outside, you've got three sections then. And this is where it gets
a little bit fiddly. You take the clamps off
and take your needle off. And basically, you are
now just going to do a double knot to tie those
two loose ends together. And this is the
fiddliest part of it. It's the only fiddly
part, really. So again, might just
take a little bit of practice getting that
knot as tight as you can. Once you've got that knot
as tight as you can, then all you need to do then
is to get your scissors and cut off the two ends. Okay. Now, obviously, the size of your holes are
going to depend on what it is that
you use to make them. And you can see here that I'm just pressing
those holes down a little bit because my brada
made quite large holes. If you're going to
use a darning needle or a smaller nail, then you'll get smaller
hose, obviously. So that's now ready to
do the trimming again. And I am going to use my cutting mat and my
knife and my ruler again, just like I did with the other with the last
smaller one that I did. So I'm going to just
do that and then bring you back into camera
once I've cut that. So it's now cut, and when I
open it up on the first page, I can see that it's got paint, you know, on the inside cover. So what I'm going to do
here is take a glue stick, and I'm going to glue all over that first cover and a little
bit down the spine as well. Now, the beauty of
doing this is that not only does it cover the
paint that's on the inside, but it actually puts a
little bit of glue on those stitches and helps them to stay in place
a bit easier as well. So I'm going to
take the first page and just literally fold it over onto that inside cover and from the spine
outwards, just press down. Take my tissue again. Get off any excess glue. And then that covers
up any paint that's on the inside and helps to
stabilize those stitches. Just go around the
edges again if you need to if you've got a little
bit of excess glue. So now I'm going to do
exactly the same at the back, only I've turned
it round because it's just easy for
me being right handed down the spine again, all the way around the edges, and all in the middle. Make sure you've got enough
glue going down those edges, otherwise it will peel away, as I said earlier with one of
the other little notebooks. From the spine again, can use your tissue if you want
to press that down. That keeps it nice and clean. Wipes off any excess
glue around the edges. And there you've got
another smart notebook, journal, whatever you
want to use it for. The great advantage
of making journals this size is that they're
not too overwhelming. You know, sometimes
you start a journal, and maybe you don't finish it, like if you're anything like me, and so you end up with
all these notebooks that have lots of empty
pages at the back of them. But because you've started
journaling in them, you don't then know what else
to do in the back of them. So making one to
the size that you want just makes it so much
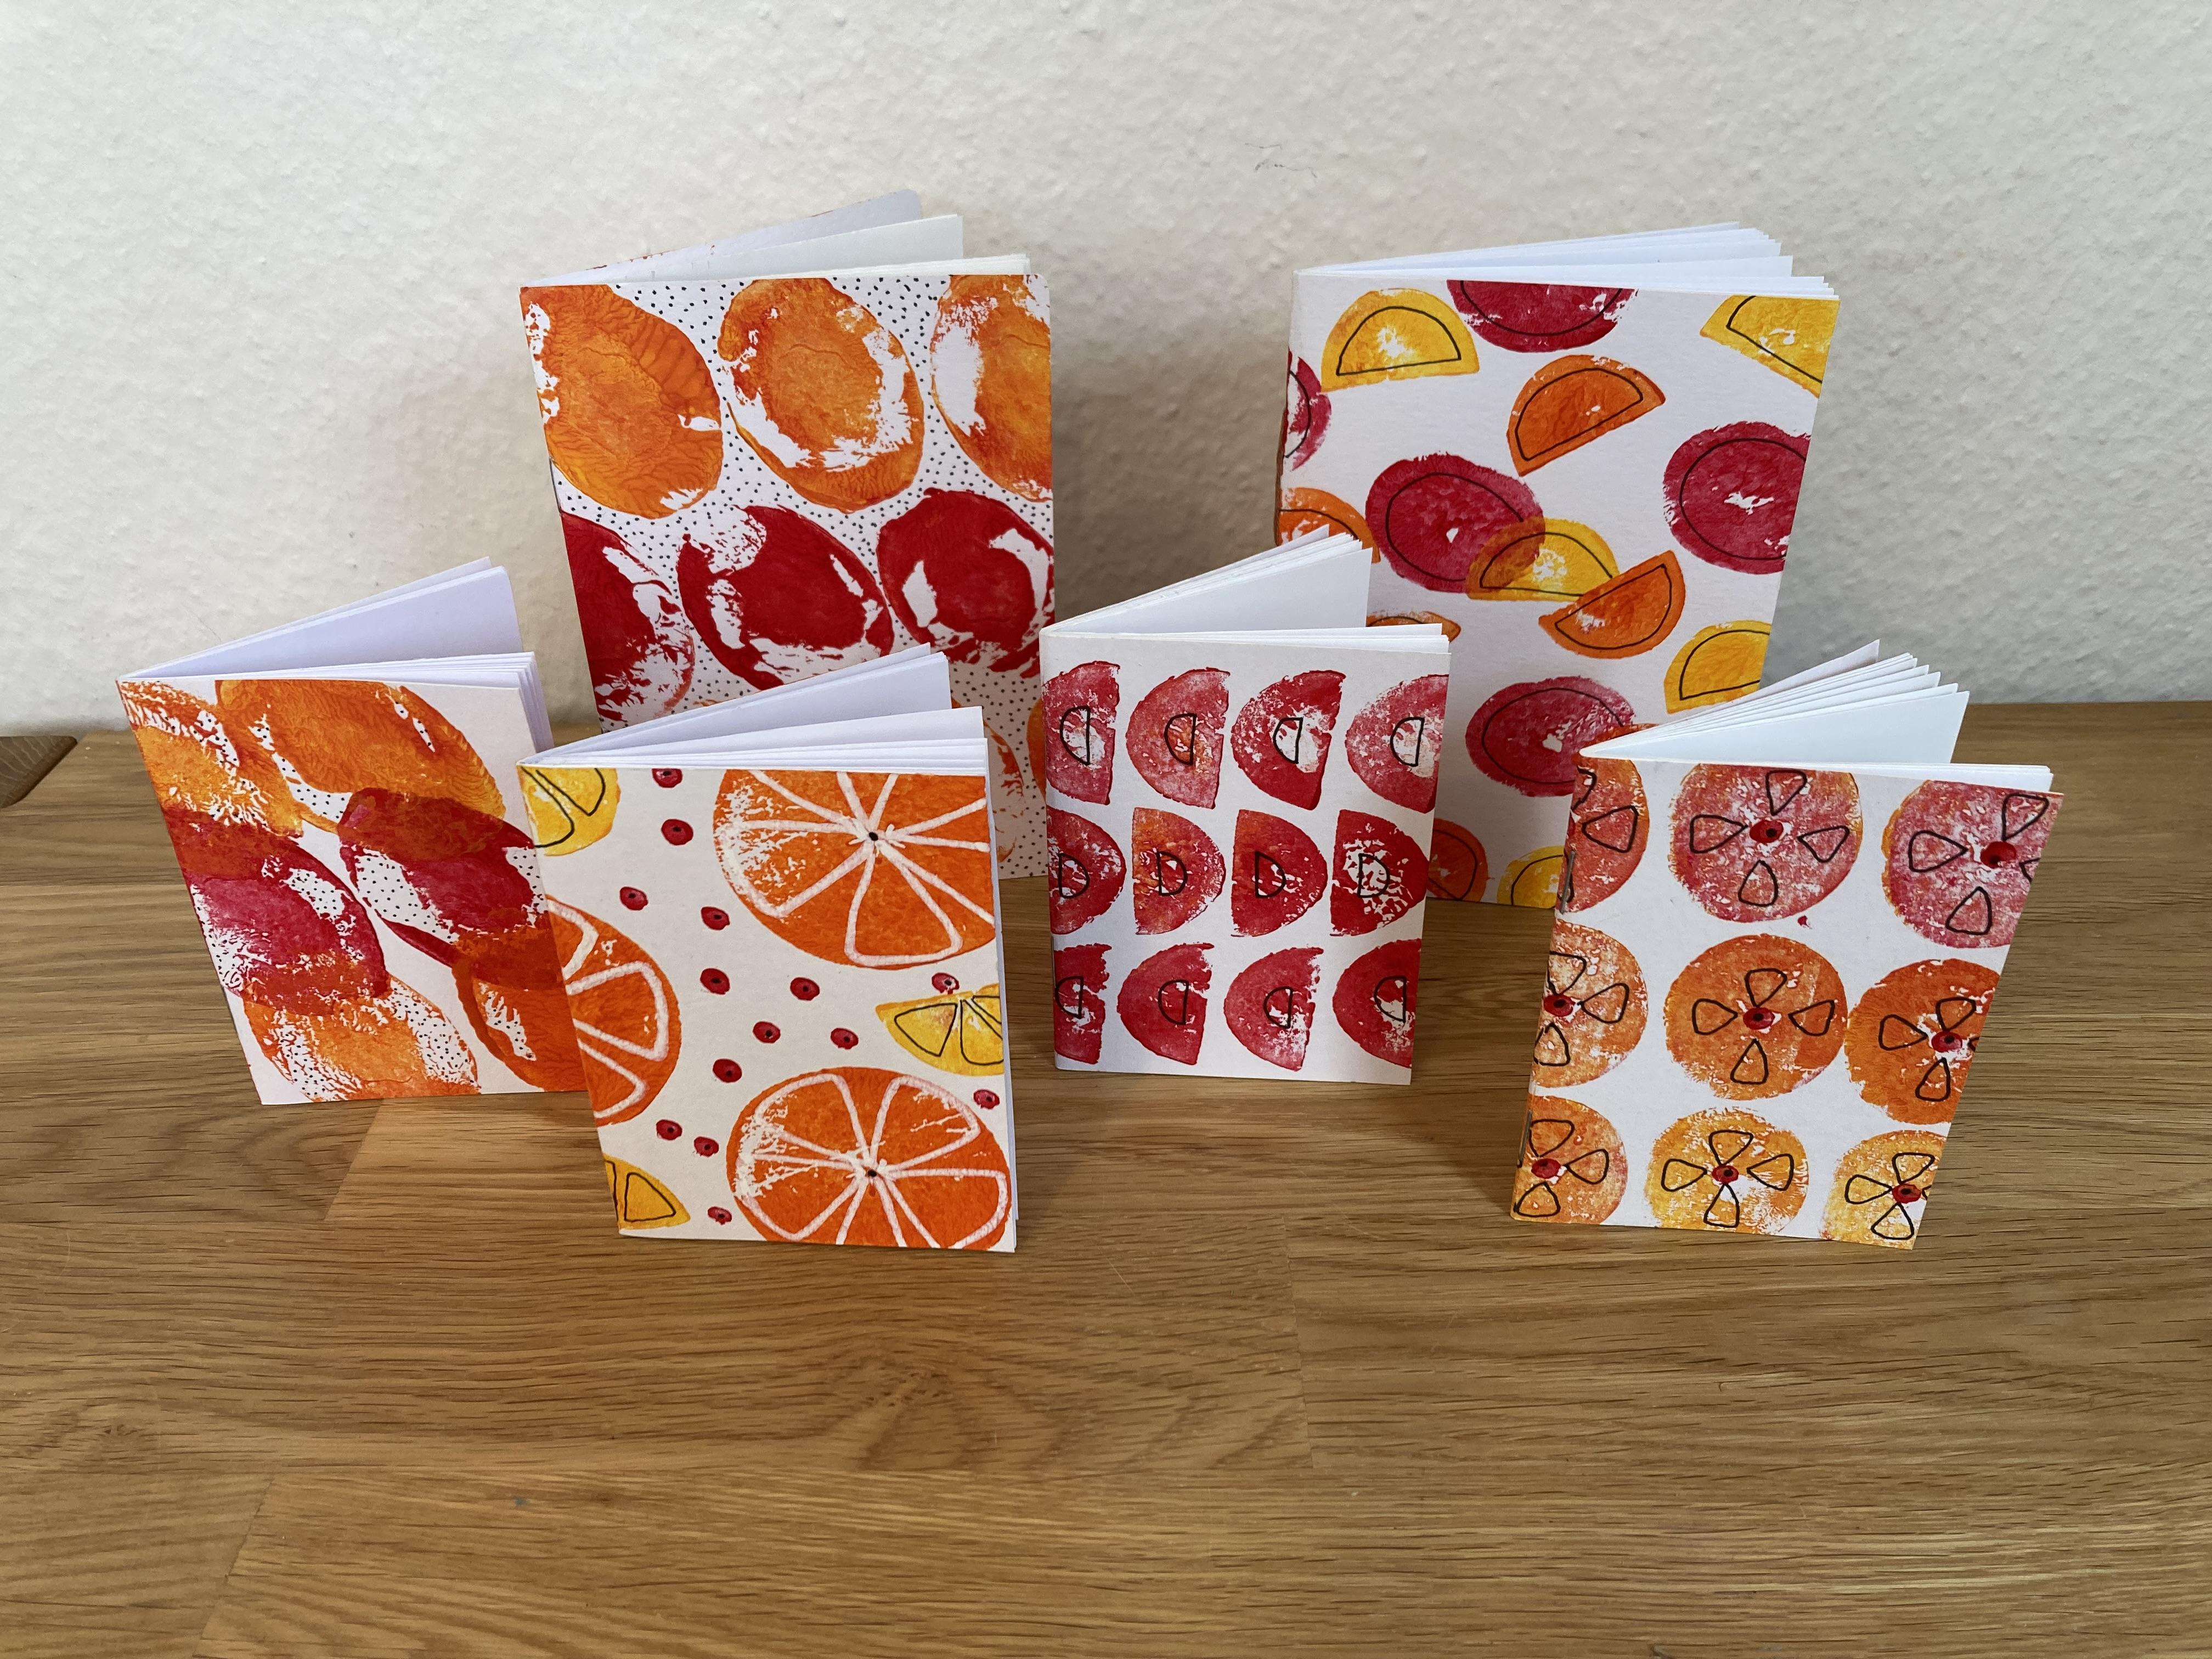
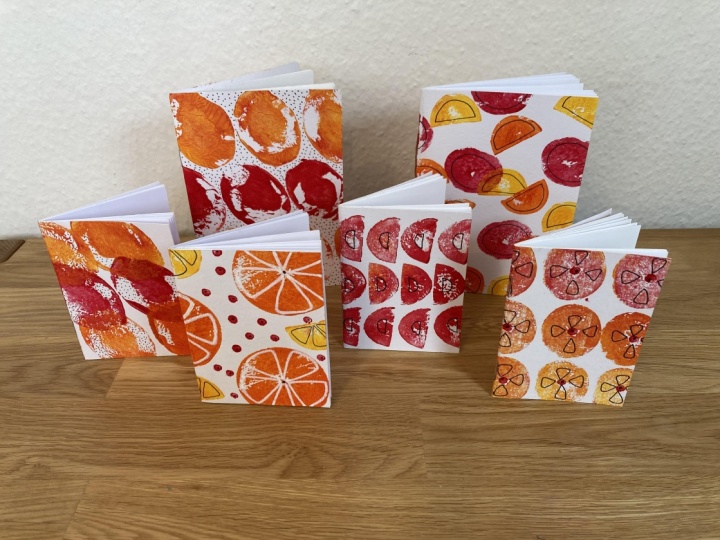
easier to actually fill it. Here are the journals and the notebooks that you've
just seen me make. And I ended up with quite a lot of paint still left
on my palette, so I decided that as the
vegetables were already there, I would actually make some more. So here you can see, I've made a larger
notebook that's of a similar kind of design
with that one there. I made a smaller
notebook that sort of echoed the segment idea that
I did on that one there. And then I made another
small notebook that kind of echoed the little
semicircular shapes that I had made
with the potatoes.
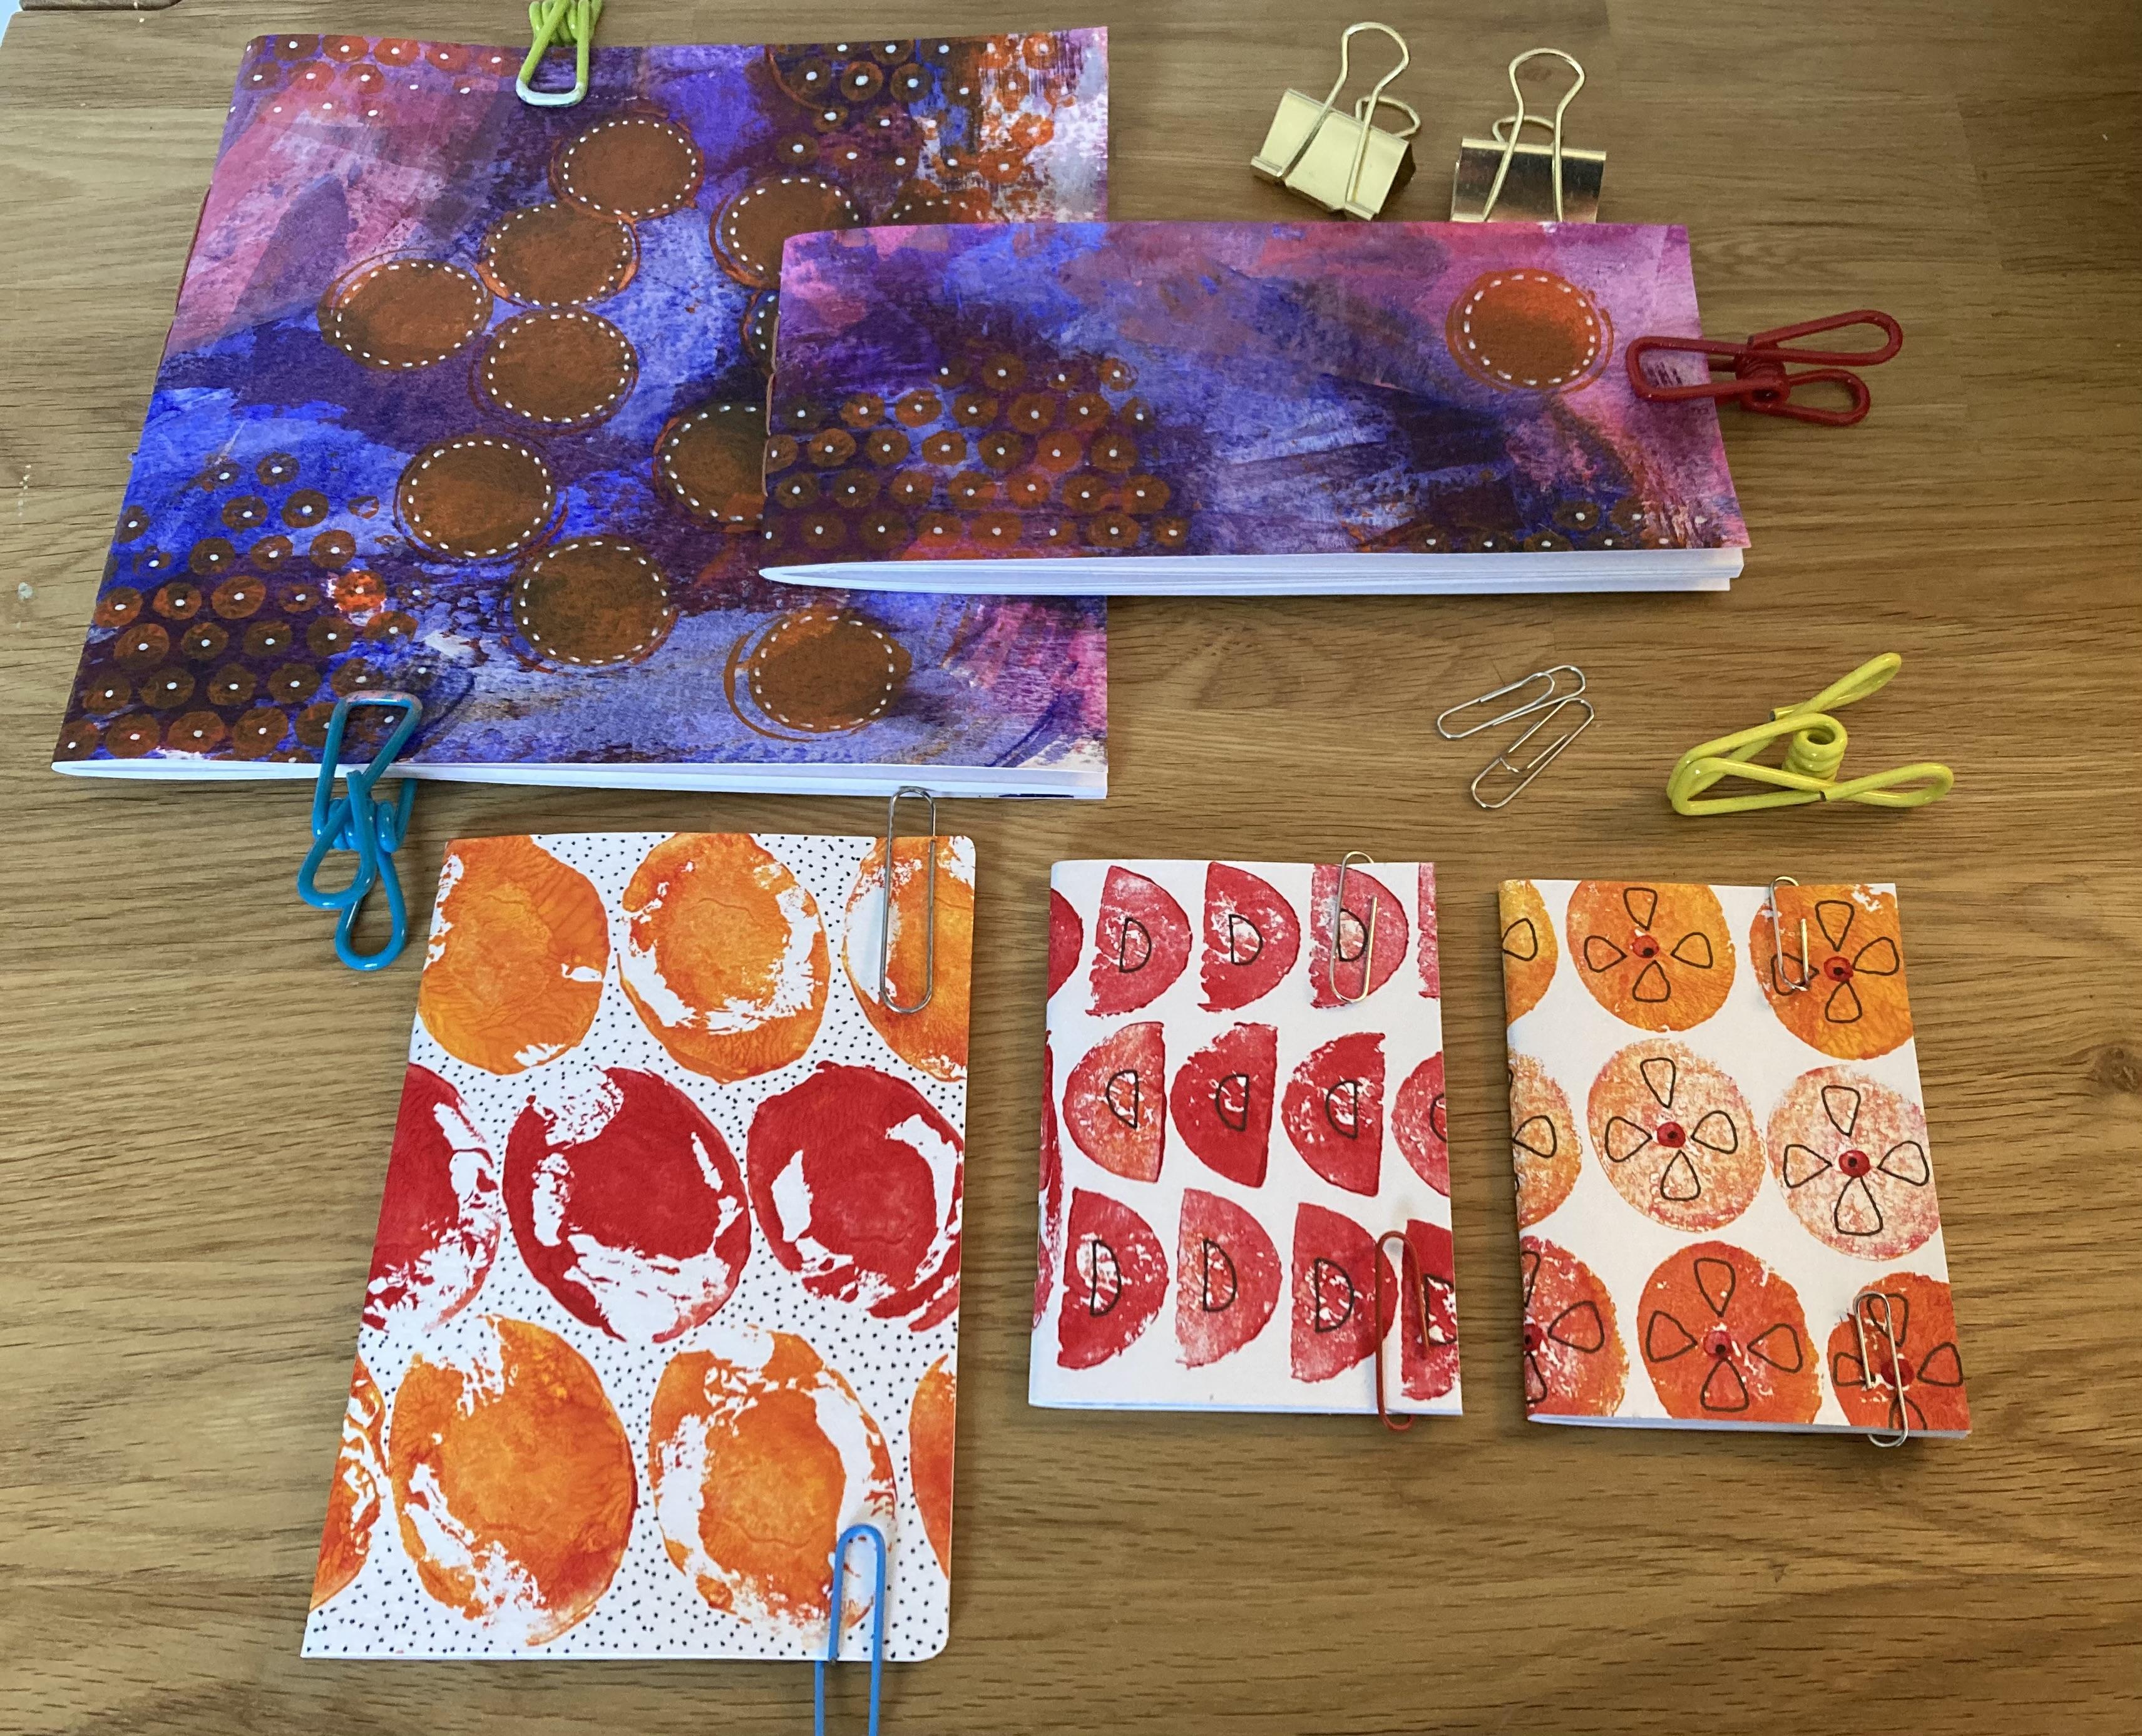
10. Final Thoughts…: I just wanted to
show you these as a last thing here because
I've made this one here. It's exactly the same principle as I've just been showing
you through the class. This one is actually
a sketchbook and it's made with sketchbook paper,
so I can paint in this. And I've used a threading method here because it would be quite hard to get a staple through this paper,
which is so thick. And the beauty of making
your own sketchbook is that, again, a bit like a journal, you can decide on the size. So instead of having a really thick sketchbook
that, you know, it takes your ages to fill, Um, you've got one
that's a smaller size. You know, it's got
less pages in it, and you could maybe then
use this for a theme of some sort so that
you know that you're actually just using one theme
in a smaller sketchbook, and you actually end up
filling all the pages with it. And here I've got one. I used obviously the
same paper here. In fact, I think that
came from there. I did. Same paper, A three paper that was cut down. And I made this size
of a sketchbook. And the theme that's going to be in this
one is going to be landscapes because it
just lends itself, the shape of it
just lends itself. Plenty of ideas there, you know, lots of choices, different methods for you to choose as to how
you're going to put your inners into your outers, how you're going to then, um, cut them around the edge, whether you're
going to use knife, whether you're going
to use scissors, whether you're going to
use stitching method, the sellotape method,
or the stapler method. And, of course, whatever
shapes you decide to use with your potatoes or your vegetables or who knows what
vegetables you might come up with or what fruit
you might come up with. You know, the world's
your oyster, really, although I wouldn't use an
oyster, it'd be a bit messy. But, you know, you know
what I'm saying here. You know, really, it's
just about having some fun and experimenting and seeing what you
can come up with. I do hope you've enjoyed
taking this class. You know, the techniques that you'll
have learned in this, you can actually apply them
to other things as well. I mean, it's a great way to
actually create pattern. So if you're a surface
pattern designer, then, you know, this is a
really good way to be able to create
repetitive patterns. And, of course, you can also use this technique for
printing on fabric, which then, of course, you know, you can then use for cushions, making cushions or making bags, whatever your imagination
can come up with. I would really, really love to see what you do come up with. And if you'd like
to leave me either, you know, a little snippet, either partway through
the process of what you've been doing or even show me the
finished object, then I would love for
you to upload it into the projects section so that I can have a
look at it in there. And if you'd like to leave me a review as well for the class, I would really appreciate that. And that helps other people also to decide whether or not they want to take the class as well, as well as, you
know, being able to see what's in the
projects as well. So that would be
great. In the meantime until I see you in
the next class, please take care of yourselves, be gentle with yourselves, and I'm sending you all Bit ove. Bye for now.
 Dawn Cawthra, Artist, Designer, Holistic Educator