Transcripts
1. Welcome: Let's create a mesmerizing
digital pattern inspired by the serene
beauty of snowflakes. Through this class project, you'll apply the techniques learned in pattern play to craft a unique and stunning
digital pattern using affinity designer. On your ipad, we'll
explore snowflake styles, dive into affinity designer and start learning
the tools needed. We'll create our very own pattern preview
template and we'll get to starting on creating your first digital pattern
in affinity designer. Then we'll learn how to properly export your patterns into
a file. Let's get started. Welcome again. I'm Katie from Percha Made. Today we're going to have fun, you know, enjoying the
coldness outside of January. Although right now it's just kind of raining here
in the Pacific Northwest. But, you know, grab a cup
of tea, cocoa something. Picture the snow falling
outside and you know, just we're going to
get into creating snowflake patterns in affinity designer,
having fun with that. Tell me what is your
favorite thing about winter? Is it the snow like
crunching under your boots? Is it sitting inside with a cup of cocoa or
tea or something and just that coziness or maybe you have pets
that have fun in the snow, pop that in the chat and
I want to see 37 there. Fog and drizzle. Yep. Last weekend we
had with wind chill about 13 degrees here and a big ice storm
came in, we lost power. We had hot cocoa. I had hot soup just before
the power went out. I chucked everything into
my instant pot and kept it nice and warm for the day. When dinner came along, we had almost hot soup. It cooled down a little bit. Yeah, Cozy vibes. Yes. Kim, I am all
about the cozy vibes. I am not here for the cold last year when it did
snow here at the beach, it snowed all over the beach, and we got to walk down to
town and walk onto the beach. And that's a really
cool experience because it doesn't
happen very often. But then we hightailed it
back inside and had a good, nice, warm day. You're in Ontario? Oh, nope. Yep. No, thanks.
Too cold for me. Too cold for me. I just heard something and I'm
hoping my front door didn't just like come open. I'm going to just leave it
a little bit and see what happens. Let's get going. Today we're going to be learning affinity designer
on the ipad and this is affinity version two. It's an intermediate
course affinity designer, but it's a beginner
course for making. Really what we're going to
be doing today is learning how to make the pattern work. Um, I'll walk you
through each step. If you are a beginner
in Infinity designer, you might want to watch
some of my other classes. I have some. I'm going to
pop up a little bit later. I have my very first
beginner course that didn't make it to skill share but did make
it to my patrion. Things happened, It's fine. I'm going to redo it later
but I will pop it up for you if you need it. Also, if you are a beginner and you want to
follow along, just sit back. I will walk through every step because I'll be looking down at my ipad a lot of the
time and it's just me. I will be answering questions. At the end of each module, I have about six
modules to go through. We'll walk through all of
those at the end. All right. Let's go for our first walking through the
resources. All right.
2. Walking-thru the Resources: Walking through the resources. Quick question. Do you have any questions? Before we get started, I'm going to have a
sip of tea real quick. Little bit slow on the uptake. If you don't have any questions, I am going to get going. You should have gotten my PDF for this class,
Okay? No questions. Great. You should have gotten the download in
your e mail today. I know I set it up a little bit differently and there was
a little bit of a glitch. Hopefully you got
your downloads, the Youtube link is there. All of your downloads are
at the bottom of the page. If you hit the download button
here, it will download. And you can tell it where told, I always save my two files That way I can pull
them up later. We have the template as well. I am going to be walking
through the template so that you don't have to
well, let me put that. We're not actually going to
pull up the template today, but I want you to
have it in case you lose what you're
going to make today. In case you just want to
have it on hand on file. But I will walk you through
making the template today. Let's go back here also,
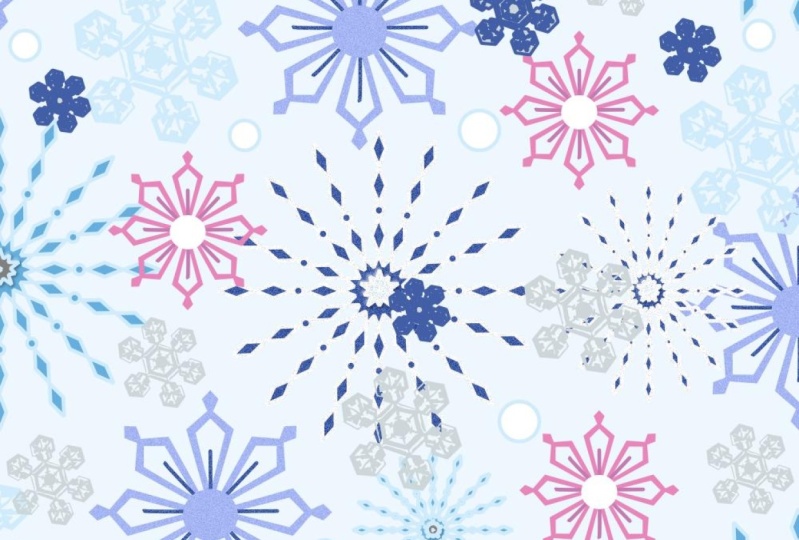
snowflake inspiration. I'm going to show you off snowflakes and those
are on a website that a artist wrote about a different artist's
artwork or pictures then. Yeah, and then there's the
color palette as well. Okay. You haven't been able to
download because of tech issues? Okay. Let me know if
that's still an issue I could see about popping
them into the chat. Was that the main problem, Kim, that you didn't
get them properly? Okay. No trouble downloading. Okay, perfect. All right, let's move forward with getting comfortable
with affinity designer.
3. Getting Comfortable Affinity Designer : Comfortable with
affinity designer. I love it when we
have ipad issues. I don't fun fact,
affinity designer, When I first started using
it I really hated it. I had a really hard time
getting to know it and I didn't have any experience with
the other vector programs. Maybe a couple of like the free downloads that I still just never
really understood. I took some classes
on a finite designer. I download the app, tried it out, and I was like, no, I don't have time for this, it's taking me too much time, Things are still not
coming out right. Fast forward, another year I
decided to get back into it. I decided to take the
time, make the effort, and just put all my energy into figuring it out,
rewatching things. I finally got it. Now I love it. I love mixing it with procreate to get a little bit more
of a hand drawn look from procreate that I pull
into affinity designer. I have another class on
that that is my asset class and shows you how to do
that. That's a good one. Let's go over our
A designer tools. Let me open up my ipad and
I'm going to pull that open. If you're new to a
Pineda designer, this is how it will look set up. I have these all set
into projects to help keep each of my
projects organized. This is my patterns for me. I like to have a
cover for each one. This is just a cover
pattern and then all of my patterns in one spot. I'm actually going
to keep that open. Then we're going to do what? Some of the places
that we will look for is you've got your lives, these are all your
live documents. You can close them out
and they'll go away, but they save to a file on your Cloud or on ipad. I have everything set
to go to the Cloud, so I can pull it up on my computer or I can
pull it back up here. But really just leave
them in my live docs. If you want to make a document, you can come over here. You can pull in new document, pull from the clipboard. If you copy something from another place and
want to paste it, you can pull from
the clipboard or you can pull the new template. The downloads that you've
got today are going to help. That's where you'll find your templates because
it's saved as a template. You'll open template. I have mine saved in a
whole template file, and my pattern originals. If I want to do one, I can just pull it up here. Another thing that is
really great about this, when you open, let's just open, let's open this one for now. If you are needing to know what these toggles
are on your ipad, you can hit the
question mark and it tells you what everything is. The top is specific to your
left side of your screen. If you're on node, then it's going to show you
something different up top. And same with move
or your pen tool, it's all going to
change up here. You also have your personas, it's always set to designer, but if you want to go to pixel, then you can draw in pixels. You have pixels and vectors, or rasters and vectors. Your rasters are pixilated,
Pcr raster based. And it will, it won't be smooth. On the outside,
vectors are smooth. No matter how big or
small you get them, they're going to stay smooth. But you can create raster or pixilated drawings on top
of your vector prints. You just have to realize what size you're
setting them at. Don't size up from that size. You may size down, but
you can't size up. Switch back to the screens. I'm going to open
a new document. Quick sets. Okay, let me show
you how I did that. New. Do I have presets
set over here? I'm going to go to
my 2000 square. It's 300 pixels down here. I'm going to say create
an artboard, It's in RGB. You can change that to CYMK, your different gray scales. I just keep it in
R GB and hit okay. When you're drawing a shape, you can use the shape tool. That's what we're
going to be using today for the most part. Here is your shape
tool right here. You can click on it and choose a lot of
different shapes Here, I'm going to choose the diamond, You can just slide it out here. This little red dot
right here changes the angle at which
your diamond is set. At any time you want
to take that away, you can hit undo that
goes back one spot. You can do another
one to get it back. Three fingers brings
it back for you. If you want to bring
up your quick menu, you can do three fingers. Oops, quick swipe down. If you want to duplicate it, you want to copy,
you can cut it out. You can change it to a raster. Change it to curves. You can do all those things with a three finger swipe. All right. Any questions before we
move forward? Perfect.
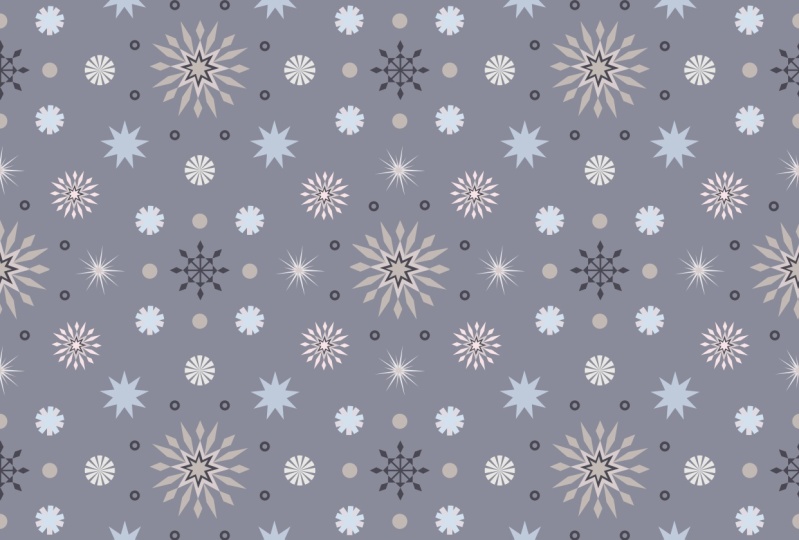
4. Exploring Patterns: Now we're going to explore
some more patterns. I have a bunch of
different patterns on my website that I've
created over the years. This is one, and this one looks like it
might be a half drop, but it's actually a full drop
repeat set with a three, a three spot pattern. That's from Luis D
from the 1,800 It's really classic
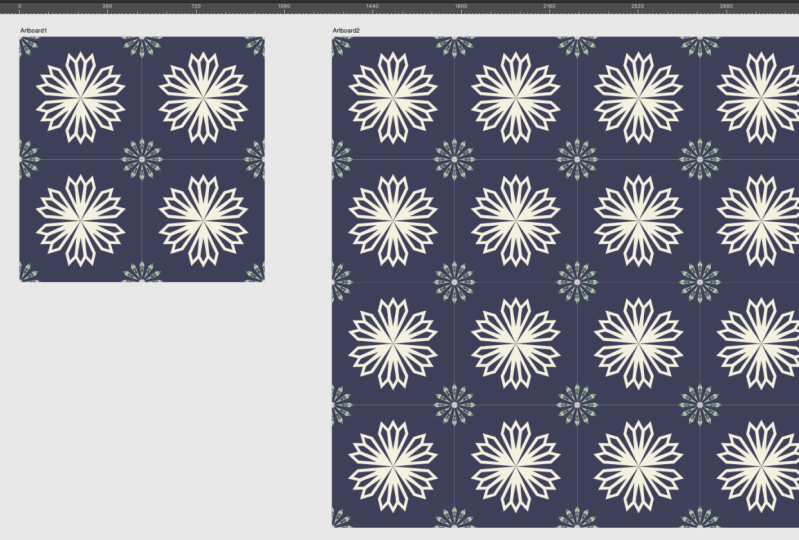
pattern book that has a lot of different techniques. That's a full drop pattern. Here is another one that
is a full drop pattern. And full drop means that it
creates a square on the page. Here's my pattern. It's just one in the center, and the four corners
are squared, and my pattern is
a square motif. Then if you have a drop pattern, let me find another
one that is the drop. This one I have the one pattern in the
center of the page, but as you can see, it goes over and down. That's a half drop pattern. Half drop pattern means that it goes over one and
down half a page. Affinity designer is
really great at helping you make all of these
possible very easily. It's all down to math. If you use this
tool over here says the transform tool allows you
to pick a part of a design, you can add or subtract
in the design. Makes it perfectly easy for it, makes it easy for creating really perfect pattern designs. All we're going to move forward in creating our pattern
design pattern template. But are there any questions
before we get started? Are there hex codes? I can enter an opening. Things? Yeah, we'll download
that real quick right now. Actually, we'll do it when
we start putting together our pattern because we have to be in an
open program first. Let's do that real quick. We're going to be setting
up our pattern template. Moving into the next step, okay.
5. Setting Up Your Full-Drop Pattern Template: We're going to be setting
up our pattern template and moving into the next step. Okay, so let me just
get this ready. We're going to open
up our new document. I'm going to start with a
very brand new document. I'm just going to
keep it at the 2000, Create my artboard and
make sure it's at 300 DPI. And hit okay, let's
do the color first, pop on your color. Let's go to Swatches. Click on Swatches and the
hamburger at the top here. That's where we're going
to import our palette. I always import as
application palette. That way every, um, every design I use, I can use that color pattern. I have mine all saved
snowflakes and the resources. This is where you can hit wherever you saved it on
your computer, find it. And then you can just
upload the pattern and it comes right into
your swatches here. Is that easy enough? I hope so. Now I'm going to click
on My layers again. You can click the question mark over here if you don't
know where layers are, and click on Layers. If you hit the three
little dots over here, and I don't have a
layer selected yet, select the board, the three, then I'm going to tap on
where it says boards. I'm going to rename
this as my pattern. This is the board that is the 2000 square board that
I'm going to rename pattern. If you see it says pattern here, then I'm going to go to my sandwich up a top and
hit artboards again. It doesn't seem like
I did anything, but if I drag it over, I'm creating another artboard. And I'm going to go to
my transform tool here. And I'm going to re do the
size at 4,000 and hit okay. And 4,000 if you're
having issues, just make sure that
this is not set to a different little
number or to have that infinity logged in when you're making
the initial size. Because anytime that's clicked
and you change one side, it makes it even on the other. You can keep that turned off. Now I'm going to go
back to my layer panel. Since board is already selected, hit the three little buttons
here and type in pattern, or sorry, this is going
to be our repeat board. I'd like to have them named. You can make this any
size starting off, but no matter what
size this one is, it needs to be double
for your repeat board. Since this one is 2000, this one should be 4,000
That was 3,000 then it needs to be 6,000 Okay. Now we're going to add a rectangle onto
the pattern board. And we're going to work
on the pattern board. Make sure that's toggled here. I'm I have my
snapping turned on. If it were turned
off, it'd be gray. But since it's black, that
means it's turned on Ops. Let's do this. Sometimes it gets spinicky if you make it a little
smaller to begin with. And then bring it up when all the colors
light up like that. With the red and green, it
means that it's full size. I can also check
that here by hitting the transform tool and know
that it's 2000 by 2000, I am going to lock
that in place here. I'm also going to
go to my swatches. I'm going to make it white
on the full color here. And then the outline color, I'm going to make white as
well. You need to have. Both of those filled in
at the same color so that it doesn't create a line
in your repeat later. I'm also going to slide that over to the
left and hit Lock. Now I'm going to
also create a group. I know it's just one thing, but I'm going to
make it a group by hitting this little file button
here. And hitting Group. I'm going to take this group, come over to this button here
that is the Symbols button. I'm going to hit Symbol, since that group is
still highlighted. When I go to Symbol, I'm going to go to the sandwich
or the hamburger up here, and add symbol from selection. Okay, now it has a yellow, a yellow dot and it says symbol here that is going to help create our repeat on
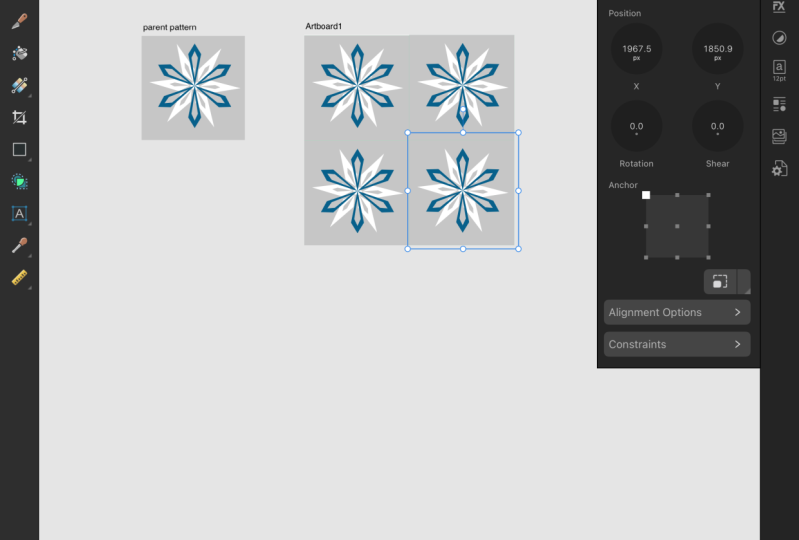
our next art board. Now I'm going to move
to my repeat board. In the repeat board, I'm going to go to my symbols again and see I have
that group here. And I'm going to hit Insert. That just dropped that
symbol into this board. I'm going to move it
into the corners. You can, oops, hit the move tool and lock
it into the corners. And you can see because
the X position is at zero and the Y position is at
zero, that it's all set. Now I'm going to repeat
that process it symbols, hit Insert, and I'm
going to drop this one. I'm going to hit the move tool, make sure I'm going to drop that into the corner.
Down at the bottom. That one's at zero, X is at zero, x axis, and this is your y axis. But y is a 2000, because the top of
it starts at 2000. I can see that I have two
symbols there right now. I like to group
them in the lines. I'm going to hit group. You want these going
vertical down the way. I can do the three finger
swipe and hit Duplicate. But you can also hit the three buttons up
here and hit Duplicate. Now I have this group, and I want to move it over 2000. I'm going to set this at 2000, and it moves it into
the next place. We have the first one, then we have the second one. I know it's all white, but I'm going to show
you what happens next. If you open those up, they
show all the symbols, right? But now if I go back
to the pattern board, open symbols and click
on my rectangle. Watch what happens when
I change the color. All of the colors change. Then you have to switch over to the line and put
that as the same color. See when you don't have it. When you don't have that,
you see the line there. But if you have the
line, then it's gone. I'm also going to lock these. I don't accidentally move them like I just
did a minute ago. Lock lock the repeat box because I don't need
to have those moving. All right? This is also the time if you want
to put a logo in, I would put it into the repeat
artboard and not have it sync That way when you share your designs later you can have your logo right on there. I'll show you how I put mine in. I have mine saved in my assets, which is really helpful
if I can find them. There you go. I have
them saved in my assets, so I can just pop it in
and pop it into my design, and then I lock it there
and it's saved there. But right now I'm going to just take that out and delete it. I don't need that
there right now. Yeah, this really helps you don't forget your
logo because it's going to be saved in
your template and it will be there at all times. I'm going to go back and change
this color back to white. I don't know if you noticed
in the color palettes, I always give you a true black, a true gray, and a true white. You know that they're always there in your color palettes. I have this set up, it's ready to go, and I
have this one locked. Now, I'm going to save
this as a template, hit the hamburger, and
hit export as a template. And rename what template
you want it to be called. This would be full drop and perch and handmade. I don't know about you, but I save everything with
my design company name, every file has that. Then I save it to this one. Since I had just had it opened, it's I'm saving it to
my pattern originals. I already have it there, so
I don't need to save mine. But you can save yours. Really watch this a few
times if you need to for figuring out how to make
that pattern template. It makes creating
so much easier. You can actually
just start making a pattern and make your
pattern a template as well. And just take away some of the stuff when you need to or if you find a pattern you really like and you want
to change the colors, all you have to do
is go in and change the colors because
it will be all set. But that's a different class, we'll do a different day. Are there any questions
moving forward? I think we're ready to move
on to the next lesson, which is, and I don't know why those aren't
working at the moment, creating your first pattern.
6. Creating Your First Pattern: Creating your first pattern. Definitely watch
a few more times. Yeah, Like I said, I had to watch them many
times to get going. It's hard to keep
up a. I understand. Okay, I'm putting my
glasses on and we are going to the next phase. Some reason my keyboard thing
isn't working very well. Here we are. We have our template
already made. I'm going to work
just in the pattern. I have my repeat on lock, so I don't accidentally
move anything around. Open up your layers, open up your pattern. We are going to first off, just start working on creating
a diamond shape today, I want to make it really easy. We're create a diamond
using the shape tool. Go back to the shape
tool button over here. Hit diamond and create
a diamond shape. I'm going to start
mine off here. I'm going to use my move tool
over in the corner here. I'm going to keep it
centered on the page. And keep it on this tip
here is on that red line, it's centered that way. I'm going to go back
to this move tool. I think that's where
I want to keep that. And moving here, okay, we're on our shape here. What I'm going to add to this, before I even get started, I'm going to create everything
I want on this shape. I'm going to change the color
of that shape real quick. I don't like having
my edges done. I turn that color off and I'm going to
change my fill color. I like that blue. Now, I'm going to make another have my diamond
shape still filled. I'm going to have
the move tool and I'm going to change
that color real quick. It doesn't matter what
color this one is, I'm going to zoom in. This one, like I said, doesn't need to have a color
really associated to it. I'm just doing the
pink so you can see the difference and keep it on the green
line so it's even. Now if I go to my layers, if I click slide to the
right on both of them, that means they're
both selected. I'm going to go over here to Shape Builder and click
on Shape Builder. I'm going to hit just the
center and the minus. That means I deleted
it another way here, I'm going to go back and undo. Another way you can
do this is with the move tool you can go to. When you have moved tool, you go up to your
geometry and subtract. That will take it away. Now you're down to one curve. Anything in your
layers is called curves unless it's the shape
made with the shape tool. A minute coupa. All right, now I have this shape started. I'm going
to close that. The swipe down sometimes
makes them move a little bit. For me, I duplicate by
hitting the three buttons. And hit Duplicate,
because I want it to not move on my page. Now I have two of these. I'm going to go to my transform. First, I'm going to change my anchor to the bottom
corner or bottom center. Then I'm going to go to
rotation right here and hit 60. And hit okay, and just moved it. 60 degrees on the page. Now since it's, since you can still
see it connected here, I'm going to hit the three
buttons and hit Duplicate. Because that pattern is still in that function without
touching anything else. I keep duplicating until the product is
finished and I've got six points Now you can see
all of my curves right here. You can't see them over here yet because they're
not within the symbol. But what I can do is slide
them all to the right. Another way to do
this is if you hit the top button and then two fingers on the bottom
that gets everything. Then if I hit the
geometry tool and add, that makes it one pattern
and not multiple. If I just did that.
Let me show you. If I just move one, then it goes back this way, but I want to have
them all connected. I'm going to go back up here. Add, I'm going to make sure
that it's on my center. I've got the green
line and the red line, that means it's on the center. Now if I pull this down, I can either open this and
place it in the center, or I can just hold on here
and see how it moves. When I place it on
top of symbols, the whole line turns blue. That'll pull it into the center and then makes
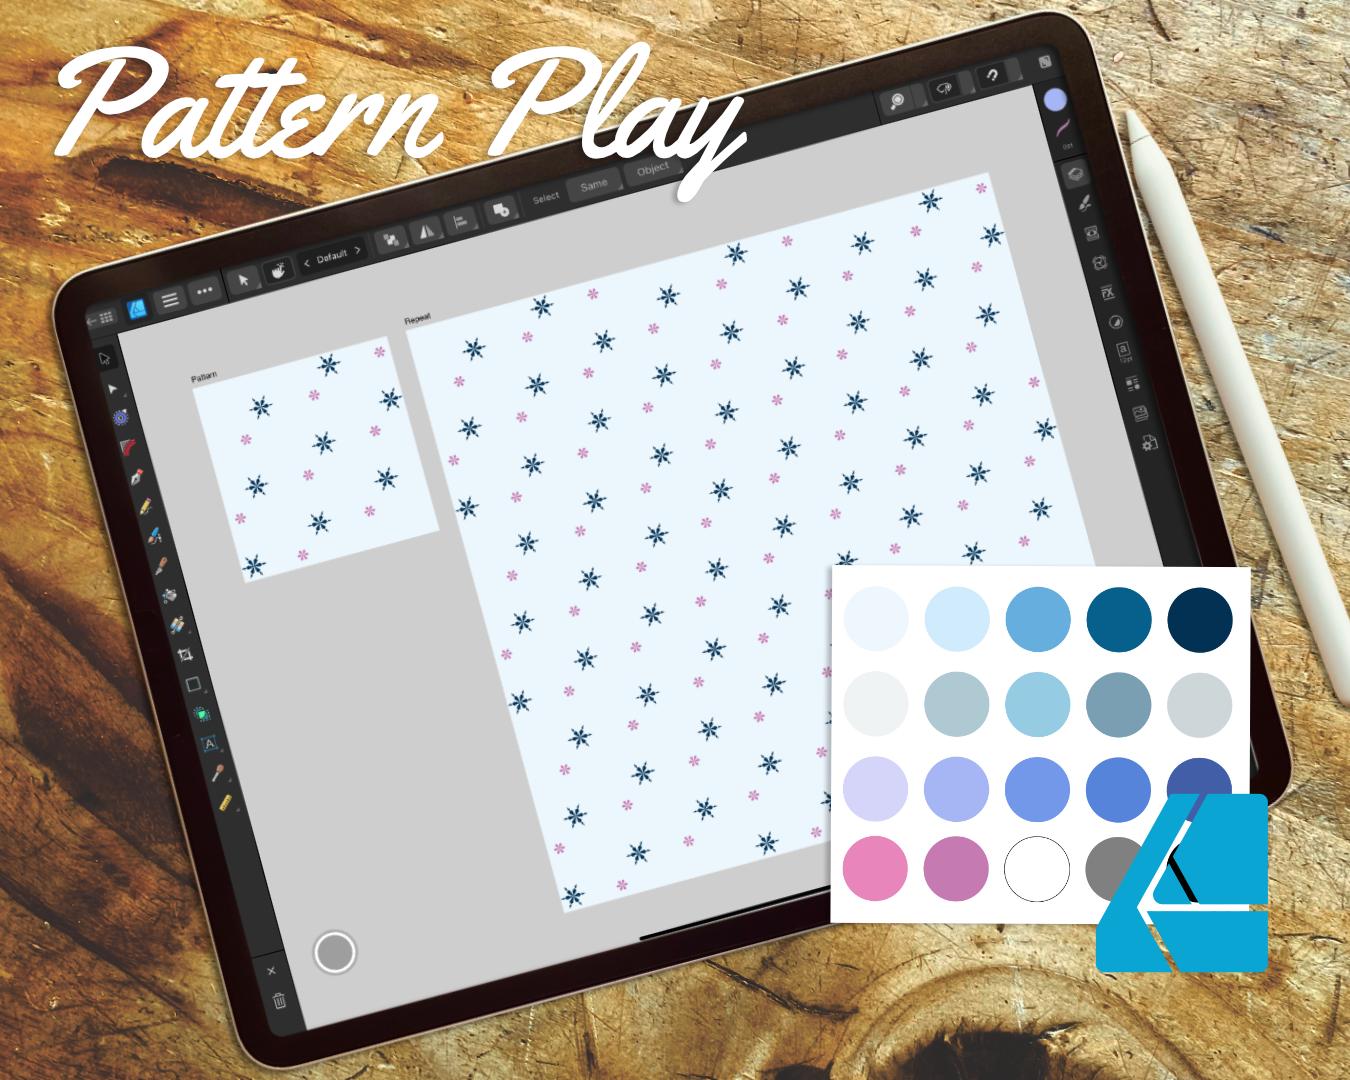
your pattern happen. Exciting. Yeah.
Duplicating is way genius. I don't know, there's
some loud noise outside. I hope you guys can't hear it, but it's just where we're at. We have our first design in our pattern and our pattern
preview is working for us. I'm going to change
my background because I want to
different color. I think I want it a
little bit lighter. I'm going to go for
the light purple. I want to add, oops,
something else. I'm going to lock my rectangle. When I swipe across, it doesn't move, but this is where we can start
adding more details. I'm going to go back over
to my shape builder, go back to diamond. Let's put one off to the side. I'm going to make it thinner. This one, I'm going
to start with this, I'm going to change my color. I'm going to start with
the shape like this. We can't see it over
here, but that's okay. What I'm going to do now, I'm going to make another shape. Get my move tool. I'm going
to bring that to the center. I'm going to make this
one look a little different because Why not? You can see because the
shape and the lock is on. It's bring it to the
center of this one. I'm going to change
that color real quick. I'm anytime you make a shape, going to take it out of your symbols pattern and you just will have to
bring it back in. But I'm going to take the two and I'm going to go up here. Actually, you know
what, I'm going to add a little bit
more to this one. I'm going to do the shape again. Go back to my diamond. Pop over to my move tool. Getting move tool
up here and get that because lock is on. I know all the
corners are touching. Bring it up, bring it out. I'm going to make it
a little bit bigger. Now, I'm going to make them all one
color and that's okay. This one. I'm going to go
to my Shape Builder here. Go to the Shape Builder, I'm going to make sure all
of those are connected, all three of them are clicked. And if I hit this
one and this one. I can hit Ad. And that makes one shape, it cut out, the one
that we didn't do. Let me show you that again. Can you see the blue lines? When I do this, there's some blue lines on this
one and blue lines here, but there's no blue lines here. And ad, and it creates
one full shape. All right, now I'm on this one and I'm going
to hit the three lines. I'm going to hit Duplicate. Go down to transform. It's still at the bottom of. My anchor is still
at the bottom center because that's where
I left it before. I'm going to hit
60 in the rotation again because it's too wide. I don't like that
one. I'm going to go back up here and
start this over again. I'm actually going to go
to my layer and delete it, because I want the process
to just happen naturally. Go to my transform tool. I'm going to change my
anchor to the top center. Hit 60, okay? And then duplicate, duplicate,
duplicate, duplicate. Now we have six, but it's off
the side, and that's okay. Let's hit the top one here
and two at the bottom. That highlights everything
and hit the geometry. And then the Add button. Now I'm going to move it to
where I want it to be. I am going to pull it down on top of the symbols
and I'll bring it in. Look, now it's there. One thing I want is I want to
center this in the corner. You can see you've
got your green, your green line
and your red line. I know it's perfectly
centered in the corner. But when I open this up, see it's one corner here. But on my preview, I can only see it in
parts of the corners. I can't see it in
all of my spaces. What I have to do is I need to duplicate this and set it
into all of my corners. I'm going to pop off of
this and pop back on, just to make sure that sometimes when you're
using duplicate, if you're staying on
the same subject, it will continue to duplicate
it how you did it before. If you pop back on again, then it restarts the
duplication process. I'm going to hit Duplicate, and it's still right here. And I'm going to
go to transform. I want the x and y axis to change because
it's on this side. I want to add 2000 and
it brought it over, but still we don't
have any on the bottom because we haven't filled
in the bottom yet. Now I'm going to hit both of them and slide to the right on both of
them. Hit Duplicate. Go to my transform tool, and we're working
on the Y axis now. And we're going to hit Add 2000. It brings it all the way
because it's the corner, we have to have four. Then I'm going to group those. I know that that's one group. And anytime I move that
one group, it's set. You can't move them if you have one over here and just on the left
side or the right side. You can't change the shape
or rotate because if you do, it changes how it looks. But you can move them
on the x and y axis. We just made a repeat. How are you feeling about that? Are we loving it? Is it so good? I love this. It
makes it so easy. Having just a quick
design put together makes it really easy for making your patterns
using the shape builder, I was a little scared,
I'm not going to lie. The shape builder, when I first
was like trying to learn, it seems so scary to me. Instead, I would use
the geometry tool, but sometimes that
didn't work right. When I finally figured out really how easy
the shape tool is, I was just like, boo mind blown, here's our pattern,
here's our repeat. Yeah. You can use them
both, sending them off. Although I do have some problems sometimes because of the way the groups are, some of these things
are above others. Or if you're using pictures that have a little transparency,
they overlap funny. When you are sharing this, sending out to say
spoon flour to license, always send your pattern, not your repeat, because sometimes those
don't add up, right? But your pattern will
always add up, right? This is really just
a preview for your own so you can see it
happening in real time. All right, do we have any questions before we
move on? I don't think so. I think we're about ready to go. The next one, we're going to be talking about exporting
and showcasing.
7. Exporting and Showcasing: Are going to be exporting
and showcasing our artwork. Some reason that my
keyboard is not working, it might have just
died on me and that's why it's not
working for me. Hopefully, that's the biggest
technical issue I have. It seems like the class
is going okay so far. Exporting, like I was
saying a minute ago, ex pattern design
versus your repeat. Definitely, if you want
to share your repeat with other people and
like on social media, then share your repeat because
Spi might not be seeing the flaws that might
pop up sometimes like the extra color or sometimes
they don't layer properly. I have found that doing the vertical works
better for your groups, for how it showcases later on. But let's talk about exporting. Exporting, we want to come up to the hamburger and
hit export, right? And this is where it
gets into whether, how you want to export it. I usually do a J
Peg in the area. I come over to my, my pattern art board because that's the only
one I want to export now. And you can double
check that because the size is 2000 by 2000. If it's all of the area, the whole document, it's
not going to be even. This is where you say you want to showcase
it on social media. I would bring the size
down to 1080 square. I would bring the
quality down to 75% You don't want to put your best artwork
on social media. You don't want a copy that
somebody could just pick up and have perfect pattern
designs or perfect edges. So this is when you
bring the quality down and the size down, then you just hit, you can preview it right to make sure you're sending
out the correct things. So your pixel format, you can change here if you want. Gray scale or CYMK or RGB, if you're sharing
on social media, it needs to be RGB. But some print
companies require CYMK, made a document in CYM K, but want to put it
on social media. This is where you would
change format and don't use the document format and vice
versa if you made it an RGB, but want to share it as CYMK or export it that way,
that's how you do that. Then you just hit. Okay, Because I have the size, I have a hit. Okay. And then you
can title it here and save it to whichever
file you want to save it to. I don't need to save
this one just yet, but that's how you export it. Saving it in here,
like I was just here. I went back in the
corner button, back to my live documents. And you want to make sure you
save here, give it a name. Purple Snowflake, a made and hit Save. I will pop it in to this one. Since mari and snowflakes, I'm going to save it here. You can move these around by getting them to
toggle on and off. I'm going to move these back closer to my other snowflakes. Then you want to share, share them on social media. Share them on Instagram. Like I was saying,
don't use high quality. Do put your logo if
you're sharing on Instagram That way it comes back to more ways
to protect your artwork. There are always going
to be people out there who will try to
take your artwork. This is just one more way
to help protect yourself. Something I forgot to show earlier but we can show it now. Is the macro snowflakes
that I love, all the different inspirational. These are real snowflakes
that a gentleman took photos of and captured
them on his camera. In macro form, like this is a real snowflake,
it's incredible. Another snowflake, so you
can gather your inspiration, create beautiful,
beautiful designs. Have fun creating
snowflake patterns. More other patterns. Yeah, it's really great.
8. Thank You!: What was your favorite
part from today? I'd love to hear it. I'd love for that to
pop into the chat. I, I love creating
these designs, but I love the simplicity
that can happen to create a really just
timeless piece. Okay, you've created these
beautiful snow flakes. Today, we've had a fairly
quick introduction to pattern design. I really can't wait
to see your designs. Remember to share
them on social media. Tag me, perch mad if you do remember to use the
hash tag creating. Hm, That's my personal
hash tag when you're doing artwork, it's a fun one. You can see everybody's artwork if you search that hashtag. Yes, it is simple. It doesn't have to
be complicated. I think that's what held
me back for so long, was thinking how complicated it really was, but it
doesn't have to be. This is jumping off
point for creating, um, having fun doing it. Right? So, thank you so much. Thanks Kim, for watching today, and thanks to all the friends who will be watching
in the future. Have a good one. Bye.
 Katie Simmons, Digital Artist | Perch Handmade