Transcripts
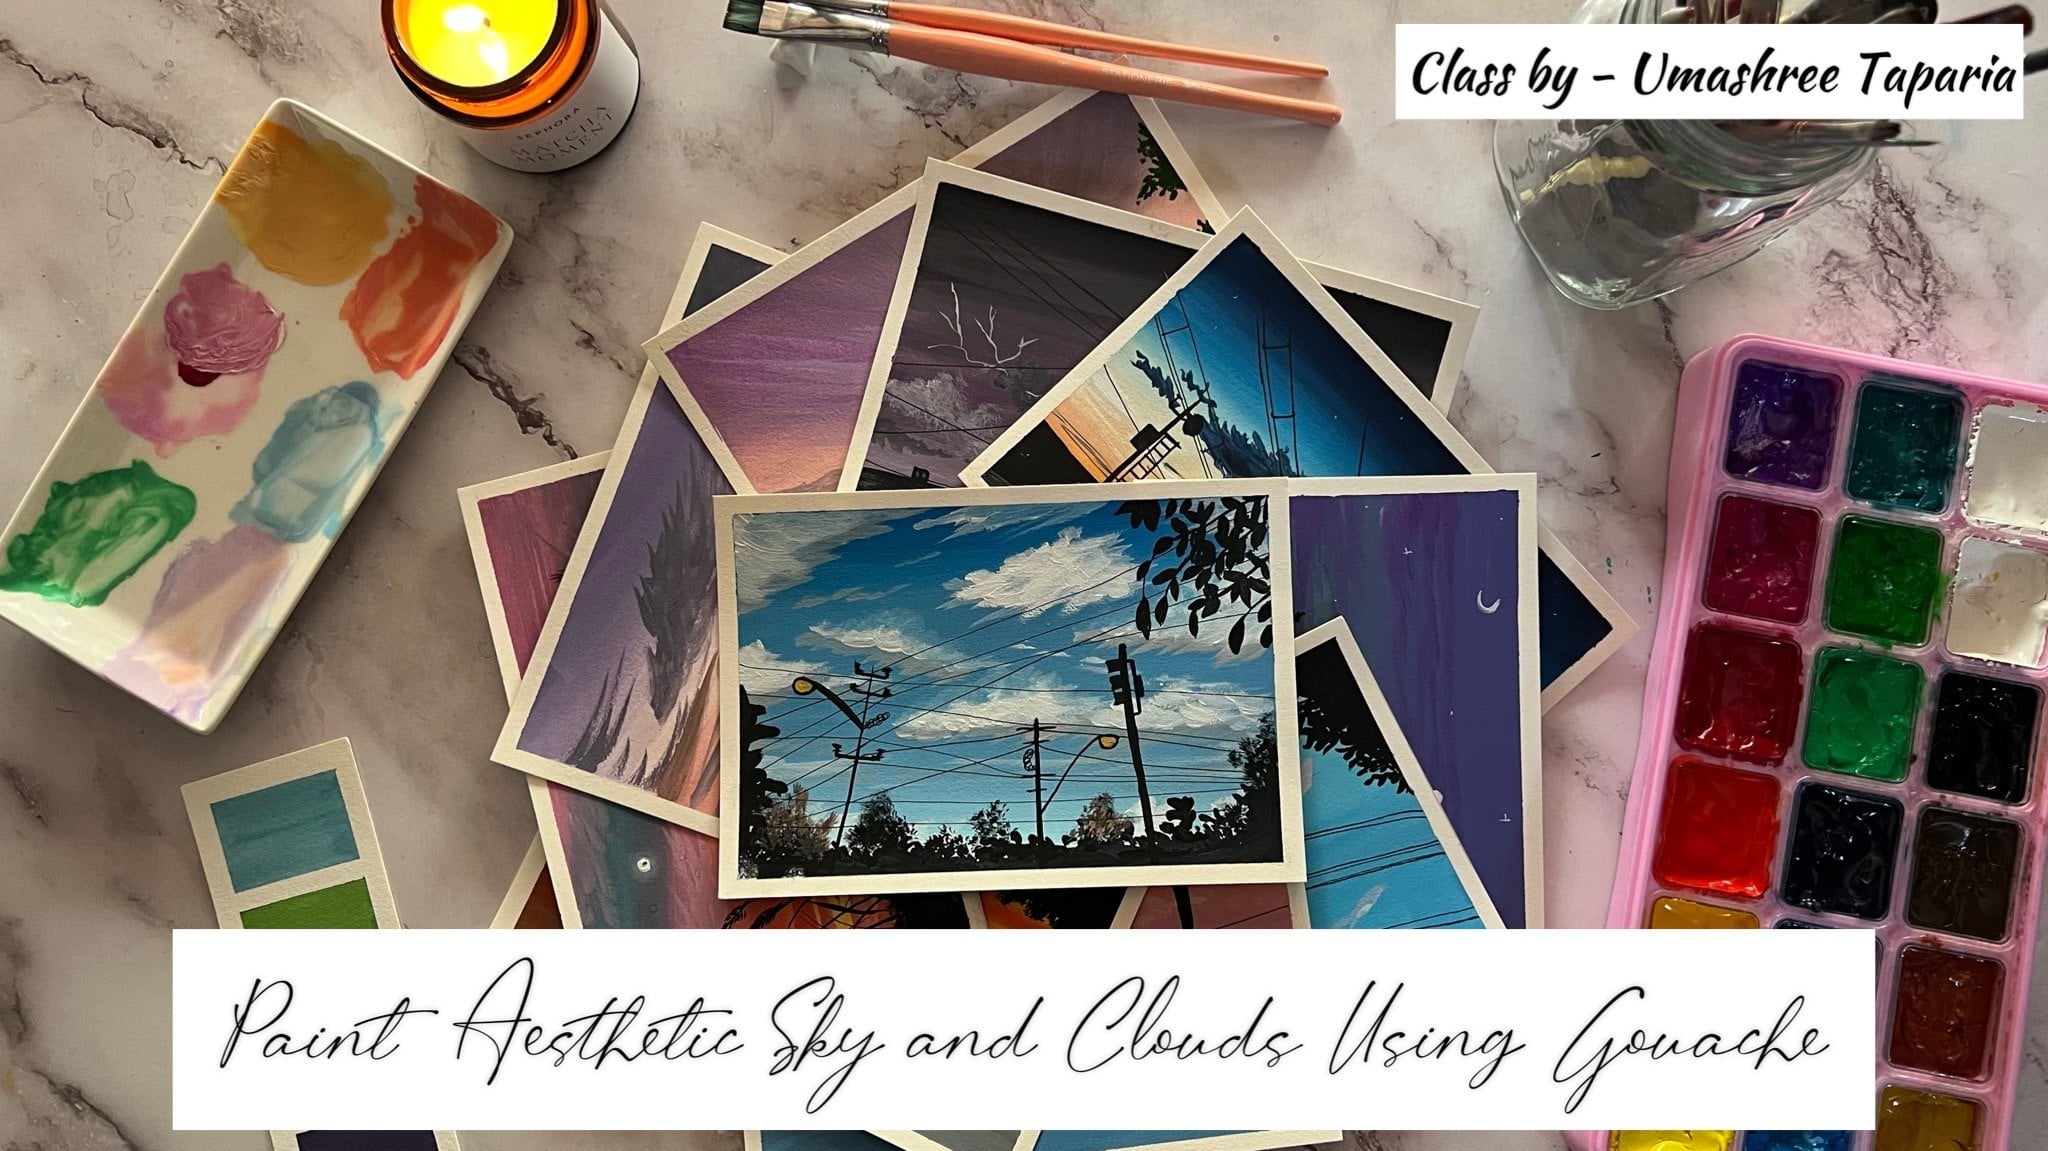
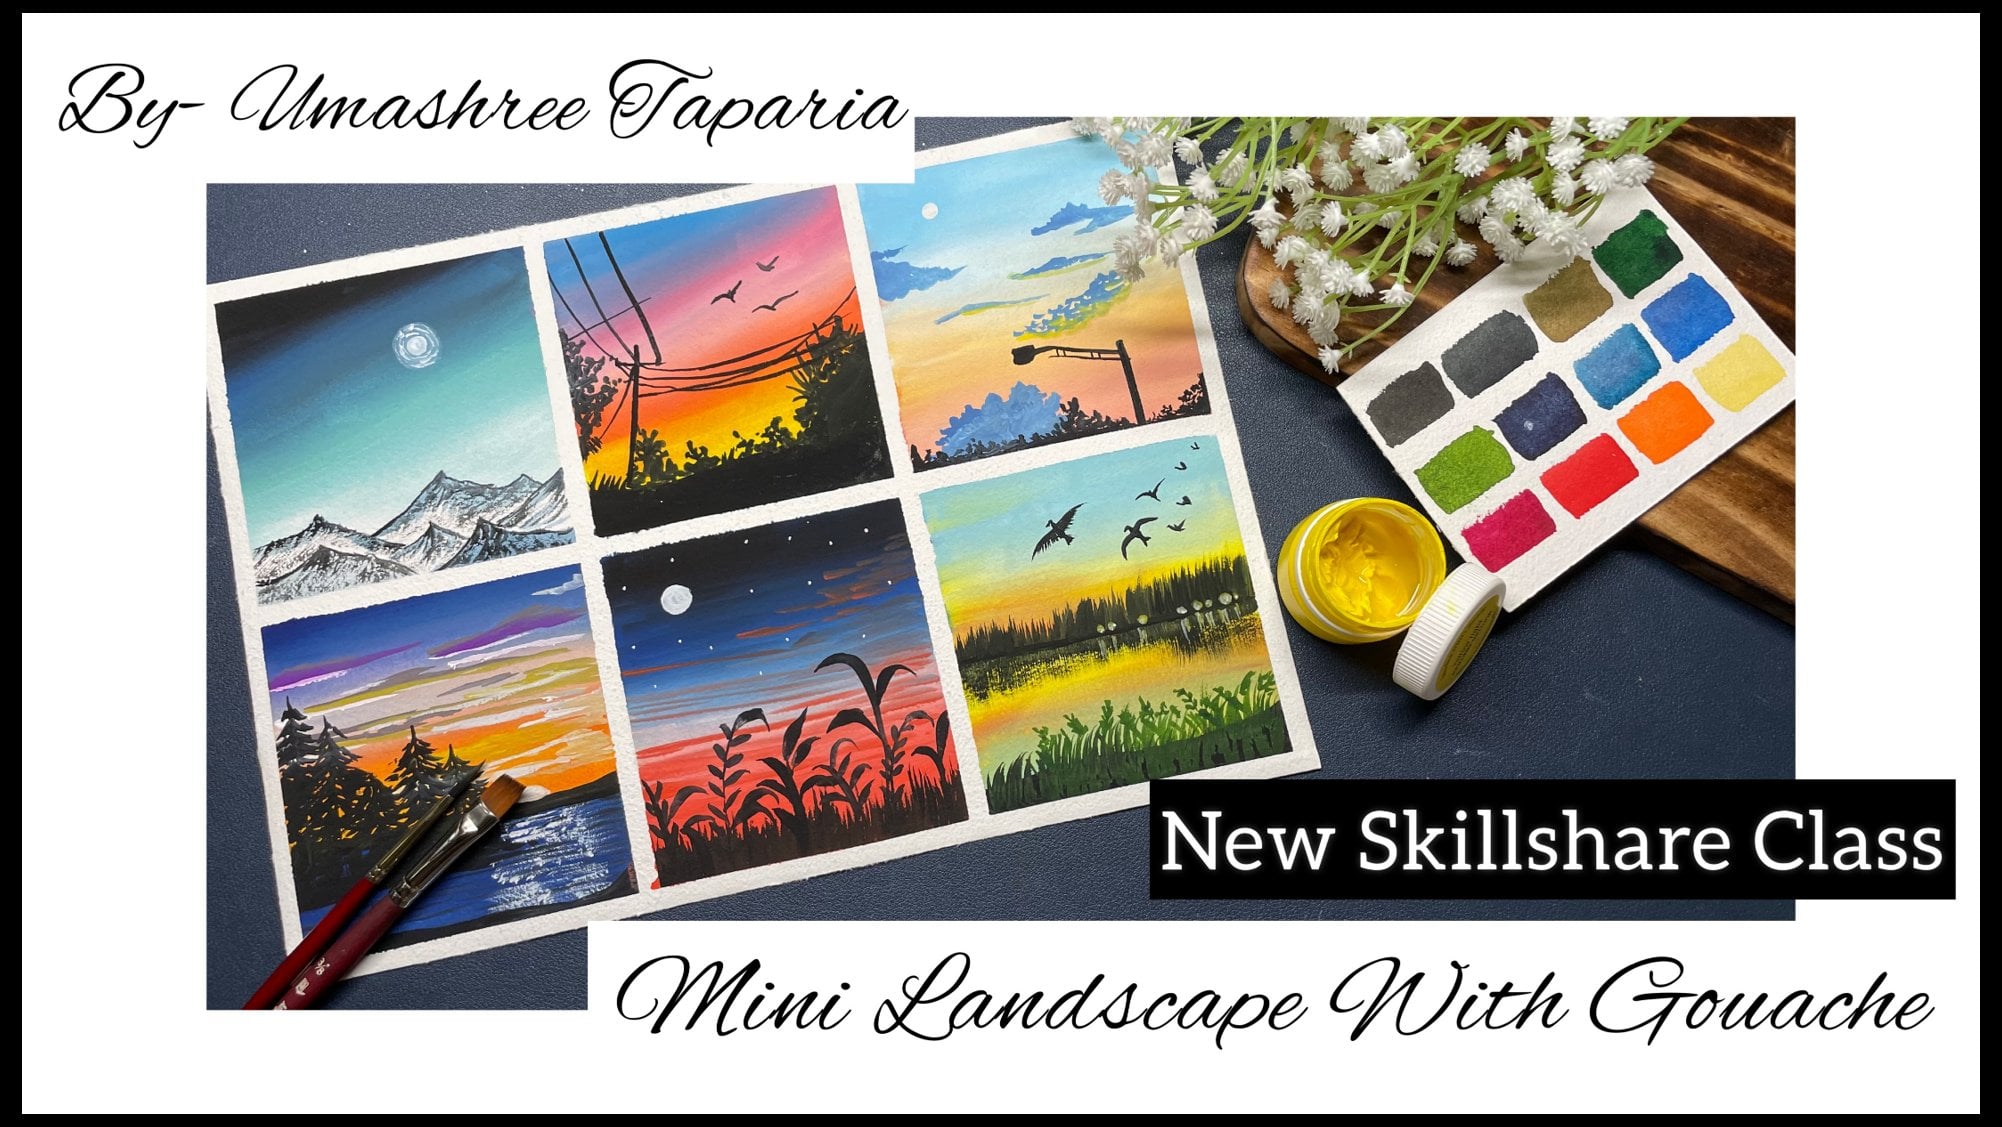
1. Hello & Welcome Back: Do you ever look up
at the evening sky and find the colors of
the sky speaking to you. The lavender melting
into saffron. It feels as if the sky has been spray painted by an artist. Hadi offense, I'm an artist and an art
instructor based in India. You can find me on Instagram and Pinterest
under the handle, creating from the heart. I have been working with
gouache for almost a year now, and I absolutely love
playing with this medium. Creating blends is so much fun. Bennett comes to quash. In this class, we are
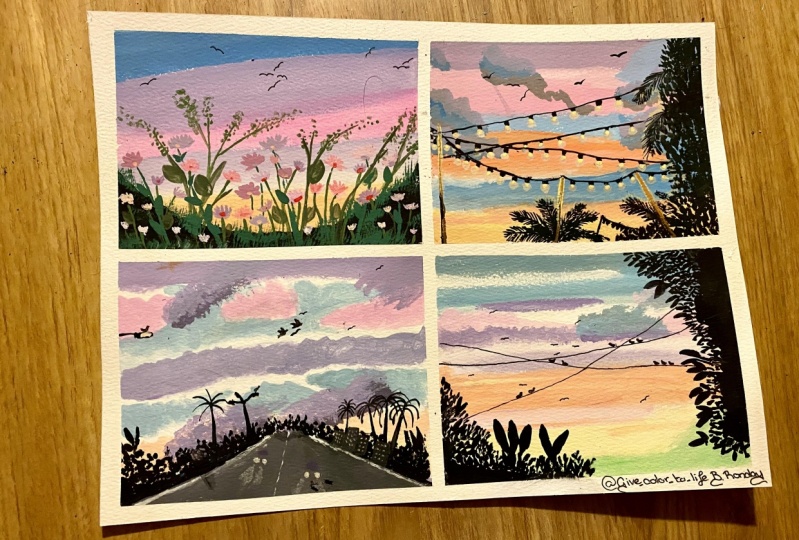
going to be painting in four different beasts and
sunsets using the wash medium. I will guide you through all the materials that I will
be using for this class. And I will tell you about the alternate depths
that you can use. Then we will begin being
four different based on skies using different
color blending techniques, but using the same b is four to five colors for
painting in the piston skies. For each of the class project, we are going to go ahead with a very different
landscape layoffs or all the full class projects. This class is going to be
more focused on painting. These be still skies
using the colors, but learning different
techniques to blend these guys and
adding the clouds. We will be learning to
add in the clouds and also the layering technique
for adding in the details. So without any further ado, let's move into the next lesson and have a look into
all the materials. And then beginning with
the false class project, I hope to see you join
me into this class.
2. Materials Required: So before picnic, let
me guide you through the materials that I'm
going to be using it. First is this set
of quash kalos, which is by the brand hemi gosh, I'm using in hardly seven to eight
colors from this palette. If you do not have quash colors, you can use in poster colors, or you can use in any
temporal colors or any other brand squash beans you need not have the
same goulash colors. I'm using in this spray bottle to keep my colors
moist throughout. Next, coming to the sketch
book I'm going to be using in this handmade sketch book by a log-linear artist in India. I'm going to be using
disrupt green people sketch book pages of
handmade Ross Greene Paypal. It has taken the edge loop. So I'm going to be having a clean edge using
the masking tape. But at the end, I'm going to be having in the
decal edge loop, giving it the perfect view to these pretty based on
sunsets that we are going to be painting
in next year. We'll be needing a color
palette for mixing your colors. So I'm going to be using in
this ceramic palette for mixing the colors for each
of the class project. Next year we'll be needing a masking tape to tape down
the edges of your paper. Next coming onto the brushes, I'm going to use some Princeton
velvet touch flushes, that is the flat brush
and some round brushes. And I'm going to be using in some stationary that
many liner brushes. Apart from that, you would need a jar of clean water
for each exercise. Somebody should be bought for some dabbing off the brushes. So these are all videos that you will be needing
for this class. So grab them and I
will see you guys in the first class
project of this class.
3. Class Project 1 - Into the Bushes: So let's begin with the
first class project into this class. So I'm first going to begin
by dipping down might be. So I will just show
you that beeping down for false class project. And then for the rest
of the class projects, I even have my B put
the belt on to D. Now since I'm using the handmade
before or you know, it's very difficult to remove the masking into uniquely quit. Many gave me otherwise the
edges may get blown off. Secondly, or you can see my people is thicker
edge all so you know, I am just very
roughly thinking in equals basic because after the moving in that edges may add little different alignments. Because if you look back, I'm having, it also seems maybe, but it's roughly when I
begin to be in it will be a little difficult
on me or, you know, it will be of the blending
will deepen it in time for me because I'm
using a rough green people. And for Bosch the
best paper that is, is a smooth grain people. But, you know, bit
that offering people the outcome looks quite
different and beautiful. So I'm going to be using
in dystrophin people, which I have the bone already. Now I'm going to be
using these beads. So I will just
quickly open mapping. Books do not include, not have all the sheets
we are going to be using in very limited sheets
from this color palette. It's hardly doing
the V6 270 follows, which are all the
basic fellows that will be available in any basic valid 5 is becoming difficult. The brushes that I'm
going to be using, the brushes that I'm
going to be using an omni-channel going to be
round brushes this time, I'm just one fact, Russia. So the brushes that I'm
going to use, these brushes. So this is now 322 brushes, one smallest size flat brush
and non big size flat brush out your sign-in first begin
by preparing the Padlet, what the battles
that we are going to be using input this guy. So I will quickly begin
picking up one color at a time and V8 the base to
the villains for that by mixing in
the white board. So the first command that I'm picking up as the violet fellow. Now in case if you do not
have the violet palette, you can mix in
your pink and then through dint of blue
to get provided. Next color that I'm going to be using is the yellow follow. After this, I'm going to be
using in the orange color. So I'm using the volume
invalid from this set. And next is going to
be the pink follow. So I just removed color first. Now I haven't removing
the orange color. Now to each of these colors, I'm going to be adding in
whitewash and I haven't mix all the colors and keep ready so that when I begin
painting in this guy, I have all the colors in my palette and I do not
have to read in-between. Now as I was telling
you in the beginning, since I'm using in
a Ruffin people, I'm going to make my beam
a little extra weight. That is, I'm going to
make it a little most Moodle so that the palace
client more easily on disrupt green people with
the US MOOC green beans may glide easily
even if the other little button and using
enough clean people, I prefer using the beans in a lithium liquidy consistency to make the flowing and
the movement better. Now I'm preparing all the sheets of the colors that I have listed on my palate by mixing invite and little bit of water. But I'm making sure I'm on that so much water that
they act like watercolor, so you need to be
careful about that King has been so vital. Mixing the colors
wherever you are, need to either add by other
all the pigment and color, you can go ahead and
adjust accordingly. The other goods we need all
the others in obese value. Now I have make all those 3D. I am mixing very
little fellows because falsely and painting
on a very small space, it's taken me, you will not
been eating much because we are going to be using invite
in between from lending. The next funder
that when preparing your is obese to dawn of new, I'm using in the city
in blue color and mixing it with white
and keeping a Jedi. And the five basic colors that
we are going to be using, inpainting almost
each of these guys. And then providing needed me, ME using green, black,
and the browns. So let's begin with the
first class project now. Now far being deemed, I'm going to just keep little
off the white quash also, they don't even need to liquidy consistency for
blending in-between the gallows to get the perfect and smooth blend
and transitions. So keeping a JD message so
that I can use it easily. Now before thickening
to beat, I'm going. Innovating a good
conductor black color for this piece to look along, to get them into grayish
tint to this blue palo. I'm just very and
I didn't keep the little blue also there
separately for using on here. So now you can see I've
got a piece to grayish, kind of a blue tint. Now using this Eigen begin
from the top species. We do not have glide
in a neonatal for dog. Now you can see
when I'm beginning with being on do this
enough green people, it's a little difficult to
lead on the beans easily. So I may be using in-vitro model for no to spread
the beams easily. But if you are using
this MOOC dream, people do not add much a photo, otherwise you will not be able to achieve the opaque look. Now, I'm beneath that green. I'm adding in the Feast. I haven't said. Now under the blue, I'm going to use in
the right column and theta1 little blend in between them so as to lead on the next color
underneath this. Now you can see again and again, I'm dipping my
brush into water so that I can easily
spread the paint. But again, I will repeat
if you are using in US MOOC Vin people who would not have to dip it
again and again. Now you can have created a very nice no Gordon using
in the Vitamix blender. Now the next color
that I'm going to shift do is a pink color. Now you can see I'm
using a round brush and going very
slowly step-by-step. And you can see still
the blending is happening very
easily because I'm using the gouache colors and blending with washes
easy as compared to what the gallows because since
it's a dry medium and easily available and can
be blended in easily. Now on both edges
underneath the white wash, I added in the pink
color very lightly. Now under the pink color, again, I'm going to be adding
in the blue color and blend both of
them very easily. Now when I play both of these, you may get a little puppet, then automatically the blue
and the things blending it. So let that be it will create a national unnatural thing
into European thing. But in case if you do not want the purple plane than
between them again, you will have to zoos
and white quash for blending just as we used
at the about space. Now next, using in the weeks of the violet color and adding
it just been no out your. Now again, you can see I'm blending each color
step-by-step together. So when I added the open color, I made sure I blend it
with the bandwidth, the blue and the pink color at the top space using either
water or whitewash, depending on the kind of
people that you are using it. Now under this open, I'm going to be using
in the orange colors. So before that I'm adding in
a little off the white floss because then the opening of the fopen will
either get though, it may give you a little map. So to avoid the market
opens and you'll get the perfect lending hand using in the next one
right in between. That is how you need to understand the properties
above the Bible, which follow up and mix together may give
you money fallow. And so as to avoid that, you can use invite quash
to blend the shadows and you don't get trade off
those more equal to between. Now next under the orange, I'm going to be adding
in the yellow column. You can see how step-by-step
disguise getting formed. We are able to
blend despite going slowly callow by fallow
one color at a time. You don't have to rush. It's very easy to
blend them, wash. So if you're previously
or Palo has dried in, can simply pick up the
previous layer by layer again and added there when Ben blending in
audio can just using a damp brush for blending
in-between the others. Now then DIA bottoms
these I'm going to be filling in with the yellow
Gallo and in-between, I'm going to give it a
little audience sheets of the clouds has been. Now on the left side you are, I'm going to add in a
little touch of the thing, forget and then
anthropomorphism space, I'm going to fill
it completely with the yellow color and we will
be ready with this guy like this going step-by-step part of eye color and blending each other together with
the previous SEO by adding in the next video. Now what would this
guy I'm going to be adding in little cloud is. So for adding into Cloud the deal I'm going
to be using in the orange color and blue color
mix that we already have. So far, the orange
color I'm going to be using in the audit
fallow mixture emitter literally bite and
it's going to be a little darker than what
we already used it. So now I'm shifting my
smallest size flat brush, I'm using this, I'm
going to add in the clouds just using
the tip of my brush. So first beginning in
with the orange color, I'm just going to slide in little strokes from
the edges to act. And as the plots. After this, we are going to
be adding in the clouds with the blue column mixed in with a little tender flag to
get that grayish thing. Now you can see better than me. I'm just using the
tip of my brush, pulling up little strokes
to add invaded and flowed through this piece of
sky that we have added in. Now next, using the blue color, I will begin adding in
little cloud effect. You're at the bottom
side so you can see I'm just putting
that little blue stroke. I'm not worried much
about the blending of the strokes right now
because automatically, after you begin adding
in the details and blue, this is the lifecycle of hits that we are
going to be adding in. All of it will look perfect. Now at the bottom left side, I'm just putting up
little clouds diagonally. Now next we're adding in
the clouds at the top side, I'm going to add in a little
bit in dark black, blue. This blue mixed
together darker so as to make those Cloud
visible at the job site. So just to adding in a
little bit of black, you can see how minimum
black I added in. Make sure you keep adding
the darker colors little by little so that you do not
have any DACA end altogether. Now just going to be adding
in very simple clouds, add the tops piece. I'm going to pull up this
darker own buried underneath. You can see all of this am
adding when those pieces are dry so automatically because may be points
rough textured, I'm getting a little
rough strokes, but because of those drops, drops the browser getting
more of the realistic view. So just adding very
middle cloud strokes from the top edges. And you can see I'm simply
putting out this color, didn't that is off the black
mixed in blue and white. So we have ID with us Pi, but now we need to
begin adding in some Bush the beads into this big thing for compete
this painting new. So for that I'm
going to be using in my smallest size brush and I can quickly picking
some black wash and using the black wash, did it live it out, out in in any white or any other follow? I didn't begin adding in Bush deviance at
the bottom side. So they are going for me
adding in the bush D1 at the bottom side and
onto the right side. So make sure that this guy is completely dried before
you begin to add this. So I'm going to be, and
using the tip of my brush, I'm dabbing it
very simply to get in the bush detail
at the top species. And then as I move down what I'm just going to fit in this
piece black did agree. But at the top, I'm just giving you the needed
look through the bush. You can see just dabbing
the paper off my brush, pulling up little grass
or leaves strokes. So you can see I'm trying to lead either height
and add the edge. Oh no, I pulled up little off the bush from the left end also. Now as I'm moving downwards, I'm going to decrease
the height of this. So first I'm just giving you the detail at the
top species and then I will just
fill in the bottom speeds quickly with
the black color. So now you'll see I'm
just filling the rest of the board game
space directly with the Apollo in-between
the Wacom space. Also, if you have little up the gaps left in it
will be fulfilled meal, it will add to the
natural beauty of the most detail that
go to adding in. But in these, if you're coveted, compete directly with
black like this, although it may be perfect. Now you can see
automatically add the doctor deviance
that you added. Losing in the tip of your brush is giving such a nice day. Now if any of you have seen that the median is not visible, you can just pull out a little
more of the bookkeeping. So basically just dabbing the tip of my brush
to get into detail. Now I'm going to add it
onto the right side. Similarly am going destroyed, popping towards the left side. So far the right title until
I'm using the same process. You can see I'm using
the tip of my brush. I'm just putting that
simple leaf strokes very randomly close
to each other. I'm trying to force to outline
the shape that Why do so? You can see at the top it was brought up and as I'm moving down what I'm producing this
piece of this bush DDD. And as I'm going
to go further down what I've been folded
in, please it again. So basically just time before, a little different cheap
that is brought up at the top then on the
29th doesn't know. And again, by moving downwards, I'm increasing the
breadth or not. This is just the edge that I'm adding enforced
through this also, I will just add little
more detail to it. And then I can fill the rest of the space with the black
color moving inside. So at the edge you
can see I've given them the medians of
the leaves popping up. Now, the rest of
the inside spaces, I'm going to be quickly
filling in with the black color just in between. I mean, even into gaps
in-between two that are behind. Visible. But again, if that
gets covered up completely, it will be perfectly fine. For you can see now
filling in the gaps is so faster and so much easier because you
just have to fit it, compete with the black color. So for this, if you want, you can shift to a bigger size brush and fill all of this, complete it quickly by
just be a little careful to not build them edges also like this with
the black column. So in between you can see
by filling the black color, I randomly left
some species to let the sky B that's been giving more detailed look through
the bush out there. But at the bottom species, I have also been a completely
with the black color, just letting the need
is b then on the edges. Now I've been just give
little more detail at the urban space your, and then I'm just going
to pull out some are more prominent leaf shape
from these bushes that I've added in and then even
be done with this class, project one into this class. So now I'm just pulling
out very simple, nice strokes from
this motion effect. So I'm using the
tip of my brush, I'm pulling up this needs strokes and wherever I
want a thicker edge, I'm just pressing the belly of my brush and then
lifting it again. Now, I'm going to
quickly pull up littlest the leaf
strokes out you off on the right side AS bed. You can see I'm
going in very slowly pulling in one leaf
at a time so that I do not or do anything
because we've got the perfect sky look and the bushes have also
turned out perfectly. So make sure to going slowly, do not crash with adding
in these needs the most step-by-step one
leaf at a time so that you would not lose
the look of these bushes. So just a few more leaves. I have to walk them speeds
that I'm pulling up. And then we are almost ready
with this class project. Now lastly, using
my technical pen, I'm just going to add in a few white lines
and do the skies. B is moving in
between the bushes. Now in these, if you do not
have a technique and then you can go ahead and use any
black waterproof pen. You can add this using in the black wash and
the fine liner brush. But since I have a band, I find it easier to add these fine details using
an offense to agree. So baby Nandan v, I've added four to five of
these lines moving across the bushes and connecting them
from one end to the other. Now I'm going to quickly, I did a few boards
into this guy and then we'll be done with this
class project one for today. So you can see the fine boards
that I'm adding in gas so fine and just using
the default my so, you know, it's easier
to get in these. Finally, it is using
an, a technical bent. But in case if you're
using a brush, be careful about adding these
boards in very small size. So before removing
the masking tape, I feel like just adding a
little more of the bush. Do you didn't do it
at the backend side. So I can quickly add in a
little more of the bush dd, but I will not pull it
completely till the right side. Just a little more extension to this only in a
smaller height. So you can see just in people adopt a little more
now at the top, I'm just giving it
literally David oh, you know, with the needs that
we were having previously, but this time in smaller sizes
that I'm adding in your. And lastly now just going to add in a small moon using
in the whitewash. So make sure you use
the whitewashing, not thick consistency
so that you get an opaque layer of the moon. So just going to be adding in a very small moon at
the top left side. So that is it BID with
the class project one, it's time to remove the
masking tape and see the final painting with
those predict mean edges. Now make sure when you
remove the masking tape, your edges are completely dry. And now since I'm using a
handmade draft when people, I need to be quite
careful otherwise, I mean, ruined my edges and the people may
get turned off. Always made sure to remove one masking be at the time
for not trash with removing Asking thief and always remove your masking
tape against the paper. So we end up with the
first class project, a pretty based upside
using in wash. I hope you guys enjoyed painting this piece of sky
step-by-step NEO by Neil. Now with the flows view also, you can see that I'm
no sharp edges in between this fight
going nearby neo, in adding in the
sky and the clouds. So I would see you guys in
the next class project, which we go ahead with
the next pieces tie and a different look to it to see you guys into
the class project.
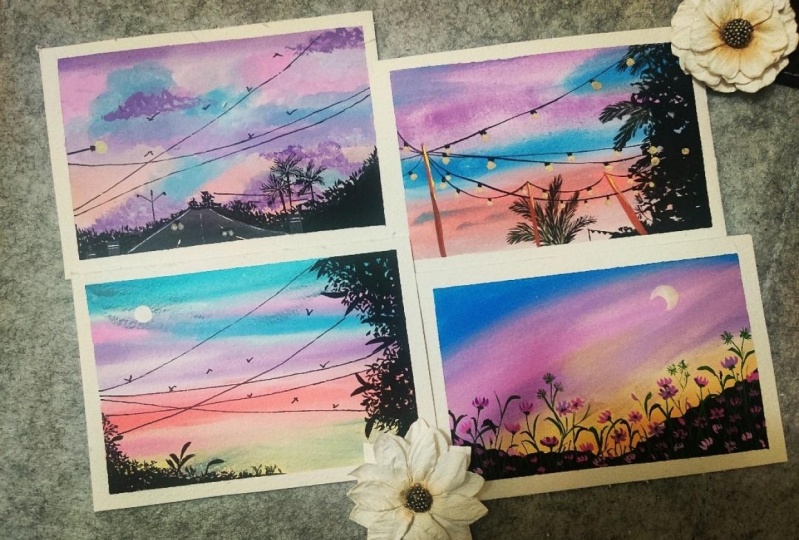
4. Class Project 2 - Onto the Roads: So now let's begin with
the second class project. I have maybe, but
they've done already just as I did in for the
first class project. Now for the second
class project, I'm going to be using
the same colors that I used in for the
first class project. So I will quickly just
prepared a little of the MOOC, Carlos, because there is very
little color on my palate. So make sure you
have all the colors JD already onto your palate. So the same, Carlos
add some violet color, orange color, yellow
and the blue color. So I'm just adding in little
by God to all the Carlos and then I will add the colors to them and forming
the basal panelist. Again, I would you
be if you do not have these exact same
sheets for yellow, you can go ahead with any
light yellow tone for odd, you can either go
ahead with a woman named interview did not
have an orange color, or you can just mix in a
little tint of your red, yellow, and white color. For the pink color, you can go ahead with the crimson color. And if you do not have crimson, you can use in your
scarlet color with a little extractant
of the white color. And for the line and
color, if you do not have, you can just mixing your blue and pink or
blue and crimson color to get in a violet tone. Now I'm mixing all
the basal gallows and keeping them ready before
beginning into three. So we are going The heck
with the same steps as before loading for
the first class project. The only difference being this time we are going to create the sky in a little different
manner than the first one. So first I'm going to begin with this base to
the violet color. I'm going to begin in
from the top side. So I'm going to use
in a flat brush and a round brush
simultaneously this time, and this time, I will show you the blending in a
little different way. So I will keep the other
round brush also ready into my site so that as soon as I need rash for
blending, it's easier. Now after the violet color, I'm just going to add in a
little white underneath this. Next after this I'm going
to be using in the violet, oh sorry, the basal pink
and the blue color. So for blending these
now I'm going to use in that round brush so fast
using the flat brush, I'm just laying down the Palo
Verde randomly in-between. I'm leaving a little gap. You can see on the right side, then I'm going to be adding
lizard blue color in-between. So now I even pick up
my round brush also. And after adding the pink color, I haven't added the blue
color and then blend both the pink and blue
using my round brush. So on and left edge also, I'm just adding in
a little bit of the pink color and
keeping a Jedi. Now next I'm going to pick up the blue color and I'm
going to add it in between both dumping sites that we
added in and the medulla in the right space that
we left in between the pink and the violet
at the right side. Now, I'm going to use my round brush and just
moving it in circular motion. I'm going to blend it with the colors around
the blue color. Don't round brush in
a dam consistency. That is, the brush was just dipped in a little bit of photo. Now again, you can see I'm using the round
brush very gently and just blending
it onto the edges between the pink and
the blue column. So this is how in-between
you can leave white spaces, add in the cloud colors directly and blend it
using a damp brush. If you want, you can even use
little of the white gouache for blending and giving little lighter
effects in between. Now again, you are,
you can see I'm using the round brush
for blending in. Now in between the
pink and the blue, you can see light tone
of the property being formed because of
the direct plane being off the pink and the blue. So that it's creating
further detail into the sky space actually
might indeed, if you do not want
that purple color, you will have to use invite Guassian between for blending. Now next underneath the blue, I added little white
because next color that I'm going to be using
is the orange color. And then the orange and
the blue bleed together, they may form all muddy. So I do not want die. I'm mixing a little
bit of the yellow and the orange together to get
a yellowish orange tone. And using this tone, I will add it into
the bottom side. Now this yellowish orange color. And so I will add
it in parts and keep blending it
using the round brush because I'm going to
leave little cloud space in-between an add another
color in-between. So now you're on the right side also you will see I'm just going to add little patches
of the yellowish orange tone, leaving gaps in between. Now in between these gaps, I'm going to add in the
piece to the blue color and add little more cloud
detail so you can see how leaving invite
gaps you can add in the color and then
blend in using by cosh. Damn brush, just as
I have been doing using the round brush in here, do not want to leave these gaps. You can even add them by a yellow layer of it for
it to dry completely. Then with a very light hand adding the blue
clouds on top of it. But I wanted to go ahead with a little
different technique here. Now with the blue clouds, I'm adding in a little bit
of the violet dye jazz band. Right now, if you
see all of these are looking just as
patches of the Palo. But when we even
begin blending this, it will automatically begin
to get into the sky shape. Now this time, you can see
I'm using a little bit of whitewash and may brush for
blending all of these colors. The blue and the yellowish
orange will mix together. It will begin to form
in little muddy colors because of the palate properties
of the orange and blue, which I do not want. Hence, I'm using invite
Guassian between and blending each of
the Palo step-by-step. Now you can see slowly
the patches are being disappeared because of
the blending that we are doing it using the whitewash. Same way, I'm going to blend in the clouds onto the
right path also unclear, the perfect blend
in-between the sky. If you are using or
soft gain people, it may not take you
much time for blending, but since I'm using in
a rough, clean paper, it may take me a
little extra time on a little extra white
gouache for blending. But you can see the result on
the dark green people also, the texture of the paper makes the sky look more realistic. So it's a little
tough for blending, but also it's what it. So now I'm done
adding in the sky. This, we are going to be
adding in some clouds. So this time for the clouds, I'm going to create a greenish
tint of the violet color. So I'm going to mix in violet, blue and the little
black thing just as we did for the blue color in
the previous exercise. This time going in
with a violet color, That's the violet, white
and the black color. The black color has to be just
a very little tint of it. So make sure you do
not add excess black. Now using this, I'm slowly
going to begin adding in clouds and make sure
you do not have excess B. So I'm using a
smaller size brush and just using the
tip of my brush, I'm going to begin
dropping in Panes. Now, better way you'll
feel that there is excess paint on the brush. Make sure to dab it onto a tissue and then
begin adding it. So you can see very random cloud shapes that
I'm forming in. And on the edges of this cloud, I'm letting me in the dry brush stroke so that it gives an actual
look to the crowd. So that is the reason I would recommend you to dab off
the excess paint onto our tissue so that
you can also get the dry brush onto the
edges of the cloud. Now, similarly, adding little clouds with the same color at the
bottom side here. Now I will just mix a little
of the same color again, but this time I'm going to keep the thinned
a little darker. That is, I'm gonna
make it one shade darker than the violet
CloudStack we already added in. And for that I'm going to add a little extra blank distance
than the previous time. Now, underneath these light-dark
logs that we added at the bottom side and
the bead that I'm just going to add in
some darker clouds. So automatically you can
see the cloud being formed. At the bottom species we
are going to show a road. We see that there's a
cityscape kind of see. So do not worry about
how the clouds are looking at the bottom
space because half of them will get covered
up and we begin adding in the road details
at the bottom space. Now just at the right side, adding in little more
cloud detail randomly. Now in geese, if you wanted to blend the clouds with the sky, you can just use a damp
brush under the layer of the Cloud and blended
into the sky like this. So you can see how easily
you can even blend this guy with quash
blending is very easy. Either using invite
guage, order damp brush, you can simply blend it with the previous neocolonial of
this guy and simply getting the look now just
starting last final cloudy days before moving
ahead and do this spin day. So just added a little after Cloud detail at the
top right side. And I'm just going
to blend a little into the sky, very little. I even let the edges also
be visible at places. Now next, let's begin adding in. And it is at the bottom space. So at the bottom space
we are going to be having in a broad way
and along the road we're going to be having in
the bush di did for adding in all of that we
are going to be using in the black color first, so I can quickly pick up some fresh black
wash onto my palate. Now first using the black quash, I will quickly mark
out the roadway. So the node v is going to be much more broader at
the bottom space. And as we move at the top space, it's going to be NADH
or so you can see a very small Broadway
that I've added in. Now, left and the
right side of this, I'm going to add a
little bush they did. Now make sure your bushes are
not too high because we do not want to cover
the entire clouds that we have added it. So they need to
be quite smaller. And out throughout the Part B, you need to make
sure that you read the heights of these
bushes as well. So you can see just using
the tip of my brush, I'm adding in the bush D1. Now as I'm moving
towards the edge, I have increased the
height of the bush. In this endless bees
keep it to very small. And as you move
towards the edge, you can increase the height
if you need like this. Now, again, you can see I have tried and make sure
that I do not cover them die of islet clouds
that I added in because I want those clouds to be visible
from behind these bushes. Now just like the first
exercise at the top by giving the bush detail and at the bottom I've simply
fill it in with black, leaving little gaps in
between very randomly. Now in the C V, I'm
going to add in the bush they did onto
the left side as well. In the center of the left side, I'm going to make sure
it's smaller in height so that I do not cover
those by clouds. And as I move towards the end, is that the edge you can see I'm adding it in a little
longer height. Now you're also, you can see it's in the same be at the top. I added in the DDI look and at the bottom species I'm simply filling it
with the black color. Now you can see how pretty those violet clouds are
looking from behind the bush. So you know, it's like a view that because
the clouds are hidden behind the bushes are little analytical is
visible to our view. We are still left to add in
and paint the main pathway and much more detail
into this pain pain yet. So since we have painted
a base to the sky, I want the bot to be also to reflect the color of
the sky a little. So I'm going to mix in the same violet to white
and the black color, but this time it's more off
the black color you can see. So I'm trying to
get an upgrade by lifting to add it
onto the pathway. So in that way, it will reflect the Greek, oh sorry, the violet color of the sky on the pathway as well. So just the admin violet
light and the black color. But this time much more Docker. Think of the black color itself getting in a
grayish while it. Now using this gray shoe, I left and I haven't painted onto the entire pathway forced. And then I have an
add-in for the BBS ones, this will dry in. So very simply I
added in distinct. Now at the bottom
space of the pathway, I'm going to add in black color. I'm going to blend it
with this and get a darker at the bottom space only. So I took up near to the sky. You have the light at the end
of the palate that we mixed it and at the bottom
speeds adding in black, giving it more darker as
it is moving closer to us. Now next I will pick
up little more of the black wash and
begin adding in for diabetes driving fast mock out the end of about three
that we added in. So just after the end of it, I'm going to add in the bush D1 as well in the US and thus base. But make sure that
this bush detail is smaller than
height so that you do not cover the entire Cloud
that you have behind this. Now, in this spot we drying, let's add in for those small
details into this pain day. And then we will add
the details into the pathway and meet
anybody topping day. So I've shifted to a
smaller size brush. And from the left
side I'm going to pop out a street
light coming in. So that means tan of this cheek
night is not enough view. It's just a main street
light that is in our view. So adding a small
horizontal line first, I'm going to mark that
street lamp. Now do this. We are going to be adding in
the light effect directly use again a mix of the
white and the yellow wash. So I'm not going to mark
the major outline of the lamp lookout your directly going to pop up
the light effect. The light off the street light, I'm going to use a medium
sized round brush. I have some yellow
and white quash mixed and you're
already on my palette. So I'm just going to reactivate that using in water you can see a pistol yellowish color and I'm just going to form a
small circle out your, I'm going to blend
into the background. So basically, this
is just going to be the first layer of the light
that we are going to add in, creating the glow effect for us. And once this glow
effect will dry, we will add the
father like detail. So using a damp brush, I'm just spreading this
yellow white color across and blending
it into the sky. Then, then we will add
the light detail on this. It will create a glowing
effect in the background. Now across the pathway, I'm simply going to be adding
in very small details. So some very random or
sheet-like details. Enzyme DDL binary
kind of look elevated anemia across the pathway
in between the bushes. So on the left side just added a very simple stand
for the street light. Again, not adding in
much detail out here. On the right side, I'm going
to simply be adding in a very simple boundary
kind of look, popping out from
between these bushes. Make sure you use a
smaller size brush for adding in these details. Now you will add this bomb G. I'm not going to add
in much of the BDD. It's going to be quite a simple, just a bomb J loop basically. So you can see a simple pump, just very simple
the days and I'm just pulling out very
simple black strokes, not abiding much about the
exact leaf shape to be looking because it's
quite a small painting and very small details. So they may not be
much in detail, but just need to get
the shape right. Now at how this I'm going to
add in another smaller pump, which will be half hidden behind the bigger palm tree that
we already added it. So just adding in
another smaller one, you're at the right
side as well. You can see slowly by adding
in 1D dean at the time, the painting is beginning
to take in shape and slowly we are getting in
such a detailed look. Now my pathway is
completely dried and I will begin adding in the
details into the pathway. So first I'm going to begin the same violet grayish tone that I have formed
on my palette. And I'm going to add little building details using this color in
between the bushes. So just very simply
using this color, adding in blocks to
act as the building. So just added one more. You're at the right side. Now you can see simply and
using very simple details, that bending is beginning to get in so much more of the detail. Look, we're not going
to be adding in the details to this
building by just simply blocks adding in the detail
creates so much didn't look into the painting and gets the painting into
more likely view. Pathway is completely
dried and I'm going to add in little detail
on the pathway as well. So under part B,
I'm going to show the glowing effect of
flight of two of the cost. They are not going to be adding in our didn't look to the car. We're just going to
show into headlights of the path showing the light
effect on the pathway. So first using invite gosh, I'm just going to
add small dots. I'm just going to blended
into the background. So I'm going to be
adding two sets of these white dots
closer to each other, one on the left side
of the pathway, one on the right side. You can see very
small dot-dot-dot. I didn't I'm using
the damp brush, I'm just blending it
into the background. So basically this is going to
act as the glowing the day. Do this, we will add the headlight light
effect and then give very small car detail and given
detail into this as well. Now there was glowing effect
dry using invite quash, either just add details onto
the pathway, onto the edges. So I'm using a smaller
sized round brush and the white quash and noted consistency and just adding in the details onto the edges, make sure you use the
smallest size brush for adding in these details. Otherwise you may run
out of proportion. Since it's quite
a small painting. In the center, I'll
register adding in very little detail randomly. Now let's add the light
effect everywhere. So I'm using in this
yellow and white quash mix that I have your on my palette, I'm going to use this
Antarctic consistency. First Eigen added to the
center of the street, like adding in the light effect. Now around that you can see
the glowing light effect that you have using
this same yellow color. I'm going to add the
headlight effect for the node at which
we already created. So just in the center
of that glowing effect, adding this yellow, white mix. Now ready carefully, just
using the tip of my brush, I'm going to blend this yellow
color as well to create more light effect on the part we around trying to show
the headlight effect, you know, spread across
because of the light effect. Now using the black color, I will just add very simple. The division between
the shoulder, RDD, just in between
the headlights, adding in the black
color and add the top creating a little block to
show the bumper of the car. So you can see I'm holding
the brush quite closely your so that I'm able to
add these minute the best. Now as soon as we
added the black color, you can see how the detail
of the headlight is popping out and creating that
glow effect on the road. Now lastly, using
the white color, I will just add
little more detail on Moody's blocks that we added. In case if you want, you can skip this step if you do not wish to add
little details out. Yeah, I'm just adding in
very simple the base. Now using my technical pen, I will just start
very simple lines and between the bushes to give more detail to this cityscape that we have added
around the pathway. So just using my fine liner pen, very simple and small lines
in between these bushes. Make sure if you're adding
it with the black color, you use a very fine liner
brush because you need to add these details with a
very fine detail brush. Now just adding a few
lines moving into this space as well using
the same black pen. Now onto this just going to simply I didn't
middle of the board details of your them sitting on to these violence
that we added it. And a few of them
into the sky species. You can see little by little, just very small is arginine so much more
depth into the painting. I even I didn't little of the streak plate
look through that, a little poll that we added
across the road side. So now let's remove
the masking tape. Before that, let me
show you a closer view. You can see the light
effect of the headline that is there because of the glowing
effect that we added in. So make sure you
blend the edges into the background and then add
in the center light effect. So automatically, you will get the glowing effect
to the headlight. Now be careful by removing the masking tape so that you
do not get off the edges. So you can see this
is a handmade paper. A little edge is drawn out. Your eye will quickly
corrected using in our little tint off
the violet color again. So you need to be
careful like this because especially
with a handmade paper, it's very difficult to
using masking tape. You got to go and
very carefully. So that is yet I'll give it
the second class project and look how beautiful this
entire spread looks together. The perfect based on Skype with the perfect
city was around. I hope you guys
enjoyed painting. This was spread. I will see you guys
into the third and the fourth class
project of this class. So let's begin our class
project in the next lesson.
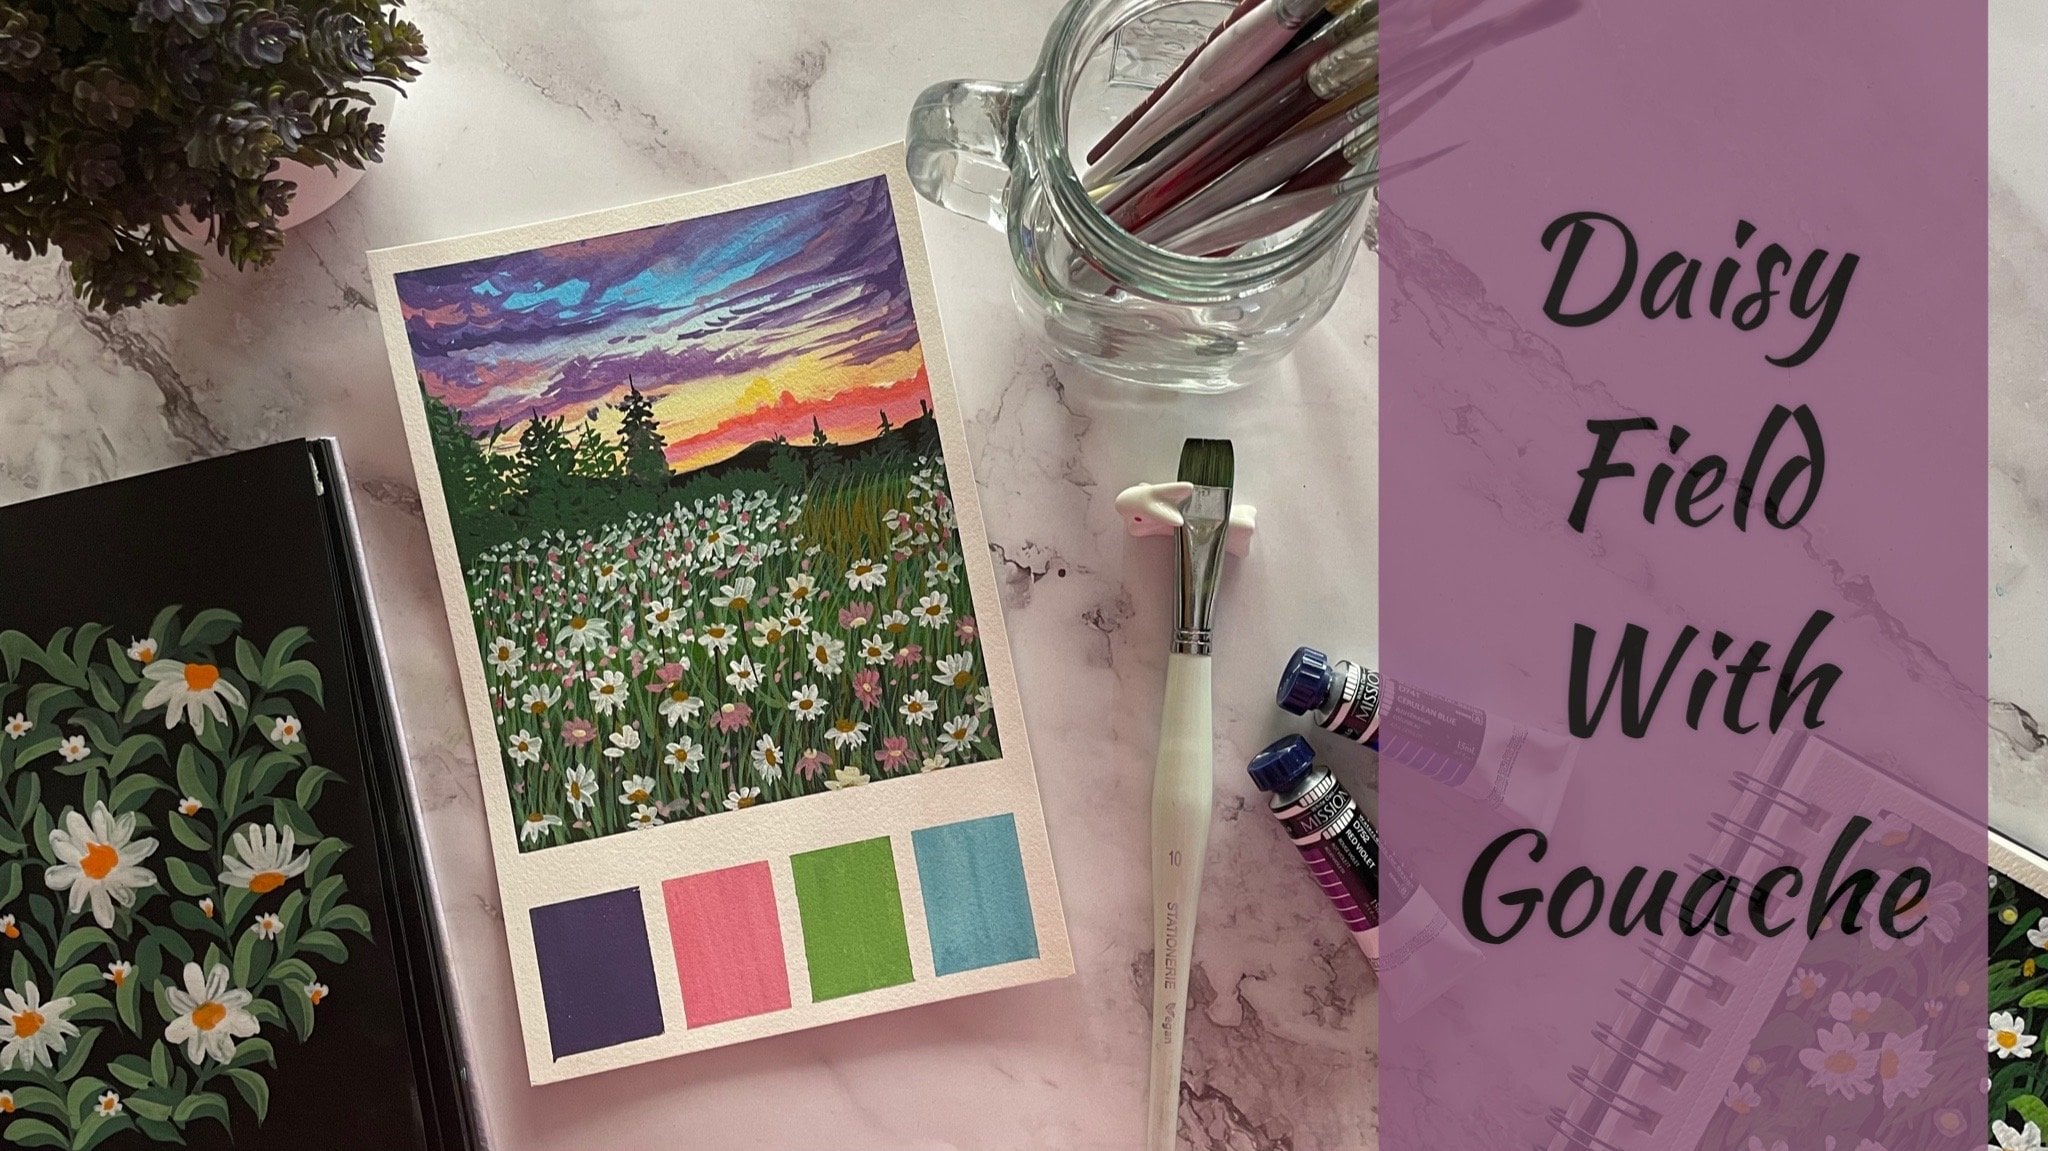
5. Class Project 3 - Into the Meadow: So let's begin with the
second spread of this class. We are going to begin
with the first fan-out. You're on the left side. I have my B, what they've done. And I will begin picking
up the colors one-by-one. It's going to be the
same colors that we used for the
first two exercises. So all for class projects are with the same
color combinations, but different techniques of blending and different
layouts of the sky. So I'm going to quickly
prepared all the panelists again just as the
previous two exercises. That's the big orange to yellow
low and the violet color. In this class, I have
focused more on creating. This guy is using the
same color combinations, but indifferently out using different all celebrate options are different dealing options. So in the first
class project we had simply just the eyelid and
symbol which they then using the black color for the next class project we added little more detail
creating in the pathway, adding in detail
around the pathway. For the top class project, we are going to be
adding in little flawed and field across
a mountain range. So with every class project we are adding in
little more detail, creating different layouts for the same basic
skies for this guy. Also in the first class project we used in somebody dealing. We did not add much of the
cloud detailing there. For the second class
project we began using in a round brush and create
different blend into the sky layer by layer and kept blending the clouds directly
by adding in the forest Leo. The third class project
is again going to build very simple blend of
the sky, the state. Or you don't very simple blend without using in much of
the different shapes. It's going to be
just Leo buy beer of the fallows blending
each of them one by one. So I'm going to
quickly prepared in all the four colors first and then begin adding
in the details. This time to the blue and even adding in a little thin Dr. pollution blue color to get a little darker tint
of the blue this time. So now I have to
follow the L2 or I will blend them when I begin
to add them on to the sky, I have just kept
them reading with the white color and
the water droplets. So first big thing in with the blue color at the top space, you can see it hasn't. It would be still
attached to it, but in the darker blue tint. Now first going to add in this blue color
at the top space. Now next to the blue color, I'm going to be adding in the base still violet colors I'm using in the mix of the
violet and the white color. Now next underneath
the violet color, I'm going to be adding
in the pink color. This time. You can see I'm
not using invite guage, Rotterdam brush
in-between for blending. I'm simply adding in
the pains one by one underneath each other and blending them together
while adding in. Now, you can also see I'm adding in the pins and little
diagonally this time. Now underneath the pink again, I just added in a little
violet highlight again, very small one as compared to the previous layer
that I added it. Now under the violet, I'm adding in a little
bit of violet because I'm using the
yellowish orange tone. And I do not want a
muddy color because of the blending of the violet and the yellowish orange color. So just used in a little
bit of white out there. Now you can see by mistake Lee, I ran on to the next page, but do not writing when I will begin painting in that one. I haven't covered that up since gouache is an opaque medium, it's easier to even cover up the mistakes and
correct your mistakes. So then I'm done blending
and creating the symbol sky. You can see this time
we just created a simple adding in the color one-by-one underneath
each other. Now did my background
sky is drying in. Ivan quickly pick up some black color
from my box and keep it ready on my palette for
adding the mountain range. So we're first going
to be adding in a very simple mountain
range at the bottom space. And then once the
mountain range will dry, we will add in the grass
details and the floor and feel the then at the bottom space
over onto the mountain. Now you may be
running that how onto the black color we will be adding in the light
color details. But let me tell you, since we are using in Gosh, it's very easy to even add
the lighter colors on top of the darker colors
and even still be visible and have an
opaque consistency. So I'm forming a very
rough mountain range. So on the left and
the right edge, I'm going to be having in the bounded range dollar
and in the sender's base, I'm going to be having
in shorter in height. Now I'm going to fill the
entire mountain range quickly with the
black color it says. So you can see how
simply I'm able to fill in completely
with a black color. And then once the
spill dry completely, we will add the details into this floral field and create the perfect pistol
field lookout you. So I'm done adding in
the mountain reach. Now we need to wait
for this to dry completely before I begin
the further details. Otherwise we will not
get the opaque look. So let's be it for
all of this to dry completely then
paint ahead photo. So now my mountain range
is completely dried and I will begin flower
details into this field. So for adding the flowers I'm going to be using
in this pink color, but in a darker without
adding in much of white. So I'm going to use
this darker tint to begin adding in the flowers. I'm going to begin adding
in very simple flowers. Just going to add a simple
five petaled flower store. Now some of the flowers I'm going to be adding
in India like, you know, top view and
some in the down view. So fast going to add
very simple flowers. Now in-between this out here, I'm going to add little
pattern with a violet color. So you can see just
across the pink petals. Using the tip of my brush, I just started pendants
with the violet color C v. I'm going to add in
very small flowers across the entire
mountain range. Some of the flowers
we are even going to be adding them onto
the mountain range. Before moving ahead,
let me quickly show it to you onto
our graph sheet, how I'm adding in
these flowers so that you'll get a better view
about adding in the flowers. So you are just using
the tip of my brush. I'm adding simple
pattern shapes closer to each other forming
in the flower shape. Now in-between the
pink feathers, I'm using a little of the violet color and
adding one or two petals using the violet follow to give the flower a
little detailed look. Now in the same way, you
can add a few flowers tilted towards the left
side or the right size. All some of the papers
moving downwards in the same V and add little islands with the
violet color like this. Now in case C, If you're not able to add
in the violet highlights, what you can do is you can be for your petals to
dry completely. And then on top of
the pink petals, you can simply add in
little violet highlights if you are not even to add the
violet petals separately. So now using these
different flower shapes, I'm going to quickly
begin adding in a lot of flowers across this
entire space somewhere. I'm just going to be adding
in very small round or legal showing as the bonds of the flowers just about to bloom. So now I'm adding in the
pink flowers out quickly. Now you can see
that every flower, I'm trying to vary the shape. So this flower I added completely with a
complete circle view. Now next I'm picking up the
violet color and go into either few flowers with
the violet color directly. So you can see I just added a little violet highlight
onto the pink flower first. And now adding in flower with
the violet color directly. Little small, small flowers. Make sure you use the
tip of your brush. You can see they are
very simple flowers just trying to maintain a round shape and add the edges of the petals, giving it a little reflow so
as to get it a flower look. Now seeing v, I'm going to add some heart-shaped flowers
quickly across this. And at the bottom space I'm
going to be majorly adding in small detail triangle
showing small buds off fish. The flowers are just
about to be blooming in. Now you can see
when I'm adding in the flowers onto
the mountain range, that is the black color. Still, the flowers are
popping out beautifully and I can see them clearly with delta lactone that
I'm adding in. So that is the beauty
of quash that you can add the lighter
colors also undo that dark colors and still
even be visible and have an opaque look just like we are having right now
with these flowers. Now at the bottom space, I'm simply adding in small buds, as I told you now at the top, just going to add a few
flowers from behind, the biggest ones
that, that added in. Now you can add
these flowers very differently in your
class project. You know, you can go ahead
with different placement of the flowers and different
angle of the flowers. They need not be just like mine. You can see I'm adding
them very randomly. I first added a small
patch of flowers. Now wherever I feel the need to, I'm adding in the photo flowers. So this is how you need
to go step-by-step. Now I'm picking up a medium
green tone and using this, I will begin adding
in the grass details, understand the dance
to these flowers. So since the green
was a little light, I just added very little black. Now using this detailer brush, this is a science
Ido pointed brush. Using this, I will begin
adding in the grass detail. Now, layering in guage, make sure you use the
pallor intake consistency so that you get an opaque look. If you will add a lot of water, you may not be able to achieve the opaque look often lighter
tones on the darker tones. So say for now, then
I need though big look off the green color
on the black color. I need to make sure that I
pick up the green color in a thick consistency by adding
it on the black color, only, then I will get
an opaque look of it. Otherwise, I will not be able
to achieve an opaque look. Now using the green color and a pointed tip brush very gently
and beginning to pull out some bigger
classrooms and giving some leaf details to these are details that
I'm pulling out. Grass details you can
see I'm pulling up very simple details
of the flower buds, which the flowers have not
yet bloomed out from there. So, okay, so I just
slipped off my brush. I will correct those green
details that have fallen by. So I will quickly, you know, be adding in the
grass details are there and cover up the
green patches that have, you know, because of thought. Brush just slipped
down from my hand. So I got those green patches. So you've got to be a
little careful with this as bare metal since
we're using wash, You can see how easily I
will be able to cover these up and they no longer
be as a mistake. I will cover them
up and, you know, fill in this space with the grass strokes
that I was going do. So now that pleases, you can see I'm pointing out smaller grass strokes
from the bigger ones. And then at the top, just
giving it admittedly did for the flowers to
bloom in, out from there. Now in between, I'm going to use in a darker green, green tone. So I'm mixing in a lot of black, but very much loved the green. I'm going to give little
more detail out to you. So I'm Doppler
effect. I just added in another layer of the gastroc. Now add the rest of the
places I'm going to quickly I then a lot of the grass strokes and do each of the flower, I'm going to pull out
the stem separately. When you are adding
these grass details, the only thing you have to
be careful about that fast, you use the smallest size brush so that you'll get
these tunnels strokes, which will give a lot more detailed look
to your paintings. Second, make sure you add
one stroke at a time. Do not rush with adding
in these strokes. For each of the flowers, make sure to add in a
separate stem they did. And then from
those, if you want, you can keep popping out for the stem details of further
leaf detail from these stems. So you can see it pleases, when I add in the
stems of the flowers, I'm even bother pulling out
little leaves from those. I will still be adding in a
lot of leaf the data to this. Now you can see repainted
simple sky this time. But for the meadow details we are going in better detail view. Now going to pull
up some tickets. Strokes often leaves the
data at the bottom space. Now on the right side you are, I'm going to pull out
some big aircraft strokes from beyond the mountain range. I'm going to keep adding in for those smaller strokes to these big Olga strokes
that I'm pulling out. So you can see I'm
connecting a few of them to the flowers
that are already there. And then at the top of that, I'm just giving it a little
town details as well. Now just pulling out
a little more of the grass details vary randomly wherever I feel that there is extra gap and I need little
off the grass details. Now see, after painting
you realize you need to add in a little
more of the flowers. Then you can simply
are then more of the flowers onto these
grass strokes as well. Because again, onto
these grass strokes also the flowers will stand out to be the only
you need to take care of. Your grass strokes should
be perfectly dry before you begin to add in the
flowers on top of them. Now next, using a
darker green tint, I'm just adding the center
to each of the flowers. It's more towards
the black side that I'm using in now to the flowers that at or towards the left side or the right
side or half in shape. I'm adding them just
at the bottom space, adding little detail into these. Make sure you use
the pointed tip of the brush for adding
in these details. Otherwise you may run out
of shape for the flowers. So in case if your brush
does not have appointed, make sure to shift to
a detailer brush for adding in these
details one by one. Now you can see with every
medium that you are adding in, the field is looking into much more detail and is
beginning to come to life. Now at the bottom space, I feel the need to add
in a little more of the flowers because I feel
that spaces and the dilemma. So I'm going to pick
up the pink color and noted consistency. I'm going to begin in
very small flowers. So I'm going to show
that these flowers are at a distance from us. So just very small
Vds of visible. So very simply just using
the tip of my brush, I'm going to add in small
details at the bottom space. Now you can see when
they're all overlapping, the green ones also, it is perfectly still
standing out obeyed because the green grasses
have dried completely. And after that I'm
adding in these flowers. Now I'm just mixing in a lot
of fight to the pink color. And I'm going to add a few
of the light colored flowers medially at the Docker
species at the bottom area. So automatically you will get a little more color variation to the flowers in your field. I couldn't have these
lighter tone flowers at the top space of this guy, because this guy is
often lighter tone and these flowers are
also often lighter tone. So then these flowers
wouldn't be visible. Like your, I will show you, you can see I'm adding
in this flower, it is hardly visible because the sky is also almost
of the same fallow. Now just going to add a little more of the field detail also. And then we will be almost done with this painting as well, even just left with one
more class project. So you can see it's heavily every class project we have gone ahead with a very
different approach, added in different details and the different beautiful
landscape paintings, but using the same
color combinations. Now slowly, just well enough. Little more of the class details wherever I
feel the need to. Your LEA may be completely
different than mine because of the placement of
the flowers and the leaves. So accordingly, if you
feel the medial can keep adding in a little
more of the detail look. Now you can see
using the Docker, wherein I have more of the black color and less
of the green color. I'm pulling out little
leaf strokes like this, giving more detail
to this field space. Now lastly, at the bottom space, I'm adding in more of the leaf D1 using the light
green paint and filling more of this
piece and letting only little black
space be visible. Now one last thing,
I'm going to be adding in a moon
at the top space. I'm going to add a half moon. So I'm going to be using
in this circle out here, I'm going to use the
smallest isochore. And using white gouache
and the brush technique, I will knock out half
shape of the moon. Half shape of the
moon at the top side. So trying to showing
the half moon towards the top side this time, you can wait for my mom
to be completed and completely and then please
The Mona accordingly. I'm just adding in
white gouache for now. And then I will add a
little highlight to this MOOC with the
yellow and orange color. For now, just adding
in an opaque layer of white forming in
a half-moon shape. So you can see the
half-moon now, but I will just add little pink highlight
though this on the edges. So I'm using this
violet pink mix. I'm just going to add
little darker highlights on the edges of the moon
and define it more. So very carefully.
You can see using just the tip of the
brush on the edges. I added the pink color. Now in the center of the moon, I'm going to add a
yellow highlight using the yellow column, which is already on my palette. So make sure you use the
smallest size brush for adding in these details and defining
the moon step-by-step. Otherwise you may run
out of proportion. And then it will
be very difficult to correct the
shape of the moon. Now using the yellow
and the white mix, I'm going to add
gluttony relating to the moon in the center space. So that is it we are ready
with the third class project. Let's remove the masking B
and C, The final painting. Make sure that your edges
are completely dry it, and in case if you are also
using a handmade paper, they move your masking tape very carefully and very slowly. You can see a decal
edge before gives another beautiful glow to the painting because of
the decade edge loop, I love using index colored sheet for such dedicated works. So the final thing that we did in Photoshop
class project, just one last step to remove it. So let me give you a closer
view of this middle. So you are, is the third
painting with the piston sky, but with a meadow in
the landscape view. I hope you guys enjoyed
this third class project. I will see you guys and
do the last class project completing in the cities
of the basis case.
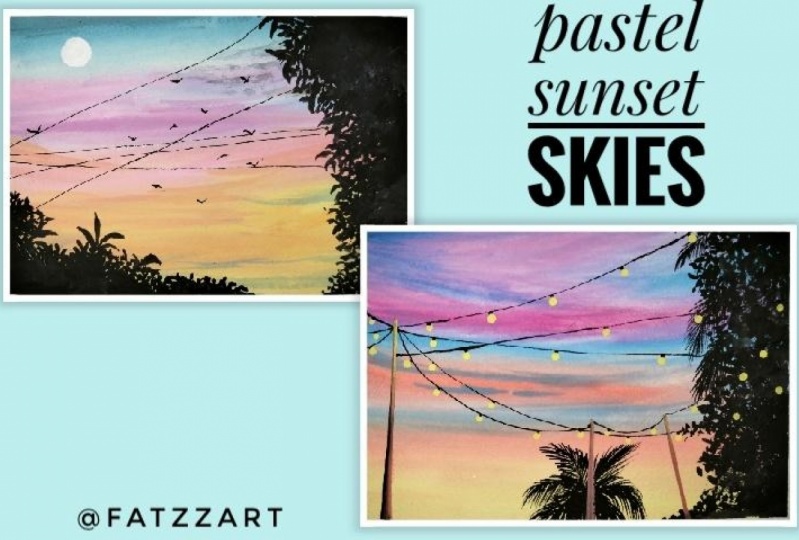
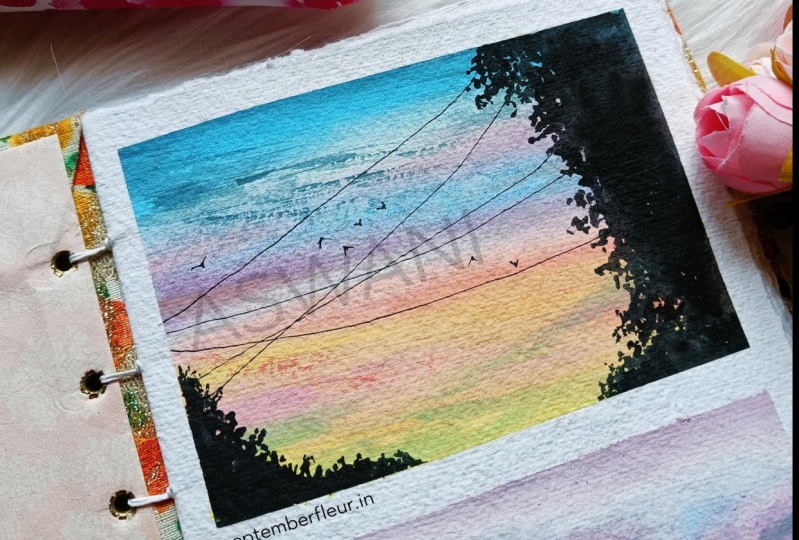
6. Class Project 4 - Street Lights: So let's begin with the last
class project into this CVs. For this guy, I'm going to
be using in the same colors that we have been using it for the previous three
class projects. That's the mix of violet, pink, blue, orange, and yellow Kano. This time we are going
to be painting in as chief view with a lot
of street lights out, low string lights
actually and giving a little funky and family DPS. So the panels that I'm
going to use it first, I'm beginning with the violet
color at the top species. This time I'm going
to go ahead with the blending a little like
the second class project that's using the round
brush in between for blending and adding in
the sky in patches. Now next I'm adding
in the mix of blue palette that I used
in the previous exercise, which I already
have on my palate. So it wasn't mix of pollution, low light wheel and white color. Now do this. I'm
going to begin using the round brush in
a dam consistency. I'm going to blend
the edges of this. Now one by one, I
will begin adding in little Carlos below it and keep them blending
into each other, nosing in the damp brush. So next below this
blue and violet color, I'm adding a layer
of pink color. Now this pink layer, I have simply blended in using
in the flag dash itself. Now shifting to my round brush, I will begin having
the loop again. So do not know either
side it a little more of the white palette which I
already had on my palette. And I'm directly adding it
underneath the fill color. Now when the blue and the pink layer blend together,
it may give you a little, since we are not losing inviting between publicly on the edges, I'm giving him dapper
blue thin as well. Now before moving ahead using the round brush
and the blue color, I will begin adding in the Cloud BB's at the top
space your as well. So I'm using this blue palo, which is does the
blue mix that I have been using since
the last exercise? So just using the tip
of my round brush, I'm simply adding in little color and blending
into the background. Now I will begin painting
the for this guy. So I'm using a whitewash forced underneath the blue colony
or that I have added it, and then I will shift
into the next color. Now I'm mixing a little
bit of the audience, yellow and the white color. And below this
white color layer, I'm going to be using in this mix of the
orangeish color mode. Now you can see because you have the white colony or you're
not getting enough money. Otherwise because of the blue and the orange closer
to each other, you may begin to have gotten
the money Boone's now on. I'm just blending it with a little bit of the
blue color as well. Now again, at the bottom speeds
below this orange color, I'm going to be adding a little more of the blue cloud space. So you can see we are
trying to building or different sky hellos that we have been using since the
past three class projects. So again, just using a damp brush for blending
in the palace in-between, I'm spreading the palette even. Now again, I would specify since I'm using it and asking people, I'm using a little more of the water so as to get
the blends easily. Now, this darker blue, I will add in the clouds to
this fossil species that we added it and then
move ahead folder. So you can see I'm just using the tip of my brush and adding in simple strokes to act
as the clouds in the sky, you need to use an add these
brush strokes very gently. If you will add in
a lot of pressure, you will get more
of the muddy tones instead of the cloud shape. So to get that from an envelope, you need to make sure
you use your brush very gently and not add
a lot of pressure. Now in the rest of
the atom size piece, I'm simply going to use this
yellow and white color mix. I'm going for being a
complete sky with this color. So I haven't even
either listed off the orange highlight
as venule in-between. To get a little more
drama to the sky out. You can see how easily
the philosopher blending. Now because of that
off green again, I'm using in a little more
of the word dog, but again, I would do my nephew, if you are using it as
smooth gain people, you will not be needing it. For both, if you will
use a lot of photo, it will be very
difficult for you to get the A-B-C Look of the
philos just as mine. So make sure you use a palomino big
consistently so as to get the perfect look to the gallows and gather albeit nucleoside. Now let's meet for this type
of enzyme completely and then begin adding in this
GBBs to the spin day. So now my sky is completely dry and I will
just quickly begin up some black wash and I can begin adding
in the leaf EPS. We are going to be adding in a little bush detail onto
the complete right side. And along with that,
we are going to add a little family of deviance
at the bottom side, on the left side has been. So let's begin step-by-step
and RDDs one-by-one. Do not worry. I will
guide you through the entire process and keep telling you as to
how to go ahead. So first I will
begin with a little funky leaves your at
the bottom speeds. So basically the G
is not in our site, it's just the palm leaves
that is visible to us. So your smallest
size brush and just pull out simple palm
leaves like this. So we are going to be
adding in palm leaves closer to each other,
overlapping each other. Just filling in this
piece very simply. So you can see how simply
just closer to each other, I'm beginning to add in these
palm leaves closer to each other forming in a cluster
of the palm leaves out your. Now a few of them
I'm even going to be adding in overlaid
onto each other. Make sure you have
them tilted as well. Like I'm adding the 10
TO now since again, might be ways that
Afghan people, I get a little dry brush stroke
in-between. But it's OK. It will only add to the
beauty of this being big, but still I tried to poverty but using an ethically or off, make sure you are adding
these details using a smallest size detailer brush only then you will be able to, Given the lookout you. So I'm done adding
into palm leaf details your at the same speed. Now I will begin adding
in the bush detail and the family feeding
on the right side. So we're going to paint
this entire patch or pure. So I've been false. Begin with the Bush DP
and then from that, I haven't followed the
family if the bills. So just using the
tip of my brush, I'm going to begin adding in the bush detail onto the edges, paused, and then fill the entire space with
the black color density. Then Bush's Ivan
pull out a little of the Internet MDD and MOOC. So now you can see I'm pulling out new to
love her palm leaves. The sum going to be having in the bush dB and on
the edges and some vague not going to be having these Help Omni feet
is popping out. Now after a little of
the family detail, I'm just adding the
two worst detail, just close to these families. And then the rest of the piece, I didn't fill in with the
black color at the end. Now as I'm moving down once again and try to
blend off between both the things that is
the little bush detail and now again, little
families details. Now when you're adding these
details onto the right side, make sure you do not
make it a lot broader. All keep it a little smaller in width so that there
is this guy still visible left to add in the string like
details into the sky. Also, we will be
adding in a few polls, so make sure you do not add it. Now at the top speeds, I'm just trying to
alter the shape a little because it's looking
like in a straight line. So just trying to
alter it a bit, adding little more
just at the top, say now the rest
of the right side, I will quickly fill it with the black color
completely in-between. If you have little or small gaps visible, it's perfectly okay. It will only add
to the beauty of these bushes and the pine
genes that we are adding in. So I'm almost done adding
in the black color, just a very small
space left out. So now. Rush and using this
model is size brush. I'm just going to add in little details out you're
on the right side. So you can see simply adding in little medians onto the edge, giving you the VD view. And if is only beginning to get into much more
of the detail, nope, just by using the smallest size brush
and adding little details. So at some places I added literally be knocked
off the families. And at some places I
add in little detail, lop off the bush leaves
as much details as bent. Now let's begin adding
in the string like so, but that I have picked
up little more of the black wash. And
now using this I will pull out three to
four string like d. D is supposed items will love the bios for
the string life and then begin adding
in the leaf is. So this time I'm pulling
out the wire with the black color directly using
in this fine liner brush. So I added one right now another one forcing
from this line. You can see I'm using a
smaller size brush pens. I mean, people get
in these thin lines, make sure you use the
smallest size brush and not a thick brush. Otherwise you will
not be able to achieve these little details. I didn't read the whole folder
at the bottom spacetime, just picked up a little bit
of the onesie and I follow, and I will begin adding
in the points out to you. So you can directly use
the one sienna color in a little darker consistency
and begin adding it. So halfway through, I
shifted to the black color. So the reason why I use the bond sienna color
at the top space and the black color the
board game space is to give a little
detail our effect. But this guy onto this ball
as bare hands at the top, I use light color
of the bonds here. Now, the one on the bottom, I mixed it with black
and gave it the Docker. Now see, I didn't do the three MOOC ones
at the bottom speeds, but off smaller height, one of them, I'm going to
add in the data as well. So now this last one
you're demanding, I'm adding in the liberal, then later on these boards I will give live in
light effect as well. For now I'm going to shift into the black color now and give more of the wireline be this crossing across
through these holes. So now I'm adding in more of the string lights moving
across these balls. You can see I'm adding them a little curvy shape to these. We are going to be adding
in the string Lai De days so far now first
adding in this gene D days, then step-by-step me when
I fold the DBAs out. Now if you want, you can go ahead with a little
different movement of the string lights and moving
in different directions. So it's completely your choice how you want to please him. So I've been just add this last one most Qingdao to order, and then I didn't begin
adding in the light. So just phi strings
that are added. Now before moving
to the 90 days, I will quickly add
in a small flag, kind of a median out. So just as one night and
then moving into the bushes, I'm just adding in
small triangular to defecate the flags
hanging out your. Now do these string lights. Let's begin adding in little boxes to show from which the light
will be popping up. So just adding small
infinite genes to show from where the lights
will be popping up. So I'm to all of
the string lights, I'm going to add these
little details quickly. Now you can see I'm leaving little spaces and
adding these details. Now on some of the
string lengths that are crossing each other, you can decide as to
where do you want to please don light according
non-Buddhist string lights. So at some places you can
leave little larger gaps depending on the placement of your string data
crossing each other. We are even going to be
adding in the string, that is the light effect
onto the bushes as well. Because since again, we
are using in wash Carlos, the light would pop up even brightly on the black colorized. So as I have moved towards
the bottom string lights, you can see I have added
these boxes in smaller sizes, plaster so that these lights are visible to us in smaller sizes. Also the spacing between the low uneven strings.
This is very less. So make sure you add those boxes smaller
sizes so that you can easily add in
the light without overlapping onto
the string species. Now do these boxes. Let's begin adding
in the light effect. So I'm going to use this
yellow and white quash mix and begin adding
in the light dBs. And I will just add
a little more of Phi plus 2 this and get a
piece still yellow color. Now using this based
on your nofollow, I'm first starting small dots
just below the black Palo. Make sure that your black
color was completely dried. It also makes sure that
you add it very carefully. Do not touch the black color. Otherwise, if we
begin to move into each other, if you want, you can even create a little
glow effect around these light fast and then hiding
these like the veils. Now under the Bush,
the date although your IV directly
either light swap and you can see
it's timing out or big Leon Buddha
black layer as well. I'm giving it the whole
freaking IDB lump your as well. Now I will quickly
add the light to the rest of the string lights at the bottom space as well. So I'm almost done
adding in the IDD, just undo the last one, make sure you use
this Colleen and opaque consistency only then you will get this
bright light look. Otherwise you will
not be able to achieve the bright light blue. Now, next, I'm going
to add in a little of the light effect falling onto the faults that
we have added in. So I'm mixing a little of the orange and the
yellow color with a little bit of whitewash and
good yellowish orange tone. I will add little highlights to these polls that
I have added in. So basically I will try to show the effect of the light
falling onto the bone, giving it that like
highlighted look. So just using the smallest
size brush and just using the tip of my brush on both
the right side of the fall, I'm just going to
add a fine line with this color mix to throw the light effect falling
onto these pools. Now I can just pick up little bright yellow
color and I will add little highlighted
with a yellow color directly onto these balls, onto the light highlight
that added on 3D. Now next, using a damp brush, I will just add
little details to. These are top speed
slides because you can see they are just
looking like dots out there. So I've been very
simply blender. Now, last thing, using a little
bit of the orange color, I will just add little highlight to the bottom space light so that they stand out more
brightly in case if you want, you can skip this step for just use the smallest
size brush and at the bottom of these
lights just add a little highlight
with the orange color, just very small
rhyolite so you can either lights are being
defined a little more now. So radio randomly,
I'm just adding little more by Nike
Egypt the night. And that is, we are ready with the fourth class
project as well. Now let's remove the
masking B and C, This final painting into
this city of the bases. So make sure you remove the
masking Dave, very carefully. Angular edges are
completely dragged. It always makes sure remove the masking tape
against the paper. Now again, your you
can see I mistakenly lifted up little off
that left side people. So that is all we
need to be careful if you're using a paper
on both sides. So I can just tried to correct
that out. But that is it. We are ready with the fourth
and the final class project. Let me give you a closer view of this class project as well. The blending looks so powerful even on a
graph sheet paper. So I hope you enjoyed this fourth and final class
project of this class.
7. Thank You: I hope you guys
enjoyed painting in these four pretty beautiful
evening sunsets with me. I hope through each
class project, you will, even though I understand the different blending
techniques that we went through for blending in disguise and thriving
in the clouds. I would love to see all of your class projects into the project section
of this class. In this, if you like this
class for whatever reason, I would request you to please drop in a review so that it will help me reach the audience who would be interested in
are similar content. I will see you guys
soon in my next class. Thank you so much to each
one of you for joining me into this class and
painting it along with me. Thank you so much once
again for joining me.
 Umashree Taparia, Artist, Art Instructor, Entrepreneur