Transcripts
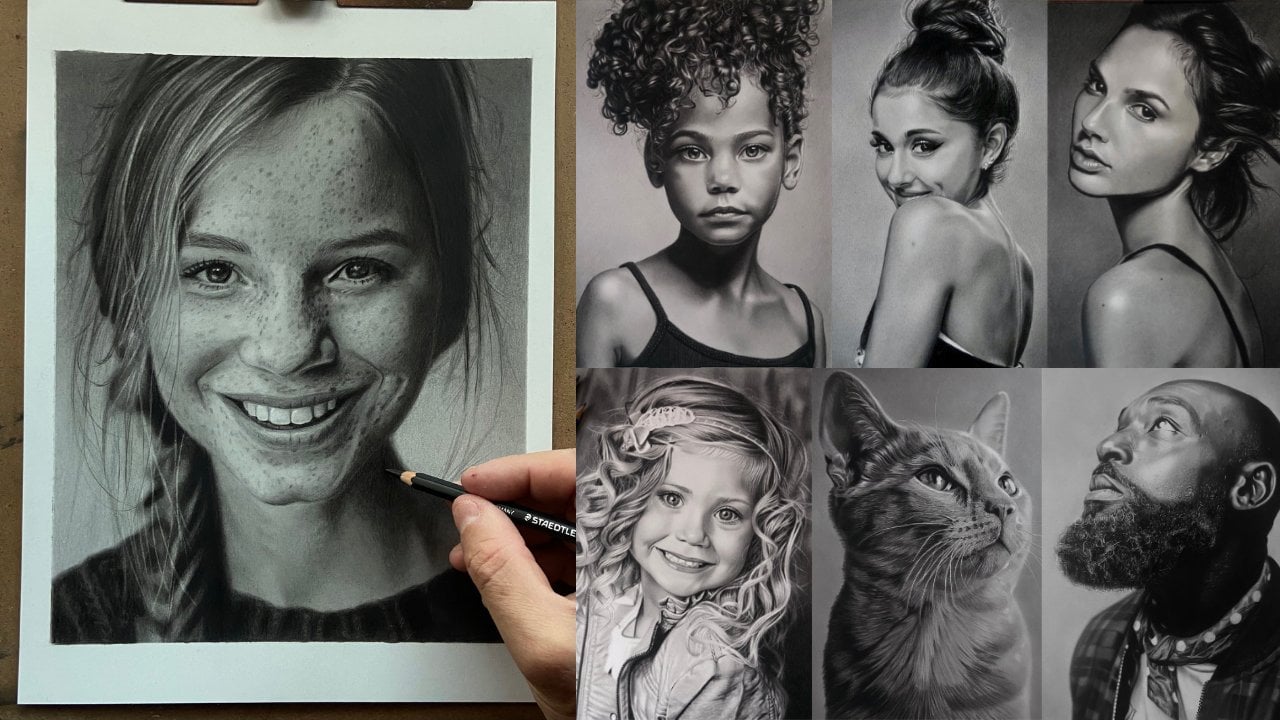
1. Introduction: Ear: Hi, my name is Shane, a professional portrait
artist based in the UK. I run my own commission
based art business, we help clients recreate
heartwarming moments by drawing photo reelist
portraiture of their loved ones. This class is the fourth
episode in the series Daily Exercises to improve your portraits and
will focus on the ear. You'll get a chance to work
on your brushwork skills once again by rendering super
smooth skin texture. In addition to this,
we'll be creating subtle skin surface hair detail and flyaway
hair highlights. Whether you're interested in photorealism or hyperrealism, knowing how to utilize
a full range of values is foundational
to achieving both. It's impossible to achieve this by using graphite pencils alone, so we need to incorporate
different types of pencils to give us a
full spectrum of value. It can be quite a daunting
prospect when starting out, even if you have a
little more experience and just want to up your game, trying to figure out which
techniques to use or which materials to buy can
be a frustrating process. So, I wanted to develop a class whereby at
completion of that class, students will have nurtured
the skills necessary to produce stunning
photorealistic portraiture. I'll guide you through 26 small manageable fun drawing
studies that will take you from novice to
advanced in one class. You'll learn a specific
lambing process that uses graphite, carbon, and charcoal pencils together to showcase a full range
of beautifully rich, saturated tones with
exceptional results. I've separated this class into a series of eight mini episodes, each focusing on different
elements within a portrait. Please feel free to visit my
homepage where you'll find all eight episodes within the series to be added
over the coming months. Students will learn how
to observe and recreate details that help achieve
realism and authenticity, a skill set that actually translates beyond
portraiture and pencil drawing as it's relevant practice for
lots of visual arts. Beginner to advanced
students, welcomed. I want to assure the
very best of luck, so grab those pencils
and let's get cracking.
2. Class Orientation: Ear: So welcome back for
the fourth installment of Daily Exercises to
improve your portraits. It's lovely to see you here. If this is the first
episode you've come across, I encourage you to visit my home page where you
locate all class episodes. I intended for the series
to be worked through from the beginning as
each individual lesson builds on the last and
has been organized in such a way so as to further
your skill set as you go. By introducing tools
or techniques, increasing time and
improving patients or practicing newly learned
skills and honing technique. Also, there are fundamental
techniques located within the first episode
that are important to master if you want to get
the most out of this series. There are eight class
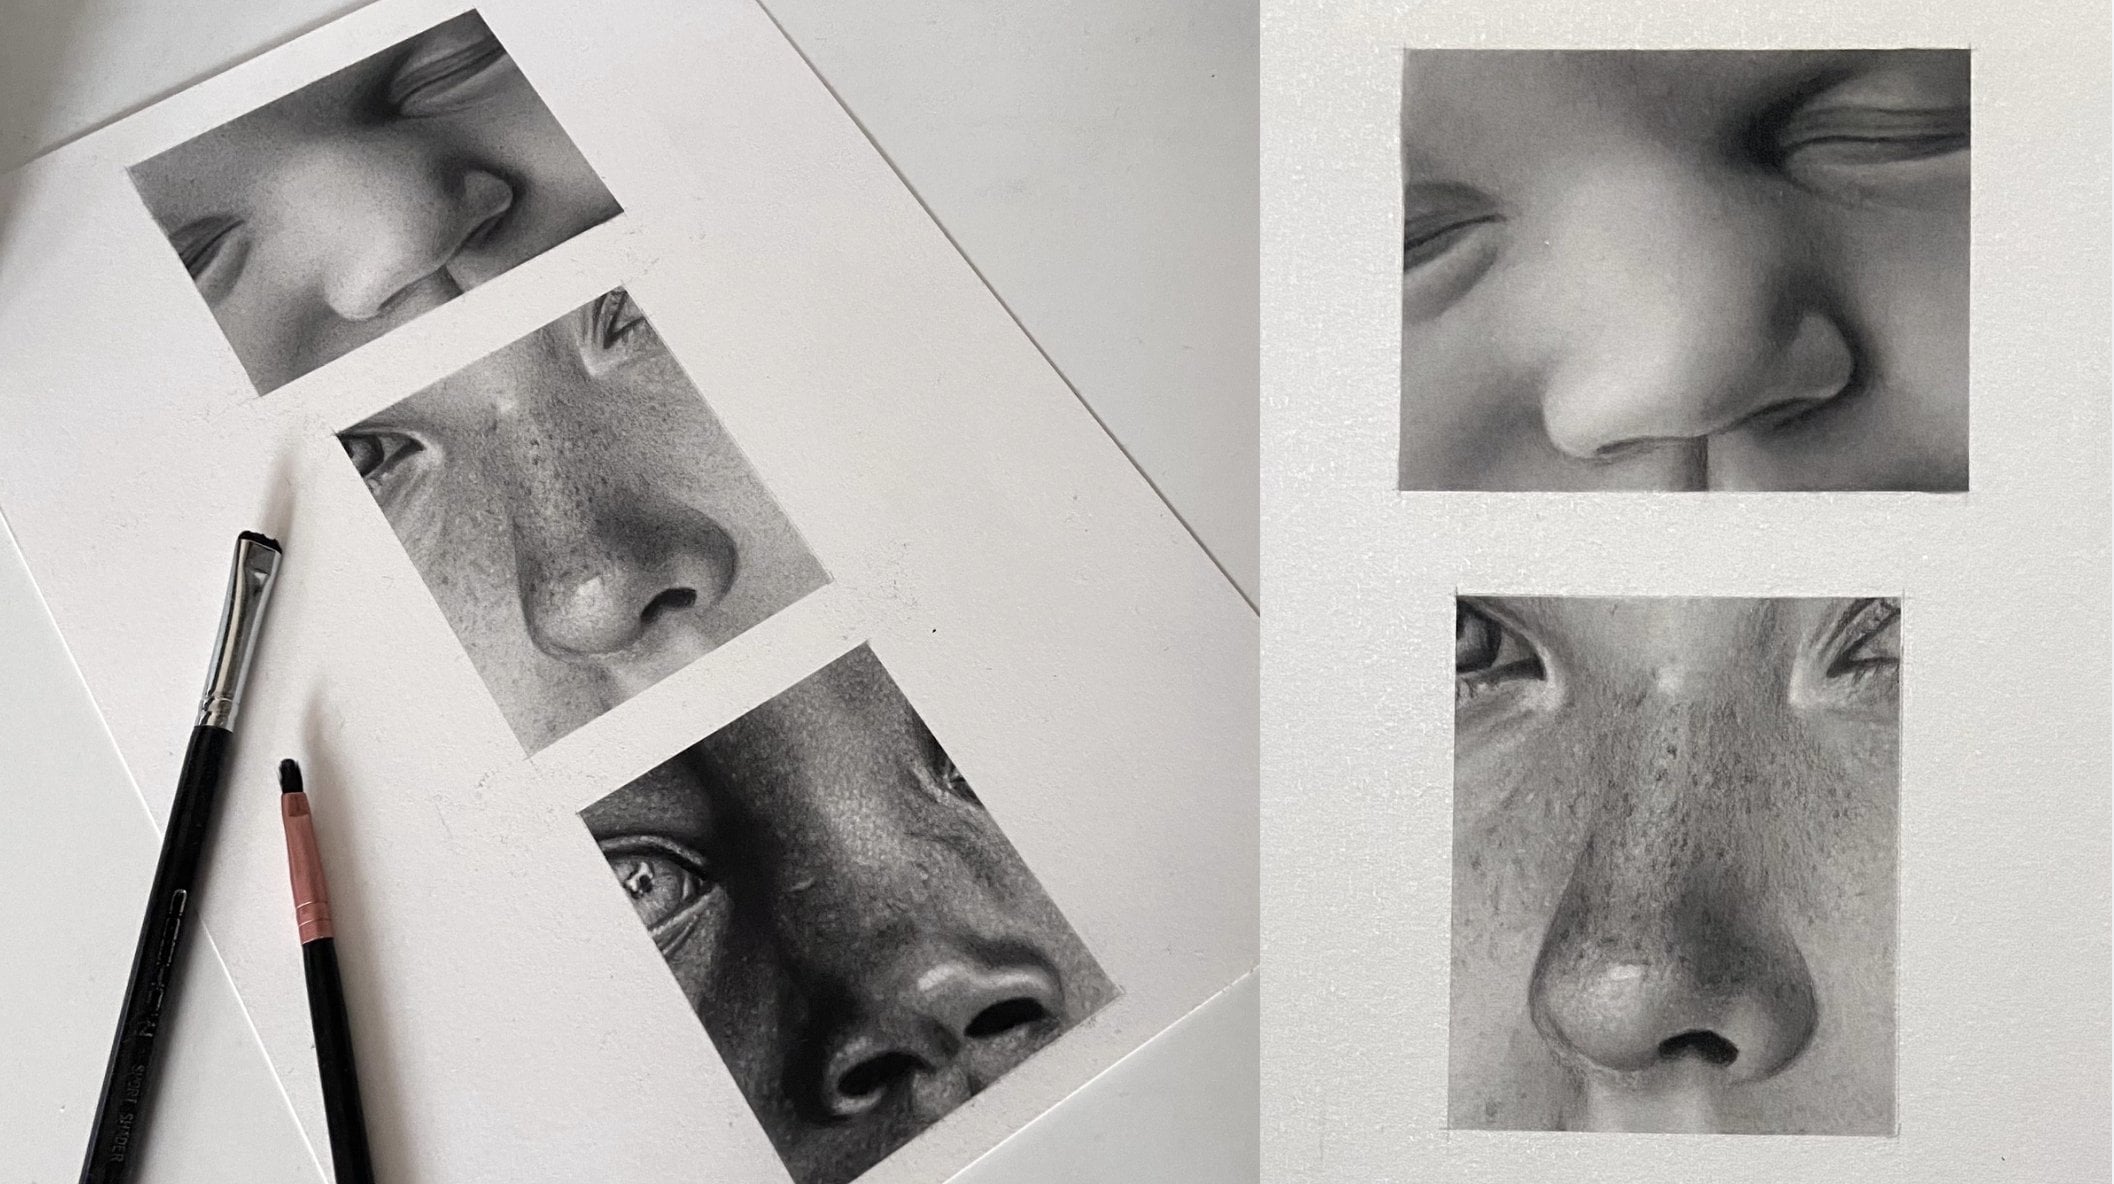
episodes within the series, and in this episode, we'll focus on the ear. You'll once again get
a chance to practice your brushwork while creating
super soft skin texture, like what we did in episode two when rendering
soft babies skin. But this time, you'll get
an opportunity to use a monozero eraser and
see just how effective this tool can be for creating subtle skin hair detail and
thin flyaway hair highlights. Two elements alone
will add depth and authenticity to your work and really help your
drawings to pop. We have a full range
of values to play around with once
again and a step by step procedural breakdown for
drawing a hyperalistic ear, including base
layers, stippling, shadows, skin texture
highlights, and more. Completing small
studies will not only help keep your
attention focused, but will also help
prevent you from feeling overwhelmed,
tired, and frustrated. Using a full set of values is key to creating photorealism. But if you place a
deep black charcoal directly on top of graphite, the contrast will
look too stark, so I'll show you how to layer different pencil compositions to maintain a consistency
in tone and keep all values in
harmony with one another. I've uploaded gridded
printable sheets in resources below this video, along with reference photos, materials list, and schedule. You can mark out the
border shapes and use a grid method for outlining
or free hand if you prefer. Get the most out of
this realism class, I recommend that you one, mentally prepare yourself
to slow down before each lesson and take your
time with every project. Two, take a photo of each
finished study as you progress, place it alongside the reference
photo using an app like layout or on your desktop and make any necessary
adjustments. This is such an
important part of the process when learning
and will give you a greater understanding of any difficulties
you may be facing. And three, try to
increase the time spent adjusting and
perfecting your work at the end of each study. The basic materials
you'll need to get started will be arches paper, Stedler graphite
only pencil set, StedlerGraphite carbon
mixed pencil set, one contipary charcoal pencil, a few cheap brushes,
and some erasers. You can find a whole lesson
on materials in Episode one. Before we move on
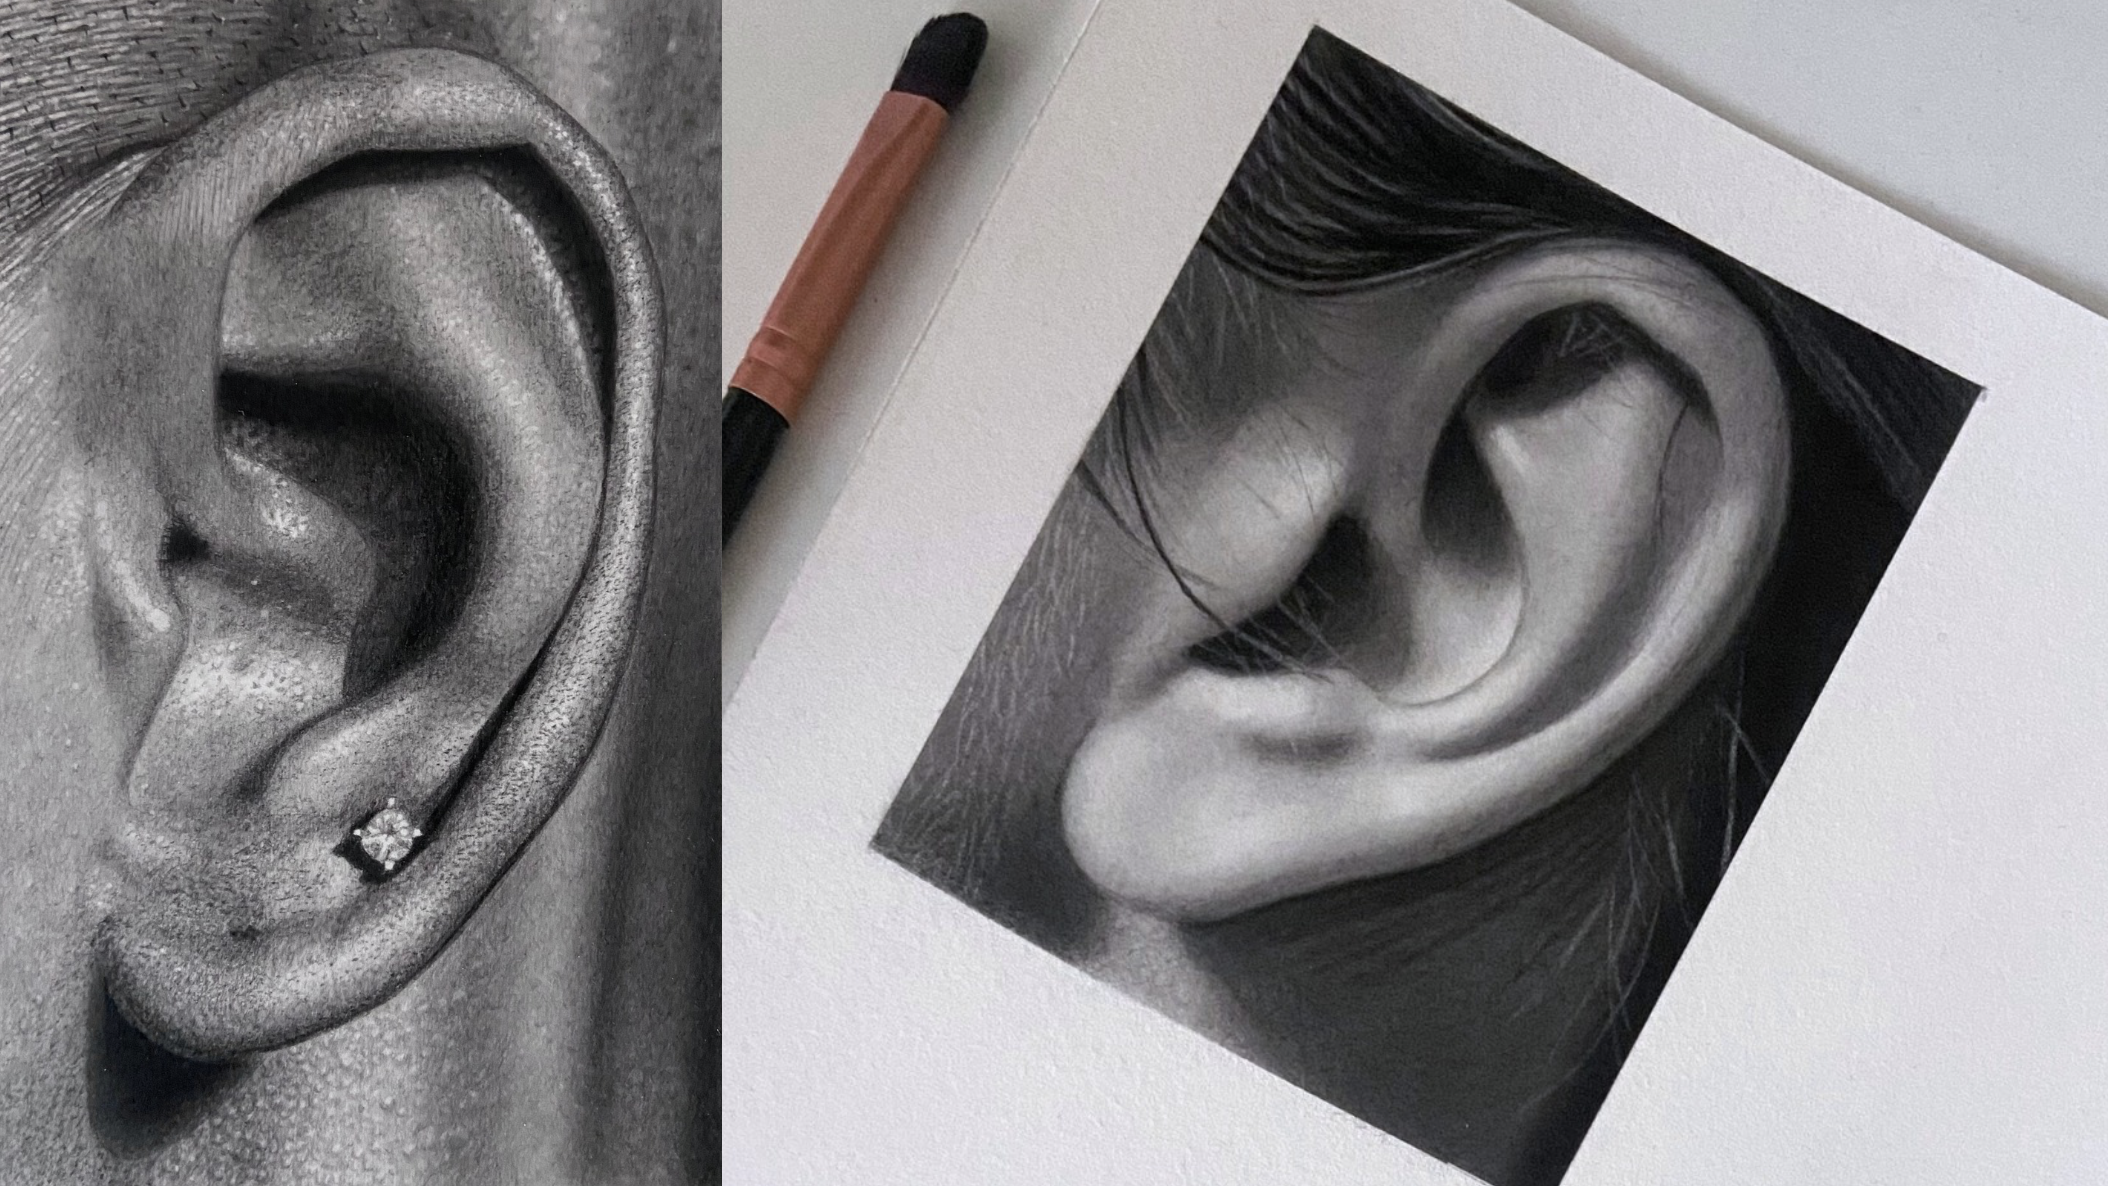
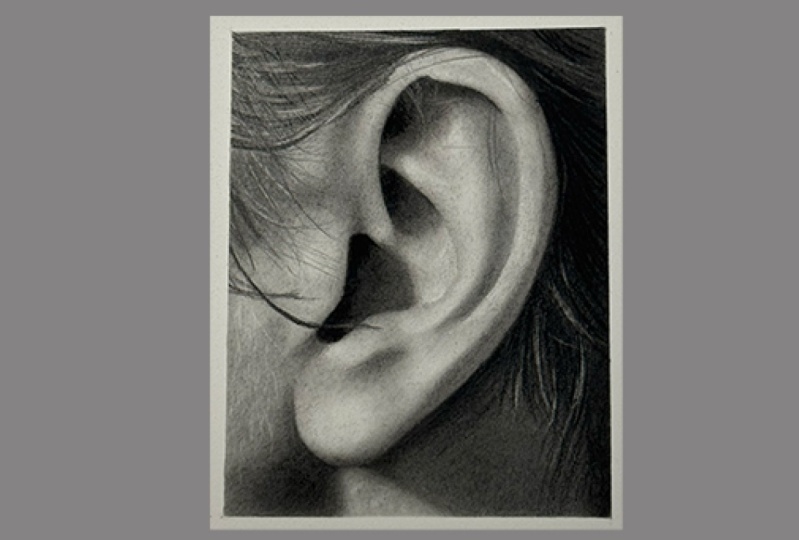
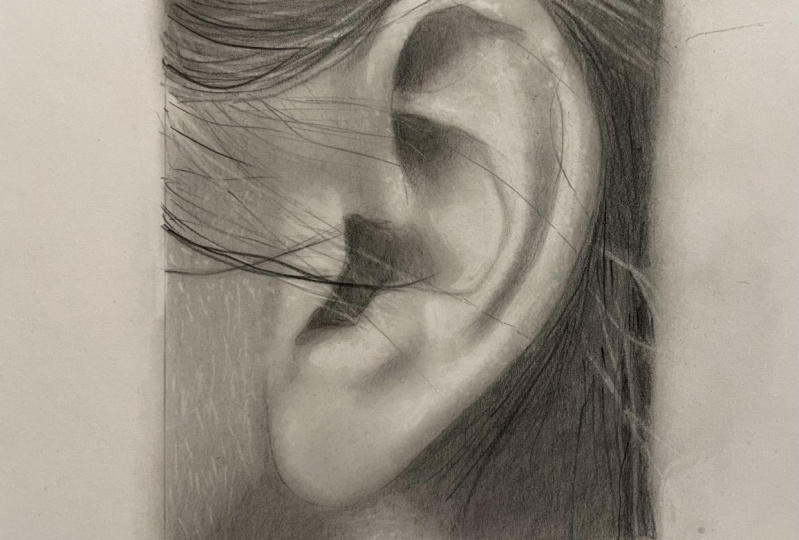
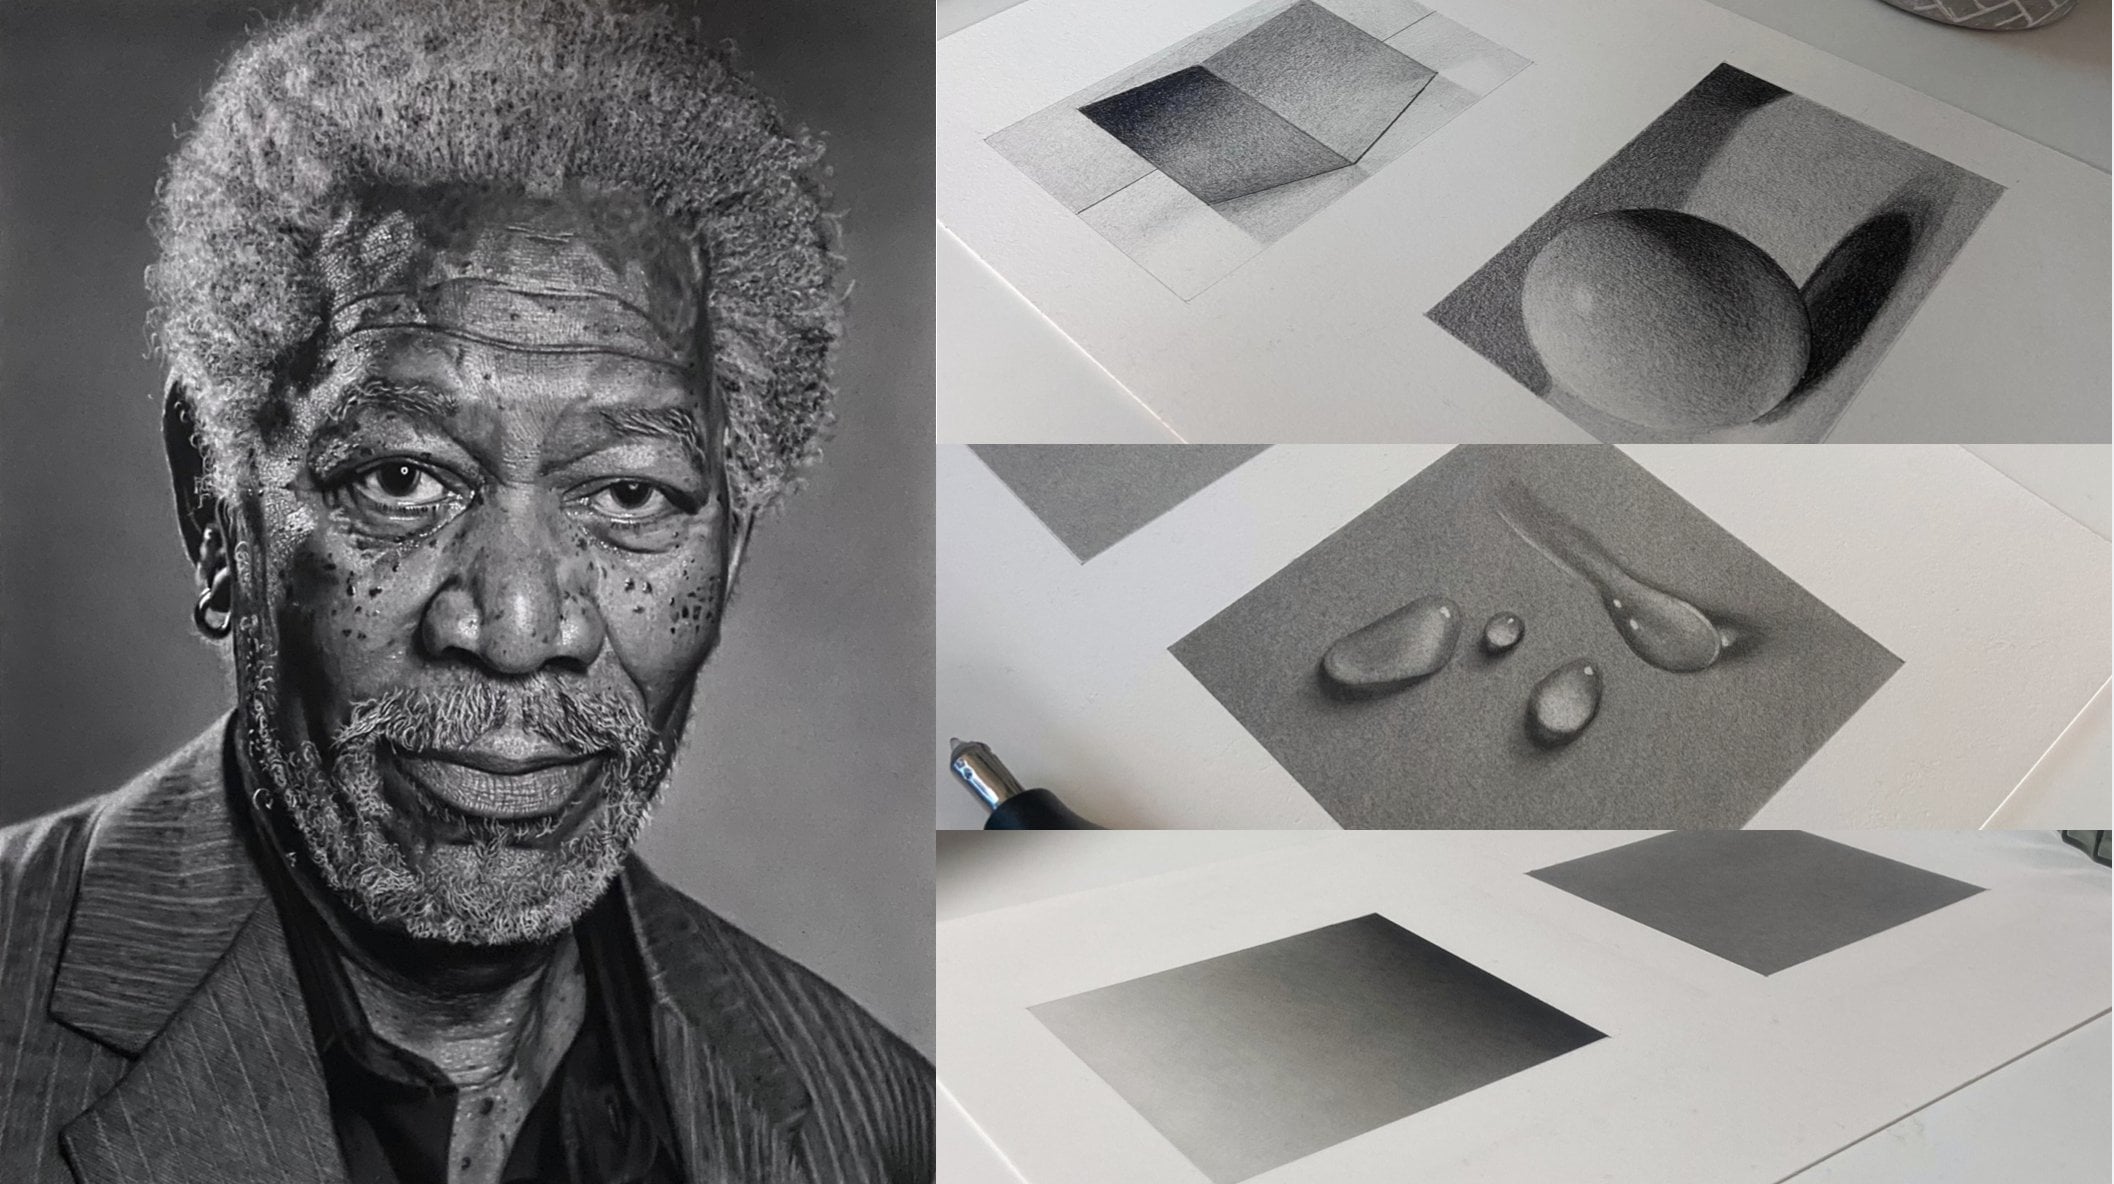
to the next lesson, I'd like to give you a
bit of encouragement. There are four years between
these two portraits. My journey was self taught, so it took me a very long time
to figure everything out. Completing all the
lessons within this class will speed up your learning
process immensely. And if you create a
daily drawing habit, you'll be killing it
in no time at all. So have fun, and I'll see
you in the upcoming lesson.
3. Ear Study 1: Smooth Skin Blends & Fine Hair Detailing Using Mono Zero Eraser: Hi, guys, and welcome
back. In today's lesson, we're going to be
drawing an ear. This study has a good amount
of light and dark value, soft tones, smooth transitions, and some fine hair detailing. We want to create
smooth skin blends using lots of brush work
like we did when creating soft baby skin and fine hair strands using
the monozeo eraser. It's really important to
use your erasers to lift any dark graphite spots when layering throughout
the whole process, as this will help create
that smooth finisher after. It's also really important
to keep your monozero eraser sharp when adding delicate hair
detailing at the end. Okay? Let's get into it. As always, I begin by outlining all the important lines
using the HB black pencil, making sure not to
go over any lines that aren't as dark
as a HB black. Then lay down the first
five B blue layer for the dark shadow
area behind the ear. And then blend together
using a brush. I'm using the IV
show makeup brush. I'm not overly concerned
about the smoothness of this five B underlayer as there are many
layers to go on top, which will give us time to
perfect the final result. Start building the
lighter toned contours of the ear using the H blue, then the B blue, using a tissue or brush to
blend each layer. Deepen the shadow some more using the five B
blue and lighten the pencil pressure to fade the five B tone into the
lighter tone underneath. Then blend with the brush. I'm using a stiff Dayowdy
Georgian short filbert brush. I use the six B and eight B
blacks to deepen the tone, along with the brush to smooth. There are some subtle value changes here in
the shadowed area. The line I'm drawing here and one at the top of the ear,
which you'll see in a bit. We want to be mindful of
these as we progress. Adding a second layer
of to be black with very light pressure and smooth out with a
brush once again. Starting to use
erasers to lift up any dark spots caused
by graphite buildup. Strengthening the
shadow behind the ear, which will also give
us a solid line for the outer edge of the ear. Add a layer of conti three B, and you can see the line our left out at the
top right of ear. There'll be some hair detail
to add later in that area. Use a brush, just smooth out. Soft or mid stiff works better with a charcoal pencil and be careful to maintain a sharp line of the ear. As I am doing here. Picking up any dark
graphite spots using a pointed Nida Bulaser. Add some mid tones
using the to be blue and smooth out with a
small soft makeup brush. I use a stiff brush at the end, as this can help
with smoothness. The stiff bristles can push the graphite around the
paper a bit better. Now I start to build
the deep shadows inside the ear using a four B black using small circular motions
with very light pressure, blending together with a small day roundly
stiff Georgian brush. I use the same brush to gently
push the graphite around that's already on the paper to soften the edges
of the toe here. Also using small
circular motions to push the graphite onto the edge of
the inner part of the ear. I use the same techniques
to push the graphite around to render some light
value at the top of the ear. Gently dabbing up
some value that's a bit too dark using the
perfection eraser. Using the same
brush to again push some graphite onto the edge of the ear using circular motions, then lift any dark spots
using the perfection erasor. Then re establish a dark line using the seven B black pencil. You can see how I'm using incredibly light pressure with the black range of pencils. It literally feels like it's just the weight of a
pencil touching the paper. And don't forget to lighten
the pressure as you blend the darker value into
the lighter value underneath. I'm just re establishing a sharp line using
the Conor pencilizer. Now let's make a
smooth transition for the darkest parts
of the inner ear. I'll use a conti three B and smooth out with
a makeup brush. Then add a seven B black to help make the transition
even smoother. Be careful not to use too
much of the conti as we need space to push to powder to
create a smooth transition. And now for the
lighter seven B black to make the transition
even better. I use a small angled makeup
brush for small spaces. This is a soft brush, but the shorter bristles will give you a slightly
better blend. Gently dabbing the
perfection eraser just to lift up a
layer of graphite. Notice how I'm leaving a
really thin light line at the outer edge of the ear as I used it
to be black here. Due to these values
being quite light, I'm using the brush
here just to push some graphite around that's
already on the paper. For the next minute or so,
I'll let you follow along as I add a few mid tone
pencils and brush work to build the lighter tones
of the ear and lift any subtle graphite spots with the kneadable and
perfection erasers. Now I'll make a
start on a hair with a few light strands
using the HB black. And now some more perfecting
using the erasers and brush, going backwards and forwards between the two
until I'm happy with the softness of the skin texture and the smoothness
of the transitions. Darken the shadow behind
the ear and jaw with a light cover of fbi black and use a Mossotuch
brush to smooth out. This brush has fine bristles, so we'll leave a
really smooth finish. Using the eight B, then the two B black to line the hair strands in the
shadow behind the ear. This area has hair
strands going in the horizontal direction and a few light strands
heading downwards. If you look closely,
the strands going horizontally have a couple
of different values. So I begin with the six B black, smooth out with a brush, then use the eight B black to darken the appropriate
places in the strands. I use a HB black to lightly create the lightest strands
of hair heading downwards. Then some more touching up with the lightograde
pencils and erasers. I'm constantly making
adjustments throughout the whole process which really helps the quality of
the finished piece. Now for some light
hair detailing, the monozero eraser
is great for this. Make sure to keep
the tip constantly sharpened by running it
along the sandpaper block, or you can use scissors
or a craft knife. Straight strands
of hair caught by the light source can have
such an impact in a portrait. If you look closely at
the reference photo, you can see that there's
even subtle changes in value within the light
strands themselves. This is where use a
batter heat eraser. I'll make a very sharp point
to make even lighter marks. Try this on a scrap piece
of paper first, though, as it can be a
little tricky to get a thin line without
going off course, and always soften the ends of your lines with a soft brush
so they look more natural. Use some lighter
grade pencils to add different value flyaway
hairs, keeping pencils sharp. I make some very
subtle skin texture here by gently dabbing
the bateria eraser, not turned on to make some
small bumps in the skin. The light source is
coming from the left, so I use the two H
blue pencil to create a semicircle cast shadow on the right of the
highlighted bump. And lastly, I use the perfection eraser to help pick up any imperfections to make sure all values
are smooth and to make sure the highlighted
values are all okay. So I hope you enjoyed that demo. Before you begin, remember
that we need to use quite a lot of brush work to create a smooth skin texture. And we also need to
keep the monozeo eraser sharp when creating
thin hair strands. Have a close look at all the sole changes in value within the drawing as a whole, but also within the
flyaway hairs themselves. Pay extra attention to where the flyaway hairs change value. Also notice how they fade
in and out at either end. Adding this small
gesture will help give each strand of
hair shape and volume. Try to recreate all the
sole changes in detail, as the more detail you capture, the better the final result. So have fun with this study. I'll be waiting for you
in the next lesson. Yeah.
4. Ear Study 2.1: Hyperrealism - Base Layers : Hey, guys, welcome back. We have a really exciting study to render in this episode. We're going to be creating
a hyper realistic ear. The biggest hurdle
to deal with in regard to this drawing
will be patience. It took me 6 hours
to complete this. It's one of the most
difficult studies to render within this series. I recommend leaving
it until the end, as there are many
exercises coming up that will gradually
improve your patients ready for this mammoth task unless happen to thrive on detail and can't
wait to get going. In which case, carry on. The first step in rendering
hyperilitic drawings is to lay down our base
layers, ready for detailing. I'm not overly concerned
about creating super smooth base layers with this study as there'll be
many layers to go on top, which will give us a chance to perfect tones and transitions. My main focus in this
lesson is to add the different tonal variations so we have a good
base to work from, and it's easy to keep track
of where we're going. I try to look behind
the detail in a reference photo to figure out the correct value
for the base layer. Okay, so let's get into it. Okay, so when I begin a project, I like to start somewhere
that I find relatively easy so I can warm up and get those creative
juices flowing. I find areas like backgrounds, necks or foreheads can
be good places to start, usually, areas with
minimal detail. This can be a great tactic
to use if you're having an off day and struggling
to find motivation. In this study, the right side of the drawing is
slightly out of focus. So I'm going to get
warmed up by building layers here just
put down two layers of five B blue to begin the
darkest part of the study at the corner and now some HB blue to begin some of
the lighter tones, blending every layer as always. When adding the base layers, I try to look behind
all the detail in the reference photo to see
what the base tone is. Now is a good time to create
a line along the outside ear using the HB black so I don't lose it
during blending. These two areas up the top
here are quite dark value, so I start the first
layer using the B blue. Something to be aware of is that when using a
brush to smooth out, it will make your
tone a little darker, whereas using a tissue, we'll keep it the same tone. As you begin adding more layers, you will start to notice the
tone becoming more solid. Don't forget we are using extremely light pressure with a black set of pencils.
This is the two B. You can notice how the
eig show brush here has created a blotchy
effect to the lighter tone. I'll have to use a Nabil eraser to smooth this out in a moment. Two layers of seven B black
smoothing each layer. I switch to a small makeup brush to smooth the second layer as I want a super smooth finish for the out of focus tone. I lighten my pressure as
I go up the page here to fade into the lighter
tone underneath. Using the Ike Show brush to push some graphite
that's already on the paper to create
a first layer to the light area between
the two dark values. And now working on the
edges of those dark values using varying pencil pressure to soften the
transition slightly. So before we begin adding value to the main
body of the ear, I outline all the important
lines using the HB black. As mentioned
previously, the HB from this set is very stable so it
won't smudge when blending. I then add a couple of layers of five B blue to begin
the shadowed areas. You can use a blending stump or small angled makeup brush to blend small areas that
are hard to get into. I made a rounded point in
the kable eraser to dab up some dark spots in
the area between the two dark values here
as it looks a bit blotchy. Then smooth out using the
stiff Dawn Filbert brush. Now to add the base layers
to the main body of the ear, I'll use a H blue pencil
and vary my pencil pressure to differentiate the changing
tones as and when needed. You'll notice how I'm leaving out the areas where
there are highlights. We'll be using a
stippling technique to cover these areas later. Stippling over these areas will leave space for the
highlights to shine through. I'm using the small, stiff bristled Georgian
Filbert brush here to blend. But try all of your brushes to see the differences
in performance. A cotton bud is also
good to use for small areas and will
give you great results. Notice how I'm keeping
my pencil strokes going in the same direction
as the patterns in the skin. I deepen the shadow here with
a layer of four B black, and then the eight B black, using the small makeup brush
to blend to a smooth finish. I cover slightly less of
the area with the eight B, so the outside edge
of the shadow is a slightly lighter four B tone as per the reference photo. And that's pretty much
it for the base layers. Now we get ready for
the fun stuff where we get a chance to bring
this study to life. Okay, so before you begin,
for our base layers, we are mainly
trying to represent all the different
tonal variations in the piece to give us
a good base to work from and a good understanding
of what goes where. It doesn't need to be perfect as we have many more
layers to apply, which will give us
the opportunity to perfect all tones
and transitions. Be mindful not to draw over any area where you see a
cluster of highlights, as we want that area for visible highlights to show
through the stippling. This drawing isn't big enough to focus on every single skin por. So stippling over our base tones and highlight areas
is a great technique. To create texture and
detail in a small area. So enjoy laying down the base labs for this study, and while you're doing that, I'll be waiting for you in the next lesson where
we start to build texture and depth using stippling and skin detail.
I'll catch you there. Yeah.
5. Ear Study 2.2: Hyperrealism Lower Half - Stippling & Skin Texture: Hey, guys, and welcome back to now for the exciting stuff. In this lesson, we're going
to start adding value, texture, and detail as we
work our way up the year. Parts of the drawing
will require building value by
way of stippling, where you'll get a chance to see just how efflective
this technique can be when creating detail for a relatively small
drawing like this, especially around
highlight areas. And parts of the drawing
will require adding tiny realistic bumps and
indentations to the skin. Adding skin detail over
a shadow line and into the shadowed area always looks fantastic and can add another level of realism
to your drawing. Hard and soft elements sitting side by side with one another. Rendering focused and
unfocused elements side by side always adds a huge amount
of depth to your drawing, making it look
three dimensional. So I hope you're looking
forward to what's coming up. Let's get into it. Okay, so to begin detailing
the lower portion of the ear, I want to create
some tiny bumps on the skin just underneath
the ear lobe. A light source is
coming from above, so I'm going to draw tiny
semicircular patterns to signify cast shadows
to these bumps. I'll then use a sharpened
battery eraser to make dots in the middle of those
semicircular patterns to signify the bumps. You'll slowly see a pattern emerge by repeating the process. I gently dab a small
makeup brush as I don't want to smudge or blur
the patterns I just made. And now using the
battery eraser to lift up some dots to create
the tiny bumps, I use a combination of power on off to make
different toned dots. I use the kneadable eraser
to lift several subtle dots. Using different tools to create different effects will help
create that realism finish. And then to finish
off, I enhance the shadows on just
a few of the spots. Begin a similar process for the lighter outer
edge of the shadow to make the detail
look like it's fading away into the cast
shadow of the ear. We can also make the
same effect using a sharp eraser first
to make light spots. Then use the pencils to
create cast shadows. Remember to make subtle
differences in size and tones to the cast shadows as some bumps will be larger
with deeper shadows. If you're struggling at all
with patience and detail, try spending one daily drawing
session on a small area and get that looking as best you can until you get used
to the technique. Just keep repeating
the process until have many different sized bumps and tonal effects and are
happy with results. As I move around the ear, the image becomes more
and more out of focus, and therefore, the markings and spots become softer
and slightly larger. Using a rounded lead on the perfection eraser will
help make larger marks. Sometimes I dab a blending
stump into some dark value already on the page and used to create soft blemishes
or skin tags. Or you can make some
powder by rubbing a pencil along the
sandpaper block. To create detail for the
main body of the ear, I'm going to use a
stippling effect. The drawing isn't big enough to focus on every single skin pore, so building layers using stippling will
help the area look highly focused compared to the brushwork used for
the outer focused areas. Using different
grades of pencils and varying pencil pressure will help create the
different values needed. It's a much slower
process and blending, but ultimately will have a huge effect on
the finished piece. Try to stipple around
any curvatures of the ear or in the direction
of any patterns in the skin, as this will help
build a correct form. Making sure the edges of any focused elements
are sharp will create depth and separate that area from the outer
focused elements behind. We want to keep a nice
sharp edge to the ear lobe, so I'm careful not to push any conti powder
over onto the ear. I don't know whether
you can see, but as I add the
to be black here, I'm leaving a very thin
lighter line between the edge of the ear lobe and the shadow of the ear
lobe on the neck area. It's these subtle little details that make all the difference. I'll let you follow along for a little while and
watch this area come to life as I build tone and
volume using stippling. As we begin to stipple
over the areas we left blank when adding
the base layers, you'll begin to see the
highlights really start to pop. Be careful not to
stipple too much over these areas and completely
cover the highlights. Dabbing the blending
stump here and there to create another
difference in texture. Same with the small
makeup brush. Okay, so we've already used
all the techniques and materials required to finish
the lower half of the ear. So once again, I'll let
you follow along for a while as I build
value and detail. Now that we have a good amount of finished value on the page, I need to make the outside line of the ear a little darker. Using a very thin line, watch how it
immediately adds stepth by separating the focused
and blurry elements within the drawing and then add a soft transition to
the seven B using stippling and
continuously making adjustments as I near the finishing values to
bring everything together. Using a combination
of power on and off to make different
tonal highlights. Sometimes you need to
make hairs that are too small to make with
a monozero eraser. Watch how I use the HB and seven B blacks to create tiny surface hairs to the
edge of the ear here. A if you find any area you're working
on looking a bit flat, adding only a few
subtle changes in value or a couple of spots or highlights will make
all the difference. I hope you enjoyed that session. Before you begin, if
you're someone who's not used to spending this
much time in a drawing, don't be surprised
if you start to feel overwhelmed or frustrated. When working on a piece to
test my skill and patience, I find it helps immensely if I concentrate on small
areas at a time, like an ear lobe or the
inner ear, for example, and spend a day's session trying to render that
area as best I can. Yes, it will take
longer to finish, but you'll be amazed at the progress you've made by the end. Don't forget to
keep your pencils sharp when stippling and remember that the light sources come in from the upper left, so the cast shadows for any tiny bumps on the skin will be on the opposite
side of the light, the lower right
side of the bump. So have fun, and I'll see you in the next lesson where
we'll be dialing in on the different focal
effects and creating directional skin patterns.
I'll catch you there. Yeah.
6. Ear Study 2.3: Hyperrealism Upper Half - Directional Skin Patterns & Focal Effects: Hey, guys, and welcome back. This lesson is the
last lesson where we get to finish our
hyper realistic ear. We need to add directional skin patterns, short hair strands, finishy elements that
are both in and out of focus and lots of
finalizing detail. Detail is our friend here, so take as much time as is needed using all
your tools to add as many different tonal
and texture variations as you can handle.
Okay? Let's crack on. We begin this part
of the year by creating some subtle
patterns in the skin. I always look closely for directional flow
patterns and try to replicate them as best I can as they always
make an impact. These are quite
subtle, but you can just about see them
if you look closely. There are also some at
the top of the year. I make the first lines
using the four H blue. It's not a flat value here, so I'm creating a
textured pattern by using rapid light changes in pressure in a kind
of tiny figure of eight pattern to provide
a textured finish. The same technique for
this section here. Notice how I'm leaving
tiny lighter spots. I use this technique for a few layers whilst
deepening the value. As I smooth out here, I'm making sure to
keep the ego brush going in the same direction
as the patterns I just made. Once again, using
a combination of power on and off to make
different highlight tones. You may not be able to
tell in the video as my overhead light makes all
highlights look the same. I use a HB black to begin the skin patterns just
above the ear here, paying extra attention to leave
space for the highlights, keeping my pencil
sharp and constantly rotating my pencil to use
the sharp side of the lead. Using quick changes in pressure so as to create different
tones and texture. Once again, making sure
to keep the I show brush going in the
same direction as the patterns in the skin. With a sharpened battery eraser, I'm using delicate pressure to make a combination of tiny dots and lines to create highlights in between the lines I
made with the HB black. You can coincide this with different toned highlights using the monozero eraser to an angle. I use a brush to lightly
soften the edge of the highlighted area so it fades nicely into the darker skin
tones already on the paper. You can use a small
blending stump to further soften
any lines or edges. Just keep going backwards
and forwards between all your tools
until you're happy with detail and transitions. I use a sanding
block to make sure the two B black pencil
is as sharp as I can get it and create
tiny hair strands. Pay extra attention to where
they're coming out from. For example, they're
coming out of the lines you made
with the HB black. And then I use the
HB black to create the tiny shadows in the skin pores where
the hairs protrude. Deepening the values in this area using the same
techniques as before, but with a H blue and creating some cast shadows to a couple
of small spots on the skin. Remember to add them to the opposite side of
the light source. Once again, using rapid
changes of pressure in a circular motion to create
different tones and texture. I've made some powder by rubbing a pencil along the
sandpaper block so I can use a small
blending stump to make soft out of focus
marks on the skin. Powder always makes a
darker mark than expected, so start by using the lightest pencil you have
and test it out beforehand. You can lift any
marks that are too dark by dabbing any
of your erasers. You can even make some
tiny highlights on the opposite side to the shadows in the skin
paws you made earlier. The da Ballasa is fantastic for making soft out
of focus marks. Making just a few lighter marks can add another level of depth. Sometimes just a
couple of different tonal marks can make an impact. Making this value a little lighter as it's slightly
darker than I need. I'm using the seven B black to strengthen the shadow
at the top of the ear. Then I'll complete the outer
edge of the upper ear. We've covered all the
techniques previously, so I'll let you follow along for a few minutes without too
much interruption from me. I use mostly stippling
whilst building tones, being mindful to add
the subtle lines of the skin near to where the
ear connects to the head. Gently dabbing a soft
brush or blending stumps will add subtle changes in
tone to the highlights. Not forgetting the
sharp line to separate the focused area from
the blurry area behind. So before you begin, remember, we want to add as much detail and tonal variations as we can. Keep in mind where
the light source is located so you can add
shadows correctly. And remember what
was mentioned in the last lesson
about focusing on small areas at a time and trying to complete
them as best you can. This technique is so helpful in rendering final details
for hyperalism. So, have fun finishing
off your study. I can't wait to see you upload
it to your projects page. Details on how to
do that are coming up in the conclusion.
I'll see you there. Yeah.
7. Conclusion: Hey, guys, you made it. Congratulations. I just
wanted to give you a huge pat on the back
from making it to the end of the fourth
episode. Well done. We got to practice our
brush once again to render wonderfully
soft tones and saw how effective the monozeo
eraser is when adding thin hairstrands
and subtle skin texture. Then we've got an opportunity to create a shallow depth of field effect by drawing different focal effects side
by side with one another. Experience just how
effective this contrast can be for making a
drawing, jump off the page. You've also built
value, texture, and highlights using stippling while adding realistic
skin flow patterns. I love drawing these studies,
and I hope you did, too. Please feel free to
try any study as many times as you like until
you're happy with results. So before I wrap everything up, I want to remind
you that you can upload all completed studies
to your class project page. Each student gets one project
page per class episode, but on that page,
they're able to upload all the projects from the
episode along with text. Even space for thumbnail
photo at the very top of the page where you can add a drawing from the class
that you're most proud of. The thumbnail picture
is what will appear on the main class page for
everyone else to see. Students can press on
the thumbnail picture, which will open your
project's page for them to see all the wonderful drawings that you made
throughout the class. If you'd like to leave a review, you can hit the Reviews tab and then press Leave a Review. All reviews are warmly welcomed, and I always love to hear
your thoughts on the class. If you have any questions
regarding the class, you can hit the Discussions
tab where you'll find a discussion that I started
regarding contact me. You can hit Reply or
one of these tabs and post your question and
I'll reply as soon as I can. Also started another
conversation thread on my main profile page. F a page, scroll
down to the bottom, press the questions
and discussions, thumbnail and leave
your message. With that being said, I
cannot wait to see you. In the next episode, we have some fantastic
studies coming up. So take careful now, and I'll see you a bit later.
 Shayne Wise, Professional Portrait Artist