Transcripts
1. Introduction: Hi, I'm Nadine. I'm a watercolor
artist from Melbourne, Australia, that's
just been lucky enough to have a couple
of weeks in Europe, and I'm one of those people that take 1 million photos thinking, This will make a great painting, and I get home and I
file them all nicely, and then I never open
them again to paint them. And I think part of
the problem is that I get a little bit caught
up in my head thinking of. There's a lot of detail in that. It's going to be a really
difficult sketch. And I just talk myself out of it and
don't end up doing it. So I think this lesson
today is as much for me as it is for you to show you
that you can be loose, you can be messy,
and it'll be fine. So what we're going to do is
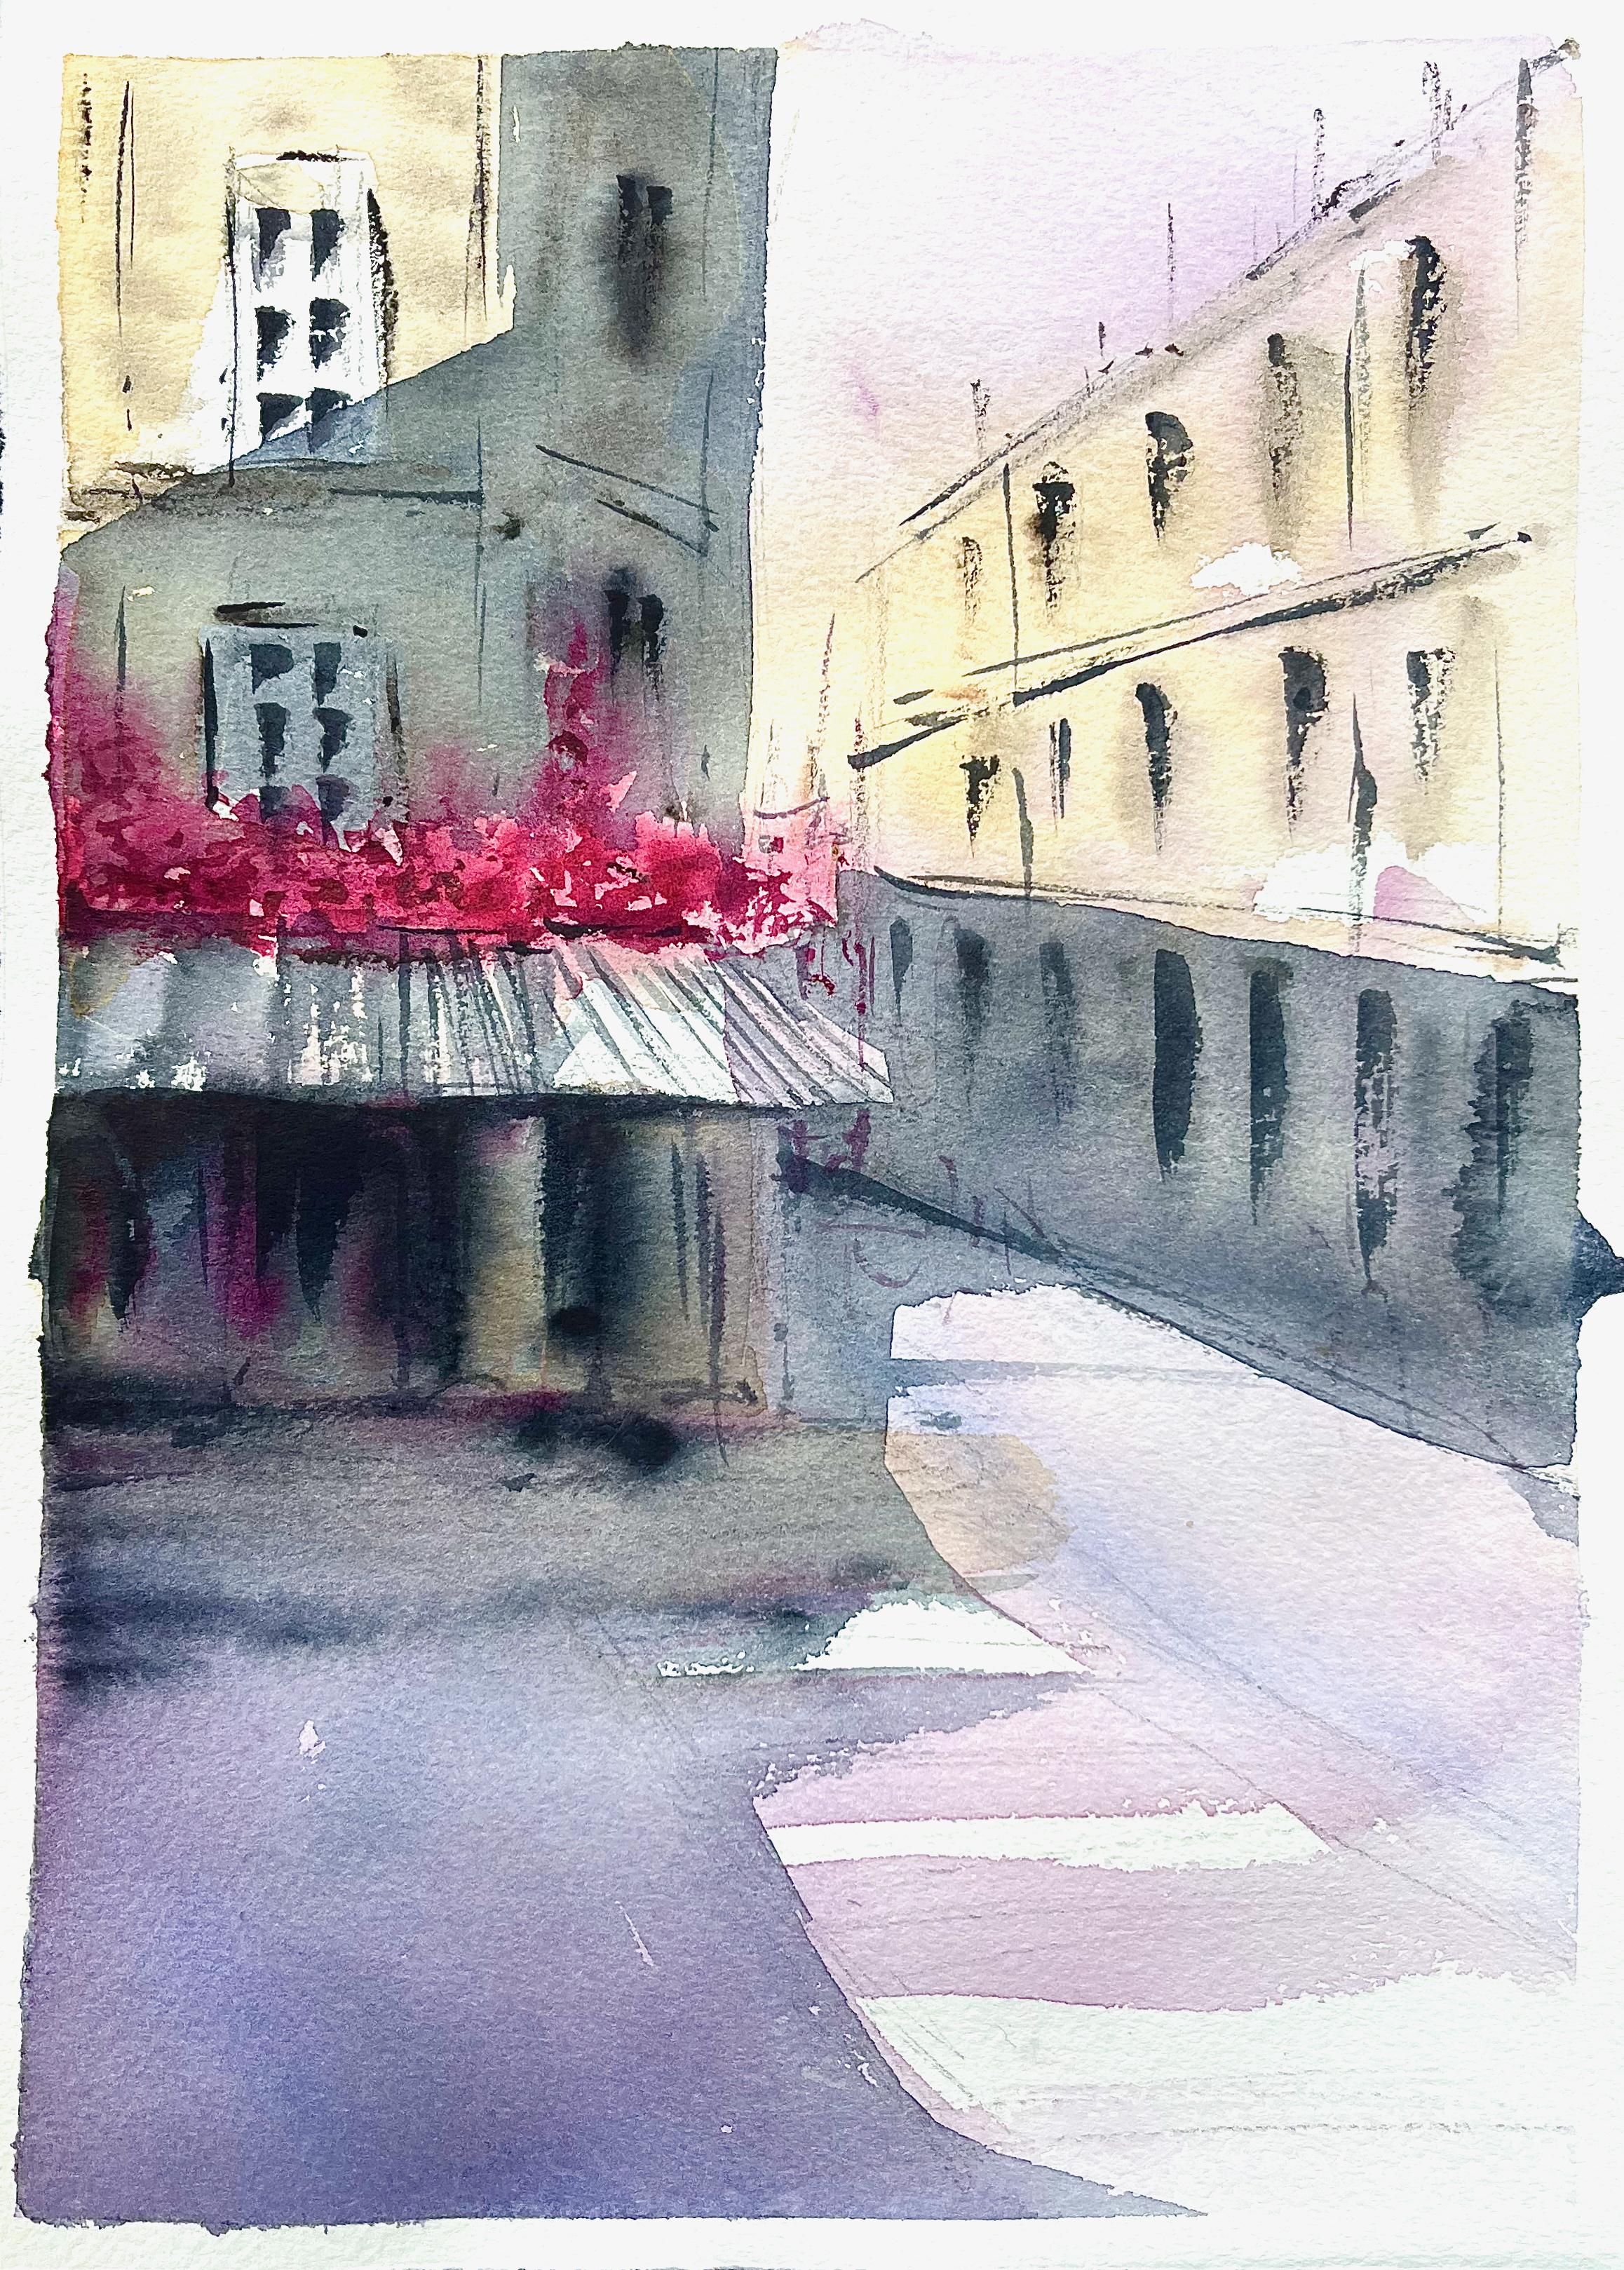
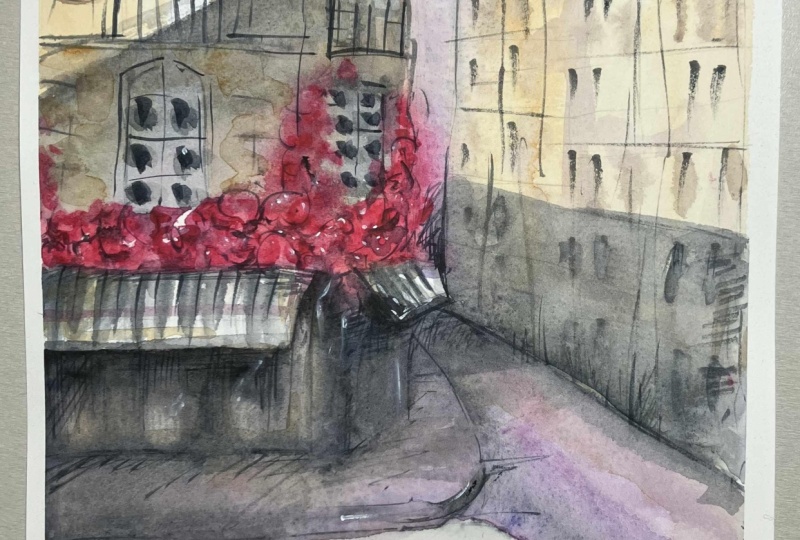
do a little cafe in Paris, and the sketch will go through, which is really, really
simple, really, really messy. The painting is also
really, really messy. I made a lot of
mistakes in this one, and I thought, you know what?
You can have the mistakes. You can see what
I do to fix them, and you can see that often, I think you make a judgment too quickly on what you
think is a mistake, and it's important to let
the painting dry before you actually judge whether
you've messed it up or not. So let's get started.
2. Materials: Materials for today's class. First up the reference photo. That's mine, and you
can download that directly from the
Skillshare site. I'm painting on 300 gram
Arches cold pressed paper. I'm painting on a
slight tilt on a board, and I am taping it down with just some regular masking tape. I've got a normal HB pencil, and then in terms of paints, I have a few. So the purples through here. I've got some Windsor
and Newton cobalt, and I've got some Windsor
Newton permanent rose. Don't know where the
tube is. I happen to have some squeezed
out in my palette. Through here all this warm. That's Windsor Newton yellowca. And I've also got some
Daniel Smith Vandyke brown, or you could use burnt umber, and I've got some
Daniel Smith indigo. In terms of the brushes,
I'm just using the three. I've got a reasonable
sized oval brush here that will go the distance. So it doesn't really
matter what shape it is. It just needs to be big
enough that you can get through fairly large areas
of the page quickly. Then I've just got a couple of little synthetics for details, and I've got what the sizes
are in the project section. Now, you also need a pallet, a jar of water, and some
tissue or toilet paper. And for this one, I'm going to go through the sketch and
show you how to sketch it, but I have also
included a template if you don't want to
sketch it yourself. It's pretty rough
and ready, but it is up there, and you
can download that. So we'll move on
to the sketch now.
3. Sketching Up: Alright, I'm going to show
you how I sketch this up just because really this is
quite a complicated scene, really, and I want
to show you that you can ignore all of that. We just want to get some
of these basic shapes in. So I have got my
sheet taped down, and I'll give myself the
basic building blocks. So I'm going to start in
this left hand building, knowing that I want
to come across and start from the top
here somewhere. Give myself a bit of a vertical, and I want the face of this
side of the building in. So maybe I'm about there you can see that my lines
are really super rough. Then I'm gonna pop
this building in. So to help me to help my eye, I'm going to pop my
pencil and just kind of see how much of an
angle that's on. So I'm kind of coming
up there somewhere on another vertical
here. All right. Now, these lines,
I'm not going to stress about the
perspective lines, but they do kind of
come down and around, so I will maybe give
myself just a bit of an indication and I want where this ground level is where all those bikes are that
I'm not going to draw in, even a little bit
interested in that. So that's roughly this building. Then I have all these
flowers and these awnings. Probably easiest if
I start by saying, right, I've got a
couple of stories here. Because no one's going
to have this photo to figure out if it
looks like the photo. Okay. I am being careful of these lines here as the building wraps around to get a bit of an angle on them. And then these
awnings. I'm going to start with this one
that's simplest. So maybe down about here, I've got a bit of a
shape for an awning. And this one's quite sorry. This one's quite tricky. I'm going to ignore that it's tricky and just give
myself a bit of a shape. In here, probably. And the building comes down. I've got some nonsense
going on in there. Alright. And there's the ground. Um, 'cause that comes
a little bit over. Okay. Awning buildings windows. So, there's one kind of
here, one kind of here. Then I've got all of this mess of flowers all through there. And then I am going
to put in a bit of a hint of this
pedestrian crossing. So kind of maybe myself a line a bit wider here,
something like that. Now, this is, you know, this is not quite straight, but I don't want to make
life difficult for me. I'm just going to come straight across and just
give myself a few. Few stripes that we
will try and get in. That's probably all
I'm going to sketch. Keep it really, really simple. I've got a bit of a mess of the pencil
lines around there, but I don't really care. I think I just rather leave that in so I can wing
it as we're going. So that's it. Now, I would say,
before we start, this sketch may not
end up being the one that's actually in the painting video because chances are, I'll go to paint this
and I'll mess it up. So if you want to paint this
way and paint this loosely, you have to accept that some versions are
going to be great and some versions are
going to be terrible, but you'll learn
something each time. So hopefully this one goes okay. But if you're watching the
painting video and think, Ah, that's not the same sketch. It's because I'll have messed it up. And that's completely fine. And part of the fun of doing this is seeing which ones
work and which ones don't. Okay, we'll start painting.
4. Getting the Basic Shapes In: Okay. This is now the fun bit. We're going to whack
on the first layer. Now I'm actually going to
tilt my board just slightly. I'm going to pop it just on
the edge of my computer, not a huge tilt, just a little bit to let the
pigment run down towards me. I'm going to start
with this brush, I think, it's not massive, but it will go a
reasonable distance, and I'm going to use initially, I've got some cobalt, some permanent rose,
and some yellow ochre, I think what I'm
going to start with. I start up here in the sky,
which is pretty light. I'm going to give
myself a little bit of permanent rose and a
little not that much. I was going for less than
that, but that's okay. I'll just dilute it
out with my water. Co lighter than I did there. Then I've got this
building where I want to put a little bit of
my yellow ochre in. I'm just going to throw that on. My page was dry when
I went on there. I drag that down. Okay. And I've got bits
of dry paper in there, and that's okay. I
don't mind that. I'm going to stick with
my yellow ochre and drag some into this other
side of the building, come down to kind of where
the top of the awning is and come underneath. Messy, keeping it really messy. Coming across to the other side of the building with
my yellow ochre. And I'm going to kind of
chisel out initially. The windows, roughly. Now, I didn't mean to
go through the awning. I have now, it's pretty light. That's okay. I'll
leave that there. Then coming into the ground, now I'm going to switch back to my permanent rose and cobalt. Didn't get any
permanent rose then. When I come to this
pedestrian crossing, I'm just going to
leave a few bits of white little bit more
blue, I think in there. Can I get any? All right. Now, while
this is drying, I've got a nice web page. I've effectively got
everything wet now. I'm going to throw a few
more bits and pieces in. I'm going to pick up my
sticking the same color, knowing that underneath
these awnings here, there's going to be stuff. So I'm just throwing a bit of paint underneath
where those are. I'm going to throw a little bit of color of that same color just in the other building just so that it talks
to this one a bit. All then I'm going to switch
to brush. Maybe this one. So little synthetic now. I'm going to pick
up a bit of what's? I've got some van dike in here. I'm just going to look at the I don't know
that I like that. Maybe it's got
some van **** with some burnt sienna in there. You can't see my well. But I'm just trying to give myself a little bit of an indication of
some of this brickwork. So I've got my brush on the
side, really milky wash. I've stuck with I've stuck
with the vandyke. That's okay. And I'm just kind of chiseling out a couple
of those lines. It will all soften
back into that wash. These ones here, I've
angled slightly. These ones here are straight. Maybe I'll put one
up there. Okay. Then while I'm still
really messily wet, same color that I've used here, I'm going to just drag a few just a few hints
of windows in there. Something's going on in there. I've picked up a bit more paint, and I'm going to drag a
couple of lines just to show me the definition
between the floors. I just walking paint around. I'm not overthinking this, I'm just thinking I've
got some verticals, thinking about where I've
got some darks under here, while it's all wet, trying to chisel out some of
those pencil lines so that I can see
where I'm going. Now, while before it dries, I also want to put in
some of these flowers. I've got some straight
permanent rose here, creamy to toothpasty texture, then I'm just going to start to throw a little bit where I think I probably is. It comes quite a long way up. And just let it
do its own thing. Before I let you have a
breather, I'm going to take, I've got some indigo, really thick, not much
water on my brush. I'm just going to
tilt my brush on the side and just suggest
a couple of these windows. Now, I've got a real mixture here of wet into wet
and wet on to dry. That's what I want. That will give you
interesting things. I'm not trying to keep this. I'm not trying to paint windows.
I just want to suggest. Now, I said I was
going to let you stop, but I want to just get a
little bit of a couple of darks just to restate what's
happening to get my eye in about where these
awnings might be. And where that road might
be, maybe this one, too. Okay. All right, so I'm
going to come out of that. Let that settle in, then we'll
go in with the next layer.
5. Adding Some Details: All right. Now, it's been about 15
minutes and I'm dry. You need this to be fully
dry before you keep going on or you will get
into a whole world of pain. Okay, I'm going to go
back to my big brush. I'm going to define a little bit more
around these windows. I'm going to get my
milky yellow aca. I'm just going to pop
just another layer of color. You might not need it. Mine's a little bit
more pale than I want down the side here as well. A little bit more stuff. It
doesn't matter if I get this. Here is one point where
I don't mind if you can see the wash
underneath because again, it just creates a
bit more interest. I'm going to keep going with
that underneath the awnings. Wash my brush and just bring
that into the foreground a bit so that I'm
just letting that yellow ochre bleed down. Now the reason I'm doing
that is because I want to restate some of my
darks underneath here. I picked up a bit of indigo
and a bit of my van ****. And I just want to pop a little bit more
underneath there. I don't want to overthink it. I want all that movement. I want to what I did
I came horizontal, put a vertical, put a
vertical, put a spot. Very brush strokes there. Having said that, I don't
really like that spot, so I'm just going to
soften that spot out. All right. Drag
that through. Okay. Now, while I nice
and wet in there, I'm going to take I think
my vanyke thick van ****. I'm going to just give
myself a few more lines. Sorry, I've got a really
little synthetic now, so I want to go a
little bit more detail. I'm just dragging a few lines around to show I didn't
really want to go that far. I'm showing you all the
mistakes that you can make and how to rescue
them, basically. I've just washed my brush and I'm just
softening that line. I came too far down then, so I just back that off a bit. Now I've also got these windows and things on the other side. I want to think a
little bit about that. I'm just going to drag a little bit of a couple
of lines down there. I've got the bit between
sorry, that was my cat. Bit between the flows here and I'm just tidying
up a few of those shapes. Little bit more underneath here. The idea is to just keep building it up,
keep working it up. I also want a few verticals. I don't want to paint a
line all the way down. I want broken strokes. I'm not picking up enough paint. Really hoping you
can't hear my cat cleaning himself at the
moment, but Any hill. All right. Walking around
a few little strokes. Then what I'm going to do,
I'm going to think about a bit more on these pink flowers. Let me see if any of that
where I brought that. I'm still wet. I
just want to pop in. Another layer just nonsense
to suggest these flowers. Mixed I'm after a mixture of wet and wet and
went on to dry. So just coming down,
few coming in. So I'm dry on this side, so you can see that those
marks hold firma and up. Yeah. Okay. Now, on this side, I'm still quite I'm dry. Here I'm going to pick up a little bit of nig, a
little bit of van dike, pretty dry on my small brush, and I'm going to
put in a few more little details, broken lines. Nothing particularly fancy,
few little verticals, broken lines, just
some nonsense. But I don't want
it really solid. I'm just maybe a bit
more paint than that. Restating a few of those. Let's see if I'm trying to
find the right consistency. It doesn't matter if
I have to go over a couple of them to get the right the right amount
of water on my brush. Then I want a couple
of boards slipping, a couple of verticals as well, maybe I've got a bit more
nonsense going on in there. What I don't want to do is sit and look at
the reference and go, there's a balcony, there's a window. I'm not
interested in that. This gives you the
impression that we've got some windows happening in
there and that's all I need. Now, I think probably what
we're going to do next, I'm going to leave that
again for another I will probably take another
10 minutes to dry. We're going to put
a shadow through, and then we're going to build up a little bit more
of the details. So come out of that, let that fully dry. We'll
be back in ten.
6. Adding the Shadow: Okay. It hasn't quite been ten. I'm touch dry. I can still feel I've got it. It's a bit cold and I can
still feel I'm not 100% dry, but I have a limited
window to paint. I'm going to push
on. Don't advise. I would recommend
waiting until it dries, but I'm not going to
listen to my own advice. I'm going to pop
a shadow through. So in this picture, this is all pretty much in dark and the lights
over on this side. I'm going to change that and
I'm going to give myself a little flash of light on the
top of this building here. I'm going to put this in a
little bit of shadow as well. You can make it up
however you like. Like I keep saying,
no one's going to see the photo, no
one's going to know. What I'm going to do is mix I got a little bit of
my permanent rose, a little bit of my cobalt, and maybe a little bit of
indigo to make a shadow color. I do advise testing that out
before you go to gung ho. Alright, so I'm going to start, where am I going to start? I think maybe in this that's
probably not dark enough. Let me go again. In this
building in That's too dark. Goodness me, we will
get there in the end. So I'm kind of chiseling out that awning coming
through underneath it. It's quite dark under there. I'm going to come
maybe through that, um pedestrian crossing a bit. What you don't want to do, you don't want to hesitate too much. Whatever you get on, you got to live with.
Try not to hesitate. I'm going to come
through too dark again. Coming through, and I'm
going to come across. So the important thing
is not to panic. Like I came on too dark then, but I can rectify that. I can loosen the wash a
bit and deal with it. Not if I panic, though.
And then I want to just. I'm going to get my tissue and just take a little bit
off there because I want a little bit on those flowers. Alright. Then I'm going to do a little bit of dark
across the awnings. And on this one, I'm going to put
some thinner lines to suggest I've
got that striping. Taking my glasses off. I've said this in a
few times before. When you're painting
loosely like this, taking your glasses off if
you wear glasses is good to make sure you're not getting
too fussy or squinting. Squinting is also a
good thing to do. Now, again, I have that
thing I'm quite wet still. I'm going to make use of
that. I'm going to go to my medium in between brush. I'm going to restate a few dark. Picking up my really solid
indigo now, actually, I might pick up some permanent
rows and some indigo, and I'm going to chuck
a few more darks. You can see I've lost
the edge of my row, maybe back into the indigo. Really restating. Every time you put a
wash over like that, even though the paints settled in, you can lighten it a bit. I'm just restating some of those darks and
when it's fully dry, I'll probably have
to do it again. Taking a bit of the excess off my brush coming into
those two windows. The reason I'm
painting my tissue, restating some of those
on that side too, because my wells
quite watery in here, if I pick that up,
I go straight onto the page and I've already got
all this water on the page, I know that there's too
much water in the brush. I want to paint my
tissue to make sure that this is a really dry brush so that when I put this on, it doesn't completely cause the cauliflower because
that's not what I'm after. A bit more in here. Maybe some just to see maybe I want a bit more
yellow ochre in there. But this is if I touch
too much in here with that much going on in
there, I think I'll regret it. I think maybe I'll
put just a couple of my permanent rose marks
in there and then I'm going to let that dry before I do too much more in there.
7. Finishing Off: Okay, spend another 10 minutes, and I've got a bit of
a rookie mistake here. I went off and made
myself a cup of coffee, and I didn't notice
that I bled out onto my I had a big wage
of water here on my tape, and it's bled back into here and pushed and made
this cauliflower here. Can't do anything about that
now. It's completely dry. So rather than trying to
muck with that and lift it, I'm going to ignore
it and just keep going and hope that I
pull enough attention elsewhere that it doesn't
really matter that it becomes part of the
messiness of the painting. Okay, so what I'm
going to do now, I'm going to restate some of my darks and put a few
more little details in. I think I'm going to start
with my small brush. And I'm going to pick up
a bit of indigo, creamy, and I'm going to restate
these little windows. So putting another
layer on the top. If yours have stuck and they haven't disappeared, you
don't have to do that. Mine have gone a
little bit pale. So in here. Again, I've
got my brush on the side, and I'm just pulling it down. I'm not really
painting a square. Okay. And the same maybe I'll give myself
two marks in here. I've got a few more of these little lines across maybe my restating some
of my verticals. I may be on this side as well. So I don't want to overdo it. I just want to add some finer lines
around the place. Alright. And maybe underneath
my awning there as well. Sitting back, I need to do the same thing underneath here. I might go, make it easier for myself and go to my
medium size brush now. I do want to bit. I
think I want a bit of yellow ochre to show me where the side of
that building is. So I'm just going to throw a bit of that
pretty milky still. Just after that edge. Just a touch, and then
I need to really have a few stronger darks
to make that work. I was dry here, wet there. Again, getting that combination of hard and soft edges is good. Then here, I need to tidy up because I've
got that mess here. I think what I'm going to do
to back that off a bit is restate some of my
windows in there, so it's not quite as obvious. I've got this I've lost
my road line down there. I think I want just a bit
more something happening. Maybe I'm going to go
back to my little brush. I pick up a bit more of my violets and my
permanent rods and my cobolt I'm just going to put a bit of nonsense around the place. Restating again with my dark
underneath that awning. When I'm doing this,
I will quite often do this and then come back 2 hours later
the next day and go, Oh, no, I can add some more. You can continue to
add as you walk away, come back with fresh eyes, which is probably better
than doing it all in one hit because I think when you come back with fresh eyes,
you see it differently. All right. I'm starting. I'm getting very close
to starting to Muck. All right. I'm going to maybe do strengthening up a
couple of the lines. On these awnings, which
again, are very messy. But this is where my
attention is sitting back. All right. Now, if I probably haven't got as
much light through my flowers as maybe
I would like, what I could do, I don't
think I'm going to, but I could use a little bit
of gase to get in there. Instead, I'm just going to put a few more darks
underneath those flowers. So I've got really
solid permanent rose, and I'm just throwing it in. Alright. Let's see
where we're at. Yes, you can see
how much water I had on there that
it spread through, but I don't think
it really matters because the rest
of it's so messy. When I do that, I
think, maybe I do want a few more few harder strokes. Just a bit more detail, easier if it was fully dry.
8. A Final Word: Okay, so the last little
finishing off video, finished quite abruptly because
I realized I was starting to ramble and
starting to fiddle. So I put my brushes
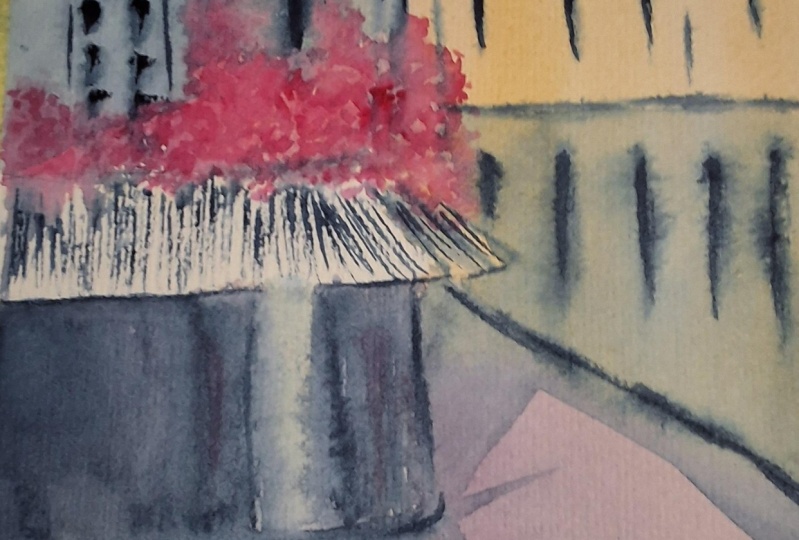
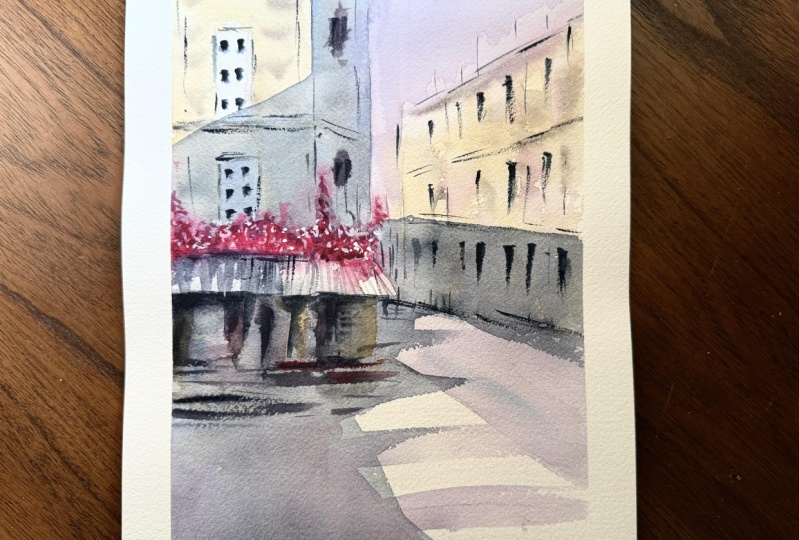
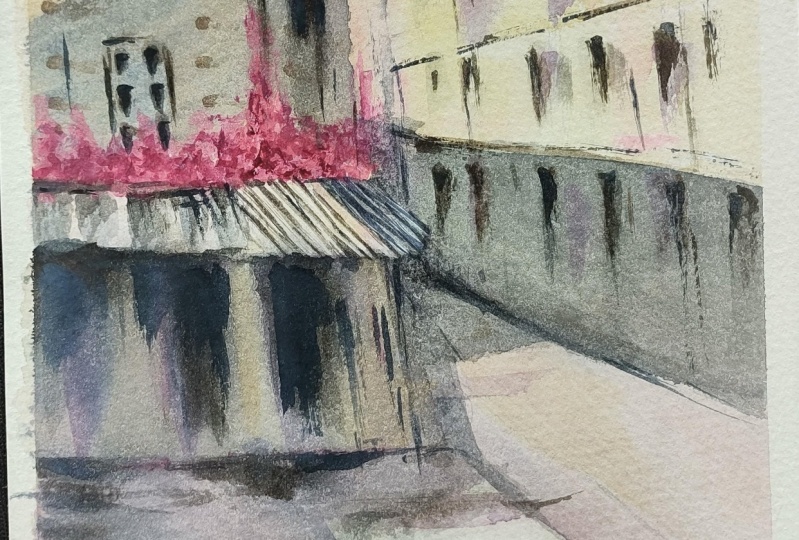
down, and I'm finished. So I've done this
a couple of times, and these are a couple
of other little versions that I've done, and you'll notice that
they're very different. Well, well, they're different, but there are bits that
I like in each and it's always disappointing,
trying to pull everything that you like from different
versions into one painting. But that is probably
what I'll I'll do for myself next, sit
there with all three, think, Okay, which bits
do I like and which bits don't I like and do
a final painting. So this isn't an exercise
in Hue is the masterpiece. This is an exercise in capturing the essence, really
of the reference photo. This, for me, evokes
the feeling of walking past the street and
going, Oh, look at that. That's a gorgeous little cafe
and taking a photo of it. And that's really all I'm after. So give yourself
permission to have fun. If you've got some
versions that you like, upload them to the
project section for me on the Skillshare site. I always love seeing
what you've done, and I'm always happy
to give feedback. So thanks for joining me.
 Nadine Dudek, Professional Watercolour Artist