Transcripts
1. Introduction: Hi, I'm Nadine. I'm
a watercolor artist from Melbourne, Australia, and I wanted to do a quick
little class with you today that's made up of
three little lessons all really short that are
aimed at practicing brushwork and
specifically brush work with a dagger brush. It's a beautiful
brush to work with, and I think it's
really important to practice your brush skills if you want to be really nice and loose in
your watercolor. And I like a dagger
brush because you can do a whole lot of
different marks. So you can come up onto the tip and get really fine detail, but you can also come
onto the side of the brush and do
really broad strokes. A, they're a little
bit hard to control, so it forces you to be
a little bit loose. So what I want to do today
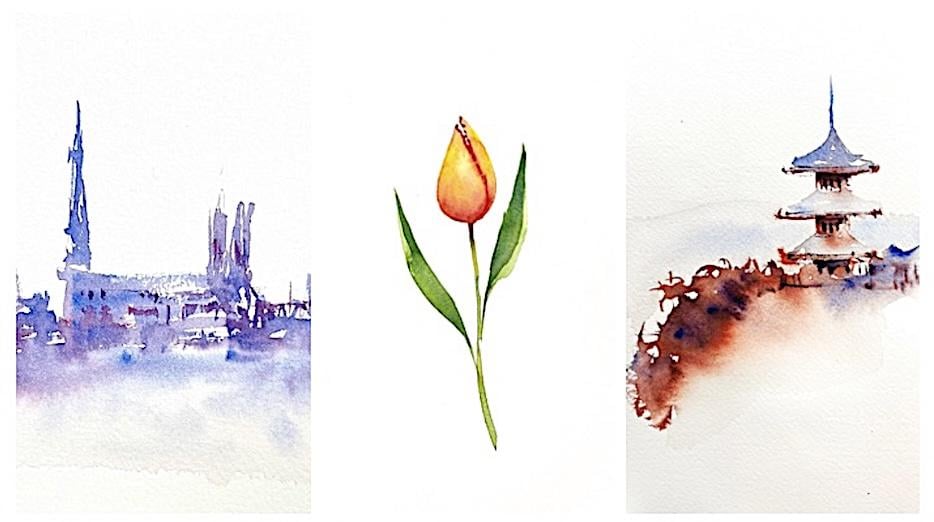
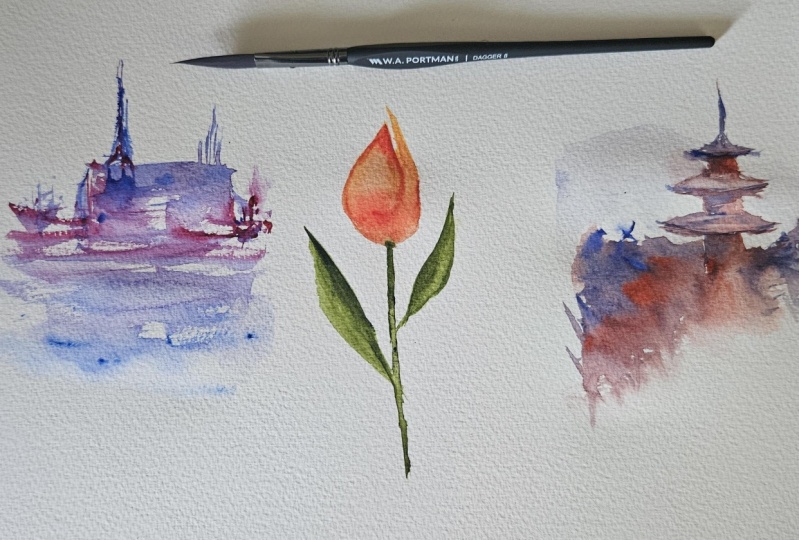
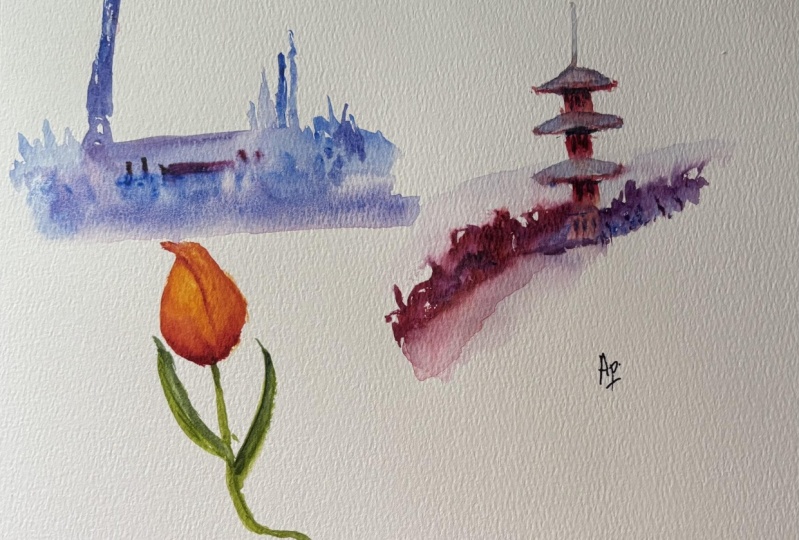
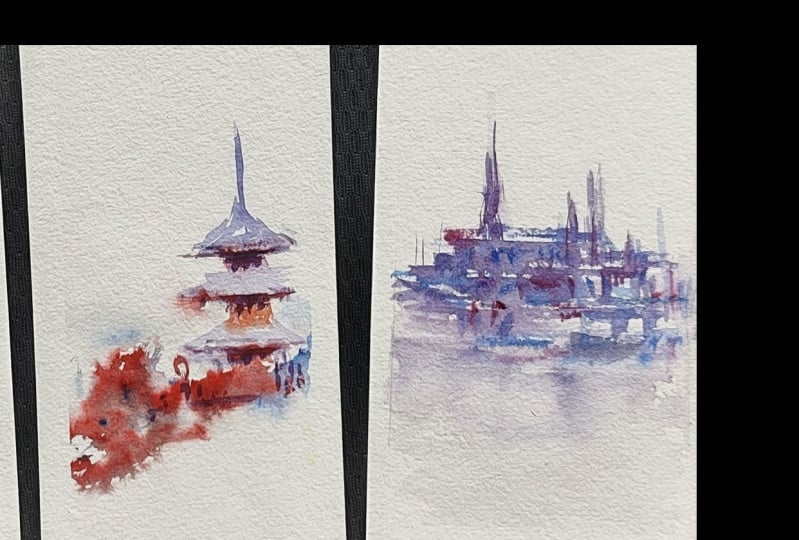
is three little exercises. One's a little cathedral that's off in the
distance and it's really painting with the
tip of the brush and letting the pigments mixed
together on the page. The second is a tulip where
we'll use broad brush stroke, the heel of the brush to get
a beautiful curved shape. So quite different
from the cathedral. Then the third is the
little Japanese temple. And it's combining using the tip of the brush and
also the side of the brush. So we're getting fine
strokes, and we're getting really big
bold strokes as well. And so it's not designed
to be full on paintings. This is really sitting
down with scraps of paper and trying to just relax into it and be really free and loose. So I'm not getting you
to sketch for this. This is painting
straight onto the page. And I have sent it because
of that, I have set it to intermediate. I don't know that it really needs
to be intermediate, but the painting is fast, and I do intentionally, I want you to be fast with this. I don't want you to think
at all with this one, but I still think
that by the end, you should be pretty happy, and I want you to be looser in your wrist and a bit
more confident about just making some marks on
the page. Let's get started.
2. Materials : So materials for
the lesson today. So to start off with,
I'm painting on a board. I'm painting on a slight angle, and more maybe one or
two of them I tape down. It's probably handy
to take down just with some regular masking
tape for this one, because I'm using
little bits of paper. Now, the paper is 300 gram
arches, cold press paper. And I've torn it into lots of little bits for
this exercise. You don't need a pencil
or an eraser for this, I want you to paint
straight onto the paper. I don't want you to be
sketching up for this. Now, for the reference photos, if I'm using a reference, I've included actually
in the video. I'm not giving you a
reference photo to printout because I
don't want you to get hung up on looking
at the reference photo. I just want you to be able to glance at it every now and then, each reference photo
that I've used is within the actual video. Now, in terms of paints, using a bunch, you don't
have to use all these. For the little Cathedral here, I've got some permanent rose from Winthro and Newton
and some cobot blue. Also from Windsor and Newton. For the tulip, I've got some Hansi yellow
medium and Pyl red from Daniel Smith and some
sap green from Holbein. Not for any particular
reason other than I wanted to try because I
saw someone else using it. If you don't have a green, I usually mix up my own green
so you could just as easily use the Hansi yellow with one of the blues for the green here. For the little Temple, I've got the Hansi yellow, the Pyl red. I'm using some French ultra and I think that's all
we need for that one. If we move then onto the brush now the brush is
really important. So it's a dagger brush, and I've got the details of
this brush up on the material section
on the side. Now, we want to be painting on the tip here and also on
the side of the brush. Doesn't matter if
it's not this brand, but it needs to be a dagger. Now, in terms of
there anything else, all you need is a palette, jar of water, and some tissues and we're right to get going.
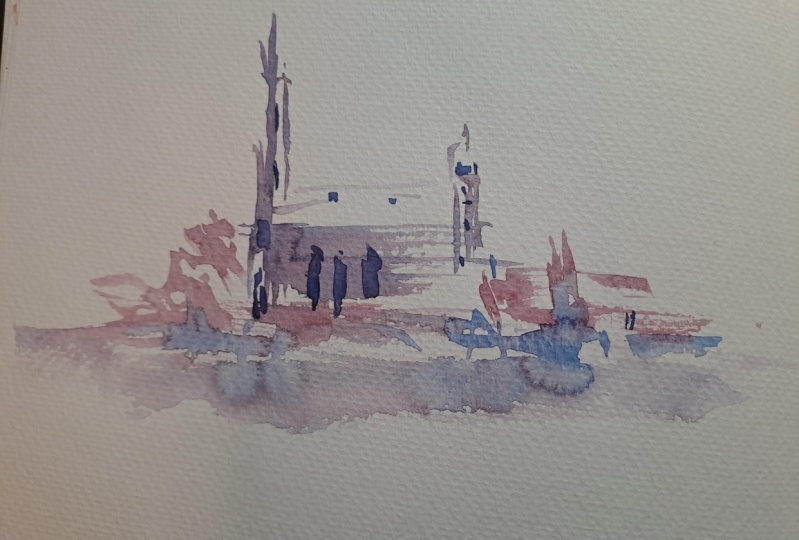
3. Cathedral - Fine Marks with The Tip of the Brush: Okay, so what we're going to do for the first one is we're going to do a cathedral
off in the distance. And for this one,
I'm happy for you to look at a few reference photos. I've got a couple for
you to look at here, but I just want you to get
the idea in your head. I don't want you to get
caught up on looking at a reference photo
and then trying to paint exactly what's there. This is all about using
your imagination, letting the brush do
the work for you, and seeing what happens. Now, I am going to look
at my color wheel, which is something I do
occasionally, not very often. I'm going to for this
first one, stick in this blue violet,
red violet range. So I'm going to use some cobalt and I've got some
permanent rose. Right. So what we're
going to imagine is that we've got a
spire on the left, maybe a big spire on the left, a bit of a rectangle
for a building, bit of a spire on the right, and there are some
buildings on either side. I'm going to come up
initially onto the tip of my brush and paint a bit of a triangle for the first spire. But I don't want you to really
heavily paint a triangle. The rigor is hard to control. We want fairly loose strokes. So I'm touching into my
cobalt and my permanent rose. So I've got a bit
of a milky mix of a purple coming up onto my tip. And just painting loosely
in a bit of a spire. So I've got lots of little
bits of white paper in there. That's fine. Now I'm
going to grab some more, maybe a bit more of my purple. I'm going to come down to
the side of the brush now, give myself a bit of a building. So I'm going to
pull that across. So still, nice and messy, I've got mixing colors in there. Come up to the tip again,
maybe a smaller spire or Oh, actually, I didn't get that. Maybe I'll do two um, well, I don't know what you
call them, the rectangles that are so more
notre dami I guess, kind of on the side there,
so the shorter ones. I should look up
these words before I actually start to teach. Alright, then I'm going to
tidy up that rectangle a bit, picking up my blue,
picking up my pink. And now you imagine there
are some stuff happening. On the side here as well.
I don't know what it is. There are some other
buildings in here, you know, you don't often see a
cathedral by itself. It's usually nestled in
amongst other things. So I'm going to get my
brush, put it in some water. I'm just now
painting with water. I'm going to paint up to this. And then in a couple of spots, I'm just going to
let that touch. Now, my room's really warm because I'm all of a sudden
I've got my heater on, so there's not much
movement there. So now I'm going
to pick up again, my permanent rose and my cobalt, and I'm going to
throw a bit of paint. Into that just so that there's something happening
in the foreground. Now, as that's
drying, I'm going to pick up some more
solid paint of both of them and just drag a few more bits of
paint around the place. And if there are any whites that aren't like they're helping me, I can close them in. And then just picking up a
little bit more solid paint and throwing in a
few windows, again, while it's all still wet, then I'm going to come out
of that and let that dry.
4. Tulip - Using the Heel of the Brush for Curves: Now all of that was up
on the tip of the brush. Well, most of it
was up on the tip. What about the
side of the brush? What marks can we
make with that? I'm going to do a
quick little tulip for that to show you. I'm going to pick up a
little bit of yellow, little bit of red. So
I've got my orange. I'm going to pop the
tip on the page, but I'm going to
press into the heel. I make that a shape. Come onto the other side, do the same, and
then I'm just going to roughly tidy up a
little bit in there. Then I'm going to grab.
Actually I might join. Join those two. All right. Then I'm going to grab
some sap green and do a stem while this
is all still wet, important to just keep moving. So I should have taped down because this is a
little bit movable. Got a stem. Then
I'm going to pop in a leaf bit more sap green. Here, I'm going to
tip, push down, come in to join the stem, do the same on the
other side, tip, push down, come in
to roughly join. Now, while this is still wet, I'm going to wash the
green off my brush. Then I'm going to pick up really thick toothpaste
consistency red. I'm going to drop
it into the base. Let that run into the
stem, that's fine. But I'm also going to pop. Yeah, you get those sort
of ruffled edge tulips. So on this open edge here, I'm just going to whack a bit of red down and then
drag it through, you know, the
overlap as the petal comes in to wrap around. And then a little
bit on that side. Wash my brush. Then I want to make the water
do the work for me. I put all this pigment on, but now I'm going to drop in water and let it
all move around. And then I've dropped it in, so it's moving the pigment
and then I'm kind of wing it off because I want
interesting things to happen. If you've done any of
my classes by now, you know I'm a lazy painter. So I want stuff that I
don't have to work for. Just before it dries, I'm going to restate the red just down the bottom. Just
rounding that up. So this brush just makes the perfect curve for
the bottom of that tulip. I'm going to sit, let
that dry for a second, pop a couple of details on,
and then we'll keep going. All right. So I've
got my sap green, and I'm just going to
pop a little bit of French ultra in to make
it a little bit darker. Then we take that mix, and I'm going to come on
with that tip of the brush, push down, and pull that
through and leave a flash of light on the side of the leaf. Okay. Then on the other side, I'm going to do the same thing. Now I'm going to
push onto the tip, then push down, leave that light on the edge and
join it into the stem. And then I'm going to pop just
a little bit of the dark, just underneath the base of
the flour onto the stem, just to give it a little
bit of a shadow underneath. And probably I'm just going to strengthen up
my yellow my orange, I think, on that bottom of the chalk, and then
I'll stop mucking. So I'm just coming
on I'm dry there. Just want to
strengthen up red and yellow sometimes
can get a bit pale. So keep reminding
yourself messy is fine. Like, it doesn't
matter that I've got these little bleeds up here and I've got the little
flick out there. It's neither here nor there. What matters is where you pick
to put a couple of darts, put a couple of contrast. So here, this little light
to the dark is important. This little shadow underneath the bottom of the
chirp is important. So those little sort of details let you get away with
messiness everywhere else. So lovely for the up on
your tip brush throats, but also great for these
beautiful beautiful shapes. Don't come out and let that dry. Oh
5. Japanese Temple - Mixing Up the Strokes and Letting the Pigments Mix on the Page: Long skinny bit of paper now. We're going to do a bit
of a Japanese temple. Got a photo from my sister. I don't want you to blow I don't want you
to zoom into it. I just want you to get the
basic idea of the shapes. We've got a couple
of roofs here. I'm not going to worry
about the buildings, and I just want a bit
of a flash of trees. Now, this is practice on
brushwork and letting the paint mix on the page
forming different bleeds. So again, not a proper painting. This is practice. So I'm going for. I've got some French
ultra in my well here. Milky. I've got a little bit of Pyl red because I've
been messy in here, so a bit of a gray, really. I'm going to start on the right, give myself a little
bit of that top it, then I'm coming into the roof. Milky wash. Got a bit of a blue and a bit of a
red in there and messy. I'm not overthinking that. I'm going to pop my brush
now in the orange and say, there's a bit of
a building under there, back to the blue. Well, the blue and
red. Now I've got my next roof line. Now. What I don't want to
do I don't have to paint in all those
white bits of paper, but what I do need to do is give the pigment
somewhere to run. I need to make sure that these shapes join
up at some point. Another bit of orange there, wash my brush back
into my blue and red. And you can see how messy that is and it's not
like the reference, but it's okay. It's
just the guide. A bit more of my
orange down here. Now, a couple of things
I'm going to do. I'm going to grab some water. I don't want to paint the wall underneath that's
on the reference, and I want to have some trees
coming down the side here. I'm going to come
up and touch to that bottom of the
building, grab some red, a little bit of my
French ultra as well, and just chuck some stuff. Into the side here.
I've got a mix of wet paper and dry paper up
on the tip for the dry. I'm going to throw a
bit more water on here. Then I'm going to grab a
bit more blue, I think, and just chuck a bit of that. Now, while that's all drying, I think I probably want to track a little bit over this side. I'm going to ignore the building
that's in the reference, but I'm going to pop a little
bit of color on this side. Then I'm going to
pick up some pyl red. I'm still wet,
everything's still wet. I'm going to drag a
couple of fine lines. Again, brush tip of the brush, beautiful loose little strokes. Into that wet paint where I've got coming into the
wet some on the dry, so I get a real
mixture of strokes. Okay. Now I want to stick a
few harder darks in here. So I'm still quite wet. I'm getting all these
beautiful bleeds in together, getting these colors mixing,
which is what I want. But now I want to
have less water on my brush than my page, and I'm going to take
a bit of the Pyl red and a bit of a French ultra
to make a really thick dark. I feel like I've got some sap
green in there somewhere, so I keep getting bits of green. Less water on my
brush than my page. If you're not sure
that you've got less water on your
brush than your page, paint the tissue until you
know that you're nice and dry. Before I'm fully
dry on the page, I'm going to drag a
few of those darks. Because I'm not quite dry, so I'm getting a
little bit of spread, but it's still
holding pretty tight. Then I'm just going
to do that in a few places maybe the
odd line in that roof, just to add a bit more interest. And then I think because
I can't help myself, I'm going to just throw a few little bits and
pieces that dark around. All I'm going to do is suggest a bit I don't want to paint
a background on that. That's not what this is about.
I know I keep saying that, but I'm just going to give the mere suggestion of a
mountain in the background. Onto the dry paper with
a touch of that I've got really milky French
ultra and my red mix. I've got to be a bit
careful. I don't mind a bit of bleeding
in the building. I don't want to have it take off on me and spread
absolutely everywhere. You could wait until it was dry, but I like the accidents. I often find a nicer
than trying to plant. A little bit of color. Coming down on this side too, maybe a bit more of the blue. I was drying there,
I've just wet it down with dirty
water effectively. Okay. Now, I have to
let that fully dry, and then I'm going to
pop a little shadow underneath each of
the roof lines, but I have to let that
really settle in. So coming out of
that, 5 minutes, 10 minutes, and then
we'll come back. Okay, it's been 5 minutes, and I'm nice and dry. So now I'm just going
to take a milkier wash of the dark that
I use for those. And I'm just going to pop just a bit of a
shadow under each of those us And then that's it. That's all I'm gonna do. So super simple. But I'm wanting you
to get the joy of all these bleeds that move through and see what
the pigment will do for you.
6. A Final Word : So I know that that was
really quick paint, but I want you to
try and keep it fast because I don't want you to have time to stress and worry. I want you to see what you can do with the brush when
you move quickly, when you let the
pigments mix together. When you come up on the tip of the brush, when you
come to the side, leave lots of bits
of white paper, really let the medium
do the work for you. And sometimes, I think you're trying to judge it while you're actually
painting it. And with watercolor, it always looks
better when it dries. Well, it always looks
different when it dries. So you can't really judge
while you're midway through. So I want you to relax into
it and just have some fun. I would love you to
post a few pictures of your finished little paintings up on the project section on the Skillshare site for me to have a look at. So
thanks for joining me.
 Nadine Dudek, Professional Watercolour Artist