Transcripts
1. Introduction: Hi, I'm Nadine. I'm
a watercolor artist from Melbourne, Australia, and I'm a strong believer that watercolor
painting should be fun, but I'm also very
aware that it can make you quite frustrated and
cranky really quickly. And I think probably
because we try and exercise the level of control over the medium that we just
really don't need. I think it works best when it's fast and there's not
very much thought in it. So what we're going to
do today is an exercise just in that being
loose, being quick. We're going to paint a
little scene of hinkaera and I want you to not overthink. And I've said it to all levels because I think even
if you're a beginner, I think you should
just be able to jump in and see what happens
with the paint. So what we're going
to do is we'll go through the reference photo. We'll go through the sketch,
and with the sketch, because I want to paint loosely, it's important to keep the
sketch really minimal. And so I want to show you
to be thinking in shapes, not thinking I'm
drawing a balcony, I'm drawing a window, I'm drawing a tower. I
just want you to think rectangle squares lines. So really, really simple. Then we'll go through,
and the painting itself is pretty much one wash, and we'll be doing
a little bit of wet in wet and wet on dry. So I'm hoping by the time
you get to the end of it, you're happy with
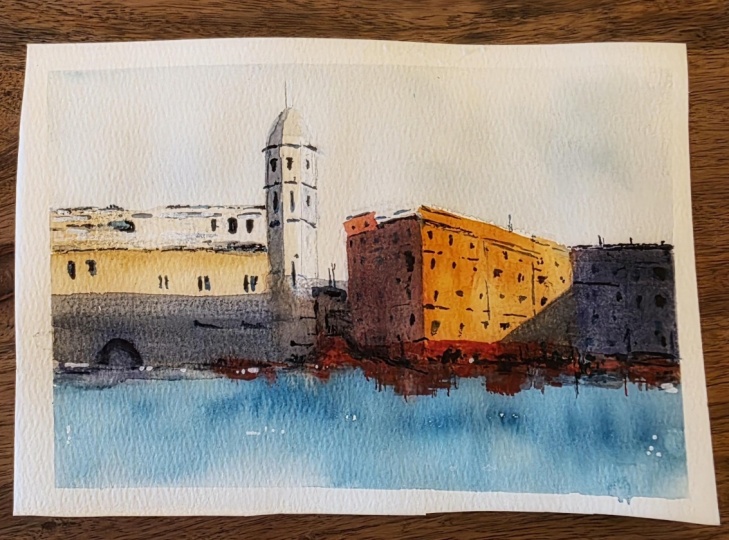
what you've got. I did a couple of versions, which you might find
you have to do as well, and I probably would
suggest watching it through first and
then tackling it. So let's get painting.
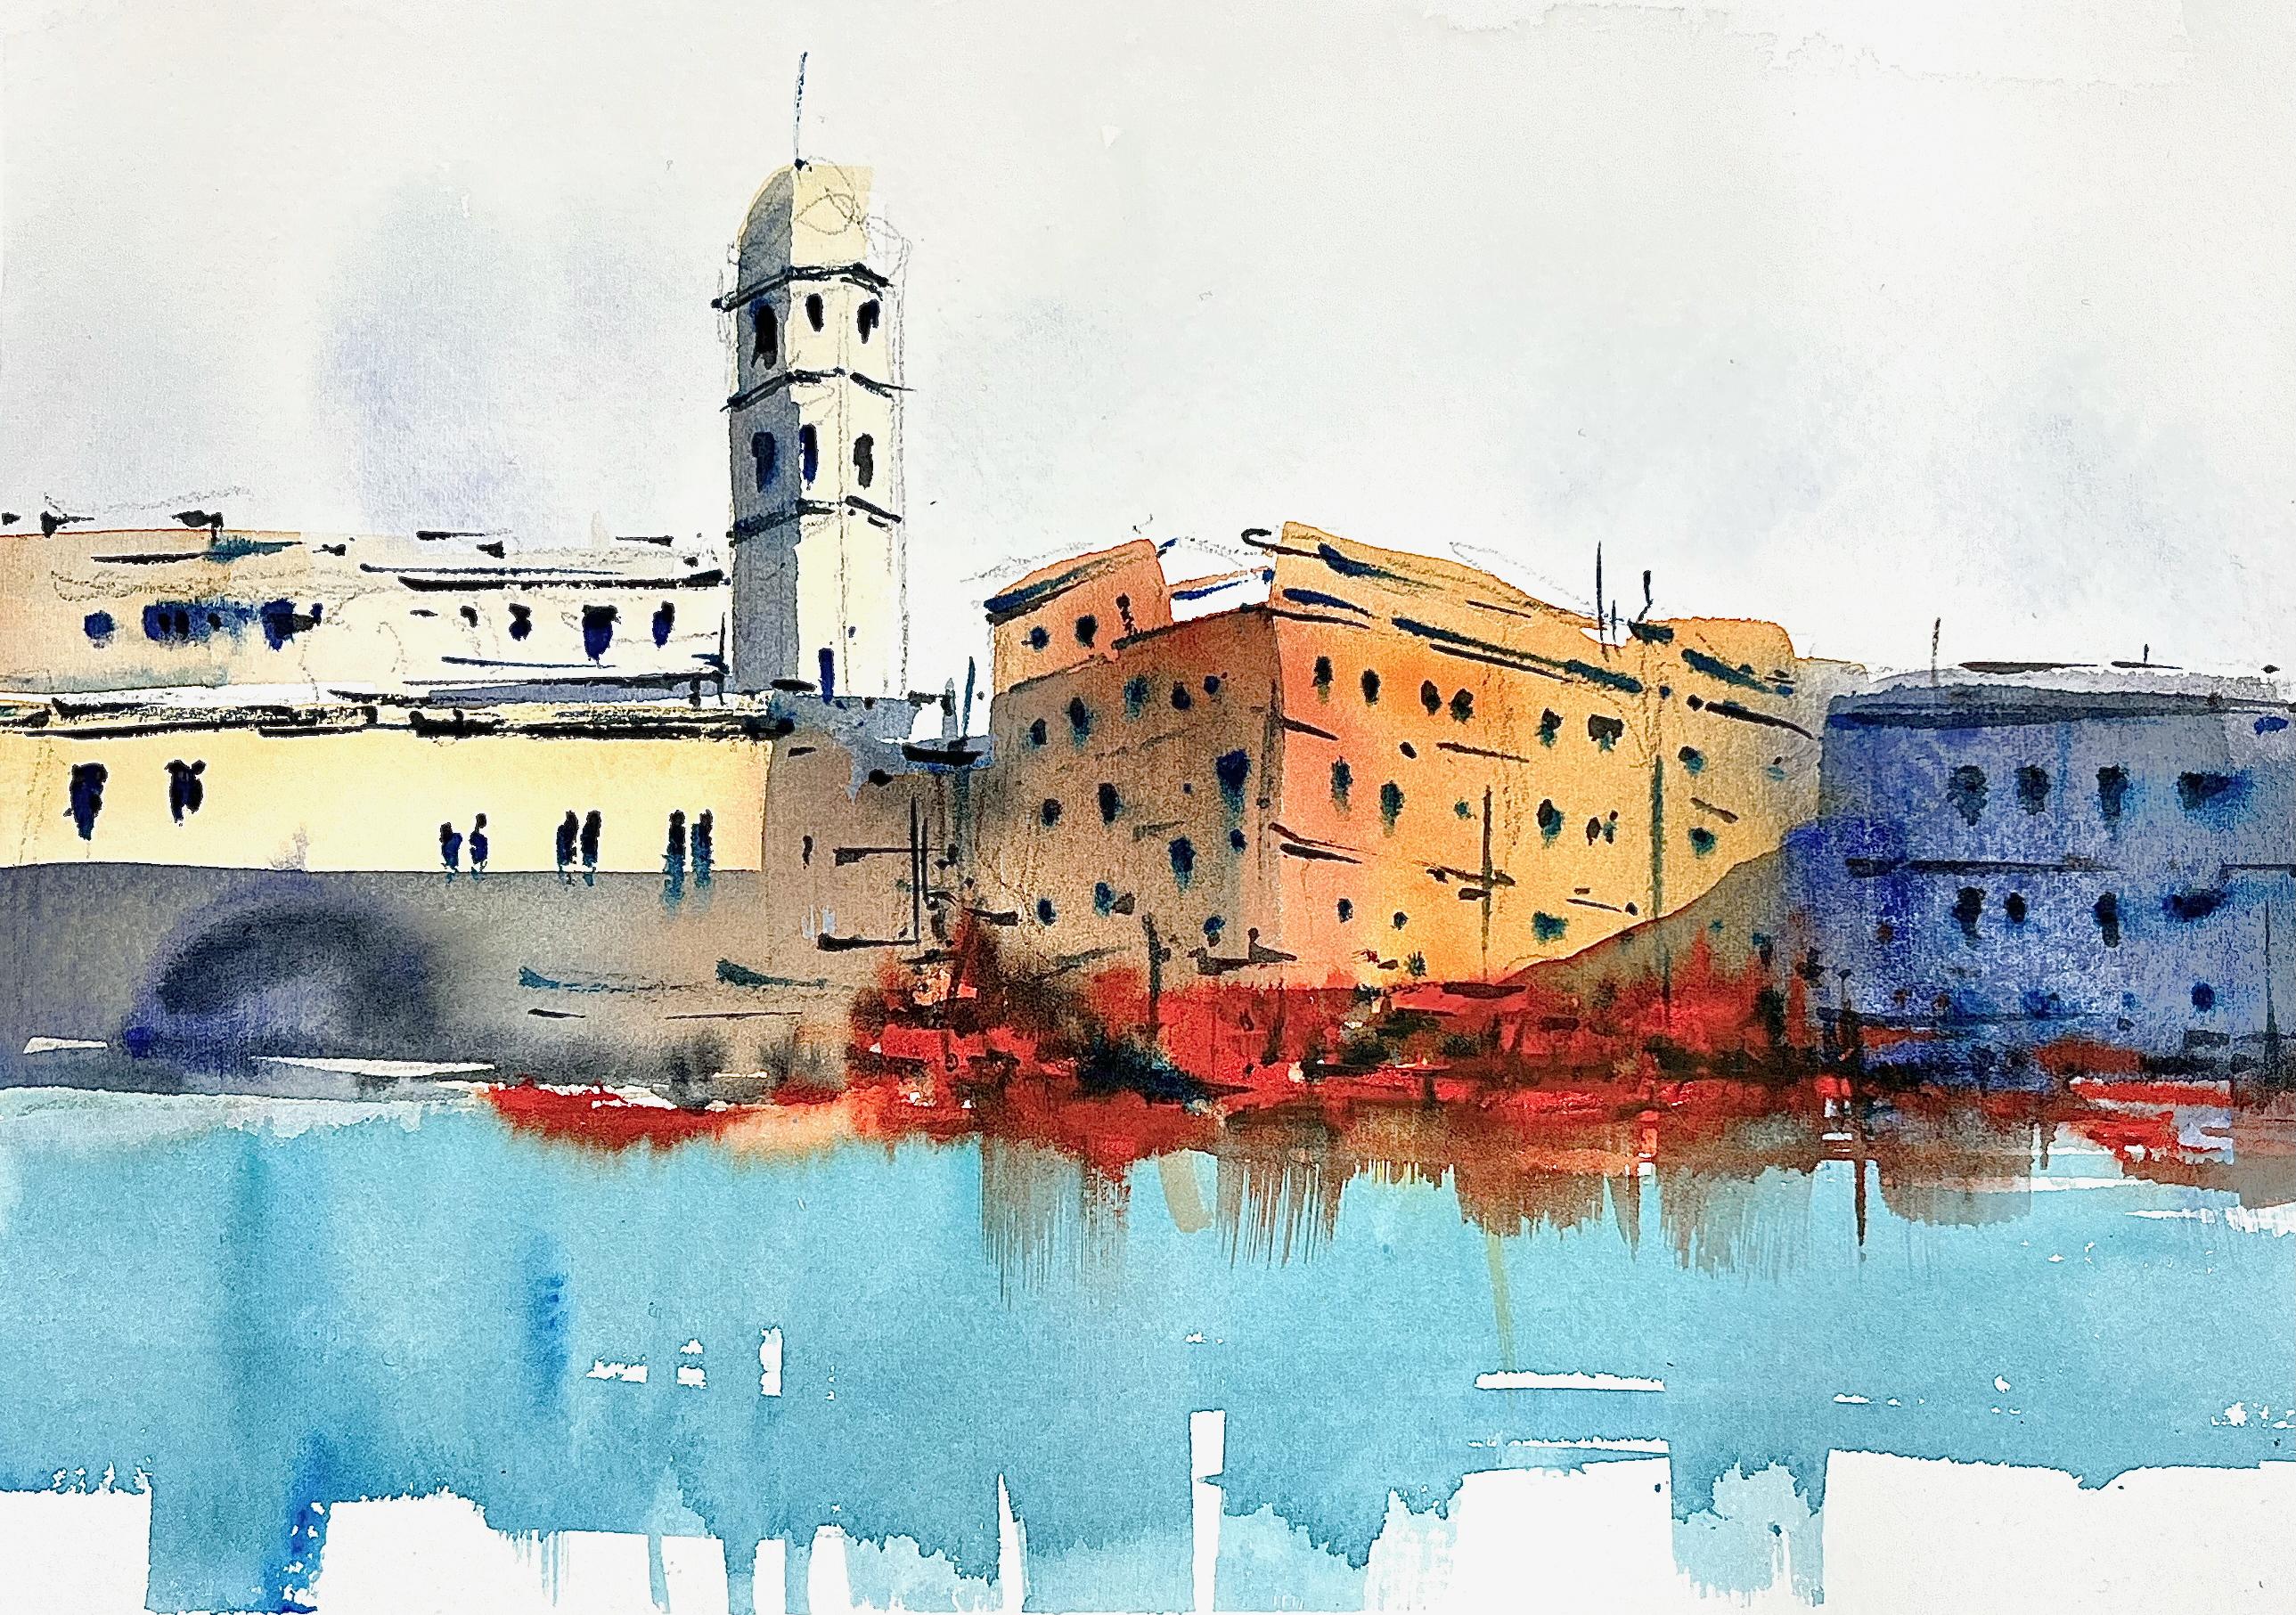
2. Materials: Materials for this class. First up the reference photo. This is from Pixabay, and you can download that
from the Skillshare site under the materials section. I'm painting on 300 gram
Arches cold press paper. I've been lazy and I
haven't pre stretched it, but I am taping it to a board, and I'm painting
on a slight angle. You'll need a pencil and a regular eraser,
and then for the paints. Now, it doesn't really matter
what you use for this, keeping the blues and oranges. I've got I went on
shopping spree recently, so that's why I'm using these. I've got some cadium
orange from WinthroNewton, and some Cadmium red
scarlet from Daniel Smith. I've got some Graham. I haven't used it before,
but it's quite nice. So Ultramarine Violet and some Windsor Newton
Pthalo Turquoise. Now for the really dark dark, I'm cheating and I'm using
some Daniel Smith Indigo. I'm just using two brushes for this. They're both synthetic. I've got this flat brush, which is a Taklon
glaze brush and a little round synthetic the details of these
under the materials. This is nice because
it's easy to get these architectural shapes in. Other than that, you'll
need some tissue, your palette, and some water, and I think we're good to
start with the sketch.
3. Sketching Up: Let's have a look at the sketch. Now, it's a complicated photo. I don't want you getting
caught up in that. I just want you to
be thinking shape. I've got some rectangles, got this tower, here
some more rectangles. The thing to note here is that these roof lines are
heading that way, and then they come
down that direction. This one heads back up, and I'm actually going
to make it straight. So that's why you'll see what
I mean when I sketch it. So I'm going to start
with the tower. Don't put it in
the middle of your page, slightly offset it. So I've got a rectangle for
that with a bit of a dome, and that rectangle is made
up of three sections. The balustrading kind
of comes line up, cross and down, line
up, cross and down. So how many are there?
Maybe another one? Doesn't really matter. But that's sort of
the idea for that. Then I've got underneath it. I've got some buildings
and bigger structures. I've got this archway in here, maybe a few more
rectangles up here. Then I've got these buildings. Here I've got a few
lines coming that way. Then the roof lines come down maybe all the way
down to about there. Then I've got this one
that I'm just going to do straight across just
to make it easy for me. I'm not going to worry. There's a lot of other
stuff happening up there. I'm not going to
worry about that. Then there's all this business in know what that one was about. All this business in the front there with all the
people walking along. There's going to be
some stuff down there. This doesn't have to
look exactly like this. I just want to get the idea. Alright. That's
where we're going to stop the sketch and
start painting. Do you have a go
at this free hand? If it freaks you out,
I'll put a picture of this a template up on the Skillshare site, and
then we're ready to paint.
4. Suggesting the Sky: All right. I think my towel
is probably a bit small, but I don't really want
to draw it again. Do I? Okay. I'm going to
make my towel just ever so slightly bigger. Just as I'm sitting
here, that's bugging me. I'm just going to make
it. Just a touch. Right. So I'm going to pop I don't usually
bother with skies, but I'm going to pop
just a touch of sky in. I'm just going to
wet down the paper, kind of chisel out around
the buildings there, doesn't matter if it comes
into the top of the buildings, but what I am going to do is I'm going to pop some water down. This side of the buildings
are going to be in shadow, so I can Oops that's dirty. Put some water down there. This building is going
to be in shadow. You'll be able to
see it more clearly when I pop some pigment on. And this side of the tower is
also going to be in shadow. I'm just going to
pick up a little bit of my Pthalo Turquoise
and my violet, and I'm just going to throw just a little bit into that web page. It's not really about the sky, so I don't want to overdo it. I just I'm just going to get
a little touch of color on. With the sky, you want to put it on and get out, you
don't want to muck about. It will help me
when I go to paint, remember that I want to
keep this a little bit lighter and that my shadows
are coming down here. There's really not much in that, but I want to keep the
sky really subtle. I'm going to come
out of that for 10 minutes and let that dry, then we'll come in and
put the buildings in. H.
5. Getting in the Buildings: Alright, I'm fully dry. So now we're going to
start in the building. So initially, I'm
going to go with a really milky wash
of my cat orange. So I'm just gonna get some my colors are all
mixed, so slightly tricky. So really milky. I'm going to
come straight on the page, paint over that tape, and just whack a
bit of color on. I'm going to pop a little bit in the tower and a bit of a
wash in the dome messy. I'm going to keep moving.
Now I'm going to get a bit of my scarlet red. Is that what it's
called? What have I got? Cadmium red, Scarlet. I bit my red and come
into this building. Now here, I've got that angle that I
want to keep in mind. Just a couple of loose
strokes in there, I might join up that space, come back into the cat
orange and I'm going to drag some paint
through that part, remembering again so that
angle of the roof line. Then when I get to this
one on the side here, I think I'm going
to do that just because I can in
some of my violet. Mix that up a bit, a bit
of a lump of paint there. Then I'm just going to drag. Just getting my eye where
I think the bottom is. Then with the violet, I'm going to take
creamy consistency, thick paint, trying
to get a bit up. I've got a bunch of
colors in my well here, so I make it a bit
difficult for myself. In this bit there, I'm going to suggest an arch. I pop my hand down and then
push to get that curve in. Doesn't matter that
it's bleeding. I'm also going to
pop maybe a couple of just a light wash of rectangles in those
buildings up the top there. Now, before this is dry, I'm going to go into my Pthalo
Turquoise and I'm going to just drag some paint through. Now, I'm not going to paint the whole the whole lot you can, I'm going to leave
some white paper. That's just if you want
to fill it all in, absolutely, fill it all in. I'm just going to leave it a
bit messy down the bottom. Now, while I'm still wet, looking for a tissue. While I'm still
wet, I'm going to now grab some thicker paint. I'm going to go with my red. There's all this
business down here of the umbrellas and
people and everything. I don't want to
paint all that in, but I want to pop in some stuff. To suggest that. I'm just walking that red around there and letting
it bleed into the page. Then I'm going to switch
to my smaller brush. I'm now going to pick up,
I'm going to squeeze out some Pthalo Turquoise
and I'm going to throw in a few of those as well. I'm just bearing my marks really toothpaste
consistency paint in there, suggesting there's
something going on. Now, again, while
it's still wet, I'm going to grab up a mix of Pthalo Turquoise and my violet. After a bit of a dark
I'm going to start to suggest a few little
windows and things around. Brush on the side. On the tip and
then I'm dragging. I'm trying to vary
my brush strokes. Now here, I'm a
bit dry there now, so these are going to
stick a bit harder. It depends again how
warm your room is. But with these ones, I remember I'm following
that angle going up. Then as I come across the
face of the buildings here, I want to come down. Bearing them a bit. Bit of my blue, bit
in my turquoise. And I'm going to come
over to this side. Okay. I'm going to give
myself a little bit of a line to show me where
that roof line is. Then when I look at it, there
are a couple of these sort of little arches there, and then a couple of
bigger windows in there. Above here, there's a
bit of stuff happening. Again, no one's going to have the reference photo next
to your painting so you don't have to get really stressed about all these
little bits and pieces. Okay. What have we got in the church. In the tower rather. I'm just going to put a
little bit of stuff. Then I'm going to pop
a few actual lines. Now I'm thinking about
actual roof lines now. But I don't want to just
walking a few around. I don't want to draw
the whole line in. I want some broken strokes, and I'm going to do a few
verticals as well in here. I don't need the line I
want the lines broken. Okay. Just randomly walking
around a bit of stuff. There may be a few to
suggest the layers between the floors.
Again, just a couple. Then I'm going to pop
in the balustrading. What do we got? We've got a bit of
a line up a bit of a line down a bit of
a tower, a spire. And a few more roof
lines in here. I need a little bit more
going on in there. All right. I'm going to come out of that. Let that dry fully. Then I'm going to come
and put in a shadow, and then we're
going to put a few more significant darks
in with some Indigo. But I need to let that
fully dry or I'll be able to put my shadow
through. Come out of that. I
6. Putting in the Shadow: Okay, I'm mostly dry. Some of these bits of
paint are still a bit wet, but I don't really
care if they run. So I'm going to make myself
up a bit of a shadow color. Gonna use a bit of Indigo
and a bit of violet. And I want it milk. I want it to form. All I'm going to
start on this side. And I'm going to
come straight under that straight over rather
the arch, put in there. Now on the building, I'm going to on the church just pop in a touch
on the side there. Maybe a bit in here.
Bring it down. I'm just releasing the
light on this side. Then I'm going to pop some on the buildings here on this face, but I'm going to leave a
flash of light at the top. I'm just going to drag
them down like that. Maybe bit into the water. I don't see that
paint was still wet, but I can get that little drag into the water, which is fine. I'm wash my brush now. Then I'm going to come over
and I think what I'm going to do I'm going to pop. I'm making this up as I
go along. That's okay. I'm going to put this one
in shadow a bit more. Now I'm going to bring it a
little bit over in this one. I've got a little bit of a diagonal there just
to release the light. On there. Again,
we're going to let that red drag through? Probably. I'm switching up to my little I'm just going
to must that up a bit. I'm probably going to I've got these lights in here that
don't really make sense. I'm probably going to
close those up a bit, maybe a bit with my
red. Just get them in. Now, while this is still wet, I'm going to restate
some of my darks. Now I'm going to go with straight Indigo and my little
brush and I'm going to put in just a few more little
lines around the place. I'm wanting a mix of the Pthalo Turquoise that I had there for the
windows and the Indigo. In here, because I'm
all wet down here, I'm going to throw a few little
bits of Indigo in there. I'm going to restate,
I think with violet, actually, a bit of that archway. So I have Violet and the
Indigo on my brush there. And maybe a few more. So it's here that I really
want my focal point. I'm going to strengthen some of the little darks
that I've got in here, but I want to probably wait
until that shadow is dry. What I'm going to do, I'm
going to come out and let that dry for another five and
then come back in to there. Now, I would rather this
had been a straight line. You can see I've done that, but I can't do anything
about that now and if I fiddle with that,
it will ruin it. I'm not going to
worry about that. Yeah, there are many
straight lines in here. I'm going to pop just a little
bit of a roof on that one. Then I'm just going to
keep that. I'm going to let this all settle in, come back to a
couple more details and then we'll be done. Real quick, don't overthink it.
7. Finishing Off: Alright, I'm fully dry now. So I'm gonna come
back into this. A number, where's my
tissue there we go. I want to strengthen a
couple of my darks on here. I've picked up some Indigo
with my fine brush. I'm really just wanting to put a little bit more detail
in here without getting too carried away just because I want to pull the
eye a little bit here. There's that one
on this side too. Going to restate. And I haven't put that. There's a clock here. If you start to put
that kind of stuff in, it's really easy to
get a bit too fussy, so I'm leaving
that out because I just want the general
general feel. I'm just walking a
few little darks around a bit better. A few more maybe along here. I'm just going to
restate that roof line. Just a few little nonsense
marks around the place. I might print some those and maybe these have got
the four in there. This is one of all of a sudden you'll work out
that you put too many in, try and not get too carried
away, less is more. I am going to restate this
has fully disappeared, so I'm just going to
restate a couple of those windows in this one
and then I'm going to come. I still, that's
still really wet. I've been away for
ages, but there's still a little bit of
bleeding in there, but that's that's okay. I like that mix of hard edges
and then the little bleeds. I think I'm going to
come out of that. Let's see how it. Look. That's where I'm going
to leave that one before I keep fiddling
and add too much in.
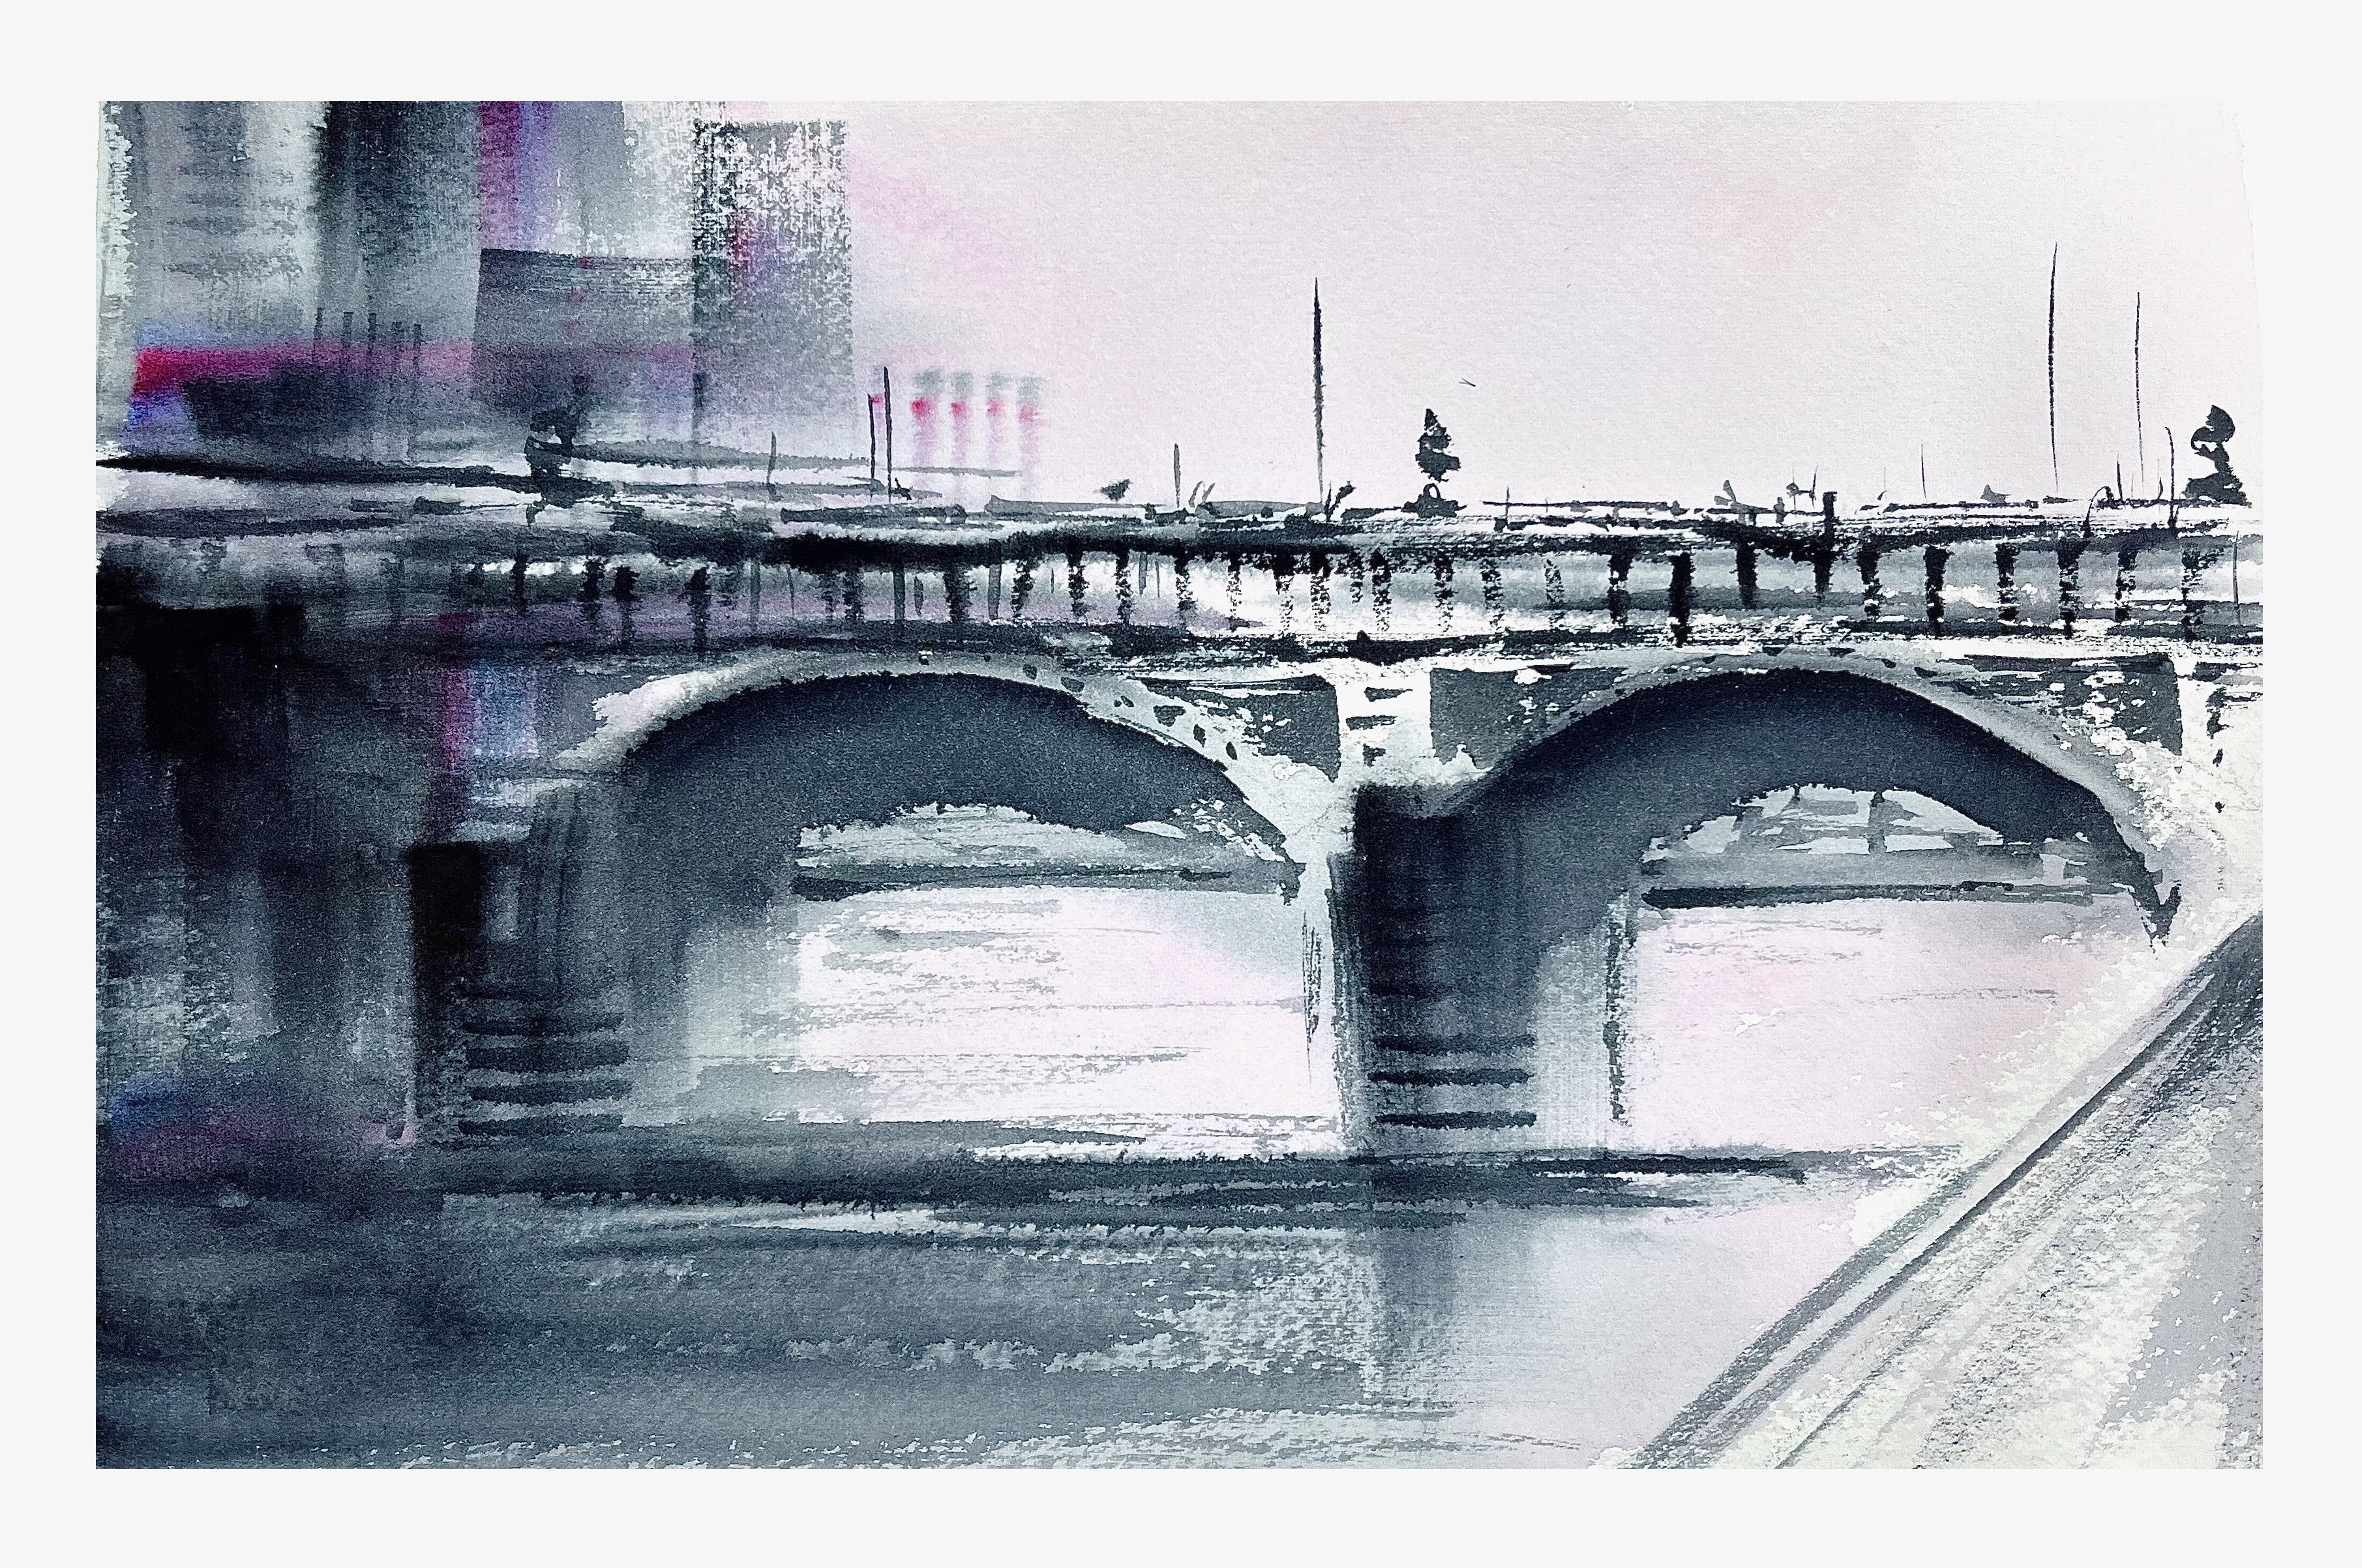
8. A Final Word: Yeah. So the point
of this exercise is to not get caught
up on the detail, to move really quickly, to use a mixture of wet
in wet and wet and dry and just suggest
the scene you don't have to get caught up
in all the detail. And because it is so fast and
the sketching is so loose, they will all turn out
a bit differently. And, of course, as
always, for me, I've got, you know, multiple different
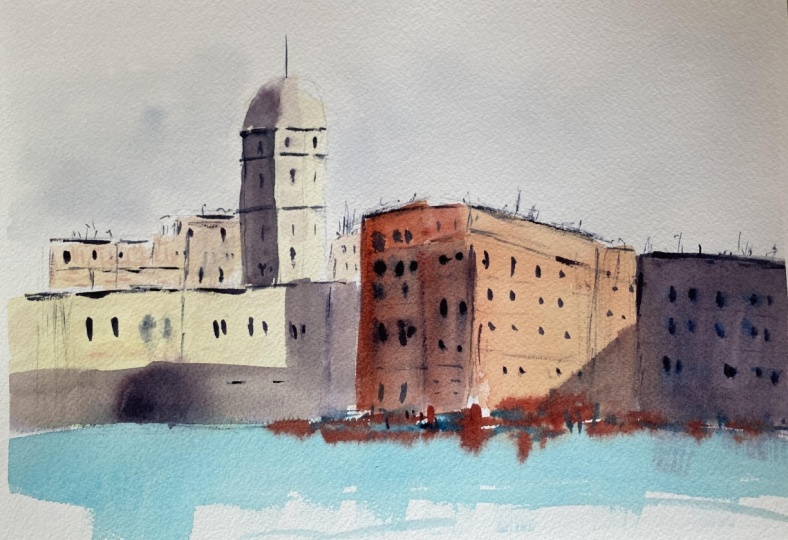
versions where I like bits on each one. I think I probably
prefer this one. And the reason I like
this one is because I like the light here and I like the light
on the tower there and the little messy bleeds
that I've got through there. So each one will be a bit
different, but that's okay. For me, I find I get a little tighter when I'm actually uh, filming rather than when I'm practicing to see
whether they will work. So you don't have that excuse. You can be loose and free because you don't have
anyone watching you. So if you get to the end and you're happy
with what you've done, pop a photo up on the project section on the Skillshare page for
me, have a look at. I'm always happy
to give feedback, and thanks for joining me.
 Nadine Dudek, Professional Watercolour Artist