Transcripts
1. Introduction: Painting flowers is a
joyful way to explore color and texture and also
have fun in procreate. Hi, I'm Eva, and I'm
full time artist. And in this class, I will share with
you how you can paint the beautiful
hydrna flower. The bloom of this flower can feel very tricky
at first glance, but we will break it
down into simple shapes. We'll begin with loose
practice sketches so you can see how to simplify the flower head and each petal using just a handful
of confident strokes. Once we go over these
warm up sketches, you will feel more
confident to tackle the whole illustration with
color, depth, and details. And during the process, we will also look at
few color options. Then we will move into
the illustration itself, first painting the
flower shapes, then building the depth. And after we are happy with our values and colors
on our flower, we will finish with
beautiful details, leaves and small
touches that make the hydrangea illustration and even if you are a beginner, I will guide you
through every step. Grab your iPad, open a new
canvas, and let's start.
2. Petal shapes: So let's start with practicing
the petal shape and overall shape of the flower by just sketching without color. We will move on to the
color version later on. For sketching, I will be
using a soft pencil brush, but you can use any
brush that you prefer. So to start with
these flower petals, the best way is to
start with a circle. If you're not comfortable
with drawing circles, you can just draw a circle, tap on the canvas, and procreate will help you
to create perfect circle. Now when you have a circle, create points on the edges, and then you can
connect these points. So you are creating
kind of like a target. And now you can create
a middle of the flower, and then you can just
create these type of shapes to connect to the
circle in the middle. We are creating a
little bit wider on the edges and then going
narrow towards the middle. Kind of like a teardrop shape. So you will connect
all of these points, and at this point, we are not creating any overlap, even though in real life, the flowers are overlapping. I mean, the petals are
often overlapping. So now what to do after you have this
simple flower shape? Well, you can rotate this circle in many
different angles. So depending under what angle you are looking at the flower. So the circle can be more like ellipse when
it's more squashed. So it doesn't have
to be perfect, and you can play around
with different shapes. So let's fill in one of these shapes when we are
looking from the side. You will do the same. You will add these points on the edges. Then you will add the middle. I will start with this petal, which is further away from us. Then we can add also this and the one next to you is
a little bit different because we can see side
of the petal as well. You'll do this
kind of half oval, and then you can
connect the petal. So every time the petal
is kind of closer to you, you can connect these points. And the petal closer to you will look a little bit more like
folded or with a bend. You can do that also
on these other ones. So now you can already start with this folded
petal if you want, you can play with the shape and then just connect
to the middle. So you can practice doing
this few more times. So sometimes you can create the fold bigger and
sometimes smaller. And you can also try adding
the lines kind of coming from the middle of the flower
to create the veins, which you can often
see on the petals. You can also test
out the overlap. First, I will do that one petal, and then I can create another
one just here on the side, and the second one will
be a little bit hidden. You can play around
with a little bit of distance of the petals
and that overlap. But you can keep the petals also as they are so they
don't need to overlap. So you can stay
within the circle, or you can also go a little
bit outside if you want. And when you are happy
with your flowers, you can reduce the opacity
of this layer and you can redefine the flowers
with more sharp brush. I like to use a
flat pencil brush and then just draw
over these shapes. I need to make the brush bigger. And you can vary the pressure
of your brush as well. It really doesn't
have to be perfect. I like the wonkiness as well because we are not trying to be geometrically perfect. All right, perfect. And now, what about the
whole flower head? So let's move on to the
next part and I can show you how you can construct
the flower head.
3. Flower head: All right, so now I
will hide this layer. I mean, both of these layers, you can also group them. And now I will create a
new layer where we can sketch the overall
shape of a hydranga. So the overall shape
is usually round, but how would you arrange
the flowers there? You can again start with the circle and you can get
the help of procreate, especially if you are
drawing bigger circle. And then you can duplicate
this circle and make it smaller and just make it
fit within this other one. We are trying to align them. You can see these alignment
guides to help you. Now you can draw those other ellipses or circles within the
first central one. We will have bigger flowers in the middle and then you can do the same as we
previously did. And draw those four petals
within each circle. So we will see most of these
flowers from the front, so you don't have to
draw that folded petal. Now you can add those
other petals on the outer edge with those more tilted and
slanted ellipses. So you already know
how to draw those. So you can just fill in
the shapes here with the folded petals
and you can play around with the sizes
of these petals. Here I'm just creating very rough sketch because I know that I can adjust it
on a separate layer. Same as before, I can select I can reduce the opacity of these layers because
they are just my guide, and then I can create
a new layer where I can redefine the
sketch even more. And if you want them to overlap, you can make them much bigger. And you can also
delete these parts. And of course, you can start sketching bigger
flowers from the start, so you don't have to
make them bigger, especially if you
don't want to end up with pixelated lines
because you want to make sure if you are drawing in a bigger scale and you
want to keep lines, especially, the lines are kind of crisp from
the beginning. But because this
is just a sketch, I don't mind if some of these lines are
not super precise. You can also rotate them. And then just fill
the whole shape. Now I can just move
these layers and I can show you one
more layout idea. I will swap back to this soft expressive brush or another expressive brush that I like, which
is quite soft. If you want to have a
side view of a hydrna, I need to move this
little bit higher. Now I will create a new layer. If you want to have
that side view, you can create this
mushroom overall shape. So basically,
something like that, then you can put
the leaves here. And then you would put one of
the bigger flowers here in the middle and then you will create those ellipses
here on the side. Also here in the back,
creating that overlap, especially if you
don't want to have too many flowers or petals
on the flower head. The same way, you can add the
leaves to this one as well. Of course, Hydranga has
very specific leaves, and I will show you
how you can create the leaves in the
colored version in the following lessons. Now let's move to
the next part where we can test out
different colors. For
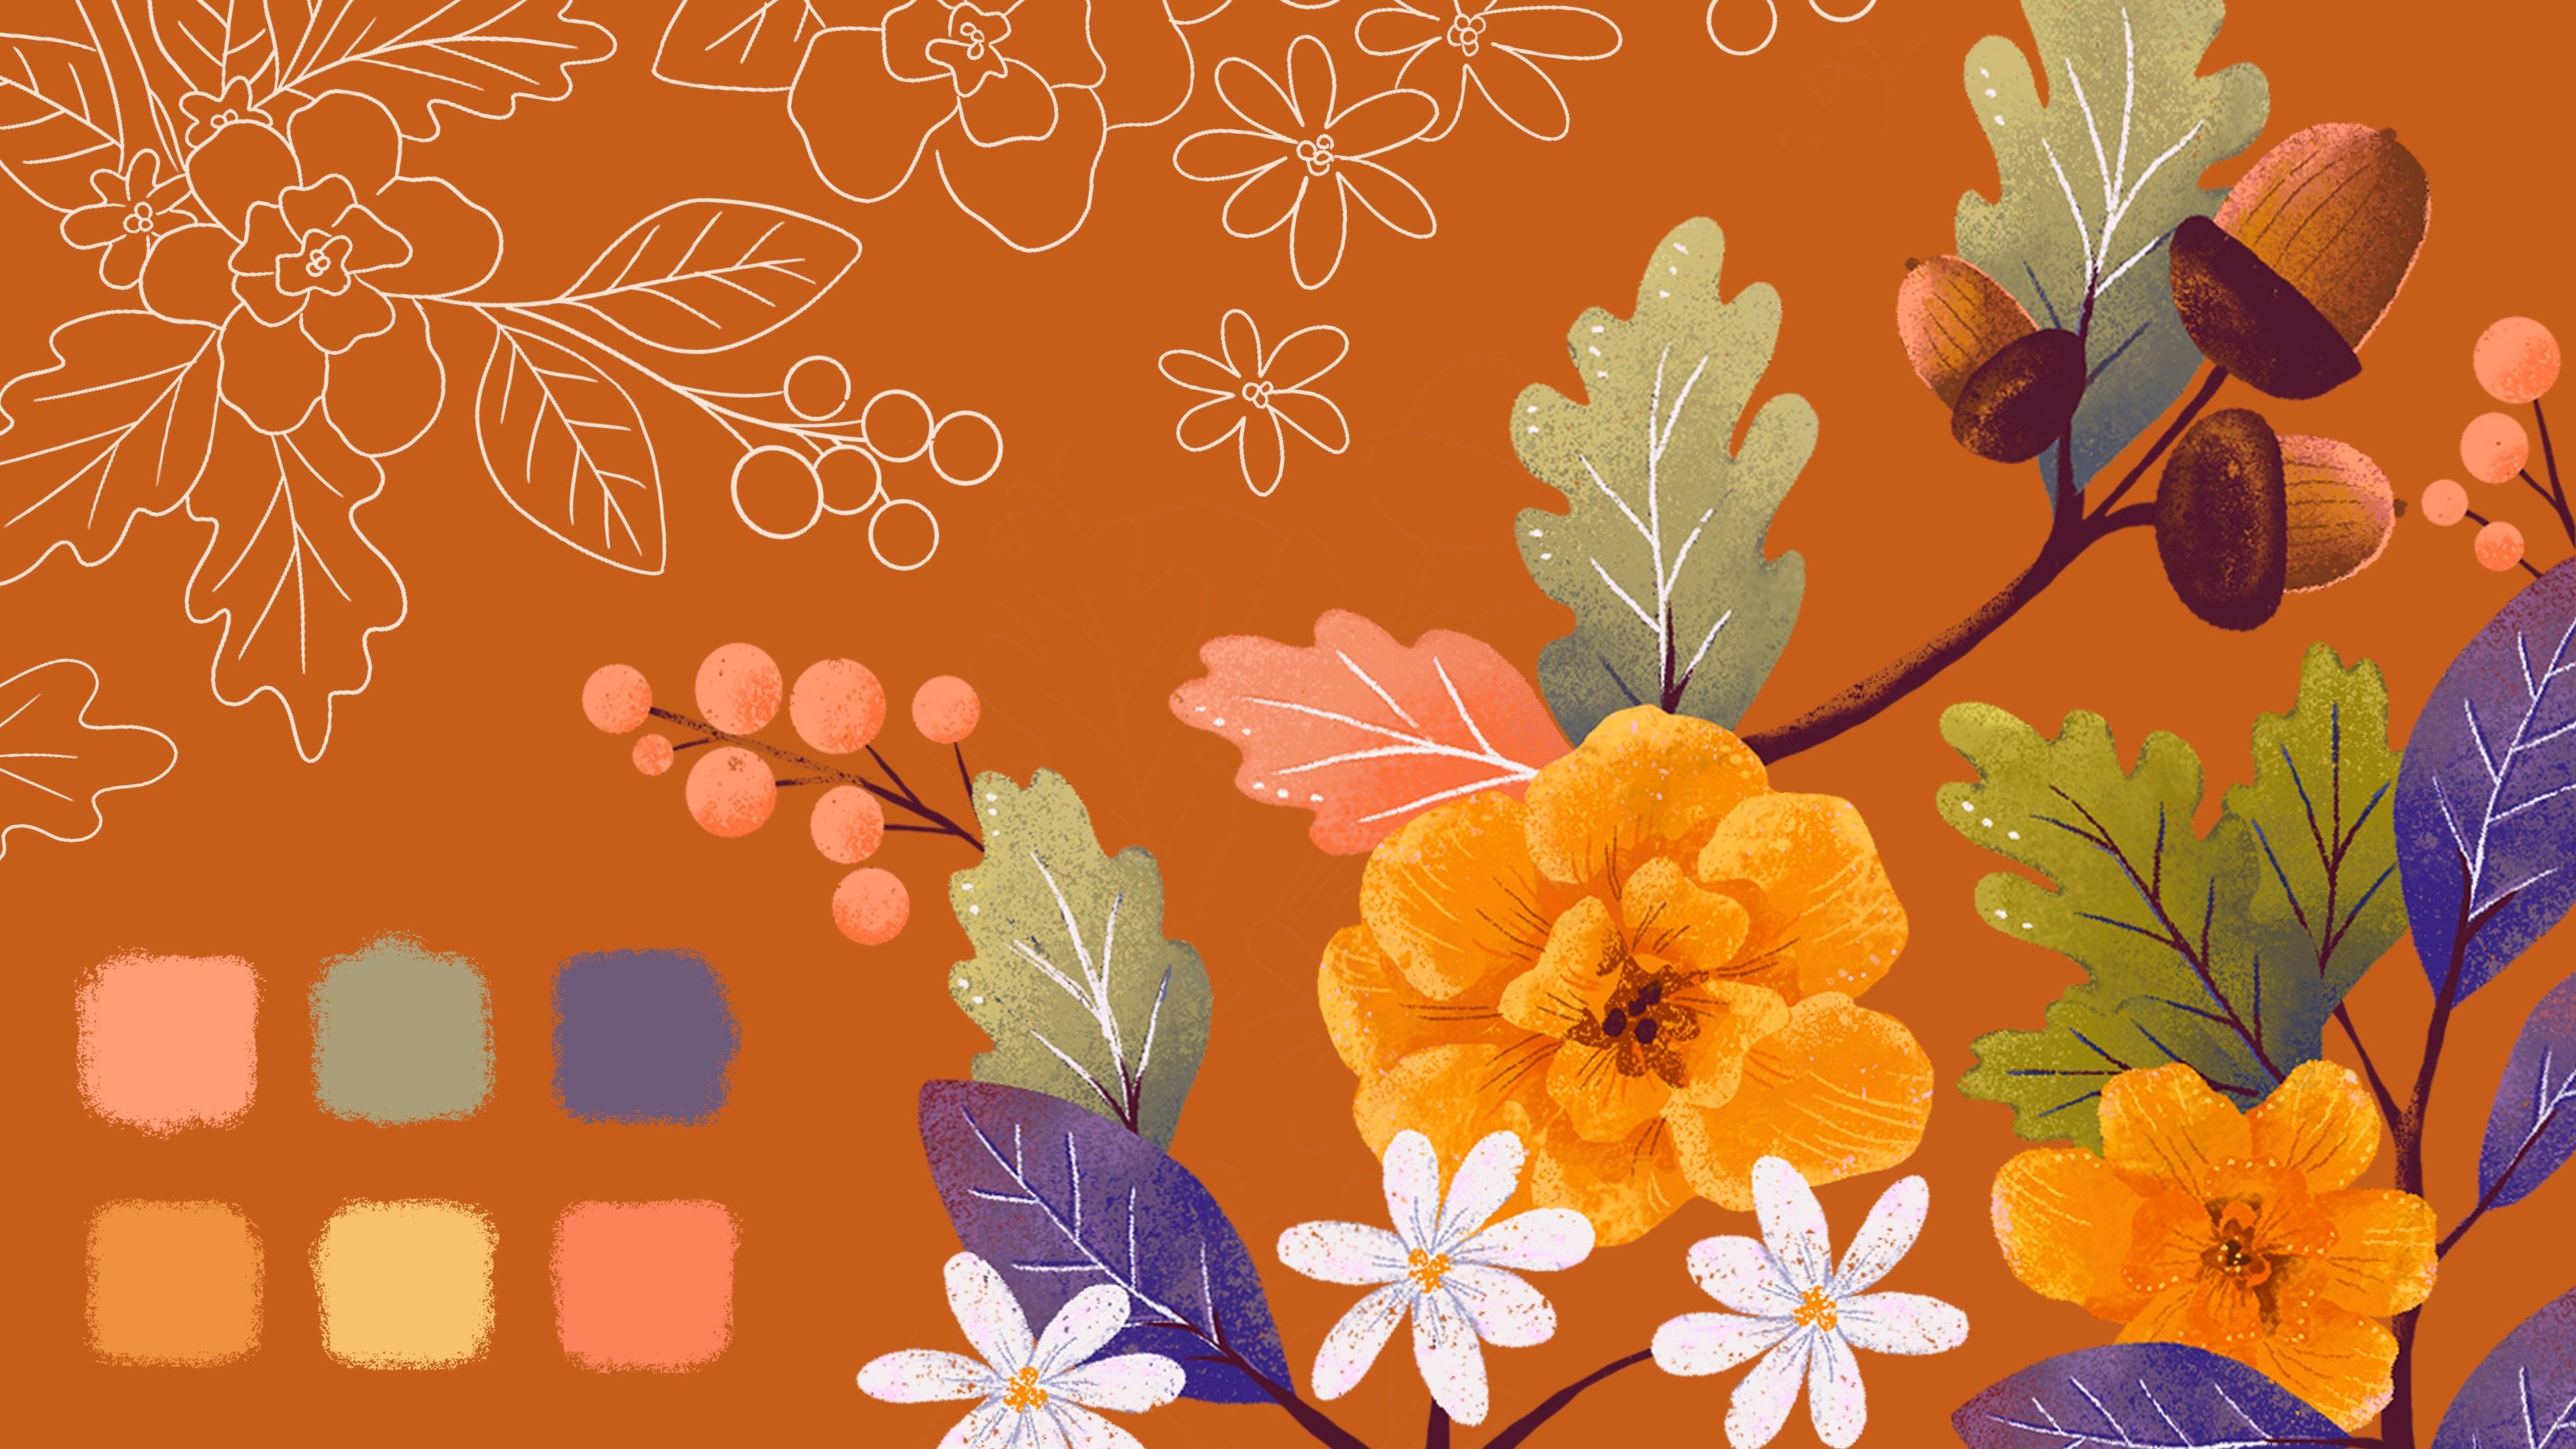
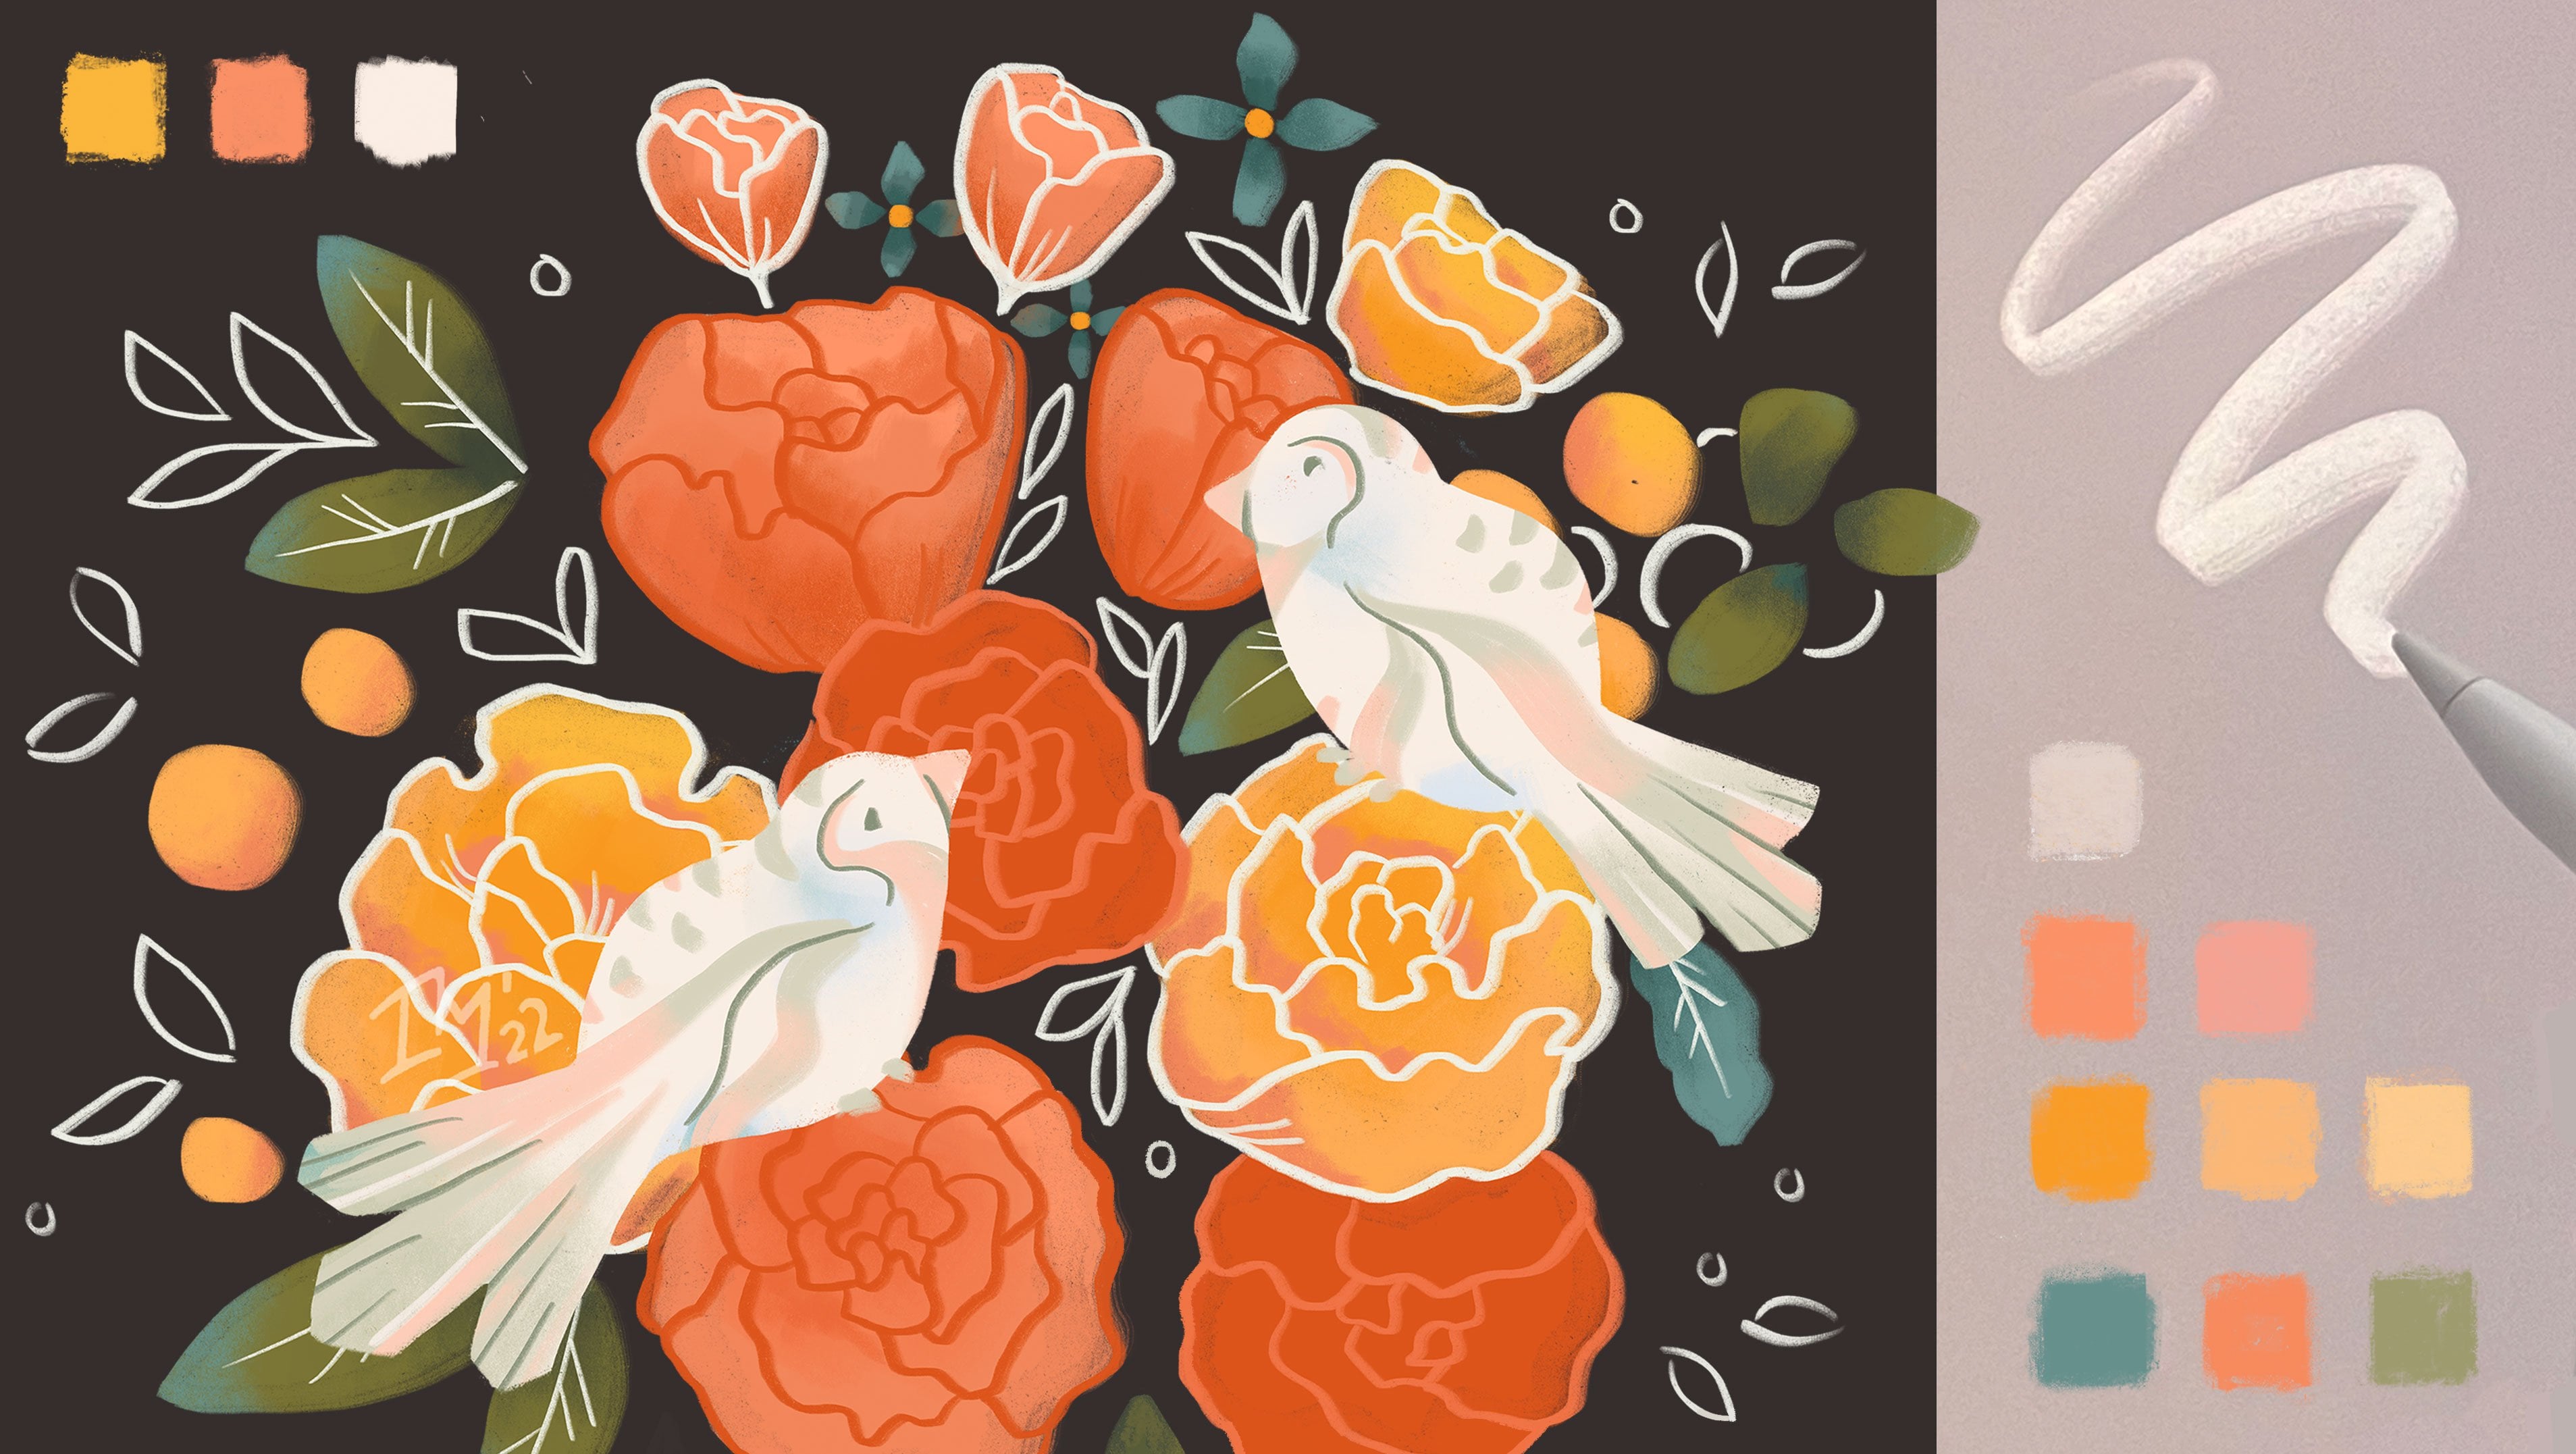
4. Color: All right. And now
let's talk about colors that you can consider for
your hydrangea flower. So very often, you can see the hydrna flowers in this
type of realm of colors. So from blue turquoise to purple violets and
pink color shades. So for this part,
I would swap from sketching brush to
a painterly brush, but you can choose any brush for this type of color marking, so you don't have to use the
same brush as I'm using. So to start with kind
of bluish purple tones, we can think about this type of hue range between green
turquoise and blue colors, and you can move the
slider somewhere on the top right of
the value wheel. And you can test out
if you like the color. So this one is quite nice
desaturated blue color that you can consider
for your flour. But if you prefer more
saturated blue color tones, you can also move the
slider a little bit here to the left
towards the greens and move the slider also
a little bit higher up to the top right and
test out that color. So this is also very
nice blue color tone. But if you are still
thinking, okay, I want to have even
more saturation, you can move the slider
more to the top right. And test out that type of very nice rich,
light blue color. So this is something you can consider for your
blue color shade. And if you prefer using
more purple colors, you can move the slider towards the purple and violet color
tones and test out purple. And here we can move the
slider more to the middle. And test out this
type of purple, kind of nice hue valurne. This is quite saturated
and rich purple color, which I really like. Now you can also
think about, oh, maybe you would like
your flowers to be very light purple, this pastly color shade. You can consider this type of pastly very soft look as well. Then you can also move towards the red tones and
think about, like, Oh, maybe you want to have a very
nice and pink hydrangea, because you can see these
beautiful pink shades as well. And you can even push it
more towards the red tones, if you want to have very
nice warm light pink. And this can be also very nice color choice
for your flower. So think about what color hue you would prefer
for your hydranga. And I really like the
purple color tones for this type of illustration. So I will be using
purple color spectrum. For our project illustration. But as I said, you can test out different color hues and go for your favorite and still
follow the same process. But you will just use a different
hue for the base color, and then you will
build from there. All right. So I will be using purple color tones
going forward. So now it's up to you
to choose the color. As I said, I will be
using purple color tones, and now we can move
on to the next part.
5. Brushes: Before you start with the
project illustration, you can test out different
brushes that you potentially use during
the project illustration. So you don't have to use the same brushes as
I will be using. So that's just one example. So now I will show you different brushes that
you can consider. So if you open brushes and existing brush sets
that come with procreate, you can, for example, try
out wet acrylic brush. So you can make brush bigger and test out painting simple petals. With this brush, and you can
try to vary the pressure. So it will create
this nice opacity. So now I didn't lift the brush, and you can see that there are different brush strokes
created within these shapes. And you can test out also smaller brush and
painting five petals. For the simplified flour, because we will be creating
different flower shapes, and you can decide
if you want to do four petals or five petals. So you can kind of alternate
how many petals you add for your small flower heads when we will be building the
whole hydrna flower head. Now, if we move to the artistic folder
with different brushes, you can test out, for example, brush called Old Beach, which is quite nice as well. And again, try to vary the brush pressure when you
are painting these petals. So pressing harder and softer
to fill in these shapes. So it's nice warm up
exercise as well. So now I can paint five petals. And you can try
different shapes, some longer petals and shorter. Practicing those shapes that we looked at in
previous lessons. Another brush that you can
try is the wild light. Let's find it. It's
here on the top. You can also try creating
different shapes. Let me make the brush a little
bit bigger and can sample lighter purple with
a soft pressure, you can test out
creating petals. So this one gives
you this JGI edge, which is very nice. Then another one is this one, the Plymsle, which is also quite interesting because
it has this nice overlap. Let's make it bigger again. Okay, not as big, so you can test out
also size of the brush. So this one has
that nice texture. And you can really play with the size of the
petals and the shape, so it doesn't have to be
geometrically perfect. Now I will take
this darker purple, just stepping on the pencil where it activates
my eyedropper. You might have a different
shortcut for that. Then I will go to
the brushes again, and now I will take this one, which also the name
is hard to pronounce, so I will not try, but this one is also quite nice. So you can test it out and you can see with different
brush pressure, you create a little
bit different texture. So not lifting the brush, and you can create these
interesting brush strokes. And you can see all of
these flowers look quite different from each other because we use different
brushes, right? So you can test out
the brushes that you think you would like
for these type of petals. For example, some brushes
that you already have or the preexisting
brushes that come with procreate will be using
my favorite brushes. Again, you don't have to use the same brushes as
I will be using. Just test out which brushes
you like and try to use your favorite brushes so you can see how the flowers
will look at the end. When you have your favorite
brush selected for painterly brush strokes or more textured look
for the flowers, let's move to the next
lesson and we will start painting the
flowers and the petals.
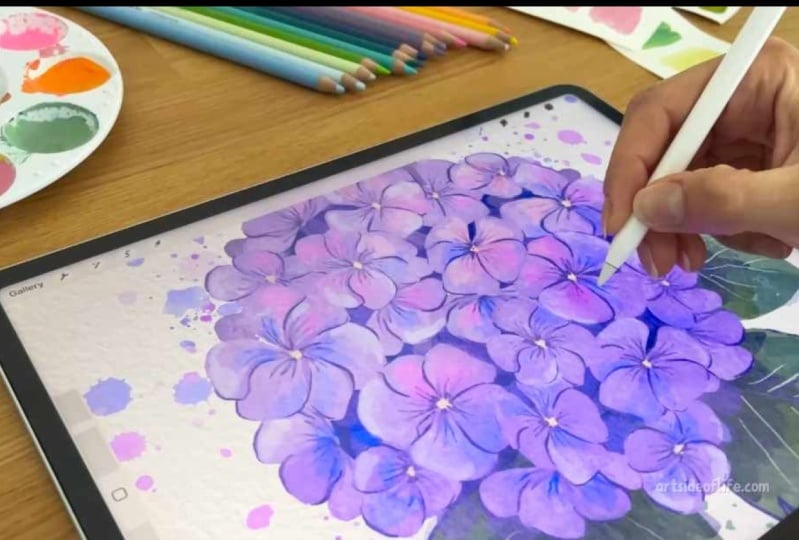
6. Painting flowers: Alright, let's paint. And because it's quite
complicated flower with lots of details, we will make our life easier, and we'll start painting
with just a few flowers, and then we will
add the details. And you can find all the brushes that I will be using
linked in the description, but you can use any other
brushes that you prefer. From the colors, choose purple, pink or blue color as
a base for your flour, and then you can also
adjust the colors later. So from the brushes, I will be using the
brush number nine from the watercolor brush set. And we will start
with a few petals, which will be overlapping
a little bit, but I am not lifting the
pencil or the brush, so I have a little bit of
the texture there left. So now I will create
another petal here. I'm not painting over
the other petal, but a little bit of
overlaps all right. Here there will
be another petal, I'm leaving some space for that. The last one will go here. Now onto the next one. We want to have a little
bit of variety in those. Now I will start with one petal, a little bit shorter than one little bit bigger
and slight overlap. And this one is a
little bit more like a triangle or two triangles. And then this one will
have a slight bend. Then I will add a
smaller one here. Still not lifting the pencil. Now we will create another
one which is tilted a little bit more so we see the petals more from the side. Okay, let's do another
one like that. All right. And let's
paint another one. So now I will take a
different brush just to add a little bit of detail
in the middle of the flower. And for that, I will use
slightly darker color, and I will do that
on a separate layer. So I will draw lines coming out of the middle
of the flower just to mimic the details and the veins that are kind of in the
middle of those petals. I'm using these
radial brush strokes, and I'm also varying
the pressure from lower to stronger pressure, lower to higher pressure. So you can kind of create
that variety there and create these radial strokes going in the middle to each
of these flowers. Okay. This one is a little bit different because
this one is sideways. So we are creating these
lines going to the edge here. Perfect. Now I will also blur these lines a little bit and
I will use the brush number 19 still from the
watercolor set just to reduce the sharpness of
the strokes at the end. Perfect. Now I will go back to the
layers and I will create another layer and I will create more definition on the
edges of the flowers. I will use the sketching brush, as you might know from some of my other art that I like to add a little bit of definition, especially where there is
a little bit of shadow. These petals are
overlapping here, so I'm adding a little bit of the definition to
some of these areas. I'm using also soft and higher pressure
and lower pressure. You are creating these
type of brush strokes, soft, high soft pressure. All right, so almost done
with this part. Perfect. Now we can zoom out and we can select all our layers
and just move them a little bit higher because
we'll be arranging them into a circle or a ball how the
hydrangers are growing. Before that, we have to add a little bit of
the background here, and I will select this
layer with the flowers. Tap on the icon,
click on select. Now we have the area selected. And on the layer below, I will drop the white
color into the object. You can see the threshold. I will use the highest
threshold possible, there is the opacity there. I will fill each of these flowers by tapping
on continue filling, and this should fill
all my flowers. Here you can see the
flowers are there. Now I can deselect and I can duplicate this
layer a few times. There is enough
opacity if I want to paint under it. Let's check. I will swap two different color. And now the opacity is better, and we still have
texture from our brush.
7. Arranging flowers: All right. So now you
can group these layers, and you can duplicate
the whole group. So I will hide this group
and I will flatten this one. So we have the flowers
as one object. So now I will
select each flower, so I can have them
on a separate layer, swiping down cut and paste. Now it's on a separate layer, so I will do that for the
other flowers as well. Now I can rearrange
these flowers. So they create this
half circle or full circle if you want to
create this ball of hydrnger. So I will use these
flowers on the edges. So I will rotate them and
put them on the edge, but also at the bottom
of these other flowers. I can duplicate this one, rotate it, duplicate Perfect. Now I have this flower, which also fed on the edges, and I will duplicate it
again and rotate as well. Then we have these main
flowers which are quite big, and we want to have
them on the top. And the same goes for this one. We can also make
them a little bit smaller so we can create
these gaps in between. And you can also
use the warp tool. Perfect. So now,
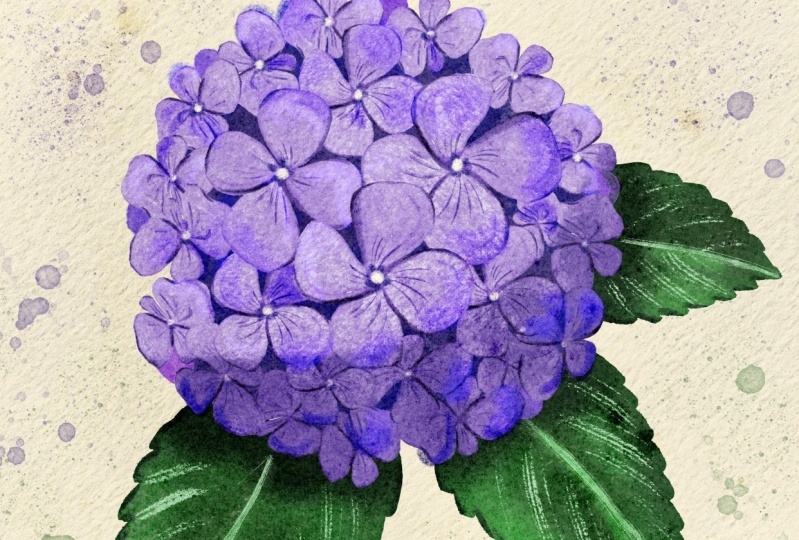
8. Adding depth: Perfect. So now I will
merge all of these layers. And now I will paint under
this layer and I will create the shadow layer showing some of the
flowers in the background. And for that, I will
use a loose war brush, and I will paint with
darker blue color. And I will loosely paint
behind these flowers. And I can also alternate
and use a purple color. So we have more colors
in the background. It's already starting
to look great. But let's add few
of these petals just in the background where
we are missing some part. So I will create new layer. I will use slightly darker color than we have on the
other flowers already, and I will go to
the original brush that I used for the flowers, and I will just add
few more petals. Perfect. Now let's
create more volume. So I will create a new layer, and I will choose
a darker color. So like darker blue
or purple color. And now on the separate layer, I will paint on the bottom
half of this hydrangea. And you don't have
to be super precise. Just select half of it
and trust the process. But make sure you are
on a separate layer. Now, go to the layer and
set the layer to multiply. Then let's merge all of
these layers together, and now we can set
this layer with a clipping mask by tapping on the layer and selecting
clipping mask. Now you can reduce the opacity
a little bit and you can smudge the edges with
grainy smudge tool. So now we imagine that we have light coming from the top left. I will reduce the opacity
of this one even more, and you can test out
different blending modes. Also, this very saturated one looks quite nice
or darker color.
9. Color variety: Now, create a new layer and we'll add a little
bit of color variety. I will select a lighter
orange pink tone, and I will draw on few
petals on the top. For that, I will swap
to more flat brush. Bush number brush number 30, in this case, and I will paint on top of
some of the leaves. And this will be quite subtle, so you don't have to be
very precise in this one. So after you paint it
on few of the petals, you can go back to brushes
and set the layer to overlay. We'll reduce the
opacity slightly, and now you can play with
few of the other colors. So you can add something
a little bit more orangy are also very pink. And then you can also just
blend it a little bit. So it's more subtle. And we can add also
a little bit of the blue because I think
that's a nice addition, and I will do that on some of the petals here more
closer to the bottom. And it can be even darker blue. You can add also some lighter
blue on some of the petals, and I'm keeping
the lighter color closer to the edges
of the petal. And we can blend it together with the other colors again with the same smudge tool. Perfect. And now to add a little
bit more detail, we can add the middle
part of the flour. It's easier to have that
on a separate layer. So I will use the brush with
a little bit more detailing, and I will use this either light blue or
you can use a very light kind of almost
yellowy beige and draw a circle in
some of the flowers. So you are kind of doing these
movements with the wrist. So there is a little
bit more variety, and you can kind of vary
the pressure as well. So here we don't see the middle, so I'm not adding the
white or yellow dot there. Perfect. And to emphasize the
middle part of the flower, you can add a little bit of
this dark blue close to it, and I will add that
with this brush, which is more like flat brush. I need to make the brush
a little bit smaller, and I'll just paint a little bit closer to
some of these circles. Just to add slide the
definition there. But this is very optional step, so you don't have to add that. Perfect.
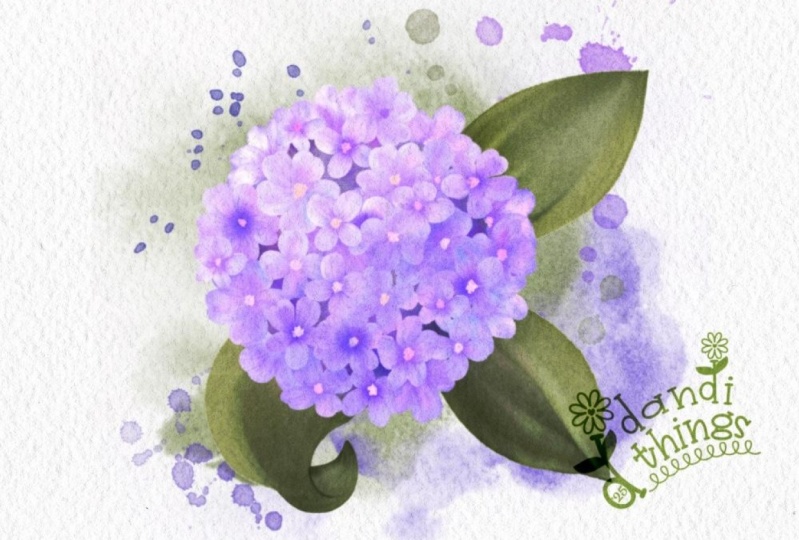
10. Painting leaves: We can add leaf, so we have some
nice detail around. To do that, I will
create a new layer. I will use the same
brush as I did for the flowers and I will draw a leaf with this
jiggeryhard or broken edge. I will feel the shape with the brush strokes because I want to keep some
of the texture. I will repeat that
with two more leaves. And I will duplicate
this layer to increase the opacity and on
a separate layer, I will create more colors. So something a little
bit more blue. So I'll paint on this
side of the leaf. And then a little bit here, and also on this leaf. Then I will add a little bit of this desaturated red
color, almost brown, and then also warm green and also darker purple
just under the leaves. Now I will set the
layer to color burn and reduce the opacity and
also smudge it a little bit. Now I will add details
to the leaves. On a separate layer, I will take the pencil
brush and I will softly draw these
veins of the leaf. And and now I'll reduce the opacity and it
looks already pretty great. But we can add few more details like we have these
lines on the flowers. So we can add few of those lines also to the
edges of the leaves. So I will create that on a separate layer with
a sketching brush. I will add a little bit of line here as well. Perfect.
11. Adding details: And now I will create new layer and we can add
some watercolor splitters. So I will sample the
color from the flour, and I will add some
splitters around, and I will try out a
few different ones. So there is slide variety, and I will also add all the
details in different sizes, just tapping on the canvas, and I will also add few green ones and also
a little bit of yellow, and I think that kind of
adds the super nice detail. You can always delete a few if you feel like
maybe you have too many. When you are happy
with all the details, you can select all the
layers and group them. And if you have enough
layers available, you can just duplicate
all of these layers and everything becomes
even more vibrant. Or you can keep it
with these textures. I can flatten this group, and I can also uncover
the paper texture and art texture because I was working in my paper
texture template. You can always import
this artwork into the paper texture template
to have additional textures. So you can have these
textures on top of the art. So if I have this
duplicated artwork, everything is even more vibrant. When you are happy
with everything, you can duplicate the canvas and you can also
merge these layers, so everything is
even more vibrant. We can also go to the adjustments and
you can go to curves, and we can move the
sliders slightly. So we can adjust some
of the vibrancy here. So as you can see, you can play around with
this part slightly. Perfect. I quite like how everything looks now when
it's even more vibrant. I'm happy with this
one. All right. Amazing. Now to
mimic the focus of camera where
something is more in focus and something is a
little bit more blurry, we will smudge some of the parts of the
flower and to do that, I will duplicate the layer so we can adjust the intensity, and I will use the smudge
from the brush number 19, and I will smudge some
of the edges here. So I will keep this
part more in focus. You can see that this one
is smudging little bit outside so we can use the clipping mask and
clip it to this part. Perfect. Now I will reduce the opacity. You can see now it's very
sharp with zero opacity, something like this in between. All right. I hope
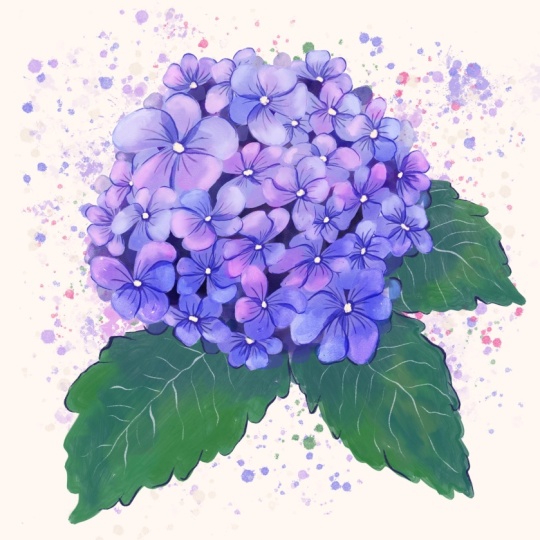
that you enjoyed this illustration with
color, depth, and details. Please take me if you
share your artwork, if you followed this video.
 Iva Mikles, Illustrator | Top Teacher | Art Side of Life