Transcripts
1. Class Trailer : Hello and welcome
to a new class. Drawing characters
is so much fun. Combining drawing people with cute outfit and colorful
patterns is even better. Hi, I'm Eva, and I'm full-time illustrator
based in Central Europe. I will guide you through
every step of the process. Even if you don't have any experience with
Procreate or drawing, try to have fun during the
process so you can end up with this lovely colorful
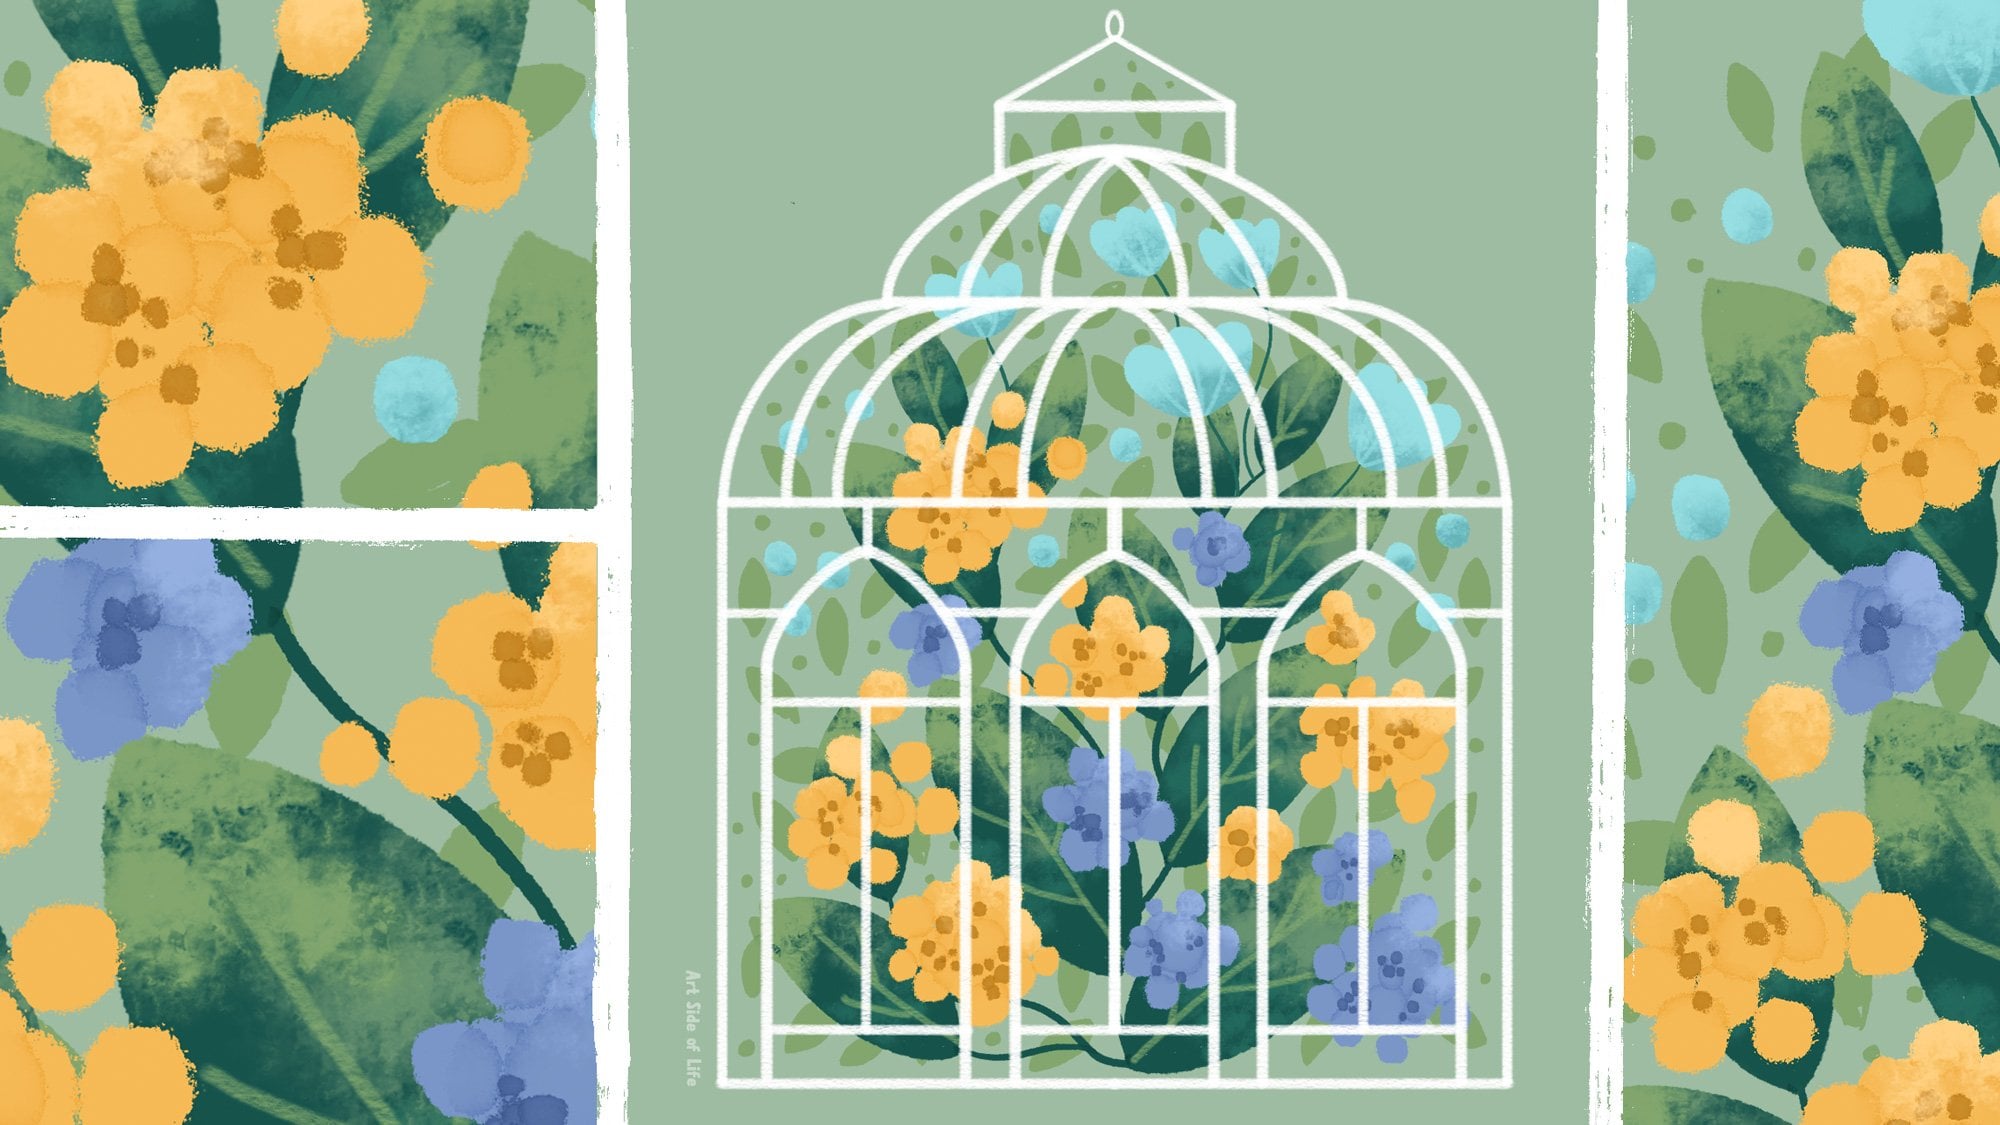
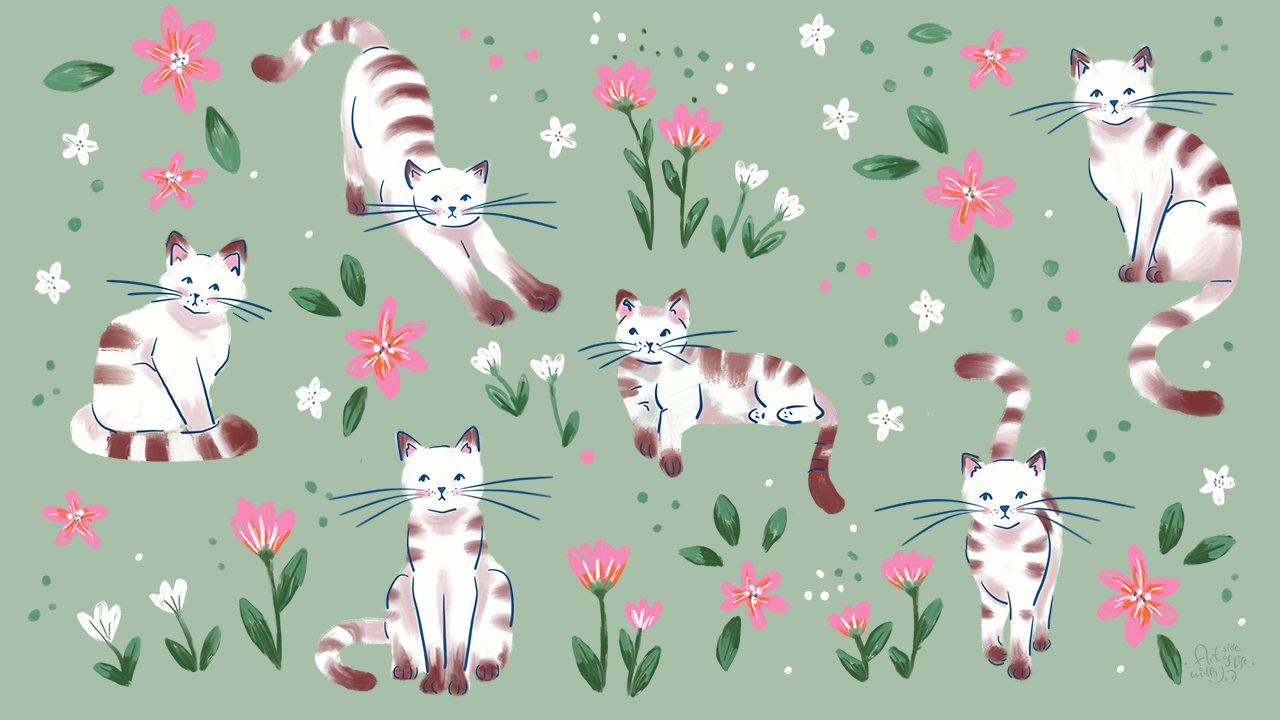
illustration with floral pattern design. During this class, we will
start off with constructing the character using stylized
shapes and proportions. Then we will redefine the
drawing, designing the outfit. Then we will design a colorful
pattern full of florals. Afterward, we'll add basic
colors to the character. Then we will also
design a face with proportions of the
facial features in mind. Then we'll put it
all together with our cool floral pattern in
one final illustration. I hope when you
watch this class, you will feel super happy about what you created and
you will feel like, oh, I can't wait to share my character illustration
with others. When you are sharing
it on Instagram, please make sure that
you tag me in the image, not only in the description
because that way I can see your illustration and maybe you will see it in one
of the next videos. Like these amazing
illustrations made by wonderful creative people
who watch my classes. If you don't know
yet, you can find even more drawing
tutorials and classes. They are Procreate
and other tutorials. I have more than
30 classes there. There is a variety from beginner level to
more advanced levels. You can also find
different topics. Without further ado, let's start and see you in the class.
2. Canvas and Setup: The canvas size
is 3,000 by 3,000 pixels and the color
profile is sRGB. I'll link the color palette
in the description, if you want to use the
same color palette as I am using during this class. We will hang out
together for awhile. If you want bring some water, make some tea, maybe a different drink
or prepare a snack. I usually have a coffee
or water nearby. I find it important to stay hydrated so at least
get some water. When you are ready,
let's get started.
3. Sketching the Character: As you can see for this class, we will have two
canvases set up, one for the pattern
that we will apply on the character outfit and one
for the character itself. Let's first open the
character canvas. Here we have empty canvas
[LAUGHTER] as you can see. If you go here to
the Layers menu, you can see we have one layer predefined as when you
open a new canvas, there is one layer. Now, I created this fun brush
pack for you which you can download for free and this way we will be
using the same brushes. Go ahead and download
these brushes or you can use any of the other brushes that you prefer that
you already have. First, I will go
for this pencil, round opaque brush which
has some texture to it, but it also has quite good opacity so we
can see our sketches. Great. For the first
part of the sketching, I will go to this color palette, which I also created for you, which you can download
for this class. For this first part, I will select the
yellow so we can see what we're drawing
quite visibly and first, we will create action
line for our character. To do that, let's make sure
we are on the correct layer. I have the correct brush which I want to
use for this part. Its on full opacity and I will maybe set it to 76 percent. It doesn't have to be precise, but something around that value. I want the character
to be standing. It will be a front view. But I want the pose
to be a little bit more actionable and active. I will create a line which is
maybe something like this. I can try again,
with the double-tap, you can always go back as
you might already know that. Let's try again. Maybe a little bit more
curved at the bottom. I think this works. It's little bit more straight. Our character will not
be falling to the side, but the action is still there. Perfect. Now go to
the layers panel. But click on these
two icons obviously. Now on the layer, click on the N and we can reduce the opacity by sliding
the slider to the left. Maybe 43 percent should be good because we
want to sketch on a new layer that we
don't want this part or this line to obstruct
our view of our sketch, but we still want to see it. Maybe I can reduce it even more, 30 percent I think
seems about right. Now click on the layer
to close the panel. Now click on the plus sign
to create a new layer and we will be sketching the
character on this layer. Now, go to the color palette. I will take this
light blue which is here on the right second row. You can take also
the darker one, if you prefer darker,
more visible sketches. But I think these light
blue can work nicely when we have this
light background, so it's not too harsh, but this is just my
preference and you can choose whatever
color you want. I will make sure I'm still
in the brush which we were sketching that line with
which is this pencil brush. Perfect, and we are
on the correct layer. Now, I will start with the head. I will place the head not
on the top of the curve, but maybe somewhere around here. Let's sketch a circle
just for the placement. Perfect. I want the character to have one foot here
and one foot here, so it will be standing
in a frontal view. But because we will put this
one leg more to the side, the pose will be little
bit more actionable and basically more active as we talked about in the other class, the dynamic poses people class. There you can see all other
variety of different poses. But for this one, let's establish where we will put the shoulders
and the hips. To make also the pose
little bit more active, I will angle the shoulders. Let me do this like this
so I can draw easier, and then the hips will
go the other way. Perfect. We are creating this more active pose
by angling the hips. Now, I like to do smaller torso, so I will create this half oval shape,
little bit smaller. Then I will attach the spine. Perfect. Now I will add legs. One will be straight. Oh, well, let's add the joints before so you
know what I'm thinking. The hips will be
somewhere around here, shoulders here, perfect. Now I can add that to the legs. One leg will be straight here. Here will be the foot. Halfway I will add
the knee and now I can add the other
leg somewhere here. There are a little bit wider
hips and other foot is here. I will place the knee
approximately in the same height as
on the other leg. We want to have the
character quite symmetrical. Perfect. Now, to understand
better where the hips are, I can create another oval
and now we can add arms. I will put the arms probably to the pockets so we don't
have to draw the hands. But if you want to challenge
yourself, you can, of course draw the
hands and everything. But for this class, we will just keep the hands hidden so it's easier
for us to draw that. As you can see, you can also
add that to the joints a little bit considering
the halfway of the line. Of course, there would be foreshortening in
the real-world. But here we are trying
to keep it simple. But as you can see, I added the joint quiet low, so maybe I'll redraw it a
little bit higher here. Let's take the eraser. By holding the eraser, you should be able to
have the same brush. It selected the same
brush, that's good. I'm erasing with the same
brush as we are drawing. This is little bit
better, perfect. We have the basic structure for the character and you can
also add edge the neck. As you can see, the
head is little bit maybe too much to
the left because we want to have it in the
middle of the shoulders. To fix this, go to the selection tool
here on the left top, select the free
hand selection tool and draw around the head. Then go to the arrow, which is transform tool. Make sure you have uniform
transform selected. We can move the head
slightly to the left, so it's in the middle
of the shoulders. Perfect. Now, obviously
you need to fix the neck so it's attached to the spine and then you
can draw the neck. You can see that
would work perfect. Now we have the basic structure. Let's create another layer. Go to the Layers menu. Click on the plus
sign and we will redefine our sketch
on this layer. We can reduce the opacity of these basic sketch
layer as well. We can see better what we're redefining on the next layer. Make sure you are on
the correct layer now. I will take another color
and this time I can sketch with this
darker purple blue, so we have a different color. This technique is used in animation also when
you are redefining the sketches building up your drawing or you're
drawing in-between. Anyway. Let's go
back to our layers. We're on the correct layer. Perfect. Now I can
already start drawing the outfit because
we just want to have a basic outfit for this class.
4. Redefine the Sketch: To draw the outfit, make sure you are on a
separate layer on top of the basic structure and
the action line layer. Now we are still using the pencil brush
set because we are still sketching and I prefer something
simple for sketching. Perfect. You can also
explore my sketch brush set, where you have a variety
of pencils to choose from for sketching and I can show you in some
other class how I use different type of sketching
brushes for what purposes. But let's go back
to this brush set where we have this
pencil which is round, and let's sketch the outfit. For this character, I was thinking to create a
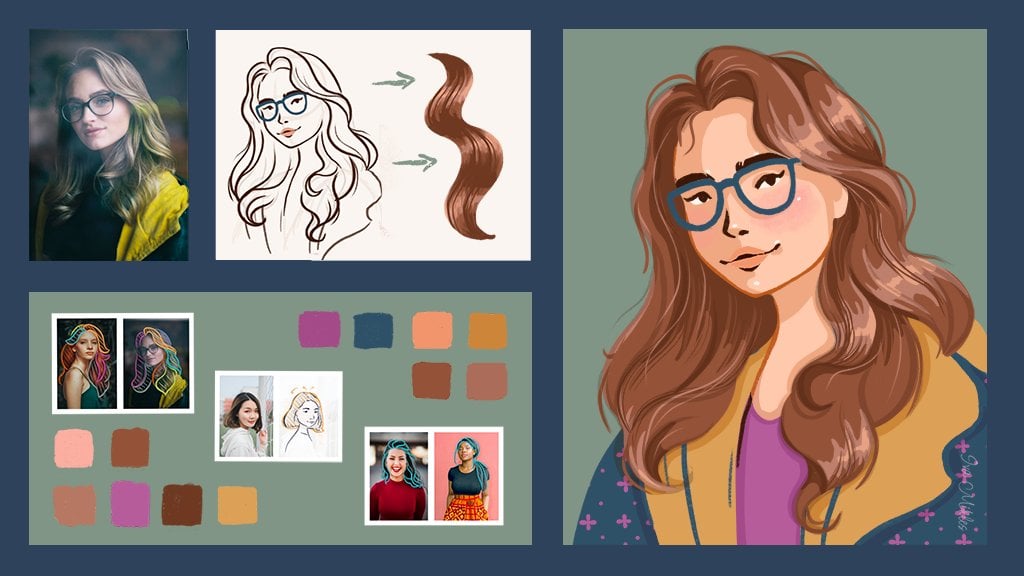
jumpsuit and you can go ahead and find the variety of references on Pinterest
or your own photos, or basically wherever you want to find the reference
but for this one, I don't want to go too much into details of finding references, so let just sketch
like basic jumpsuit. I will add sleeves, so I will add shorter sleeves. I'm drawing these half circles. Maybe let's zoom in so you
can see a little bit better. Perfect. We have these half
circles for the sleeves. Here on top, I will
follow the shape of the shoulders ending the
line on top of the shoulder. Let's zoom in more so it easier. [LAUGHTER] Here we
can add the neck. We're not obviously
sketching only the outfit, but also the rest
of the character. Here we don't have
such a long neck and I'm following this line
for the shoulders, but I am making it a little
bit more curved so we can imagine there is basically
some flesh on the character. Here we can add the face. Here I will change
the shape of the head to more oval so we
can have some chin, and the bottom there of course, different shapes for the faces, but this is just one
way to draw the face. Then here, the neck line, I will do this oval shape. I think it's called both
neckline or well, not sure. Anyway, this shape, [LAUGHTER] and then we
can follow the shape of the spine depending on the
waist of the character, but the waist can
be narrow or wide, but we are not drawing
different body shapes right now so
just to simplify it, following the
structure, what we did, this line is little bit more straight and this line
is little bit more curved following the
spine here on one side, but not to have the
waist too thin. Here we can just add edge. Perfect. Here we can add little bit of chest
because it's female, but not too much so it's just
like a little bit of bump. You can design it
however you want. Now, if we move down the legs, we can create these white pants. To do that, I will add a hip. Following the structure
as we did before. Now I have a hip, so there is a little
bit of curve, and then I will create a
straight line more or less. Obviously, as you can see, it's not super straight. In the middle of the pelvis, there will be the middle
part of the pants, like the crotch obviously
and on the bottom, I will create this curved
line and add a simple foot. We are not designing shoes for this one that much, and here, let's add another leg and make sure they are
approximately the same width, so it will look more natural. I can erase these squiggly lines and make sure that the legs
are in the similar width. Again here I can add
curved line for the pants. This foot, because
it's turned sideways, needs to be little bit longer. Obviously because this
one is in the front view. We can make this
even more narrow. I think this can work. Now, let's add arms. Following the structure and basically what we drew before, and going from thicker to thin. The pockets will be
probably more in the front, so not behind the character so I can add these lines for pockets, and the arms will go into
the pockets with the hands. Now I can erase this line. There are many different
ways how you can sketch, but this is just one of
the ways, of course. I did some stroke there. Now we can add some hair and of course you
can design the hair how you want and I show
you different ways how to draw hair in
different classes. Here I can go for maybe a
fringe for the character. Add little bit of
volume on top of the head and maybe she has like long hair. Let's see. Maybe I
can go back and add little bit more volume
to this left side. I think this is a little bit better and you erase this part which I don't want. Maybe this crotch can
be a little bit lower, so let's adjust that. But other than that, I think we are set and now, let's go create our pattern.
5. Designing the Pattern: Now we can go to the other
canvas to create our pattern. We have more flexibility
when we want to use it. We are on the new Canvas and here obviously we don't
have any other layers. Let's start creating and for this pattern I want to
use a different brush. Hopefully we will create
something quite fun. From this brush pack I will take this brush watery flow which has little bit of texture but is watery [LAUGHTER] obviously as you can see from the name. But it looks a little bit
more like a watercolor. You can of course use any other brush that
you like to design the pattern or maybe you have another pattern you want
to use or recreate. But for this one
I want to create floral design or pattern
using this brush. Let's take this brush and I will draw variety of flowers
in different colors. I will do that by using
variety of these colors from the palette and I will create more layers
for these flowers. So if we need to we
can move them around. First, let's start
with pink flowers. I will take this
pink which is the second in this color
palette from the left. Make sure that we are in the brush folder
that we want and using the brush that
I just mentioned and if we are on
the correct layer. Perfect. To do that I will create few flowers which
is quite simple shapes. Now, as you can see, the brush is quite
small so I want to make it a little bit bigger. So I will make the brush
maybe nine percent. Let's try. I think this works. As you can see, it's
nice watery brush. Let's go back and I will create few flowers with simple
petals using this brush. When I'm looking at this
flower I think it's pretty huge for the design that we want to create so let me zoom out. If I want to make more flowers I need to make
this a little bit smaller. Let's go back and I will adjust the brush to maybe four percent. I think this is better
because I want to create maybe six flowers
in this pink color. Let's create these flowers and you can use this
around hand movement. You can also vary the
amount of petals. I think this is nice. Let's create another one. In here you can get
quite creative with the shape of the
flowers and just play with it and make the pattern
your own and basically express your inner artist when designing these
flowers of course. Of course you are doing it
also with the character but here you can
differentiate as well and just play with
the shape of the petals or you can design more patterns and choose the one
you like at the end. You have so many options you
can go online and look at some patterns on
Pinterest or wherever, just make sure you are not copying just one
design when you are recreating some
pattern but just get inspiration from
variety of patterns. Now we can add the middle
part for the flower, go to the color palette and take the yellow for the
middle of the flower and here we can add this
middle circle for the flower. They look quite nice. I like it. They're cute. [LAUGHTER] Let's create
another layer for more flowers by clicking on the plus sign
as we did before. Now, go to the color
palette again and select the darker blue which is the second from the right
in this color palette and we can add few flowers
in that color as well. It's nice, maybe less of
them so we don't have to have the same
amount of flowers. I can create also
a little bit of overlap in these flowers. I think it can be nice. But now looking at it
maybe I can add these or move these darker flowers
below these pink ones. So go to the Layers menu
and take the layer, hold, and drag it
below the pink layer. I think this is nice. Now go to the color palette, select the yellow again, and we can add the middle
part for the flowers. Nice. Let's add more flowers and by clicking on this
layer with pink flowers, now click again on the
plus sign to create a new layer and we can
add some orange flowers. I will take this fourth
color in the color palette. This is nice, bright, orangey, red color and now I can create flowers which are
a little bit bigger. As I'm not getting
things perfect pattern, I can also just
draw on the sides because we are not going to
do a repeat pattern here. Let me start maybe here. I will create like
bigger petals. Maybe I can make the brush
bigger for this one, bigger flower, bigger brush. Maybe five. The five should work. So for this one I will
create more angled petals. Maybe I can make the flower
a little bit bigger. I think this is nicer just
to have some variety. The petal works here. I think the pink flowers
are nicer on the top, so let me also move this one lower below the pinkish flowers. Now on the same layer I
can add more petals in approximately same size
and I can do it also here just to fill the canvas. Now going back to the color palette and
choosing the yellow again, I can add the middle
part for this flower. Nice. Now let's add more
color to this pattern. Maybe we are missing another blue so we can
create another layer. Let's create another layer above this darker blue flowers by
clicking on the plus sign, going to the color palette, and taking this light blue which is here in the
bottom right corner. Click on the canvas
just to close the color palette and now
we can create more flowers. This time I can create maybe different
shape of the flower. Maybe something like this. Let's try that again. [LAUGHTER] I think this works quite nicely. I can recreate this shape also here and I'm redrawing
them to have more organic shapes
because otherwise you can also maybe copy this shape. But in this case
I want to redraw the shapes just to have
this nice organic feel. We can add maybe some leave here and to this side as well. I think we are getting
there with the flowers. Now I'm thinking this
orange flower is maybe too much in the middle, so taking a lot of attention in space so I'll
go to the selection tool, go to the freehand selection, select the flower, and move
it a little bit to the side. Exit the selection. I can also move the pink
flower a little bit higher. Selection tool, freehand
selection tool, draw around the flower and move the flower
somewhere here. Lovely. Now let's add
some red flowers as well. To do that I will
create another layer. I want to keep the pink
flowers on the top, click on the plus sign and
let's take the red flower. I mean, red color. [LAUGHTER] The red color it is, we are still using the
same brush and now I will draw more like
round flowers. They have this rounded petals around the middle
part of the flower. Then again, I can
draw more of them and you can play with the
shapes of these flowers. I can add maybe one here, add one here. As you can see,
I'm adding more of these red flowers just to fill the Canvas a little bit more and this brush is quite fun to use. [LAUGHTER] As the other
painterly brushes. If you like painterly brushes, you can also check out
my gouache brush set, where I had so many
painterly brushes. This set is quiet
fun to use as well. Anyway, going back to this one, let's keep the same brush. I will go to the
color palette again, selecting the yellow
as we did before, and we can add the middle
part of the red flower. Just using the circular movement rotating the brush
in the middle. As you can see, as I didn't use the color
everywhere in the middle, it's taking a little bit
of the paint on the side, which is quite fun, I think. Did we fill all of them? Maybe here a little bit. I think this is nice. Now, let's add some greenery. To do that, let's
create another layer. But this time we'll
go to the back because I want to have the
leaves and behind the flowers. Clicking on the plus sign, I need to drag and drop this
layer below all the flowers. First, let's start with
this lighter green, which is the third in the
first row from the right, and I will just draw
simple leaf shapes. Leaf shapes, I mean these
oval with more pointy ends. But now maybe for these leaves, I can make the brush
a little bit smaller. Let's make it four percent. Now I can add random
leaves around the flowers. Maybe two leaves per flower, and maybe some are just
floating around here. Again here you can just
be creative and play around with the placement
and sizes of these leaves. You can just fill in the areas that you feel
like you can just balance out if there is too much white space or you
just want to add more color. I think this is quiet
fun exercise to do. Maybe these two I
don't like there, let's maybe add them here. I think this is better. Now I can add maybe one here. Maybe this is too much. Smaller one, one here. Basically fill in the
space as much as you want. You are balancing the colors with all these
leaves and flowers. Maybe you like the pink
more or the orange, so you would just have more orange flowers
or more green leaves. Or maybe you are using different color
palette, maybe purple. Let me know which are your favorite colors
[LAUGHTER] I am very much looking forward to see your projects and basically seeing what you
create with these patterns and the colors may
be that you like or the amount of leaves
that you will create, or making some of these flowers more
prominent or more visible. I think it's always fun to
see how everyone else sees the world and just making the designs also
their own little bit. It's super nice. Let's create more leaves so we
have more variety. To do that, let's go to
the layers panel and let's create another layer with
the plus sign as usual, and drag this layer below. It doesn't want to work. [LAUGHTER] Just click
and hold and let's go. Now, perfect. Now you can drag it
under the other layer. Let's go to the color palette. Now you can take the
darker green and we can add a little bit more
leaves in the darker color. You can randomly add them to certain areas where you feel
like that it will be nice. Maybe here. Let me make the Canvas a little bit smaller so we
can fill the shapes easier. We will see how everything
will work on the character. You can drag the paint
around the Canvas. Maybe there is too
much green here, so I'll reduce the
amount of green. Add one more here. I think we are almost done. I think I can add some yellow
to these blue flowers. Let's find the right layer, which is this one. Take the yellow
color and I can draw the circle as we did before on these blue
flowers as well. Now look at your pattern
and see if you like it. Now, I'm thinking
that this flower can be still a
little bit smaller, so I will find the right layer, which is this one, take
the selection tool, draw around the flower. Go to the arrow
for the transform. Make sure I have the
uniform transform tool. I can make the flower
little bit smaller and move it slightly higher. Maybe somewhere here, maybe I can rotate
it a little bit. Let's see how that will
look. Maybe this way. No, I think this way, it's a little bit better. I think this works. But now I don't like
this dark green leaves, so let's go back to those. Touch and hold the eraser to
erase with the same brush. I will erase this, making them a little bit
smaller brush for the eraser. Now, going back to the brush, and now I can draw. Now I have a brown color, let's select the
right color so we can create the same leaves
as we have on the layer. Now I can add the leaf here
and fix this one which is now visible and maybe
add one leaf here. I think this works nicely. Now, go to the layers panel and select all the layers
by sliding to the right. Now, group the layers. Now we created a group, slide to the left,
duplicate the group. Let's hide this one. We don't need it anymore now. Now on this top group, click on the layer
and select flatten. Now we have one pattern on
one layer, which is awesome. Now the next step is to bring it to our other Canvas
with the character.
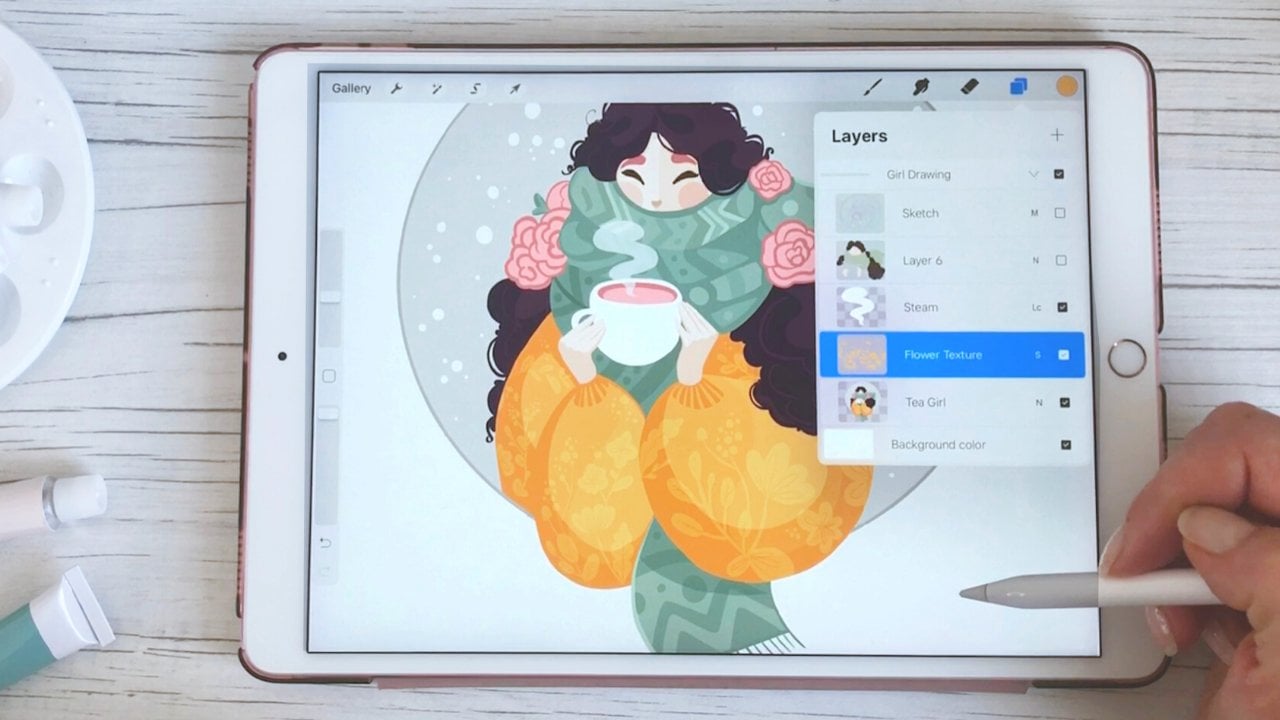
6. Adding colours to the Character: Now let's take this pattern through our Canvas
with the character. To do that, you can
just tap and hold on the layer and drag
it to the gallery. You can hover over or
use your other hand, so I can still holding. Click on the gallery, click on the Canvas
you want to go in, and open the layers panel, and you can release the layer with your pattern
on top of the layers. Perfect. We have it here. For now, I can hide the layer because we don't need
it at this second. First, we need to
create base colors for the character and
basically color the character so we
can add our pattern. To do that, I will
create another layer, so we will be coloring
on a separate layer. Click on the plus sign, this will be our color layer. I don't need these
two layers with the rough sketch and the action line anymore
so I can hide them. I will drag this layer
with the sketch of the character above
the color layer, which doesn't say color, but we can of course rename it. Let me zoom in on the character. Now on this layer, I will create basic
shapes for the character. I will make sure I will have
one layer for the outfit, then for the skin of the
character and for the hair. We can build up the
character in layers. Here on this layer we'll create the colors for the
outfit of the character, and I'm thinking the
outfit can be white. But in that case, we need to change the
background for this character. Let's go to the
background color. Click on the layer, and you can select
the round view, or you can also play with values if you prefer this view, but they prefer this
view for the color. I will select the light
blue for the background. This is nice. Now I will
go to the layers again. To make sure that
we see the sketch well also when we are coloring, let's set the layer to multiply, which makes everything
darker on this layer. We can close the layer, make sure that you are on the correct layer where
you want to color. Go to the brushes. From our brush bag, which we are using here, I will select this first brush, which is quite opaque and
doesn't have that much texture, but you can use
different brush to block in the colors if you
prefer, of course. Now, I will go to this
white in the color palette, which is little bit of white, so it's not pure white, but in the color tones, and now I will block
in the shapes. Still making sure that
I'm on the correct layer. Following the sketch
that we have here, I will block in the shapes. Let's see about the size. I think maybe 10% is quite good. I can also zoom in to
make sure that I'm filling in the shapes in the
correct areas that I want. I can also reduce the opacity of this layer to see the colors underneath
a little bit better. We are on the correct layer, and now I can draw and basically create the
shape for this outfit. Just following the lines that we created and following the shapes as we did before. This is nice. Then I'm just following the shapes from the sketch
as we created them before. Here I don't want to have
perfectly straight lines, so I'm not using the tool where you can straighten the shapes. Because I think it's a
little bit more organic and nicer when you have
slightly wobbly lines. This takes a little bit
of trial and error. You can of course, also rotate the Canvas, so it's easier for you to
create the perfect shape. But for sake of this video, I'm not rotating the Canvas that much so you guys
don't get dizzy. But otherwise I will be
rotating the Canvas a lot to get better lives and basically
easier flow when drawing. Now, I need to make
sure everything is closed and then I can drag and drop the color into the shape. Everything was closed
apparently, that's good. Now let's go to
the layers panel, click on the plus sign again, and now we will add a skin color to the
character, and of course, as we all know, there is variety of skin tones, so choose the one that you prefer to add to this character. I will go for these
lighter brown color, so it will stand out nicely also against the background
and next to the outfit. We are on the layer
under the outfit. I can zoom in and I can
start with the head shape like this and you can always adjust the lines if you think
they don't work. Make sure that you close the shape behind
the outfit as well. Maybe I can add the
ear on this side, which we didn't have
before and we can try drag and drop if
we closed everything. Look, here we did. Perfect. Here I need to adjust
the shape may be either of the outfit or for the hands because this layer is behind, so maybe we can try
adjusting the hands. Let's select the correct
or the same brush. I can zoom in. Making the eraser a
little bit smaller, maybe 20% and fit into the shape of the
outfit as we designed it. The same on this side. Then we can adjust
the outfit as well. Go to the Layers, click on the outfit, take the correct brush, take the white color not sampling from the canvas because we have
also the blue here. We can zoom in. Make the brush a little bit
smaller, 6% should work. Then I can fill these gaps. I think this works nice. Same goes here. It's not rounded here
in the corners and it will look a little
bit more natural. Maybe we can round
this corner and erase a little bit
from this angular hip, it might have been a
little bit too much. I think this works nice. Maybe we can add a little bit of volume here on the shoulder to balance out this line because it's going
more straight, compared to the outfit. Let's see, we are on
the correct layer. Let's take the brush. Now I can add a little
bit of volume here. I think that works. On the skin tone layer, I can erase this part as well. We have the line following and
here we have the shoulder, so that should work. Let's see. I need to have the skin tone selected and just
fill in the gaps, which I didn't do so precisely
in the previous step. Let's see if we have the
ear placed correctly. I think it can be a
little bit lower. Go to the selection
tool, select the ear. I can move it slightly lower and add a little
bit of volume here. Let me draw it again. I think that's
easier in this case, so I will add the ear here. As you can see I made the
face a little bit longer, which I think works nicely. Now we can add the
shadow under the chin. We will be not adding
too many shadows, because I want to keep the
illustration quiet flat. But under the chin, I think it will help you
to define the character. Going to the Layers, click on the layer with the skin or the flesh and
select Alpha Lock. Now go to the colors, and on the color wheel, drag the color a little bit
more down and to the right. I think this can
work, let's see. I think this color is okay. Now draw under the jaw line, making the shadow
a little bit wider under the chin and more
narrow as you go up. I want to make sure that
on this right side, let's zoom obviously, I am following the
shape of the face. I think this should work. Making the shadow wider under the chin and more
narrow here nice. I can also add the shadow in
the ear of the character. I think that works. Now let's create hair. To do that, I will go to
the Layers menu again, create another layer and
drag it under the skin tone. Go to the colors, select the dark color here, which is on the right and now I can follow the shape
of the hair again. Let's test if we closed
the shape properly. No, we didn't, so I can draw behind
the character one more time to make sure
that I close the shape. Maybe I didn't close
the shape here. I think this works. Here I can adjust
the skin tone layer. I will disable the Alpha Lock, go to the eraser. For this part of the fringe, I want to make sure that it's
a little bit more narrow on the top and also
straight in this part and everything is
more or less aligned. Now, going back to
the hair layer, I can also smoothen
out this edge, I can have it a little bit more flat maybe on the
top or more rounded, however you prefer
to have the design. I will angle the illustration, so it's easier for me to
create the round shape. Here I will erase from the part and add the volume here
again for the fringe. That means I need to erase from this part again
just to align it, because we didn't design
it in the sketch part. Maybe I can add one more
line here for the skin, so the split in the fringe. I think this works nice. I can add a little bit of
loose hair flying around. Going to the color palette
and taking the dark color again and I will add
little strand of hair. Fix the mistake here and maybe add one hair like
that also on this side. Let's rotate it, so it's easier. Let's try one more time. Maybe I can straighten this part and erase this, so it's aligned. Let's check the other side. Going to the brush again, making this side also straight. I think this works nicely. Perfect. Now we can add
face for the character. You can double check if you aligned everything how you want. Maybe I can align this
fringe little bit more, erasing from the skin tone. You can also work on the one layer if
that's easier for you. If you don't want to add
textures, that's also possible. I think this is a
little bit better. Now we can add the face.
7. Designing the Face: Now we can sketch the
face of the character. We can zoom in and go to
the layers panel as before. Now let's create another layer. First, we can mark the approximate placement
for our facial features. I will take a different color, not the same as we
used for the skin. Maybe I can take the yellow
and see if that's visible. Yeah, I think that's visible. Then I will draw a line going through the
middle of the face. Because the face is
a little bit angled, I will draw a line more angled. Approximately like this, going
to the bottom of the chin. Then for the eyes, nose, and the mouth. Perfect. I will make this
a little bit less opaque, reduce the opacity, so it's not so much in the
way obstructing the view. Now I will create another layer, clicking on the plus sign. I will take the dark color, which is here in
the right corner, go to the brushes. For this part, I will
use the details brush or basically the brush
I like to use for the details from this brush set. Now I can start
with the eyebrows, which will be a little
bit higher than this line just under the fringe. I can make the brush
a little bit bigger. Let's say 30%. And create these
curved eyebrows. And the same on the other side. Now, I will add the eyes and the eyebrows,
as you can imagine. But I was thinking that maybe the character can
be looking down. To do that, I can just create curved half ovals following the approximate placement
as we created in our guide. The same here on this side. I can reduce the thickness
with the eraser, making sure I'm using the
correct brush as for drawing. I can reduce the size
of the eraser to 20%, and making these eyelids little
bit thinner on the edges. I think this should work. Then going back to the brush, I can draw these little maybe
half oval for the nose. Basically suggestion for
the nose, quite simplified. Then for the mouth, I will go to the color palette, and I will take the red color, and I will draw the top
lip for the character. Then for the bottom part, I can go again to the dark color and suggest the bottom
part of the lip. I can erase part of it. This is just one of the
ways how you can draw the faces or to stylize
this simplified faces. If you want to see more, you can check out, of course, my other class where I go
through different ways, how you can simplify the face. I think this works
for this part, and now we can zoom out and
we can add our pattern. Well, before that, let's hide the guide because we
don't need it anymore. We can check if the
placement of the face works. You can also zoom in. If everything is aligned, make sure that the eyes are in the same distance
following your guide. I think this works. Now, looking at it, I think maybe the
part under the lips, I can make that red as well. Going to the layer and
selecting alpha lock, I can paint over that
part of the lips. I think I like this
one a little bit more and I can
erase a little bit from the nose as well just to make it a little
bit more subtle. Making sure everything is balanced the way
that you like it. Just creating the
shapes that you like. Perfect. I think this works. Now we can add the
pattern for our outfit. Now, I see that we
still didn't add the shoes which we could have
done with the basic colors. Let's do that now. We need to turn on the
sketch that we had before. Let's create another layer
under the hair layer. We can maybe make the shoes
in this darker color as well. Let's take that color. Go to the liner brush
as we used before, and let's fill in the shapes
for the shoes as well. Now let's add the other shoe. Make sure the shape is closed. Perfect. Now we have shoes
as well. [LAUGHTER] Cool.
8. Adding the Pattern: Now we can add the pattern. Let's disable the
sketch as before. Now we have the pattern here
and the outfit layer here, so what we need to
do it's to drag this layer on top of the
outfit so let's drag it here. Perfect. Now we can enable the layer to see
it. It's quite big. If we want to adjust it, we might need to re-scale it. I can make a copy just to make sure that we have the
possibility to adjust. Slide to the left, "Duplicate," it'll hide
the layer and on this one, I will click on the icon
and select "Clipping Mask." Perfect. We have this huge
pattern on the outfit, which is quite interesting. What you can do now, you can go to the arrow tool, make sure that you are in
the uniform transform tool and you can adjust the
pattern how you like it. I can zoom out here to see that the pattern is still
within the area. When it's a little bit smaller, I think can work better. Let's make sure that all the colors that we
wanted to add are there. You can move around the pattern to see what you prefer more. I think I prefer this left
side of the pattern more. Maybe something like this and I can make it still
a little bit smaller, just make sure that you are
still within the shape of the outfit and maybe move it. Maybe you like the colors which are much bigger and the
flowers which are quite huge or you prefer maybe this area of the
pattern or this one, depends how you
design the pattern. You can also redesign
the pattern if you like a different angle or
a look of this outfit. Maybe I like this side or
this side, I can't decide. I think this works quite nicely. I think the pattern works
nicely like it is here. I hope that you like
your own pattern and you can also add other
details to the outfit. Let me exit this mode
and let's add a belt. To do that, I will maybe choose the same brush as we
used for this pattern, I will create another
layer above the pattern, I will go to the
color palette and choose this I think darker blue. Now I can create the
clipping mask as well to be able to draw within the shape
and I can add the belt. Maybe let's make it a
little bit smaller and try if this brush
works for this part. Maybe we can use the other
brush which we used before, I think that would work better. Let's do that. Make the brush a little
bit bigger, maybe 4%. Maybe 7% is better. Now I can add the belt for the character and I can
also add some pockets. Let's add the pockets
on a separate layer so it's above the skin tone. Now this is easier. I think they work quite nicely. Or you can also hide the
hands behind the whole body. Now we can go back
to this layer, which is helping us to draw within the shape of the outfit. I will go and take
the pink color and we can add some pink
color on the sleeves. I think this works nice. If you want, you can
add the pink also here on the top part of the outfit and if you have
a hard time drawing that, you can also rotate
the canvas as before. Trying to keep the same
thickness of the sleeves like here and you can add the pink
also here at the bottom. Let's add the pink here. If you think you
would still like to have the pattern smaller, you can go to the layers,
duplicate this layer, select both layers, now I can resize them so I will have the
same size for both. I can hide it, I mean the transition. I can hide the transition
behind the belt. Again, zoom out to
see if this works. I think the pattern is just on the edge of the outfit
and now I can go to one of the layers and
I can move the pattern here to the top and
see which part I like. Actually, this top
part doesn't look bad. Maybe with this
blue flower here, I think that works quite nicely, or something like this, or you can even flip the pattern and have
this pink flower and the red flower here
or a little bit of this orange color too so
you have some variety. I think this works quite nicely. You can play around
with this type of patterns and how we use
them and, of course, you can also use these patterns directly
drawing on the character, just about the outfit layer. But I like to
design the patterns separately because
sometimes it's hard to fit the pattern
that it doesn't look like how you would actually use it with the character, but you can try both options directly drawing on the
layer and designing the pattern on top
of the outfit or designing the pattern
separately and then you can actually reuse it
for some other project or maybe other parts
of the illustration where you want to
place this character. Thank you so much
for being here. I hope that you enjoyed creating this character and I can't
wait to see your version.
9. Final Thoughts: How did it go? I can't wait to see all
your awesome artwork. Please share your drawings
and illustrations. Also, the work in
progress if you want, in the project section. If you want to expand on the knowledge you'll
learn in this class, you can watch my other
classes about characters, and also about colors, called color palette, and color and light masterclass. Visit my teacher
profile to find them. If you would like me to share your projects on Instagram, please tag me in the Instagram stories
in the post and course description so I can help you and your art to be
discovered by more people. Thank you so much for watching and see you
in the next class.
 Iva Mikles, Illustrator | Top Teacher | Art Side of Life