Transcripts
1. Introduction: Sunsets are nature way
of painting the sky, a gentle reminder of the beauty, change, and peace that
comes with letting go. Each one is so
unique with colors blending effortlessly
to create magic. Hi, I'm Somia Kartik,
a passionate artist, and welcome to my
first kel sha class, painting Serenity,
a sunset of hope. I'm excited to have you here, and it's a true joy to share this creative
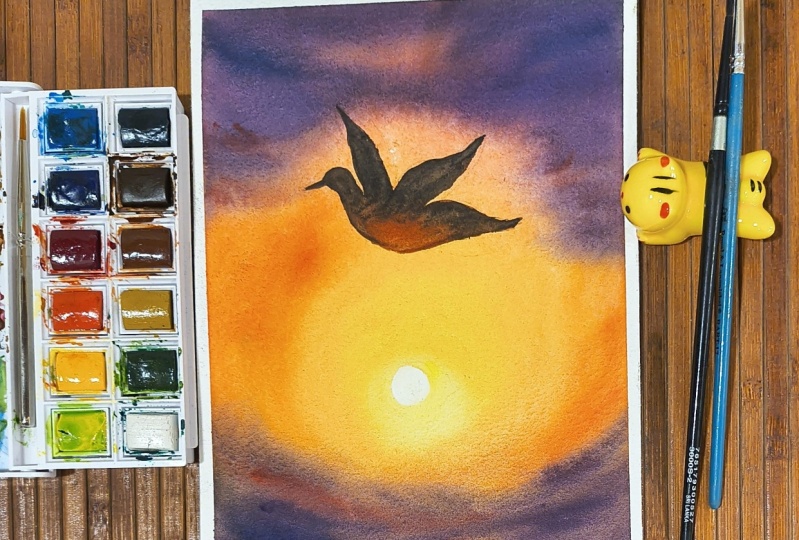
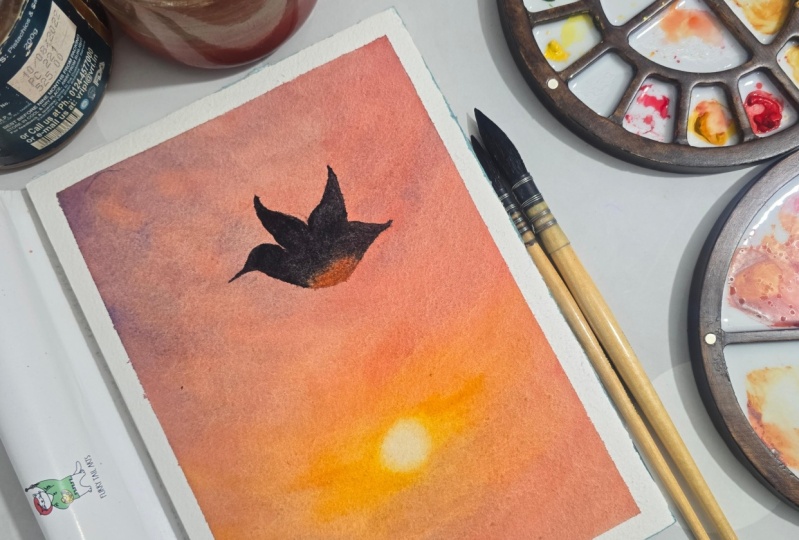
experience with you. In this class, we'll be painting a serene sunset with a bird soaring gracefully
through the sky. We'll be using just three
warm primary colors, red, yellow, and blue to keep
things simple yet stunning. I'll guide you step
by step on how to create soft glowing
size using wet on wet metal and create crisp details like painting a bird using Breton rye metal. So whether you're starting
your watercolor journey or already have some
experience with it and want to
refine your skills, this class is perfectly designed to have fun and
easy to follow along. So by the end of this class, you'll have a beautiful
place full of warmth and hope to
brighten your space. So grab your brushes,
your colors, and let's paint this serene
sunset and bring it to life. See you next session.
2. Class Materials: Welcome back guys.
In this section, we'll talk about the materials we'll be using for
the class project. First, I'll talk
about the paper, watercolor paper we'll be using. I'm going to use
Fabriano Artistico, 100% cotton paper,
which is of 300 GSM, 140 LB and size five by seven. I'll be using this block
for class project and also explain the
techniques as you go. I'll be taping the
watercolor paper in this glass board
using this masking tape. And next coming to the brushes, I'll be using these
three brushes. One is flat brush for
the initial washes, and I'll be using this
Escuda size ten brush for painting the sky, and also this one detailer brush for painting the bird
and also the sand. So this is from Mincent Newton, size five Foundation series, and this is from Zenart supplies
for the initial washes, size Eight size flat brush. Next, I'll talk
about the colors. In this class, we
are going to paint a beautiful vibrant sunset
with three primary colors. So it is a limited color palette so that it will not
be overwhelming. Even for beginners, they
can use any primary colors. It can be warm primary colors, can be cool primary colors. I'm going to use
these three colors. So these are the spatches new gamboge and this is the one. And next one is pyro scarlet and the final one color
is French ultramarine. These are the three
primary colors and we'll use only these three colors
to paint this bird too. We don't need black. But if you are not comfortable
mixing the colors, you can use black.
That's an option. Next we need two jars of water, one for initial washes and one for washing
off your breashtress. Next, you can use optional white gouache
to paint the sun. And also you need a pencil and eraser to make your bird
sketch and sun sketch. And you can even use a spray bottle to
reactivate your paints, if it got dry, make
sure you keep it ready, and then we start
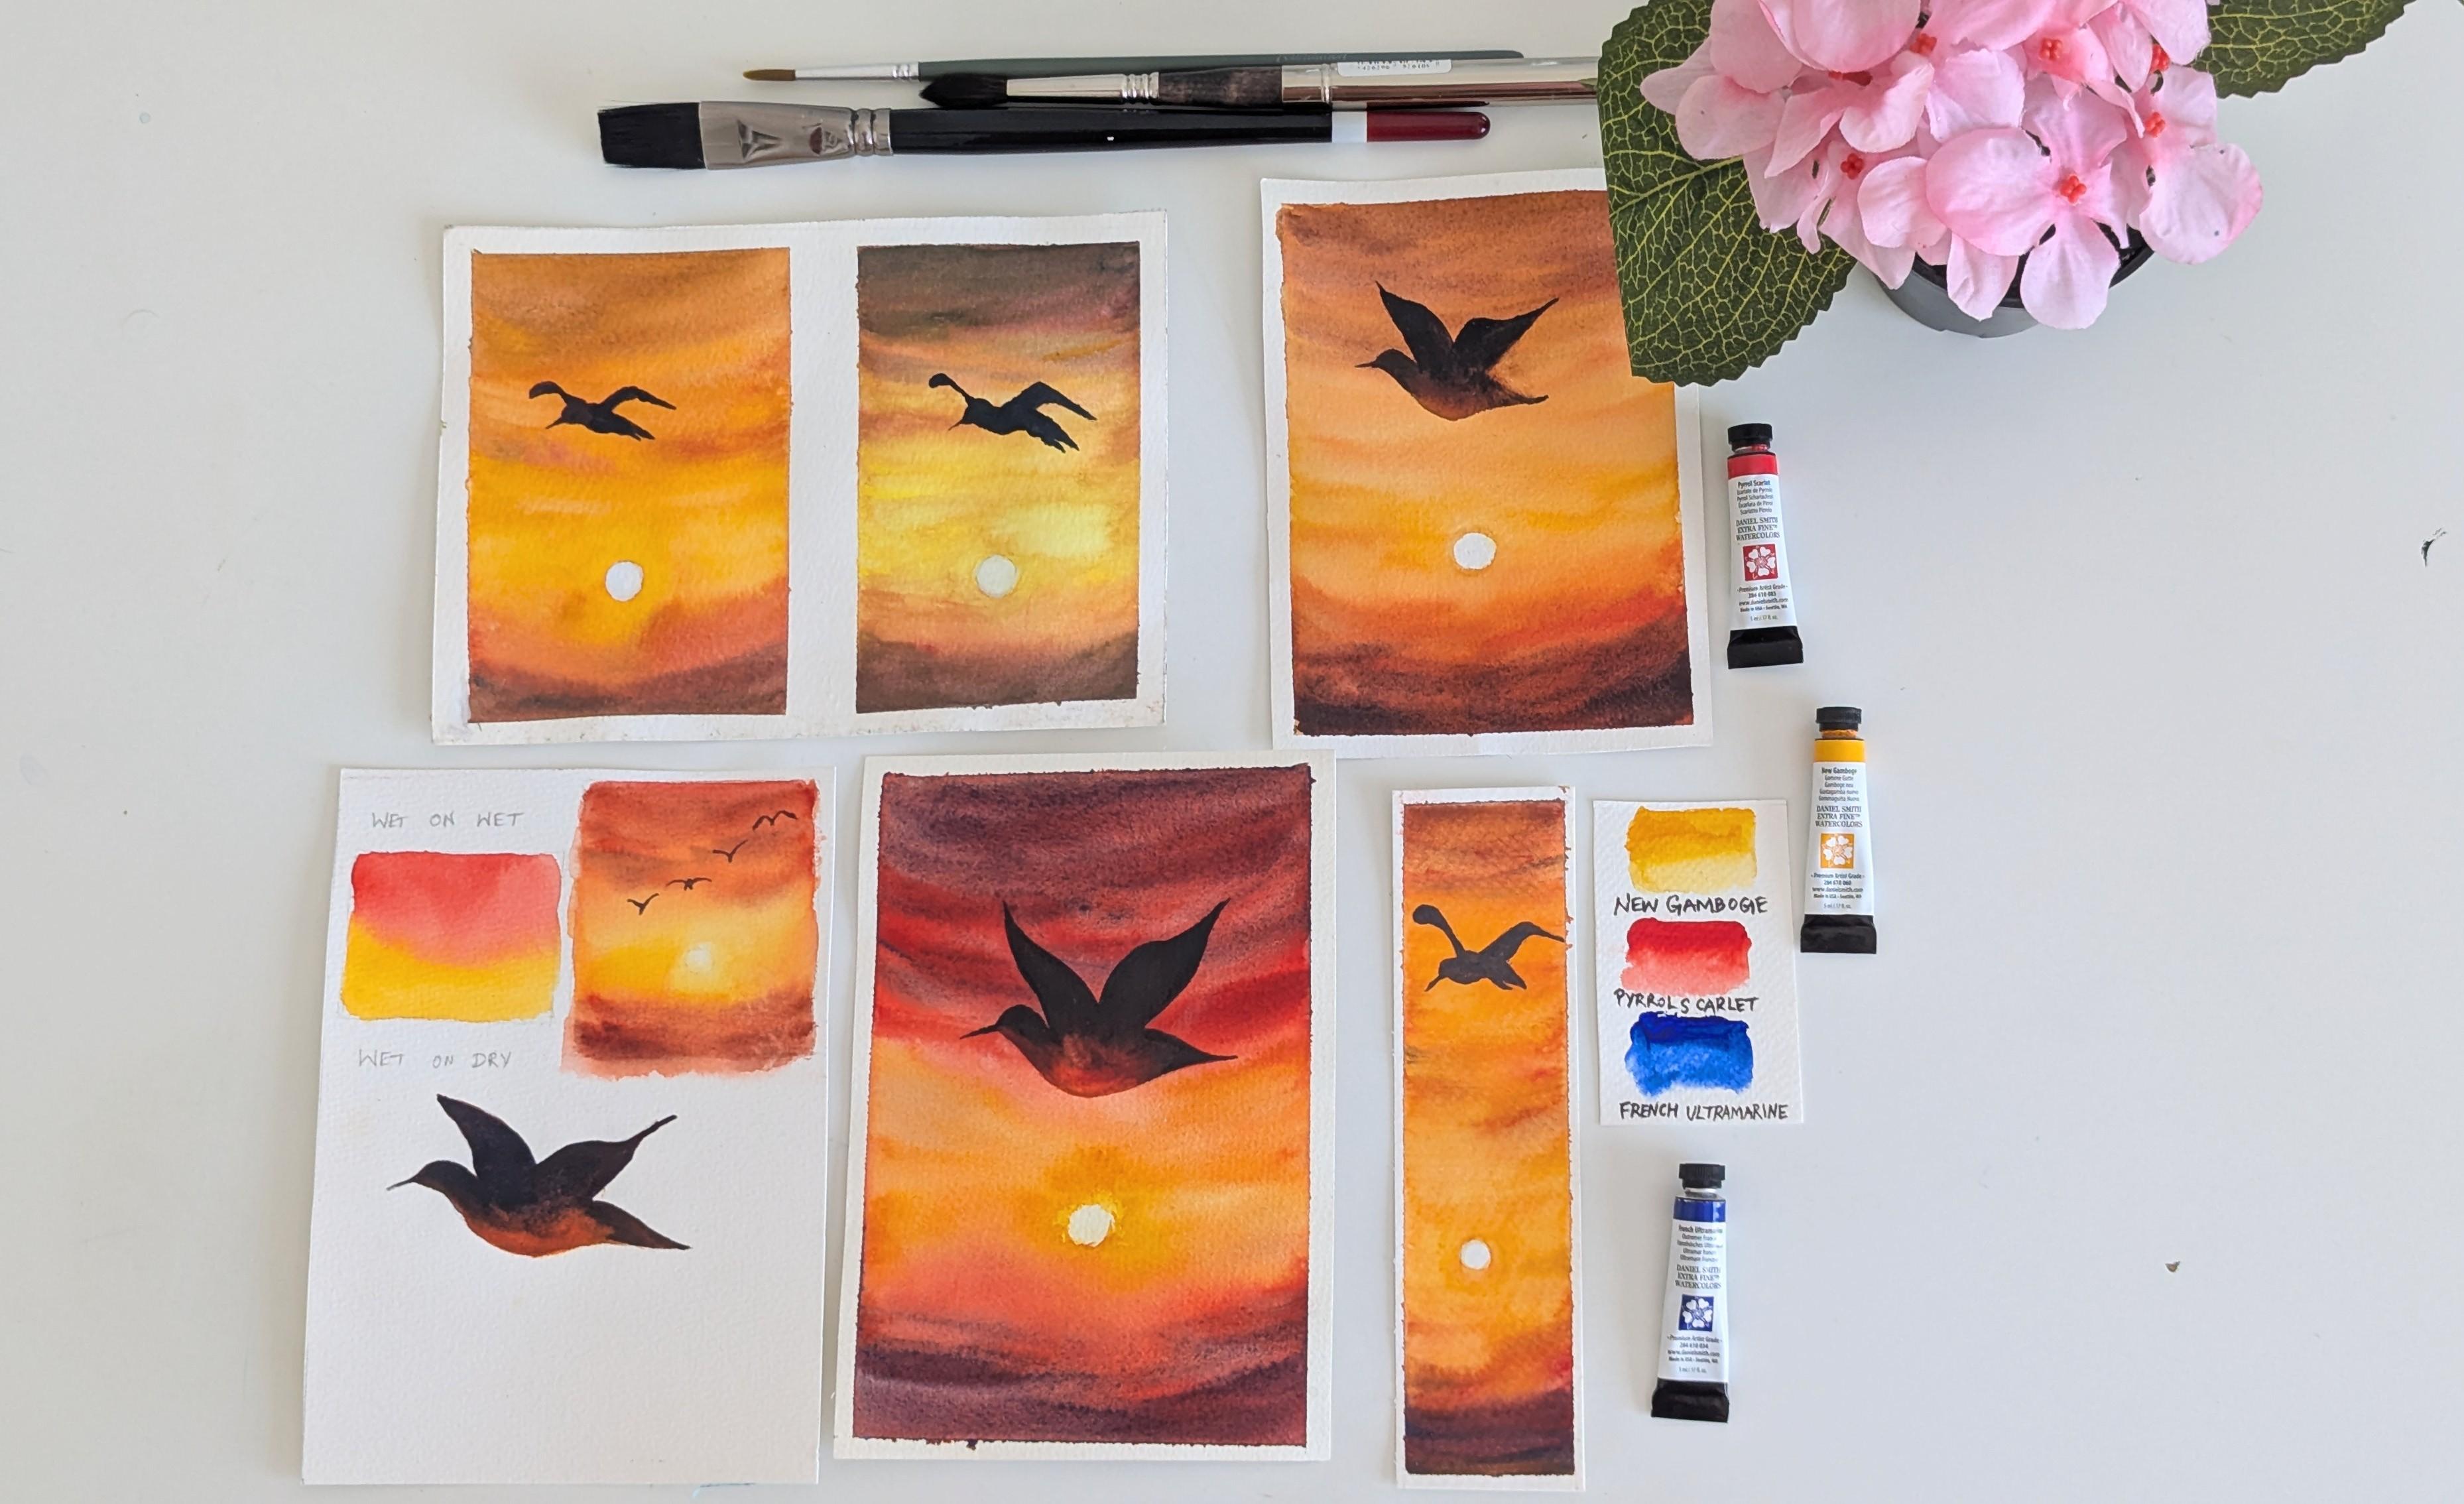
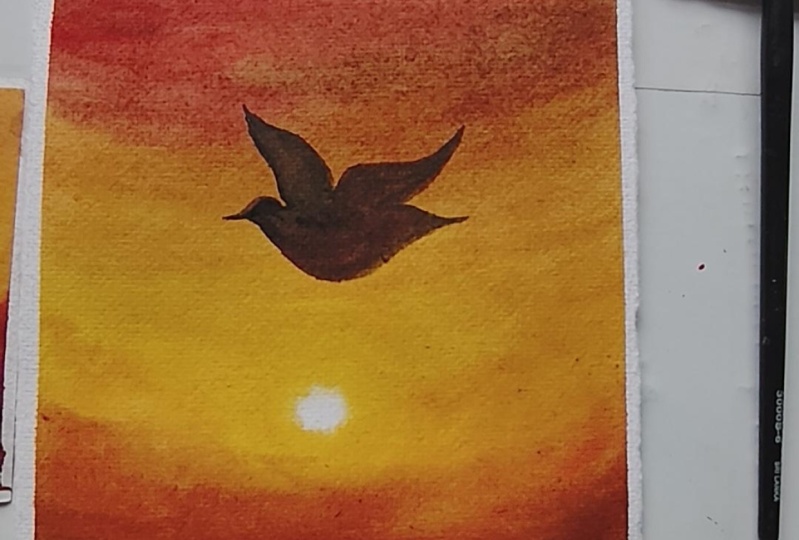
at class project. So as you can see, I have made few tryouts while
planning for this class. So I have used both
warm primary colors and cool primary colors. You can see this one is
warm and this one is cool, and I even tried on canvas. You can see that. So you don't want to have
too many colors. You just need yellow, blue and red color
to make your bird, even making black color. But you can also use black if you're not comfortable
in mixing colors. Grab your supplies and
let's get started.
3. Color Swatches: Hi, friends. Welcome back. In this section, I'll
swatch the colors, all these three primary colors for a glass project
we'll be using. So what are the colors we need? It's new gamboge, you can see, and next one is Pyl scarlet. The third color is
French ultramarine. You can use any
ultramarine for this. A I'll tell the alternative
or substitute color you need if you don't have these exact same
colors as I use. So first, I'll swatch the
colors for you and then we'll see the alternative for
the other colors actually. Oh so first, I'm going
to swatch the yellow. This is the already said, all these are warm colors,
warm primary colors, and they are super pigmented and they are all
from the same brand. It's Daniel Smith actually. They have warm colors and cool colors and many other
different colors too. But these three colors are
best for a beginner to start. So see, they're super pigmented and I allow
the vibrancy color. See? This new Gamboge if
you don't have new gamboge, you can use, I think, you can use candymelo orange, or Indianello you can
use or candy Mello deep. And the next color we'll
be swatching is Pyl red. So this is a next color we'll be using for
a beautiful sunset. So make sure you have your colors ready before
we start a glass project, and then it'll be very useful
to do your project easily. So this is a color. If you don't have
Pyl scarlet, I mean, you can use Cdium red hue, this is from son Newton, or you can use scarlet red. This is from Q or
watercolor, actually. These are super big merin too. And the next color
you're going to swatch is French ultra merin. So So you should have a very dark color. As watercolor dries very light, you can use more
dark tick colors in your watch and see
the color actually. If you don't have
French ultramarine, I think ultramarin will be in all the basic set
and bigness sets. If you don't have ultramarin, you can use to blue, and this is from Sena actually. You don't want to buy this, but I'm just giving you
a substitute one. These are the colors we'll
be using for class project, get your colors and
let's get started.
4. Techniques Part 1 - Wet on Wet: Hi, guys. Welcome back. In this technique section, we'll be seeing two
min techniques we are going to need while
painting a glass project. One is wet on wet technique, and the other one is
wet on dry technique. Wet on Wet technique
we'll use to create this beautiful smooth sky and wet on dry technique to
paint our bird, actually. So let's start. So I'm applying even coat
of water on my paper. So wet on wet is nothing but applying wet paint
on a wet surface. So first I'm applying
my clean water. See, make sure
there is no puddle. And it's very glossy.
I hope you can see it. So I'm starting with
my lighter color. So always apply your
lighter color first, then your darker color. Apply them next to each other so that it will blend evenly. You can even move the
board after you apply the pines to get that
smooth transition. I applied yellow and red. So you can see a beautiful
orange in between them. So you can add even more colors
if you are not satisfied. So make sure you apply dark colors if you
want a vibrant sky. See? As you can next I'll show you the beautiful
colors. That's it. See? Before starting in between. You can see drawn
here for the sun. I'm going to write my
paper. Entire paper. It's okay if you cover the sun. Make sure you apply
an even coat of water and not a puddle, your sky will blend evenly if you have the correct amount
of water to paint ratio. First, I'm going to apply even
coat of water in my paper. Then I'll start my paint. I apply even coat of water now. Now I'm going to take
my yellow color first. I'll apply around the sun. In watercolors, after
the paint is dry, it might look even lighter, make sure you use dark colors if you
want a vibrant sunset. See, I'm just going around
the sun with yellow paint. Then it's just going around it, and I'm using my next color now, which is nothing
but scarlet red. So you can just apply paint. Next color that is I'm using
my right next to yellow. Make sure keep a
tissue paper near you so that you can take the excess paint or
water if you don't need it. First I applied my red
color. After yellow. I don't like that. I'm making a smooth transition by taking some more yellow. See, you can see a beautiful
orange. It's okay. Happy accents are always good. Next, I'll be taking my blue for applying
to the top of the sky. So make sure you have your
paper wet while doing this step because
wet on wet technique is always good for skies and
your skies will look smooth. I got this brown color by
mixing my blue and red. And also I'm going to apply
it in the bottom surface. So make sure for
this entire process, your paper stays wet. Then only you'll
get a smooth blend. So I'm going to paint a sky now. Sorry, not sky. Clouds now. You using just a few
vertical strokes. You can use a touch of blue even to get your sky little brown with your red
and yellow colours. It will also look
beautiful actually. Make sure your surface
is wet and also stop applying these clouds
if your paper got dry. Make sure you re wetted
it and then start again. Then only your blends will
look smooth and beautiful. I think my legs are already dry, so I'm going to apply a
clean coat of water again. Oh, the surface. Let's wait. While my
layer is still wet, I use a tissue paper
so that I can paint the sun later because I see my pencil sketch,
so I don't like that. No problem. We'll use whitewash
or white watercolor paint to paint the sun later
after painting the bird. Okay. Let's wait
till it gets dry.
5. Techniques Part 2 - Wet on Dry: I'm going to start my
sketch for the bird. I start with a like this, a small thin and a
head that is curved. And then for the wings, I go like this. And then it's like an
M shape, actually. So I just see and
paint my birds. That's my style. So so
start with a small beak, then curve and then
come like this and then go a little
bit high like this, curved straight line, and then an shape or this is
the shape of a whale fin. You can, you know, so
like this and then a curved line and then
come again like this. Then for the tail part. Again, a curved line, and then a twist. So next for the bottom, just from the beak,
you start here, bend it, and then
create the tummy or the body of the bird and
then connect these two. So I think it looks like a bird. So make sure you get
this sketch ready, practice it, and then
we'll start to paint. So as we see in the
second technique, wet on wry techniques, so we are going to
paint the bird with a wet on technique. So I'm going to
start with my red, yeah, red, yellow
paint, actually. Yellow and red paint, actually. So I'm applying wet paint
on a dry paper so you have more controlled and crisp
strokes because this technique is used for detailing
actually way all that is. So you can use this
wet on dry technique. Always to add your details to your landscape or flowers,
whatever it might be. I think it's two, so
I'll add more orange. Sorry, yellow. And then I'll create a
brown now after this. I'll make a brown
now adding blue, yellow and red, all these three, Beginners, it might be not
easy to blend this properly, but don't worry, make sure
you practice before you start your class project
and try these techniques. It will be definitely for the try and you'll be more confident while
painting actually. Because I as a beginner definitely did a lot of
tryouts and then got the hank. Don't worry, keep practicing
guys, then you'll get it. See, I got a brown using
all the three colors. Now I'm going to make
more darker color, like a dark brown and then
keep coloring the bird. You can use a bigger brush. This one is a pointed
one, so I'm using my big brush itself because
it has a fine pointed thing. See, it has a fine pointed tip. So you can use this brush fine
pointed brush if you have, or you can use this brush to. This one is good, too. You can use a smaller size brushes
for adding the bird. Now when you come to
the beak, be careful. You don't lose the shape and then keep adding
colors to your bird. Make sure you don't go over
the line outside the line, I mean, so that your
bird looks Good. In your landscape? I think I'll add even more blue to get my darker
color that is black. See? I pod is getting life. Getting to life now. So make sure you paint it evenly
and in a good way. Se wet on dry technique. You can just paint over the
drawing you made and have more controlled strokes
more control or paint too because you can wipe off take a paint if
you don't like it, and then blend it again. But you might get sharp edges by using
wet on dry technique. I think it's even more brown, so I'll make sure to add more blue to get
even darker color. And I'm going to blend it now. I'm going to blend it now. See? And I'm going to blend
my bid at the bottom. Smooth blend. So keep applying your plans. Do you like it? I'm retouching it a
smooth blend, I think. Finally, make it smooth. The shape is good for bird. You practice this bird painting before your class project, it might be very really
helpful actually, and you don't want to
make your landscape bad. So practice this technique. Wet on dry and wet both techniques before
you start a last project. I think this layer is dry. So I keep my hands and
see whether it's dry. Yeah, it is dry, so
I'm going to use my smaller brush because
this is a small layer, so I'm going to use my smaller
brush to add my birds. And before that, I'll erase the sun because I don't lie because we
don't want pencil marks. So I'm erasing it. So make sure you don't
sketch it or you can erase it after if your
pencil marks are seen. So I'm going to paint few birds. Not this one, but a
simple one for beginners. I'm going to paint a simple one so that you can practice and
then start your painting. I'm going to use a V
shape bid like this. I like this. A small one. Next one, I'm going to give a few detail like head and a leg like this you can make
your wings little bigger like this and small curve like this and an tu M shaped. S. It's that simple guys, please practice it and you
can paint it like a pro. So keep practicing
these techniques and then start your class project.
See you next section.
6. Class Project - Painting the Sky: Hi, guys. Welcome back. So you can see I have taped my watercolor paper on all the four edges to
keep my edges clean. So make sure you do the same before starting
a class project. First, I'm going to draw the
sun before wetting my paper. So draw a small circle, but with a very light
pressure in your pencil, so don't draw it too thick because it might be
seen after you paint. So this is my son.
So I'm going to wet my paper before doing a sky. So make sure you apply
a clean coat of water. And get a glossy look before painting the sky and also make sure there is no puddle
of water on the sides. Make sure you use tissue paper, and then wipe off
the edges actually. If you paint over the
santo, it's okay. Not a problem. We can
use white gouache. Finally, if it gets covered. Practice the techniques before you Srta glass project guys. Make sure you practice a lot. The few techniques I told you in our technique sections and then start with the
gloss project and make sure you keep your colors ready and you don't want to run out of colors in
the middle of a painting. So make sure you keep your
colors ready to your sides. I use my flat brush
to wet my paper. So as you can see. You can see a glossy
look right, see. So make sure there
is no puddles. I'm going to wipe
more of my edges. Because your paints might go and make your painting look bad. So make sure you clean your
itches and also make sure you apply even coat and
the water stays for a long time because
100% cotton paper, if you use the water
stays for long. If you use any 25% cotton paper, it'll be good, but it will
not stay that long actually. Make sure you use 100% cotton paper guys to
get a good result. For beginners, I know
it might be a little difficult if they
don't want to invest. But please guys get
the best paper first. Be watercolour always gives a better and great result in a good Watercolor
paper, you invest. Try out 25% cotton paper or 50% cotton paper if you're
not ready to invest, then you can start with
100% cotton paper if you're more confident and
you want to paint more. So I have applied even
coat of water now. Let's get started. First, I'm going to take a
lighter color of yellow. So make sure you
go around sun and then make it deeper as you go away from the sun
to give your painting a depth and vibrant look. See, I have started. Sun gets covered, make sure you use your tissue
paper and depth center. As we drew a circle there,
that's your indication. So start with a lighter color and then gradually move
to a darker color. First, I'm using
new gambooch guys. Next, we'll be using. Next, we'll be using red PyalRd. So So I'm mixing a little bit of both because
I think my red is too dark, so I'll make sure I'll add more orange to my color
to tone it down. So I think my son
is getting covered, so I use a damp brush or
a tissue paper to make it So I'll blend the
colors evenly, guys. Use circular motions like this. And when you go
away from the sun, you keep your colors darker. Blend the two colors
evenly guys so that they don't
look like patches. I'm going to use my damp brush. See? You can use
a damp brush too. Dab the paper, clean it in a water and dab
the excess water, and then you can do, make sure you do it fast because some places you are in the water paper
might get dry soon. So make sure you do it fast. Next I'm going to take my blue. Oh Next time we're going to take my blue and then make it
darker towards the bottom see. If I mixed all red, yellow, and blue to get this deep color. So I won, you need to act fast. I think my top layer has dried, so I'm going to rewet my
paper at the top part alone to keep my
paper wet and damp. And so you can see the sun and
see, I have added blue at the base with
a mix of all three. Next, for the top layer, I'm going to add some more red like this for small
horizontal strokes. And then I'm going
to take my blue and then and a little bit red. So as you can see, these are all three warm colors. Se it's like purple,
reddish purple, but I want to make it look
even more like brown, so I'm adding more red and a little bit yellow
to get the warm tone. So Make sure you do it all fast because
it might get dry, so I'm giving some more
depth at the bottom two. I'm taking some red and
make it even more vibrant. And also, while
this is still wet, you can add some strokes with red and a little bit yellow. See, you can have simple
horizontal strokes like this. You can take a little
bit or a little bit of blue to get a little
brownish color. So keep making your clouds after you apply even
coat of your paints. So first yellow, next,
you are going with blue. Next, I want even more depth. I'm going to take
all the three colors and apply it at the top of the sky to make it even more darker because as
watercolor dries lighter, you should use pigmented
pains when you do watercolors so that your result will be
more vibrant and beautiful. I like desired actually. So so I'm going to do
some more layer of low to make it more vibrant at the center of
near my son actually. So make sure you do
it fast, otherwise, your paints will
dry and you had to re wait and rewet and
then start it again. So I think I need
more yellow here because the transition should be smooth and it'll look
beautiful artery. So make sure you apply even coat of pins
and keep your layers smooth So one more final touch for my sky
at the top of the sky, I'm going to take blue, red, and a little bit
yellow, then more blue. So I need a brownish color at the top with all three mixes. If you mix unequal
consistency in all, you'll get a black
color, actually. You can even use Prussian blue for a warm tone of ultra melon, but
it'll be too deep. That's why I recommend
prussian blue, but it's a substitute you can use if you don't
have any other blue with you and make your
painting like we do now. So I just use some simple
horizontal strokes, guys, for my clouds to make it a little dramatic
and beautiful. You can add more clouds if you want your clouds
to be dramatic, but I'll stop with this
because I don't want to lose the um, beautiful colors. I made it before, so I don't want to do it, guys. If you are satisfied,
please stop. You don't want to keep using some horizontal strokes
like me, satisfied. I'm going to keep adding a little bit depth to my painting by adding a
few more layers, guys. This is optional step.
We don't want to do it. I'm not satisfied
with my painting, so I'm making more darker
strokes, darker clouds. See? Simple vertical strokes. Not any fancy strokes. Make sure you use dark colors to make your outcome good
because as I already said, watercolor dries a little
bit lighter after getting. I'm satisfied with this. I think one more final stroke at the right, then I'll stop. Because I don't want
to do it, guys, and make my painting look
messy. That's it, guys. See you next section where we'll paint our birds with on re technique. See you next section.
7. Class Project - Painting the bird: Hi, guys. Welcome back. This is the outcome we got
after painting our sky. Next, we'll be
painting the bird. First, we'll sketch
and then paint the bird so that your
artwork comes to life. I'll be using all
these three colors to make a black
and also a brown. And also a mix of
these two red and yellow to give the glow because it's soaring
near the sun. So first, we'll sketch, I'm going to use my two H pencil and an eraser to draw my sketch, bird sketch, and
also I'll be using this size number five round
brush to paint my bird. So if you use a smaller brush, you can add crisp petals to your bird and it'll
be beautiful. So let's get start sketching. So first, I'm going to
start with the beak, so I'll be painting the bird here in between
these two areas. First, I'm going to sketch,
start with the beak. I think you can see my
sketch, start with the beak, then and a little curve
for the beaks head. And then I'll be drawing a shape of a curve leaf or a fin shape like a
veil for the wings. I'll go up like this and a curve I think you can see my
sketch because it's dark, I think you can't
see, but you can see, I'll show you after I finish it. So like an shape, Yeah, like an M shape. So then a curve and
then bring it down. I think you can see my sketch. Then I started the beak, then a curve, then a
little straight curve, like an shape then or a curve
leaf, then come back here, then a little curve
down here for the tail. This is the upper part, guys. Next, I'll be drawing the
bottom part of the bird. I come from the beak. Do a curve? Do a
curve like this. And then the body should
come a curved line, and then you should
join these two. See? It's so simple, guys. Practice it before you draw this bird to
your final artwork. I have also provided some other references for the
birds drawing. So it's simple birds
with MNV shape. So you can try that
too if you're not comfortable with this.
This is our sketch. I think I'll take and
show you a closer look. This is our bird sketch. Next, we'll be
mixing the colors. See? I have made
all three colors and sprayed my paints
to reactivate it. These two also yellow
and red colors, make sure you keep it ready. Because it's near the sand
soaring from the sun, you need to keep the glow, make sure you keep red
and yellow to separately. I'm going to mix this to
make a black, see guys. I think this is
more brown color. I need to add more blue
to make it even darker. So I'm going to take my ultramarin blue
French ultramarin and add a little bit. So let's try. I hope
you can see that. See? It's close to back. I think I'll add a
little more blue. So I think you can swash the colors in
a scrap paper and see. So see, it's almost too
dark, gray or black. So S, it's dark. You got a black, see, beautiful black by mixing all
your warm primaries. So next we'll start beating. I'm going to take my elmo the bashes and keep my pinch do. I'll start with a light color. I'm going to take
this yellow first. And a little bit of red. I think this is not yellow. It's too orange, so
I'll take more yellow. And then start with the bird,
bottom part of the bird. Or you can take day I'm showing the pins. I hope you can see it. Yeah, I think now
you can see it. I'll be using these
yellow this yellow first. And start with the bottom part. And then little bit red. I think I'm going to I took this color and a little bit of
red to make a brown, see, a lighter version. So I'm doing we on ride technique and you'll get crisp patches
when you paint this. I'm going I just clean my water. Then I'm blending all
three with a damp brush. So I'm going to blend
with the damp brush. Make sure you clean your brush and take the excess water
before blending the colors. So I'm dabbing off
the excess paint and blending these three
colors to get even blend. For the glow, I'm adding
yellow to the bottom. So next, I'll be mixing this
red with this color black, the mix of all three and create a brown and then go after that. See? I made a beautiful color
like burnt sienna. So I'm going to just paint the remaining
part, little brown. You can keep planting the colours so that it doesn't
leave any patchy works. So I'm going to add
little yellow and red to keep the glow. You can sketch your
bird a little lighter. I sketched it a little bit dark. Usually, bigger artists, they
usually sketch it light. But for you to see, I made it a little darker. Next after this, I'm going to take my black and then color
it all through the bird. So as as the wings get away, you can make it a little darker. I keep blending two
colors, you can see. When you go to the,
be careful guys. You don't want to
lose the shape. So for the tail two, I'm going to add little brown
color to keep the glow. So make sure you do it slowly and give a
beautiful look. So next I'm going to take my black and then just
paint or the shape I drew. So first, this wing, and then I'll go
to the other wing. So you can shape, you can change the
shape if you need. If you're confident enough
to paint with your brush. See, it's very sharp edges. This round brush size number
five from Inson Newton. So I can paint it freely
without any fear. If you use a bigger brush, it might not work
sometime unless it has a sharp ib like this
round brush, actually. So just feeling the colour now. So next, I'll start
with the beak. And then the bird's head. Take it slow, guys. Then if you want, you can turn the painting to make
it more comfortable. So I'm going to use a brown. The color we made,
like burnt sienna, mixing red and a
little bit of black. Red, and a little bit of black to get this
beautiful brown color. I'm going to blend it here
between these two colors. So so washing my brush, dab off the excess tissue. And then using a
damp brush, then it. I want to make the beak
even more little sharper. I'm taking my black again, dabbing my excess paint, and then shaping it up. So next we have one moving, so I'm going to turn
my artwork like this, and then you can see
the pencil mark, so I'm just going through that. Make out a line, and
then fill it in. Make out a line and
then fill it in. So now, you just need
to fill those colors. See? So we are now
going to blend even more because it doesn't
look nice to me. So I'm going to
keep blending with brown and then wipe it off. Next, I'm going to use a
dam brush to get even glow. I can use red and yellow color, which we mixed earlier.
To keep the glow. So clean the brush,
dab it in a tissue. And then blend it. Now with the black, I'm going to blend it even more. So take a damp brush,
blend the colors. So if you want glow even more, so you can add low to it. But make sure you don't cross the birds body edges and
then change the shape. So I think you need to wait
till the bird gets dry. So that's it, guys. One
more touch, final touch. If you're happy with your bird, you just stop it.
Don't overdo it. So let's wait till it gets dry. Or you can use hardware to make it dry faster. So let's wait.
8. Peeling the Tape: I think painting
has dried fully. You can erase the pencil marks, then peel off your
masking tape, guys. So let's peel off the
masking tape now. And also, when you peel
off the masking tape, peel it at an ankle so that
you get a really nice action. So there you go, guys. A painting is complete, and congratulations for painting along with me and see you
in the final section.
9. Conclusion: Congratulations, guys. Lakota created a charming
sunset full of warmth and beauty with
just a few colors and your own imagination. Thank you so much for joining
me in this class today. It's been a true joy to share this great experience with
you and I hope you had fun learning few watercolor
techniques like wet on wet and wet on rain and
painted a beautiful sunset. Isn't it amazing how a simple palette can create
something so magical. If you like this class, I truly appreciate if you
could leave a review. So it not only encourages me as an instructor and also
artists like you who discover this class and
don't forget to share your projects in the projects and association of the class. I can't wait to see your
beautiful creations and enjoy your creative
keep experimenting. Say inspired, and remember every breaststroke is a step
towards. Oh, thank you. Thank you so much for
pleating with me today. See you in the next class.
 Sowmya Karthik, Artist and Educator