Transcripts
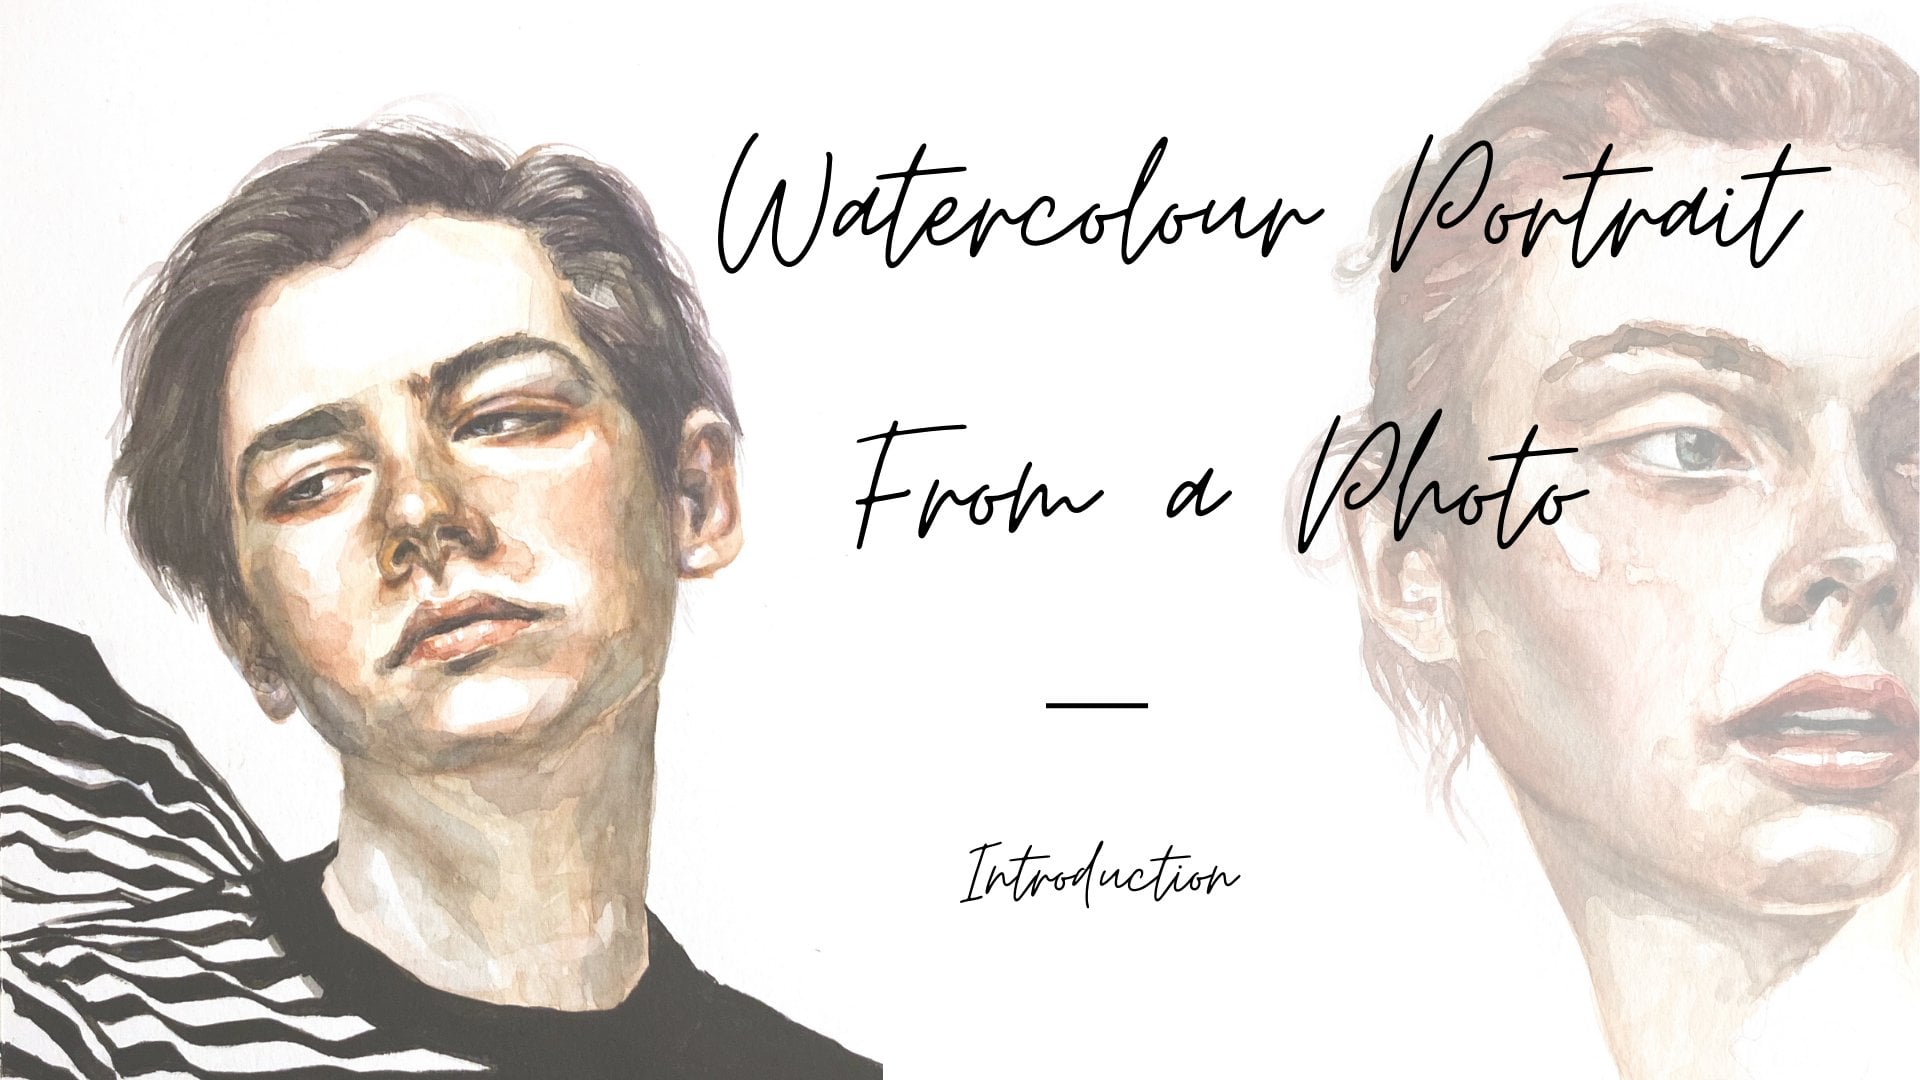
1. Introduction: Hello and welcome to the
steady day challenge, 30 days of painting
with watercolor. My name is Nadia, and I am a professional artist living and working in Berlin. And I'm so glad that you've
joined me here today. After publishing my
last watercolor class, I came up with this challenge as a fun and rewarding
way to consistently practice painting
with watercolor if you haven't had a
chance to see it yet. But once you learn more about painting a watercolor portrait, make sure to check
that out as well. As I mentioned there, I used to struggle a lot with
watercolor and I found that relaxing and
practicing really helped a lot with
developing my skills. Next class, we will be
focusing on two things. Practicing painting
with watercolor to develop our
skills and building a creative habit
by incorporating painting into every
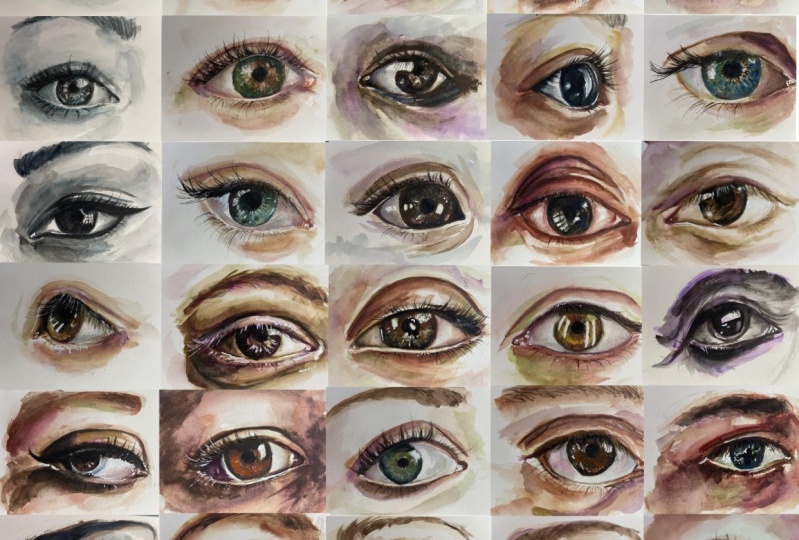
team for 30 days. I feel like the eyes are the most intriguing and fun part of the face to draw and paint and mastering the
art of eyes can make a huge difference to the
quality of your artwork. Ideally, you've held a pencil and the brush at some
point in your life. But I'll also be going
over some basics if you don't feel comfortable
drawing freehand right away. To begin, I'll briefly
go over the materials, some options to get
your ideas onto paper if you don't feel
comfortable drawing free and yet some basic
watercolor techniques and some things to take into
account before we start. Then we will get stuck in and start with a 30 day challenge. I will be sharing my
entire creative process with you as we go
in every lesson. I'm hoping that the challenge
is accessible to everyone. Beginner to advanced, as you're mainly challenging yourself to practice and develop
your creative habit and skills during 30 days. I've selected 30 eyes are
quite unique so that we can experience a broad spectrum of possibilities using
different colors, trying out a few
different approaches and getting a range
of different results. At the end of the 30 days, you will have practiced a whole lot and develop
your watercolor skills. I hope you feel
more confident in your painting abilities and can let loose and
have fun with it. The aim is not to paint
hyper-realistic eyes, but rather to be
expressive and to start living the
paint, do the talking. I hope the experience
will motivate you to keep on painting
and get more into it. So let's dive right in. In the next lesson,
I'll see you there.
2. About This Class & Project: In this lesson, I'm going to be talking to you
a little bit more in depth about what we're going to be doing in this class. So mainly about the project and the structure of the class. The project for this
class, of course, will be to complete the 30 day challenge and create 3D paintings of
eyes and watercolor, ideally over the space
of 30 consecutive days. If you can't manage an IR day, you can also find
your own rhythm. Maybe every second
day works for you, or only on the weekdays, leaving out the weekends. But I do recommend that you make it a regular
thing and new routine so that you
can start building your creative habit and get the most out of the
consistent practise. I do understand though, that it can be
quite overwhelming. So we could also just say that the project really consists
of 30 mini-projects, 30 paintings of i's. And of course you
can also upload single paintings of eyes
into the project section. So now that we've
covered the project, let's talk about structure,
the daily lessons. We'll begin with me showing you the painting we're going to be making and the colors
I've mixed for that day, you can find all
the colors I'll be using and the combinations
to mix them from the watercolors
that I've bought as a document to download in
the resources section, I won't be going into the technical details
about how to mix colors. So if you need some
assistance with that, please check out
the colors lesson of my watercolor portrait
from a photo class. For the most lessons,
I'll be sketching my images before
I start painting. And for the most part you'll
also see this process. I'll be sketching, freed him, but I'll also be uploading and listened to give you a
couple of options to transfer your image to your paper if you don't
want to draw a free him. Having said that, I do
recommend you give it a try. With practice, you
can only get better. The first few videos, I'll be recapping on some
basic watercolor techniques and alternatives to
freehand drawing. If you are practiced or I'll painter and prefer
to skip ahead, please do make sure you watch the materials and before you begin videos to be in the loop about what you
need for the class. And every lesson, I
will be giving in detail commentary
about my process. And I will also be repeating important information
in every lesson, just in case you've skipped today for
some reason or other, or you've been away
for a while or you're like me and then when
you're doing something, you forgot about something
else that's important. So yeah, I hope that's helpful. One thing I want to
mention some days it takes me longer to decide
that a painting is finished. And some days I can't stop. So if at any point you're
happy with your eye, you can obviously
just leave it there and you don't have to go
to the very end with me. If you're a complete beginner, you may want to try
painting two eyes a day. It doesn't really
matter if you repeat. So maybe you want to repaint
the eye from the day before, after painting the
eye of the day. And maybe you'll even find
that you've progressed. Patient's excitement
for learning and perseverance will be great tools to bring along to the class. So find your own rhythm and
wanted to learn and enjoy. I'm aiming to make
this challenge accessible to all levels. So please let me know if you need more
information or guidance. One last thing, I like to have
my hairdryer class when I paint is sometimes it just takes a little too long for me, the drying of the watercolor
and I'm impatient. So if you're anything like me, maybe you also want to
have your hairdryer handy. Now let's move on to the
next lesson in which I'll be talking about the materials you'll need for this class. So I hope to see you there.
3. Materials: In this lesson, let's talk about the materials that we
will use in this class. We will be needing
paint brushes, paints, watercolor paper, a pellet
masking tape, a wooden board, graphite pencils and erasers, jazz for water, kitchen towels or other paper
to absorb water and paint. Optionally, you may want to have a ruler on hand if you
don't want to draw freehand and prefer to
transfer your eyes using a grid and the light source if you're wanting
to use tracing, I suggest getting
at least three or four sizes of paint brushes. I have a one, a three, a 10.16, but mainly I use
the three and the ten. I like to work with
watercolor tubes, but you can use whichever type
you feel comfortable with. The colors. I suggest you have on hand, yellow, ocher, burnt sienna, cadmium red, crimson red, ultramarine blue, Prussian blue burnt
amber and ivory black. But if you want
to, you could also get white for highlights in the eyes in case you are
not able to reserve them. Generally the whites and our painting will be the
whites of the paper, and we won't be
using white paint. Your watercolor
paper needs to be at least 300 GSM and
I prefer fine grain. Then you need a pallet with mixing areas and
little compartments. We will be keeping the colors. We mix, masking tape to tape
the paper to the board. This helps with coping when
we're painting with water, graphite pencil
for the sketches, I recommend the two H or
report age if you're using the grid method and an HB or
two before your sketches. And if you want to
incorporate some pins, so when two paintings also
have an eraser on hand, you wouldn't need two
water containers, one for dirty water
to clean the brushes, and one with clean water
to hydrate the pigments. You'll also need paper towels to absorb water and paint
once your painting, I prefer paper towels because
they don't have lint. I will be giving the
images of eyes from Unsplash and uploading them
to the project section. But if you want to
append additional eyes, I can really recommend
the website also that those are the materials. Let's continue in
the next lesson with some basic watercolor
techniques.
4. Basic Watercolour Techniques: Hello and welcome back. In this lesson,
let's take a look at some basic
watercolor techniques. As you can see, I've already
prepared some squares here on my paper where I'm going to be trying a few
different things. I suggest you grab a blank
watercolor paper as well. And if you want make room for ten different
compartments on it later, we're also going
to be looking at trying a value scale in terms of intensity and then watercolor washers from adding
a little pigment, adding a lot of pigment and how this makes the
difference on the paper. Maybe you also want
to make a space for five different values
on your paper here. I'm going to start with
the wet on dry technique, that is wet paint on dry paper. I'm going to use
my yellow ocher. I hydride my pigment
in the mix and compartment of my palette and apply the paint to my paper and car movements
with my number ten brush. Next, let's take a
look at wet on wet. For this, make sure
your brush is clean and wet the area of your paper which you
want to paint on. Same procedure as before. Hydrating the pigment
and applying it to the paper with the number
ten brush and CAM movements. You can already see how the paint is behaving
differently. This technique is less
controllable than wet on dry. I'm going to change colors
now and use my crimson red. And I want to try smoothing
out the edges of the circle. I'm going to paint that. Once I've painted my circle, I clean my brush and dry
it with my paper towel. And then I start smoothing
out the edges by going over them with
my almost dry brush. Again, I'm using
calm brushstrokes. Now let's try dropping
paint onto wet paper. Again, I'm going to wet
the area I want to use for this with clean
water and clean brush. If it's too wet, the paint
will most probably extend all over the entire width
area. See how you go. I'm just dabbing my brush with Kremlin pigment
onto the wet area. You can already see
how it expands. In the next compartment, I want to try and overlay
so that I am starting with yellow ocher and I'm just going to paint a
little square here. Now I need to wait
for that to dry. In the meantime, I want to
see how colors look when I mix them directly on
paper while they're wet. Instead of using overlaying of dry layers to build up volume. So I'm going to start again with yellow
ocher and then add some crimson down the bottom and just let that mix them
with the yellow ocher. The next technique is one that I use quite a lot when painting, which is lifting up or removing pigment and areas
for tonal variety. If I've made a mistake or
if I've used too much, I'm going to start by
painting a circle. And let's say I
want a little bit of the white of the paper to
be showing on this layer. I clean my brush, dry it with my tissue paper
and with an almost dry brush, I can start to lift up
pigment where I want. If the area has a lot of water, the paint will start
to expand again into the areas that are
not completely dry. So I have to go over it a few times until the watercolor is a little more dry,
tendencies too much. Or you might also lift
up a layer of paper. I can also lift up most of or all of the pigment by
using my paper towel. In fact, if you make a
mistake while it's still wet, quickly get you clean
paper towel and just dab it onto the fresh
watercolor area. The next thing I'm
going to try as a graded wash, using my crimson, applying quite a lot
of pigment at the top, then cleaning the brush and weighting it with clean water. I'm applying it here
in a smooth manner so that the paint starts to
expand into this wet area. Remember that watercolors
are translucent. If we don't add water, it becomes too opaque. And then we can
add layers on top. So we always want our
layers to be translucent. Now let's go back to
the overlay exercise. I'm going to layer some
crimson onto the yellow or it can now,
while we layering, we always want to make sure that the layer is dry before
we start painting on top, the square where I dropped
pigment onto wet paper, you can see that there
was quite a lot of water as the parent has
completely expanded. So I'm going to go ahead and drop a little blue
in there as well. Is it still a little wet? Let's see what happens. Let's take a look at the
scale of transparency. Next, I'm going to start with a very
light wash over here. The next square, I'll add a little more pigment in the
next little more and so on. Your colors will always dry a little lighter than
when they are wet. This scale is good just for
testing out how the paint looks and behaves depending on how much water or
pigment you use. Now that I'm done with that, I wanted to see what
the layering exercise would look like with
some blue at the top. I'm going to use
my test strip now, which is great for testing out your washes before you
apply them to your paper. You can also use it as
kind of a second palette. While we're waiting
for that to dry. Let's take a quick look at the color wheel for a
little color theory. This will not be new to you. We have the primary colors, yellow, red, and blue. And when they mix them,
make secondary colors. Between yellow and blue. We have greens, between blue
and red, we have purple. And between red and
yellow, we have orange. When we're working with
colors that are very bright, you can use the opposite
colors to make them a little less bright and
a little more earthy. When you're working
with yellow e.g. and wanted to turn it
down a little bit. You can use a little bit
of purple and portraiture. We work a lot with
orangey tones, so we'll be using
shades of blue to tone down the colors
that will mix. Okay, so you can see this is
a dry sheet of exercises. You can see how the colors have drive and when you
feel comfortable, you can go onto the next lesson. And I hope to see you there.
5. Ways of Transferring Your Image: Hello and welcome back. In this class, I'm going to be presenting you with
two ways to get your image onto
your paper if you don't want to draw the
eyes freehand yet, I do suggest that
you give it a try. The doesn't matter if the drawing doesn't
look like the photo. It's really good practice and you'll get better
the more you do it. Let's start with
the grid method. If you're wanting to transfer your eyes
using the grid method, you'll need two
copies of your eye. My printer printed this one out. Not so great. So I'm going to use this
one to draw my grid on and the other ones to use
while you're painting. Basically what you wanna do. First, you make sure that the paper that you're using is the same size as your image. And if it's not, then measure out how large your image is. In my case, I've got
11.9 cm by 9.3 cm. I'll just put that down.
So I don't forget. Then you want to see
how large you want the distance to be
between each indicators. Usually, I would use 1 cm. It really depends how
large your images, but I will use 1 cm. You decide how large you'd
like to make your squares. The squares basically then help us to transfer
the information in each square to our paper, will begin by marking 1
cm distance on the image. Okay? And then we've got
the 9 mm here, right? And then we're just gonna
do the same as the bottom. Make sure to start on the same side that you
started on at the top. Otherwise, seeing is
we have 9 mm here. It will become distorted. If we start from this side, then we just make lines. And fine to press hard on the image that you're
working on with two grids. But once we get onto
transferring that to our paper, we want to press lightly
because otherwise it's going to leave and then I'll
taper which we don't want. And it can be really hard
to erase 1 cm by 1 cm. And again, remembering
to start on the same side at the top here. And if you started
at the bottom, start at the bottom
and both sides. Alright, then we'll
do the same thing. Just pull the lines across
so we end up adding leaves, beautiful 1 cm squares,
or over a month. Now, before we draw our
grid onto our paper, I'm going to put letters
up the top here. And numbers down the sides. Again, letters and numbers. Okay? Alright, so that would
be to begin with there. And now we've got to
draw the grid paper. So basically the same procedure. Very lightly, yeah. Make sure you use
an HB pencil for this to H or H for six age. Definitely a very one that
makes very faint lines. We want it to be
very easily erased. So we've got grid on our photograph and we've
got a grid on our paper. Basically will want
to start looking at where things stopped. I'm going to start with
this corner of the eye, which starts at B five. Okay. It starts pretty much almost to C5 and then
it goes through C for just way through the
corner there. The top. Okay. Then does the cross
right through to h, actually right through to I. And then it comes down
through here, through J four. Then it kind of fades
out. So that's fine. And then we can see here H1, H3, we have like a
crease that comes down. You can mark them to still working with my H pencil. So you can start with the
HB pencil here if you like. I'd just like to first sketch
of them really lightly and then go over it again with an HB pencil so that
when I erase the grid, I don't automatically
erased. They're drawing. All the while I'm drawing, I'm looking at
what's happening in my reference image and then
I'm looking at my papers so your eyes keep
doubting between the two. You don't just look at
one look at both of them. I have a pretty much
constantly in movement. Okay, so there's a highlight of the eye here that
I wanted to say. Before I erase the grid, I'm just going to go over my drawing outline
with an HB pencil. Don't press too hard stool. So once you've
reinforced the drawing, will just start
erasing with grids. So if you happen to erase a little bit too
much of your drawing, that should be fine if
you've marked it on weld and you can just
retrace your door. If the grid method
isn't your cup of tea, Let's take a look
at the option of tracing the image
onto your paper. If you're tracing your image, you will need a
light source like a light table or a window, or a glass table with light. And then they basically
just enough so you can see your image through
the watercolor paper. And you'll want to be doing
this in a dark environment. Just switch on the light source. Get your image and you just
fix it onto the table. Two corners is fine just so it doesn't move while
you are tracing. And then you place your
watercolor paper on top, make sure it's the
right way round. And you also want to fix that onto your image so
that doesn't move. And then just start tracing
the important areas. Remember we're
drawing a roadmap, so outline dark areas, areas you want to reserve, e.g. like the highlights of the eyes. And you just continue
until you've traced your image onto your paper completely and then you
can just remove it. The light back on. Those would be two alternatives
to freehand drawing. That as you can see,
they're a little more time-consuming and also
a little more tedious. So I would suggest
you get the freehand drawing a guy and
just see how you go. It really doesn't matter
if it doesn't look exactly like your
reference photo or we're looking for is an
indication to where to paint and a way to
preserve the white paper. In the next lesson, let's
just have a look at a couple of things to keep
in mind before we start. And I hope to see you there.
6. Before Your Begin: Hey guys, welcome back. So I just wanted to
talk about a couple of things before we start. And they are the
workspace set up some pointers about the colors that I'm going to be using. I'm going to talk about taping
your paper to your board. I'm going to give you a
point or bad avoiding a common mistake
when drawing eyes. And also what our aim is
when we're making a sketch. So I'm going to begin
with the workspace setup. So as you can see, I've got my palette over
here to the right. I've got my two jars of
water up the top there. I've got my brushes here. If we're going to
be using a pencil for the drawing as well, I'll have that right here. I've got some paint
tubes on the left here in case I need
to refill my palette. I have my clean paper towel, I have my test strip, and I have a wooden board. I will take my paper too. I have some standard color mixes that I like to use and I'll be uploading those as a PDF to the resources section
of this class. I do prefer to mix
my colors instead of using them straight
out of the tube. But as already mentioned
in this class lesson, I will not be going into how
exactly physically to mix those colors because I already covered it in a different class. Just head on over there if
you need more information. Okay, so for all
of our paintings that we're going to be making
in this 30-day challenge, we're going to be
taping our paper onto a surface like
a wooden board, e.g. and we have to make sure that
we're using the right side. So granular side, smooth side, we want to be using the
granular side at all times because the backside doesn't
absorb a lot of water. So we want to avoid using that. Maybe you want to do this at the end of painting each
day for the next day, or ready to motivate
yourself for that next day. Let me just quickly
show you how to avoid making the common mistake, which is drawing the
complete iris and pupil. What we would start with
would be just withdraw the eyeball and then we'll just put the iris and
the pupil inside. And then you have
to imagine that it's covered by an eyelid. The entire iris and pupil
are really only seen with expressions such as fear or
surprise or bewilderment. So that's really
important to know. So just remember that
when we're sketching and painting and don't make the mistake of drawing
just a round iris and ran pupil and not
covering up by an eyelid. When we sketch the eye, before we start to paint, it's important to know that what we're trying to do is make a roadmap for ourselves to know later where
we have to paint. So we're trying to give
ourselves clues, e.g. mocking and shadows,
highlights of the eyes or other areas
that we want to reserve, the white of the paper
of bright colors, etc. So knowing this,
there'll be a lot easier to decide what to sketch with a pencil and it doesn't have to be overly
detailed or anything. If you're keen in
the next lesson, let's start with 30-day
challenge with the very first. I, I hope to see you there.
7. Day 1: Hello and welcome to
the very first day of the 30-day challenge painting
eyes with watercolor. Thank you so much
for joining me. I hope you will enjoy
this challenge and I am really looking forward to seeing all of your projects. Okay, So I've decided to start this challenge with a
monochrome painting. And that is because
it is simpler to focus first just on the
painting aspect of things, and then work our way up to mixing colors and then
using those colors probably tomorrow then this is the image I'll be using
as a reference today. We're going to be painting exclusively with our blues lick. So if you haven't made up
a lot of their color yet, go ahead and do so now, I'm going to make a
pencil sketch beforehand. So if you want, you can trace
the image onto the paper. You can use a grid or you
can just draw freehand. I'm just going to go freehand. If you've seen my watercolor
portrait from a photo class, you will know that
when we're sketching, what we're trying to do is make ourselves a roadmap for way to paint and where to leave
the white of the paper. So basically just highlighting important areas to
give ourselves clues. So that's exactly
what we're going to do in this class as well. And observe how the pupil in this photograph
doesn't really round. I mean it is, but you
can't really see it. More like a diamond shape. And the iris has some really
cool patterns on there. So I'm just going to
draw those as well. Remember it doesn't
have to be 100%. Using the image as a reference. My ideas, this little
shadow here, just lightly. I feel like I've made the
iris a little tree Labs. Correct. Utensil. Sometimes it's also about looking at the
negative spaces, not just positive
spaces. So here e.g. and just notice that the pupil
is too large because the white of the eye is quite
large and the photograph, and it didn't seem that large. My drawing, I'm just going to move up the
pupil a little bit more so that it's
looking at correct? I'm going to leave it there. Now. I'm going to
start painting. If you want your
painting to dry a little quick and make sure you have
your hairdryer on hand. And just as when we using other colors will bring our mix over to
the mixing palette here and just add some water tasted that's
way too, way too intense. Let's try and make it a bit of a light wash and then
we'll get to them. They're just mapping the
areas that are the most and shedder making the brush stroke and then the depth thing
that as we please, you can see how it moves
a lot towards the sides. So take a little
pigment away from here. I can do this by just passing
your brush over it and then cleaning it and
then it on tissue paper. Or by using your tissue paper directly to lift up any
excess pigment or whatever. You can also use your test sheet as a
kind of a second pallet. Eyebrows as well. Because little water going to inject a little
pigment in the moment. Wet on wet technique here. They debit and then smooth
it out a little bit. The line here, we want to reserve some of the white of the paper with
the highlights of the eye. So this is where our drawing will help us here a little bit. And we're just starting
to indicate to ourselves the areas that we need to
build on and the next layers. So that's pretty much
just what we're doing in the first layer and we will
paint over the first-line. We probably wouldn't
see any of it, but this is just
really to get the ball rolling and stop this
building up of layers. I'm going to change
to my smaller brush. The number three. Start doing a little
bit of detail here. Usually this line of
the eyes quite wide, but this little bit of I
think they should be using. So some of the island
here is quite okay. I'm just going to
use my hairdryer to dry off the painting. So when that's completely
dried, let's just continue. Some more black Can starting with the details
now a little bit, make them more intense. Man, really intense. Just going to add some brush strokes here
because I don't want it to be all the same intensity as we always do with
building up our layers, even if it is just
with the one-color. Just click your brush
lightly here to start doing a little
bit of the eyelashes. Remember that you can also lift up pigment or water
with your tissue paper. On to more highlights
here in the AI. Because AI does not have very intense
outline of the iris. So I would put that on there being guided by
my drawing still here. Another wash over here. Over to the crease of the eye, intensifying There's
different see, quite intense strikes again. A little bit of pigment here. The shadow over here. And start to intensify some
of these areas that are pretty color over here. Now I'm going to do a
little bit of detail on the eyebrows in terms
of hair and things. Usually when we're painting, we don't want to be making
those, the cotton masks, but it works quite
well with hair, eyebrows and eyelashes
and things like this. Now that the pupil is dry, I'm going to just
intensifies there again. And here I'm going to start from the bottom
credit line here. As I said, there's some kind of byline I'm here, so proud of, but not the white paper. Back to the crease. Really happy. Hello left here. The indicates some areas here. Lotro the whole thing. Quickly. That drives. Can go back to my
number ten brush and just give a little
more intensity here. More than eyebrows. Just working on the
areas of the iris and the pupil here while
the other areas dry, remembering to visit highlights. Coming along. Goodwill wash
over the I will I will. Never completely wide even if we can't see it here very clearly
in our reference photo, I'm still going to put a
bit of a wash on them. It's going to dry it off again. It's going to make a very
light wash and go over that. Usually what line? Under the eye. Talk
a little bit here. So the trick really lies and adding the right
amount of pigment and paint, not going out at the top end. Very important is to
reserve the highlights, the white of the paper. These contrasts will
really make your painting stand out and you cannot
achieve it by adding white, lighter, There's a
certain amount of highlights you can add with
the white out of the tube, but it's just not the same. So I really encourage
you to practice leaving the highlights as
the white of the paper. Definitely more intense
and I'm trying to make Pencil. Lines doubling system
may turn and face trying to give the impression
of there being the crease in the eye
without outlining it. It's not even going to dry it off. And then I'm gonna
get a little bit with pencil, graphite pencil. Right? You want to make
sure completely dry. Because if it's still wet, you're going to ruin your paper and you'll ruin your drawing. So I'm just going to start here under the eyelash line where I always find
it a bit darker. Shade it very lightly, and then you add some
eyelashes there. Here. You feel like
you've used too much. Great, but don't worry,
you can just erase it. I grabbed logo with my pencil. Also going to try to define this a little bit
better with a pencil because I'm finding it
really hard to do so with the watercolor painting. Kind of grabbed my
number ten brush and really light wash. Not too much water. Going to go over
these types of game. Just continue increasing
the contrast. Really just adding
volume that way. Just want to be working a
little bit all over the image. Hello, little bit of color
here and the eyebrow line. Again. Now I'm going
to mix some a little more black into my blue black. We, tonal variation. Not too much, that's too much. Then I'm going to
intensify again. Remember that the intensity of the darkness here isn't
the same everywhere. So you can make some
tonal differences by going over some
areas and leaving other areas mean not
going to go over. You can really experiment
a little bit there. I really enjoy the
tonal differences in the iris and the pupil. You can see what I'm doing here. I'm just going over the areas
that I've already covered. Just getting into their eyelash
line a little bit again, the corner of the eye touching up some parts of the
pupil and the iris, intensifying the shadow
on the crease of the eye. Also just under the
eyelash line there on the eyeball and getting back into the eyebrows a little bit. Starting to intensify this
corner of the eye here. And getting back into the iris and the pupil
and the eyelash line. And just trying to keep
that tonal variety going on in the iris as well. So just making a
couple of random marks there to make it
look very organic. Heightening the contrast
underneath the eyelid here. Don't go over the top. Can always smooth at
the brush strokes. Really just we keep going heightening the contrast
until we're satisfied. So if at any point and
you're just satisfied, you can always just
leave it there. I really want to make this
stand out, out of the paper. Smoothing out the edges. I'm just going to intensify this shadow under the
eye just a tiny bit. To make a highlight
really stand out. You need to put a
darker area next to it. I just really want to get back into this white of the eye. So I'm just going to put some light washes on
this eyeball area. He had tried it again. Finishing touches I'm just going to make the data is part of the painting which
is the pupil really stand out by applying
every black. And also just here,
the eyelashes. Going to add eyelashes
to the bottom. We need a bit of a
lighter wash for this. Otherwise it's just going
to look really fake. Really ignores just erase that. Can say with a light wash, with the blue black light wash. Couple of eyelashes here at the top that make
them all the same. Some are in different
directions. I was a little clusters. Some. Sure it's not too dark. Can just go into
families details again, redefining a couple of lines. Define contrast. One more thing I'm gonna do
is just loosen it up up here. See how these islands
is coming out. Dry it off and there'll
be the finished drawing. Right? So that concludes today's day after
30 day challenge. And I hope you've
had a good time. I hope you've enjoyed it. And I also hope to see
you again tomorrow. See you there.
8. Day 2: Hello and welcome back
to the 30-day challenge, the early days of painting
eyes and watercolor. Today I've chosen
this image to use as a reference for
today's painting. And I've already
gone ahead and mix my colors that I'm
gonna be using. I am going to sketch my
eye today with a pencil. So I've got my HB pencil and
I've got my eraser on hand. You can trace the
image onto the paper. You can use a grid or you
can just draw freehand. I'm just going to go freehand. When we're sketching
what we want to do. I'll just remind you. We want to make a roadmap for ourselves so we
know with the paint and wait to reserve paper, e.g. and remember it doesn't have
to be 100% with just using this as a reference for
inspiring as painting. Okay, So this shadow
here as important. And we're going to reserve
this line here under the I put in the pupil and iris. And I'm looking at positive
space and negative space. So the positive space case
would be the iris and pupil. Negative space would be
the inside of the eye. So you kinda keep those both in mind when
you're drawing this. And then you compare
your drawing to your image and see
if it's about right. She's actually got a couple
of shadows on the here. Alright. I think that's the sketch. I'm going to grab my
number ten paintbrush and I'm going to start
with skin tone one. And we start with a light wash, just finding the areas. I It's going to smooth
out the edges here. Actually a little
lighter area here that I want to mask that. I wasn't aware. Remember that we want to be
making com brushstrokes. We want to be going
from beginning to end. A little bit wet and
width, if you'd like. Put in the corner
of the eye here. In the first layer. I'm really just trying to
establish some kind of ground and work with the
drawing that I've made and just suddenly start
to build up the colors. So that's why we started with a light wash and the
lightest color first. And we're just starting
to indicate to ourselves the areas that we need to
build on and the next layers. So that's pretty much just what we're doing in the first layer. And we will paint
over the first layer and we probably
won't see any of it. But this is just really
to get the ball rolling and stop this building
up of layers. And I'm just going
to dry that off now. Right guys, just remember
that you want your layer, this layer to be completely dry before you start
on the next layer. And I'm going to start
now with my skin tone to bring it around to
the mixing palette here. Checkout, right? Color suits me and
I'm just gonna go, going to start getting into the details here a
little bit more. So you can make the stroke and then you can
just smooth it out. A little pigment. So we're
just working away here, flexing on some details. I left line maybe no. I put that **** on
their gold dust shader. Also put the one
the second shadow. Slightly lighter. What? I'm going to grab a
slightly larger brush now and get into the shadow up here. Don't overdo it. I'm just applying
these first layers and just starting
to add in some of these details to derive it. Again. Now I'm going to do the eyebrow and I'm going to use the wet
on wet technique. I'm going to apply water
to where the eyebrows located and then I
will inject pigment. And let's also use skin
too for this first, just to give it a
bit of background. Just kinda dab your
brush on there. Let's see how that expands. It's quite nice and you want, you can smooth it
out a little bit that you just clean
your brush on your paper towel and just kind of go over the
edges with the brush. While that's drying,
I am going to get my small brush again and I'm
going to start on the eye. And for that, first of all, I'm going to use my
yellow or green color. And I'm going to try to reserve
some highlights in the, I can never make a very light wash because the eye is between
blue and green. Lighten that a little bit more. It's a little more water. Electric blue and some
yellow and add a little bit more of my Prussian
blue to this color. Even a little more. It's more like it. So let's
go again with this color. Let's move on to that, towards the inside
because it gets lighter. And then as you can see, there's like a yellow
on the inside. So I'm just going to go head and put a little bit
of yellow ochre, just pure yellow ocher. Let's save that. And now I'm gonna
go with my blue black and just touch people. So while we're waiting
for that to dry, let's have a look
of her eyebrows going wherever you want it to. I feel like mine is a little bit too defined here
down the bottom. Brush stroke. I just want to
smooth it out a little bit. And I am also going to get to my smaller brush again and take a very light
wash of the loop black. Remember you can use
your test strip as well as like a second pallet. And we're trying to
work out layers. So I'm just going to
go see how the white of the eye is never
completely white. You can see that this is a
really good example of that. It's quite dark. Blue times and red tones. Now I'm going to bed Miami
ten brush number three here is add a little
bit on the other side. And down the bottom there
we have a little bit of a reddish term number counter. Read them there as well. See how I've seen how the
iris is very visible. And you can see that in the reference photo
it's not this visible. So don't worry
about that because once we start darkening
around the eyelash, line the stem to appear as well. It's going to go a
little bit again. You will see how that
starts to look a little more natural once we
get into the darkness here. I want to work in this part
here with a little bit about purple shadow. I'm just kidding. They're just going to grab my skin tone
again, but I live. You will shadow under the eye. Let's way too intense. So let's just turn that down by cleaning the brush and then
taking out some pigment. So I'm going to add a
tiny bit of cadmium red to this Cephalus columns
of a second shutter. You can see those
different card game. Way. Too much light,
too much pigment. Make your brush stroke. And then I rinse my
brush a little bit, dry it off a little
bit, not completely. And then I can just
take it and make it smoother or tech where
little pigment at the end. I'm gonna go back to my
purple shadow and just, Hey, this past year, a little bit of attention. Remember that we
always want to be working with translucent layers. That's the whole
beauty of watercolor, is that it's translucent. You can see the
buildup of layers. New use it to build up volume. I'm just going to grab
that here a little bit. Dry quickly again. I'm going to get into
the eyebrow now. And I'm gonna do that
with coffee brown. Just kind of make
a few remarks here that we have eyebrows also
coming in from the top. Doesn't have to be realistic but not aiming for a realistic can. Conflicting the
brush or the PayPal. So now we're gonna go over the Eilish line again
with my coffee ground. The top and also down
the bottom here. My tree. I'm just clarifying
the details here. My purple shadow, a little
more, crimson, red light. Little bit of a shadow here. Okay, so very slowly we're
building up the layers. I'm just going to grab my Prussian blue and a
little bit of yellow ocher, the color that we made before, pretty much the green ARCA. I'm just going to go
over the iris again. Little bit of strong,
little bit wash, adding some Prussian
blue to the green. Or I can mix that we made. Whoops, made a bit of a mistake. To worry. Drive that. I want to give the eye general another guy was
the skimmed three. I just wanted to give
it a light wash. I must give it a background. Can just smooth it out
a little bit over here. So that was just
interested in so abruptly, with the eyebrows here, being careful not to activate the coffee brown of the eyebrow. We'll just go out again. Alright, making sure your board still attached to
your paintings. And let's go back
to the white of the eye in Tibet
and we're gonna get the blue black again. Just make it a light wash
and just get in there again because it's a lot darker than what
we've got right now. While that's drying,
I'm going to take another stab at the eyebrows
with the coffee brown. Can be a little bit
more intense than that. While that's drying,
I'm going to go back to the crease here just again with my skin tone to intensify that the splatter brush again. Skin tone, too much
water and pigment. Making sure your pupil
is completely dry. I'm going to get my
HB pencil sharpener and it's going to put a
little bit of scatter here. Can you use so as a
tool to help dock? And so we're not
going to overdo it. Just very lightly.
Don't press too hard. Don't want to make
notations on it. Python. Very light strokes here, the curvature of the eye. And I'm also just going to
deepen the shadow here, but I'm just not going to draw one straight line across
which is going to track. And at certain points, I'm going to go back
to my blue black. I'm going to darken the people. Lash line. See how it's dark and then in the
middle gets a little lighter. So let's try and just do that. Just kinda smooth out here. With my smaller brush still, I'm going to grab the yellow or green
mixture that we might pull some shadows
around the axis. I really feel like it's
all a little bit too red. So I'm going to just go get
them here under the eye, brown and a little bit
of that green shade. This part here is a lot darker. Let me go ahead and continue
with this **** I hear. Okay, I feel like
the eyebrows are still a little too light, so I'm gonna get back m there
was coffee brown and mix, a little blue black and there just a little bit and
make a couple of marks. And then I'm going to just
smooth that out a little bit with my skin too. I'm just going to
get back in the eye. More reddish tones in there. See how much a reddish times you get a very rough time for a couple of
touches down here. Now I'm working wet on wet here. Just a couple of very
subtle touches here. As you can see, not
too overpowering. We just want us to
look kind of organic. Not, you know, we're not going for the hyper-realistic thing, but organically be really cool. That's why if you read this way, two pigments gets better. To go over this path again with a light
wash of blue black. Move it out a little bit. I think I'm going
to leave it there. Then you can go as long as the one just one
more layer of skin, one very light wash the very, very light wash. Blue, black and the eyebrows. Just going to put a
few details them. More details. Find Rhode Island
doesn't look here. See other kind of curve up. Just a little bit. So I'm just putting in some
very fine details here into the iris. What the color that
I'm except earlier, the Prussian blue and
the yellow ocher, so pretty much the green. Okay. I'm going to use
lead in the pupil. And I'm going to dab some and smeared onto this wet area here. I feel like the I will still needs to get a little
darker in here. So I'm gonna go back to my blue black and give it another. So I'm gonna see if I can make the eyelashes a little
more organic over here by working wet on wet with the coffee brown
and the blue black. I'm not really happy with
the iris yet either. So I'm just going to add
a little curve there. Try it again. I'm gonna go over the
bottom lash line with some coffee brown and then go over the top lash
line with some blue black. My small brush just to make some eyelashes here.
We'll bring them back in. So I'm just going to grab some yellow ocher, pure pigment. And then with the shadow is going to go back and here down the bottom
that's very red, so I'm going to use my
skin to mine them here. No more here. Last but not least, my iris and some paths
around the edges. And black print on a couple
of lashes. Then the bottom. I am going to put one more shadow here in the
corner, the purple shadow. Okay, so I'm gonna
leave it there. Once it's dry, you
can remember from your board and you just
do it very carefully. You kind of roll out
the edges like this. You don't lift it up. You roll it out so that
you don't ruin the paper. I hope you enjoyed today's
lesson and I hope to see you again tomorrow for
another eye and say, did I challenge?
I'll see you there.
9. Day 3: Hello and welcome back
to the 30-day challenge. 30 days of painting
eyes of watercolor. Today, I've chosen
this image to use as a reference for
today's painting. And I've already
gone ahead and mix my colors that I'm
gonna be using. All right, let's stop. I've chosen this
AI today because I find it quite fascinating
how close up it is. That's really look
at some detail. Details, really, really
observe what's happening here. If you've decided to draw
freehand, that's really great. This is beautiful breakfast for learning how to draw freehand. If you haven't, don't worry. I prefer to paint,
to draw as well. Remember, we're going to outline things here that are roadmaps. So here is a shadow
that we went to. Outline, this shadow down here. Super interesting, look
at the blue tones. And I'm going to stop the
iris almost to the middle, pretty much to the end. And the pupil. You make a mistake. I'm
going to put this **** up. Quite prominent. We went to this little
white line here. Definitely. This dates to their pupils like in
the middle of the iris. Important. Well, I'm just looks off Draw and the
highlight of the eye here so that we
reserve that as well. Then the corner of the eye. I say, let's start painting. We are going to start with
skin tone, one, light wash. To remember we're just outlining interesting areas for
ourselves right now. I'm going to start with
this area, right? Yeah. So starting with a light
wash of skin tone, one really interesting because it helps us lose our
fear of the blank paper. So even though it would
probably disappear under the layers that
we put on afterwards, just kinda gets
the ball rolling. Today I'm going to
fill my entire paper, but not all with one column
called load too much, Sean, remember they
can always erase. It would color. That's putting a little
water on there with a clean brush and then just dabbing away with
your paper towel. I find layers. Just
want to make sure that the bottom layer that
you're working on is dry. Boys. Before settling
on the next layer, I'm going to put
one bottom layer of the green ocher
over the iris. Reserving at all times
there highlights, making sure we don't go over any lines we
want to reserve. The word paper did not
reflect the wider five. Keep observing your
image as the painting. We've made a roadmap
for ourselves, but we haven't outlined
absolutely everything would just wanting to paint in. Okay, So now I think this guy, I'm going to start
going over that with my skin tone to always
test your test paper, She's going to add a tiny bit of crimson and they're brownish. Just a very slight difference. I'm going to start
with brushstrokes. The crease of the eye. Also want to now just quickly go over the top of the eye
there with my skin tone three, which is what the cadmium. So it's a little
bit more orange. You can see it's got this
beautiful orangey tones here. And some of them apply the pigment by generously
smooth it out. Water. To again, get down
to this card, games. Intensify that a little bit because it's going to
work a little bit wet on wet. And this iPad here
with skin tone to it is I think under
the eye is dry now. I'm going to go get him there, as well as some skin turned
to especially this part here. I'm just going to go back to
skin tone one for a moment. Check out the top
of the eye again. A little bit too much pigment. Remember you can always
use your test sheet. Secondary mixing pellet. So I just want to
decrease proud. Here. Grab a little bit of skin
three from this part. Here. The pupil is now dry. I'm going to darken here. Let's go shedder. To begin with. Now you might say, oh, the dish as green, shouldn't I be using a darker
green for the shedder, Kim? But I find that using different colors too
dark and can intensify shadows actually adds a lot of interesting detail and
variety to your painting. You're gonna be going over
it with green as well. Later. Use in blue black pupil. I'm just going to stop. Let me get my skin tone to
a game with them. The crease of the eye
a little bit more. So you can see
there's just a lot of going back and
forth between colors. Adding layers, intensifying. So really building up those
layers to really give depth to our painting is going to go back to pupils. Smooth a little bit. And I'm going to grab my blue black and just a touch
more of the Prussian blue. So that's more than
black to blue. And I'm just going to
shadow here again, I want the paint to expand a little bit because
we're into the eyeball. I'm gonna get my green broker and just kind of go over here again. Don't like to come. Hello. I'm just making
some marks for that. There will be some variety, even once I've covered the eye, I'm going to get in there with a little bit of yellow ocher. And the moment you can
see what I'm doing here is getting small
regular mask scan. And I'm also going to go
over the shader here, subject to take them. If it's still wet, be careful. And you just want
to be injecting pigment and not moving
your brush too much. Okay, thank the bottom of the eye here is
probably right now, so I'm just going to
get in there with a little bit of shadow. Just going to make some
irregular brushstrokes and it gets cold,
quite expressive. Lightest wash them here because what I actually
want to do is put a little bit green bunker
in a minute as well. And here. Then I get in here
with my pixel shader. Then I'll work on the
crease of the eye. Purple shadow. Number ten, brush again, and
skin tones three. And I'm just going
here a little bit. So it was proud of the eye. Very intense than to make them lighter wash. And then
I'm just gonna go over here. Remember there's that one
white line that we want to reserve to skin tone one. This is a wash still. Lost. Can turn one cup of five if I feel like the iron is probably dry by now. So I'm gonna go over
the pupil again, some blue lake here and start making some
irregular months and hear about a
little crack here. I've just dip my small brush and some water and I'm just kind of diluting strokes so that they won't be differentiated to him. He used my yellow ocher.
I'll get onto this. Diluting these very precise. I'm going to start
putting a little bit of skin mixed with some
crimson onto the eyeball. Just a light wash. Smooth that out. I'm going to start with
the green under the eye. So I'm just adding this color to a few specific areas to give a bit of richness and
variety to my painting. Going to add a few more
areas which I find this lovely green
tone to the e.g. here, I like the eyelashes. Also up the top here. And I'm just going
to dry that off now. And I am going to start by painting the top corner
here, wet on wet. And I'm going to be using the green ocher but adding a
little bit of Prussian blue. And I'm there, but, and then, you know, that drives the meantime. I'm gonna see the same
for this area down here. Let me just dabbing
it in there and the paint starts to expand. It's going to correct
this brush stroke up here that's infringing a little too much of
my painting to me. I will take my skin tone
to darken a little bit. Here. Now I am going to grab its contents tree and
just go over this area again. And going down to the
bottom of the game, that's a little too intense. I'm just building
up the contrast. Looking for the areas
that are darker. I'm trying to really
make this stand out. Now. I am going to continue
with my coffee brown. I'm just going to give them to the shadow here
and a little bit. You can see what I'm doing here, just intensifying these shadows and making a few more months on the iris so that it really does look like a lot
of different shades. And the cookie observed
the photo really what a lot of variety in there. And get a little bit
of blue black and just kinda still wet. Soften the shadow
here a little bit smoother to blocky
from the right now. Can put a little bit
of wet on wet work. I'm sweating a few areas. I'm just going to dab my brush on the wet
areas and expands again. I think that's going
to give it a quite a nice organic feel. I won't let that dry. Meanwhile, I am going to use my purple shadow with my small
brush to get here again. It's going to work on any areas that still look a little weird. I'm also going to
grab my coffee brown again and just work on the crease of the
eye a little bit, making sure that it's dry. Well, that's drying. I
am going to grab my blue black and intensify
these two corners. But at the top, a lot
more than at the bottom. Now, I am going to get pure yellow ocher and a little bit little wash
on the eye as well. Make sure every layer you put on his translations that is
a lot of pigment in them, which I'm just going
to load a little bit. My back to school. Three. Last thing I'm gonna do is just put a little more emphasis
on this path here. A little bit more of a
shadow going on here. Got to wait for
this to dry first. I'm gonna get in here first. Grandma hairdryer again. You can turn to going to
go over this part here. The pure ivory black
for them to use. When the pupil and I
get coffee brown again, just intensify the shedder
and branch out a little bit, make it look a
little more organic. Want to go just quickly into this shadow under the eye
with the coffee grounds. Then I'm going to click on
the islands nine up here, a little bit of brown on there. You can actually see much. Either scan kinda insinuate
that there, there. Needs a little bit of
coffee brown here. Dry it and then I'm just
gonna do the eyelashes. I'm also just going to put a
very light wash over. You. Really want that corner of the eye to be a
little bit more pink. So I'm gonna get just
from a pure crimson and just go over this area here. And quickly. Now that it's dry, I can
see I need to intensify. Just touch here. I'm going to get into the
eyelashes, my smaller brush, coffee brown member and
you make a mistake. Not a big deal. It's going to blur the edges. I don't want them
to be too precise, but I do want to inject a
tiny little bit more pigment, the base while it's still wet. I'm going to be
working quite quickly. There is a little bit too much. So we're working
with a lighter wash first to define the
eyelashes and then we're going over the bottom part with a better, more pigment. You can also start at the bottom and then
do strand by strand, phasing them out and say Go. Working with small brush, water and paper towel. Starting to look
quite good. Here and eyelashes are not easy. Again, either you can start with the light wash and then
add a little more pigment, or you can start with a deeper color and
then phase it out. Use your artistic
license here as well. I showed them a
little bit more here. I don't want all of
them to look the same. So maybe you can vary
it a little bit, making the font a
little bit more solid, all the way through variety. And here as well. I'm going to get the corner
you a little cookie black on some of them, just these ones down this side. Remember if you make a mistake, not just embrace it. I might just leave
these ones here. I am just going to
grab my crimson again quickly and intensify. One of the I inject a
little more pigment. This red will really make
the green eyes stand out. Little detail here,
but enjoys us. A little too intense lately. I'm going to leave it there.
It's going to dry it off. Right? So that concludes
today's day after 30 day challenge painting
eyes with watercolor. And I hope you've
had a good time. I hope you've enjoyed it. And that also hope
to see you again tomorrow. I'll see you there.
10. Day 4: Hello and welcome back
to the 30-day challenge, 30 days of eyes. I'm going to be painting
this image today. And I've already gone
ahead and mixed my colors. Start by sketching
the eye again. Today we've got kind of profile. Remember that we're
not trying to go for a completely
realistic look here, trying to be more expressive. So don't worry if your drawing doesn't look exactly
like your photo. Also, a few, I'm not
too keen on drawing. You can always use
the grid method or trace your image via a light table or
another light source. Remember again
that the sketch is mainly roadmap for us for
where we want to paint. That means we're going
to be marking and shadows that we
find interesting. And also where there's colors
that we find interesting. To just go ahead and mark
those things on your paper. My pupil here. Remember that. It's great if you can
reserve the highlights of the eyes so we
don't have to be working with white paint. I will just mark those as well. Tend to fades here. So we're not going to map those to clearly because we can
actually see it clearly. Okay, let's start painting. Going to start with
skin tone one. As per usual, this is probably going to be
all covered by the end. It's great just to take away this fear of the white paper. It also remembering
that you can use your, your test strip here is the second kind of palette
to make a lighter wash, starting to feel some shadows. I find interesting, but don't want to be covering
my entire paper. Smooth out. If we find we've used too much. Remember you can always erase it a little with your paper. In the first layer. I'm really just trying to
establish some kind of ground. And we're just starting
to indicate to ourselves the areas that
we need to build on. And the next layer is just going to use
little water here too. This breaststroke fade
out a little bit. I'm going to get into the
eyebrow right away as well. Can we use wet on wet technique
for that to begin with, just to give it a bit of a
background with skin tone one. So you just add some water to the area that you
would like to paint. And then you just dip your paintbrush on
there with the pigment. Quite blurry down here. I'm going to take my
smaller paintbrush. So the number three, well the iPad dries and just
also got this details here. Just going to finish
them here and its shadow which I haven't finished yet. Still wet. So I'm gonna go
ahead and already start on the iris with the ocher green on that
a little bit here. The pupil and the iris. I hardly ever seen in its
entirety, especially the iris. So you don't want
to be going just drawing a full circle
and the eye here, that just looks weird. Instead we just see where
it ends down the bottom. And at the top you
can see that part of the iris is definitely
covered by the eyelid. Just going to go ahead and
fill in most of the iris, the screen color, the
highlights definitely, which I've marked for myself. And also I don't want it to be completely uniform so I apply and then take away some pigment, smooth announcement edges. Object to look in here. This is only the very
first brush stroke. So there's gonna be
a lot more to come. We putting on a lot more
layers also cover the pupil. Not going to stay dry. I'm going to grab my skin tone to start going over some
details like the crease here. We want to be building. I
felt layers as per usual, starting with the lighter colors first and then
working our way up. So I'm starting with
the skin learn too. Even though later on
we're going to be using the outer skin tones. Skin tone to the ligament. Continuing with skin
turned to the side. And I'm going to drive it off. Okay, so we keep going. I'm going to grab my
number 16 brush now. And I'm going to go back to the skin tone one and
make a very light wash. And then I'm going to
give most of the areas. We wash just to light one. Because obviously you can see that all of the areas are
pretty much in shadow. There's just a few highlights. I'm going to start with that. And I'm just going
to dry that off now. I'm going to start going in there with
my skin tone for now. Now that we've kind of
lost a little bit of fear. The white paper. It's building up. And Laos, this is what
we're practicing. Building up all
those layers with different colors,
different intensities. I always like to smooth out my brush strokes a little bit. You can do exactly
as you see fit. While that's drying, I'm just
going to go over the eye, the inside of the eye again. And I am trying to
get my green ocher again and just work a little bit on the areas that
are a little darker, a little bit of
variety in there, smooth out the brush strokes. The outside of the iris is also a little darker
as you can see. He's little wet on
wet technique here. Skin tone 12, little bit and
then use some certain parts. Outside IRA. It can be really free
here and your Keller use. These are just the
colors that I'm using, but you can choose how you
would like to use your color. Next, I'm just going to
give the pupil a bit of a darkening here
with the blue black. And I'm going to already go over the eyelash line a
little bit less black. And I'm also going to use some coffee brown in this part here with
the coffee brown, I want it to start
coming out of the paper. So I'm really just trying to add contrast and see what
colors I need to add. I was lacking contrast, so I'm going to start
using a little bit of the purple shadow and make
that a tiny little bit more reddish by adding
a little more crimson. And then I'm just going to stop working here on the crease the island with the brush clean and a little bit
and then smooth. Move that brushstroke. Kind of nitrate with the eyelash line to the
same side of the crease. Wouldn't get my larger
brush number 10.2 stack. And here it's a little too intense. While that's drying. I'm going to go back
over to my eyebrows, leaving a little
bit. The highlights. Maybe just go and live
with a smaller brush. Doesn't matter if it
doesn't look exactly like what its own your photo. We've got artistic license. So make sure you use that
to while that's drying, I'm going to get back in here. I'm actually going
to put a bit of brush stroke on this path,
actually freely doc. And you can see this
smooth that out. I'm going to go grab
my skin tones six, which is a little
bit more reddish. I'm just going to get into
some of these areas here. We're going a little
more loosely today, I guess it's just the
kind of mood I'm in. I know that the Iran still wet, but I'm just going to put a wavy lines here
right next to it so that maybe we unify with
this reddish color. See that there's a shadow
under the eyebrow too. I'm gonna get my skin tone one, fill this barrier here. Not the lightest
part of the eye. Also going to get. And I hear a little bit careful. Leave it white line
there as well. If it's coming along, just
going to drive it up. Once that's dry, I want to just go over these
skin tones again. And I'm going to go in
again with my skin tone, six, slightly more reddish one, and go back over these. As I have here, just kind of go over the eyebrows a little bit, co-operate those. Just continue increasing
the contrast. Really just adding
volume that way. Just want to be
working a little bit all over the image so that parts of it dry and then
you can go over it again. And while that's drying again, I'm going to go over
the inside of the eye. Actually going to just work low wet on wet and this corner because it's a
little bit undefined and a reference image. So I'm just going to see if that will make it a
little bit blurry. If I did a little bit
of pigment on there, it's going to intensify, densify a little bit of
coffee brown on the pupil. I'm a little bit more. These paths, iris and
dark and this past. Lot talkin. Just put a little bit of like, um, they're gonna get a
little more blue black. And here, I really want
it to be quite dramatic. People. My skin tone 12th to spend a little bit more
in here and the iris, It's got a little bit of brown. You tend to find
that area there. And then also an
unmixed coffee brand with the skin tone
12 shader here. I'm going to get
the skin turns six and the coffee brown just intensified to six
and coffee brown. While that's drying,
I will go back to the eyebrows
with coffee brown. Define a chair. Then. I'm just going to dry that off. Now. I'm just going to go back
to my skin tone one. Sure I'm not even
too much water or too much of color
and I'm just going to apply a little washed out because it's
actually not white at all. That why does the eye is not quite little bit more
pigment in there. And also not quite at all. In this part here
is darker orange. I'm just going to
give some areas a bit more of an orange
tint because I feel like that's a
really nice blue light that we can see in this picture. Orange lives. Remembering to visit
the highlights just with the net of it. Because the skin tone one, I'm just going to
add some cadmium because essentially
it's when again here, make it a little more orange. It's gonna go back to my green ocher just
with a bit of a wash, add a few shadows and this
tonality sounds labs, you can see one of
those shadows here. That's drying. I'm going to
grab some pure yellow ocher. And I'm just going to go a little bit with
this darker color. Try that again so I can see
what the colors look like. I just feel like we need to
intensify a tiny bit more. I'm going to start
with this part here. It's going to get
the people shed and mix it with a coffee brown. And then I'm going to
make sure I don't have too much water on my
brush and get back. And then I can just go into some of
these details again. Defining a couple of lines. Some contrast and shadows. Let me go back to skin tones
six mixed with coffee brand. And just go and
tense a little bit. The shadows and the iris. Just observe what's going on in the reference
image. I'm going to Intensify the pupil.
Small blue black, adding a little more
black to the blue black. And I want to say the eyebrows. Like we could use a
little more skin tone to, with a little bit of
cadmium red here. Here. Also here. Darker. Done a very good job of reserving
the white of the paper. The key is I'm just going to try and pick up a little
bit less pigment. Then go over it. This part here, just a
little bit of the skin too, and crimson, red. And I feel like the Irish still needs a
little bit more contrast. Again, I'm gonna get my
skin tone four areas here. Give it a little more variety. Intensify the pupil. More green ARCA. Here. Right off again, like
I've made a bit of a mistake and whether
the pupils shape. I'm going to grab my
coffee brown and just pull the pupil down a little
bit because I feel like it's a little more
elongated than others. Round reference whether or
not it is look exactly like. I just feel like that'll
be a good thing to fix. And then I'm going to take away a little bit of the
pigment on the side here. A little bit more darkness. I'm going to add the
eyelashes in a moment. That's the last
thing I'm gonna do. Feel like I could get under the eye again with a little
bit of the pencil shadow. And just getting into some of these creases above
the eye again, area above the eye, just heightening that contrast. Wanted to, I'm a
little more red eye. So again, I'm gonna
get my skin tone one, read certain areas. And with my skin tone to this
area again is too light. This this a little bit. So remember that if
you're going to modify brushstrokes after
they've already tried to do this
really carefully. So you might just run your
paper if you're not careful. Okay, I'm going to start
with the eyelashes. And for that I'm going to use purple shadow and mixed
with coffee brown, making sure I don't have
too much on my brush. To find a couple of eyelashes. Smooth them out a little
bit so they don't look like they're Photoshop. The top. I'm going to use
a little bit of blue, black and the mix to
begin with as well, because it's really
scary, dark up here. It's going to flip your page, like the beginning of
your brush stroke. And it's the best type
you want it to be. Quite thin, wispy or at the end. I can also make very thin
little lines at the top here. Retouch the ones down the bottom here with a little
bit of bootleg. Want it to be quite subtle so
that it doesn't look fake. Just a couple of
strokes over there. Just intensified top here. Adding a little more
black to the blue black. Little more intense. And as a finishing touch, I'm just going to add more black and I'm going to
intense the pupil. Very dark is pointing
to that painting. I'm gonna drive and then I'm just going to
leave it that way. Maybe I will try one
more thing to give it that lovely sun kissed look. I'm going to get a very
light wash of poker. Really just very live
and just apply it over. Now I'm going to dry it. Now that I've added
the wash of ocher, I feel like I need to
go over the eyelashes again to just define
those a little bit. So kind of all
stuck together now. So I'll just do that. Then it's done. Very last touch. Good. Shadow here. Just the very last touch. I'm gonna get some
coffee brown and just really just
this pattern here. Make it a little bit. I'm going to drive and then I'm just going to
leave it that way. Right? I hope you've enjoyed today's
lesson and I'll see you again tomorrow for another
eye and say, did I challenge? I'll see you there.
11. Day 5: Hello and welcome back
to the 30-day challenge, the early days of painting
eyes with watercolor. Today, I've chosen
this image to use as a reference for
today's painting. And I've already
gone ahead and mix my colors that I'm
gonna be using. I am going to start
by sketching. Remember if you do not
want to draw freehand, you can use the
method with the grid or trace your eye
onto your paper. But I do want to encourage
you to start drawing free hand because it really
is really great for practice. You have to focus on this one
element which is the eye. And it doesn't matter
if it doesn't look exactly like your photograph. We're trying for a
expressive painting here. So not photo-realistic
or anything. Observe how this, this, this, this large space here between where the eyeball stops and
the eyelid comes across. Remember also to look
at the negative space. So we need to be able
to draw out iris. Just look how much space is
left here of the eyeball. Just lightly press with your pencil so that you don't get any dents
on your paper. I'm going to mark and the
highlights of the eye. But I want to leave
as the white paper. So what do you want to be doing? You keep looking at the eye
and then at your paper, I'd paper, and
that's the way you sketch it most accurately
onto your paper. So you're constantly having this conversation
between iron hand, what's going on on the image? What's going on on your paper? Takes a little bit of training, but once you've got it down, it really is very helpful. The shadows of the eyes here, this one that's slightly
darker, very brilliant light. So we want to link
all this white paper. Okay, I think I am good with it and I am ready to
start painting now. So first things first, as per usual, we're going
to start with asking one. Even if we do end
up covering most of that with the subsequent layers, It's really great just to release the fear of
the sweat paper. And now we stop. Remember
we don't want to be covering the entire paper
with one color and making ourselves a roadmap to
where we are going to paint more intense colors
and where the shadows. You can see it's a
really light wash. Do you feel like you're getting
a little more confident? Really hope so. I feel like I'm
improving every day that I'm doing this challenge. Just filling in
these spaces here a little bit under
the eye shadows, making sure that it's dry. I'm just a game. Just put a little bit
of color over the top. They're still what
that Kyla term one. Remember that the
white of the eye is not really completely white. So while that's drying,
I'm going to go over the iris and the pupil. And for that, I'm going
to take my green. Remembering that
I have some areas that I want to reserve the
white of the paper for. I'm just going to stop
doing it in sure. I'm observing those areas
that I want to reserve. Take away a little bit of the
pigment around the pupil. Don't want it to
be just one color. So as we've practiced, you can just grab your
brush and keep the, keep dabbing it on
your tissue paper. And then you just go
over areas that you want to remove a lot of
pigment from and you just dab your
brush on there. Make sure you're getting
a bad at carefully. Otherwise you might
break the paper. If you want to remove a little more than just the
tissue over there. Well, that's still drying. I'm going to go
over the eyebrows. And again, I'm doing
this wet on wet. And just to give it a
bit of a background, I'm going to start here
as well as my skin tone, one, going to start with
the crease of the eye. And for that, I'm going to
use my skin tone to end my smaller brush and just
find that fascinating. If you observe well, you can see that the 36 I am. This test throws the shadow on the eyelid directly
above the eye. Smoke outfit, brush
stroke a little. And towards the end here
make it almost disappear. You can see it's quite clear out the little glad
I chose this I, for the great Highlands. But it has really
enjoy that it's different than the
lighter areas are the areas that are
often lives and other eyes here are
dark, like this line. Between the eyelid and the
eyeball, often this lighter. Then we hit this
beautiful detail of the lighter lines around here. I'm gonna get my
skin tone one again. And this area inside
of the eyelids, bit of a strange area. So again, to my larger brush, I'm going to start working on
the shadows under the eye. Again, let's can turn
to the contrast here. Often in the eye, this is the dot product, but you can see here it's
actually lighter than here. And then inside of
the eyelid here. The permit, very interesting. My skin tone, well, very light wash and just kinda give it a
bit of a cut over here. I don't want to focus too
much around the area. Just a little bit so that the widest white of the
paper really sticks out. Which will be just the
areas here and here, pretty much in some
areas around here. I'm going to draw it off. Again. I'm going to get my
skin tone to it and get a little more
into this area here, just make a few. Come over here, pay little
attention to this corner of the eye here as well. And kinda let it to
sell my skin one, I'm just going to go
very lightly because of the white paper animal skin one. I'm also just going
to light wash areas. While that's drying,
I want to go back over the iris and the pupil and I'm going to do
this with blue black. Now. Don't go overboard
with intensity. So we want to still
have a translucent. And I'm just going to
start with my small brush. I'm going to let it let the pink dissolve into the iris
from the outside. I've just wet the inside a little bit so that it
can expand into there. This side, it's not, it's not that clear. It seems to be some kind
of reflection of a window or something to find. Remember, you can
always make it more intense when you feel
like you haven't got enough intensity by injecting pigment pupil to
expand a little bit. Straps around here. Brian. And that guy worked on
the eyebrow little bit. And again, working the wet on wet and just gets cleaved brown. But my number ten
brush dab it on their can't really show off this past pretty
much dry now. So I'm going to start applying a little shadow with
my purple shadow. The most intense stereos. I observed them here. And here. Like this line. I'm going to close that with
a little clip of Shinar to making sure I didn't have a continuous line because
it looks photoshopped. Just breaking it
up in some spaces. That's quite dark. And here I can just go into
some of these details, again, defining a couple
of lines and contrast. Now under the eye, I want to use a little
bit of my green ogre. Feel like there's a bit
of a greenish shedder. I'm also trying to kind
of see the shapes of the face and I'm trying to mimic those with
my brushstrokes. Try and preserve this white
line here a little bit. Now, I am going to get a very, very light wash of blue
leg. To be very light. I'm just gonna go over
the eyeball because it is definitely not
white in this case. So trying to reserve the whites of the paper
where I've mocks them. It's going to be real careful. We got a little bit it's
a little more pigment than these areas
where it's darker. Well, it's still a
little wet so that it doesn't leave very
defined lines. Careful not to overdo it because then you
might break your paper. Little area around here and it will pop out more
of the eyeball is Docker. Obviously you won't be
able to see white areas imaging unless you
have a contrast. That's why we are putting
on a wash to the eyeball. Because otherwise the
whole thing would just be what can't see with a light. But as you can see, I'm gonna get my skin tone too. You can see that in
the left corner of the eye adds a little
bit more reddish. So I'm going to do
that. I have it there. Put a bit of a red portion here, doesn't have to be completely
dry it and your blue book, It's fine if that mixing
them a little bit. Try and break up
this brush stroke over here a little
bit, the eyebrow. Next, I am going to
intensify the eye, the iris pupil
again, it's dry now. And for that, I'm going to make my blue black and a
little more black, adding little more ivory. Going to make the
pupil extra intense. So a couple of
highlights from there. And then making the wash
a tiny bit less intense. I'm going to go over
these parts again. If your eyeball is still wet, make sure you're careful if you don't want it
to be expanding into the wi wi and
don't touch it. You can see I'm just making some lines going
into the eye here to simulate a little
bit these patterns that you have in the iris. Again, these highlights
will only really stand out if they are in contrast with the darker shadow next to it. So we need to make sure that there's what a
contrast here so that you can see the
highlights of the film inject some pigment and some areas so that
B has more variety. Right now while that's drying and the eyebrows
still a little wet, I'm going to mix a little
coffee brand or the blue black. And I'm just going to
make some brush strokes, something like the
eyebrows here. We have a low texture. I don't want it to
look realistic. I just want to kind of
look like an eyebrow. Then I am going to
continue deepening. The shadow is above the eyes
were coffee black and a tiny bit of shadow to
heighten the contrast here. The same color. I'm also just kind of
give you a little bit. The last thing we're gonna
do is at the eyelashes. So remember, it's still going to add a little bit
of contrast there. Wanted to add a
little bit of a line there to smooth out the iris. Really not happy
with the eyebrow. I'm just going to add a little water take-away, but a pigment. More water, little more pigment. If you do this, make sure
you're really careful, otherwise you could really
ruin your painting. So just don't overdo it, but you can always reactivate the pigment on your
paper and remove it. So just really lightly
with your brush that rabbit trying
to get a stain out. I'm going to wait
for that to dry and then I'm gonna
go over it again. In the meantime, I would
take purple shadow, make it a little lighter. And to get them to the
shadows under the eye again, like them though darker shadows a little bit. Kind of connect the
two sides here under the same color shadow. I'm kind of rounding it up. It's going to take
a little life and their shadow on the
hit is quite intense. Now the eyeball is dry. I am going to grab my small brush and I'm
going to start applying a little bit of a reddish tones that I'm going to
get my skin tone. One can just work this theory
here a little bit with red. And then at the top,
and then it gets. Maybe around here, a little bit happy with this
content here yet. I'm going to grab my shadow as well and just a
very light wash. It's going to be very light. Right here comes down the bottom. Just put it back. Really nicely sung
about both eyebrows. I'm going to try it
again. Just make them come out this year. Then while I'm at it
was good coffee brown. I will give this another layer at the top
to intensify the shadows. Here, it's going to be dry. The layer underneath that
I have to get a bed bath. And then it's going to go over part of this inside,
but not all of them. Also on this side. Well, that's going to be
covered by eyelashes soon. Maybe rather get my larger
brush here and I can drag. One thing I do want to do
is intensify the pupil. So I'm just gonna go
almost complete black, coffee brown girl, like making
the pupil around circle. I feel like that's
just saw unnatural. The pupil is brown. Yeah, but if you draw
it like a full circle, which just looks a little
bit like a cartoon. Which is fine if that's
what you're going for, but I'm not intensify little bit around the
edges of the iris. And then getting some more coffee brand
a little bit darker. Because I go over
the eyebrow again. Careful not to touch
this, just worked on. I wrote this double
width. It's fun. We actually just want them to
be in the background so we don't want to define
them too much. Just going to go back to my
purple shadow a little bit and work on these pots
around the ival again, feel like the quiet find. I haven't defined
them enough yet. Okay. And I tried
to avoid drawing lines that go all the way
through the same intensity. If you want to put
a line through all the way through and make
sure you vary its intensity. Maybe faded out or make it
a little slimmer, low-fat. My skin tone to them. Just going to go over this
bottom half of the tracks. I feel like that needs to
come out a little more. The purple shadow again
to skin tone one, I'm just going to
cover this flight. Okay. I'm just going
to drive it off. Just wanted to go over the
very top part of the eye with a very light wash to grade it a little bit
faded out and not have it. Stops are rapidly. If you don't want to
do there, That's fine. I feel like that's something
that I want to do that now. Working on the areas of
the iris and the pupil here with a very light
wash of the grain. Okay. I've made my eye a
little more green than blue. Just try it again. Do the eyelashes. I'm going to start
with coffee brown, and then we'll see if
we work our way out for coffee brown as fun
for the contrast. Some really beautiful
eyelashes here. So I just kinda make
these wispy movements in a dry my brush and I'm trying to fade it out a little bit
towards the top there. I want them to
look photoshopped. You mess up, but it's not
it's not a huge deal. Once you start back
in, in some eyebrows, eyelashes with a little
more intense wash, other one will just fade
into the background. But try and be a
little more accurate than I've been here. You don't want to be
making them all the same. That also looks
really unnatural. You can see that they
kind of clusters. They swing down
and then come up. If you have a very fine brush now that would be
the time to use it. I tend to gloss months, so I'm just working with
this brush, but that's fine. This is why we're
starting with light so that if we mess up,
it's not that obvious. Once we've got them down, we can just add a little
detail of darker color. I would not recommend
starting with a blue black. Okay, so there we have the eyelashes tends to find
here building up some layer. So we using the coffee ground, take advantage a little
coffee brown layer as well. And I'm going to go with a
more intense coffee brand mix. So with little more ivory black. I'm just going to
add some details. Make sure your brushes last. You just keep going. You want to intensify with a little blue black, some areas, some of the
eyelashes carrying, making sure that my
brush is nice and thin. Sometimes just take a
little color away from my brush and then I can
smooth out brushstrokes. Now we don't want them
to look the same, so we're not gonna
go over all of them. I'm going to take no more coffee brown and black and
just work on these ones here because they
are quite thick and they make this corner of the eye seem a little darker. Now I'm going to attempt to do the eyebrows again
just a little bit. So I'm just going to go over
just this pub game or black, dark and then a little coffee brown and just
darken this area. Just going to go
over the iris again, but literally just take a little bit of
pure Prussian blue. And some areas not everywhere, not in the areas that
we've reserved for the highlights of the eyes. I'm going to dry it off now
and then it's finished. Right? So that concludes today's day of the
30 day challenge, painting eyes with watercolor. And I hope you've
had a good time. I hope you've
enjoyed it. And that also hope to see
you again tomorrow. I'll see you there.
12. Day 6: Hello and welcome back
to another day of the 30-day challenge painting
eyes with watercolor. Today this is the image
we're going to be painting. So we're going to go
back to monochrome. And I'm going to
start by sketching. And I think today I am going to try a little bit of
wet on wet technique. I'm going to start sketching. When we're sketching
what we want to do. I'll just remind you. We want to make a roadmap for ourselves so we
know with the paint and wait to reserve paper, e.g. reserving some highlights here, I'm going to try to
resist these highlights. I'm working wet on
wet. I'm just going to be a little more difficult,
but I'm going to try. I don't usually work with them. So this is going to
be an experiment. I just stay with me.
We'll see how it thins out and seeing as how to control
than wet on dry, I've decided to make it
monochrome today again, the middle line and
I'm going to start, I'm just going to
grab my larger brush, the number 16 and I'm just
going to slide water, make sure your brush is clean. Mine seems to be a little dirty and it's going
to lift that back up quickly and then clean my brush and just get
some clean water. It's going to remove
a tiny bit of water. It's a little too much, a few papers too wet, then your plane will
literally just go everywhere to be a little less. Control that so that
I can still apply the paint to wear one
from an oblique cut hair. I'm just going to
take some water, just dry it off the parts
that I want to reserve, the one that doesn't go there. So e.g. that highlight this
one under the eye as well. My paper towel
dabbing it on there. And then I'm going to
start with blue black. That's the only color I'm
going to paint with today.
13. Day 7: Hello and welcome back
to the 30-day challenge, 30 days of painting
with watercolor. Today, I've chosen
this image to use as a reference for
today's painting. And I've already
gone ahead and mix my colors that I'm
gonna be using. As the usual. I'm just
going to go go ahead and sketch that out. Just roughly. Remember our sketches
supposed to serve us as a roadmap for where
we're going to paint. I'm just going to put
them in the forums here. That the inside of
the top eyelid here. Don't worry if you
make a mistake and it was just go
ahead and erase it. And remember it doesn't have
to be 100% with just using this as a reference for
inspiring and painting. Freeze above the eye. And then I'm just going to put
in the iris and the pupil. But remember when
we're doing less, we're looking at
the positive space, which would be the
iris and the pupil. The thing we're putting in
and the negative space, which would be the
bite of the eyeball. So you kinda keep those both in mind when
you're drawing this. And then you compare
your drawing to your image and see
if it's about right. Then we've got the pupil and see this reflected who's
taking a photograph. Not going to do
it all in detail, just going to put them into basic shapes because
they are highlighted. Then I am going to mark and for myself this highlight here. So that I remember to save
the white of the paper. Then I'm going to see what other highlights I
have in the eye. So e.g. I'm going
to tidy up hot down here because I have this
beautiful little white line. For me. It's always important to
keep these these highlights. And because they are what really makes the eye come to life. When we've got a highlight
up here as well. Because the lashes
coming across here, it's called a shadow
underneath here. Right. So I'm going to start off
by wetting the paper. I'm just kinda make
sure the entire plate is covered with water. So using a larger
brush and clean water, make sure the brush is clean
and the water is clean. I wasn't going to have max that you don't
want on your page. That should pretty
much cover it. If you want to make
sure you can always just look a little shiny, more or less uniform, and make sure that your
paper stays tape to your board because
the foot lifts up before it's completely
dry your paperwork. They've walked because
I'm just going to give that a second to sink in for I start to paint something
that's pretty light. So I'm gonna get my
number ten brush. And I'm going to start
with skin tone one. Bring it over from my
painting compartment, my mixing compartment
over here to the palate area and
onto the test strip and just like a lighter wash.
And then I'm just going to start defining some areas
here that are darker. Now where you left
off brush is where the paint is going to expand
the most onto the paper. So just keep in mind,
as you can see. He wanted to help
yourself be able to recognize darker areas better. You can squint your eyes. It's always a really
great way of just seeing areas instead, details. Just keep going. This is just the
very first layer, so we'll be painting over
this, but I always find, it's great to get
that first layer going so that the nerves of the white paper gum still continuing with skin color and one slightly less light wash. Either some areas that feel
a little more contrast. Now, if you feel like
your highlights are being embedded in the paint as
expanding into those areas, you can get some tissue paper and just add those areas dry. So when expand onto dry areas with a bit of a lighter wash and
then clean my brush, dry it off a little bit. And just soft brush stroke. I'm just going to smooth
out this transition here. In this corner as well. I don't know if
you remember this, but the eyeball is
never completely wiped. The highlights are
completely white. So in order for the highlights
to be able to send out, you always need darker areas. If there's too many white
of the paper areas, you will not have
the same effect of highlight really
standing out. I'm just gonna go
over them inside of the eye was my skin
tone one as well. It's got a little bit brownish, reddish tinge and you can see the paper he has
pretty much dried already. Gonna go over the
reflections of the person taking the photo because it's probably going to
be the highlight. This Kellogg's can turn one. Keep going. To use a little bit of a clean brush
with a little bit of water, spread out these brush strokes. While we're doing
this, the rest of the paper is drying,
which is good. Okay, And then I'm gonna
get my number six brush and I'm going to start painting a little bit with skin tone to go into the creases
up here, e.g. intensify these shadows. Paper still a little
bit wet so it'll expand in some areas
where it doesn't. You can always modify the brushstroke with
practice this as well. So you can just smooth it out
after cleaning your brush, drying it off a little bit, just getting rid of
the excess water. I'm just smoothing that out and I don't want us to
expand quite so much. So smoothing that out too.
And we'll just continue. Same thing. The planet areas
that are a bit darker. So e.g. here the eyelash
line is actually quite dark. I'm hardly see any of the
bottom of the eyelid, so I'm just going to make
an area of darkness here. I'm just going to put a
little bit of color and I will smooth out. Continuing with skin tone. The idea here, the less pigment and
less water to my brush, onto my tissue paper to
get rid of the exosphere. And I'm going to find this
area a little bit here, a little bit darker. Just keep going. I'm going to put a little
bit of a darker line under the highlight that we've preserved and send
out a little bit more. And you can be, don't like
it to be this the fun. You can just smooth it out
towards the inside of the eye. Gonna go back to my
number ten brush. Now, I'm going to
work a little bit on the area under the eye and I don't want it
to be too intense, so I'm going to make
a lighter wash. And then I am going to find this area a little bit more of
a shadow under here. Underneath I directly
meet the corner. Here. I'm just cleaning my brush, dabbing it on my
tissue paper and just moving out
these edges here. Dry off my brush again. I don't want the pigment to expand too much into this area. So I'm just smoothing
that out so you can still see
that there's a bit of a lighter part in
the middle there. Protrudes. Next thing I'm gonna do is with my
number six brush. It's getting some
of the green ocher, bringing it over to
my palette here. Hello to light, a
little more pigment. And my, my test strip, I can see what consistency. And then I'm just going
to work a little bit on the iris here. Just going over these areas. My wash. Remember the highlights that you've reserved
for yourself? Don't paint over those
who work on this part. A liver and a little
more water to fill the firm doesn't have
to be uniform and failed to find it more interesting
when it's not uniform. I'm just going to get
a little more pigment. Then I'm just going to
inject it into here, see how it expands
into this wet area and nothing that's really
nice because it's a really nice watercolor color. Feel. These little look different
ones it's drives. Another thing I'm gonna
do, cleaning my brush, just still working with
my number six brush and just having a
little bit better, I'm just going to wet the area
directly next to the iris. The iris expands
a little bit into the eyeball area
for quite enjoy. That smart, neat,
it's no more organic. I continue now. Now that the paper
is pretty much dry. Again, I'm gonna go
back to my skin tone. But more of an intensive wash. I'm just going to put
an opinion details. When the papers wet and
we're working wet on wet, it's hard to get details on
because as we saw before, the paint starts to expand and I really just want to get a
couple of more details in here. Just trying to put
the brush stroke on, then clean my brush. And the brush strokes,
smooth it out. Do the same for the knee, smooth it off onto the pilot. Then I'm going to go
back to my skin tone. One, a lighter wash. I've got my Number
ten brush again because I'm going to go and I again get a little lighter still by cleaning my brush and then extending the
brushstroke and the pigment. And bringing your background. Maybe also hear no more water. Inserting a little bit
more pigment over here, and injecting a little
underneath here. I really like how
the paint expands, but you've gotta be careful because it's not very
easy to control. Wet on wet is very
hard to control. So I'm going to go ahead
now and get my blue black. Make a light wash of that. Lighter because I'm going
to go into the eyeball now. Going to put a
little bit of color. You can then cleaning
off my brush, just extending that pigment, remembering the highlight bottom there and offer them to the
same on the other side. Remember if you've got
too much pigment on your brush and accidentally get it onto your
paper, doesn't matter. You can just clean your
brush off and lift it up. Or if it's really, really
a lot and you can look to that as well with the
piece of tissue picked up. Now, I'm going to grab
my purple shadow. Can just go into some
of these details. Again. It doesn't have to
be uniform all the way across and just do it in
certain areas and that way it looks more organic.
Cleaning my brush. And I am modifying
the breaststroke. And continuing with
the purple shadow. A bit of a lighter wash. Put a couple of
areas and darker. That's part of the eyelid, e.g. just smooth it out
underneath the eye here. The corner of the eye. Hear me. Now remember that the
area that is next to the highlight
needs to be darker. For the highlight to stand out. I'm going to grab a little
bit of the green ocher, light wash, lighter than that. Then add that to the skin
pigment a little bit. While that's drying
a little bit. Let me go back to blue black and just work on the iris and
the pupil a little bit. Darker parts sample the outside of this virus is quite good, but it's still a little bit
wet right next to it because the way it's been quite organically into the
area of the eyeball. So as you can see
with building up layers and with patients, water to these outlines here. So it also expands
organically into the iris. Go back to skin tone to per minute with my number ten brush. Just add more contrast. Some of these areas continue must contend to check
to know payment areas. Okay. I'm gonna go
back to purple shadow. What's my number six brush? And just add them wrong. No contrast. Some of these barriers smooth
out a little bit. Adding some shadows,
the shadows. I smoothing it out. That's redefining
a couple of lines. Buying some contrast
and shadows, injecting a little pigment. I'm here either. And all of this
area is going to be darker anyway because
of the eyelashes. I'm just trying to inject
some more pigment line here. Maybe getting in
contrast as well and the iris and the pupil
using a bit of shadow. Obviously I'm layering
on top of grains. When people be more
of a brownish color. That's redefining
a couple of lines. Skin tone, one here, lovely, orangey brown tinge,
just layering that over here and so that it
expands a little bit with the Google shared
on the outside. You can observe the
only white paper. I actually, this
highlight up here, that's the only one we
don't want to cover. Okay. And I'm going to put them little more skin tone ones here, bottom of the eyelids and a little more skin tone one
up here I have a crease. Shadow under here. My size ten brush, making sure it's clean. And I'm just going to extend that a little bit
contrived one as well. I'm also going to put a little
bit of skin tone one into the eyeball because
there's quite a bit of red and they I don't know
if you can observe it, but I feel like definitely
a lot of freedom. I'm gonna get some coffee brown. While this is still wet, just inject a little pigment, making sure it doesn't expand too much onto the top eyelid. Just going to get some paper. I'm just going to dab this area a little bit so that it's
dry and paint white, want to expand into there. Then I'm going to continue
injecting some headwinds. Here. These dark areas, the pupil outside with a
light wash of coffee brown, start working in these lectures here just on the general area. And I'm going to take a
little bit of the pigment or MTO experiment a little
too much for my liking. I would the dry brush. I just put the shape
that I want again, just a little bit
more coffee brown area here and then smooth
it out with a clean brush, is clean and dry, that is highlight sends out by adding a little
bit with that less than. Then just continues
moving about till you hippie, liberal coffee. I'm just going to add a little
bit up here, the crease. And also that's really sadly. I'm just noticing
now that this has expanded a lot onto
the bottom eyelid. So I'm just smoothing
that out a little bit. The inside of the bottom eyelid. I'm going to grab my
number one brush now. Just get some coffee brown
working on these eyelashes. So I just use my brush
to lift them out. And obviously, where you flip, the end of the brush
is going to be the finest line
that you can get. And I like to work with coffee
brand first because it's not as dark and make a mistake. It doesn't doesn't
matter so much. We've got over those areas again with blue black afterwards
when we're done, observe how the eyelashes
are more or less. You don't have to do the same and try and kind
of keep it varied, not one eyelash after the
other and said, Hey, the same. Doesn't look very organic. Can see they start going in
a different direction here. You observe that before
that when you're looking front on it
and I at one point, they start going in the
opposite direction. So he'll be going
towards left in them as pretty much
the middle of the eye, they start going into
the other direction. It's good things to know. I'm just going to go ahead
and recap what the bottom. So you might still be a little bit too wet
down the bottom here. Just expanding too much still. Okay. But while it's still wet, I'm going to go ahead and
grab some of my blue black, and I'm going to add a
little bit more ivory black. This is very blue. Then it's going to inject
a little bit of pigment lashes so that it just expands kind of organically
with they're still wet. I remember that watercolor dries lighter than when it's wet
so that 123 shades lighter. So keep that in mind
when you're painting. It's not gonna be as dark
as it when it's wet. Here again, intensifying
a little bit. Okay. And then I'm going to get good food
black again and just I'm over here again. I've added a little more
ivory black to the mix, which just feel like
it was too blue and not really intense. I don't want to be using ivory black by itself when I paint. It's always good to
use mixed colors. I don't usually like using colors directly out
of the tube anyway. I always like to mix them. Sometimes I will
use a little bit of yellow ochre out of the
tube or for the eye, e.g. depression is blue
out of the tube for an area of the eye. But I always find
that it just gives us so much more depth and so
much more richness when you, when you mix the
colors yourself. A couple of details. And the I here, the game pulling up some lines but flicking
the brush a little bit. And I'm just going to grab
some of the green ocher. Just apply a little bit more, some barriers to
this small brush. And I'm going to grab
some skin tone one. I'm just going to put
in your reflection. Eyelashes can either highlight. Again my brush and just
add lovers can turn one. With the small brush. I lift up a little bit of
pigment up here with my brush. And objects, can turn one. Lift up a little bit
over here as well. To be lighter. You might just go back to my
skin tone one for a second. Just to have a little
bit more color. Here. I feel like it's got
a little bit lost. Expanded into each
other. Or up the top. Lift up a little bit of
water here so that it doesn't expand them to each
other again with much. Actually going to
smooth this out. Now, I'm actually going
to go and drive it off and then put on
the finishing touches. Now when you just dried off your painting and
it's still warm, the paint is going
to dry faster. So just be aware of that. And if you can avoid
painting on the warm paper, it's probably a good idea because I've still
got some skin tones premixed up and I'm just going to use a little bit of
bed, not as intensive. I'm just going to mix
this with the skin tone, one to make it a little bit more intense but more reddish. And I'm just going to
add that to some areas. Just a really light wash on a little bit more
around the eye. Mixtures contain three months. And I'm also going to apply this to the inside
of the top eyelid. And my number six brush, coming back over
to the blue black, making a light wash. And I'm
going to put them first. And then I'm going to grab
some skin tend to get better. You can hear a little bit, maybe a little bit, and apply some skin
turn to, to this side. Contend to get back
in here a little bit. Smooth that out, maybe
a little better. It's going to go
with the eyelashes again or a blue black. Again, adding a little bit
more of the ivory black. I'm just going to
add a few touches. Remember that it
dries significantly lighter as you can actually see. Jessica and just some
of these details again, redefining a couple of lines of contrast and shadows. Okay. I actually think I'm
just going to dry that off and then I'm going to
leave it there for today. Right? So that concludes
today's day of the 30-day challenge
painting with watercolor. And I hope you've
had a good time. I hope you've enjoyed it. And I also hope to see
you again tomorrow. I'll see you there.
14. Day 8: Hello and welcome back to today's AI of 30-day challenge with watercolor painting eyes. This is the image that we're
going to be painting today. And the colors I'm going
to be using for our three. I'm going to start by sketching. I'm just using my
HB pencil for this, just trying to get the
general shape onto paper, I'm going to see where the shadows with the
highlights of the eye. So we can reserve those and basically just get the
overall shape of this. I don't worry if it's not exactly like the
reference photo. What we're trying to get
is an expressive painting. Look at this highlight here. Is this great? So yeah, we don't need it
to be hyper-realistic. Wanting expression. We're trying something new
today with the three colors. I'm trying something
new today as well. I don't really haven't
really done that before. Let's see, Here we go. Let's not forget about the highlights. Up here. We've got a bit of a
highlight as well. Tiny bit darker than yeah. Around their shared and
there's a little lighter. Finding it hard to discern where the darker areas or you can go ahead and
squint your eyes. That really helps. Said
that a few times already, but just in case you forgot. I think I'm gonna
get right in there. And I really enjoyed
working wet on wet, but last times that I did. So I'm just going
to do that again. I'm just going to
wet the paper with my larger brush, clean water. Then I'm going to
take away some of the highlights so that the paint doesn't
expand into them. I want to keep those clear. That actually extends
onto the eyeball so I don't forget to
take care of that. I didn't really market well. I forgot to mark and this little highlight down
the bottom as well, but we don't want to be
using a pencil while the paper is wet because that way we will totally
ruin a painting. Just really ruin the paper. Great way to Ronnie
painting before you even started up here as well. And I'm just going to begin
with the coffee brown. Just a light wash Wash. Not too intense. Just start going over
some areas here already. See how the paint expands. Its beautiful, really like that. Because it's a really
nice organic field as you can kind of paint. But the paint will just do
its own thing after a while. I'm gonna be mixing wet on
wet and wet on dry as well. This session. What we'll
be working a little bit faster when it's wet because
it dries quite quickly and then it doesn't extend so
nicely as you can see here, you're going to dry
a big brush again, just smooth that out a little bit over the top here, something to lift that up
would have pigment there. It's going to grab a slightly
smaller brush again. Then number ten, smooth
it out a little bit. Remember that you can
erase the pigment with you a clean towel. Sometimes not all of it, but to some extent.
Very good about that. Highlight them about them live. I've just gone ahead and Rick, just removing a
little pigment here and they're totally varied. Feel like I'm starting to emerge already and we haven't
really even started yet. Right? So much crime. A little bit from up here, as I said, bit lighter. Know, pregnant, the mass starts
to expand a little more. Everyone wants to be. Dry before we begin from a mixed layer and stopped intensify some of these barriers that are
pretty common over shadows. Remembering to visit
the highlights. Next one here. Loosely put them
in a darker area. Remember that we're
trying to build up layers layer by layer. Just suddenly you get
the volume in there. And I'm just going
to dry that off now. Okay, so once it's
completely dry, I am going to start the
crease of the eye again, still continuing with my
coffee brown, more intense. And then I'm going to smooth
that out towards the cuff. I'm just going to do
what we always do. Heighten the contrast
buildup in the usual. Just continue and
really just adding volume that we're just going to be working a little bit
old either the image so that parts of it dry and then
you can go over it again. Smoothing out brushstrokes
with leaving them. Just as you prefer. Your coal. The eyeball again here. If you remove pigment,
do it carefully so as not to my paper as well. Let's work layer by layer. Really observing what's going
on in the reference photo. And training our eye
hand coordination. I'm just going to grab
my number three, brush. Get into those details. So remember that you
can always correct areas using your brush
or your paper towel. If the area is still wet, you can just dry off your
brush and lift up the pigment. And if the area is already dry, you can wet your brush with some clean water and
just re-wet the area, reactivate that pigment
and then pick it up with the brush or
with your paper towel. May not supposed to do it, but I find that it
really works for me. You just have to be very careful not to lift up the paper. And if you have layers
underneath that, you'd like to keep, you also have to be careful
because they'll most probably come up as well when you
reactivate the pigment. So you can observe that
I'm really just deepening the contrast here just by adding more layers of the coffee brown. And I'm not sure if I
mentioned this before, but for the highlights
to really stand out, you need to have a darker
area surrounding it. So that's what I'm doing here. You can see that
highlighted the bottom of the eye and I'm just adding some more depth to the
the bottom eyelash line. And just getting into some of these creases above
the eye again, the area above the eye just
heightening that contrast. So I think I'm going to start with shadow after I've
dried this layer. Continuing, makes sure
that it's completely dry. And then I'm going to
start applying some people shadow here as well in the creases that I would go with us. You can see it's
quite intuitive. Just get some colors and you go over some areas
and then you see how it goes. And remember that the paint
always dries a little bit lighter than when it's wet. So just keep that in mind. So what I'm really doing is just looking at my painting
and then looking at my reference photo
and just seeing with the darkest areas are with
the lightest areas are. What the contrast is like. And I'm really just
trying to focus on making this
really expressive. So really having a
good contrast between the darkest areas and the lightest areas
in-between tones. So on the eyeball, e.g. we can't have a completely white eyeball if
we wanted to have really outstanding
highlights because you have to play those areas
off against each other. So really just keep looking
between the two images. Yes, seeing what you
feel like needs to have more attention
in your painting. I'm really enjoying working. Wet on wet and wet,
wet on dry it. That's quite an
experience feeling removing little
pigment here because the shapes become
somewhat strange. Really sure if that's
because the paper's wet, but I'm just going to
dry it off quickly. I think I'm going to start
now with my blue layer. I'm just going to use my
number ten brush to the Gim. Just going to dive
very bad areas. This excess water in your brush. Working on the areas of
the iris and the pupil. Really getting into this
corner of the eye here. And I'm also just going to focus on this bottom
eyelash line here, just making it darker, extending the brush stroke
and then going back up to the top eyelid and increasing that crease and also
extending that brushstroke, just smoothing that out. Making a little bit
darker all over the show back into the
iris and the pupil. And as I said, we need to make these areas
darker around the highlights. If you're using a hairdryer, you probably notice that
just after drying off, you're painting the paint
dries a bit quicker. I guess it's still warm. And I just really want to get back into this white of the eye. So I'm just going to
put some light washes on this eyeball area here
because as you can see, the more I put on without
going over the top, the more this highlight
really starts to stand out. So this is what I'm
talking about by a document in the areas
around the highlight, you can just increase
the contrast between the real white of the paper and where you're pulling a
pigment on the paper. I'm just going to
get my blue and my number three brush
and I'm just going to go over a couple of details. So again, just adding
more color to increase the contrast between
the light areas and the dark areas here
with the details. It's going to go back to
keep brown for a moment. The trick really
lives and adding the right amount of
pigment and paint, not going up at the top end, very important is to
reserve the highlights, the white of the paper. These contrasts will really
make your painting stand out and you cannot achieve
that by adding white later. There's certain
amount pilots you can add with the white
out of the tube, but it's just not the same. So I really encourage you to practice leaving the
highlights as the white of the paper and also preserving some areas that aren't quite
the white of the paper, but that the white
of the paper really still shines through the color. To give it the light curve. Maybe just a touch
more coffee brown. Here. Work on a couple of details. Also with coffee brown. Small brush, very small
brush for number one. And I put it in some detail
now with the coffee brown, I'm just going to start putting in a couple of eyelashes here. Just clicking the brush. Loose movements. Try not to do every eyelash. Really always like to
go for organic fields. The blue, black and
red pigment in there. The lashes. That much like how you work this guy and you can
always correct it by using your clean tissue paper with
your brush. Clean water. Just be careful not to
go out of the page to match when it's wet,
otherwise, right? It's going to have some
shadow details in here. God, either this corner, coffee brown, then the
little bit of glue, and a very light
wash of blue black. Now I'm just getting into the
final little details here. So the reflection
of the eyelashes on the highlights in the iris. And I'm just going to work
on those little details. Okay, so I'm just going to
put a little bit lighter. Still not been lightest part. Very much. Okay. I'm just going to dry that off and then I'm going to
leave it there for today. Okay. So once you've made sure
that it's completely dry, you can just remove
it from the board. And that concludes today's
session of 30-day challenge. I hope you had a good time and I hope to see you tomorrow.
15. Day 9: Hello and welcome back
to another day of, but they delayed challenge
painting eyes with watercolor. Today we're going to be
painting this image. And as per usual, I will be uploading the reference image to
the resources section. I'm going to start
by sketching the, I'm just using my
HB pencil for this, just trying to get the
general shape onto paper, I'm going to see
where the shadows or highlights of the eye. So we can reserve those and basically just get the
overall shape of the eye. Don't worry if it's not exactly 100% like the reference photo. What we're trying to get
is an expressive painting. Then I'm just going to put
in the iris and the pupil. But remember when
we're doing this, we're looking at
the positive space, which will be the
iris and the pupil. The thing we're putting in
and the negative space, which would be the
white of the eyeball. You make a mistake
in your sketch, don't worry about it.
You can always erase it. Then I am going to mark and
less self this highlight here that I remember to save
the white of the paper. So as you can see today's eyes
a little bit more complex. It's a profile,
It's a child's eye. The reflections in the
eye quite intense. You can hardly see what's
going on on the eye, but we'll just see how
we go and we'll just start wet on dry today. And as per usual, I'm going to start off with my skin tone, one, light wash. My hands and areas. Not all at the same intensity. I want the wash to
be a bit lighter. I can just add a little water. Essentially, this
first wash will always be paved over anyway, but just kind of gives us a good indication of where
we need to take next. Remember that in
these first stage is what we're
looking for as just highlighting with
the darkest areas are so that we gave a
kind of sense of ways. Just keep painting black people in the iris first layer. Also a very light wash. I'm just going to start going
either eyeball quite dark. And I'm just going
to dry that off now because I'm making sure that first layer
is completely dry. We can continue with
the next layer. And for that, I'm just going to start with number three brush and my skin tone to them is going to define
a couple of details. For this crease and the eyelid. Extending the brushstroke,
modifying it. Just observing and trying to represent what I observed
in the reference image. But it does not have to
be exactly the same. It does not have to
be hyper realistic. Trying to make an expressive I painting rather than
just 100% what's going on. But I'm still observing it. That's really important. Now for number ten brush, I'm just applying
these first layers and just starting to add
in some of these details. Making your brush stroke. And then I rinse my
brush a little bit, dry it off a little
bit, not completely. And then I can just take it and make it smoother or take away a little
pigment at the end. And start them tends to find some areas
that are pretty good. Shadows. Remembering to
visit the highlights. I'm going to make up a
little bit of blue black, but with more blue than black. And I'm just going to
go over the iris pupil. Then I'm gonna get my
regular blue black. Well, that's drying. I'm going to grab
some purple shadow. Works in warm. Here. There's a little purple shadow in there. Wants to work. Vectors can turn to them just building
up the contrast. Looking to the areas that
have done really stand out. And I'm just going
to dry that off now. I'm gonna go ahead and make another layer
of shedder up here. Cancel the m. The smallest brush can turn to those
pregnant to live. Bathroom a little bit. And I will my purple shadow
adding a tiny bit of blue, a little less red and a
little more blue in there. Cleaning my brush and then modifying brushstroke,
little penguin, then layer shadow, I
believe at five lecture, we're going to go grab a little purple shadow
and a little blue. I'm just going to go
while that's drying, I'm going to grab
my green ocher, a bit of a shadow over the eye. So I'm just adding this color to a few specific areas to give a bit of richness and
variety to my painting. Out under the eye a little bit. Just go into families
details again. Defining a couple of lines. In contrast, shadows. Bring it around here with a very light wash. It's
going to drive it. I'm going to start by making the inside of the
eyeball a little darker. Mix shader eyelashes there. And I just really want to get back into this white of the eye. So I'm just going to put some light washes on this
eyeball area he had. While that's drying,
I'm just going to give iris and the
pupil another car. Really getting into this
corner of the eye here. My skin can one. My number three brush. Here. It's going down to so again, just, I'm adding more color
to increase the contrast between the light areas
and the dark areas here with within the details. Can turn one. Now, blue black, add a little more black. I'm just going to give the iris and the
pupil and mother go. So you can see
that I'm not going over the entire iris here, I'm just going over
some areas to kind of have this tonal
variety and the iris. Little kind of variety. I'm also going to grab my coffee brown brown making Ireland's line here. I'm just blurring. Want to insinuate them. Stand in the middle leg. We can go here and
just smooth it out. Live less than the former. Sperms. You can
kinda see that here, but I was a pupil. Dilation. There's kind of a lighter month, very fine brush now. Now I'm just getting into the
final little details here. So the reflection
of the eyelashes on the highlights in the iris. And I'm just going to work
on those little details. The eyelashes here,
still wet. Paint moles. Wanted to be blurry. I'm going to grab a little
skin tone to and I'm just intensifying up here
over the eyelash line. The inside of the eyelid, the top eyelid there
with coffee brown. I'm just going to go
over the eyelashes here. I'm going to go over the bed, simpler black, everything
because sometimes having some eyelashes
down the bottom here. Continuing with my fine brush, I'm going to use a little purple shadow in
the corner of the eye. And I'm going to
use a little blue black, a little bit. I'm going to also use a
little bit of skin tone to the eye a little bit more. Let's conclude black areas. The iris again. Just lightly going to define a couple of eyebrows up here. It's going to go a bit
discontented around here. Remember if you can't see the
areas of darkness, shader, just squint your eyes, makes it easier to discern
larger areas and not details. Usually we eyes
focused on details, so it's hard sometimes to see exactly where areas of shadow. I'm just dabbing a little
pigment away their skin tone, one very light wash. So you can see
there's just a lot of going back and
forth between colors. Adding layers, intensifying. So really building
up those layers to really give depth to our painting has taken
away a little piglets. List of fun. Adding a little more, a
little bit of purple shadow. The light wash of blue black, adding a tiny bit of blue, so it's more blue than black. I went to the other
areas are behind you. It's just a little bit so
that it's not all the same. I actually think I'm going
to leave it here today. I'm just going to dry it off
and then I think I'm done. Okay, guys, I think
I'm done for today, so I hope you enjoyed that. I hope to see you again
tomorrow for another day of the challenge of painting
IS for 30 days. You there.
16. Day 10: Hello and welcome back
to the 30-day challenge. 30 days of painting
eyes with watercolor. Today, we're going
to be painting this. I, and I am going to start
off by sketching the I, just roughly just highlighting the areas that are
interesting for us. And the general shapes.
When you're sketching, you want to be looking at your reference image
in your paper, just flicking between
those two all the time. But remember, we're not trying to paint a hyper-realistic. I hear. What we're trying
to do is get them expressive painting
at the end of it. So it doesn't look exactly
like the photograph. Don't worry about it. Find it's not the
most important part. I definitely want to reserve
this, highlight them here. Now I've got my general sketch and I'm going to stop painting. We start off by just
wetting the entire paper. I'm just going to remove
a tiny bit of water here. And then I'm going to start with my number ten brush
and my skin tone one. I'm just going to make
up a quite a light wash and just start applying
that to my paper. E.g. spending quite nicely here. Already going to start trying
to outline this crease and the eye a little bit
even though it's going to be very washy. I know when I'm
working wet on wet, I like to have my
hairdryer quite close because otherwise it will
just take a just to dry. So as you can see,
I'm just applying paint areas here that I
had expand onto the paper. I will already quite
dark and quiet read. Having some more pigment
into certain areas. Then I clean my brush
and then I'm going to get the greenish
time that I have. And I'm just going to go. The first thing I'm gonna
do is I'm just going to reserve those areas here that
I want for my highlights, but I want the white papers. So I'm just going to
dab my tissue paper on this or that the paint doesn't
expand into this area, then I'm going to
start painting. I also don't want
to expand and too much into that Eilish line. So what I'm gonna do is I'm
just going to clean my brush. I'm just going to
remove a little pigment and moisture from here. Still be smooth. Stoke kind of got
into this area but it won't be as expanding. And then here remember we had that one highlight of the
eye that we actually done, one for right now at all. Just smoothing out here, removing a little
pigment and water. Before I go on dry this layer now I'm just
going to remove a little pigment
from the top here. And also here. Dabbing my tissue paper on the inside of the eye here
just a little bit. Okay. And I'm gonna go ahead
and dry it off now. Okay, so know that layer's dry. I am going to stop working a little bit on the
crease of the eye lids. And for that, I'm going to
just wet this line here. You can see I'm just
applying water to stop. Then I'm gonna get my
skin tone one again. I'm just going to dab it into those wet areas
so that it spans. But it's a controlled expansion. Then I'm just going to work
a little bit wet on dry. So it's a bit of a mix of
wet on wet and wet on dry. While that's drying,
I'm just going to go over the pupil and the iris a little bit as my
number ten brush and I'm going to grab
some blue black, just going to make
a wash. And then again with some clean water, I'm going to wet this area
that I want the paint to expand into and around
to fill it all in. Sometimes it's
interesting to have some areas that have
the previous layer. I'm just going to dab
my brush in the paint expands into the areas that
are equipped with my brush. I'm just going to
let it do its thing. My smaller brush, I'm
going to start with one of the few details on
the inside of the eye. My number three brush and skin
tone to make it too dark, you want to be working with
transparencies. Still. Look a little bit on
this detail in here. My brushstrokes. Well, it's still a
little wet up there. I'm going to inject a little pigment into
this crazy stereo. We're ready to smooth out
your brushstrokes much as you'd like or just
leave them as they are. That's totally up to you. Continuing with skin tone to make that brush a
little bit lighter. Mark here a little bit. This barium eyes. When that's dry up here. Reinforce that line
a little drop. Now we're going to
use my hairdryer, drive it off and I am going to continue working
with skin tone to for now, let me use my test strip
here is the kind of talent. Few areas that I
want to intensify. Little bit of color on
the inside of the eye. Remember the eyeball is never completely wiped unless
there's a highlight. There's a highlight and
you leave the rest of the eyeball what you
will not see that I like because you need darker areas to be
surrounding the highlight. For the highlight to
really stand out. Then just with a light
wash the blue black. Remember we want it
to be quite light. I'm just going to go
over the eyeball. Remembering that
highlight down there. Just smooth that out. And with the green shade
that I have made up, just a light wash, I'm just going to put a couple
of shadows in there that I see here in the room
that's very intense. Remember if you need to
remove pigment and water, you can always do that
with a clean brush by dabbing the paint brush onto your tissue paper and then just moving it out of
the paper carefully. Really, really light wash I'm just going to give him Yeah. I can hardly even see them. It's a bit of a deeper
shadow here on the eyeball, I guess from the eyelashes. While that's drying,
I'm going to grab my blue black and
my smaller brush, my number three, a
little bit more intense. The wash still want
it to be translucent. That can be a little more
intense than before. And I'm just going to
work on a couple of areas inside of the iris. Again. Always use for finer brush
if you feel the need. For them, these little things that come out of that tuple a little bit and staying
with the blue brick. Hi, my name's some detail here. Don't freak out if
it's really dark. Remember that the watercolor
dries 123 shades lighter than what you're seeing
right now when you're painting with a mixed
the blue black, green patches of color
and here the blue black. Now while that's drying
with my number ten brush, just going to use
my skin tone three, I'm just going to go
inside of the eye here. Contents. There's a highlight on the top and on the
bottom here that I want to reserve kinda sides out
with a clean, wet brush. I'm just going to move a little bit of this pigment because it's a
little bit intense. Then it's going to
go back to skin tone to intensify some areas. Use too much pigment.
Remember, this happens to me quite frequently. Just go over it again. And remove it. So I'm just kinda available pigment
with my tissue paper. We'll go back to skin tone
one for a second. Contend to. You can see what I'm doing it. You just the same as always, building up layers by adding
translucent layers of color, which makes the
volume and depth. You can experiment with
this a little bit quiet, signing a few different colors and a few different methods. While that's drying,
I'm going to go ahead with my faithful shadow. A couple of touches on here. Still wet for them to
expand Muslim to there. And here I'm just going
to soften that out. And bottom. They're still a little wet too, which is great because it's
going to expand into it. Which will make
it look smoother. Look kinda working half
wet on wet and wet on dry. A little bit of black. I will just plan out. A little big man. Okay, and while that's drying, I'm going to intensify the
blue black and a little bit, a tiny bit more
ivory black to that. So it's not as glue and
more tending towards black. See how it's still translation. Jessica into families
details again. Defining a couple of lines. In contrast. Smooth. Those out a little bit into the
interior of the eye. Clean water. No pigment here and there. And once these areas are dry, I'm actually going to stop on
the eyelashes and the bit. I'm going to start
with the coffee brown. It's very intense. It all translation. We want it to be
translated again. Okay. And I'm just going to mark
the areas for doctors. Around here. We compare
the marion which is quite low bathroom and
what it is at the moment. I'm just going to add a little coffee brown
than the eye as well. Coffee brown and intensifying a little bit in the sky here. Don't go over the top. Now I'm just getting into the
final little details here. So the reflection of the
eyelashes on the highlights and the iris love that tonal variety on the iris actually liked it really
makes the eyes come to life. So I always worth a
little bit harder on making random months
really trying to mimic what's happening on
the I that I'm looking at up here can actually
see a little bit of ocher. So I'm just going to
put a little bit of pica pure I've drawn there. Gonna drive it off again. Once it's dry, I'm going to
take my number ten brush. And I'm going to go over
this part of thumb side of the eye quickly with
some skin tone to it. And then I'm going to dab in a little bit of purple shedder. Smooth that out to
make it too intense. A light wash of blue back here again, pretty common. Practice that a lot of blue circles here. And I'm just going to die again. And while that's drying, I'm just going to grab my
very fine brush and I'm going to start doing the eyelashes
with some coffee brown. It's really defining them. Really observe the
eyelashes here. You can see that I've
got up all the time. Sometimes they're
really actual eyeball. If you really observing
what's happening there, you achieve eyes that are
more organic looking, more realistic looking
even the fastest expressive, expressive
brush strokes. I've just got my blue black now, working on three areas. While that's still
a little bit width. I'm just going to wait a
little bit of pigment, Kiran, just take it away. You can do that
even once it's dry, just to keep their kids. Because you're not
actually supposed to. Theory, once the
watercolors dry, you don't touch it anymore, but I like to do that. But carefully time I've done it and don't push
your brush too much. Otherwise, you might just
take away a bit of paper. I'm just going to start from eyelashes down
the bottom now. I'm going to do
that with my coffee brown because they're not as dark and very bad for us to get too dark already. I'm just going to brush
over them. Clean brush. Just move the pigment
around a little bit. Here. When a minister ulcer
now at the top there, I'm just going to smooth
out this line here, a little bit of this in circular motions with a
wet brush with clean water is going over this area which hasn't completely
dried yet, but almost. And just smoothing that out. Remember to take a little
bit of pigment away. Just wanted to look a
little more organic if we have very hot lines
than it doesn't look very organic because there's not really any harsh lines
in nature in their face. We looked at almost
want to leave it, but I'm just going
to give a couple of more touches with skin turn
to in a couple of places. Namely here, just a couple of
exceptions here. So you can see how by putting a dark and light next
to this highlight, the highlight really
just starts to come out. I'm just kinda take a
little bit of pure cadmium. I really quite like how
dramatic that those here. The last thing I'm gonna
do is I'm just going to get some pure ivory black, just hydrate the pigment, make it quieter, backwash. And then I'm just going
to put it over the iris. Applying pure ivory black to just one area to make it be the darkest area of
the entire painting, which is what we want, because it gives
it a little bit of depth and makes
it more profound. With my very fine brush, I'm just going to draw
out a couple of lines into the iris scan. So you want to make sure
your brush is not dry. It's kinda slicker thing that I'm really got the
shape right here at the top. I'm going to drive it and then I think I'm done for today. So I'm done for today. I'm happy with it and I'm
going to leave it there. Thank you so much for joining me again today for the
30-day challenge. And I hope you had a nice time and I hope to see
you again tomorrow.
17. Day 11: Hello and welcome back to the
30-day challenge painting. As with watercolor, today, we're going to be
painting this image. I'll be uploading
the reference image to the resources section. So I've decided
that I want to do another monochrome I today. And I am going to
start by sketching. Remember that it
doesn't have to be exactly like the
reference photo. Just using a photo
as an inspiration to make an expressive painting. So I'm kind of using the
positive and negative space here to figure out how during the number withdrawing, what we want to paint and
also what we want to reserve. I'm going to start again working wet on wet
surface that I'm applying clean water with a clean brush to the entire area of my paper. I'm just going to remove the little book by passing
my paintbrush over it and then dad and
my paint brush on the paper towel that I
have next to my board. All right. And I'm going to
grab the glute leg, bring it over to my mixing area, hydrated and make sure that
it's a nice light wash. My two dogs. One to the first wash should always be
quiet, translucent. It's going to start
on the darkest areas. Now the paint is going to
expand as we already know, to make sure that we are reserving the highlights
that we want to reserve. The white of the paper. Eyebrows, go. Get them to the areas
that literal and shadows. As you can see, I'm doing
the same thing as always. Applying the paint
and the paper. If I feel like I've ended much lignin paper,
too much water, I just go ahead
and clean my brush and remove excess
pigment on my brush. And I feel like me and you're a
little impatient. Greg, your hairdryer
and just drive it off next once that's dry, I remember that we always
want to make sure the layer that we've just worked on as dry before we start on
the next layer. The next thing I'm going
to do is just deepen the shadows and
enhance the contrast. Already going to put in
some eyelashes here, just roughly. Working on the areas of the
iris and the pupil here. I'm just building
up the contrast. Looking for the areas
that are darker. I'm trying to really
emphasize stand out. Then. I'm going to
continue with the case of the eye, eyelid,
smooth brushstroke. The P1 decided to work over there while it's still wet so that we don't have, in the end a huge difference between the makeup
and the eyelashes. Look once it's dry, we'll see and start to intensify some of the areas that I've already
gone over, shadows. Number ten, brush, I'm just
going to grab the ball. And the bottom of
the eyelid here. I feel very organic. Maybe you want to smooth
it out a little bit. I'm just going to give
that away, dry off. Once it's dry, you can continue easier
working monochrome, because basically all you're doing is just adding one
layer after another, deciding how light or intense you want your
washes to be building up. The contrast really just continue increasing
the contrast, building up the layers and really just adding
volume that way. Just want to be
working a little bit all over the image so that parts of it dry and then
you can go over it again. Remember that if you're
having a hard time seeing where the
darkest areas though, you can go ahead and
squint your eyes. That really usually
helps to define areas. Sometimes either
just a little too precise and they
realize that there's too much detail and then
they find it really hard to process information
that's more general. So you can see what I'm doing
here is I'm just going over the areas that I've already covered with a
more intense wash. So I'm really just making it darker around the bottom of
the eyelid and the eyebrows, just adding a little color. They're getting into the
corner of this year but with a slightly lighter wash over
this shadow under the eye, just making that a little
darker to work in these areas. And so it's helpful to
move the paint brush in the direction of
how the skin goes. I feel like it can
really start to see how the AI is coming
out of the paper. And that's because
of the contrast that's being created now, working a little bit
on the ball here. Which remember, I
think we covered never completely white
logo and the shadow. Otherwise we wouldn't be
able to see the highlights. We want them to
stand out as why we have to put some shading on them so that we can
differentiate between eyeball, it is not highlighted
and the highlights guy. With my smaller brush, I'm just going to intensify a little bit, decreases, smooth it out a little. Here. I'm also going to add a little more intensity to
this area of the eyelashes. Here we put some details
in the eyebrows. Careful not to touch
the eye if you're doing this while it's drying. Roughly. Going to be very precise. Just going to get back into
this barrier here. Details. We just keep going. I mean, you do the same
as always. Really. Just intensify,
intensify, intensify. Make it as dramatic as you like. And I just really want to get back into this white of the eye. I'm going to grab
the move fluid leg. A little bit of ivory black
in there so that it's a little bit more
towards black and blue. Just concur with
the iris and pupil. Drama. Remembering to
preserve highlights. I'm going to apply my eyelashes. Known for that, I have applied
this blue black all over. And I'm just going to
get my smallest brush and make sure that it's wet. And I'm just going to
stop flicking it with paint so that it's really thin. Not always making
the same marks, burying them up a little bit. Here you can see that
back heel around, expanding and just
remove a little pigment. We've got it off. The eye
is already pretty nice. What I need to work on
this area down here, and also this area up here. So I'm just going to do that. No, north on that for a moment. Lift up a little bit
of pigment here. Here, a little bit
to intensify that. While I'm intensifying, I'm being really
careful to preserve my highlights still
because the highlights of really what is going to
make the eye come to life. Very fine brush. I'm going to go
into the details of the highlight of the either. Personally. I mentioned reflected up here
symptoms structure. So just to remind you to make a highlight
really stand out, you need to put a
darker area next to it. And also make sure
you don't leave too many surrounding areas
as the white of the paper. And just putting in the
rest of the eyelashes here. Eyelashes up the top again. So yeah, I'm just adding
the finishing touches now. I'm just looking
where maybe I can put one brushstroke here
and one brush stroke. This, that's really just the very small details
that I'm covering now. Finishing up, I'm just going to intensify a couple of
these shadows in here. I hope you enjoyed today's
lesson and I'll see you again tomorrow for another
eye and say, did I challenge? I see you there.
18. Day 12: Hello and welcome back to another day of 30-day challenge. 30 days of painting
eyes with watercolor. And today I have chosen this image to use
as my reference. I've also gone ahead and selected the colors that
I'm going to use today. So why don't you go
ahead and mix up those colors if you
haven't done so already. And I'll meet you back here
to begin with painting. Just going to do quick
pencil sketch today. Loosely, the general shape. Remember if you don't
want to draw freehand, you can always use the
grid method or also trace your image to your paper
using a light source. I'm just drawing in the
inside of the eyelid here is the shadow over
here which I want to mark. And now let's go down to
the bottom of the eye. So then just draw this
bottom part of the eyelids. You remember tear duct here. Look darker. The iris partially
covered at the bottom as well as at the top here. So what I'm gonna do is I'm
just going to draw around the circle and then erase the parts that are
covered by the island. The pupil. We're just going to mark the
highlights as well. So for highlight here, remember we always want to put in the highlights when we're painting because the highlights of what makes the
eye come to life. So then here you can see this
also a little line which is highlight, very light spot. Couple of wrinkles done. Obviously the eyelashes that
come close here, quite dark. I'm just going to draw them in. And with that, I'm going to
start painting. Once again. I'm just going to
get my cane water. Remember we have
two jars of water, one which is clean and one which we use to clean
your brushes them. I'm just wetting the entire
paper trying to get it evenly wet with another layer. And then I'm going
to start painting. Starting with skin
tone one is the usual, just to get things going, get the ball rolling
using my test sheet. Very intense. Remember
you can also use the test sheet is
a second palette to make the wash as
light as you want. Then I'm just going to
start injecting some color. I'm just going to be
very loose about it. So as you can see, I'm
just making some strokes here trying to reserve
the highlights. E.g. here, I've just
gone over that. Someone will take a
little bit of tissue, just dab it on there to
lift up the pigment. And I'm just going
to do the same for this highlight right here. Also for the little line
under the eye there. So that when the paint expands, it won't expand to those areas. It will not expand into
the areas that are dry. I'm just trying them off. Deepening the **** up here. Here we go. The lines up here,
still very wet. Maybe we can do something. Just experiment and that's
exciting. Turns out. Remember that this
challenge is also try new things and I
had fun with it. Doesn't have to turn
out really well every time or anytime. Just going to clean my
brush and I'm gonna go straight to my green ocher. I'm just going to start
working on the iris here, covering it all. Now. Know how I'd like a little
bit of tonal variety. So I'm just going to get
my tissue paper to start lifting up a few
specks of black men. As you can see, there's lot
of light areas here and the iris actually miss little
bit of a highlight up here, which is quite nice. Gone ahead and lifted up
the pigment from the paper. Just going to see
what happens if I use my skin tone to
while it's still wet? See how that works. I'm just going to go over some
of these shadows, skin tone to them. You also have this
line here to expand. As you can see,
working wet on wet. It's a completely
different feeling. It's there. It's a lot less precise than if you're
working wet on dry, e.g. but it's also very expressive. I would say, lift up a little bit of
pigment on my brush here. Well, it's drying. I'm going to go ahead and add
the pupil with blue black. And also I'm going to start working on
these outsides here. The iris. Don't really want that
to expand too much. So again, I'm gonna go ahead get clean part of
the tissue paper. And I'm just going to
dab it on the eyeball here so that we can
add expands a little. And when it's when this is dry, we can just go ahead
and make a little more precise with that
again, under the IMU. So there's not an abrupt
finishes the ice maker iris. Now with the medium brush, let me get an eye a little bit. Little touch of tonal
variety. Also in here. You can see now that I've
dried this part off, it's a lot easier to get a precise edge, doesn't
expand anymore. Just going to go over
the shadows again. Looks concerned too. I'm going to just smooth
this out a little bit. You can see this part is
actually quite a lot darker. And it's okay if it
expands a little bit, little bit more of intensity
under the eye here. As you can see, the
paper's still wet. I'm just adding layers. Just going to go. This part here. Just adding layers
as we always do. But the only difference
being that the paper is wet. The paint is a lot
less controllable, but it's quite exciting. See what happens. You can still always
manipulate the paint a little bit smoother edges and push around
the brushstrokes. Just quite hard to
get a precise edge. That's all. Skin tone to
get my purple shadow. Want going to add a little
color to the inside of the eye here. Going over the top. And remembering that we are reserving this little
line down here. Remember, if you use your
brush to lift up pigment, be careful because
I've just lifted up some of the
darker pigment here, which I wasn't really
meaning to do. It's not a big deal, but just remember that
that's what happens. When you go over
an area which is still wet with a dry brush,
you lift up the paint. I want to get the shape of the iris a little
bit more precise. And I go over these
areas, as I just said, with a dry brush to lift up
a little bit of pigment. The water. Make sure your brush
is clean for this. Otherwise you'll be spreading
paint that you don't want to spread and
areas the wrong color, at least over this area
again, smoothing it out. Also going to go over
this area with the PIP. Quite dark in here. Shadows again, my
pixel shader here. I left. You can see it's Murphy
squint your eyes. Remember that trick if you don't know where the dark areas are, just when your eyes and
there'll be much easier to see. Highlighted has gone
again at the top. And I wanted to reserve
here smoothing this out. So smoothing a little bit here. Under the eye while
I'm painting, the paper is drying
and towards the end, I guess I'll be
working wet on dry. And I'm not going to
try the Python once the paper's dry painting
is going to be finished. My midsize brush again. Work a little bit on
the shadow up here. Just a little bit. Just to very subtle cheddar. First the stuff as well, right? It's contend to go back
under the eye here. My little highlight here
couldn't get that back. My clean and dry brush, again was concerned to trying to define the
bottom of the eyelid here. And it's not that easy because clear lives kind of grab my green ocher again and I'm just going to either
side of the iris again. Continuing with the green ARCA, I'm going to use a little unstable up here shader. I'm also going to
use a little bit and that'll help us to
find bottom eyelid. Little bit inside of
the eyeball here. Smooth. Ted. Continuing the blue black. It's going back into the eye. Let's see skin tone
one. Find that again. The eyelid down the bottom here. Thinner, blue black again. And I'm going to make it
very, very faint wash. Very fun to apply a little bit. Here is a little coffee brown
and this dark area here. Okay, I'm going
to start defining the eyelashes a little with my very fine brush.
Coffee brown. I'm just going to
flick the brush, see the iris spilling
into the eyelid again. So I'm going to clean
my brush, dry it off. And data. Three ones is this fuse
together a little more? So I'm just wetting that. Hopefully lead to spill over. Meanwhile, let's make it like
coffee brand Washington. It a couple of fire flashes
down the bottom here as well. Remember to follow that up with certain parts
where I'm doing to a little bit of blue black eyelashes
up here still wet. Try not to make them all
saying I feel like I've made them a little bit
too uniform over here. So I'm just going to add one. Just wet my brush and
diffuse it a little bit. I don't want it to stand
out too much metal to let let that dry for
a little moment. And we'll go over there again. Pick two coffee brown
just injecting pigment. Now, I'm just experimenting. I encourage you to do the
same thing as we don't. We haven't painted wet on wet for the entire
painting before. I find it really exciting
to see what happens. And to see how it turns out making semi-random
maximum there. I'm just going to
get a little bit. Pure Prussian blue, which we
always have on my palette. I'm just going to put a
little bit of that in there and spread it around. It's going over
coffee brown again. Just injecting a little
coffee brown iris and the pupil as well. Maybe around here. The edge of the iris. Tillage again, removing some pigment and
water from this side here. Just smooth that out. Back to skin tone too. Because this part here
just doesn't know me yet. Objects more pigment in there. We really want this
part to be quite dark. I'm just going to go back over this **** up here because I lifted up too much pigment beforehand that I had
to wait for it to dry. Skin tone. One here is not the lightest
part of the paper. Just go back to using a
little bit of the plate leg. No more intensely. And a little purple shadow. To find this line under
here a little more. Highlight, really
start to stand out. I'm just going to diffuse
it a little bit so it doesn't look like a
little line on them. Just like we practiced
and start to intensify some of these areas that are pretty
color over shadows. Remembering to preserve
the highlights can turn to and smooth it out. Shedder, tip them,
deepening the **** up here. I am going to have
to dry it off. Firstly, I'm going to put
a little thing from here. So I'm just going
to quickly dry it off so that I can put the
finishing touches on. Okay, So I really
liked this aesthetic. If I'm being honest, I'm just going to do a
couple of finishing touches. And that would be the pupil, which I'm just going to go
over with the blue black. And also just a tiny bit more black in there so
that it's not really intense. Then I'm going to
grab the blue black and also just go over
the edges of the iris. So if you've gone ahead
and dry your painting, I don't know if
you've noticed this, but your paper is
more likely to let the paint dry quicker when
the paper is still warm. Just keep in mind. I'm gonna go back to
the Prussian blue. Okay, so that would
be one of the things. And then I'm just going to go over this shader here again. Make it a little
smoother skin tone to the little purple shadow to intensify this part
right in the crease. Two here. And also, I'm just going to go into
this part of the eye here. Smooth shadow to lie a little bit of coffee
brand may want to whip. Still careful to reserve
this highlight here. And I have another
one down here. And with the Prussian blue, just a light wash. I'm just going to go over these highlights here because they're not as bright as
this one over here. Okay. Just going to dry it off
and then it's finished. You go, That's the finished. I I really hope
you enjoyed that. I hope to see you again tomorrow for another
day of painting eyes. And the 30-day challenge.
19. Day 13: Hello and welcome back
to the 30-day challenge, 30 days of painting
eyes with watercolor. This is the image that we're
going to be painting today. And as per usual, I'll be uploading
the reference photo to the Resources section. And as I've really enjoyed
this the other day, I went to do another painting
and just three terms. So the coffee brown, the purple shadow,
and the blue black. So I'm just going to start
as per usual with a sketch. So when we're sketching,
remember what we're trying to do is just hi, let areas for
ourselves that we're going to pay later
that are important, such as shadows or
very vibrant colors. And then I'm just going to put
in the iris and the pupil. But I remember when
we're doing this, we're looking at
the positive space, which would be the
iris and the pupil. The thing we're putting in
and the negative space, which would be the
white of the eyeball. So you kinda keep those both in mind when
you're drawing this. Remember if you don't
want to draw freehand, you can always use the
grid method or also trace your image to your paper
using a light source. Remembering to harden the
highlights like cubes from the darker areas. Okay, I'm going to start
painting with that as my sketch. None to begin with
the coffee brown. Actually, I'm going
to work wet on wet. I'm really enjoying working
wet on wet for some reason. It just gives the whole painting a little bit of a slower you feel to begin with wet on wet. Because a new discovery for me, just going to remove
a little bit of the excess water by going over the paper
games, my paintbrush. And then I'm just going to
stop working on the iris. Going to reserve the
highlights a little bit. Swatch to expand. It's going to try see how we go. The lines up here, still very wet here. I'm just going to
really soften that out. I don't want that
to be too dark. You will say that
this line here, I hope you witnessing
through this whole process, that painting is really
a process like we don't start off with a perfect
painting to begin with. It's really a journey. Every painting as a
journey and not feel like every painting is
just a stepping stone to the next painting. And I really liked that journey. And it's so much
more fun of you are relaxed and you don't worry too much about what it's
going to turn that like. Actually, it's not
just more fun, but usually your work
turns out better if you're not worried about
how it's going to turn out. As you can see,
the paper is still wet and I'm just adding layers. I'm just going to go
over this plot here. Just adding layers
as we always do. But the only difference
being that the paper's wet. Want to add color to them. I hear periods. And now I'm actually going
to go and drive it off. Okay, so you layer
should be completely dry before you start
on the next layer and make sure it hasn't come unstuck while you were
blow drying your painting. And then I'm just going to start working on the iris here. On some of the darker areas. Let me give them the
eye a little bit, add a little touch of a
variety also in here. And start to intensify some of these areas that I've
already gone over, shadows. Remembering to visit
the highlights. Then I'm going to
cover the iris hue. Just going to smooth it out. Multiply the brushstroke,
bring it over here. Then I will have a little
under his alleged line. A little bit more of
intensity under the eye. A little bit on
the **** up here. Deep in English it up here. I'm just building
up the contrast. Looking for the areas
that are darker. I'm trying to really
make this stand out. I'm going to start using a
little purple shadow. Again. I'm just going to go here
and I'm going to go ahead. Ed, Lead pupil. Also learn to stop working on these outsides here, the iris, the lighter wash, touch-up, little details and Iris pupil. Remembering to visit
the highlights. Continuing with the
eyelash Lauren. Smooth that out. Jessica into some
of these details. Again, intensifying
contrasts here as well. Just going to smooth
that out with a lighter wash. Just go over some of these
details in here. Still working with
pip or center. Savings highlight. Grab a little bit more
purple shadow me smaller brush and just turn
this stuff Nottingham, these lines, the crease of the eye while still
a little bit wet, so it kind of expands
a little bit. Okay, I'm back my
coffee brand for the light brush at the
top here. A little bit. So you can see
there's just a lot of going back and
forth between colors. Adding layers, intensifying. So really building
up those layers to really give depth
to your painting. And I'm just going
to dry that off now. Going back to purple shadow, I'm just going to pull
him a couple of details. I'm just going to soften
them a little bit. When you want to smooth
out the brushstroke, what you need to do is either clean the brush and then dry
it off or just dry it off. It depends really how
charged the paint brushes. And also if you're working
with a different color. And I'm going to
define this line here, the corner of the eye here. Now remember that the area
that is next to the highlight needs to be darker for the
highlight to stand out. Hitting a little pigment
to the corner of the eye there because
it's a lot darker. Get them to look
for a little bit and just work on the iris
and the pupil a little bit. Darker pots example the
outside of this virus. And just cut either
the top eyelid again as well and just intensify this color coding to reiterate this
bottom eyelid here. Insist on that. And I'm just adding in
some more details here. Smoothing it out. And heightening the contrast, building up the layers. I am just getting into those small details
of the eye that are really important in
making it come to life. So I'm just going to
quickly dry it off. Now I'm going to start
applying some blue black. And as per usual, I am starting with
the darkest areas, getting into those edges of the iris and really trying
to heighten the contrast here by just putting in a
few lines into the center of the iris and just really
darkening the pupil, making that really stand out. I'm getting into this
corner of the eye, which I feel like
it's a lot darker. So you can see
that I'm not going over the entire iris here, I'm just going
over some areas to kind of have this
tonal variety and the iris pigment here and there. Some lighter wash, glute leg get into some
of these details here. Just going to smooth that out. Remembering to visit
the highlights. Just kinda go back to
my coffee brown areas. Not quite sure if I want to use the blue flag on the skin. Isn't that smart with skin? Because I feel like that would just take away from
these areas here, which are the darkest areas
of this whole picture. A little bit of coffee brown. See how we got building up our layers just
little by little, adding more and more
intense colors and washes. Just going over the
iris and the pupil again with the coffee brown. And then with a light wash just going over the top eyelid, the inside as well,
just darkening that. The eyelash line
a little bit with a slightly more intense squash. Also just going to get into
this corner of the eye again. Let me use a little bit of fat in the crease
of the eye as well. Still working with
the copy Brown. Put like that. It's not so I don't want
to overwork this one. I just might call it
as Dave. Quite soon. I will however, use the
trick of just putting a little ivory black
in the pupil and early in the pupil and
not in the whole pupil, just with a very, very deaf
as Tatas include black here. And I'm just adding in some more details here and
heightening the contrast. And I'm just going to
put them eyelashes. Well, that's drawing
that I will be using my number one
brush, pen, blue, black. Just going to make these flicking movements
with my brush. Let's repeat the
same movement every time so that pulled
up look different. The bottom lashes,
I'm going to use a little bit of coffee brown. Couldn't go either
this top part, again with a little
bit of blue bag. I can't get that a
little bit darker yet. Remember that the
watercolor dries 123 shades lighter
than when it's quit. I actually think I'm
just going to dry that off and then I'm going
to leave it it today. Okay. Well, I'm going to
leave it there for today. I'm happy with it. And I hope you've
enjoyed this lesson, and I also hope to see
you again tomorrow for another day a day challenge painting eyes.
I'll see you there.
20. Day 14: Hello and welcome back to another day of the
30-day challenge, painting eyes with watercolor. And today I've
chosen this image to paint the colors I'm
going to be using. I'm going to start
by sketching out the I just roughly
onto my paper. So remembering that the
sketch is going to help us and at the time of painting, wanting to get the shape, the general image
onto the paper. And also highlight shadows
and highlights e.g. or where it's really important to put in the color because
it's really intense. Stuff like that. So I've got
this lovely little highlight here which will lead to reserve right underneath
the eyelash line. So when you're
drawing the pupil, you can look at the
positive space, which is the pupil and
the negative space, which in this case would
be the whites of the eye and how they in
relation to each other. My reference image. And then how they
look on your paper. Up these interesting
highlights here. Again, I'm not trying
to be too detailed. Just squinting my eyes
because it helps me just see general areas of shadow. And we've got this one
line coming up here, this window that's being
reflected on the I here. And I guess some kind of railing or something
in the window. So I've got a lovely little
highlight down the bottom. So for that I'm just going to tidy up my drawing underneath. So I'm just going to try to
get the drawing in one line. I highlight. This line starts up
here splinting again. That's the bottom of the
eyelid and the highlight. Okay, and then we've got
these lines coming up here. Kind of wrinkles, I guess. Let me leave it like this. I'm going to wet my paper. Clean brush, clean water
using my number 16 brush. And I'm just going to make sure the papers entirely
covered with water. Then starting with
skin tone one, mixing that up and bringing it over to my mixing
area of the palette, to my test strip
that's way too dark. We want to make a lighter wash. The first wash that
tells me that intense. Just start remembering that when the paper is wet
where we left off the brush is going to leave the most expanding brush stroke. A little bit here,
move it around. And we've got this
lovely shadow up here. Very intense. Just go over that again. Injecting little pigment, maybe moving a little bit with
the brush but not too much. Don't want to break the paper. Maybe I will intensify my washy little bit
just for this part. Making sure I don't have too much pigment and too
much water on my brush. And if I do, I can
just go ahead and dab it off on my tissue paper. Then I'm just drawing the
lines with my paintbrush here. Remembering I want to
reserve my highlights. Go under the eye here. Again with a slightly
lighter wash. Wet this area here, this area here, see the
curvature of the face here. Right? And remembering when
we go over the lines that we don't really
want to go over where we have highlights that
we want to reserve. We can always just lift those
up with some tissue paper. You want to try and do that
as quickly as possible. Slightly lighter wash. I'm going to go over
inside of the eyeball. Not as intense. See now here, my preserved highlights and all being overtaken by pigments. I'm just dabbing one
tissue type down here so that I can make
the white of the paper. I don't want to drag it across because then I
might also ruin the paper. So moving on to
skin turn to now, going to start intensifying
some of these creases here. And you can see the paper's
not that bad anymore, so it's not expanding as much. Not a big problem. We can go and smooth out the brush
strokes in a minute. Just going to wet the
brush a little bit in here and start darkening here. Just filling in some
of the areas that I find appropriate right now. Just intensifying some shadows. Still working with
the skin tone too. As you can see, it's
building up layers. I'm just going to come
in to this corner of the eye here, dark. And then I'm going to cut out
into the inside of the eye. And while I'm at it, we'll make this part
here darker so that the highlight which
starts coming in here will be more parent. Remember that if we really
want to understand that, we need to put it in
contrast with something. It could be, in this case, we're using a darker color, but if you want e.g. a. Red to really stand out, you can put it next to a green and that will
really make it pop. So that's complimentary colors. Using complimentary colors
to bounce off of each other. I ended here smoothing that out. It's going to get that
line in there. Right? And just this part
here going quickly. So some red around
the iris here. I'm going to start
with the coffee brown now around the iris
and the pupil. It's going to expand
a little bit here. I don't really mind because I
feel like I'm a preference. I mentioned iris expands a little bit into
the eyeball area. I would just let it happen. Just roughly putting in these
shadows and highlights, it doesn't have to be exact. That meant not as expected. You can always just take some tissue paper and
lift that desktop. And then continue. Just wait a minute until it's
a little bit more dry so that it doesn't extend
into this area. While that's drying,
I'm going to go ahead and start on
my purple shadow. I'm just going to intensify
some of these areas here. Especially this really
dark shadow up here. And stop intensify some of these areas that
I've already gone over. Shadows, remembering to
preserve highlights, the eyelashes here so
they make it darker. I'm just going to go either this area darker
with the PIP shadow. And we just continue
heightening the contrast. Vector, skin tone. A little bit. The area under the eye. Lift up a little
bit of the pigment here and intensify a little bit. This crease under here. And also here
underneath the eye. Still working with
one skin tone, one eyelash line as well
as can turn 1 ft out. I'm going to lift some of this up with my own dry paintbrush, small-world response,
actually quite a lot darker. I'm going to expand that. Come over here, curvature, face and my skin tone one. Going to re, iterate
this bottom eyelid here. System that really intense. And I'm going to put a
little bit of red turns in. I eyeball. Remembering that I have
this highlight them here. This side. Okay, while that's drying, I'm going to go over the iris, some paths from little
bit of the screen. Okay? Then I'm going to grab the blue black and start to go over
this darker area as well. The iris and the pupil. Then I'm going to get my
coffee Brown stopped. Some of these creases again to expand and extend this paint. So I'm just going over the layers and reinforcing
the contrast and you can see how the image starts to
come out of the page more and more to the corner of the eye. Here. Just see what I am doing. Really intensifying phase
shadows and these colors. And again, especially around the highlights that they
really start to send out. Smoothing it out down
the bottom here, but also gonna go over this line down here
with the coffee brand. To heighten the sense of that, I feel like it's something
urgent quite well. A reload the coffee brown and start to run a
little bit roughly. Putting in meshes. Not too detailed,
just for the field. Iris and the pupil again as
well with the coffee brown, still way too light in
comparison to the rest. And then I will go
back to my skin tone to just tackle this part down
underneath the eye again, this bottom eyelid, the inside. Intense color. And just go over the top
eyelid again as well with skin turn to and just intensify this color,
smoothing it out. My number ten brush. To smooth out a little bit. Also connect the eyelids. The rest of the graph, skin tones free for this, like a light wash. I was taught violet here,
intensifying the colors. Maybe dabble tiny
bit of skin tone three down here into the
areas that are still wet, expands a little bit. And I'm going to grab
the green ocher. Just make a light wash again my number six brush
and I'm just going to put in the shadow on
the eyeball here. It comes down from the
eyelashes and cross here around the iris. I'm just going to fill the eyeball a little
bit this color. So you can see
there's a bit of a highlight here on the eyeball. And then also then go ahead and use a little bit of this on the other side. Quite intense. I'm just going to smooth that out now with a light wash. So just add a little bit of
green to the skin tones. Here. And here. Okay, I'm going to
dry that off now. Once that's dry, just
remember that while the paper is warm
from the drying, if you've tried
with a hairdryer, then the paint will dry quicker. If you start painting
straight away, just keep that in mind. I'm going to go back
to my coffee brown. Make a bit of a wash here. I'm not too light, not too dark. And just reiterate
some of these creases. Just intensify those. Don't have too much water
or pigment on your brush. And if you do, if you
notice that you have, then you can always
go ahead and dab that on your tissue paper. Just get rid of
the excess student to the corner of the eye. They're fun and I, this corner of the eye as well. To learn more detail on this in a minute with smaller brush. Now just the cation again with eyelashes,
darkness of them. Slightly more intense wash. I'm going to go over the
iris and the pupil again. Remember that the intensity of the darkness here isn't
the same everywhere. So you can make some
tonal differences by going over some
areas and leaving other areas we're
not gonna go over. And then in the next
round, brush strokes, you can go with a
different color or you can really experiment
a little bit there. I really enjoy the
tonal differences in the iris and the
people who like that. It really makes it come to
life and be more organic. I'm just going to
grab this can turn to and start darkening here. Then with the skin tone three, just going to go over the
bottom eyelids again here. They're a little bit here. Maybe add a little bit. The skin countries,
some of the creases. It a little bit onto the eyeball here as well because
Clinton three. Then maybe some skin tone
one over on the other side. Jessica, shadow
here with the skin, turn one around the iris. Down the bottom here. Now I'm just going to
go back to my blue black and curved the pupil. My number ten brush for
this. Just for pupil. Another, another go. I made a little more intense. Good luck here. Very washed out blue black. Learn more intensely in that wash. Little
more intense wash, just going back over
the iris and the pupil. And we just continue heightening the contrast with a very
light blue black wash. I will just cover
this highlight color. It's not 100%. Just
to remind you. To make a highlight
really stand out, you need to put a
darker area next to it. And also make sure
you don't leave too many surrounding areas
as the white of the paper. And again, start working a little more
intensely on the eyelashes. Them, I actually worked
with my smallest brush, my number one brush. I have a little bit of skin tone to it and it's Kevin
here a little bit. You still working with
skin turned to her. And I'm just adding in some more details here and
heightening the contrast, building up the layers. And now with the skin tone too, I am just getting into those small details
of the eye that are really important and
making it come to life. So you can observe
that there's a lot of red in this eye and
the photograph. And I really liked that. Just last steps and find
colors a little more. Just going to put in
some eyelashes down the bottom here with
some coffee brown. Remember that the
watercolor dries 123 shades lighter
than when it's wet. Blue black. And I'm also going to add a little more intensity to
this area of the eyelashes by dabbing my brush on the paper so that it's random and
a little bit organic. Okay, well, I'm going to
leave it there for today. I'm happy with that. And I hope you've
enjoyed this lesson. And I also hope to see
you again tomorrow for another day of 30-day
challenge painting eyes. I'll see you there.
21. Day 15: Hello and welcome to another
day of the 30-day challenge, painting eyes with watercolor. Today I have chosen this
image to use as a reference. And as per usual, I am going to start off by
sketching it onto the paper. Roughly not too many details, but I said this every time. What we're doing, highlighting the areas that we're
going to want to paint. Mac and the shadows. Don't forget to mark and
my highlights as well. I left line darker and then
put in the pupil and iris. And again, I'm looking at positive space
and negative space, or the positive space in this
case would be the iris and pupil in the negative
space would be the inside. Here. We're going
to highlight here. And I'm going to be starting
off by wetting the paper. I find that that
has really worked well for the first
brush strokes. Just to get the ball rolling
and the pink flowing, I find that the looseness of white working wet
on wet as really good. Okay. So I'm just going
to wait a second. One that's sunken a little
bit into the paper. I'm going to start off with my skin tone for just bring it over onto
the palette there. Mixed it up quite nice. It's a little bit too intense. Remember that we can use the
test strip is second pallet. And then I'm just going
to stop working on some of the areas on the paper. You've got too much
water or too much paint, too much pigment on
your paintbrush. You can always debit
on your tissue paper, which you should
always have on hand. And then you just
start painting, filling in both barrios trying to resist
the highlights you can append was a lot less controllable
than working wet on dry. But it also has this
lovely effect of just kind of spreading onto
the paper, which is nice. It's really letting the paint
to stay for a little bit. As you can see where you
left off your brushes, where the paint
starts to spread. So just experiment with
that a little bit. Remember that the eyeball
is not 100% what? So you can also put some
paint and pigment on there. So I'm just applying these first layers
and just starting to add in some of these details. And I'm just going to
start by putting in the areas with the
most contrast, the darkest lines
and my photograph, they're already looks
like something. Will take a little
bit more skin tone and just inject some pigment
here and there can expand. I'm going to try to
save this highlight here that I've just taken a little bit
of my tissue paper. I'm just going to remove some water and pigment
from this area. And then I'm also going to smooth it out up here that
wanted to expand so much. The eyelid up here is
actually a little lighter. So I'm using an almost dry brush just to remove a little
water and a little pigment. I'm still working with
them for a moment. I'm gonna give a very, very light wash here. Refining some details with
an almost dry brush here, dabbing it on my tissue paper, Moving a little pigment to get a little bit of
detail in there. It was quite well known
that just smooth that out. Okay, I'm gonna move on
to skin tone five now. It's more of a reddish term. So let's just save that, that I'm going to apply that
to this corner of the eye. Actually going to change to my slightly smaller brush pen. Just work this
corner of the eye. The detail comes across here. I'm just going to
smooth that out a bit of an overlap here. And my than ten, so it's just inject a little more pigment
into their skin, turned five just to go over
the top island little bit. You can still manipulate the breaststroke even
if the paper's wet. Trying not to manipulate it too much because
you just lift up the pigment from
the brush stroke underneath that want that. I'm going to give
them to the I here. Just a little bit
of color already. Hello, I'm Jessica and to
some of these details again, going to drive it now. Okay. So I went, Let's try make sure your paper stays
tight to the board. Otherwise it'll be very walked. It's we're working with
a lot of water here. So I just make sure it's taped. I'm going to continue
with skin tan ten. So just getting them to
some of these details here. Remember a few papers to warm. The paint will dry quicker
than when it's cold. And I'm going to go over
the iris and the pupil. Remembering that I'm
observing that highlight. Sticking with skin tone
ten line here is Docker, kinda smooth out the edges. The top here. And I want the paint to
expand a little bit there. Okay, Now, I'm going to take a little bit
of skin times six. So even more red here again. So just to remind you to make a highlight
really stand out, you need to put a
darker area next to it. So let me use those contests. It's still wet, so be careful
you can inject pigment, but I wouldn't
suggest manipulating with restaurant too
much. As I said. You might just take away the layer underneath
a few manipulated too much, little bit here, and thank you for not
to manipulate it too much because the
layer underneath may not be completely dry yet. Now back skin tone can make
a bit of a lighter wash. And I'm going to get
into these details. Making your brush stroke. And then I rinse my
brush a little bit, dry it off a little
bit, not completely. And then I can just take it and make it smooth or take away a little
pigment at the end. It's going to inject a
little pigment here, actually. It's bands. And some of these creases, some of the darker areas. So this is definitely
a dark area. Get into this crease up here. Under the eye a little bit. Change to my number ten brush. Think continue with
the skin tone, skin smooth, and start to intensify some of these areas that are pretty
color of the shadows. I think the pupils
pretty much dry now, so I'm just going to grab
some coffee brown guy here. Focusing on that
highlight a little bit. Just going to fill
my eyelashes here. Squinting my eyes
to see the rough, darker areas and not put too much detail into it
right now, it's dark areas. I've mentioned quite
a few times before. It's a great way to see where the dark areas without
focusing on the details, just squinting your eyes
makes it a whole lot even. Grab some skin tone. Nine now. Pinterest inject a
little bit of pigment into this still wet
area of the pupil and iris expands a little
bit of water and let's see how that was in the paint expands into
especially added water, then keep injecting them. Pigment. Skin tone area. What I'm mostly going to do
now is grab skin tone five. You can kinda see that there's a little bit of a shadow here. Member lighter shadow. Now, I'm also going to use
a little simpler and five, are the shadows here. Kinda let them flow out, frustrate on the paper, then play around
with it and live the more intense in some
paths and less than others. It's got kinda gives
us this nice variety. Off. Again, just making sure your paper stays
taped to the board. We don't want it
to be walked once we remove it when it's finished. So just keep pushing
it onto the board. If it does come
unstuck a little bit. Continuing now with a
little purple shadow and a little bit
of color up here. A little skin tone can again. Tonight. My other brush, remember ten under
the eye a little bit. Remember that an order for
highlights sustained out. The other areas
have to be darker. We are working with
the white about paper. This part here. I am going to start on my blue black for the
iris and the pupil. Where I wanted to come to the lash line
there is where it's darkest and start to intensify some of these carriers that are pretty
color over shadows. Remembering to visit
the highlights. Just add some extra pigment into the pupil because there is
always the darkest part of the eye in them, just building up the contrast. Looking to the areas
that are darker. I'm trying to really
make this stand out. And I'm going to grab
some skin tone for. I'm going to make
a very light wash. Pulled the inside of the
eye on the left-hand side. Not completely white. Hi, cloner. Here. A little bit in this
corner, I cut out working with skin tone fives. Kinda dry that off. And I'm not liking the shape of the p
of the irons over here. My paint brush, I'm
just correcting that. Finishing touches. Going to grab a little bit of skin
tone, ten, litres wash. I'm just going to go over the entire iris of the eye. Shadow. Working
with skin content. Building up the contrast. Nobody has confirmed
for very light wash. My very fine brush, I'm going to add
in some eyelashes. And for that, I'm going
to use the coffee brown. See, I've got my
number one brush here. Just, just for a little
bit of the detail. Like your brushes. Low contrast there. And last but not least, I'm trying to just
get a little bit of pretty much pure ivory black. I'm just going to put
that on the pupil. Remember, we don't usually
work with pure ivory black. I don't usually work
with few ivory black. Very, very small details, e.g. the pupil also going
to give it a lighter squashed just underneath
the last line there. And then back to my blue black. Contrast a little bit. I'm going to put on a couple of eyelashes at the bottom here. Just a couple. Very light. Isn't the coffee brown again? So I'm going to try
that and then I'm done. You have it. That's the
finished I for today. I hope you've enjoyed it. I hope to see you
again tomorrow for the next i and the 30-day
challenge. See you then.
22. Day 16: Hello and welcome back to another day of the
30-day challenge, painting eyes with watercolor. Today, I've chosen this
image as a reference. And like always, I'm going to
start by sketching out my, I just roughly onto my paper. So just trying to
get the forms on the paper and also highlight the areas that we want to point out to
ourselves to pay later. E.g. shadows or highlights, um, in our colors. Details that we find important. So we're making
ourselves a roadmap. Eyelashes coming over here. Coming over here. Remember not to
press too hard on your paper so there's no
indents from your pipe pencil. That's really annoying because the paint will go straight
and then we don't want that shadow under that. Here. What I'm gonna do
before I finish, I'm just going to draw in this highlight that I want
to reserve under the eye. This little line here, very light and also slide here. A little bit of highlight here. I'm going to go ahead
with my large brush. I've really taken a liking to working wet on wet to start. I find that really
simplifies things. Alright. I've just had to adjust
the light a little bit. And now I'm going
to start painting. I've got my skin tone one, just bring that over to
my mixing compartment of the palette here. And I'm just going to
start working on some of the details and making sure I've got my
tissue paper close. Remember that where we
left off the brush is going to be where it expands
the most while it's wet. So knowing that you have a little more control
over your paint. And then if you're not happy with the way
that it's expanding, new brush, dry it a little bit and then lift up
the pigment, the game. That's what I wanted to up here. You're going to get a little
bit of tissue paper because that's a highlight that
I want to reserve. Just lift up a little pigment and I'm also going to lift up a tiny bit
of pigment and PO, look like of light. Then it's going to go
over this area here. Also lift up a little
bit of pigment here because this is also
supposed to be highlighted. Continuing with skin tone
one and it's still wet. Just injecting a
little more pigment. Then I'm going to clean
my brush and go over to my blue black and I'm
going to make a light wash. Want to start working on
the inside of the eye. So very light. Just going to go kitten here. A little bit. Clean off my brush and dry it, and stop just to smooth
out this brushstroke here. And while that's drying, I will take a little
bit of my coffee brown, make a light wash, and then start the
pupil and the iris. Remember if you've
got too much pigment or too much water on your brush, you can always just dab
it on your tissue paper. Take it off. I'm remembering my
highlights here. I'm hoping that the paint
won't expand too much into that part because it's
a little more dry now. Outside of the iris
here Monday to lift up some pigment here because I've just gone
ahead and covered that. And I'm also going to get
slightly smaller brush. Just go in here, take off the little
pigment from the virus, wetter and dried it
off a little bit. And then I'm just going over the pod carefully to lift it up. Like that shape
isn't quite correct. So I'm just going
to go in there. My small brush and this
can turn one again. There. I'm just going to
go over some of these creases again
with my smaller brush. The paper is still
a little bit width, so it starts to
expand and places. You can see that where
it's still really wet, the paint doesn't really
even take the paper. Smoothing out this brush
stroke over here a little bit. And we just continue
heightening the contrast. I'm still working with
my skin tone one here, it's looking quite
intense though, isn't it? Then with a very light
wash of the skin tone one. I'll just go over
this area here. Just smooth that
out a little bit. Under the eye. They're a little more intense. And on the inside
of the eye as well. Just making the most of
the paper being wet. Now, I'm just going to
grab some yellow ocher, just unmixed color, just literally yellow ocher
straight from the tube. I've got a mud mixing
compartment and I guess you should
also on the palette, that's one of your colors. And I'm just going to give
the iris critical wash. This. I'm going to lift up a
little bit of pigment with my smaller brush,
this area here. And then going back
to coffee brown. Now with my smaller brush. Steps to get in
here a little bit, see how wet the paper stores, see how much of the expense. Let's define a little
bit more around here. It's still a little wet, so it still starts to expand
into the rest of the eye. So usually when we're
working wet on dry, we will wait for the layer
that we've just worked on to dry before we start
working on the next layer. But seeing as we're working wet on wet and this first stage, if we apply the next color while the color
underneath is still wet, it'll just nicely
blend in with color. Smooth it out a little bit, went a little bit over
the top eyelash line. And I'm going to squint my eyes. Remember that's a
really good way to see where the darker areas, without going too much into
the detail and the eyelashes coming over the eye actually make it a
little darker here. So we can add the detail
in later with blue black. Just going over some details
on the inside of the eye. Here. In the corner of the eye
is actually really ducks. And take a little pigment away. And they're still want to go over that looks purple
shadow and things. And just remove a little
bit of pigment here. See if I can't make this a
little bit more precisely. I think it's still a little wet. Okay. Well, let that expand. And I'm going to
stop with skin tone to I'm gonna go over some of
these creases again here. The paper is almost dry up here. You can see hardly any extending no Pentagon
to this past year. So we're just building
up those ideas. As we have seen since we started painting
with watercolor. It's really always the
same but different image. Still continuing
with skin turned to feel like it's too intense, like that way too intense. You can just remove
segment your brush. Just going to eyeball
a little wash. No-one. Don't want to paint
over that so quickly, we can just lift up this
pigment here before it dries. And then continue adding layers. A little bit of pigment with
an almost dry brush here. And now I'm gonna go
and dry that off. So that I can work with
a little more precision. When you've dried it off or
when you've let that dry. Just remember if you've
used a hairdryer, the paper will absorb
the paint much more quickly when the
paper is still warm. So I'm just going to wait for a second until it's cooled
down a little bit. And then I'm going to
continue painting. I'm going to begin again
with my purple shedder. Let's bring that over to my
mixing compartment here. And just got some areas that need defining and intensifying. Corn sample was not meant to be, kind of messed it up a
little bit over here. It's lifting up some pigment. And it's going to continue
intensifying scenarios. Adding more shape,
more precise shape. Yeah. Remember what I said
about the highlights for them to really stand out, I need to be directly next
to an area that is darker. That's why I'm always putting either blue or black
or purple shadow right next to these highlights. Making it a little more intense here than it is on
my reference photo. But it really doesn't matter. What we're really going
for. Some expressive. I am not a photorealistic, exactly like the photo. I'm just going to squeeze
that out a little. Just since this a
little bit more around. Just making sure I don't have
too much water on my brush. And I can kind of observe that this part is a little bit flesh. I'll just put a light
wash of purple there. Then smooth it out. A freely over done it
with the pigment here. Just with a wet brush. I'm just going to
remove some pigments. Wetting the paper
first and then with the dryer brush because carefully so we don't
ruin the paper. And then I am going to
get some green ARCA. Just a light wash, just going to work on
the eye a little bit. I'm back to coffee brown. Sentence of this area of pupil. Remembering a highlights. You can see they're
not 100% white, so it doesn't matter, but
they're now a little darker. Injected some
pigment there it up. Actually, I'm going to get
some of the burnt sienna, which I have on my palette
for mixing with other colors. And I'm just going to
use the burnt sienna straight out of the
tube that I have on my palette and just inject
pigment. Over here. Got usually like to use colors
straight out of the tube. But sometimes it's helpful. I'm going to use my
skin tones free now. Just stuck up with details. So I'm just adding this color to a few specific areas to give a bit of richness and
variety to my painting. So just really select a few
points to put this color. And now I'm just going
to take the blue black and start working
on the eyelashes. Start with the eyelash line. Then I'm going to switch to
my very fine paintbrush. I'm going number one paintbrush. Put in some details here. The eyelashes, the
iris, and the pupil. I'm just getting into some
really fine details here. And you can see
how making kind of random marks on the pupil here. So that will give a
nice tonal variety which will make the eye
look a lot more organic. Switch back to my slightly
larger paintbrush, can get some number six. And I'm just going
to add some blue black them to the
pupil area here. Intensify that. Love more. Darkness here to the lash line. While that's drying. I'm going to get my coffee
brown and my very fine brush. And just define this again. Is the area around the iris eyelash line a little bit. With my number six brush. It's gonna give
them the corner of the eye that stem here, just some text, some pigment. Maybe just go back
to skin tones. One for a moment. With the number ten brush. Make the light wash. That's way too intense. Light wash, That's better. Then just go over some areas. And I'm just going
to dry that off now. When that's dry. Remembering that once
when it's still warm, it will absorb the
paint a lot faster. The paint will dry a lot faster. So just make sure
it's not too hot. And I'm going to go
back to my green ocher. Just a light wash and just a little bit to
the skin tones, areas. Light wash. Right? And back to blue black, just inside of the eye here. Given lead another wash. Smoothing that out
with a clean brush. A little bit of green ARCA. Intensifying that. And very intense. And we just continue
heightening the contrast. A little green, okay. Coffee brown. Iris pupil. The eyelashes tend to take a little curved
shadow onto the screen. Ends can turn one smooth. Let's soften that
edge a little bit. So you can see
there's just a lot of going back and
forth between colors. Adding layers, intensifying. So really building
up those layers to really give depth
to our painting. I think today for
the first time, I'm going to use the white. And the way I'm going to
do they're pretty simple. Chest, I'm gonna take off the first leg.
Let's hands dirty. And then I just get it on
my brush and I just use a very thick highlights
in the eyes. Here. Make sure you use it very thickly if you're
going to use it. Otherwise, it will just
be gray eyelashes, which seemed to be a reflection. Okay. So I think I'm going
to leave it there for now. That will be the finished.
I just make sure before you remove it from your board
that it's completely dry. And I hope you enjoyed today's lesson for 30
days of painting eyes. And I also hope that I see
you again tomorrow for another I and the 30-day
challenge. I'll see you there.
23. Day 17: Hi and welcome to another day of the 30-day challenge
painting eyes with watercolor. This is the image
that I have chosen to use today as a reference. And seeing as it's a
black and white image, I'll be using three
colors again. As per usual, I'm
going to start by sketching the image
onto the paper loosely. Remember that when
we're sketching, what's important is to get
the shape onto the paper and also to draw and shadows and highlights
that we want to reserve. So I'm just going to
put in the forms here that the inside of
the eyelid here. And then I'm just going to put
in the iris and the pupil. I remember when
we're doing this, we're looking at
the positive space, which would be the
iris and the pupil. The thing we're putting
in, the negative space, which would be the
white of the eyeball. Then I am going to mark and
myself this highlight here. So that I remember to save
the white of the paper. Looking at the negative space, which would be this here, just under the eyebrow,
above the eyes. I'm going to leave
the sketch there. And I'm going to begin by
wetting the paper all over. Like getting my largest brush, which is a number 16, and just dipping it in
some clean water and then just adding the
water to the paper. We want the water to sink into the paper a little bit
before we start painting. So I usually just
wait 9/22 or so. So I am going to grab
my number ten brush and get some coffee brown starting with
multi brand today. I'm just going to start mapping and some of the shadows here, but the AI working
wet on wet right now. Remember that when you take
your brush off of the paper, the paint is going
to expand the most. Once you figure that out, it's easier to predict what
the paint is going to do. If you feel like you've got too much pigment and
water on your brush, you can always dab it
on the tissue paper, which should have won him. Over the eyebrows here, just the general
area details yet. Just going to clean my brush and remove a little
bit of pigment and the water from this part here. I want this part of the
island little bit lighter. Put an eyelash line. When Ira, remember that we've reserved this highlight
of the eye there. We don't want to paint
over there and we see that the paint is
expanding over there. Then we also wanted to take that paper towel and
just dab it off. That's already emerging. I love wet on wet. It's great. Discovery through this
30-day challenge. Actually never really
put wet on wet before because it was always so hard to control and I just like to
be in control of my paint. It's why I struggled
with watercolor. So you can see I'm just adding more
pigment to certain areas, trying to start heightening
the contrast already. So I can see that the pigment is expanding a little bit too much into
my highlight there. So I've just got a little piece. She paid back and
then just stay there. A way that works well for
this thing to Deb was lovely. Night line at the
bottom of the eye sits. Thank you, Greg. Little
highlight as well. My paintbrush here. Here. Here. Just wetting my brush a
little bit to contain these, this expansion of the pain
but not make it sir, drastic. And then it's gonna
get small pigment. This proud again. The papers slowly drying now. So to still expand, but not as much. Just gonna get my
very small brush, just wet them a little bit, dry it off, and
then just go over this little line than
human I want to reserve. The pen has kind
of expanded into another, wanted to disappear. Just wetting the pigment again
to lift it up carefully. So we that type of thing paper and just dabbing on the tissue. I also really like how
lining this is, Scott. I'm just going to
smooth that out. I want it to be more organic. Chemical, unlike
a bit wet on wet, it really does seem very
organic, doesn't it? I'm just going to
intensify here. I'm going to dry that off now. Feel like the paint is
expanding too much. Alright, so now that's dry. Still very warm. So just remember
that when you're painting on a warm paper
that you've just dried off, the paint is going to
try it a lot faster. So I'm just going to
wait a little second until it's cooled down a little bit so that it's cooler. I'm going to start working
with Hubble shadow. I'm just going to take
my smaller brush, smallest, something I
can work details with. I'm just going to
start on the details. See I'm just applying
very light wash to start because I've kind
of lost my drawer in the process a little bit. Just redefining some things
that I've lost my drawing. That's gonna be interesting. Layer after layer, like we
have done all the time. Like I miss this a little bit, so I'm just going
to take that off. And again, because it's dodge
because it's more accurate. Does he do see a mistake that you would like to
correct while it's wet, you can just grab some tissue
paper and David on there. Or you can re-wet
the pigment and then carefully lift up the
pigment with your paper. Just really carefully
so you don't lift up paper or other layers. I mean, if you do wet your
paper after it's already dry, then you will probably lift up all the layers that are
underneath as well. So you've got to
think about that too. Okay, and now my
number ten brush, I'm just going to smooth
this entire area. Squinting my eyes again and
to see about the eyebrows. I don't want to put
in too much detail, any detail really yet. I'm just going to see
where it's darker. Squint your eyes. It's kind of just
smooth that out. Tidy this up a little bit again, waving my paintbrush
little bit to reword this pigment on the
paper and then just lifted up. I want this to be a bit smoother. Cribs more. Shannon, kinda be lost those lovely line under
the eye highlights. I'm just going to creative than recreating it just by documenting the
areas around it. Because I've said before, the highlights to stand out, the surrounding areas
needs to be darker. Making them darker. Saying is I've lost the white of the paper
them not by much, but it's definitely not the
white of the paper anymore. The only white of
the paper I have now is this highlight up here. A little pigment here as well, a bit too little bit of time. Some people wants more shadow, can stop to intensify some of these carriers that I've
already gone over shadows, remembering to visit
the highlights, grabbing my number
ten brush again and I'm getting the people shadow. And I'm just going to intensify
more shadows around here. And just got into some
of these details again. Defining a couple of lines. Fine, some contrast and shadows. The outskirts of the eye now, Iran as well. So I'm going to
drive it off now. Right. And when that's dry, I've just noticed that I
hadn't really worked on this. Proud of the eyeball,
a lot darker. I'm doing a little work on
that before I start adding. I'm just going to lift
off the bat here. Since the Clean little
lighter for some reason. And now I'm going to go
in with the blue black. I'm going to start
with the details and stopped to intensify
some of these areas that are pretty common I ever
remember to make sure that you're painting stays taped to the board so
that it doesn't warp. Because working on the areas of the iris and the pupil here. Can I grab my number
ten brush now? And we'll just continue
planning areas that are darker, cleaning the brush. And then I'm just going to
extend that brushstroke here. Comes the round. That to expand a little
bit not be so clear. Intensifying, intensifying
the current layer by layer. So making sure the
watercolor is translucent. Little bit of a wash top eyelid. Back into the eyeball. They're kinda working
wet on wet here. Good. She's come and get
them in the eye here. I'm sweeping motion. No more intense. Just smooth that out. Then you want to
smooth brushstroke. What you need to do is either clean the brush and then dry
it off or just dry it off. It depends really how
charged the paint brushes. And also if you're working
with a different color, by defining a couple of lines. Just inject a little
bit of pigment. Drink around here. Jessica and to families
details again. Just going to put
them as my eyebrows, just loving detail but still wet so it kind of expands and
it looks more organic. Observe how the eyebrows at
the end here that come in from both sides and then at some point That's just
from the bottom up. Dry that off again and
see what it looks like. Hey, I'm just going to put
on some finishing touches. Not yet happy with
how this is looking. So I'm just going to smooth
that out a little bit and then switches intensify
a little bit here. And then smooth it out. Here. When you smooth out, try to smooth out with flatter brush. Not look the point
that lie the brush flat with my teeny tiny brush
and gets the number one. Grapes and flew back and
just put a stray eyebrow, eyelashes here, green
and round here. You can see in the
reflection here is up here. Remember that the
watercolor always dries a little bit lighter than what
it looks like when it's wet. Good to know. And a couple of style
it has some photons. Make that line a little bit darker so that the
highlight of the eye, it's a little bit more apparent. The eyelashes with just using
these flicking movements. And you can do more than
one layer if you wish. Jessica, into some
of these details, again, defining a
couple of lines. I think I'm done.
I'm just going to dry it off and then that's it. So make sure it's fully dry before you remove
it from the board. Otherwise, it will walk. I'm just going to leave it
on there for a little minute more so that it can cool down. And then when I remove
it, it will be smoke. So that's the end
of today's lesson. I hope you've enjoyed it
and I hope to see you again tomorrow for another I am a 30 day challenge.
I'll see you then.
24. Day 18 : Hi and welcome back
to another day of the 30-day challenge painting
eyes with watercolor. Today I have chosen this image to use as a reference
for the daily. And I have mixed up the
colors that I want to use. I'm going to begin by sketching the I loosely onto my paper. Remember that when
we're sketching, what's important is to get
the shape onto the paper and also to draw and shadows and highlights
that we want to reserve. Don't push too hard
with the pencil. We don't want to hit marks, pencil marks on the paper because the watercolor will
just go directly into that. And we don't want that slightly
in the eyelash line here, the eyelashes, they
are really quite dark. I come down to here. Then later we can
put them in details. The eyelashes, putting the pupil, the iris. You can see that
this is hastened photographing this phi
reflected in this eye. I want to make it that detailed. Squinting my eyes here to see the darker areas around
the edge of the iris. Pilots here, this tidy up
the bottom eyelid here. I can pull up the pylorus. So I'm going to
leave it there for now with my large brush,
which is the number 16. I'm just going to wet
the paper completely, just making sure
that it's evenly wet or other maybe you want to go over it a couple times
using my number ten brush. I'm just gonna go over and
stopped with my skin tone tin. Try that here on
your test sheet. You can see I'm
just focusing here on contrast dark areas. Also as the Spanish line. You can smooth this
out a little bit. Lighter areas. You can see that
just for myself, but very good at preserving it. I come over here on
the bottom here. Just continue doing that. Maybe you can go back into her eye and then maybe with a slightly
lighter wash. I will just call
them eyelid here. And maybe also to stop
putting a little bit of a wash inside of the
eye to start off, get the ball rolling, lose your blank paper. And also, it's good
to build up layers using the lightest color
we're going to use first. And living up to
the darker colors. I'm just going over the top
here again, we can turn ten, but you can see the
paper's pretty much dry, so it's not expanding anymore. Of course, do a lot of
smoothing out myself. You can see I'm just
building up layers. And I'm going to put a
little bit more smooth. I'm gonna stopped using a
little bit of skin tone five now It's a
bit more reddish. And I'm going to intensify the areas that I've
just worked on and there's still a little
wet so I can just loosely asked my
brush over bones. Careful not to
interfere too much. Otherwise they'll take away the pigment this way
it's a new color, will just mostly expand and to the color
that's still wet. And I'm just going to
expand that a little bit, just smooth that out and
continue and try and find area that's already working. You want to smooth
at a brushstroke. What you need to do is either clean the brush and then dry
it off or just dry it off. It depends really how to
actually paint brushes. And also if you're working
with a different color, I'm just going to
smooth that out. Real nice smooth feeling to it. And then painting the brush
and let it expand onto the paper and bring that down a little
bit here, McCarthy, I just put a wet paint brush, still working with skin tone
five over this barrier here. Okay. And here the eyelashes. Be very dark and TD corner, I know I'm going to scan timeline, start working on the
inside of the sky. You can see this
part is still wet, so that'll expand it to there. That's fine. And here
it's mostly dry. Just going to lift this up with a dry brush is clean
and dry that I didn't really want it to expand
and I'm just going to try it with tissue so that it stops
expanding onto my eyelids. The paint will only expand
into areas that have also wet. And we just continue
heightening the contrast. Working on the areas of the
iris and the pupil here, while the other areas dry. I can see there's a little
bit of green in the eyes. Just going to finish
this part here, remembering that
this highlights. And then I'm going to go to my green ARCA plasma so that it confused the darker
color around the outside. Okay, I have my skin tones six. At the back of those
Ginsburg five can start to intensify some areas that
are pretty color of shadows. Remembering to visit
the highlights. Stress enough that
these lines here, I don't want them to
pick two prominent, want them to be there so that
the highlights stand out. I'm just going to
smooth everything out. This side, smoothing it out. On the corner of her eye too. Continuing. This contains
six top of the eyelid here. Smoothing that out too. Okay. Now if my number ten brush, I'm just going to smooth
this entire area. And a little bit
That's contents. Smooth out up here as well. Just a little bit more. It's contains six eyelid. The top. Smooth that out. With the dry brush. Smooth that out a little bit. Continuing with skim through and sticks to the bottom
of the eye here. Just a little bit of shadows and testify
this area in here, this eyelid is also quite dark. Just wet my brush
a little bit and I'm just going to
smooth that out. A little bit more
pigment in here, its contents little shadow here. Mendelssohn smooth it out
and came back to skin tone. Ten, little bit more color here. So just put some more top here and smooth it out the
same on the other side. I'm going to go to
my blue black now. Start putting in some
very dark areas around the iris and the pupil and
also around the eyelashes. Really worked. The
contrasts start coming out. Pretty much this entire
area here is very dark. I'm just going to
add that just so we don't get confused because those starting to get
a little confused. Sunlight and in
reality it's so dark. And then I'm just going to start adding a little bit of
detail eyelashes here. And then meet here
at the bottom. Right. And then I'm going to
continue this area. Iris and the pupil
shape is really, is some manipulate
that a little bit. Good Then here. So I'll just remove that. That's pretty usual dead tissue
layer to remove pigment. And then I'm just
going to keep going. I'm going to go to
skin tone nine. I'm just going to add some fat and the iris and
the pupil as well. Feel like that's more
brownish tan job here and I've got
suddenly more of a bluish greenish tinge and just document
the pupil as well. Or brownish off here. And then I'm just going to
get the brush and just inject a little water for
the distance to just use together a little bit. Grab the skin tone,
find interests, cover these areas here, which are the arms. I'm going to put in details. And then I'm going to continue
with skin tones sick. This corner. I smooth
it out a little. Just adding a
little bit of water to the outside of the iris here. So that expands a little bit. Quite enjoy that it's not 100% clear in the image
that we're referencing. Trying to clarify again with
the corner of the eyes. And then it's darker. Smooth it out a little bit. Intensify this shadow here. So highlight starts to come out. Still working with skin tones that defining the eyelid here a little bit more on
the bottom of the eyelid. Sometimes it's not that easy to get the lines like he wanted, especially because the
paper walks while it's wet. System tray, this
doesn't really matter. We're not trying to go
for the hyper realism. And we just continue
heightening the contrast tone. You want to go back to
skin tone five amendment. I'm just going to pick up here a little bit of a
wash at the top, eyelid. Little more intense object, a little bit of pigment. In these pots on the, the I going to make a light wash of blue
black now for the eyeball, light to dark, just a light wash.
And I'm going to start going over this part here. I'm just drawing with
my brush and then I'm just going to smooth
it out a little bit. And this side of the eye to apply a light wash
that's way too dark. I'm just going to
extend this pigment. Can see the side of the
eye as much darker. I'm just going to actually
inject a little one here. And I'm gonna just dry it off. Right? And when it is dry, remember as long as the paper
is warm from the hairdryer, if you dried it off
with the hairdryer, the paint is going
to dry faster. So just keep that in mind. Once you're comfortable
with fields, Let's continue painting. And I'm going to go
right ahead and start just making that shadow
above the eye darker. Okay, so I'm gonna
get right in there and just really intensify that. Smooth it out over the eyelid. And we just continue
heightening the contrast. I'm gonna get right into here, into the corner as
well with the entire nine and start darkening here. And also around here, I'm gonna go with eyelashes
was contained mine, and then come down and
define the cloner. I again. Then I can see this
little dark as well as here. And also down here. It's been smooth this
out a little bit. Now with a little purple shadow, I'm going to get into these creases and
heighten the contrast. The corner of the eye with the shadow lines and
then moving out. So do not force lines. Look for your gamut. Here again, smoothing it out, but I'm going to grab the screen, are just going to
add a little bit to certain areas skimmed, e.g. here. It's very intense. Instead of a greenish tinge
on the skin here and here. And I find this green
really balances out the rest of the skin
because it's quiet, reddish. And then the screen just
kinda brings it back down to want to have a little bit more of a reddish tied
on the top eyelid. So I'm going to grab
my skin tone five, light wash, and I'm
just going to go. And also, I would like to have a little more red on
the bottom here. Now I'm going to add a
little bit of a wash also to the top eyelid here. And then I'm just going
to smooth that out. Kind of loses itself. Okay, well that's drying. I want to intensify the
iris and the pupil. So I'm just going to
get a wash with black. And I'm going to use an intense, more intense course that
I'm just going to add some more ivory
black pigment and Prussian blue pigment to
my mix so that there's less water and more
concentrated pigment. Quite intense. And I'm just going to start
going over these areas that everybody remembering to hear both sides of the eyeball, that kind of loses itself. And why does the, I smooth it up quite a lot more. Remember ten brush,
I'm just going to be a little bit looser. Areas. You can move a much lighter wash of blue black to start a game on
the inside of the eyeball. So I'm just going over the
layers and reinforcing the contrast and you can see how the image starts to come out
of the page more and more. I'm just adding a little bit of detail here about the eyelashes. Generally. I'm going
to go over this in a second and I'm just gonna go
back to my purple shadow. Intensifies areas. Get some skin times, five. And a little bit
of that in here. Then I'm just going to
smooth this area out. The game purple shadow, come over to this corner. It's more than that as well. And underneath the eye. And then with my
number ten brush, I'm trying to come up above the eye shadow and here as well. Now look but tiny, tiny brush coming back
to my blue black. And it's very intense. It's great. And I'm going to start
putting these violations, which just using these
flicking movements. And you can do more than
one layer if you wish. I'm just on my second layer now. And then I think
I'm going to just put one very last
finishing touch, which is with ivory black. I'm just going to go
over the pupil here to make that the very darkest
area in my painting. One more thing I'm just going
to do a little touch over here is just smooth
out this area. Okay, So when that looks
a little more organic, I'm going to let it dry and
then I am done for the day. I hope you've enjoyed
today's class and I hope to see
you again tomorrow for another day of 30 days painting with
watercolor. I'll see you there.
25. Day 19: Hello and welcome
to another day of 30-day challenge painting
eyes with watercolor. I am today, I have chosen
this image to paint. Let's get started
by just loosely sketching the eye
onto the paper. Remember when we're sketching, what we want to do
is get the form, the general form, and
also where we're going to paint shadows, highlights. I'm just give ourselves a guide. Person has their eyes very wide open so you can see
almost all of the iris, but as you can see, there's still some of it
covered by the top eyelid. But you can see the
eyes pretty wide open. Now we want to look at reserving this
highlight right here. Feel free to erase your drawing if you're
not happy with it. Like I made it a
little bit too long. Look at that
highlight just here. I want to reserve that. Then we've got the eyelash line. I'm just squinting my
eyes to see more or less where the dark areas Bob, corner of the eyes a
little bit higher. It's also a nice little
highlight down here. Can we want to preserve? Then let's look at
these highlights here. There must be some kind of
lighting system around. It's reflecting in the eyes when they're highlighted
here as well. From there. Now, I was just going to leave
my sketch like this. And I'm going to
wet the paper using my number 16 brush
and clean water. Just wet at all over. If you have a larger brush or a smaller brush that you'd
like to use is fine. Just see what materials
were best for you. I'm just going to let that
sink in for a moment. And I'm going to start using my skin tone one night a wash. Right? And then I'm just going to start by marking them some
of these darker areas. And remember when you're
working wet on wet, the area that is going
to be most expanding. It's going to be where
you take your brush off. My brush, I'm just lifting off a little bit of pigment here. It's Dr quite quickly already. Just a little bit wet. Now, if you want to help yourself be able to recognize darker areas better, you can squint your eyes. It's always a really
great way of just seeing areas and fed details. Inside of that top eyelid. They're down here already. We just keep going. This is just the
very first layer, so we'll be painting over
this, but that was fun. It's great to get that
first layer going so that the nerves
of the white paper, you've gone swimming to look a little bit
more pigment here. And going a little lighter
with a wash stall. Little bit of color
inside of five. Remember the eyeball is never completely white unless
there's a highlight. Because if there's
a highlight and leave the rest of
the eyeball white, you will not see that
because you need darker areas to be
surrounding the highlights. For the highlight to
really stand out. Well, that's dry. I am going to grab my green
marker and just start. Iris and the pupil, making sure not to the
other the highlights. Just going to start with a
light wash and I'm gonna be careful not to touch the
areas I've just worked on, on the inside of the eye. Was this paint is
going to expand. So I'm going to
continue with skin tend to just go over those areas again, applying paint and then
manipulating the brushstroke. I'm just taking it over here. And I'm just kinda
smooth it out. So I'm just applying these first layers
and just starting to add in some of these details. Barn and darker areas. Come and grab some coffee brown. People. Define. Some darker areas. Grab a little bit
of yellow ochre, just the pure yellow ocher. And I'm just going
to use that data a little bit of pigment
on here because I feel like the eye is
a little bit yellow. That's quite
interesting, isn't it? I'm also going to
grab a little bit of burnt sienna dead that in there to get some
tonal variety of, I loved her know,
varieties in the, I feel it really makes the
painting come to life. It looks organic. And we'll let that dry. And while we're doing there, I'm gonna go over to
my Paypal shadow. Once again, start working
on some details here. Our next slide here. Smooth that out. I'm going to smooth it out
towards the bottom as well. So a wet paint brush and I'm just going over the edge
of the paint expense. Putting a little more
pigment, a mere shadow. I'm just going to put
some more details. E.g. to farming a little bit more down here. You can see the shadows here. Pretty much all the way across. You can interrupted
in the middle, so it gets more of
an organic feeling. And also with a
lighter purple shadow, I'm just going to comfortable
wash to this Bible here. The highlights stand up more. Make their spend a little bit. And the moon little pigment. Just a little lighter. Then I'm gonna go over
to the other side of Phi with this
full-service highlights. And going back to skin
tone to go over this. So the top eyelid, I'm going to smooth
it out a little bit. A little pigment with some kind of reflection of
the highlights in there. I'm just going to smooth
it out towards the bottom. Little bit of pigment. That edge. Again with the skin tone through a little
bit more intensely. And here I'm going to grab my
sometime street light wash. That's way too dark. It's really light. I'm just going to
dab a little bit on my tissue here and then smooth it out. Flat brush this web smooth. While that's drying, I am going to go back to coffee brown. More intense. And the pupil. Next line up here with the coffee brown to the level where
it will just go. Spend kinda really local organic corner of the eye there. And move my number ten brush. I'm just going to go
back to the screen. Okay. Very light wash, very
light wash. Just want to take away a
little bit of this red. I'm just going to put a little
bit of a greenish tint. Shadows, helped her
down a little bit. Remember, you can use
complimentary colors to turn down **** is that the two poppy? Red? I'm using some green and that will help make it more balanced. And I'm going to go
for my blue black now. Just kinda make it really
light, wash, really light. I'm going to start
adding a little shadow. The eyeball. Make it too dark. Side. It's more in shadow
towards the bottom here. Mentally of different phyla
that we want to reserve. And now for the highlight
to make it stand out more is going to
work more intense. Just around. Saying back to purple
shadow on the deal, Whichever you put them face. That will help make the
highlight more apparent. On this island here. Moves the pigment
around with fresh. While the pupil is still damp, I'm just going to blue
black male the most. I'm just going to
work a little bit around the outside of the iris. Detail here. Very fine brush
staying with a blue black. People are a little bit errors. Can take care of.
It's really dark. Remember that the
watercolor dries 123 shades lighter than what you're seeing right
now when you're painting. But in some detail
now, the coffee brown, I'm just kind of start putting
a couple of items here. Clicking the brush, loose movements to try not
to do every Irish the same. Really always like to
go for organic fields. Not imagined that two
things are the same. Some eyelashes down
the bottom here. It's really loosely trying
to bury them again. After coffee. The
photograph here, just kind of trying to
make my own eyelashes. And while that's
still a little bit, then I'm just going
to go over the top. Simply back. I'm just going to
quickly throw that off. I'm just going to wait till
it cools down a tiny bit. Once it has cooled
down a little bit. Going back to my blue black. And I'm just going to outline with a little bit
more green Parker, little bit more variety in their multilayers in
these highlights. And then I'm just going
to add a little bit more black up here to the left line. Not focusing on
the details back, darker and more intense. And sometimes the frame
a little bit here. Multiple shadow here. Let's do I'm here to serve
expands a little bit. Mostly burnt sienna. I'm just going over this,
but just remember pupil, more non-mixed burnt sienna that we've used for
mixing our colors. To mix them new for this. I'm just gonna go
back to my skin tone. It's going to flip
my tiny brush. Really care for it. Crease here, shader here. So this becomes more apparent. I think what I'm missing now is just a little bit of dark eyes. Random there. Nothing. I'm just going to dry that off and
that's me done for today. So there we have it. That's my finished painting for today. I hope you've enjoyed that and I hope to see you
again tomorrow for another painting and
the 30-day challenge of painting with
watercolor. See you there.
26. Day 20: Hello and welcome back to another day of the
30-day challenge, painting eyes with watercolor. Today I've prepared this
image as a reference, and I have also decided which colors
I'm going to be using. And as per usual, I'm going to start by drawing
a rough sketch with pencil. Doesn't have to be exact, just general shape and then
marking in the shadows, the highlights areas I want to say there is
I wanted to paint. Just giving myself some clues about where to paint
and we're not paint. Can see there's quite
a lot of wrinkles here which makes it
very interesting. Find slab chose this one. So when you're
drawing the pupil, you can look at the
positive space, which is the pupil and the negative space which in this case would be the whites of the eye and have it
in relation to each other and the reference image. And then how they
look on your paper. Don't forget to mark
in the highlights. I'm going to leave
the sketch there. And I'm going to wet my paper using my
largest brush for this. I'm just going to let it
sink in for a second. So I'm going to start
with purple shadow, just mocking in the
darkest areas here. I'm going to start remembering that when the paper is wet, where we left off the
brush is going to leave the most expanding brushstroke. Remembering to the highlights. She's got five of
my highlight Theia. It's going to expand
a little bit here. I don't really mind because I feel like I've referenced and mentioned the iris expands a little bit into
the eyeball area. More purple shadow. Intensifying, injecting pigment. Just go over that again. Injecting a little pigment, maybe moving a little bit with the brush,
but not too much. I want to write paper. Just smooth that out. I'm just going to dry that off. Alright, and now I am going to continue
with purple shadow. And the paper's dry now so
there'll be more precise. Remember that your paper will
absorb the paint quicker. Women still warm from the dry. Jessica into some of
these details, again, defining a couple of lines, intensifying some
contrast and shadows. It's building up layers. Start intensifying some
of these creases here. Start to go over
this darker area as well as the iris
and the pupil. And then filling numbers, barrios trying to
reserve the highlights became just going to flip the brush a little bit. Extend that over here. I'm going to go inside
of the eyeball. Not as intense. Remember to keep your
highlights highlights. You can lift up the pigment
and the water from there. If you accidentally go over it. You can also use white
paint because it's best if you just try and try and
reserve as best you can. My medium-size
brush out a little. Just continue increasing
the contrast, building up the layers. And really just adding
volume that way. Just want to be
working a little bit all over the image so that parts of it dry and then
you can go over it again. Still going with the
people's shadow. Filling my curves
with the face here. It's going to dry it off again. Okay, now I'm going to
move on to the coffee brown and start going
over some areas again, starting with the pupil, the eyelashes here so
they make it darker. I'm just going to find
this area a little bit. The area under the eye. You can always change
brushes and then manipulate the brushstroke to liking. Sometimes it's hard to get into these areas details with
the medium-sized brush. So just see what feels
good for you. Preparing. We're trying to make this little highlight
them here stand out, which means the areas
surrounding it to be darker. Don't want to
outline up exactly, but we want to create
this idea that it's, that the eye is which, which means my life. Jessica, into some of
these details again, redefining a couple of lines. Sometimes these areas
can be hard to define, but you can also
play around with it. Leaving a little bit open. Okay. Now to smooth that out. Yep. All right. Go ahead and try that off again. Now I'm going to continue
with blue black. Just intensify the shadows,
you know, the drill. Just kinda car pupil iris again. I left mine at some of
these creases again. Just going to smooth that out. Remember that the intensity of the darkness here isn't
the same everywhere. So you can make some
tonal differences by going over some
areas and leaving other areas we're
not gonna go over. And then in the next
round, brush strokes, you can go over that
with a different color or you can really experiment
a little bit there. And just tackle this top down underneath the eye again,
this bottom eyelid. Also with the blue black intensifying
and contrast shadows. And Jessica into some
of these details. Again, injecting pigment, still wet. So you don't want to move
your brush too much because you probably lived
up the layer before. You can inject pigment
and they'll just expand and really organic way. Smooth that out a little. Just grabbing my smaller brush to get into the
details a little more. Like I need a little more
intense. Good luck here. Lift up a little bit. Again. I've got pretty
much bread dry brush, and I keep data on
my paper towel. Trim the excess pigment and water in the brush,
just picks it up. And I'm just adding in some more details here and
heightening the contrast, building up the layers. Just couldn't grab some
more until these creases. I'm not going to go
into the wrinkles and detail injecting pigment. I'm try that off again. And
I'm going to continue with some blue black flu flu black with more
intense black pupil. So yeah, I'm just adding
the finishing touches now. I'm just looking
where maybe I can put one brush stroke here
and one brush stroke. This, that's really just the very small details
that I'm covering now. Just gonna put in a couple of details with my small brush. Not the smallest, smallest one. I think this one will do. Just since the I am
to highlight here. Okay, I'm gonna
drive it and then I'm going to be
done for the day. And they go, that's
the finished. I I really hope
you enjoyed that. I hope to see you again tomorrow for another
day of painting eyes. And the 30-day challenge.
27. Day 21: Hello and welcome back
to the 30-day challenge. Daily diet is a painting
with watercolor. Today we're going to be
painting this image. I was at the final app store
the other day and I saw this bright light gold color, which I haven't actually
had a chance to try out, but I might just try
that out because of the nice little
highlight that she is going on on her eyelids. So let's see what happens. It's optional if you
don't want to get some kind of metallic
shade, that's totally fine. You really don't have
to just see how you go. As per usual, I'm going
to start with a sketch. I'm just sketching freehand. I always find it quite helpful to practice sketching freedoms when we're working on units like individual
parts of the face. So you have an eraser on
hand if you make mistakes. You've probably noticed
that I don't always have the eyebrows in the painting. I'm not really a fan so
much of painting eyebrows, so I prefer to hit the space
under the, I really do. You wish you can see this
part here slightly lighter so it will just trying not to look at the
eyelashes too much, but they obviously all
this part of the eye. So we can't really ignore them. Do dark and quiet a lot. So this is a really interesting I marking and the highlights with the eye that I'd
like to reserve as well. This shape isn't quite right. That's correct. Good. I think I'm just going to
leave it there for now. Start with wet on wet, wetting the entire paper with a clean brush and clean water. And I'm just going
to remove some of the water with a very fine
piece of my tissue paper. So I'm just going
to make low point. Can just remove water
from the past that I don't want to
pay to expand into like these highlights
here than here. This one here. Just removing a little bit
from here from the eyeball. Then I'm going to start
with my number ten brush and my number for skin tone. Remember to have
your test strip so that you can test the color. Yep, That's cool. I'm just going to
work start working on the darkest areas here. Now when you're
painting wet on wet, you don't want to insist
too much with your brush. The paper is a little more
vulnerable when it's wet. So I'm just applying these first layers
and just starting to add in some of these details. So the width of the paper,
the more the paint will expand as you can see. So I'm just working on this first layer and
just being a little bit looser about the paint and just letting it expand
a little bit more. I'm still trying to
preserve my highlights. And now I'm going to
go and dry that off. Make sure you're painting
stays taped to the board. And then you just want to
make sure that it's all dry and it is an I'm just going to continue with skin
tone for for now and just go over those areas that I've already
started working on. This ones here, e.g. this eyeliner corner of the eye. You want, you can smooth
out but brushstrokes. I always like to do that, especially at the
very beginning. When you want to
smooth brushstroke, what you need to do is either clean the brush and then dry
it off or just dry it off. It depends really how
charged the paintbrushes. And also if you're working
with a different color. First we're trying to work on the general areas of fact Muslim later we can go into
detail from the general. The pupil and iris. Being careful not to go over those highlights
about myself. And then I'm going to intensify on the outside
under the eye here. And also just go over the
outside area of the eye with a light wash around the top there and come over
to the other side, intensify the crease in
the corner of the eye. Just floating up my layers and then smoothing
it out a little bit. Just continue
working in this way. So I'm gonna go over with
the eyelashes, are here. Grabbed my slightly smaller
brush, the number three. I'm going to be continuing for now with my skin
tone for and I'm just going to intensify this crease of the
eye a little bit. You can make the mark and
then modify the brushstroke. I'm just building
up the contrast, looking for the areas
that are darker. I'm trying to really make this stand out and I'm just
going to dry that off now. Yeah. Okay. So it's completely dry. I'm just going to continue
now with my skin turn six. Get into some of those details. It's a little bit darker
than the skin to N4. And just getting into some of these creases above
the eye again, the area above the eye just
heightening that contrast. In this corner of the screen for some of these darker areas. Want to be reserving this
little highlight them here. Highlights is what makes
thighs come to life. As I've said before.
For highlights. To stand out, the surrounding
areas need to be darker. My number ten, brush, continue with the
skin turns six. Sam, just continuing to
increase the contrast here and also following the curvature
of the face a little bit. Kinda get into the eye, the pupil and the iris
now, some coffee brown. I'm just going to
give it one coat. Remembering those highlights. We don't want to go over the whole thing controlling the coffee brand and
eyelashes a little bubble. And then just come over and just putting in the
rest of the eyelashes here. And I'm going to get a
little bit of black. And I'm just going to dab
some here with the pupil. Starts to expand a little bit. Now, I will make
a lighter wash of the blue flag and work
on this barrier here. The iris is kinda
like Louis color. A little bit of the pigment, they're very light
wash of skin five, it's going to start going over
some of the eyeball here. And can I get some more coffee
brown number ten brush? And this work on this area
under here, a light wash. I just wanted to
start to really get some contrast in here
so we can start to see the darker areas and lighter areas once you stopped
happening, the contrast, I just really start to come
out with the paper up here. So careful. Smooth that out. And I'm just going
to dry that off now. I'm gonna get some
skin tone five. So I'm just going to give
that of a general wash a lot of the areas
because I feel like it's a little bit reddish. Make sure your paper stays
glued onto the board. So as you can see, I am just covering some of these areas. I'm not going over all of the
areas because if we do then often we just lose that kind of tonal variety that I love. So yeah, just selecting some areas to go over
with this shade. These strokes here. So working wet on wet and wet
on dry and mixed fashion. I'm just going to dry that
off so I can see better. Right? Making sure that
it's completely dry. I'm going to stop putting
them through shadows. Shadow. When we learn this is a lot darker than the purple
shadow, but it just, it'll give it building up the
layers going to add volume. So I'm just really building up this contrast all
over my eye here. So getting into the eyelashes, the corner of the eye then here, reinforcing the
line under the eye. Smoothing that out a little bit. I don't want to
have lines as such. Just that shadow
under the eye also on the inside of the eye
and that corner there. I'm just going over the iris again in the eyelashes
with the iris. Just really trying
to add depth to this painting and
rewriting Carlin richness. Also going to go over the
eyeball a little bit. Just careful not to go over the top and also to
preserve the highlights, to remember if you have too much pigment
or water on your brush, you can always
just dab it off on your clean tissue paper. Just gonna put some
type of shadow here. Actually no light at all. Lovely contrast up here as well. Going to dry it off again. Just making sure that
still glued down. Go into the eye
with my skin tone. Nine now, remember we're
working transparencies, okay, So even though
you want to get data, we don't want to go and pick. So it's always translucent. Very important to
remember that we want the colors to shine through
then underneath as well. That's going to be
every color that shows through but beauty that work. So I'm also going to go around the outside
of the eye with the skin tone line just with a wash that's
not too intense. And just my number ten brush. And just adding some details in there to heighten
the contrast. Again, really trying to make that I come
out of the paper. Also have the top there. Smoothing out the brush strokes
when I feel appropriate. Couldn't go over the
iris and the pupil web. It's drying. Here. Some blue blood. Getting into some details. Just apply a little bit more blue black but
very light wash to the eyeball. Remember that the eyeball
is actually not watch. It always has a little
bit of a shade to it. Sometimes you can, sometimes
move bread to observe. You can also invent
your own color. Grab my skin turned
five, light wash. I'm just going to go over
the fundamental eyelid here. Remembering that high that I reserved. Want to go over that. Over the six contains six light
wash over this part here. And I'm just going
to dry that off now. I feel like it needs a little
bit of a ton of variety. It's a little too
reddish for me, so I'm just gonna
get skin tone ten, which is more gray, greenish, want to
make a wash of that. And I'm just gonna go over
some areas with this. Just going to go
over this part here. And now I'm going to
go and dry that off. Now usually I use the blue black or Payne's
gray on the skin at all. But saying is there's some
eyeliner in the game. I'm going to use
blue black for that. So I'm just making a wash. My number three brush,
painter, him makeup. Careful not to reactivate
the layer underneath that. Don't insist too much. Just going to smooth it out a
little bit towards the top. Again. I really do DAC
in this whole area. Going to mix a little
bit of coffee brown and the blue black. Class. Welcome to this area underneath the eye is down the bottom here. I will use my number one brush. Complete lack of interest
in details here. And I again. So as you can see, I'm just really getting
into some fine, fine details down here. You can leave it potentially. I could leave it
here, it'd be fine. But I'm just really enjoying
getting into these really, really tricky little details. I'm not going to keep
going for much longer. I think it's almost done. Good. Thick skin turned nine. Contains six. Hello with a color in here. I'm just adding the
finishing touches now. I'm just looking
where maybe I can put one brushstroke here
and one brush stroke. This, that's really just the very small details
that I'm covering now. Florida Washington here, simply black and some skin color for the Eigen
here a little bit. Just going to add
a little bit of this reddish time lesson's
content for the eyelid. And I'm just going to insinuate a couple eyebrows
at the top as well. Just whispering the
brush over that. You can use any of
the darker tones for the one that's dry. I am going to try this gold color from the
eyelid. So you know that girls. But as I say, it's optional, so I'm just excited
to try that out. Different kinds of
elders know the Golden, the reference image is
more like copper, gold. And this is definitely
not a couple of gold. Master. It looks like when it's dry. So it's a little shimmery. I don't know if
you can see that. That's cool. I'm just going to go
a little bit over the eyelashes again and then I'm going to leave
it there for today. Okay. Well, I'm gonna leave
it there for today. I'm happy with that. And I hope you've enjoyed
this lesson and I also hope to see you again
tomorrow for another day, 30 day challenge painting
eyes. I'll see you there.
28. Day 22: Hello and welcome back to the 30-day challenge of
painting eyes with watercolor. Today we're going to
be painting this. I, and I've already gone
ahead and done my drawing. And also I've gone ahead
and mixed my colors. So without further ado,
let's start painting. And as per usual, I'm going to start
with my skin tone one. Put a test strip under there. Maybe you can use
your test strip as a second palette just to
see how that's going. Wash wise if it's too
intense or the color is not quite right. Let's start. So again, we're just
going to try to mark for ourselves areas
that are important. And that we'll want to heighten the contrast and later as we go. E.g. the shadow here. Remember you can smooth out your brush strokes as you wish. I say this every time, but this first layer
really is just to start indicating
where the colors are gonna go in to take away from this nervousness of
making the first maps. So you can be really
relaxed about this. Max. You don't have to worry because we're going to be painting over them anyway. I just start working
up your layers. First part. Alright, so while that's drying, I'm going to grab my skin tone. And just again, the
lash line here. Know what a wet and wet so
that it looks quite organic. I'm just going to modify my
breaststroke the middle. Then I'm going to
grab my coffee brown. I'm just going to start
working on the iris and the pupil layer. Remembering that I want
to say highlights, which are much myself. That's just this one here under the lash line that's
quite a lot darker. So I really want
to get them there. With my skin tone, five, fill in areas, indicate the lashes that you
can kind of see up here. I always like to have a
little bit of tonal variety, so don't fill in
the entire iris. Not inject a little
more pigment. Then I'm just going to continue
now working with skin, turn to an intensifying
some of the shadows here, right in the crease
of the eyelid. It's going to modify
this bootstrap as well to soften that. Continuing with skin Hunt, who just going to get into
a couple of details here. The darker areas. Like I've made a mistake here. It's a highlight I
actually want to reserve. I've just gone and lifted up the pigment layer and
I'm just going to repeat that a little bit up here. Breaststroke. Okay. Now with my number ten brush, skin turned to again. Make sure it's not too intense. And I'm going to intensify
the shadows under the I modifier that
breaststroke as well, just soften a little bit darker. You are directly under the
bottom lash line as well. Not all the way through. So as I said in another lesson, your eyes are constantly
moving between your reference image and the
image that you're painting. Your piece of paper. Trying to observe
what is happening. Slightly lighter, wash the skin, turn to just gonna go
over the eyebrows. It's going to intensify
a little bit. Here. As per usual, we're just building
up my layers. Just observing and
putting in color. Remember if you can't see
larger areas of tonal variety, you can just squint your eyes. It makes it a lot easier. I'm going to go back
to the lash line now. Look a little bit of
purple shadow on the side. It's still a little
wet, but it doesn't matter if I just inject
a little pigment. And here you start with
your brush too much. Intensifying the crease of the eye with the purple shadow. So it's going to work a little more on the shadow
under the eye as well. I would say again, my skin tone to remember that
watercolor is translucent, so I've done start working
with opaque colors. I'm actually going to give
the eyeball the little wash, and I'm just going to
get a little bit of blue black or Payne's
gray and just make it a really light wash. As I say, I think in pretty
much every lesson, the white of the eye
is not actually white. When we are observing
highlights. It means that the highlights as the white paper and I have
all this dark hasn't met. If we leave that I will
completely shading, then we won't be able to identify the highlights
and make them stand out. Just gonna get my number
three paintbrush again, just a few areas
with spin turn to remember that we're practicing, so it's fine to make mistakes. And it's fine if it
doesn't turn out amazing. Just trying with the things
that we don't leave yourself, the freedom to die
of different things. We're not going
to learn anything and will always be making the same mistakes and creating the same words. Just relaxed. Working with skin tone one
now just a few areas here. Actually going to grab
my larger brush and just work on the top of the eye there with a little
skin tone, one. Just building up the contrast. Looking for the areas
that are darker. I'm just trying to be a little bit looser
with my paintbrush today. Not smooth at all.
My brushstrokes. Quite hard actually, yeah. I was second-guess
my brush strokes really because we don't know what it's going to
be like once it dries. Where the mystery, which has
half the fun of watercolor, but it's also a bit nerve
wracking, isn't it? Okay. So while that's drying,
I'm just going to go back to my coffee brown. Just start working
on this pattern. If I again, just want
to be working a little bit all over the image so that parts of it dry and then
you can go over it again. Just continue increasing
the contrast. Really just adding
volume that way. Okay, And I'm gonna go
ahead and dry it off now. So you wanna make
sure that your layer is completely dry before
you continue working. Yep, that looks good. Okay. So I'm gonna go grab
my purple shadow. And I'm just going
to start working a little bit on these areas. Here. Shadow. You can see it's
quite intuitive. Just get some colors and some areas and then
you say how it goes and remember that the paint
always dries a little bit lighter than when it's wet. So just keep that in mind. Smooth it out a little better. A little bit too intense. Now, a little pigment from here. I'm actually going to take
this opportunity to go over the pupil with some blue black. I feel like there's
a little bit of blue in there as well. These highlights is
actually only one really, really bright highlight,
which is that small up there. I'm gonna get my skin tone too. Stuck on some of
these inside areas. There are no more red. And skin tone. One
system come back here. Just to highlight there, but I did not want
to go over again. I'm going to remove my pigment and then I'll wait
till it's dry. Skin tone to five. Just going to go over some
of these shadows up here. Remember that we use
in the photograph as a reference and it
doesn't have to be 100% like the photograph. So we're really just wanting
to practice painting eyes, having a bit of fun with it, and experimenting
a little bit with leaving brushstrokes as they
asked, moving them out. Seeing what difference
it makes. Up here. I'm just going to
go purple shadow. And I just really want to get back into this white of the eye. So I'm just going to
put some light washes on this eyeball area here
because as you can see, the more I put on without
going out at the top, the more this highlight
really starts to stand out and get some coffee brown. And I'm just going
to mark and a few of the eyebrows up the top
equipped with pizza. While I'm at it, I
might as well just either from other parts of
the iris and the pupil again. Jessica into families
details again, intensifying, redefining a couple of lines in the eyelashes
around here. Just whispering to
find paintbrush either they're still
using coffee brown. Hello coffee brands here. So I'm just going to darken little bit crease of the eyelid. Some coffee brown. Quite intensive. Modify that. Gosh strength the middle. My number three brush for that. My skin tone to work on this
area under the eye again. Just smooth that out a
little grab a little shadow. I'm just with a light wash
inside areas that I again contend with touches
here and there. Little bit of
pigment in there in the eye crib sheet and just get in there and
make that a little darker. Skin turned five again, just the eyebrows, little wash all over just
in some parts. And then smooth it
out a little bit. And going back to the iris and the pupil with
the coffee brown, maybe a little more intense. The trick really lies and adding the right amount of
pigment and paint, not going out at the top. And very important is to
reserve the highlights, the white of the paper. And I'm going to get some
blue black and also just bring people here and dab a little bit under the
Irish line so that it gets darker pigment into
the wet areas there. And with my tiny brush, it's going to send
me that some of these shows again
the shadows here, just pulling down pigment
that I've just injected. I'm gonna go over some of
the eyelashes as well. My small brush and
my blue black, coffee brown. I'm going to write
this one line here. In the bottom row. Observe how the eyelashes, good. You don't have to do it 100% that if you make
them all the same, it won't look organic. Try and vary the shapes and
forms and any direction. Go over the top, continuing
with my tiny brush. Put it in a couple of details. And the I here,
some purple shadow. Just to remind you. To make a highlight
really stand out, you need to put a
darker area next to it. And with a little
bit of blue black, just kinda go over
the eyebrows again, just adding a few. Remember to add variety
up here as well. Don't do everything the same. We could probably
go on for awhile, but I think I'm going
to leave it there. The last thing I'm gonna
do is just go over the pupil with some
pure ivory blank. So that, that is definitely
the darkest part. I'm just going to
dry it and I'm going to leave it there for today. All right. So that's a finished painting. I hope you've enjoyed it and I hope to see
you again tomorrow.
29. Day 23: Hello and welcome to another
day of 30-day challenge. Painting eyes with
watercolors for 30 days. And for today, I've chosen
this image as a reference. Unfortunately, my camera was not working while
I started this, so I'm just going to walk you through the beginning steps. As you can see, I just
lightly sketch the eye and I began painting already
with my skin tone one. It is all fairly standard. We've done this before, so I invite you
just to join them. Once you've mixed the colors
and got your sketch ready. Just going to go over sections. But the second
layer of skin tone, one, I'm just building
up the contrast, looking for the areas
that are darker. Now that we've done
the first layer, I'm going to start
already just to define iris and the
pupil little bit. So I'm getting my green for bed and I'm just going to start outlining a
little bit here. I'm just going to flip one, wash over the whole thing. Remembering to visit
the highlights. Just wanted to take a little
pigment away from here. It's a little bit lighter. I'm just going to go
back to skin tone one. Just put away, wash up here, making a brush stroke and then I rinse my brush a little
bit off a little bit, and then I can just
take it and make it smoother or take away a
little pigment at the end, making sure that it's dry. I'm going to start working
with my skin tone to intensifying a little bit around the crease of the
eye and the eyelid. Finish line here. Just going to smooth that out. Continuing with the skin tone to the I here carefully
putting a metal line. Remember you're
always looking at the reference photo and at what you're doing
on your paper. You don't always
checking out what's going on and you don't want to be just looking at
the reference photo or just the paper. Notice you put on a little too much pigment,
that's my problem. You can just smooth it
out with your brush, will pick it up with your paper. Can be quite loose with
your brushstrokes. Just going to put the eyebrow them with some coffee brown, smooth it out a little bit. I'm just going to
go back into the, I intensify that a
bit with blue black. Actually just define the pupil. Then bring a little
more darkness to these areas at the edges. Soften that up a little bit. I don't want it
to create a line. Move my paintbrush,
my wet paint brush over this outline
here on the inside. And add a little water
around the pupil. Just going to inject some
pigment here and there. Even though we can see the
pupil quite well-defined, I don't like drawing and
painting it this way. It just looks a
little too comical. Me. Make a couple of strokes, can try and simulate what's
going on in the eye. So I'm just going to get my
green ocher again and make a circle around the pupil. I'm going to get in
there again with my skin tone to keep intensity. I'm still using my small brush, but you can use the brush that's more
comfortable for you. We're just going over some details on the
inside of the eye here. Really observing what's going
on in the reference photo. In training our eye
hand coordination. It's not the one that
I wanted to pain. That's the line that
I wanted to move to. Middle segment where from here. I'm going to start going over the eye wash. Now I'm
going to make flu black, very light wash penstock filling them the
eyeball a little bit. As you will recall, eyeball is not white. Otherwise we wouldn't be able to appreciate these
beautiful highlights. May have to be the widest
white of the paper. Okay, and I'm actually going
to go ahead for ready. Just a little bit of shadow
because it's really quiet. Because on the side, We get my Paypal shader. I'm going to darken over here. It's really want this to be dramatic. Light wash. I'm just going to go
over this part here. You'll be able to see
how little highlight above the eye starts
to come out once I got over the eyelid line with some skin tone to just
about the entire line. Just make a mark. Yeah. While that's drying, I'm going over my iris and
pupil again with the black. Black to that. A little bit of wet on wet here. So that means I'm just adding a little water and then just dabbing on this that kind of expense and that's not as clean as if I just
start painting. See the eyelashes are
inflicted on this highlight. Now while that is drying back to the shadows
as the eyelid. And for that we're
gonna get a big tip. Shader can just
intensifying here. Next line. And then I'm going to bring my smaller brush and getting into the crease
of the eyelid again. But still, I'm just kinda
dead going to publish it. I'm there as well. Then grab my larger brush again. More crumbs me, and then stop
the shadow under the eye. But this ****, I'm going
to use my skin tone to it. Skin tend to up here as well. Well, that's trying. With my purple shadow
with a little more blue. I'm going to get back into
this corner of the eye. Very intense. So
I'm just going to take away a little
pigment, smooth it out. It's gonna be a very,
very light wash. I'm going to try and get into this part of the eye
with the great OCHA. Really has like a
greenish tinge. E.g. I'm going to get into
the eye rather little bit, copy round, make a
few marks up there. We don't want them to have
too much protectionism, but just kinda said I
blend into the picture. I'm gonna get my coffee brown and just intensify a little bit around the eyes decrease. And I'm also just going to focus on this bottom
eyelash line here, just making it darker,
extending the brushstroke. Going to intensify again in the eyeball here
with purple shadow. Let me get some skin tone three, which has got more
cadmium on it. And then going back up
to the top eyelid and increasing that crease and also extending that brushstroke, just smoothing that out. Go back to skin tone worm. Shape them a little bit of planning these areas in
the Bible a little bit more. Then I'm gonna get
my skin tone too. And you put a wash of spin
turn to some ties side, kind of unifies that
he painted separately, then it makes it
different claims. The eyebrows again, little
bit coffee brown color. I'm going to get
some more blue black and intensify and a year. Now that's a shame
because that's still wet. We don't want to touch that yet. We can work on the
inside of the iodine. Just putting a
little more detail, I'm going to grab the green and also just
intensifying they're a little bit kind of
unite the two colors. Black brush strokes. Remembering we want to
keep the highlights of the eyes is the one to pay. My number ten brush. I'm going to go and
put in a couple of green ocher shadows. Q e.g. seemed to be using
quite a lot of pigment, but then smooth it out
as I make the stroke. Can probably observed that. I feel like that's pretty dry. A little bit of blue black and just define
a couple of eyebrows. Now I'm going to go
over the lash line, just intensify that
with some blue bag. Just continue increasing
the contrast, building up the layers and really just adding
volume that way. Just want to be
working a little bit all over the image so that parts of that dry and
then you can go over it again. I'm just going to start
on the eyelashes. Start directly with
blood back down here. Then I'm going to
switch Kathy Brown. So now we've got them
in the coffee brown. I'm going to go over
some of the blue brick. Maybe we don't want to do
things always the same because then it really will
bring you into the organic. We don't want to be
kinda filling in all the spaces here. Black. I'm actually going to mix, blend legless, some coffee brown. Pregnant here, their eyelids, eyelashes too thick, you can kinda dead the
pigment off of your paintbrush and go back over it to take away
some of the pigment. This corner here again, a little bit of darker pigment. Very fun lab. Just kind of adding a little
color here and there. And you can see how it
really gives it some depth. The more we build up the layers, the motifs that I have, and the more volume. So I'm gonna get
my skin one again. Just give light wash
to this part here. Put the eyelashes
done the bottom. Now, starting with coffee black. I feel like the shadow
here needs to be a little darker and intensify that first. In the meantime, just
get yellow ocher, pure, obviously
diluted with water. And I'm just going to wash
a little bit with this. Like I would do a good kind of smoothing out a little
bit these outlines here. Okay, Well, I'm wedding for the part under
the eye to dry, I am going to get black,
just ivory black. Pure. Pretty much a
pupil less than half. That needs to be the darkest. I'm gonna get coffee brown. Jessica, eyelash line
a little bit darker. Then with my small brush, I'm just going to whisk little bit out to
the left like that, just filled in the Spanish wine, making it more organic this way. Getting coffee brown again, making sure this layer is dry. On the bottom here. Getting a little bit more
intense, coffee brown. Maybe get in there with
a little blue black too. Not all of them. I'm going to try that off. And then I'm going to
leave it there for today. I hope you're happy
with that and well done for completing another
day of the challenge. I will see you tomorrow.
30. Day 24: Hello and welcome back to the 30-day challenge painting
eyes with watercolor. This is the image that we're
going to be painting today, which I'll be uploading to the project section
as the usual. I've already gone ahead
and mix my colors. So I suggest you go ahead
and mix those colors. And I'll see you here in a
minute to start on the sketch. I'm going to start
sketching now. Remember if you don't
want to draw freehand, you can use the
grid method or you can trace your image
using a light source. I do suggest you start
practicing drawing freehand. That's really great practice. So here's a little trick. If you're not quite
sure where the shadows, you can squint your eyes. If you squint your eyes, you
can see things less clear, but it all kind of
gets grouped together, which is sometimes
really helpful for identifying general
areas because the I just sees too much detail. So sometimes we find that hat
to discern general areas. So again, remember
that we're trying to make a roadmap for ourselves. The way we got to paint colors, where it's going to be dark. Also going to draw
in the highlights that we want to reserve. The pupils around. Here. Remember, don't press
too hard on your paper, otherwise, the pencil
is going to leave an indent on the paper, sorry, up marking here the
highlight that I want to reserve the paper of like a
bit of a highlight just here. And then we've got this
beautiful highlight them bottom, which will really make
the eyes look alive. I'm actually going to
start painting now. And as per usual, I'm going to start off, let's can turn one light wash, mock and some areas not
all at the same intensity. What the wash to
be a bit lighter, I can just add a little water. Essentially, this
first wash will always be painted over anyway, but just kind of gives us a good
indication of whether you really observing
what's going on in the reference photo and training our eye
hand coordination. While it's drying, I
am going to continue. Let's can turn to learning
some things on the inside. So I find them here. Either dab a little bit
towards the middle tier. Here. In the first layer, I'm really just trying
to establish some kind of ground and work with the
drawing that I've made. Just going to grab a
slightly larger brush, my number ten brush, over the entire thing, actually, except for
the highlight there. I'm just going to get
into detail there with the smaller brush
or a little bit. And I don't want it
to be all uniform. As we've discussed
many times before. I'm going to take
away little bit of pigment here where I see that there's a lighter color
and the eye, just like that. Dabbing your brush onto
your paper in-between. Clean my smaller brush now and start going over the
crease of the eye with my skin tone to smooth
that out a little bit here. Also, eyelashes are
coming in here and slightly lighter than the takeaway little
bit of pigment here. Then continue working
on my crease. Remember already
going to start going over the shadows over here. We're just going to use a few of the other
colors in this moment. Just smoothing out when I
feel like it's appropriate. Depending a little more there. We need to add a little more. Yep. I'm also going to grab a
little skin turned to an area. I remember the white of the
eye is rarely actually white. And then continue going over
the shaded areas a little more with the skin
tone to appear, e.g. get my skin turned five member, you can use your test sheet
to mix colors as well. I'm just going to start. So I'm just kind of
playing around saying with a good fit, I'm just going to put
a very light wash over pretty much the
entire top of the eye. You're not experimenting
a little bit. I'm not really sure how
this is going to turn out. The beauty of it, isn't it? While it's drying, I am going
to get my purple shade. Guide on some of the inside
of the iPad's really intense. Apply them Back in this area here. And a lighter wash? That's correct. Yeah. Kind of work and a little bit more
on my crease here. And I'm going to put
a very light wash of skin tone to the eye here. I'm just going to drive it. Okay. Continuing now, I will stop intensifying the crease of the
eye with skin tones, sick. Grandma number ten,
brush and make a wash. Number six. In those shadowed areas. Remember that we're building up our layers so we don't wanna go too intense right
at the beginning, just slowly adding and that
creates volume and depth. You have it either corner. She's really just all
pretty much in shadow. The washes over being
that we don't want to cover the entire pain, paper and paint right
from the very beginning. But we just want to
darken the more intense. As we go along in the end, possibly the whole paper will be covered, but we're not sure yet. Let me go little by little. While that's drying, I'm
gonna get back into the eye. And for that, I am going
to get my skin tone for just give up a bit of a
wash over that in a minute. I'll do the same
as I did before. I'm just removing some pigment. Maybe I'll start adding objecting little pigment
around the edges. It's going to take away here. And with skin tone, I'm just coming around here. Around the edges of the iris. The pupil, let me touch up. The layer underneath
is dried already. Don't worry about it. You can just smooth it out
with your paintbrush. And while that's drying, I'm gonna cribs can
turn nine again, a bit of a lighter wash. And I'm going to go into this caries here
corner of the eye. Now we don't have
to be too precise here with the eyelashes. No, trying to go as well
as more of an expression, not a complete copy of
the reference image. And we're just practicing
how to pay us. That's the main thing here. Just intensifying, objecting
little pigment there. And also just in here injecting pigment that might
be paintbrush too much because you might
just know when you pay your layers still, not dry. Skin tone nine. I'm
also going to get into this product for
eye a little bit. Just intensify the shadows here. Just going to go back
to my number ten brush with my skin tone five,
it's going to go there. Here. Just really intensifying
everything. Now, remember that you can be really free with
your brushstrokes. You can lead them
exactly how you make them in the first instance. Or you can smooth them out. Still working with
skin tone five, him to this very
dark shade on the I do want to make a little more intense and while that's drying, we can go back and intensify the iris and the
pupil a little more. Going on with my coffee brown now makes it look a
little blue black. Making a few months in here, you can see this
random brushstrokes, the pupil, and the path under the eyelid to be dark
because it always does. Often you'll notice
that these things, it's kinda like a
sun coming out of a hole in the iris. Like that. I'm going to leave it
there for now and dry. First thing I want to do
is go over the inside the eye the eyeball with my blue
black or very light wash. Okay. That's a little too intense. I'm just going to put a little wash over pretty
much the entire thing. Bearings here. Make sure your brush is
clean. Smoothing it out. Now I am going to go
and just some shadows with some federal shadow here. Just observing where the
shadows are more or less. Here. Obviously that's very
intense shadow over here. Now I am actually also
going into the inside of the thigh here because it's really dark, intense enough. And then just quickly try that. And then I'm going to continue with the iris and the pupil. And in fact, I'm going
to grab my skin time, Tim washington, I feel like I haven't really
got the color to green wash. I know that. That's a little more like it. I'm just going to take away a little bit of this
pigment to you. I'm going to grab my skin tone. Nine, get into those
intense shadows. I'm going to begin. You're gonna be
working on quickly because it dries
really quite quickly. I'm gonna come over this side, since five is still
working with into nine. Just wetting my brush
now and again to smooth out these shadows. And then dabbing my brush
on the paper in-between smoothing to add a little pigment in here so that it
expands a little. Or to be quite
dramatic over here. So this is kind of
wet on wet technique, just intensifying the shaders. Shader. Then I'm also going to just go over the ledge
line with the center. And I am going to get into
the crease of the eye. Also it's going to
align this side because it's just
not very intense. Gonna get some shadow
and more intense. And I'm gonna go over the iris again with a
little bit of coffee brown. Using it there so that it
doesn't look like it's Photoshopped and also
keystrokes, eyelid. You'll hardly see
them once it's dry. It's just so that it
doesn't look like a blob. Some ivory black. I am going to define the
pupil and I can commit, will already see a
little more contrast. I'm going to grab my skin
friend, who's come on. You. Not on the eye. Variety of color. Red. Just going to dry again. I want to add a little more
tonal variety to the skin. So I'm just kinda
go back to my skin, turned five and kinda lightly
wash some areas, e.g. here under the eye. I love my skin tone. Tim, he's going to get back into the shadow
under the idea. Here. This part of the eyes still too light, so I'm going to go
back in there with some shadow under the eyes also, like God taking away things that I don't
want to take away. Just want to take
away a little bit of pregnancy here Next. And then I need to go back
over this part as well. Too bright, still. Very, very light
wash of skin tones. Six, I think I'm going to dry out and
then do the eyelashes, and then I think I'm done. For the eyelashes. I will start with
skin tone line. And that's all I have
because I've been here, they're not really defined in
a dark colored light color. So I went really and all its maximum DACA mocks and then slowly towards
the center of the eye. Just whispering the
paintbrush like this, making very small kind of staccato masks that we
don't usually make. We're trying to usually
make com movements, but now the exact offset
for them as well. What you can do, of
course, Let's try that. I'm going to type y
a little pigment. Extremely careful not to. I'm just doing this by wetting my brush and then insisting
a little bit of the pigment, especially because
it's a little bit wet. Just painted some
eyelashes and lab. I'll see how that's coming
along quite nicely. Pigment the top and bottom. So I'm gonna go with skin
turned ten from now, killing a few months
and he has a uniform. Coming over here. Add a little bit
slipped to the skin, turned five just quite like
this reddish time, right? And I'm also just going to
go back to my purple shadow, get into this corner. And then towards the bottom there I'm going to add
to this container, the container five little bit just content
online checkout. How much from this part here? So just to remind you to make a highlight
really stand out, you need to put a
darker area next to it. And also make sure
you don't leave too many surrounding areas
as the white of the paper. Okay, and then finishing touch, a little bit of pure ivory
black again on the pupil here. And I actually think I'm
going to leave it here today. So I hope you enjoyed that. I hope to see you again
tomorrow for another day of the challenge of painting IS
for 30 days. So you there.
31. Day 25: Hello and welcome back to the 30-day challenge of
painting eyes with watercolor. This is the image that we're
going to be painting today, and the reference photo will
be in the project section. As per usual. I've already gone ahead
and mix up some colors. Again today, I'm going to
be starting by sketching. And I suggest you try
sketching freehand. It's really good practice. If you don't feel comfortable or confident enough to do so, you can always use
the transfer by grid method or tracing
using a light source, like a light table or a window. But I do suggest you
practice sketching freehand, especially if you don't
feel so comfortable drawing because that way you get
better every time you try. And once you've got
the hang of it, it really becomes more simple. I always like to start by the general shape and then you get more into the
details with the paint. Since this beautiful
shadow up here, which we'll want to
mock him for ourselves, can really, really,
really want to reserve this little light reflection
at the bottom of the eye. So I'm just going
to make a sketch, bottom eyelid and then Mark
and live on a line here. Iris comes down C Again, we cannot see the entire iris. I don't think we've
had one image yet where the entire
iris is visible. And I think I've said it
yesterday or the day before. If you're not quite sure where
the dark areas I you can squint your eyes because
that way your eye just picks up on
some general areas and not all the
details which can be sometimes quite confusing. I squint quite a lot when
I'm drawing painting, especially in the
first, initial stages. You can see we can't actually
see the pupil at all unless in this image we can see the person taking
the photo of it, but they reflect
to them the eye. And that's the data
as part of the eye. So I've just gone
ahead and lock that and I'm going to
stop painting now. Starting with skin tone, I'm just going to start lacking
in some areas for myself, not the whole paper. Remember that? We're just going to start off by highlighting a few
areas that are going to be darkest or
brightest in terms of color. Most cheddar. Lifting up a little
bit of pigment here. Smooth out this brush stroke. This one. Third, assume that the shadow is
going to be the same and every I that we paint, because as you can see, e.g. it's quite interesting
in this one. Often this line under the
eye is the lightest part, but here we have it
as two doctors patent even shadow under the
aisles and darken that. Just really observe. But we want to go from the
general to the specific. So first of all, we're just going to pull
in all the areas and areas and start drawing today. I'm also printing
them the eyebrow. One thing I forgot to mark for myself with the
highlights of the eye. Let's do that quickly before we start painting the
pupil in the eye this and I let
them hear it here. So I'm going to start on the iris with the
green ocher color. It's not really enough
for me at the moment. And a little bit there
is too much water. I'm just going to stop. In all the areas that
are not highlights. You can keep observing your
painting just in case you didn't do a very good job
of drawing your highlights. You can still just reserve
from observing way they are. Maybe you want to start working at the top here with
the smaller brush. I'm going to grab my
number three for that. And while that dries, I'm here at the top here. So I'm just going to remove
that with a clean wet brush. And then ******. Tissue type that extend
into this area here. And I'm also going to just remove no pigment
in some parts here. We don't want it to be
all the same color. Generic. And I like it to
have a little bit of color variation already
in the first part, we're going to build
up my layers and then we'll be able to see
that shining through. Okay, I think actually
now the skin is dry, so let's just grabs
can turn to and just intensify
some shadows here. Just laugh a little bit. More words. Darker. You to modify your brush
strokes like this. And let's also grow
the eyelash lined with skin tone because
it's definitely my slightly larger brush again. Get into the scanner here. Remember maybe a
little bit lighter and then continue
with the shadow. Remember we're trying
to build up our layers. If you feel like you've used a little too much pigment,
that's my problem. Just a little reminder. You just wet your
brush, clean up, then you debit on
your tissue paper. And then you can with an almost dry brush
removed from you. While it's still wet? Well, that's drying. I'm going to give the ival quick light wash with the blue black
or a Payne's gray. I say this every lesson, just in case you forget. White of the eye is never
really wiped. Not really. Because if it was
you wouldn't be able to see the highlights. I'm applying and
then I'm removing. Want it to be quite light. These highlights that I've
kinda like myself good, but they're not the
lightest highlights, so it doesn't matter if I've
gone over them a little bit. I just don't want them to be forgotten about the
highlights in the end. What makes the eye
really come to life? And the eyeball or with the
different shapes I like to make my brush strokes so
that they mimic the shapes. The roundness of the eyeball, like these brown brushstrokes. Make that line
underneath the eye. What highlight really pop out? I'm going to just outlined just underline the inside
of the eyelid here for very fine line num using its contents
six for this. Then I want to go
and just smooth that line out a little bit so it looks a little more organic. Turkey's made a mistake. Remember that you
can always lift it up with your tissue paper. Just observing here the
thin side of the island. Darker so I'm just giving
it a blush with skin time to go back to five here. And I just really very, very back corner of the eye a little
bit to the eyeball. The eyeball highlights, but it's not completely
white of the paper. I'm using skin tone five-note to intensify this crease above the I want to share a little bit. And I'm going to smooth
this out towards the top. You see the shadows going onto the top of
the eyelid there. That varies as well, depending on your painting. Sometimes it goes at the top, sometimes it goes
towards the bottom. Don't use too much water. I'm going to go back to
the pupil and the iris. And now I'm going to go and
they look a little bit. Brown and just intensify
everything again. I always like to lead details like the eyelashes
and things blast. As I said, we start with
the general and then we move on to the specific time. A couple of layers here, it's trying but fast so I can
just keep working harder. Next, I'm going to stop working on the shadows
above and below. I, with my skin tones six. Miami modify that, just
smooth it out a little bit. So observe how it just
really slowly building or fell laos takes a little while, but it just adds so
much more depth and volume rather than you just
slept on the color at once. That watercolor requires
a little patience. I'm now seeing that
I feel like I have made the pupil know too narrow. I wrote with. So I'm going to grab my coffee brown
again and just finish line because it's
way too light right now. I am going to get
some purple shadow. And ones like working with them, especially under the eyes, can apply that live really going to be covered by some other colors
as well soon. But I just find that
some of it still shows through and it gives it a really nice tonal variety there. A little bit hot that
I didn't want to. Do. You might think that
currently it's not looking a lot like the colors in
the reference photo. But just bear with me. Get my skin tone
for the eye here. Then look a little
closer. Black. Just going to intensify
some shadows. Once we add in the eyelashes, this part will be
covered anyway. So this is quite a difficult
image. I'm noticing. My skin turned nine. Just add a little bit
in this corner here. Nowhere does contain five. Find you've made your
paint to a pike. Remember you can always lift up your brush or
your tissue paper. A little bit of skin tone
for item there as well. I'm going to make
a skin tone five wash that yea, transparent. And I'm going to
start working on skin because be a little bit generous which areas
are covered and then pulsar maintain the
highlights here. But that need them to be
the white of the paper. We just want them to be a
little bit lighter. Hue. Remembering the high minds, a little bit of wet on wet technique and
get sometimes six. Just an example. You trap here. She's pushed them and see how it expands.
I didn't like it. I can always modify
the brushstroke once it's a little bit drier, or I can just lift it up. So as you can see, I am just covering some of these areas. I'm not going over all of the
areas because if we do then often we just lose that kind of tonal variety
you that I love. So yeah, just selecting some areas to go over
with this shade. Want to do now is just
grab some highlights here. Let me scroll up Brexit, actually clean it, dry it, then. In there and lift
up some pigment and the water will have to go
over it a couple of times. It's very ordering like minus. And then I'm just going to grab my skin tone to five again, just go over the inside of
the eye a little bit darker. I'm a tiny bit of
blue black wash. And to plan time under here, next thing I'm gonna do is just add a little
bit more skin, turn mine on the
corner of the sky. Smooth out the edges. Really want to do now is
just add a little bit of variety by getting the green. I'm just adding some shadows. Time everywhere. But some areas. It's not so beautiful contrast to the reddish
tones that we use. I'm going to grab my
coffee brown eyebrow. Tend to find that a little
bit booting up the contrast. It looks a little more organic. Now I am going to grab my
blue black, my smaller brush. And I'm going to go back
over the iris and the pupil. General wash. Now here, the last line, the object literal
blood back into the eyebrows as well
while I'm at it. Some payment terms here. And I'm just going
to dry that off now. Once it's all dry,
I am going to grab my skin tone tin and apply a light wash
to most of the face. Remembering the highlights. Just going to play
a little pigment. I wonder is if the highlights, we're going to do this, be
careful not to run your paper. So just really softly brush, dab it on your tissue paper. And I'm just going
to dry that off now. I'm going to grab my skin tone. I'm going to add some shadows. Just keep happened
with contrast. The drama. Smooth this out a little bit. These parts are
quite intuitive now, you know, some of my skin tone to fire. You. Again. I just keep adding layers. You find that it's dramatic and nephew that it's about
the right contrast. Your tonal variety in colors. The detail. I'm going to go back
to the skin tone, five areas that beautiful reddish time. Alright, I'm just going to start insinuating the
eyebrows on the eye. The little coffee brown. Make a few brushstrokes
that aren't. Just because we're
not actually going to see this area at all. And marriage here as well. Skin turned nine. From the contrast
here and middle. I'm gonna go back to
the pupil and the iris. Clip black, no more
intense on the floor. Such a light was really
hard to make the contrast. I'm going to go sign. And this includes leg. It's going to take a
stab at the eyebrows. I want to go for the
area under the eye, go in with my skin tone. Here, I feel like that's
not quite enough. The Maghreb, content five and just go over the top
with a little bit. Going back to skin turned five. A couple of details here. I'm going to take a little bit of skin turned nine millimeter. And I'm just going
to dry that off now. So once that's dry, I'm
going to start working on the eyelashes and I'm just
using coffee brands stateless. Since kindergarten
or smooth lake. Hey, what's a little bit
of practice and learn. She's going to want to give that almost the entire
embeddable wash because these highlights here, the blue is just going to cut. I'm lifting up some pigment here. You're like up the
tub was still, still got a little more reddish. Content five, little
bit of Finland here. We're going to remove pigment on the corner of the eye here. Just lighter areas here. Smooth it out. Just grabbing a little more. It's been cleaned out. Just a little bit
under the eye here. And now finishing
finishing touch, I'm just going to go
over the pupil area, even though we can't
see the pupil going to get ivory black
almost completely. And just ask him reflection here for
person taking the baton. And then also just kind of go
over the island line again. I'm going to add these little
details to start with. I'm just going to dry it
off and then I'm just going to leave it
there for today. Okay. So that is the finished
work for today. And I hope to see
you again tomorrow for the next I'll see you then.
32. Day 26: Hi and welcome to another
day of a 30 day challenge. I am going to use this
image today as a reference, and I'm only going to use blue, black, and coffee brown. So first things first, I'm going to skip that I roughly onto the paper as the usual trying to Mark and
myself where to paint in the way to
leave blank, e.g. this highlight here, a
little highlight here. This photograph is a
little bit unclear. It's a little bit unsharp when I quite like how Express was, so I want to give it a go. It's not the easiest
to draw either because it's such a strange
shape this time, because of the shader. Just give it your best shot. I'm gonna give it my best
chocolates. There we go. So this is one of
those rare cases where you can actually see the entire iris
and pupil because the expression either shark or bewilderment or
anger, disbelief. And then eyebrow,
very close. The eye. Also quite unusual. Comes back down
there with the here. So I'm making sure we've put
on our highlights and we put in our shadows more or less, put a road map to paint. I'm going to leave it there. And I'm going to start I'm
going to wet my paper. If you prefer to work directly wet on dry,
that's fine too. I just took the step of myself that I really enjoy
working wet on wet. I'm going to begin
with the coffee brown. I'm just grabbing
some of that from my mixing compartment and
putting it onto my palette. And I'm just going to stop. Remember that the
brush will release the most paint when you take
it off the paper like that. Expand, conceive and need
to take a little bit of water and pigment so that I preserve my highlights
as the white of the paper. Let me find that some possible
then don't worry about it. You can wise a little bit wide out of the tube at the end. I prefer not to do that, but I had done before
and this per se, the widest possible eyebrow you put in the shape of that. Written here, shadow here. Okay, So now that we've
got the first layer, I'm gonna go back to
the coffee round. Slightly more intense wash
over some areas again, e.g. here the pupil lot more intense. This barrier here. Because those are a
lot more intense. Then again, go back to some of my highlights that
I've drawn and myself then and
now getting lost. My brush and try that again. This expansion under the bed. And you can still
smooth out the edges. And you can see that there's this pile of papers
already pled dry, so that's not expanding
much anymore. Okay. To copy Brown. Keep reiterating the dark
areas while it's wet. I'm just going to smooth
this out a little bit. Iris again. You see the pattern is
pretty much dry here now. This afternoon. Stuff going over the iris, even these brushstrokes
little bit. And then bring this
highlight here. A little bit over the
inside, as I say, it's not client's conduct
percent white of the paper. I'm just adding layers and
layers while it's still wet. And I think the minute
I'm going to dry it off and then I'm going to
start with the blue black. It's been a little bit and we'll start remembering that the paper absorbs the paint
quicker when it's still warm, we're going to just
wait a second. And then the meantime, I'm going to get my blue black wash ready. And maybe I'll start with the lighter wash. And I'm just going to go
over these areas, the darkest ones first. I'm just going to smooth it
out a little bit faster. And a little bit of color to the inside of the iris. Pupil. Use bed a little. Redefines
the shapes that you want. Here. Let me get my slightly
smaller brush minimum six. Just need work a little bit
on the shape with this virus. Can then grab a little
bit of my tissue paper. But I'm here to take away some
of the pigment and some of the water so that I can work
more precisely on the iris. A little bit. I'm just going to go
back to coffee brown. At the top there. It kinda gets lost in each other
because she had a tough the AI and I asked
him to become one. Up here. This is also got a
little bit out of hand. I'm just going to
put back the shape. It's a little bit of the blue black building up the contrast. Looking for the areas
that are darker. I'm trying to really stand out. A little more blue
black in there. I'm using my number
six brush and continue back here and just try and get a little bit
of variety in there. Just wet my brush with a little bit more water and just go into some of
these details again. Defining a couple of lines. I'm just continuing
building up the layers, injecting pigment
into the wet areas that I want to give
more intensity to. Put in a couple of details
here. The eyebrows. Again, maybe you
want to wait for a little bit until
it's not so warm. The meantime, get your brush
and your paint ready to go. I'm going to start
on the eyebrow. Brush across and kind
of make it organic. I don't know how
much detail I really want to put into this eyebrow. I've started going over areas with the
coffee brown again, roughly intensifying
shadows and finding areas. Still working with
my number ten brush. Light wash onto the eye. Even if it's very
high contrast image and it looks like the
eyeball is white. But if we make the
eyeball not what this highlight here is just going to stand out so much more. So just by adding
them a little bit of pigment to the eyeball, you can see how that just
really stands out now. Here I'm just going to
get my very small brush and the blue black. And I'm just going to add a little bit of
extra ivory black. I'm just going to
put a little bit of black under the pupil
there, make it more intense. Said Deb some into these
wet areas that are here. Now if the blue black, I'm just going to put in a
couple of more eyelashes, more detailed up there. See the allergen from the
top and also eyebrows. Let's put in some
eyelashes here. Now. Remember that
the watercolor dries a lot lighter
than when it's wet. So don't worry if this
looks like it's much much darker when
you're painting, blend a lot more. Once it's dry. Just going to put in a couple of lashes
and the bottom here as well. Remember we want to make
them a little varied. Going to put them
little less insect, but the top tier, that's
just really disturbing them. Sending the whole rhythm
and liquid back to him. A little coffee brown. Now again with a blue black. I'm just going to go over
this part here quickly. Remember ten brush. Make it a little more intense. Like this little
list. He's fine. And then I'm gonna drive it up. Okay, so that's today's AI. I hope you enjoyed the class
and I'll see you again tomorrow for another I
and the 30-day challenge. And I hope to see you then.
33. Day 27: Hello and welcome to another
day of 30-day challenge. Handling eyes with
watercolors for 30 days. In for today, I've chosen
this image as a reference. I've also gone ahead already and select the colors that
I'm going to use. Today. I'm also going
to start with a sketch. Doesn't have to be exact, no general shape
and then marking in the shadows the highlights areas I want to say variance,
I wanted to paint. Remember when you're sketching, you're looking at
your reference image and you're drawing
simultaneously, pretty much constantly
flicking between the two. So having said that,
I said every time, but I want to reiterate it because it really
is important. We're not trying to make a hyper-realistic drawing or painting of our reference image. We are trying to practice painting eyes with
watercolor and we want an expressive results more than 100% replica
of the photograph. Look quite sure where
this iris would end. So I'm just going to
draw a full circle even though afterwards I will be erasing the paths that the
eye lid will be overlapping. Because we know that
the iris is a circle. Let's draw the full
circle and then erase it. If that helps you,
That's the way you can sketch it every day. So we're drawing
in these spaces. We need to pay and
also the space that we want to observe the
sample, these highlights. Okay, so I'm going to
start and I'm going to start like always when I'm using these colors
with my skin tone, one, just to break the ice. So I'm just going to start by adding in some of
the darker areas. The first layer, I'm really
just trying to establish some kind of ground and work with the
drawing that I've made. And just sadly kind of start
to build out the colors. So that's why we started with a light wash and the
lightest color first. And we're just starting
to indicate to ourselves the areas that we need to
build on and the next layers. So that's pretty much just what we're doing in the first layer. And we will paint
over the first layer and we probably
won't see any of it. But this is just
really to get the ball rolling and start this
building up of layers. Just from my menu. Before we start on
the next layer, I need to make sure my
first layer is dry. Right? Now. That is dry. I'm just going to work on
quickly the iris and the pupil. And for that, I'm just going
to give both of those at a light wash with the green. Careful not to go over
the highlights that we are wanting to reserve. Okay. For a while that's drying. Make a wash of skin tone to start working on
these areas here, I'm going to use my number
three brush for this. Again. It's my number one brush. It's tricky. One to three. I
can get the idea. Remember that we're
trying to build up layers layer by layer just suddenly to really get
a volume in there. As you can see the
inside of the eyeball, he is actually darker than the bottom of the
inside of the eye hand. Really observing what's going
on in the reference photo. In training our eye
hand coordination. Building up the contrast. Looking for the areas
that are darker. Skin tone, one can turn to adding layers. Very sadly. Wasted time. The
crease of the eye very interesting is this
whole very dark shadow, then a little bit of
shadows and the light than the eyelash line and this path, I find that intriguing
and I find it quite hard. But that's why we were
practicing, right. So while that's drying, I'm just going to give iris
and the pupil another go. I'm going to add a little
more yellow ocher to the green mixture around
the pupil little bit. Then I'm going to let that
dry with my number ten brush. I'm gonna get back to the
skin tone to ingest goodbye, I graphed as a background. Just continue increasing
the contrast, building up the layers and really just adding
volume that way. Just want to be
working a little bit. Hold on to that image so that parts of it dry and then
you can go over it again. Let me get into the eye here. Just a little bit
of color already. And also to plot them
either via the inside. And then if you feel
like you've done everything you can for the
moment, but it's still wet. You can just grab your
hair dryer and just dry it off or just wait for it to dry. So I'm making sure
that layer is dry. You can start to work on top
of that now if she liked. And I am going to
continue again, starting with the darkest areas. You can see I'm just
moving around the image, just continuing to
go up the layers, going over layer
again and again. Every layer like to smooth out my
brushstrokes little bit. So while that's drying, I'm going to grab
my blue black wash. I'm just going to work on
the iris and the pupil. I'm just going to
remove barriers. Ton of variety. Remember how to remove pigment. You just clean your brush, dry it a little
bit, and then you stop by the areas that
you want to remove. I'm just going to go outside of the iris one
more time for this, but remember to make sure you don't have excess
water in your brush. And I'm actually going
to use my number three. What better? Through black. While that's drying the little
bit of skin tone three. And then number ten brush. Just go over some areas. You can see it's
quite intuitive. Like a light wash over that entire area was
very light wash. And it's going to go back to shadow and apply some
under the eye here. Some more. Boost shape has gone out of control and then they correct that a little bit. Split my small paintbrush and
I just stopped and lift up some of that pigment and make it into a
shape that I want. To be careful if you do this, remember to very carefully. Otherwise you might just
lift up your paper as well when you're
painting a little bit. Be careful because if you
haven't completely dried, it's just going to start
expanding into the area again. So maybe just wait
a little minute. Okay. I'm just going to grab my
number ten paint brush again with my green. I'll put it in a
couple of shadows. Here, e.g. we're here or here. I'm going to grab a light
wash of blue black. I'm going to start just document the eyeball a little bit more. Dark. On this side. It's going to inject a
tiny bit of pigment on this slide here because
it really gets very dark. Spend either you can wait to defer to try
how you can dry it off. I'm just gonna go back
with my number ten Bosch to some skin
time to just can apply a couple of brushstrokes
to some areas that have found lacking in depth
a little bit. Shadow. The loose hand. Then also on the
inside of the eyeball. Them a little bit
of purple shadow. Iterate this area here. The number three brush. All right, grab some coffee brown and just go over
some darker areas. Next line here. I Alicia. So I'm really just going to loosely put them
in a darker area. You feel like you have too
much pigment on your brush. You can just wipe it off
on your paper towel. Rinse your brush like new wash document with some of these areas, the iris usually the
outside of the iris. You work the Dr. and
the rest of the, I just always like to smooth out these paths so that
they've got looked like the photo shopped in
just with a clean brush, making these kind of movements towards the
inside of the eye. And then also just going to
smooth out any movement. So the specific emotion, you just smoothing it
out for them to grab the coffee brown in
the crease here. Got it. Wanted to be
the same intensity all the way around
because that also looks like it's better
shelter to the grips. My shadow. Just going to start with
the brown eyebrows up here. Smooth skin tone. An intense course.
I'm just going to go. I want to go over the top. Here. Are just a little bit shadow on the corner of the eye. Some of the skin turn to page here. Mostly this kind of plot on
the top eyelid for me inside the skylight and a
little bit wrong. So the eye that looks
a little strange. So he's promote rice
moved pregnant. Talk here. A paper towel and live. A little glute leg. And just go over these
areas here that are darker. Blue, black. Really
intensify the, I love it away tonight. Actually, I'm going to
grab a little coffee brown and add a little bit
of courage to do that. A little more Prussian blue, little more purple shadow. I'm just going to go back to skin can run purple shadow. I'm just going to drive
it and see how it looks. But I think I'm almost finished. Right? So couple of things, just some minor details. Lift up a little bit of pigment. Couple of places. You feed them through
this very carefully. When I'm lifting
up this pigment, even though the paint
has already dried, I'm just going over it with
a wet paint brush and then dabbing the paint brush on my paper towel
from time to time. Now I know you're not
supposed to do it, but it works for me, so I do. I prefer doing this
and using white paint. Watercolor. Span this pilot
hearing a little bit. Now I'm going to put on
the finishing touches, which is the eyebrows
and eyelashes. I'm going to start with the
eyebrows just with some blue black, just wispy movements. And they have to be exactly
like in your photographs. The other day the day challenge I said it time and time again. And then just a couple
of them the the I here. So don't worry if it goes wrong. Lift up the pigment
with your paper towel. We use in coffee brown. A little bit of five
big black pupil. One more thing I'm
gonna do that. I'm just going to put a
couple of strokes in here. Like it's too monotonous. So this is coffee brown, boring. Okay. And I'm going to leave it
there for now and hope to see you again tomorrow for the next INSEAD day challenge. Remember it's not going to be every day a great result,
so don't disappear. Some days are
better than others. Some days you just
have more of a flow. So I hope to see
you again tomorrow and yeah, thanks
for participating.
34. Day 28: Hi and welcome back to
the 30-day challenge. 30 days of painting
eyes with watercolor. Today we're going to be
painting this image here. And as per usual, I'll be uploading the
reference photo to the project section or the resources section
of the class. And I've already decided which colors I'm going to use as well. Okay, so I'll just go
ahead and start sketching. It doesn't have to be perfect. We go over this every
time, but remember, we're just trying to get an expressive painting
and doesn't have to be 100% like effort. However, when you're sketching, remember to look between your sketch and the
reference photo. You're always looking at both of them trying to bring out i and observing and the hand to
follow what I as deserving. Remember I sketch is supposed to serve us as a roadmap for where we're going to paint them. For iris. And again, I'm looking at positive
space and negative space to the public expense
in this case would be the iris and pupil. If it helps you to complete
the circle of the iris, then go ahead and do so. Just remember that the eyelid is probably going to be covering at least some part
of the iris very rarely that you see
the entire iris in. This beautiful little pilot can hear that we'd
really like to. So I'm going to start painting. And I've really enjoyed working, starting working wet on wet. So I'm going to do
that as well today. Just with a clean
brush and clean water, wet the entire area that
we're going to be painting. The entire piece of paper. Just let it soak
in for a second. And then I'm just going to dab a clean tissue onto
the paths that I don't want the pain to us then into
this time I did the I here. The ones down here
doesn't have to be exact. Here. We want to
be really exact. Then I suggest getting a smaller paintbrush and just applying a
little more water to the areas that you'd like
to expand and to say had been taken away now
with your tissue paper. Then I'm going to start
with my skin tone one. As per usual, just
making a light wash. You can always check it on your test cheat here
a lot of water, they're absorbed some of that. And then I'm going
to start painting in the darkest areas. I'm just going to let the paint expand safe. Here's a little bit of
a highlight as well on the bottom eyelid. On the inside of the eyelid
really can be quite free. And the first layer, especially if you're
working wet on wet and she's starting with
the skin tone one. Still don't want to be
applying the paint. All of my paper, I still want to
have that reserved some tonal variety a little
bit from that level there. While that's drying, I'm
just going to go ahead and go over the iris with
some black light wash. I'm going to reserve
the parts of the highlights that we've
already marked them. They're just going to move a little pigment
in some areas. It's really going
to start expanding again into those areas. But I find that it
really likes two. A great look when you
work in a little bit of variety into the iris. If you're in inpatient as me, you probably have your
hairdryer quite close. So I suggest we just try that quickly so
we can keep working. Making sure that
that's completely dry. Before we start on the next
layer that is completely dry, I'm going to grab my number three brush
and I'm just going to take my skin tone to and
start to work some details. Quite intense. I'm
just going to. Some water and I'm just
going to smooth that out. I'm going to go back to
my number ten for now. Just make that
expand a little bit. Just doing what I usually do. Observing what I see
on my reference image, and then just build
up my layers. Still looking between
your painting and your reference
image all the time. And we're just starting
to indicate to ourselves the areas that we need to
build on the next layer. I'm sorry, that's pretty much just what we're doing
in the first layer. And we will paint
over the first layer and we probably
won't see any of it, but this is just really
to get the ball rolling and stop this building
after flyers. Well, that's trying to get the green ocher color that
I made to worship the edge. I'm just going to go right. And while that's drying, I'm going to start the
first wash on the eyeball. Just a very light wash
with the blue black. Just going to put the skin
to the eyebrows as well. A little bit of background. I'm going to smooth that out. Because as you can see
in the reference image, It's feeling not that we have the live between the
eyebrow and the eyelid. It's gonna get more skin to
some details of the eye. Again, just building
up layers as per usual here for Chrome, for the iris again now. But simply black. No more intense this time. Too much water. Is that highlight them. We want to reserve smooth color and also the pupil. Then just let it dry. Now I'm going to go inside of the eyeball again
with a little shadow. I want to make it dramatic, but also on my Layers
little by little. We don't want to
go over the top. I'm just smoothing it out. Same on the other side. We're going to apply some pepper scattered
bottom of the eyelid here. And also to the top them. Quite dry. It, I'm just going
to wait until it's dry. And in the meantime, just going to get my very
fine brush number one, and also with the little
purple shadow lines and here, the black coffee brown. Now still with my
very fine brush. Putting the eyelash line
and here I'm just going to make some random max so
that it looks organic. And then I'm going to
go back to my skin tone to very thin brush and just get into the
corner of the eye here. A little bit. Smooth that out. Trying to get my
number three brush. In just a couple
of details here. One to get some blue black and just hide from
the contrast here. Just injecting those pigment
there into the pupil. And I'm going to use my
number ten brush again. And some purple shadow on
the crease of the eye. I'm just intensifying up here
in either the eyelash line. Gets more fluid black. A little bit more
variable there. I'm going to be a little
bit more skin tone one. Here. Add a little bit of
a greenish shader. Yeah, who I really
do, It's good. I'm just adding this color to a few specific areas to give a bit of richness and
variety to my painting. So just really select
a few points to put this color is going to grab a little bit of
skin tone one again, and I'm just going to go let
a little bit of whitewash. I'm mimicking the
shape of the eye when I paint them. Push header, hoping that
the iris is kinda dry now. So I'm going to go
over that again. Especially the shaded paths doing up the contrast
as per usual. And I'm just going to
grab a little bit of Prussian blue and a
little bit of the back. I don't give a bit of
a bit of a wash here. Then. Just with a little bit of yellow ocher that we
have on a palate. Remember pupil here
wants to expand. I'm going to go back to
my coffee brown and just work a little more on
the eyelash line now. Adding intensity. Smooth out some shadow and
mixed with some blue black. More of a dark bluish color is going to define some
areas around here. Smooth. Wash, flag for
endless Tyler behind. Well. And start to intensify some of these areas that
are pretty color over. Remembering to visit the
highlights a little bit. So you can see
that I'm not going over the entire iris here, I'm just going over
some areas to kind of have this tonal
variety and the iris. Once I'm done with that, I'm just gonna go over the
crease of the eye with some purple shadow,
smoothing it out. Then I'm also going to
go back to my skin tone to it just makes the top of the eyelid a
little more dramatic. Removing excess water. We just keep going
until I'm satisfied. I'm still not quite happy
with the contrast of the iris and the pupil. Still wet pigment in there. And I just really want to get back into this white of the eye. Play around things. Absolutely. I can also go over the either shows with my very
tiny brush though, and get back into that
shadow under the top eyelid. And then also going back to the iris and just putting
a few more marks and there just a couple more finishing touches. And there will be
some coffee brown. I just wanted to go over
the crease and the anchors. Really quite intense. Shed a little, take a little bit of
this ocher green. And I'm just going
to dry that off now, making sure that
it's completely dry. I am going to give it one
more cut of purple shedder. And with my skin tone
to more reddish. I'm actually working
with a clean brush. Just continue increasing
the contrast, building up the layers and really just adding
volume that way. So yeah, I'm just adding
the finishing touches now. I'm just looking
where maybe I can put one brushstroke here
and one brush stroke. This, that's really just the very small details
that I'm covering now. I feel like you can really see the layers from underneath
shining through. So this means that
I've been working with translucent layers
underneath the eye. They e.g. I think that's really pretty and that's really
the beauty of watercolor. I'm just going to
put in a couple of eyebrows up the top with a little coffee brown and
then I am going to try it. And that will be it for today. Maybe just a little
bit here and I can turn to all right. I'm going to dry it and
then we're done for today. I always think I'm
finished and then I look and let's dry and
it looks different. So I feel like that was really missing that little highlight
there, just stood out. Okay, now we're really dumb. I hope you enjoyed it and
I hope to see you tomorrow for another day of
painting. Eyes.
35. Day 29: Hello and welcome to another
day of 30-day challenge, painting eyes with watercolors, but they did guys. And for today, I've chosen
this image as a reference. For that. I've already gone ahead
and mix up some colors. I'm going to start by catching
my eye onto my paper. I'm just sketching this in here. The crease of the eye
importance must shed a tear duct here. This last line here is
quite a lot darker. I'm just going to
mark that as well. Got this shadow here comes. And then they put them, the pupil and iris. And again, I'm looking at positive space
and negative space, or the positive space
in this case would be the iris and pupil. And negative space would
be the inside of the eye. Spot over here, we've
got a highlight. Here. We've got the scarier, huge, It's quite dark. And then we can also just draw
in the eyebrow little bit. And if you look closely, there's also a bit of
a highlight down here. It's going to put
that into because these kinda highlight
give the life. Let's dive right
in with skin tone. One can be that
precise right now. Can be a little bit lighter. So we're just going to go
over the dark areas for now. We're just applying brushstrokes and then we're
extending the pigments, smoothing it out, modifying
the breaststroke. In this way, just applying
layers and layers of translucent paint come down
to the bottom of the eye. Remember to reserve the
highlights as the white of the paper is still continuing
here with skin tone one. And I'm going to go over some dark areas to start really building up that
contrast, but slowly. Add a little bit
with a clean brush, almost dry, that I would love
to get into the eye here. Just a little bit
of color already. And also to the bottom
eyelid here, the inside. I have gone over
my highlight here. So I'm just going to the
following little bit of tissue paper and
just lift it up. I'm just continuing still
with her skin tone. One stop to intensify some of these areas that are
pretty cool over shadows, eyebrows, bit of a foundation
to with the skin tone. One current law that's
trying a little bit. I'm going to get
the green ocher. And I'm going to go over
the iris and the pupil. Remembering that I'm
observing the highlight, but just covering the
entire thing, otherwise. Taking up a little
bit of pigment. Remember, variety here. And then I'm going to go in
with my number six brush and intend to bring it over
to this mixing pellet. And some of these creases, some of the darker areas. So this is definitely
a dark area. The eyelash line under
the eye as well. We just continue
increasing the contrast, building up the layers. Then this blend of
modernity here side. Once you start getting into
the inside of the eye here, you can see this dark line. I'm just going to smooth
it out a little bit up to the top to be inside, to look inside of the eye. I'm going to add some of this
time to treat the inside. And on this side, smooth it out a little bit. Keep adding more. And I'm gonna get
my skin tone three. You have too much
water on your brush. You can always get rid of
it on your piece of paper. Tissue paper. Just kinda get
him here a little bit. Here. Let's just smooth it out. Just going to add a
little bit more risk in turn three and certain
areas like here. Let me use my
paintbrush member, tim. It's quite an intense watch. Don't want that. I'm
just going to put a light wash of
most of the paper. Then I'm going to go back
into the iris and the pupil. And I'm going to use
some glue black here. And just start to finding
a little bit more. Some areas that are darker. Sample around the
iris and pupil. And then wet this area, just some clean water. And let painted
spend a little bit. Okay, Let's start with
my purple shadow. I'm going to stop
the eyelash line. That's a lot to
live at the moment. Always find it
fascinating to see how the ice starts to come
out of the paper. I'm just going to
expand brush strokes. I'm going to get
them to clean water, just a little bit damp. Brush this column that
the brushstrokes. And also on this side, I can add a little shadow. Highlight them here,
which was saved. Grab a little bit
of skin tone three. Just got out of
the bottom eyelid. Just too light right now. And I'm going to get the number
ten brush, purple shadow. I'm just eyebrows. I'm going to go start
on coffee brown. Pupil, iris again. I'm just building
up the contrast, looking for the areas
that are darker. I'm trying to really
make this stand out. Tonal variety. Well,
that's drying. I'm going to grab
some of this green. Okay. Just a light wash and
go over some of these areas. Maybe also the shadow over here. So I'm just adding this color to a few specific areas to give a bit of richness and
variety to my painting. Go back to the coffee brown, my number six brush. Here. Excusing a little
coffee brown on the crease of the
eye up here as well. Eyelash line again. And with my number ten brush, I'm going to go
over the eyebrows. Coffee round a little bit, make them a little more organic. So after you have tried
it with a hairdryer, your paper's always going to be warmer and that means it's going to absorb the paint quicker. So be careful of that. I'm going to go back to
skin tone one for a moment. So as you can see, I am just covering some of these areas. I'm not going over all of the
areas because if we do then often we just lose that kind of tonal variety
you that I love. So yeah, just selecting some areas to go over
with this shade. I'm also applying it to the
inside, smoothing it out, and also look at
the pattern around the iris is also a
little bit orangey. Continuing to smooth
out a little bit. Just want to be
working a little bit old either the image so that parts of that dry and
then you can go over it again. I'm also going to add
a little bit color. Skin tone three. Most fun. Yeah. That's a tiny bit too much. Going back to skin tone
to adding more contrast. Just making the eye
a little darker. So let's highlight
can really stand out. And now I am going to get black and I'm going to
add a little bit more ivory black that's
not dark enough. And then I'm going to go over the inside of the
eye again here, pupil, the iris, and
the eyelash lines. After that I'm going to
grab my number ten brush. Then maybe I'll just clean my smaller
brush and go back to the Greenberg and just add a little bit
more of that here. Maybe with a little
bit more pigment and some paths more. What the paper is
shining through. And I'm going to take a
little more blue here. Question blue and just work
a little bit with that. I'm here. And then I'm going to take a
little coffee brown. Still working with
my number six brush. I just want to be back in
details. In the corner. I forgot. Now that we have in
the bottom here, I'm going back to spend
time three blue color. And I'm going to
use a little coffee brown, little more sienna. This part of the eyelid here. And also having them there. And then back to skin
tone one little there. I think I'm just going to put in the eyelashes now
and then I'm done. I'm grabbing my
coffee, my blue black. And I'm just going
to stop flicking my number one brush like this. So you get like wispy
brush, brushstrokes. Remember not to do
them all the same. We can say this dot coming into the eye here a little bit. Continued doing that. I'm getting a little bit of the coffee brown and
I'm just going to add a couple of eyelashes and that time could
vary a little bit. You can see the colors
already fading as it dries. I'm also going to add eyelashes
down the bottom here. So as you can see, I'm also adding in some
finishing touches, some little details here
with the coffee brown just around the crease of the eye and then the
inside of the eye. I'm just going to
add in a couple of wispy eyebrows up here. And then I'm going
to call it a day. So make sure you wait
until it's completely dry before you remove
it from the board. Because otherwise, I'm
just going to put in a couple of reflection
eyelashes here. Um, if you remove the image before it's
completely dry at this, going to walk a little bit
so we don't want that. Right. I hope you enjoy today's
lesson and I hope to see you again tomorrow for another
eye and say, did I challenge? I'll see you there.
36. Day 30: Hi and welcome back to the very last day of
the 30-day challenge, painting eyes with watercolor
for 30 days end for today. I've chosen this
image as a reference, and I've already gone ahead and mix up some colors as well. And I am going to go ahead
and sketch this I onto the paper just
loosely as per usual. So I'm just making loose
marks here before I really settle on the final mark
to get the shape right. So what we're doing again
is obviously withdrawing the general shape
and then we also indicating for ourselves where
there's light and shadow. So I can see here, I've got the tear duct and then the iris stats around the bat here I
would say just come across down quite
large him and I said, I'm just going to
erase a little bit. I think the poem is correct, but just a little bit loud. Let's try that again. Inside of the eyelids. Inside of the top eyelid. Shader comes from the iris here. Next line there, then the
crease above the eye. Because the eyelash line also
takes up a little space. Here. We have the pupil and
right and said the pupil, we have a highlight and
a little highlight here. Okay? Today I am going
to wet my paper. So I'm just gonna
make sure that it's completely covered and
completely covered in the water. Removing excess
water, I want it to be nice and colors
and not do it. Okay. I'm going to start
with my skin tone one, just test it out on
my test sheet here. And I'm just going
to start going over the areas that are
a bit darker here. The crease of the
eyelid up here, you can see it starts shadow
a little bit of room here. The eyelids as well. Cuff tear that little
shadow under the eye. And of course, the eyelash line around here kinda caused
them to be shadows. Just smooth out a little bit. There's a little bit
of red in the eyeball, but I don't want this
to be repairing yet. Miami just starting. I'm just going to intensify
the stylish line up here. See how nice it's expanding
and going under the eye. Also just intensifying those
shadows a little bit down there and around the outside. Still working with
skin tone one. Yeah, we're just trying to start building up those
layers a little bit, just really sadly, and while
the paper is still wet, the pigment will start
expanding really nicely. Well, that's dry a little bit. I'm going to go into the iris. I'm just going to get
a very light wash. I'm just going to start. Don't want to paint
on my highlight there in the middle
of the pupil. Lifting that up a little
bit of tissue paper. And apart from that, though, the iris and the pupil, a little highlight down here. My smaller brush, making
sure that it's clean. Just going to remove a little
bit of the pigment here. Kind of variety going on there. And I also want to be
a little bit lighter, a little bit more for what is
the paper shining through? Once I'm done there, I'm just going to start
working with my skin tone to I'm working underneath
the top eyelid and also I took the eyelash
line with me here. I'm also just going to focus on this bottom eyelash line here, just making it darker, extending the brush stroke
and then going back up to the top eyelid and increasing that crease and also
extending that brushstroke, just smoothing that out. Let's Spend a lot here. So I'm just taking away. Lit up there. And then also lift up a little bit of pigment from the
inside of that. I'll go ahead and work a little bit with
clients can turn three, make a light wash. I'm just going over the
areas that I've already covered and also going over these areas that is still the
white of the paper and some areas that I don't want to be the whitest
white of the paper. So the lightest highlights should really be the
highlights inside the eye. And yeah, other than
that, I'm just going over the areas that
have already covered again to heighten the contrast and just start building
up those layers. Can turn to a couple of areas. So as you can see, the paper is still
a little bit weird, so the paint is still expanding quite nicely in the
layers that I'm adding on top of this still slightly wet layers are
mixing with these colors. So I am working with different colors on top of each other while the
paper is still wet. And usually when we're
working wet on dry, we will wait for the paper, the layer underneath to completely dry before we
start on the next layer, on the next color. So every time you paint, you've got to ask yourself, do I want these colors to mix directly my paper which
has a wet on wet, or do I want to build up the colors so that they
sit on top of each other and one shines through the other one and they
kind of build up to make a color and a different way
which will be wet on dry. So yeah, when you're
using wet on wet, so you will have to
take into account the colors will expand
into each other. So as you might have
noticed in this challenge, we've actually gone
ahead and mixed wet on wet and wet on dry. And I really enjoy that variety and the richness that it
gives to the painting to work with these different techniques that I'm going to start
on my purple shadow. Just get them to the timing a little bit more. Some areas. I will smooth it out
towards the inside. Like that there at all. I'm just going to use my number ten brush,
get rid of that, and then dead tissue
onto the eyeball. Get rid of a little
bit of color there. I'm going to use a little bit of the green ocher,
very light wash. I want working on the areas of the
iris and the pupil here while the other areas dry. Okay, I'm just lifting up
a little bit of pigment. Then I'm going to
go into some of the areas of the skin
with us as well. Green ocher. A little bit into these still damp areas
are in the shadows. Here. Lash line size, you can see I am just covering
some of these areas. I'm not going over all of
the areas because if we do, then often we just lose that kind of tonal
variety with that I love. Yeah, just selecting some areas to go over with this shade. Using a little bit is contained
three tissue paper here. I'm just going to
smooth that out. Then I'm gonna go back
to the blue black and just put the shadow up here. So wouldn't detail pupil, color and variety and here
and the pupil and iris. Okay, go ahead now and use a little bit of the
coffee brown to define the lash line to
look really dark. From here down the bottom here. It's going to tighten
it up a little bit. Clean and dry brush. I'm going to use my very
small brush to start just clicking out a
couple of eyelashes here. So just going over the
iris and the pupil again, trying to fix this
little part here. I'm just continuing eyelashes
because flicking the brush. And just putting in the
rest of the eyelashes here. Remember that you can also lift up pigment or water
with your tissue paper. And with the small brush, I'm going to go back
to skin tone to, and I'm just going to find a little bit more
of this area here. I'm gonna go back to black and just put a couple
more touches on the iris. Very light wash of
blue deck. I am full. And now I'm gonna go
and dry that off. And then I'm going to grab my blue black again and
just really intensified. Okay. And some of
these areas, e.g. the shadow under here, little more variety
and the virus here, just a bit light wash. And I'm going to mix
a bit of coffee brand on here and the shadow. And just really lashes again. Then limbs detail. Really small brush for that
again, excusing coffee brown. Plucking the brush like this. Then I'm going to use a
little bit of blue black. Retrace the eyelashes
a little bit. So you can see there's just
a lot of going back and forth between colors, adding
layers, intensifying. I'm going to get the blue black and I'm just going
to add a little bit. I have the black or the pupil. That's going to be the darkest. Then I'm just gonna
go back to skin, turn to if my number six
brush and just scan here a little bit more finishing touches with them. I maybe a little bit more of the green ocher
around the pupil here. Careful not to touch the
pupil said unto them, expand the black
into the iris here. Maybe a little more skin
to skin turn three. Some of these areas, Jessica, into some of these
details again, defining a couple of lines. I'm going to dry that off
and then I think I'm done. One more thing I'm gonna
do is I'm just going to put a little more shadow
around the bottom here with my purple shadow
around the top here. A little bit more
shadow underneath here. So yeah, I'm just adding
the finishing touches now. I'm just looking
where maybe I can put one brush stroke here and
one brush stroke there. So it's really just the very small details that
I'm covering now. Really getting into this
corner of the eye here. Okay, so I'm just going
to draw out again and then I think
that's it for today. So that concludes today's AI
and I hope you enjoyed that. So with that, we
finished today's AI and also the very last i and
the 30-day challenge. I hope you've enjoyed
it and do join me in the next video for
some final thoughts and comments. I'll
see you there.
37. Final Thoughts & Comments: And that was like Guys, thank you so much for joining
me in this challenge, and I hope you've enjoyed it. So if you're watching this, then you've most probably
completed the 30-day challenge. Well done. I'm really excited
about seeing your projects, so go ahead and upload them. You can upload each eye separately or when you
finished with the challenge, It's really up to you, but if you upload it as you go, I can already give
me some feedback and pointers if you want. I just wanted to share
with you that I feel like even though I'm creative
every day for a living, I've really enjoyed this
challenge and I use it to get into the rhythm before
starting my day's work. So it also gave me some
sort of structure. And I have to say I feel like I improved throughout
the 30 days too. Thanks Heaps a game. If you have any feedback, I'd be really happy to read about it in the
discussion section. So I just go ahead and drop
me a line there if you want. Now if you're wondering
what to do with 3D paintings of eyes, I have a couple of ideas. You could e.g. find
them until the book, or you could obviously frame them and hanging
them up in your house, either in groups of three or
four or two, or just single. You could give them
away as present. You could make
cards out of them, birthday cards or
Christmas cards. But if you have any good ideas, you can also go
ahead and share them with me in the
discussion section. I'm really looking
forward to seeing you again maybe in a future class. Alright, I'll see you there.
 Nadia Valeska, Berlin based professional artist