Transcripts
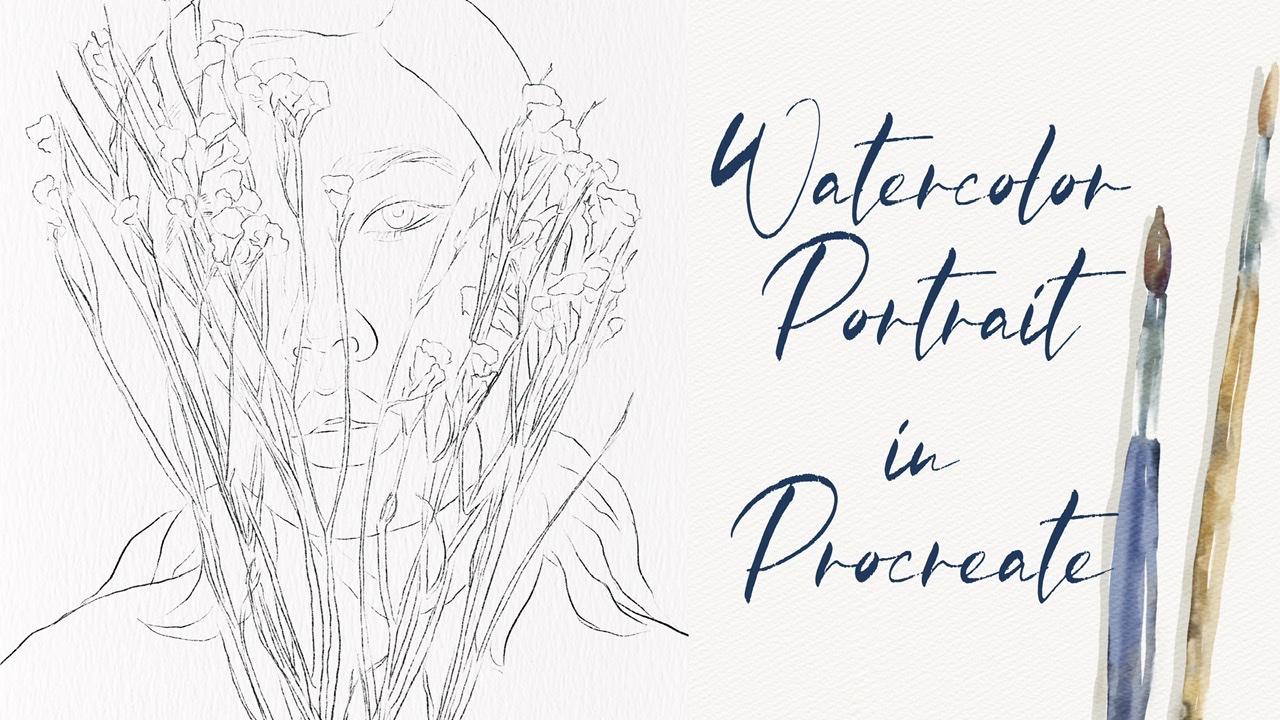
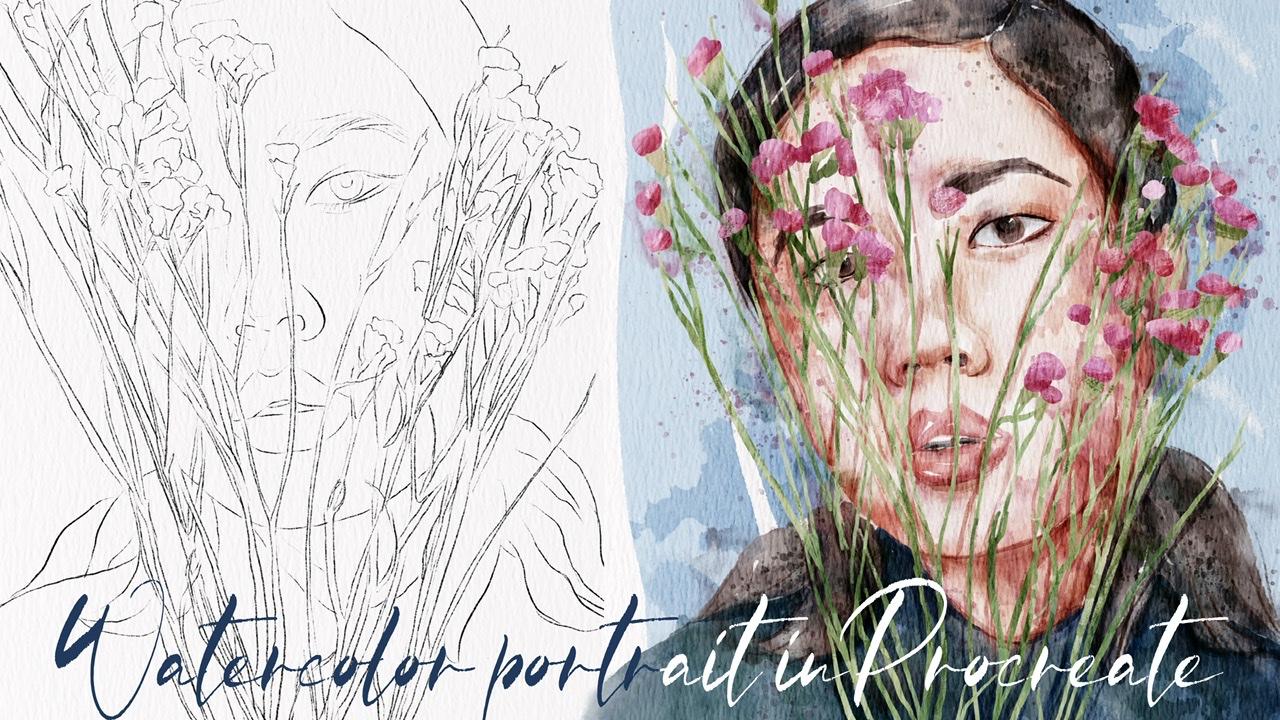
1. Introduction: Hi guys. Hello everyone. Welcome back to my quest there in mind today's tutorial. I will teach you how to paint watercolor portrait in Procreate. And so, so simple, I prepared for you a lot. So custom brushes, watercolor brushes and loan to be stem brushes, watercolor, paper, watercolor, color palette, my own sketch and my pictures that I drew. Feel free to use them for your own art projects. I would be very thankful and happy if you could share with me your own art projects and give us so short feedback about my class. And if you're ready, grab your I felt, I felt that. So now let's ban together. Hi guys. I'm a freelance illustrator who welcome back to my class and let's dive into portrait, illustration and pains altogether. Beautiful girl, we use botanicals in watercolor style. At the end of my class, you will learn more about Procreate and composition, especially how to use layers, clipping, mask, Alpha Lock Selection tool, and how to add texture, volume, and color variation to your picture. And most importantly, you will learn how to paint watercolor portrait in a simple way. And your painting technique. You can use the illustration you create for posting on Instagram editor portfolio or sell it on Etsy camera, and so on. Or just share it with someone whom you really like. I'm sure they will be so happy to get an illustration that is created by you. Today. I want to show you is that watercolor is so simple and it's a real fun. And in the end of my class and see it today, I will teach you how to create texture paper. How to use sketches. What is composition? How to create traditional watercolor illustrations in Procreate? How to use watercolors, stem brushes for watercolors affects how to pay an actual from reference picture. How to use my default Procreate brushes for watercolor painting. How to apply mine your watercolor technique. What does in UN says you need to know if you want to create watercolor illustration, how to use Alpha Lock and clipping mask. How to add texture to your artwork. I will also show you how to add shades and highlights. I will show you my whole process from start to finish. And as a bonus, I will share with you my texture paper has some watercolor brushes, color palette, sketch that I created. I will also add file of my pictures that I drew. Feel free to use it for your own art projects. Because this class is great for intermediate level, also can be useful for beginners. Watched my previous classes and experienced artists, probably here, you can find an inspiration and your ways how to pay in portrait illustration, your class project. We will be next painting the portrait with flowers. Using the tips and brushes that I gave you today. I will use Procreate for this class. We use iPad and Apple Pencil. So if you have it also Mazda drawing pads for just regular watercolor paper and pains, please join our class and good luck.
2. Creating Paper: Hi, thank everyone. There in our today's class could kinda pans as portraits of a girl. We use botanicals in a God that peristyle in Procreate. I've prepared for you all lots of watercolor brushes where I added some new brushes that I created recently. Also prepared for your watercolor paper along with watercolor color palette and also sketch. And also I will add my own pictures that I drew. Feel free to use it for your own art projects. And guys, once again, I want to explain you how to export all my freebies. Okay, so where to find all my freebies thruster, all you need to open my class in browser, not at Skillshare app, because in this way, my previous might not be reasonable. So you go to browser, it can be Chrome or Safari. And after said, go to Projects and Resources section. And in the right corner from the right side, you might find all my freebies and is a headline resources. So you can download all of Sam. And opposite also freebies will be in downloads folder. Laughter is that you can just drag and drop everything into procreate. So I think we are ready to start and now let's create texture paper. So you need to tap class. And after class. After that, switch from pixels into inches and writes 9 in chess. And please pay attention, you need to have 300 DPI resolution and maximum layers that you might have is 56. That should be enough. After tab create this our cameras. Now, next step, we need to export out textured paper into Procreate. Once again, like I told you, you can find a paper in downloads folder or maybe you saved said intos a camera roll. So please go ahead, tap action button, tap, Add. And if the paper is in Camera Raw tab, insert a photo. A paper is in downloads folder that inserts the file. That's our paper, that's perfectly fit to the size of our canvas. Next step we need to replicate cell layers two times. And after speech, gland and mode froms and Normal Linear Burn. And from the normal to color burn it and it does it replicate Linear Burn law together and merge. Next, replicate color burn two layers and merge them together. Next, lovers opacity of linear burn teal, I don't know, four to 6%. And Don Tange colorbar is fine. And as you might see here, we have bluish tone of the paper. So if you want to make it warmer, you might use it for that. You need to go to the layer where we have linear burn paper and go to adjustments and press hue, saturation and brightness. After said human lovers situation. And now as a paper is less gold and more war. And if you want, you might just go and move two criteria, yellowish color. Next Add. So for now, I like is a paper, I lie how it looks. You see here is a difference, is paper is more yellowish, color, burn layer is slightly greenish. So I selected two layers together. And after idol groups act, next, I want to rename our group. How to do that? Tap New Group tab Rename the Lexus. And the right paper. Soviet he did right. Now is a layer underneath. We also can rename it. And we can write paint here. Now let's duplicate this layer a few times. So now you're going to pay in here. And now I wanted to show you our brushes that we have. So swans. And here we have different kinds of brushes. Let me choose a color. He said one. And let's start froms if it can be regular watercolor brush. Surprise that for you so many times 2, which is quote for paint in the fight and shades, or paying pretty light colors. Next one, rule-based base color sharp. This is a new brush. I like said. I'll show you. This brush can help you to add LEA, to add deeper colors, more, add more contrast. And it has this salted effect. And also what is cool about this brush, because if you make the new strokes and say color variations, he sees a slightly different, which is very convenient. Next for AAPL rash routers as vehicle rate and know. Very useful, very convenient ones. Software comparing to the previous brush forward guard back round brush for a and shades and for, added some colors to the background. What perfect colors? Small. This brush is amazing because thanks to the brush, we can mix some colors. Pretend naturally, like say's, you see the color combination asymmetries afterwards, opposite. If you want to erase it, just your three fingers and Robert Wright will exist. Thanks for flowers. Likes edge Alliance and this process called for A1 sharper lines like this. Also it's pressure sensitive brush. So if you press harder, you have more pigment. And if you press lighter, you can just add tiny bead of shades. Most splitters final touches to our illustration was grabbed one of my favorite brushes. These brushes also cool if you want to add some texture. Next, bullet, Akash stamp. Stamp is part of my newly created watercolor brush sets. It's called ink and watercolor stamps. This is analysis temp. So I think they are pretty suitable for our today's portrait. And we have mercury or R6 depends cell Terrell airbrush, which we're going to use as a blender. Dry brush reaches called the add texture as well. And so I think we are ready. Let's move to the next part where I will teach you how those start creating our sketch call how to paint a portrait froms a reference picture.
3. Proportions of the Portrait: Let's create one more layers at as a bow. And here we will have sketch. Once again, you can also export our sketch. You can find it in downloads folder. Elasto, same action button, tap, Add, Insert a file. So this is a sketch of our girl. Once again, I just decided to easier job, save some time. So I already created a sketch. But if you want, you can do it yourself. And I will explain you how you can be off to the right. How can you paint her eyes catch and how can you understand where to place sound like body parts on the face, like eyes, nose, ears, leaves, and so on. So now I want to give you a short instruction. How can you make this cage from that reference picture? I'll create one more layer about and let's try to close it. Now we need the expert, our reference picture. For xhat, we need to go to action button, tap Canvas and tap reference. Think, think. Next, go to Image and tap Import image if your image is in camera roll. So as, as our girl. And now I'm going to explain you how to create a sketch. So as a first option, what you might do for xhat, you need to create one more layer. Add. And here you are. Impulsive picture right inside our Canvas. Create one was killed about one more layer above. And go and grab 6-bit pencil. And you can just go and trace girls face and paint it step-by-step. This is a first option. That's what you can do. Just try to be careful in once again, you don't need to visit accurate because this is watercolor portrait. We will try to be very artistic today. So this is a first option. You just trace the main body parts like this. Okay, this is the first option as a theme of a tomb. I do, I will, I will increase it a little bit, create one more layer above. And if you want to paint this sketch without tracing, so you want just to use all your skills. You'll want just to look as a picture and paints a picture right on our paper. You still can do that. But before this tire tones that I want to explain, use a main rules that proportions. So once again, when you paint a phrase, dry too, like Torrens of phase into the basic shapes. So here you might start by painting some kind of rectangle. So he knows it. Okay, we need the pander of technical access. And as you see, her face is a little bit like a tilted XAMPP. Main lines and middle line will be slightly tilted, tilted, it's not straight. It's like maybe 10 percent to the left. Lenses. After that vended paintings or main line, we need to remember that our face is divided in some parts and the nullcline is not in the middle of the face. So nose line will be slightly lower like here. So if you divide is our phase into some parts. After that, we divided like the part, the lower part into also too small parts. So in the middle we will have a pipeline. Also. Pay attention to ads, the end as a nose. This is the beginning of our ice. You see here, this is like just main roles of proportions like this. And the middle of eyeball will be yeah, it's supposed to be xa and an offset ellipse like this. So our leaves, we'll end here. So those has a main rules. Also our year, we'll start in a line where we have the ice and say we'll finish in the end of the nose. So this is our year lie. Just keeps it in mind. If you want, might seize it year here. It will start here and end here. So does possess a pre termites domain rules. If you wanted to pan set phase, just remember about the proportions. And now let's move to next part where you're going to pay in this cage. So those are our main rules, how we should pay in phase. Once again, reader needs a picture. We can see the end of our forehead and some kind of years here, ears and hair. Like say's. Next, this is a forehead and as I told you this line, this is in middle of ice. So as you see, it began of ice will be here. And you can just eyeball. Also pay attention when we paint eyes. Some people is a pained eyeballs like this is not correct because you can't see this part of eyeball. So usually when you paint. So IPO helical axis. Here we have, I believe if I'm not mistaken, you can pronounce it right. Yeah, Alex's. So remember about set next, we move to second part. Keep in mind that here we will have the beginning of second. Yeah. Let's just Panza. If you feel that, okay, you can make some mistakes. You can just copy and paste this eye and cause her eyes are pretty dark so you barely can see. There's a pupal. And sometimes this is a problem that I have. I like to fan feet, eyes. So as you see comparing to help raise my eyes is slightly big. So I'll just go and lowers the size of her eyes out. The same visits I is Val. So I select I once again, if you don't like something, just move it. If you think oh, okay. Eyes to be. So now it's accurate. Now when we paint nose, as you remember, this is the end. This is a modal auxiliary verbs. This is the ending of a nose. We will start with the small ball, like here. And you also paint one more pull from this side and another ball, Chrome's is sad. But remember that it's immutable. You'll visit bigger one here. Nice is, her nose is very accurate, so it's pretty simple to draw it. So here he has a nose holes like serious. You are trying to connect it here. Yeah. Later we'll just remove an erase all the lines that we have a painting here. Makes us human noses slightly smaller. You just erase that part. Okay, I like your eyebrows is so big. Also make a schematic. Donkeys it accurate. Half of her face is covered by flowers, so we can't actually see it falling. Next, it's time to paint leaves. So very paint leaves. We pay intel. Show you just one ball, one mobile here, one more poll here. Remember this is a n denotes the leaves. So, so feel plexus. We always have shadow on his lips here. Again, for some people, it's just easier to start painting. Like say, oh well it's the actual shape of a face and after pain details. But for me, it's easier to paint the details AND operator moved to the shape of a face. So here we have some, some, I think this is hair and shoulders. Hand, we will have some kind of flowers. Yep. And that's actually the act. So as you see unknowns or proportions, you might paint face easily. And guys, once again, this is not the TPP class about painting portraits. I will just give you some simple brief information. How can you paint a portrait? Just knowns are some main rules about proportions. But once again, it was difficult. Just go ahead, experts that picture into procreate and just trace it. You can start to set and after that step-by-step eventually, you can easily paint cause of portraits. And guys, tell me if you want the C class about painting portraits. And if you want me though, tell you more about the proportions, how I paint or traits and what is the simplest way exit tips and tricks. How can you paint portraits in a simple way like you now let's move further and next we're going to start adding some colors to our illustration. Let's try it.
4. Adding Colors: Well, we have our brushes, we have our watercolor color pellet, and we have our reference picture. So let's get started. Once again, guys, remember, we need to paint a nice paper layers, crow, that's very, very important. And I will lock our sketching layer. But before that, let's lover sat by 45, 50 percent. Okay. So I want to try to yours out your brush pull-based curves sharp. But once again, you might choose any ISO crashes at you like it's up to your regular watercolor or couple brush. It's also one of my favorites. So next thing we're going to go and grabs his cue card. I'll start is pretty light one. And I wanted to show surprise. This part of her face. If your brush is too sharp, is go ahead and loggers have Plaza de hand on Torrey later or corner blend lots of colors. Here we will have pretty bright color. Now I want to switch double ortho brush because I wanted to try deeper in Russia's. So to spark just like the doctor. And you have tiny parts here and some shade in this area. This part, this area is slightly lighter. So I'm going to return to our color. Lighter. Yoga, our lab fees, our plans, it's fine. This area's dark, dark. Grabs this dark pink color. Lexus shadings this part. Next blending tool as a blend into, I'm using terror lab crash k code. Now I think this a little bit too dark, so I'm going to lightens apart. So go to hue saturation brightness. Now I will increase the brightness to 50, 50, 50, 50 percent. And lovers is a titration a little bit like set next fee and let's move to hair and carve out feed and her and flowers. I think. Let's move to new layer pane here. Next, Grab brownish color. So I'm going to use in your brush randomly start at in chains. So on. So again, you can overlap later, I'll show you that. Then you'll have your transparency. And your one sees as other lipids. Blending tool. Now grab dark blue color. One more layer underneath. And I wanted to feel this area where youth festival, new brush. Remember what I told you? Is brash can give you different color variations. Reaches very, very convenient. Erase over lupins. Likes. Lovely. Now let's return to our skin color. And I wanted to grab this color and put a poll brash. Perfect brown color. Brown color here. Since some color I will add to her eyebrows. Like next, I want to add some colors to flowers. This is along this part. And how grabs is productive, bright color, grab my base color sharp, and I need to do it on a new layer. Above of all layers. This brush semi-transparent. So which is cool because you might see that this brush can offer ways and Nozick colors. And that's to keep its color to color. Okay, cool. Now let's create one more layer and add some color to flowers. And just check and grabs his preaching bride's kin cutter. Later I'm going to add kinda variations.
5. Adding Shades and Highlights: So now it's time to add some shades, add to our illustration. So what I'm going to do is I need to remove the transparency before I start adding any shades. Why have any introduce it? Because if done those ad, if you don't remove the transparency, it would be difficult at shades. So for example, if any, to use clipping mask, for example, I grabs is pretty bright pink color, but you see there's a color, is very, very transparent. It's not set saturated. Now let's try to remove the transparency. So I will duplicate the layer and go to logger layer, tap adjustments, hue saturation and brightness, and turn brightness into maximum 100%, replicated 20 times and merged together. Now, I can make our layer a boat and as you might see, now's a color is very, very saturated. So this is the reason why we need to remove the transparency. So let's draw that with all our layers. I will go to thereby we have hair and go tap Adjustments, Hue, Saturation, Brightness, turn brightness to maximum, replicates a two times and merged together. And advocate merge together. The same piece out plans. Abdicate, Kotler layer. Replicate, merged together. Okay, Now have you removed a transparency which is perfect. And now it's time to start adding shapes. So what I'm going to erase, I will go and create one layer above our closes and press clipping mask. Perfect. Now, either move some blending layer to multiply and grab your watercolor background. Now, I can create some kind of shades. So in areas where two objects are next to each other, we will have shades. So area reaches next to the hair, will be in the shadow. Why it's cool to use this blend in a layer mode, because thanks to multiply, the colors are more saturated. And when we use clipping mask, as you see, the PAN go beyond the alliance, which is also very, very convenient. So I want to show the sheet here from botanicals. Now, I like how it looks. I'm going to merge set together. That it's going to go to hair, create one more layer and press clipping mask. So next step, I need to go grab hair. This layer to multiply and add some color variation. Now let's go to this mask. As you see this area here, I didn't add any color to set solider. You're going to fill this area with some particular colors as well. Kay, wonderful. Unlike the shades here. Now let's create blending tool. And I want to blend the sharp lines. Now let's fill this area with the color. I'll create one more layer about CREB, grayish color. Let's move to pull up our brush. It's supposed to be white, but of course, like in a real life, color of snot, truly white can be a little bit darker. Let's go grab some shade here. Yep. Now grab reddish color. I leaped. And some color here. Now it's going to go and grep very dark color. Shows this part. Same here. This area is also pretty dark. Right here. Now if you want, you can duplicate a layer. And it looks very beautiful. I'll merge that together. Go to Blend tool. And I want to blend those colors. One to look some more realistic, more natural. And down for now, let's move to the next part and I want to add some shades TO fibers. I'll create one more layer to multiply and clip it. Greenish color, but watercolor background. And in some parts, I'll just want to add some tiny sheets. And just add some tiny color variations. Because don't, don't use just one shade of green color. That's not enough. Now grab even polish. Now let's move to purple color. So together, let's create a new layer, clip. It, set it as a multiply. Add machines to florals. So if we add some color variations, for now, I'll keep it like say is March set together? Great. But we forgot about the background. Let's add feller as well. I will use the layers we just underneath everything. That's important. Now you might think what kind of brush you want have you might use for watercolor background. I'll show you. You have a few options. The first option. So you can use and adds a background like this. This is a first option. Second one, you might go ahead and grab watercolors temp. So we can do something like set. It can help us to add artistic attach, but we need to remove some middle part. How to dose it? Grab free hand and carefully erase some overlap. And then three fingers down and cut. This. This is one of the options. It looks beautiful. If you want to turn it off and grab another branch, for example, for base color sharp, increase the size. Then those same things that background like this. If you want, you can distort it and think about the position. I like how it looks. Looks wonderful. So this can be our illustration, our background. Once again, if you have some overlap buttons grabbed free hand, carefully select the area where you have overlap pins, three fingers down, cut helixes. So it's up to you for now. I legs these backgrounds, so I want to keep it like this. Okay, that is background. Now let's move to the next part where we're going to add some color variations.
6. Adding Color Variations: So I'm ready to add some categorizations. And for Zed, I want to oversell paucity of how sketchy layer even more till twenty-five percent now have to lock it. I'll create one more layer, set it as a clipping mask, and move to multiply or effect. Now, I want to go and grab both scrub brush and add some color variations like I told earlier. So remember it's very important to show it's a texture. So I'm scraped shorelines and as you see as the colors a time using slightly different. So this is our original layer. And Zaydan, I just move say point biotin of a color wheel that leads to the purple shade, shows a shade froms of florals. Like ALL two lines over there. That's important. It's great Chileans blend tool. At k as an accent now emerged together. Let's create one more layer, allows a hair, clip, it, set it as amount. You're going to go to our brown color and move to bluish color. Why we did that? Because when two colors are next to each other, one color bleeds into another one. Most likely, not all the time, but most likely it's, it's why I decided to grab this bluish color and this color to hair. Okay, now we need our reference picture to check some shades and highlights. Go to Canvas and turn on the reference picture, like say is put. So as you see, this part will be in light. This is also, this part is also highlighted. So this particle, if we can the shadowed same, try to show that shade froms of florals on hair. Blends the sharpest parts. Volcano like say is now I like SAT, that's moved. Next part. So this is our shade. Merge together the same as face clip. It will move it as a multiply. That's gonna go and grab yellow. Hello, shows a shadow on the face. Here. He was blending tool. You can think it's not natural. So to area which is next to the hair. Also we'll be in a shadow down. Forget about. Because once again we have two objects set and next to each other. And also as area under, suddenly he's in the shadow. Area under the nose, cosine shadow. And I say this part. So now I'm going to add more color variations, more shades to our girl. So we are going to create some volume. Okay, now shade problems of florals on a face. Plant in total. Careful implant. Not everywhere of course. Just the parts is should we planned it? And be careful this brush is very, very text chart. Okay, for now is good. Now let's move to our florals. So this is our shade. I'm going to keep it like say it's March together. Create one with layer, evolves up, planned, clip it, multiply. Imagine parts where we have some hints that this shadow, in the shadow, shadow area, I'm just a flower, a little bit darker. I can't see you, but some areas here also the doctor smashed together. Now a little bit reddish color variations. So guys was I just stayed. I created a new layer in between and automatically is in Clipping Mask Mode. And I wouldn't change the blending mode. So I just want to add a little bit of highlights to the flower here. Yeah. I just wanted to make some knots at dark. And that's a little bit of light through color. Now it looks wonderful. And actually you can just saying ways, our eyes a rest of our plant, clip it. One, change that color. And if you want, you can just say tiny Beat. Says Pride colors to see the COBIT. Not everywhere of course. Yeah, Like say. Okay. We've done is add in color variations. And now let's move to the next part. We're going to add final details. Ends at what visa?
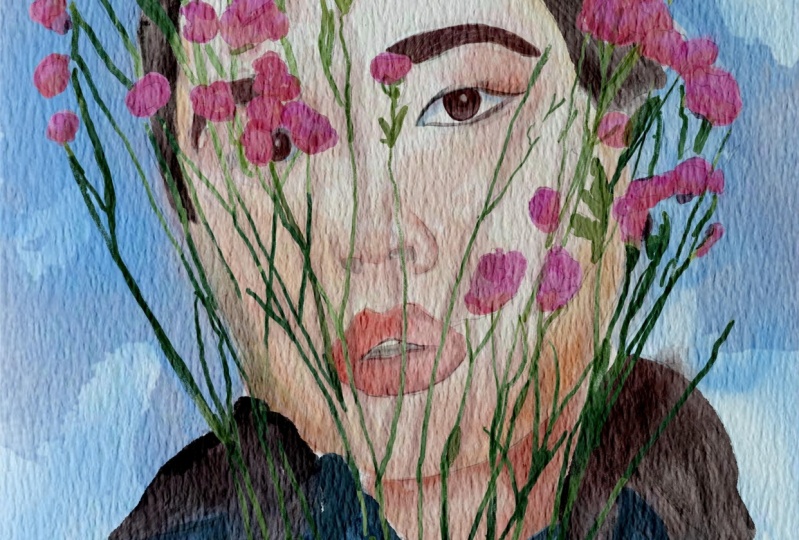
7. Final Details: The final, final details. So what are you going to do? I actually want to add some shades and I wanted to highlight some areas enough to we can turn off our sketch layer. And I'm going to use ten brushes and my splatter brush. And that's it. So let's get started. And first of all, what I'm going to talk here is I will create 10 Malaya about a girl. I will clip it again. I'll set it as a multiply. Next, I'm going to go and grab AAPL brush. And I'm going to go and add some shades. Because this area, so this part, we will peak in the shadow and grab, blend and blend some parts like this. Next, I'm going to go and add some shades to the nose. Here. Yeah, very tiny shapes behind the nose. Hey, Brooks says to Brown. Now speaking about the shades. For the shades, I wanted to create one more layer and multiply. You see it's automatically in Clipping Mask Mode. And I wanted to paint all the shades on a new layer. Why? Because later I went to control the capacity. And if I want like something I would just lovers out by city, I will just erase it because I want to make our paint and more realistic. Hi, as you see it, I'm going to control that. So it's time to add final details. And zed would be the end of our illustration. Once he can, guys, I can't, I don't like how it looks. I'm going to merge that together. Likes his. And I went to add tiny shades to our closest first, multiply. I want clip it. I will use ballpark brash by x. And I want to place it above everything here, right? So I want to show this shades from the hair on our outfit. Yes. I can. I want to show shades prom out that they don't see it in our picture. Batman, me actually painted illustration. We need to show shades from everything. Now let's move to dark brown color and shows the shades here. Now let's just say in his hair, this part. And I'm about to show shades here. And this area, It's also important to pet shades. So I shows a shade on froms, a plants wonderful RED search term. And I wanted to show some shade. And sack colors here. Blended, it'll blend, blend, blend. Some sharp lines like the kinda have shades and space and tiny shades. I can now is that it's important to pay attention when you show the eyelashes. Now shows a shape here. Now I think it's time to turn off our sketch. And she looks very beautiful. And I will create one malaria bowed. Set it as a multiply one clip. It's a can. And I want to show a tiny bit of shading. Shading this part, shade problems or leaves. Let's move to her eyes. Now I want to add eyelashes. I'm gonna go and grab a darker color. Or you might go ahead and grab mercury brash to sit a little bit of shapes here. And just same as area. I came out. She looks very good. Maybe long eyelashes Here. Okay, next part, I'm going to go and add our stems. So how does that debate underneath our reference picture anymore? I'm going to turn it off. Turn it off. So next tab is, I like how she looks. I'm going to merge together everything. And now I went to add some stamps. First we'll start with a background. I will press clipping mask, said that he had to choose a multiply crab outflow color. And I went to crap watercolor stem. And think whether you want to place a stem, maybe some stem here. Looks wonderful. I think I'm going to merge that together. Next, I'm going to just same wave. Our feet. Same stem. Lovers AB positive. This stem can help you to add very realistic batch. Merge together. Wonderful. Saying his hair. Free form and place it summary here. Same and grab. Because 10, 19. This temp is Jen took our key find. Marriage to cancer. Now is the most difficult part is face. Now create one layer above, clip it. Merge together, create one more layer, multiply. Clipping mask. 9, 10. Merge together, multiply. But one clip at this time. You see I like to add some kind of like bleeding color one another. So I am trying to draw here. You see you multiply free form. Herself pass a tail is now green powder. My excess. So I'm trying to bleed the colors. Yes, I think now we can call this piece finished. You're going to add some final thoughts here. Shows as a color bleed swan in and just maybe a summary here is a starch. And now we can call this piece finished. I hope you enjoyed today's tutorial and you'll learn something new about paint in a border color, portraits in Procreate. And as you see, it's actually possible to pay and authentic realistic watercolor illustration digitally. And again, and no one will tell you is that it's actually digital paint. And this, in next class, I will teach you how to create amazing illustrations of these botanicals using safflower builders sets that I created recently and I shared with you. And also you're going to use my watercolor brushes for sad. So I hope you already saw, let's see, chairs in a new class. I wish you luck with your own artworks. Can I would be happy to see you what you're going to create and see you. And this is the end of class. And now you know how the band portraits easily in Procreate guys have you shall live. And if you have any questions, suggestions, or recommendations, you might leave some discussion. May I?
8. Bonus: Okay. Yes. Hi.
 Inga Yoon, Digital illustrator and teacher